-
1Arduino IDE Ameba Board installation
Add the following line to "Additional Board Manager URLs" under "Preference",
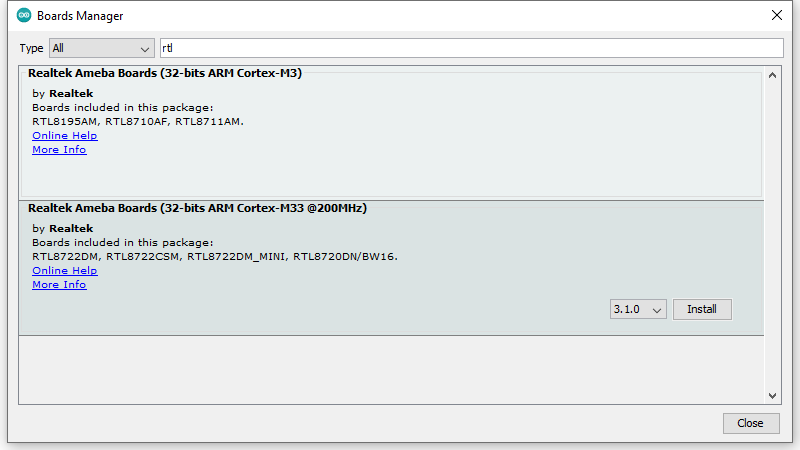
Next, go to “Tools” -> “Board” -> “Boards Manager” to install AmebaD package.
Find “Realtek Ameba Boards (32-bits ARM Cortex-M33 @200MHz)” in the list, click “Install”, then the Arduino IDE starts to download required files for AmebaD.
![get-start-8]()
-
2Connection between AMB23 and E-paper Display
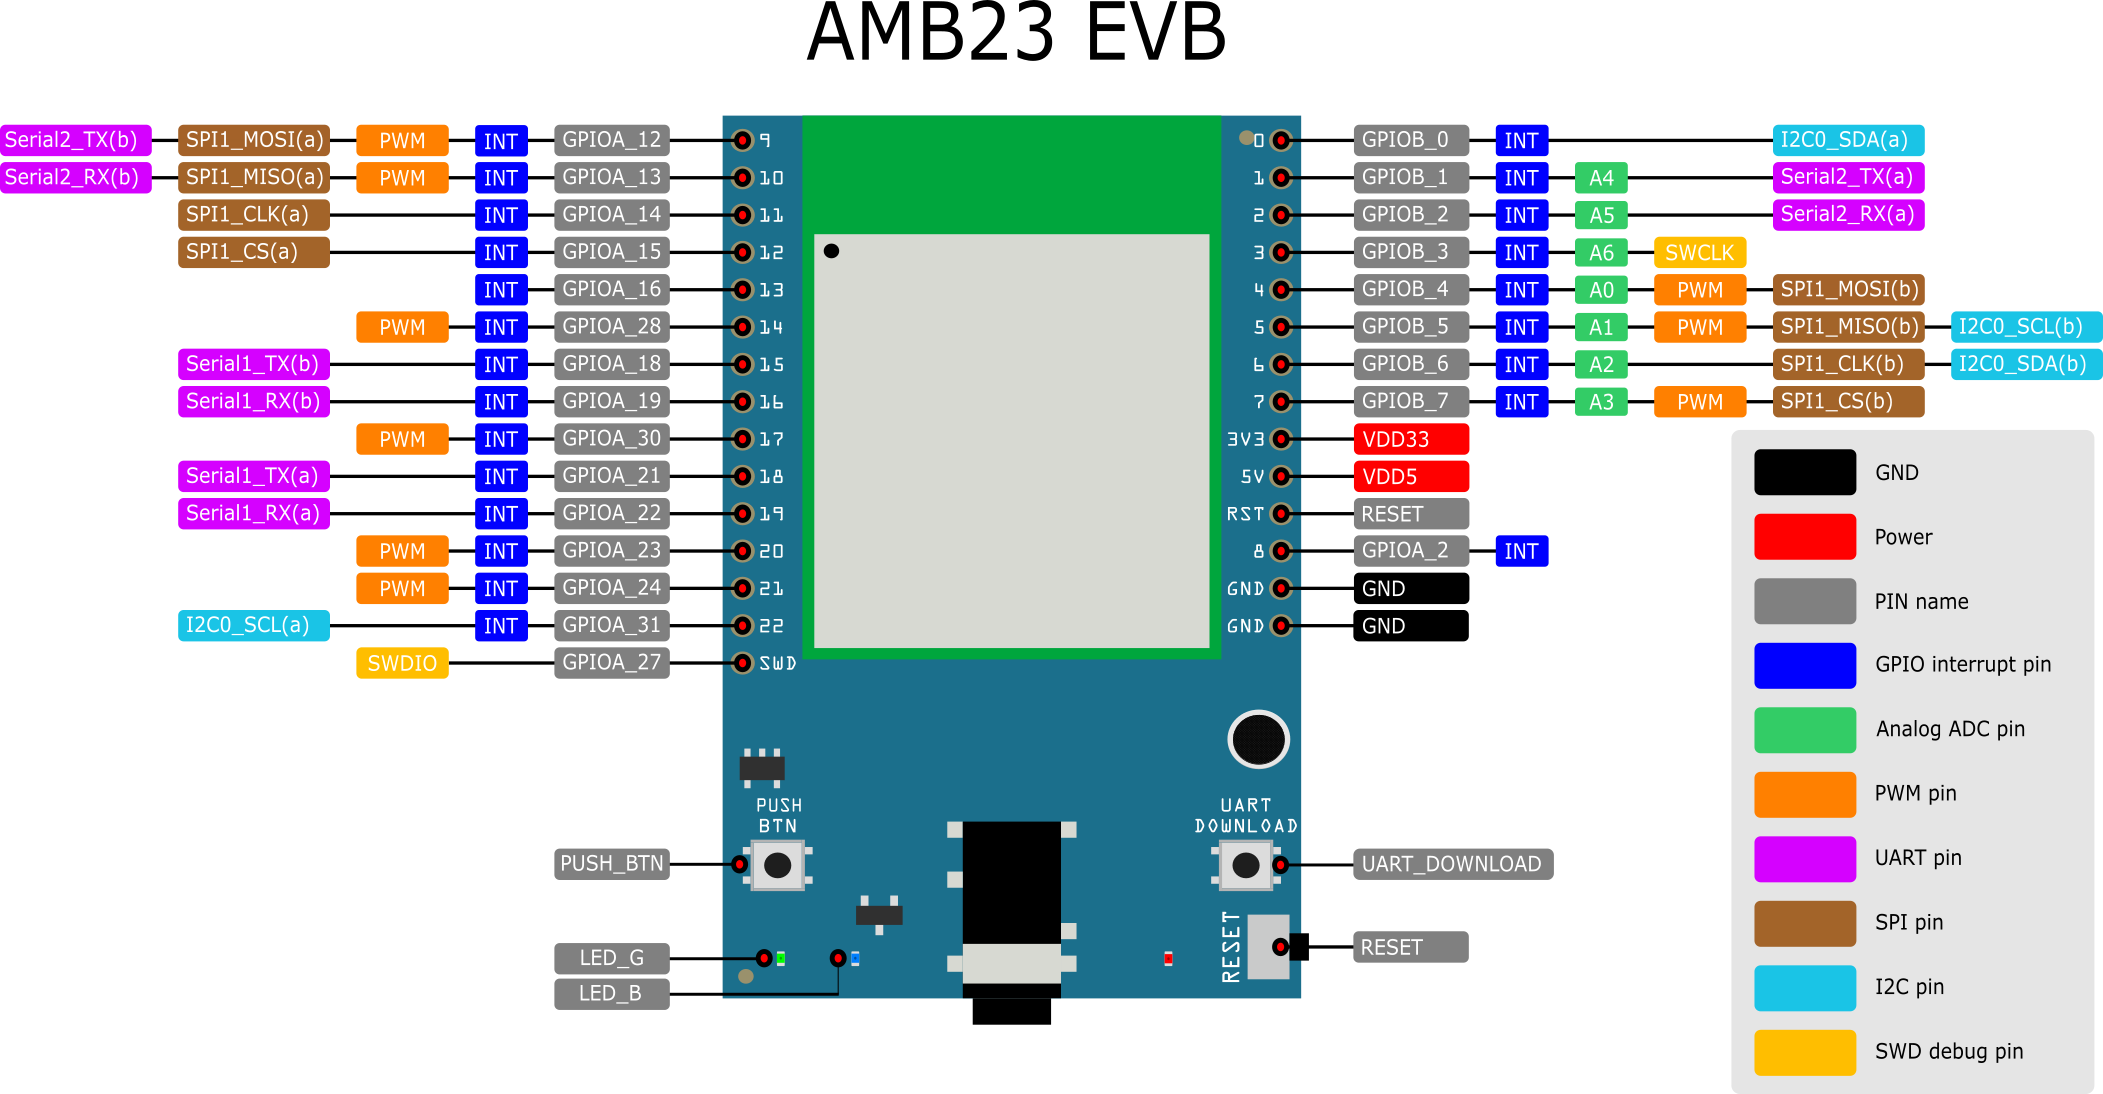
Take a look at the pin diagram for AMB23
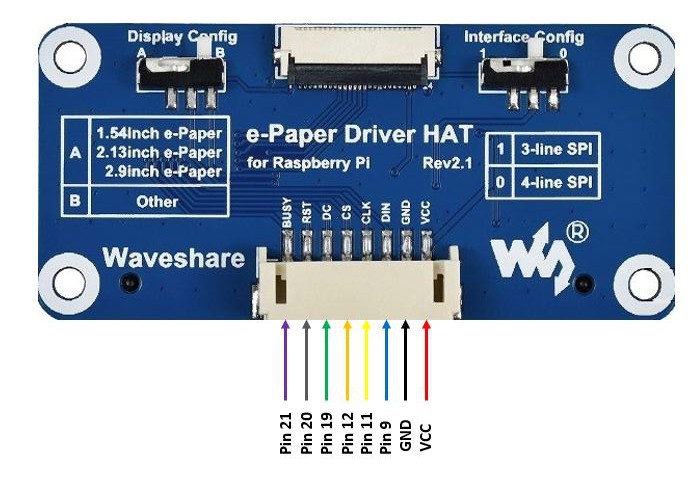
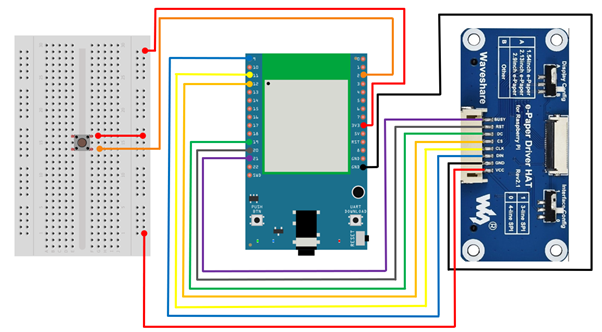
![get-start-3]() and connect accordingly.
and connect accordingly. Busy - D21
Reset - D20
DC - D19
CS - D12
CLK - D11
DIN - D9
The pin numbers definition can be found in epdif.h .
#define RST_PIN 20
#define DC_PIN 19
#define CS_PIN 12
#define BUSY_PIN 21![]()
![]()
Do note that Display Config should be set to B and Interface Config should be set to 0.
-
3Connection between button and AMB23
Button pin is defined to be D2.
Button setting can be found in ino file.
int button = 2;
int buttonState = 1; -
4Install AmebaEink zip library on Arduino IDE
Download the Eink zip library, AmebaEink.zip at https://github.com/ambiot/ambd_arduino/tree/master/Arduino_zip_libraries and install AmebaEink.zip on Arduino IDE. You may follow the instruction at https://docs.arduino.cc/software/ide-v1/tutorials/installing-libraries to install it.
-
5Create txt file in MicroSD card
Next, insert the MicroSD card into your computer and create a new text file named “User_Ebook.txt”. Then, save the content that you would like to display in the text file (Note: do only include words). The content of “User_Ebook.txt” shown below is for illustration purposes only.
![]()
![]()
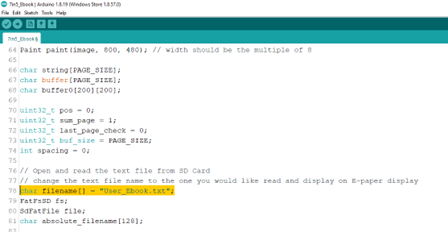
Alternatively, if you prefer another filename for your text file, you can modify the highlighted code snippet in the sketch with the new filename.
![]()
Once the file is created, insert the MicroSD card into the onboard SD card reader on AMB23. Upload the code and press the reset button once the uploading is done. When reset button is pressed, the e-Paper display will refresh and display a cover page.
-
6Change pages using button
By pressing the button, the content in the selected text file saved in MicroSD card will be read and displayed onto the e-Paper display. The content will be split into pages.
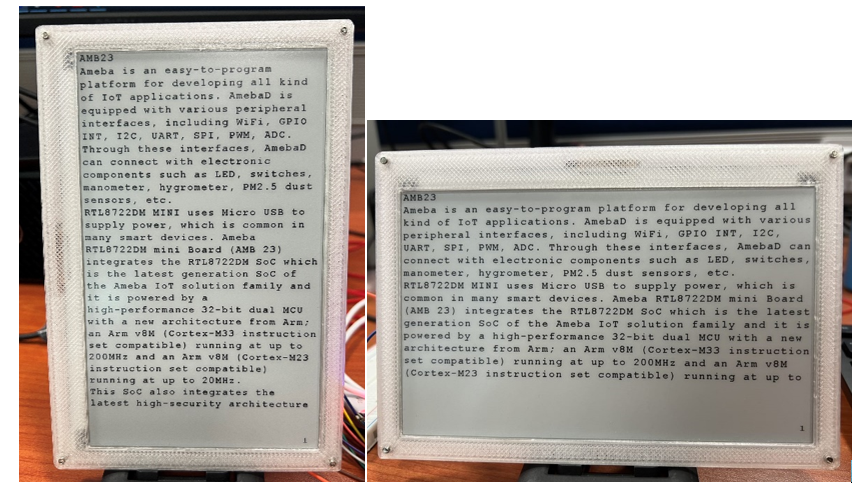
To proceed to the next page, press the button once more. The page number will be shown at the bottom right-hand corner as the page changes. You will see the following in either portrait or landscape mode based on your orientation choice after button is pressed:
![]()
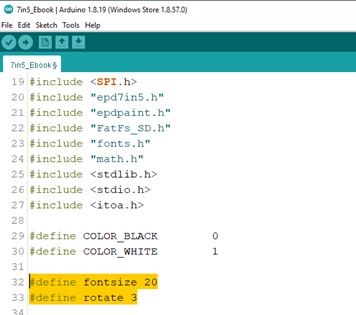
You can modify the highlighted code snippet to change the font size or orientation of the displayed text.
Supported font size: 16, 20, 24
Supported orientation: 0 degree - 0 (landscape), 90 degree – 1 (portrait), 180 degree- 2 (landscape), 270 degree – 3 (portrait)
![]()
E-book with Ameba (AMB23)
Making an E-book with AMB23 and 7.5-inch E-paper Display Module
 pammyleong
 and connect accordingly.


Discussions
Become a Hackaday.io Member
Create an account to leave a comment. Already have an account? Log In.