 jasonwinfieldnz
-
1The low down
3D printers use serial to communicate. Slicing software or Ocotprint wants to talk to a COM port. As we are adding WiFi to a printer there is no COM port as such so we will need to configure a few things to get the project working.
- Install ESP-3D on an ESP32 controller as a serial endpoint
- Hijack the serial coms on your printer.
- Configure a virtual serial port on your PC
I will start with installing ESP-3D. I will assume in this project you already have Arduino IDE installed and have uploaded to an ESP-32 previously.
If not, please complete these steps before continuing.
-
2Flash ESP32 with ESP-3D
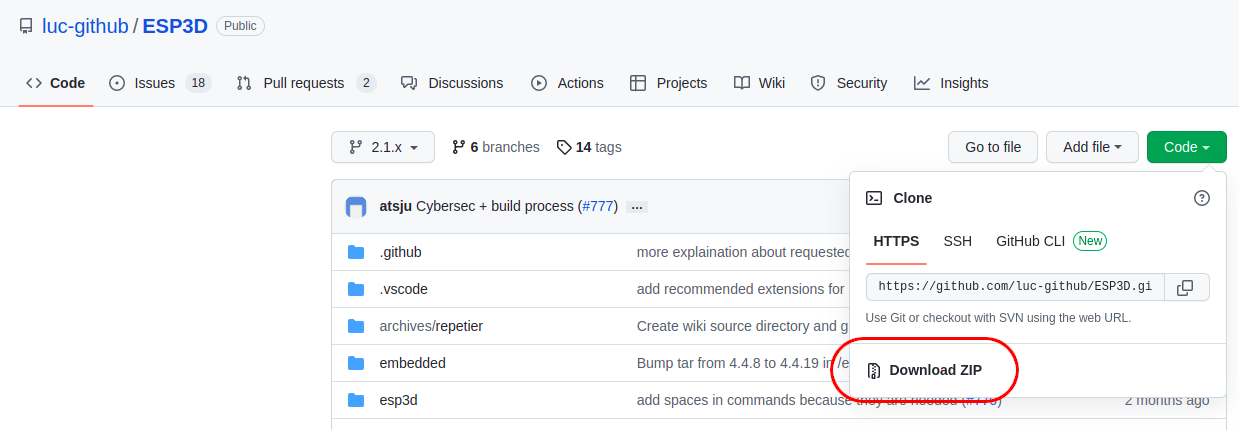
1. Download ESP-3D
Download ESP-3D from here: https://github.com/luc-github/ESP3D
Unzip the file somewhere you can find it easily.
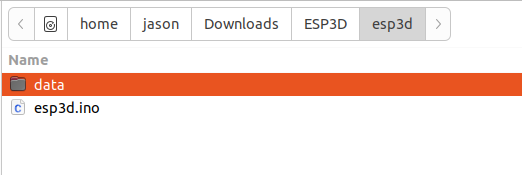
2. Open ESP-3D in Arduino.
Browse the download for the esp3d folder, within this the sketch esp3d.io can be found, open this file.
3. Pull the trigger
With your ESP-32 connected and selected in your boards try and flash the software.
I very much doubt there is a single Arduino IDE install that is the same as another so you could have a lot of dependency errors when you try and flash the firmware or you may have none.
For me, I just had two:
Websockets:
https://github.com/Links2004/arduinoWebSocketsESP32SSDP:
https://github.com/luc-github/ESP32SSDP
Once these libraries were installed I could flash the ESP-32
-
3Configure ESP-3D
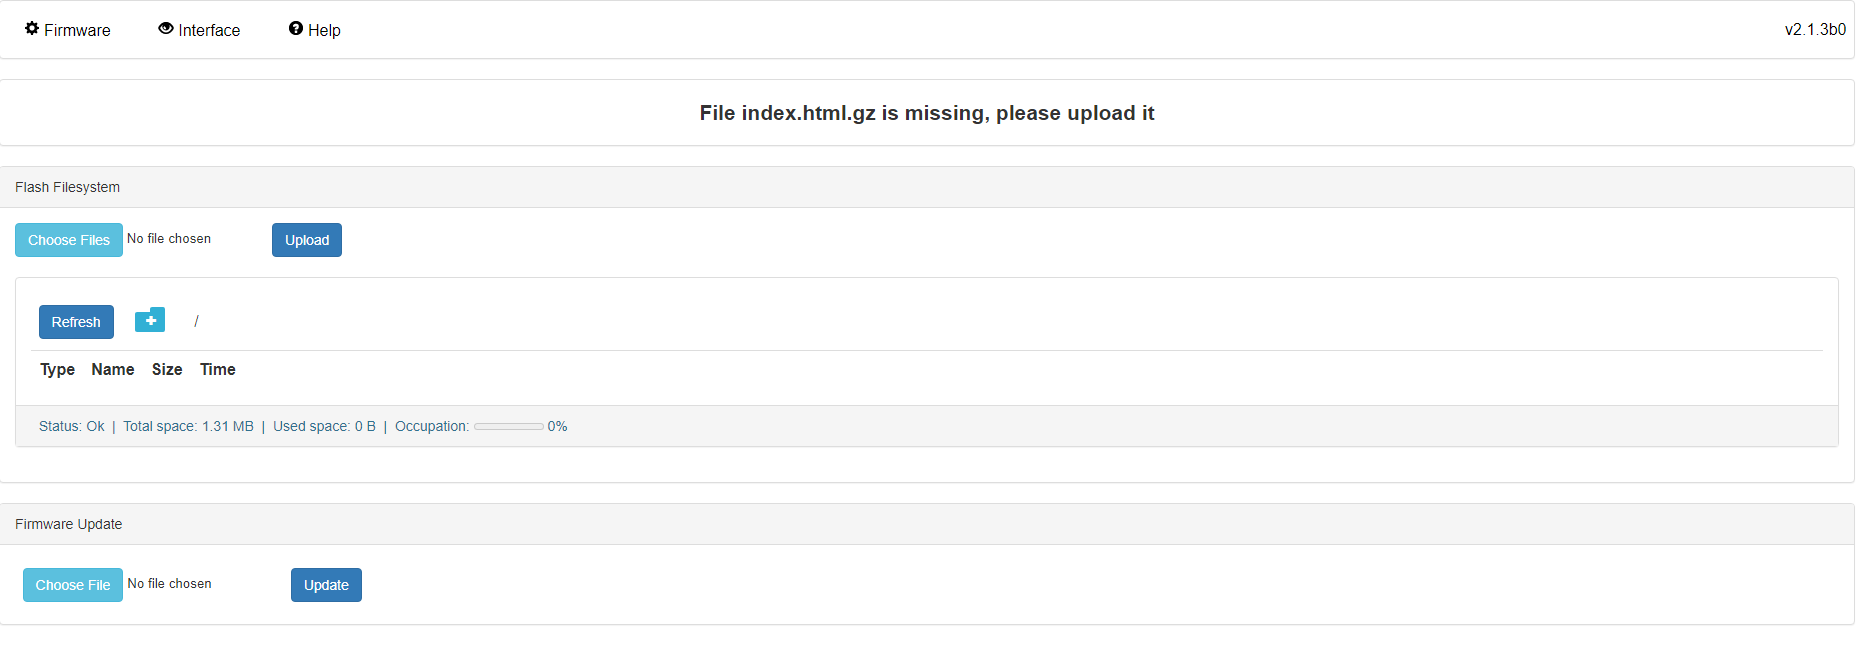
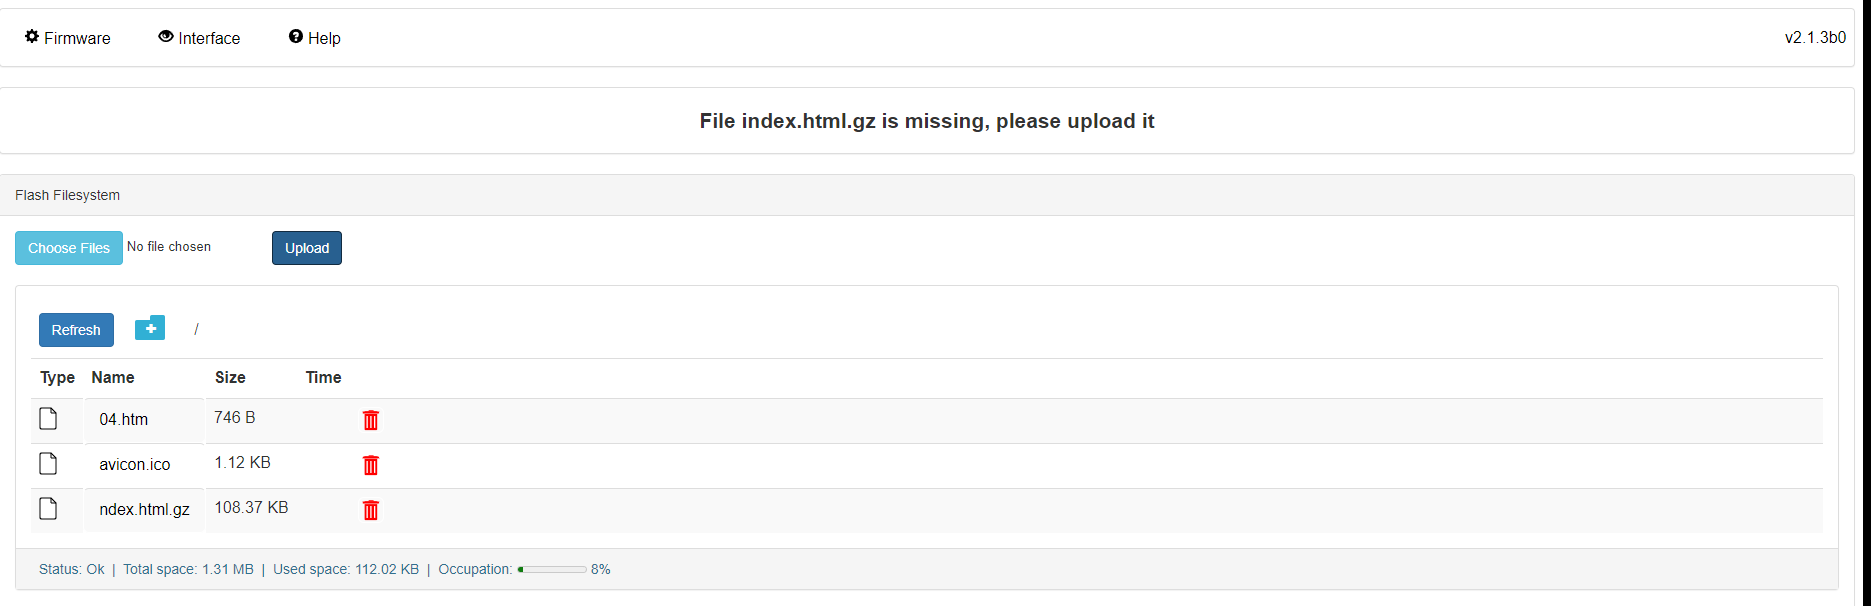
Once you have successfully flashed the ESP shortly afterward a new AP will appear in your list of APs called ESP3D. Connect to this AP the password will be 12345678. This will open a captured portal page in a browser, there will be an error on the page.
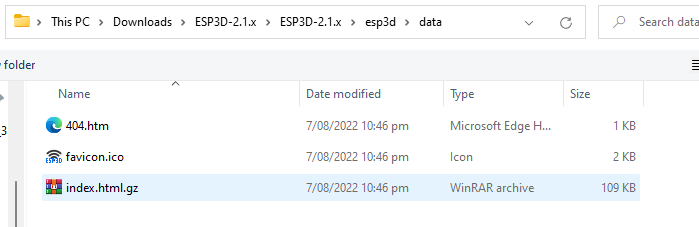
Click on Choose files and navigate to esp3d/data select all the files and upload them.
After the upload, the files should appear in the ESP3D UI.
Reboot the ESP-32
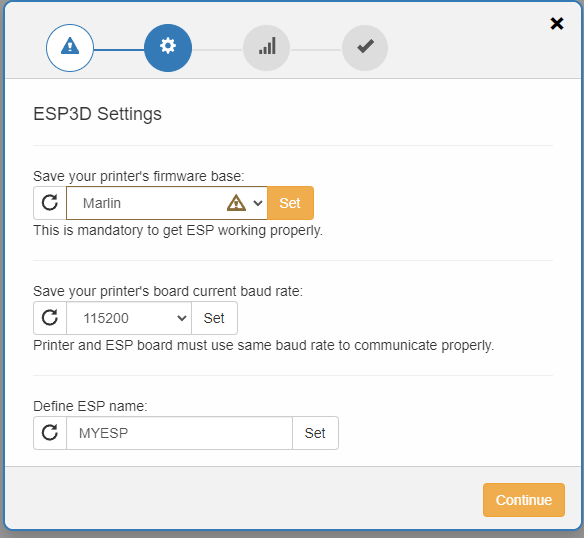
You should now be presented with the first-time configuration.
Choose Marlin, no other settings need to change here (E3V2) click Continue
On the next screen you can configure your WiFi
If you would like to connect to your local WiFI enter your AP and credentials otherwise leave the settings as they are to connect to the ESP-32 directly.
Click Continue
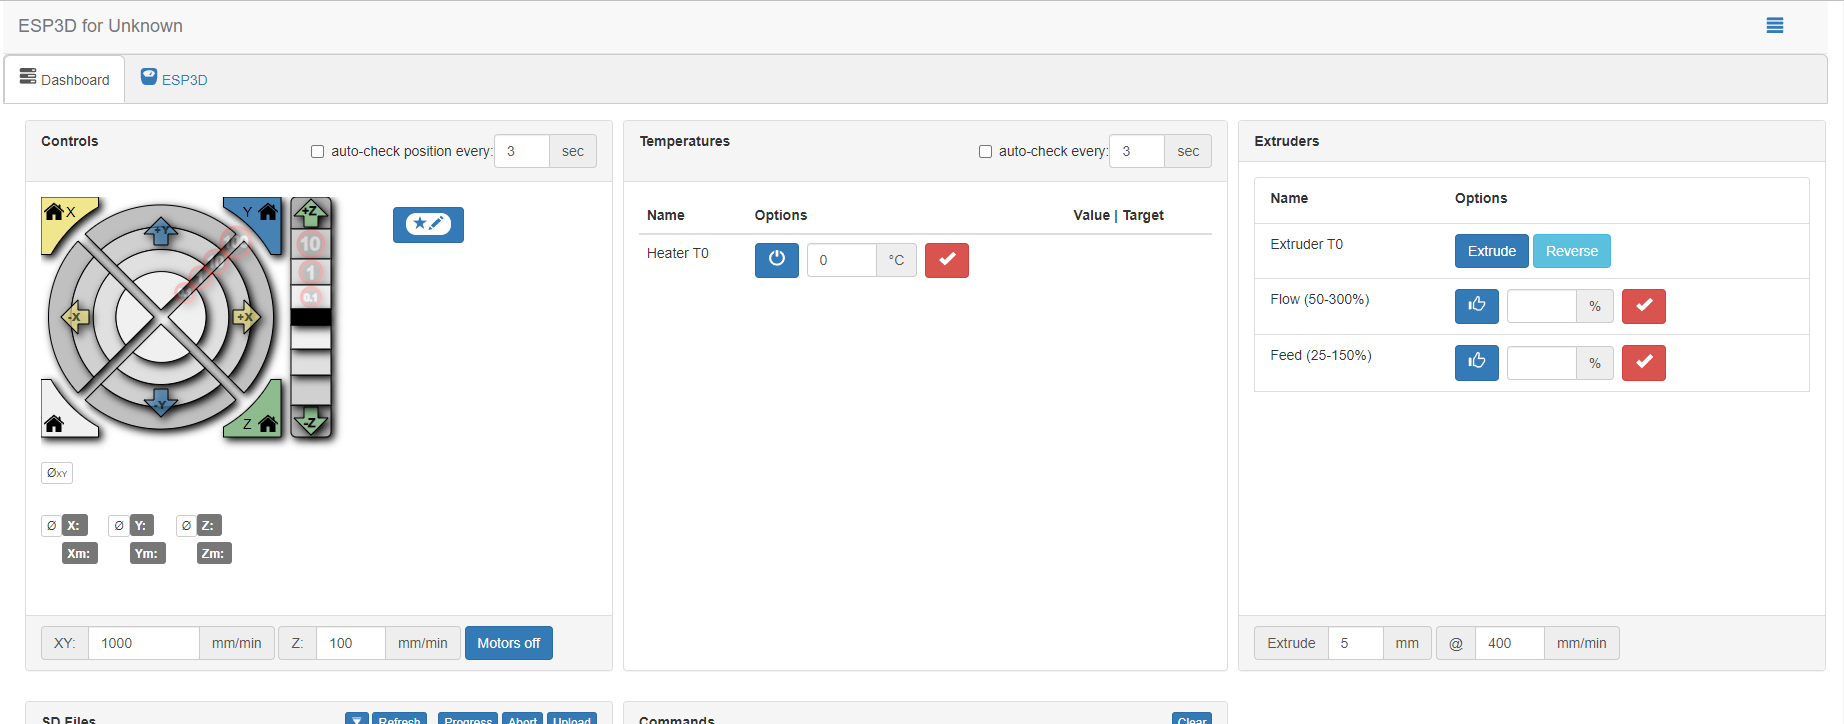
You will now be presented with the ESP3D full UI.
Click on ESP3D at the top of the UI.
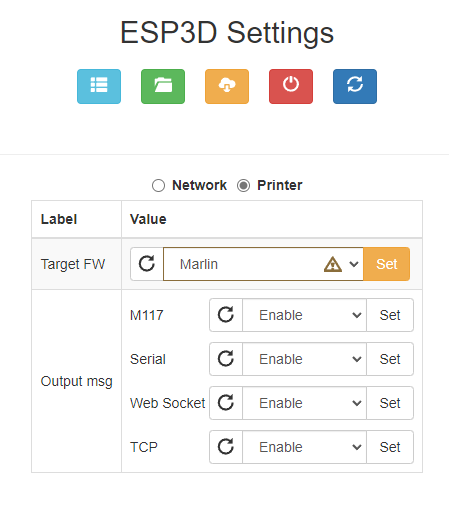
From the top of the window click Printer.
Select Marlin from the dropdown and click Set
An extra tab should now appear at top of the UI.
This is as far as we can go with ESP3D for now.
-
4Connecting to the printer serial
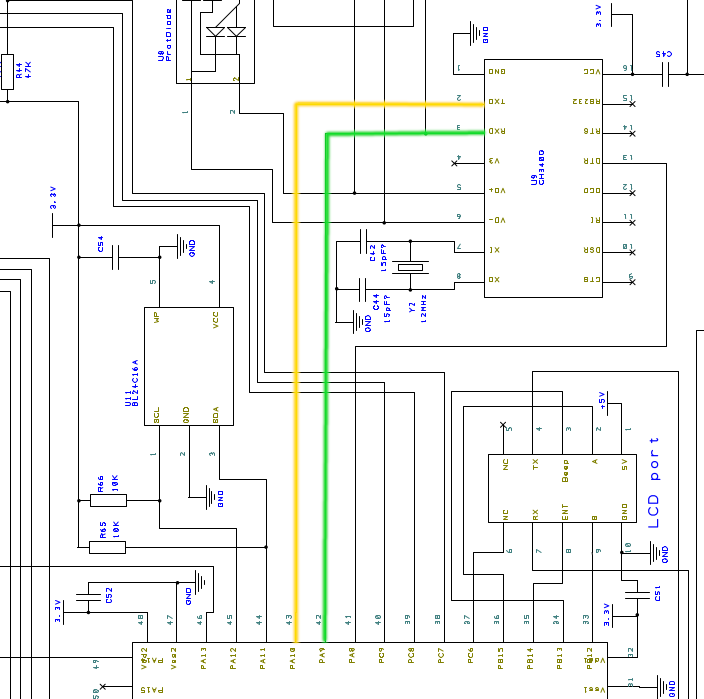
As I mentioned earlier, 3D printers have serial but the data is communicated via a converter chip to computer-friendly USB. Most small controllers can not act as USB host so we need to hijack the serial before it gets to the converter chip. Looking at the schematic for the board the printer CPU connects directly to the serial-USB converter chip.
There is no convenient header to connect to the serial so we will have to solder directly to the converter chip.
Below you can see my serial wires soldered to the chip.
Conventionally there is a header near buy that can supply our ESP32 with 3.3v and ground.
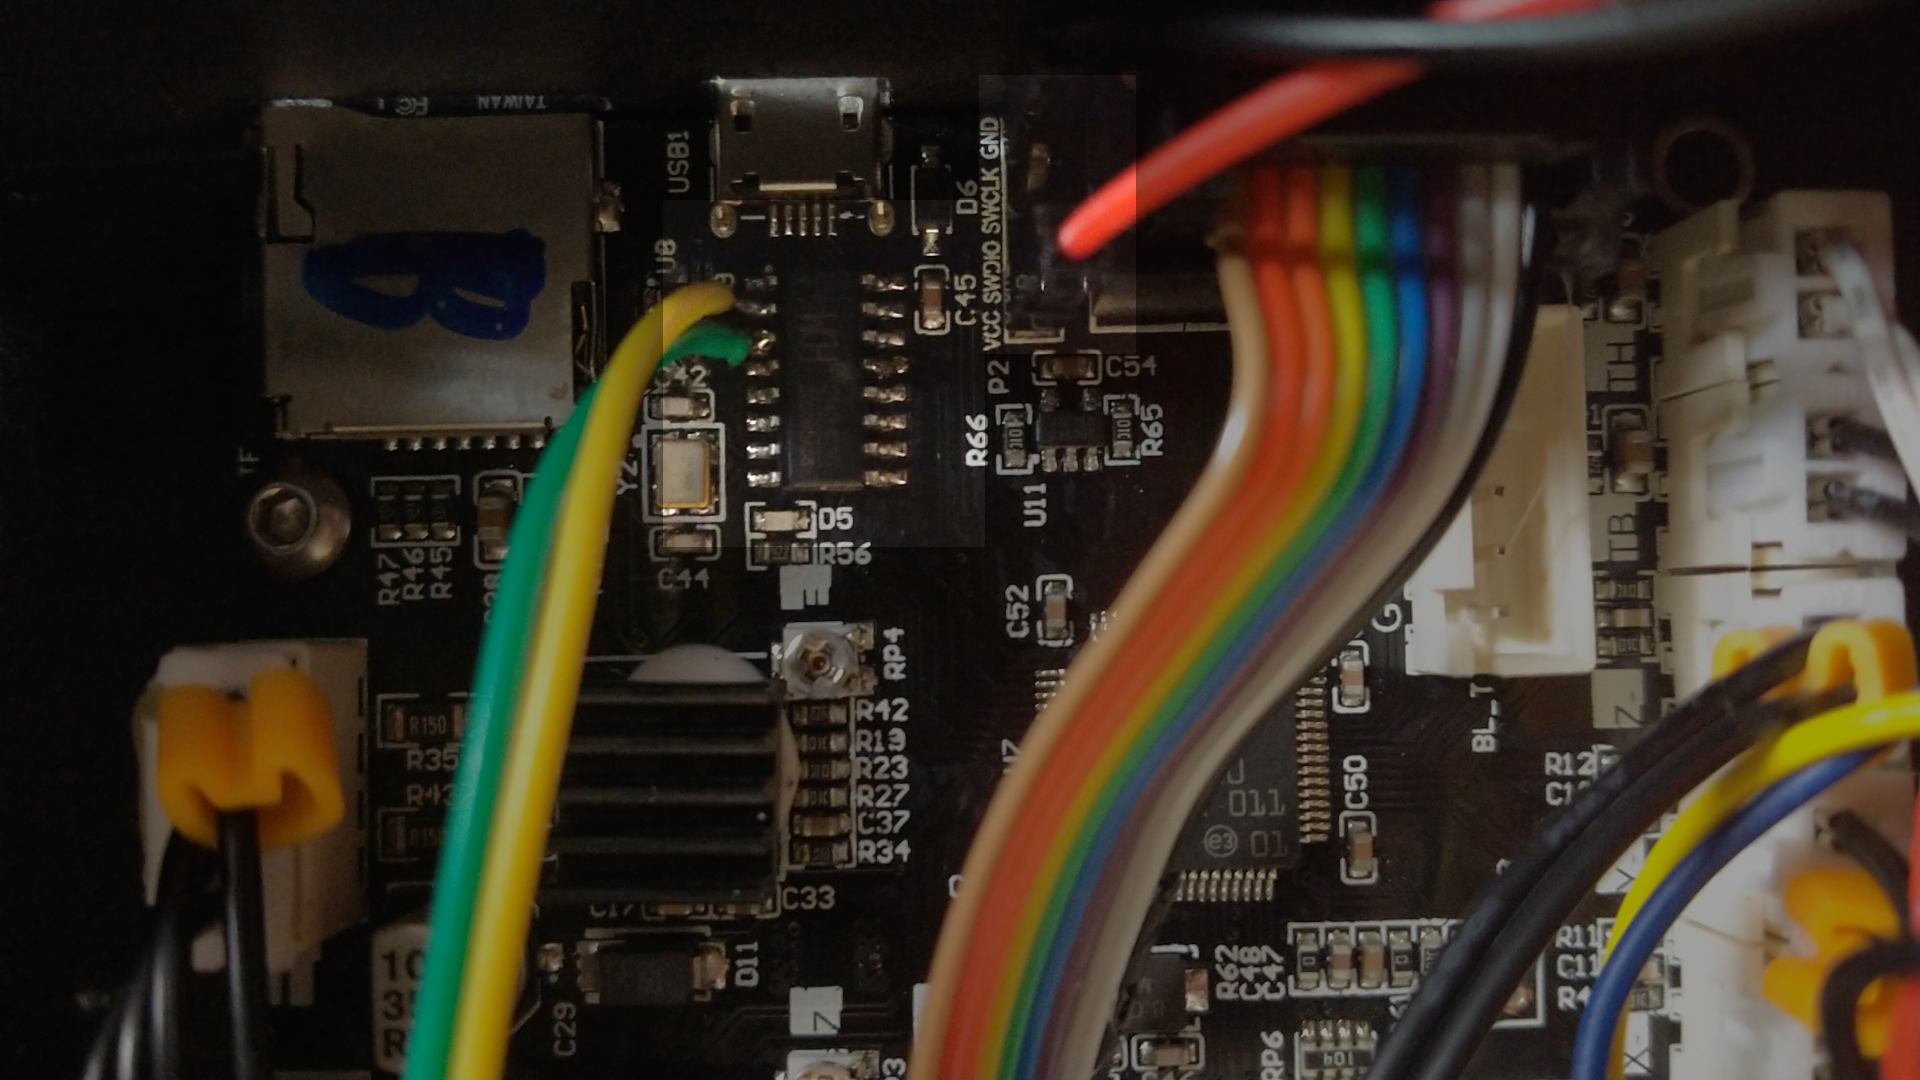
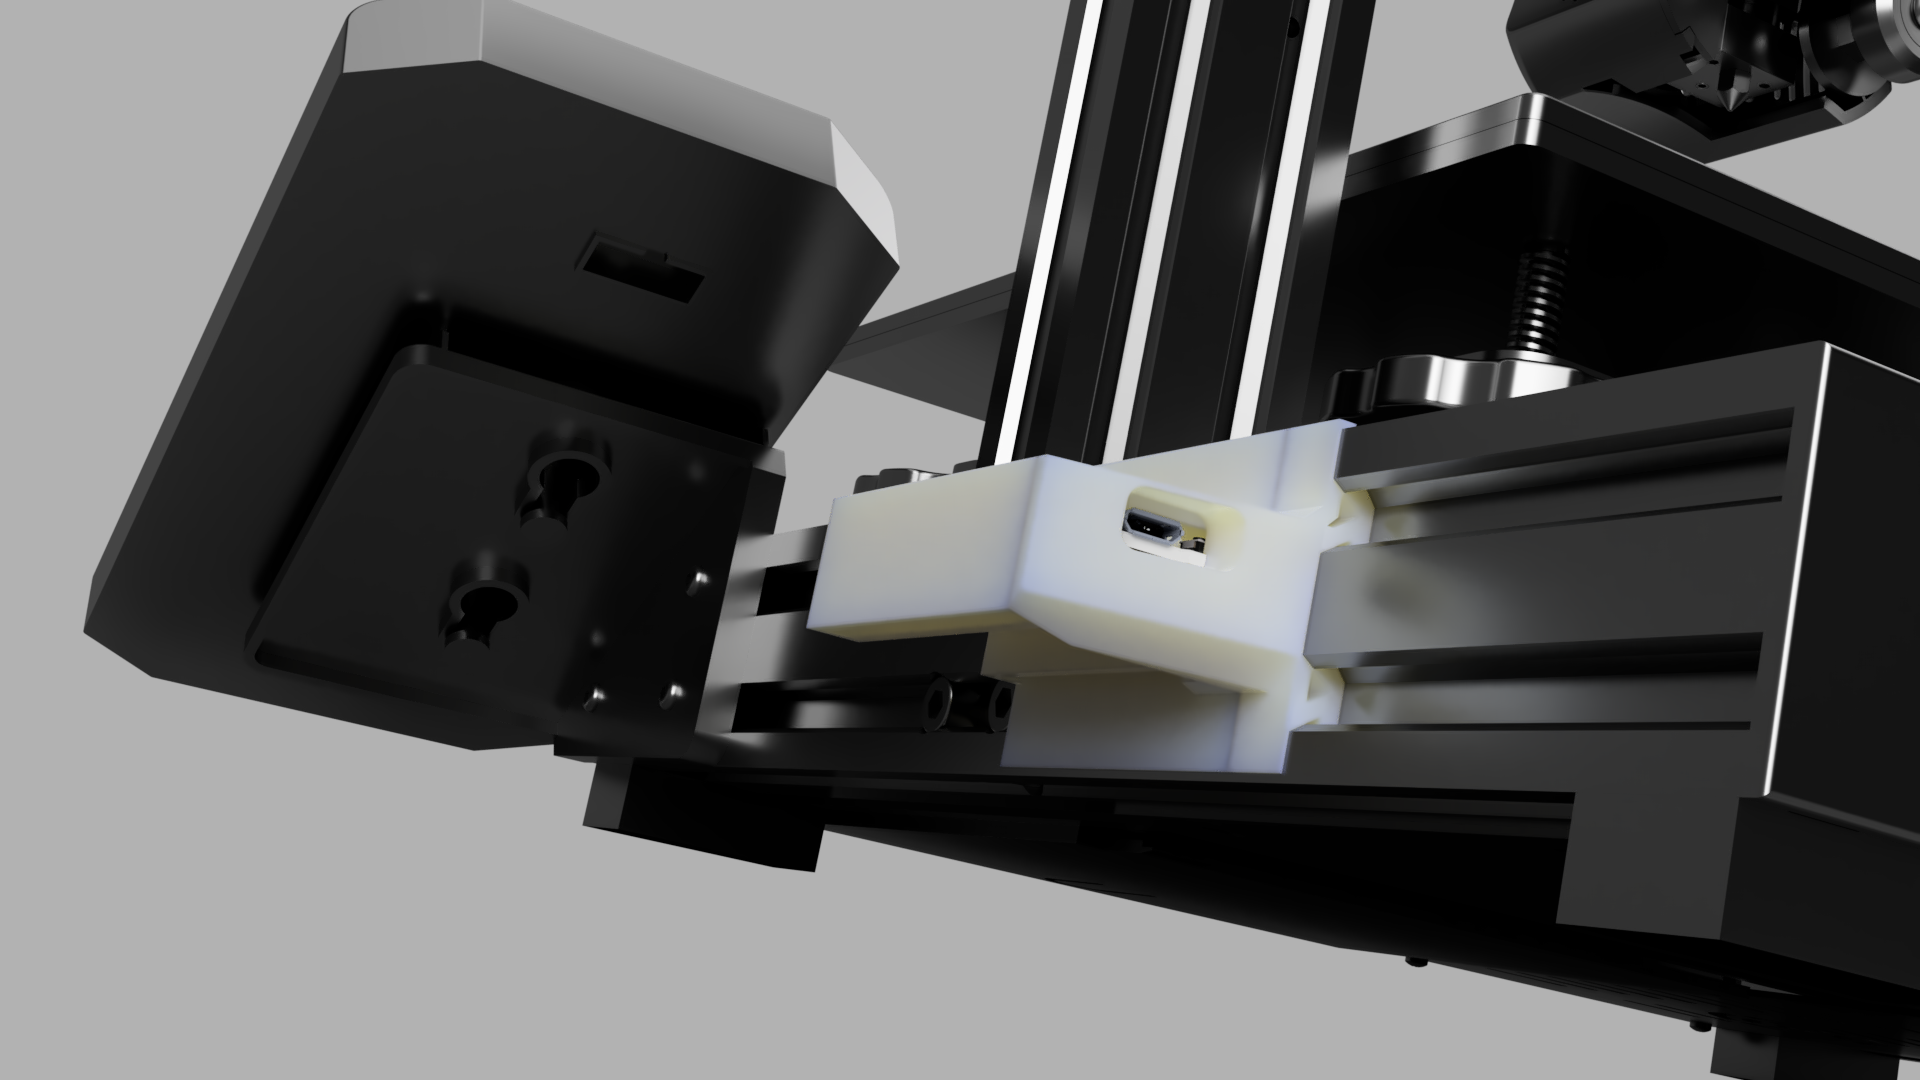
Once you have soldered the serial connection and connected headers to the power route the wires with the control panel ribbon cable.
![]()
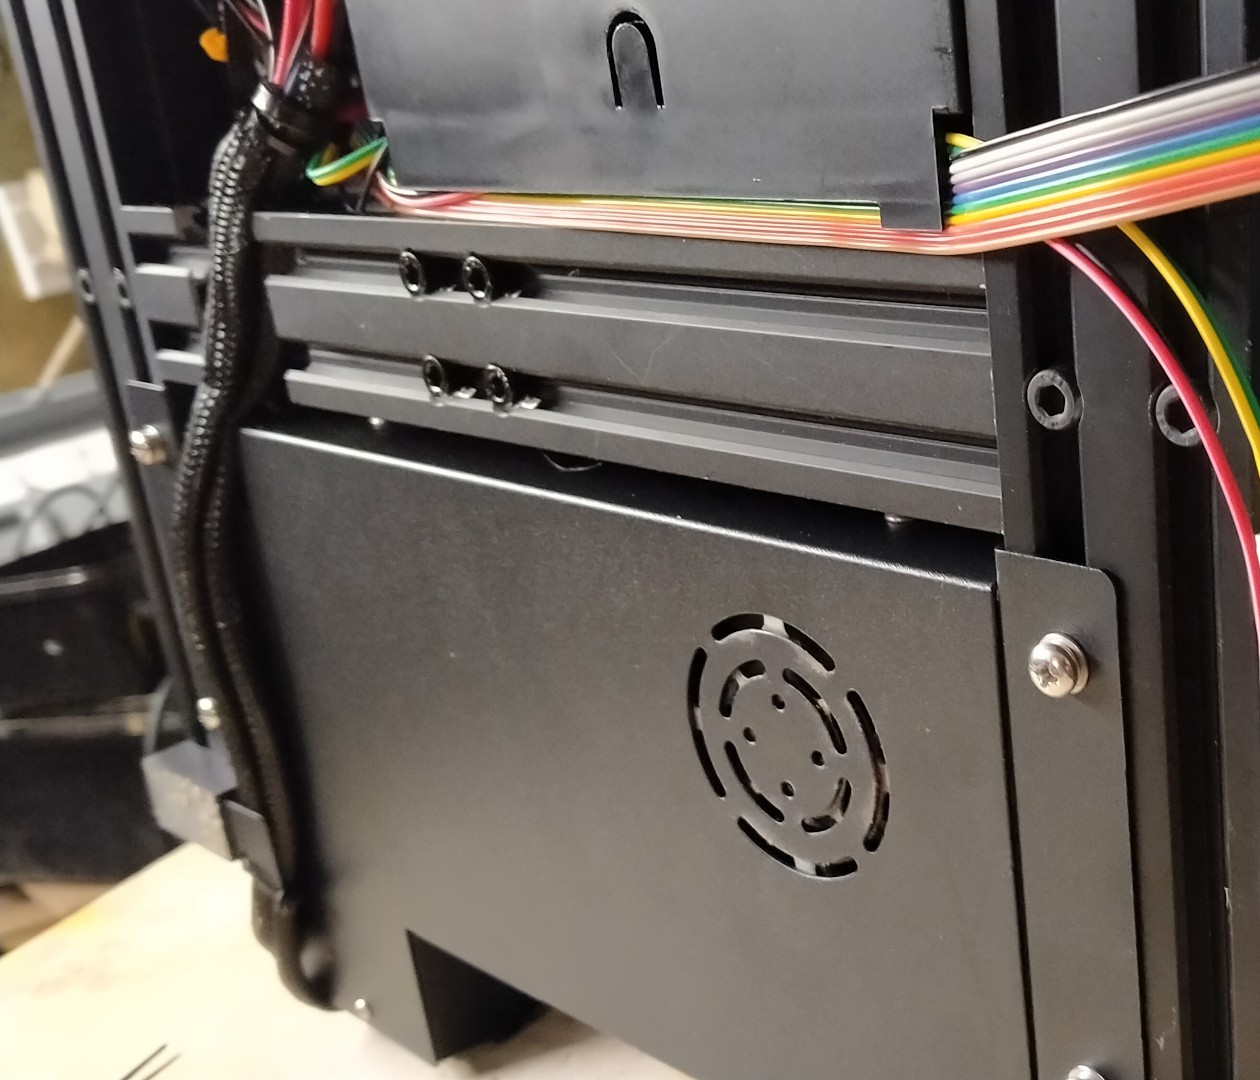
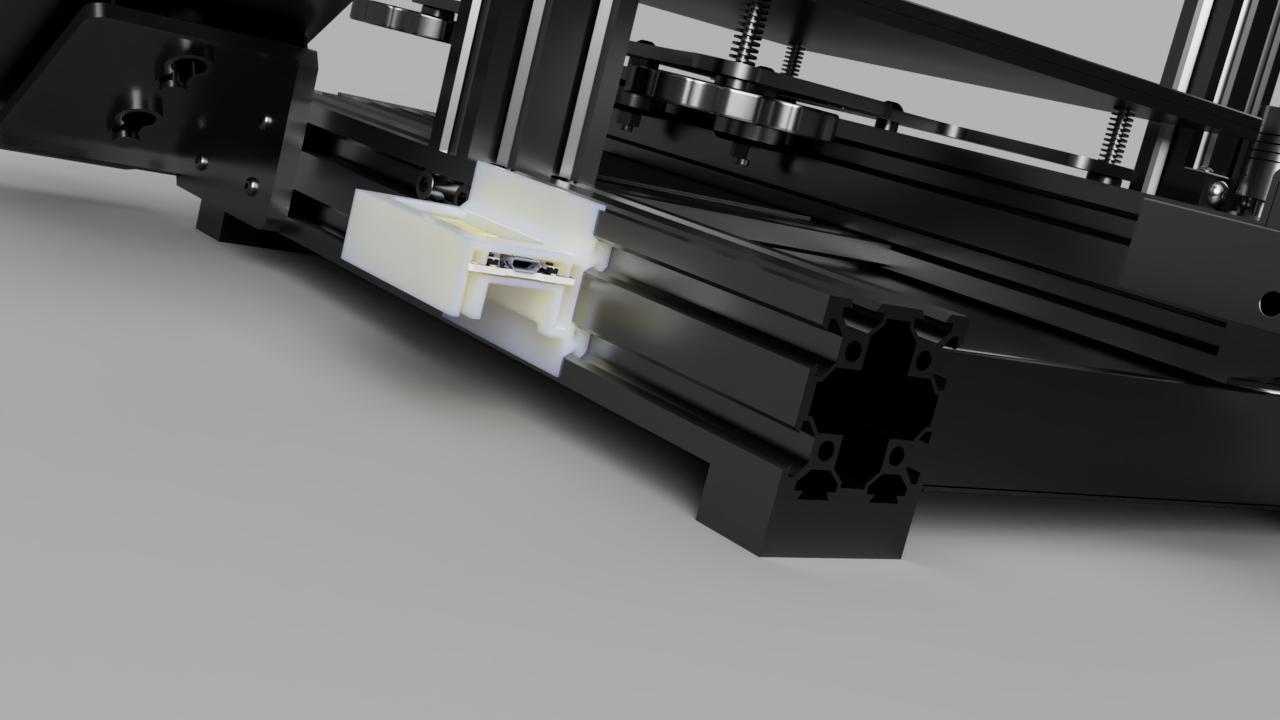
Remove the back cover of the aluminum extrusion and slide the holder (see STL) as far forward as it will go behind the ender control panel, insert the ESP32
![]()
Connect your new serial wires to GP01 and GP03 RX to TX and TX to RX connect the power wires to 3.3v and a GND.
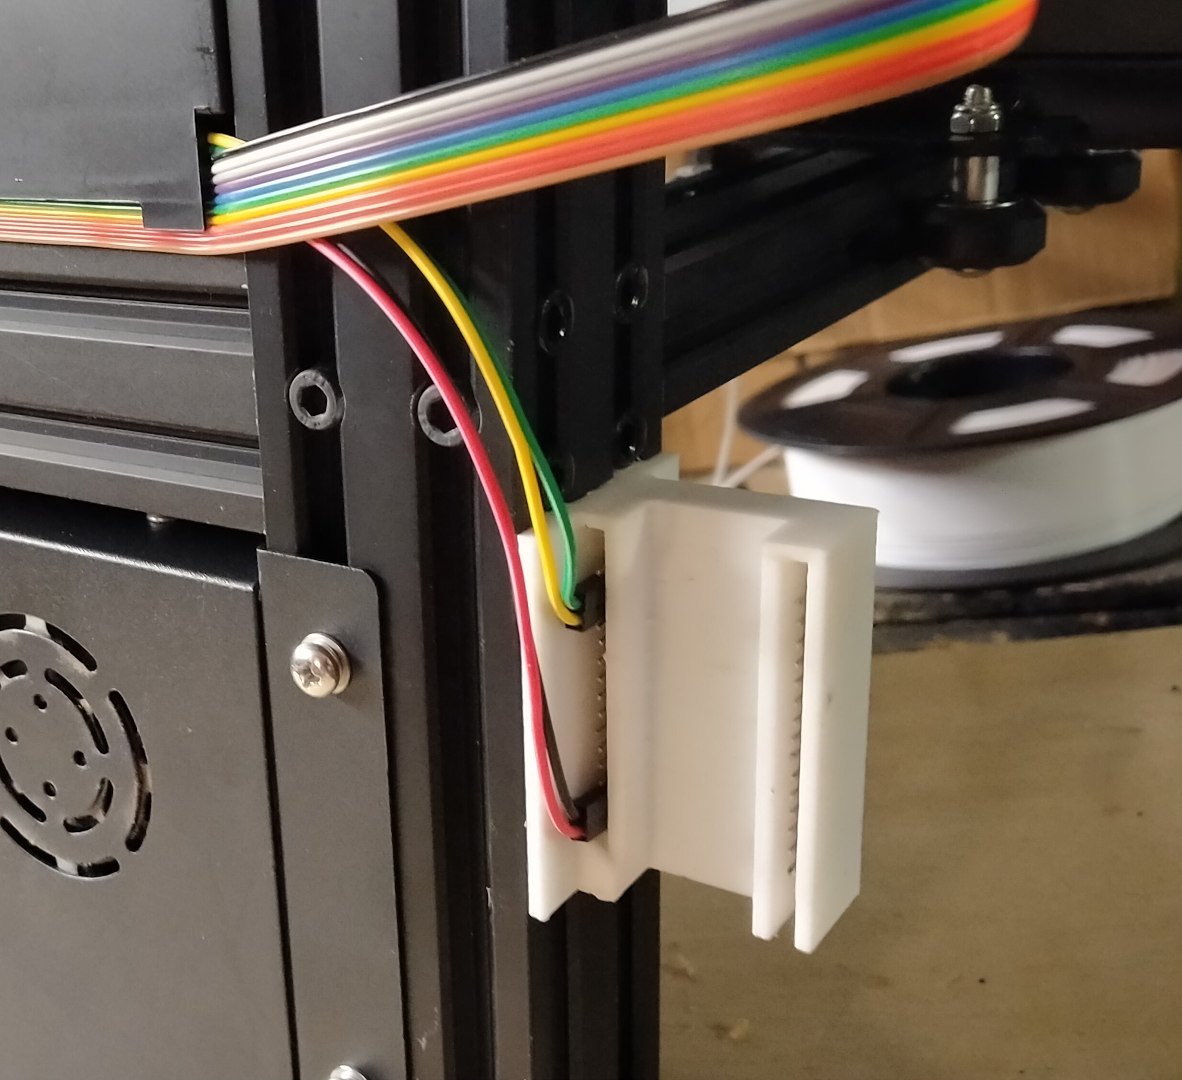
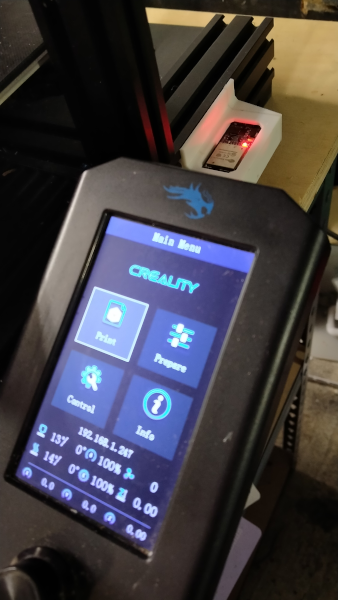
Place the remaining cover over the ESP32 mount
![]()
For now, the USB is only for flashing the ESP32. The developer has created an issue to enable pass-through support so you do not lose the ability to print via USB: https://github.com/luc-github/ESP3D/issues/800
If you have been succesfull you should see an IP address on the Ender screen.
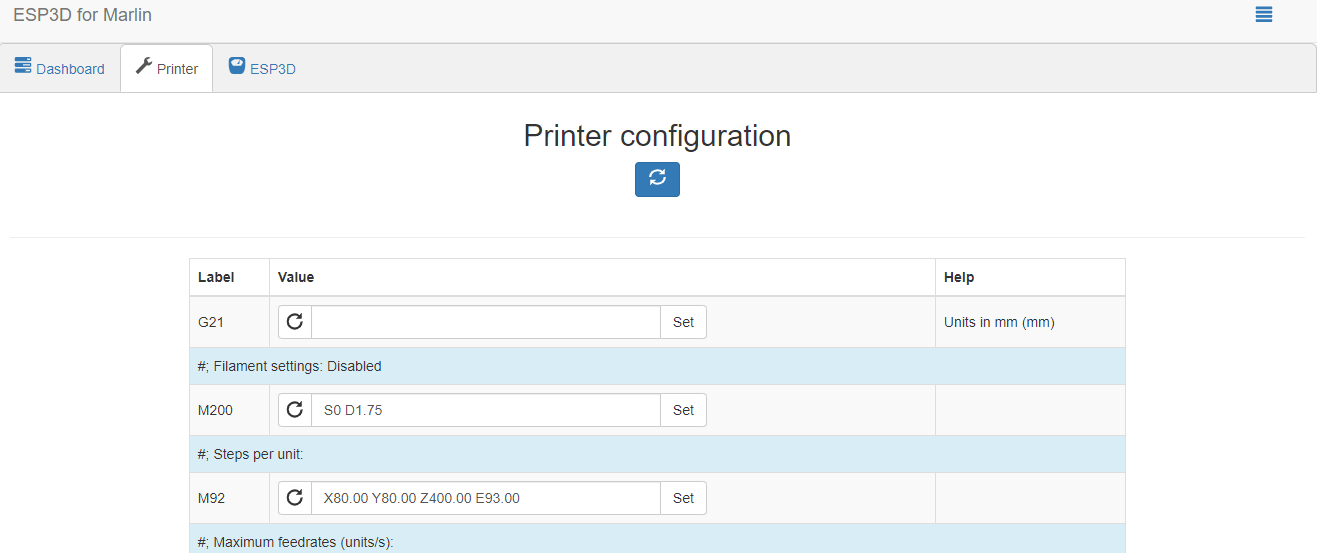
Return to your browser and check your printer tab. and click the refresh button.
You should see GCODE defaults you can change. If you only see Label Value Help the printer is not talking to the ESP32.
-
5Virtual serial port
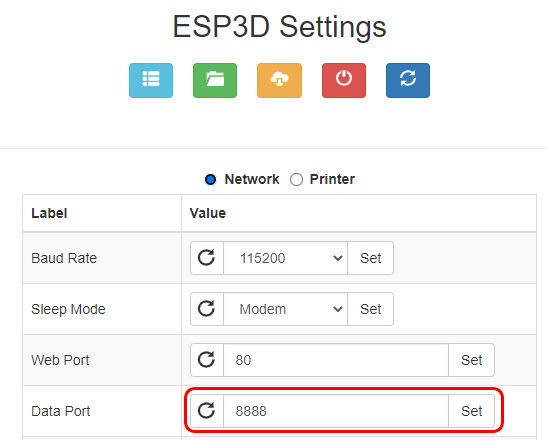
We now need to trick your slicer or Octoprint that your computer has a COM port. To do this we use virtual serial port software. There are many different apps that will do this. I found this one easy to use and appears free: https://tibbo.com/soi/software.html
The tool requires the IP of the ESP32 and a port number. The port number can be found in the ESP3D UI. This probably won't change unless you change it.
![]()
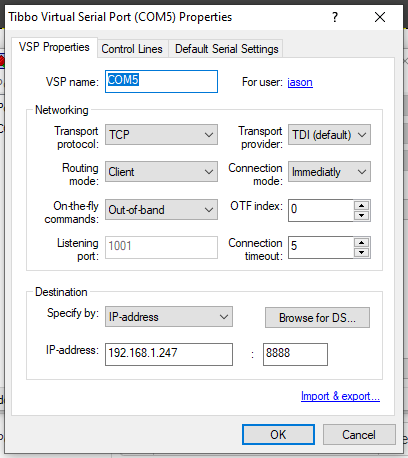
Simply add the IP address in Tibbo or your virtual serial port software of choice and the port number.
![]()
Here Tibbo has allocated COM5, remember your COM port.
-
6Print!
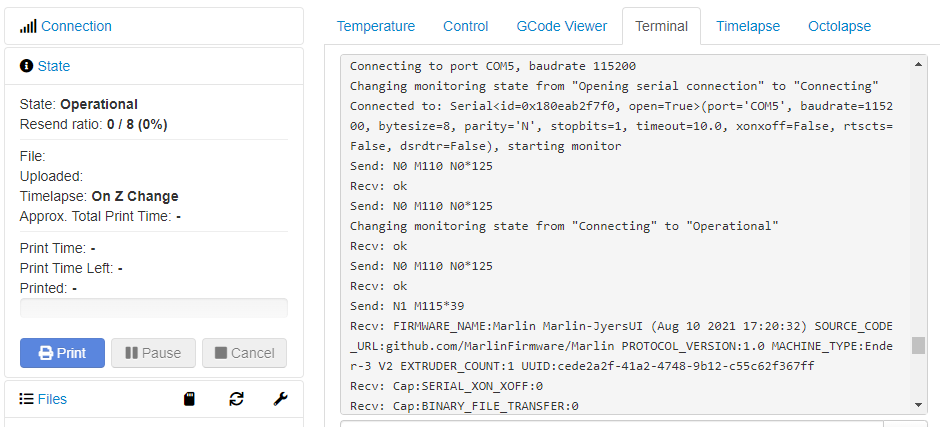
All things being equal when you try to connect from your slicer or Octoprint there should be a COM port and when you connect to that COM port you should have control of your printer as if the USB cable is attached.
![]()
Check the video at the top of the guide with my findings on how well the prints come out.
Wifi any 3D printer (probably)
Using ESP3D and ESP32 we can add built-in WiFI to any 3D printer with accessible UART

Discussions
Become a Hackaday.io Member
Create an account to leave a comment. Already have an account? Log In.