 Kaushlesh C. ( KD9VFU )
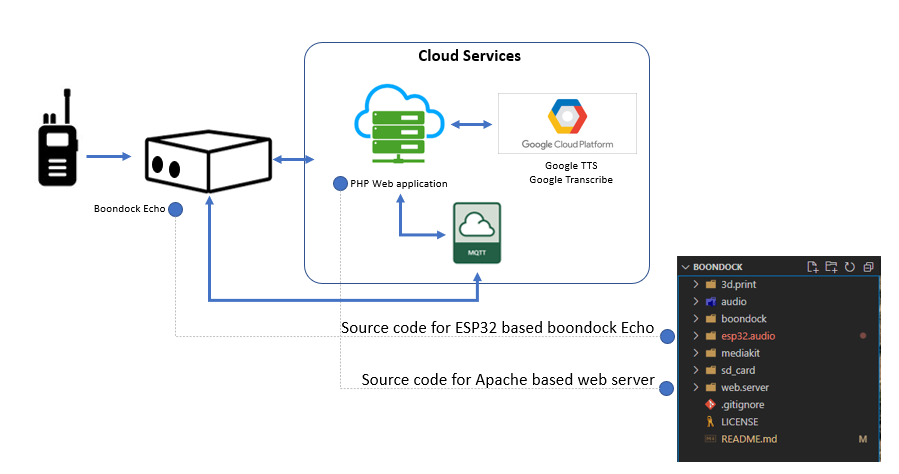
Boondock has two core components. One is the Boondock Echo device with custom-built firmware, and the second is the webserver. Boondock echo records the audio files and sends them to the cloud. And a web-based interface can be used to listen to audio files and transmit the audio using a radio connected to Boondock Echo. When you want to play an audio file, the server sends an MQTT message to Boondock Echo with a link to the audio file on the cloud.
To set up Boondock web server, you will need:
- Web server (Linux server is preferred)
- Apache Web server
- MySQL database
- MQTT Broker
- Google Cloud services account
After downloading the code from the Github link, you will find the source code to set up the web server. Boondock server can be hosted on windows or a Linux-based web server. You can find cloud service providers like AWS, Google, or Azure. in this example, we are hosting on Amazon Lightsail, which is a part of AWS. You will find a link to a video, showing the setup process in detail. here is the summary of steps to perform.
1. Setup Linux-based Web Server
In this example, we are using Amazon services for hosting the server. Amazon lightsail provides pre-configured images with Apache & PHP. Pick a suitable image.
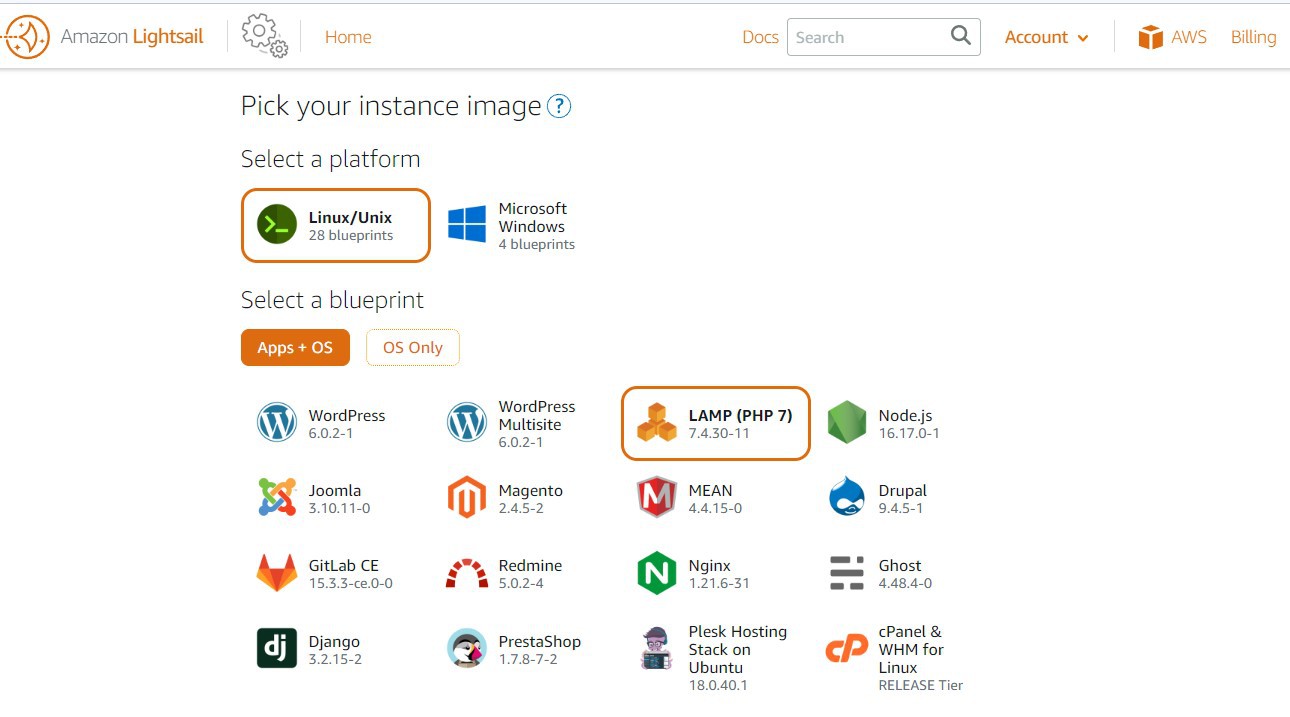
Pick LAMP ( PHP 7 ) Image. it comes with PHP & Apache server fully installed. Follow the steps and complete the server setup.
It takes about five minutes to complete.
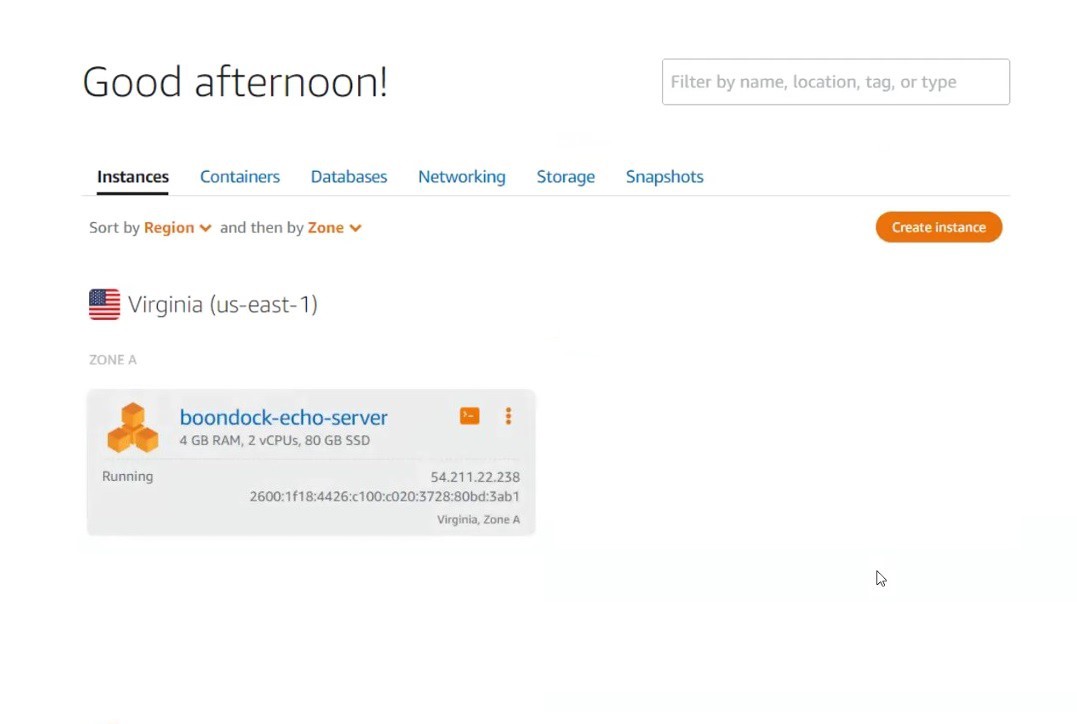
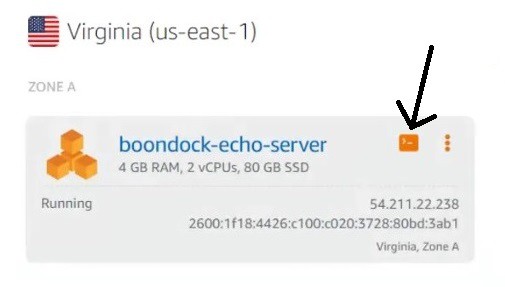
Once complete, you will see your newly minted server. Notice the public IP 54.211.22.238. You will use this IP to access the server.
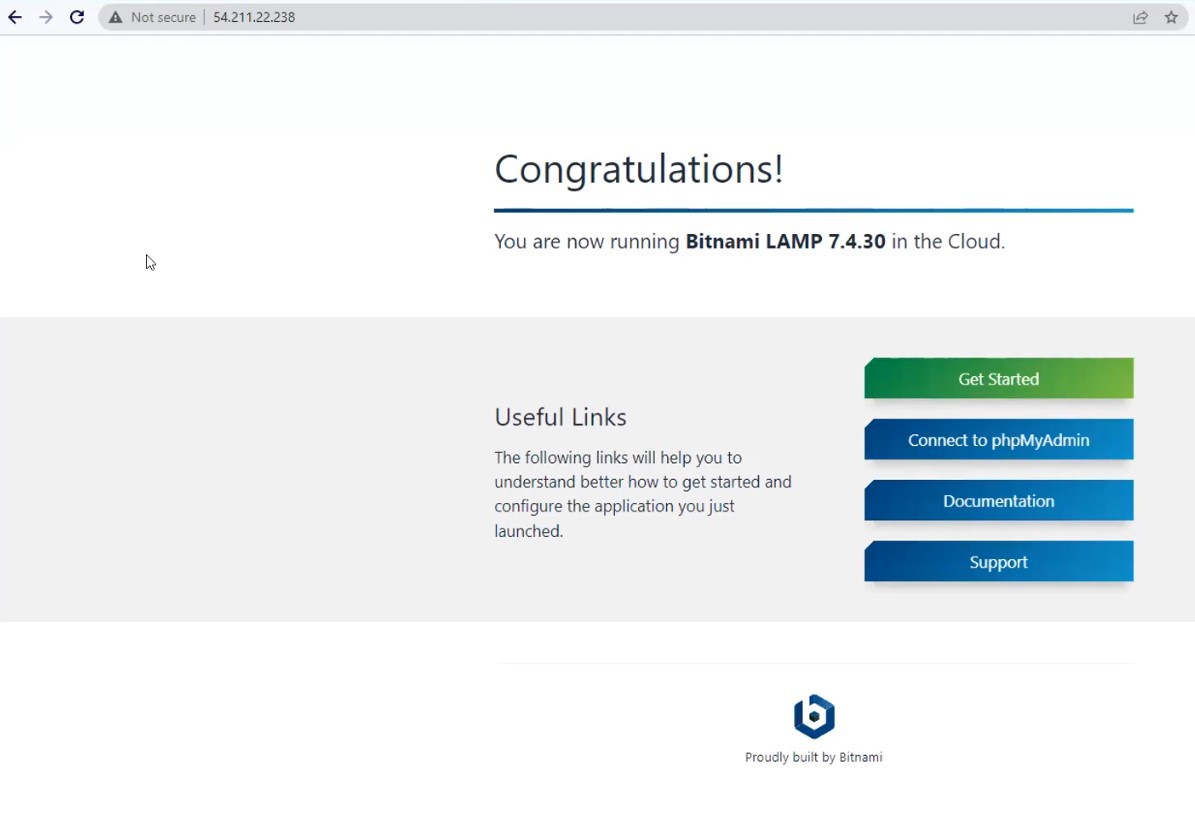
With all setup, you can open the IP address on the browser, and you will see the success page. This means that your server setup is complete.
You can read this Amazon tutorial for more details on setting up servers.
2. Install MQTT Broker
Installing an MQTT broker is simple. Go to your Lightsail server page, and access the server command line. Lightsail gives a convenient browser-based SSH. Click on the terminal icon to launch the web-based command line interface.
In the terminal, run the following commands to install MQTT Broker.
sudo apt-get update
sudo apt-get install mosquitto
sudo apt-get install mosquitto-clients
After you install MQTT Server, you need to set up authentication. here is a fantastic tutorial on setting up Mosquitto authentication. Make sure you write down the MQTT username and password. You will need that when programming your Boondock Echo.
Follow the Link to set up your Boondock Echo
3. Install MySQL Server
Amazon Lightsail also provides database as a service. in this example we are using Amazon lightsail database. However, you can easily use a locally hosted MySQL server.
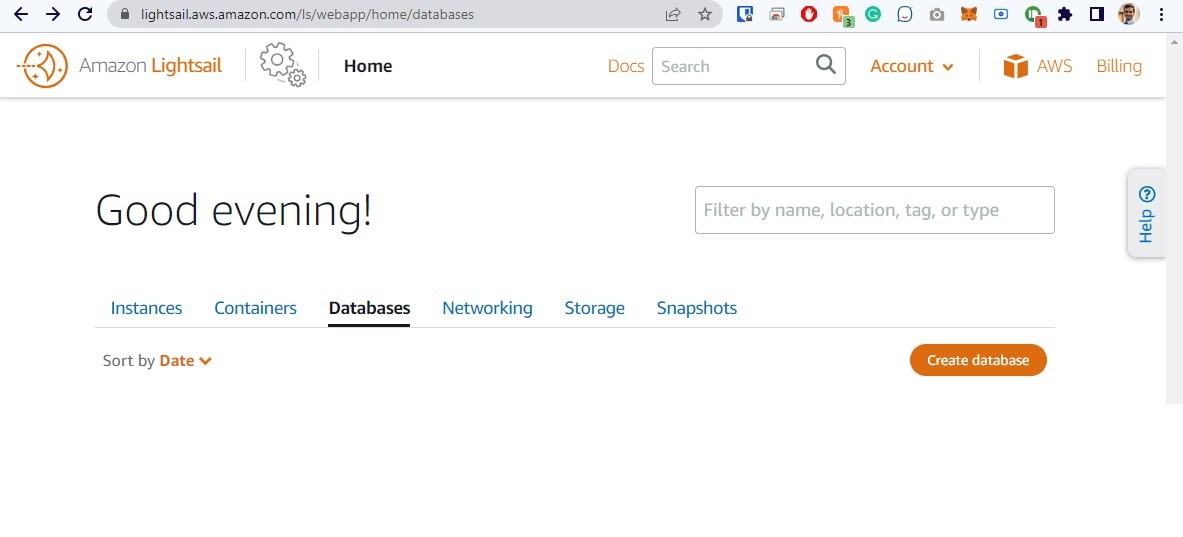
Open your lightsail account, and select Databases. Click on Create database button.
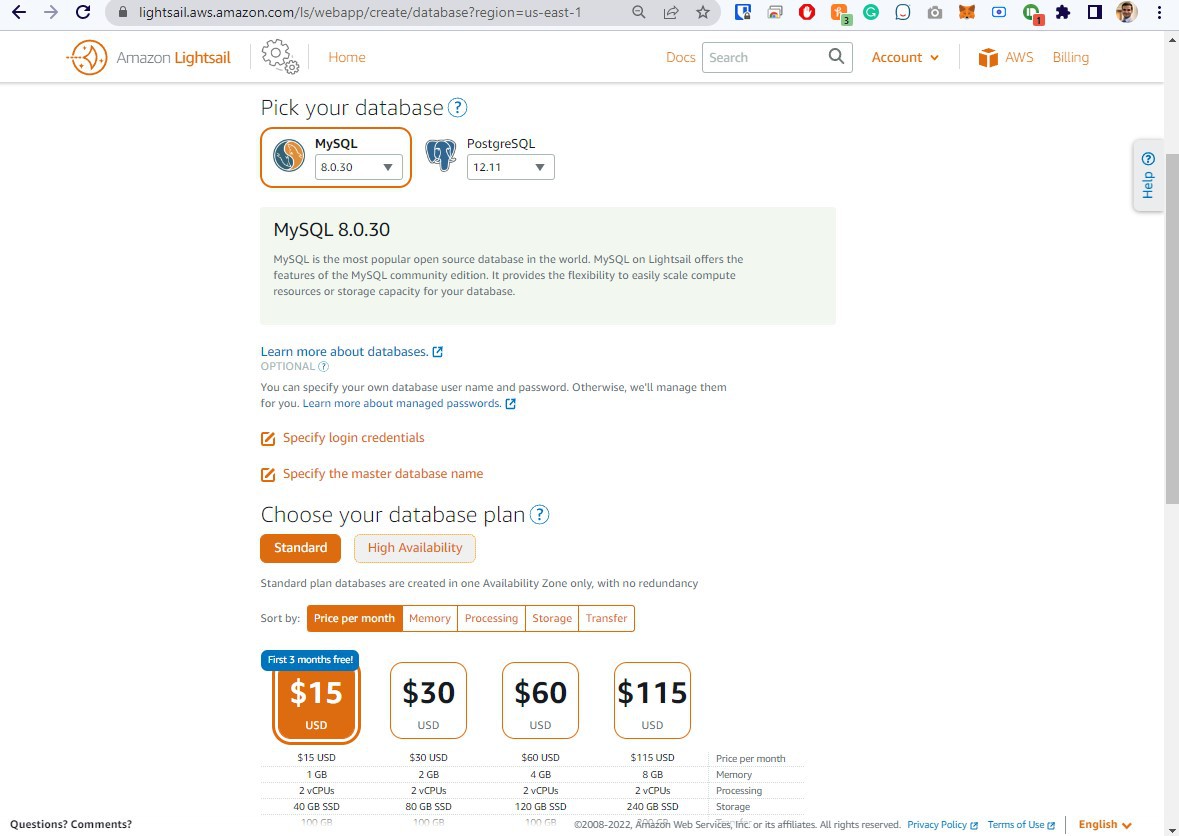
Pick MySQL database type, and pick your monthly plan. I recommend the base plan if you are expecting only a few users. Follow the instructions and create the database.
it takes up to 20 minutes for this step to complete.
4. Create tables on MySQL Server
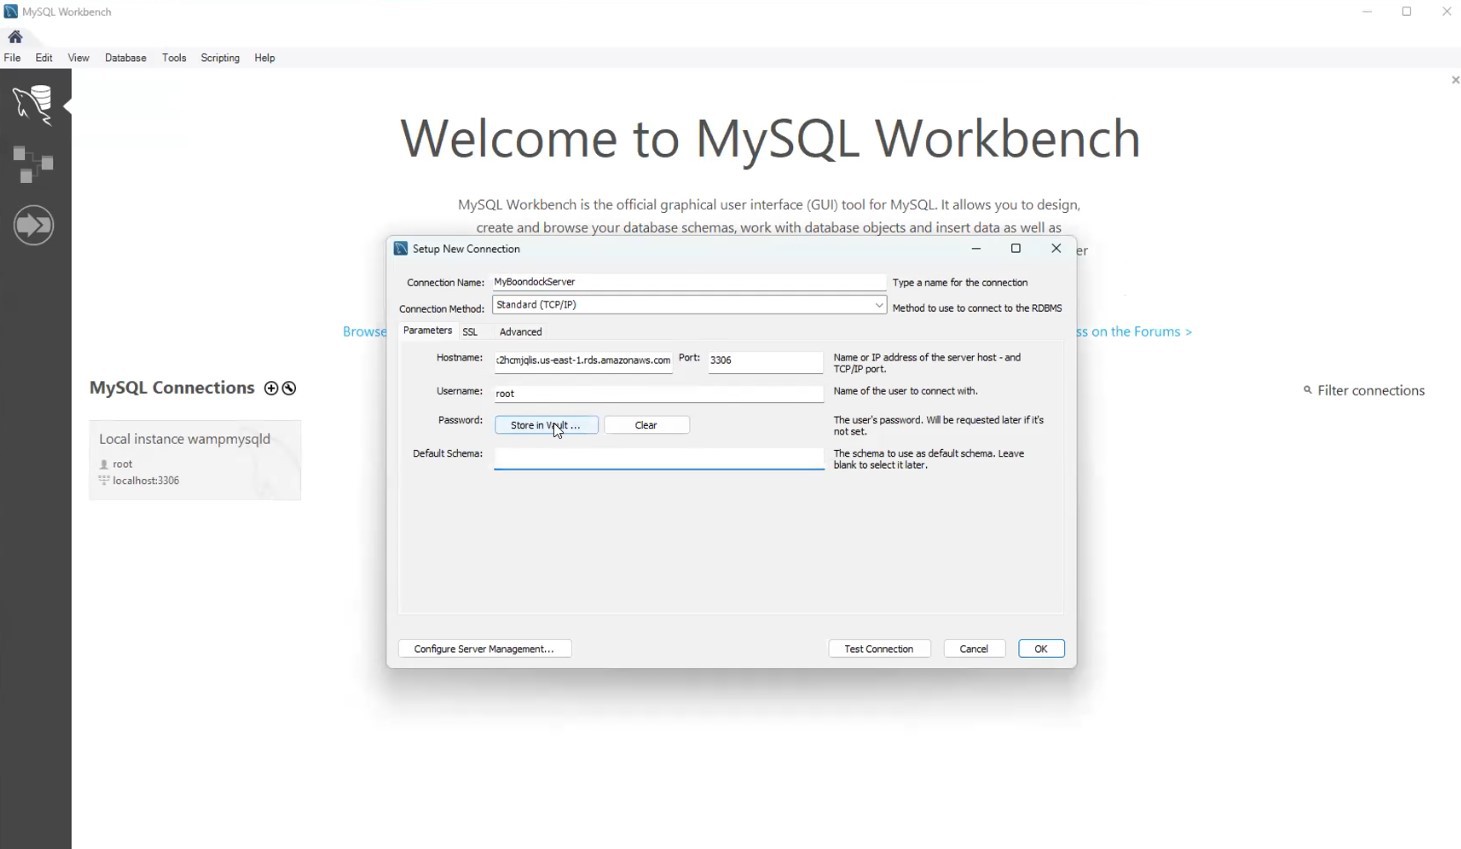
Lightsail gives you easy access to the database hostname, username, and password. Copy and save the credentials.

I like using MySQL Workbench to create the tables. Connect to your MySQL database, and create the table using the database script provided in the source code.
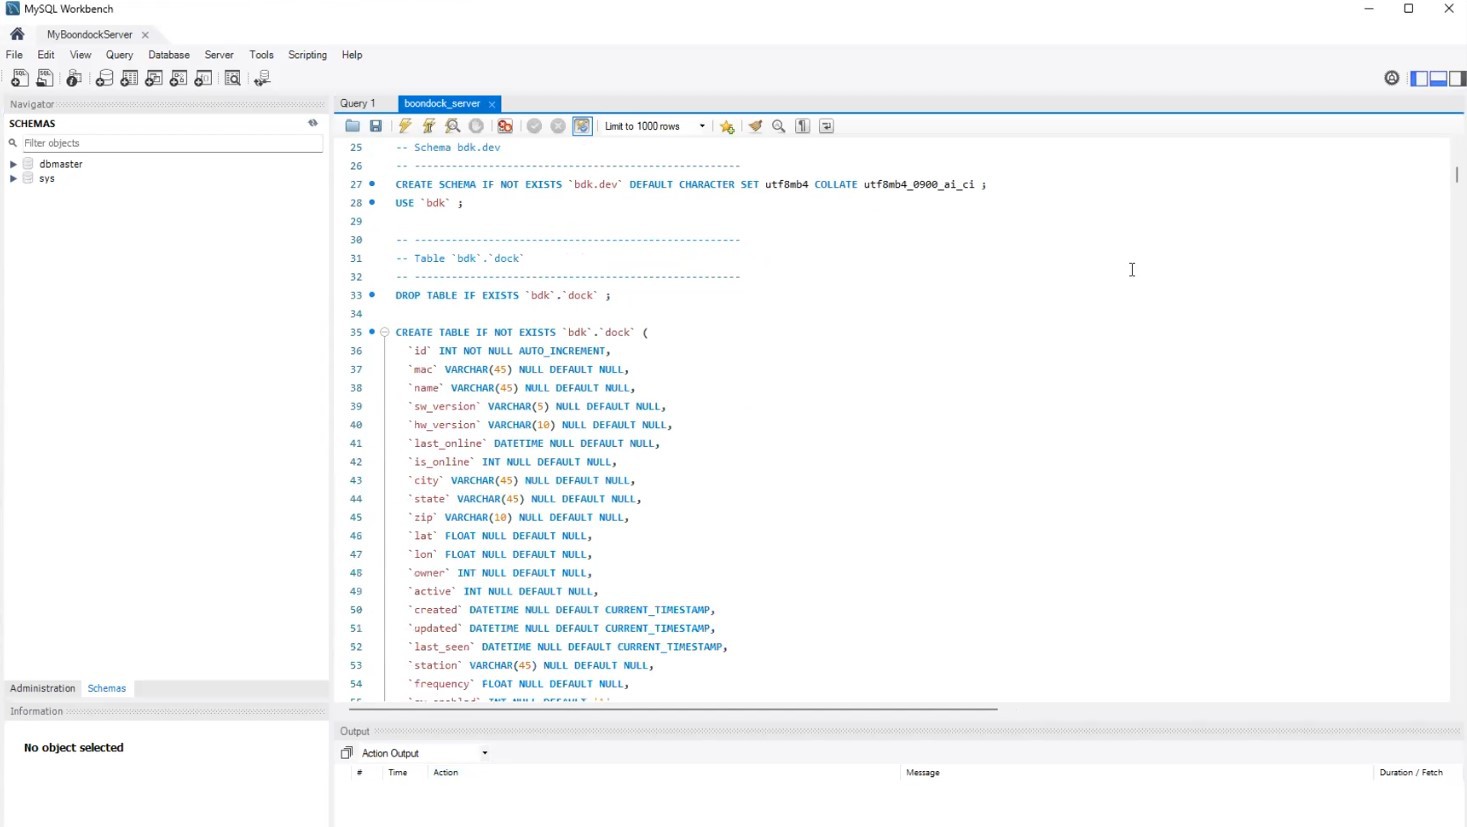
Once loaded, your will have a database named bdk with the necessary tables, stored procedures, and functions.

5. Update the PHP configurations
Boondock server code needs the right configurations to access the MySQL Server and the MQTT Server. Modify the _config.php file before uploading the files to the Apache web server.
<?php

# This is the Server configuration file
# If you host your database and MQTT on same server, use localhost, or replace with the server

$mqtt_server   = 'localhost'; # Localhost or IP Addrss of MQTT Server
$mqtt_port     = 1883; # MQTT Port
$mqtt_clientId = rand(5, 15);
$mqtt_username = 'boondock'; # MQTT username you created
$mqtt_password = 'boon!dock'; # MQTT password you used
$mqtt_clean_session = false;

$uploadFolder = "uploads/";

session_start();

$db_host = "localhost"; # MySQL Database hostname
$db_user = "boondock";  # MySQL useranme
$db_password = "boon!dock"; # MySQL Password
$dbname = "bdk"; /* Database name */

$pdo = new PDO("mysql:host=$db_host;dbname=$dbname", $db_user, $db_password);


$con = mysqli_connect($db_host, $db_user, $db_password,$dbname);
// Check connection
if (!$con) {
 die("Connection failed: " . mysqli_connect_error());
}
6. Upload the code to the server
Using your favorite sftp tool, transfer the file to the root of your web server. Here is a link to tutorial on using file transfer tools with lightsail servers

Once the pages are uploaded, you will be able to access Boondock Echo web interface on a browser.
Default username : admin@boondock.live
Default password : admin
Discussions
Become a Hackaday.io Member
Create an account to leave a comment. Already have an account? Log In.