 EK
EKThe thrusters have cables that need to go inside the waterproof enclosure. To do this, cable penetrators are used. The cable goes through the hollow of the penetrator, which gets filled with marine epoxy. The penetrator is then compressed with two small o-rings against the acrylic panel that encloses the sides of the hull.
Supplies needed:
- Potting kit (https://bluerobotics.com/store/cables-connectors/tools/tool-potting-kit-r1/)
- Marine epoxy (https://www.canadiantire.ca/en/pdp/lepage-marine-epoxy-adhesive-25-ml-0671441p.html)
- Cable penetrator (https://bluerobotics.com/store/cables-connectors/penetrators/wlp-vp/)
- Shop towels (https://www.canadiantire.ca/en/pdp/blue-shop-towels-0396641p.html)
Be sure to pay attention to the cure time for the marine epoxy. In the one I purchased at Canadian Tire, the cure time was only 8 hours. Whereas some other types online require a full 36 hours.
I haven’t seen many guides online that really showed all the steps of the process. I think this could help makers who are also trying to do something similar. So, here are photos of every single step of the process.

^ Supplies are ready

^ Setting up clamps to hold the penetrators perpendicular to the ground. Third hand tools help to keep the angle of the wire proper. The chassis of OFO is covered in shop towels.

^ View from an angle
(Click read more to continue)

^ Closer up view

^ Setup for the larger cable

^ Setup for the smaller cable

^ Cleaning the cables with IPA to remove any dirt and grease. Other sources online recommend using acetone in order to roughen the surface a bit, providing more grip for the epoxy. (I didn’t have acetone on hand)

^ This is the marine epoxy. Cut the tips and depress the plungers to get it started.

^ It requires a lot of force. Try to make both sides even. This is going in to a little mixing cup.

^ This is what it looks like before mixing. This is just under 10 mL.

^ After mixing, it becomes a uniform colour.

^ Now the mixture needs to be transported into a syringe, so that way it can be added to the penetrators. Pulling back on the plunger provides suction to move the epoxy. Found that pulling back and releasing repeatedly helped to make it travel faster.

^ This is the end result amount.

^ Here is a better view of the end result amount. 7 mL.

^ Now the process begins to pot the connectors. Going with the smaller cable first. Pushing down on the plunger to expel the epoxy.
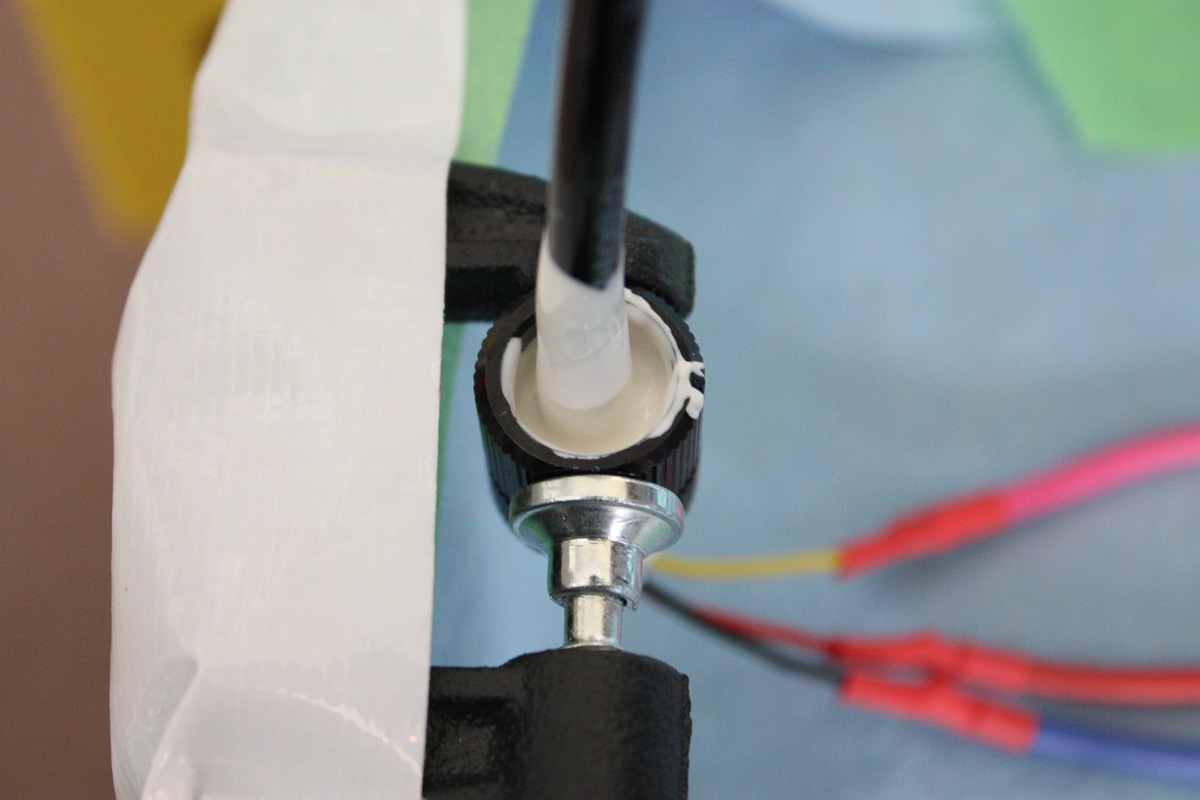
^ Here is the first portion filled. Moving the cable up and down coats it all. Everything should be coated, and there should be no bubbles or gaps. Once this is complete, filling the remainder area can be done.

^ View from an angle. You can see the cable sticking out from the end that also has epoxy coated on it.

^ Now filling the entire pocket with epoxy.

^ Here it is, complete.

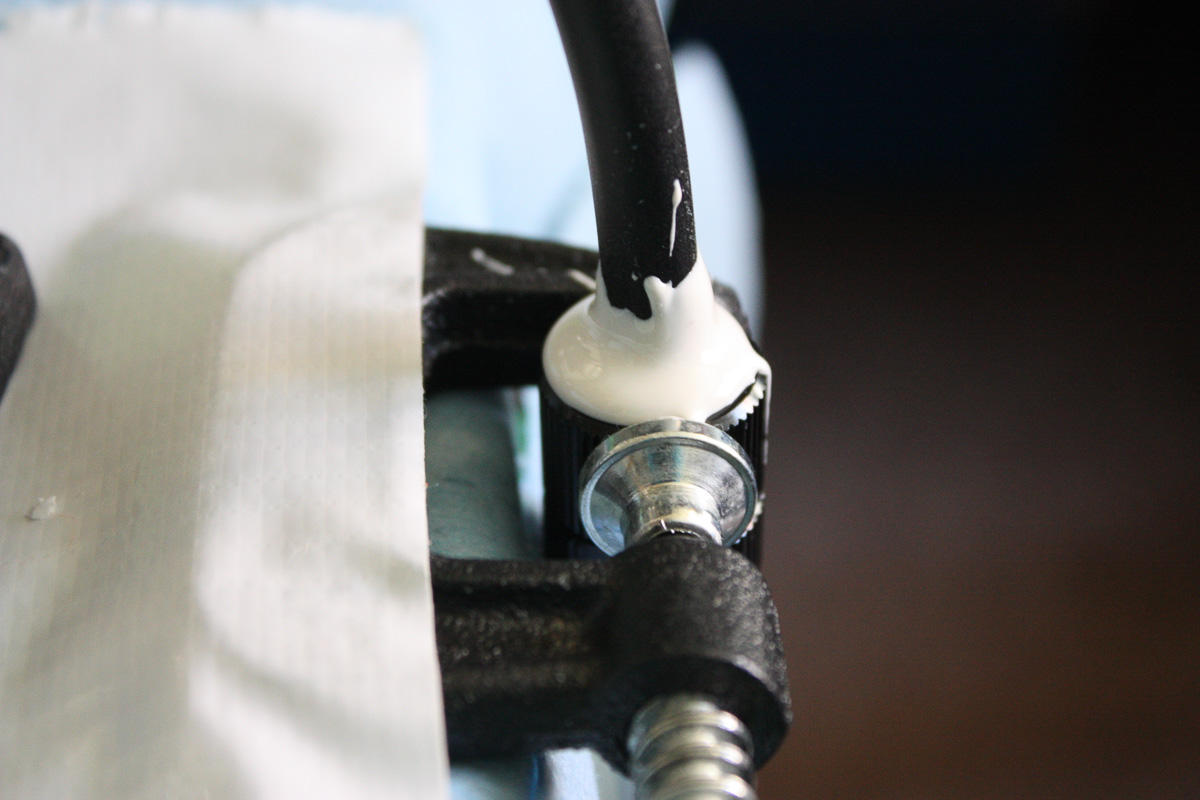
^ Next up onto the larger cable. The same process was followed. This one was a bit different because the black cable sheath was larger than the diameter of the penetrator. This meant the three cables were coated in epoxy by moving them through the hollow repeatedly.

^ Here you can see that process. Trying to coat the wires with epoxy to ensure no gaps. This is important, because if there is trapped air while under water, it could fracture the epoxy.

^ Filling up the pocket.

^ Here it is complete. This one had a little too much epoxy added at the top, but it worked out fine. You want to add enough but not too much such that it might overflow and spill onto the threads.

^ View from an angle.
^ Closer up view.

^ Overhead view after the potting is complete.
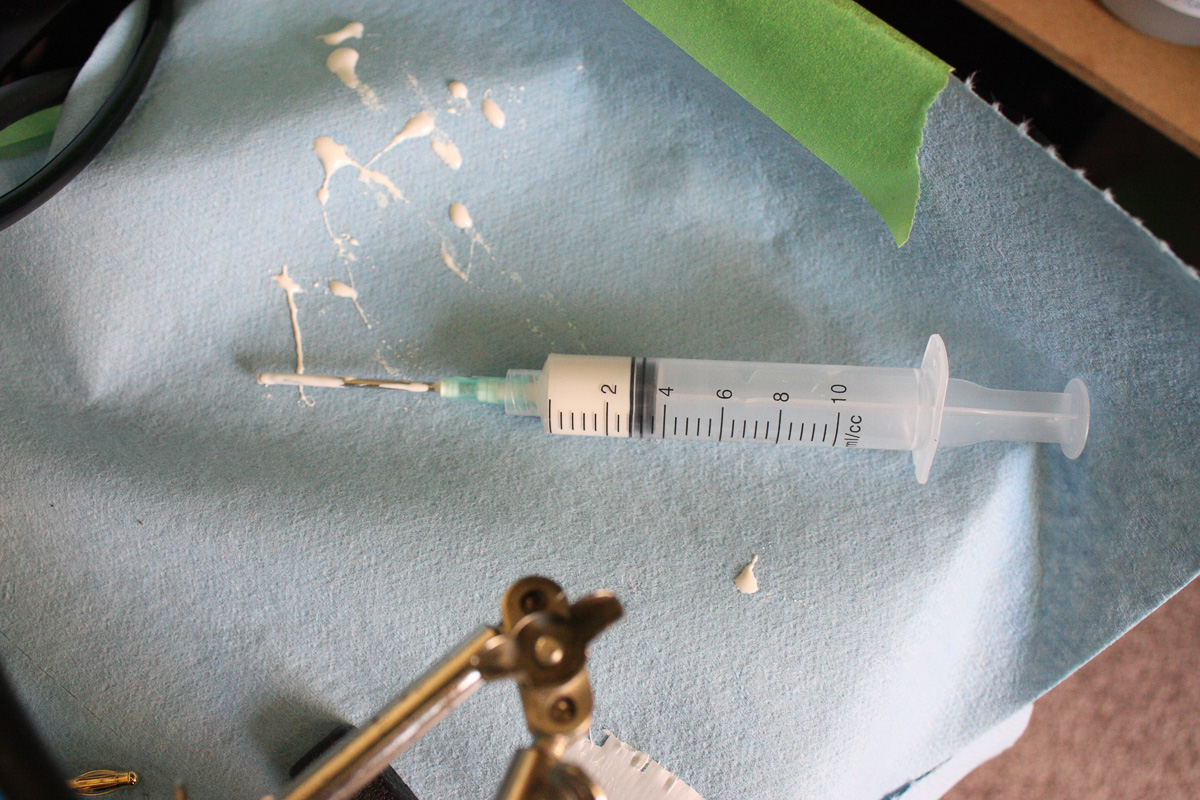
^ This is how much remains, 3 mL. Started with 7 mL, so this means 4 mL was used.
The cable penetrators with epoxy worked, and there was no shattering under water. Be sure to not use the epoxy as a strain relief. If the cable is a tether, use a mechanical strain relief on the chassis (or 3D print an adapter).
Discussions
Become a Hackaday.io Member
Create an account to leave a comment. Already have an account? Log In.