 Alejandro Mora
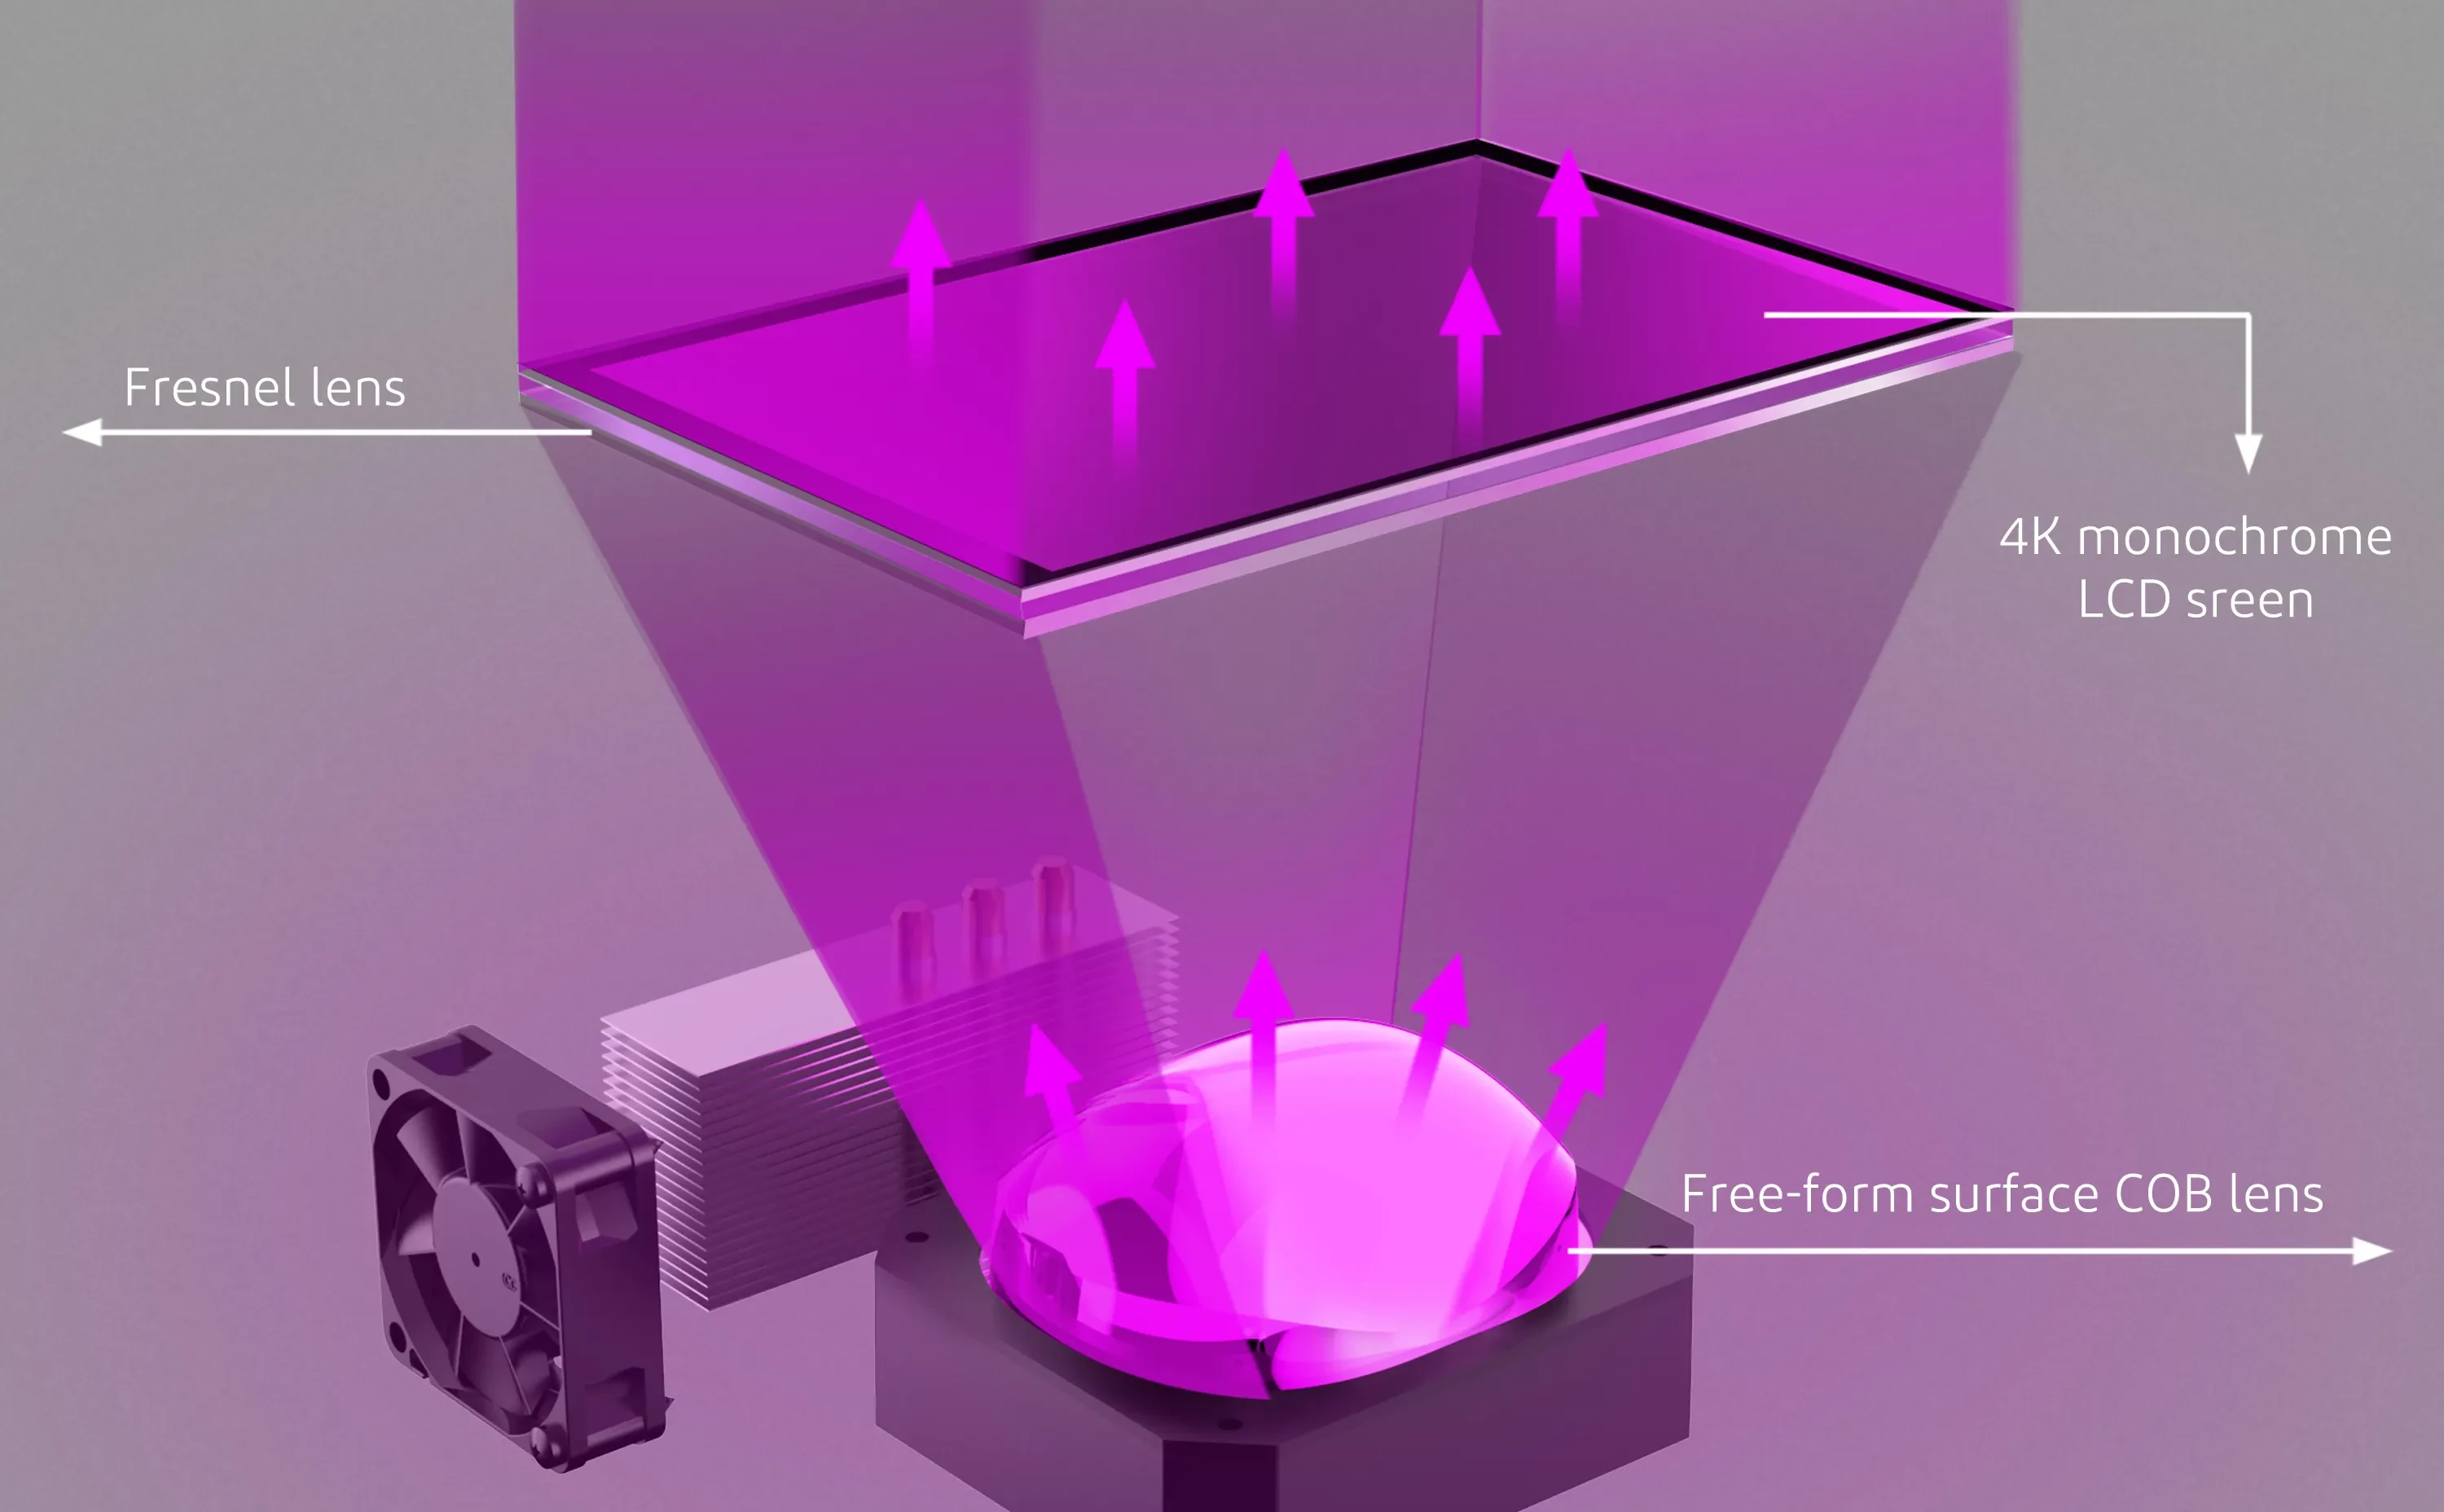
Okay, the previous update wasn't so much about being "pro", after all the new Mars 3 Pro has the same fan... But!! you will feel this way was how this printer should have been from the start.
Back to being on topic. Next in the list is the so-called Fresnel lens that it's supposed to give more light uniformity, by bending the light rays to be parallel to each other instead of scattering all over the place.
For this mod, I believe I'm maybe 90% there. While the resullt appears to work fine, I think there is room for more improvement, which I Intend to go back to at some point in case things take a turn for the worse.
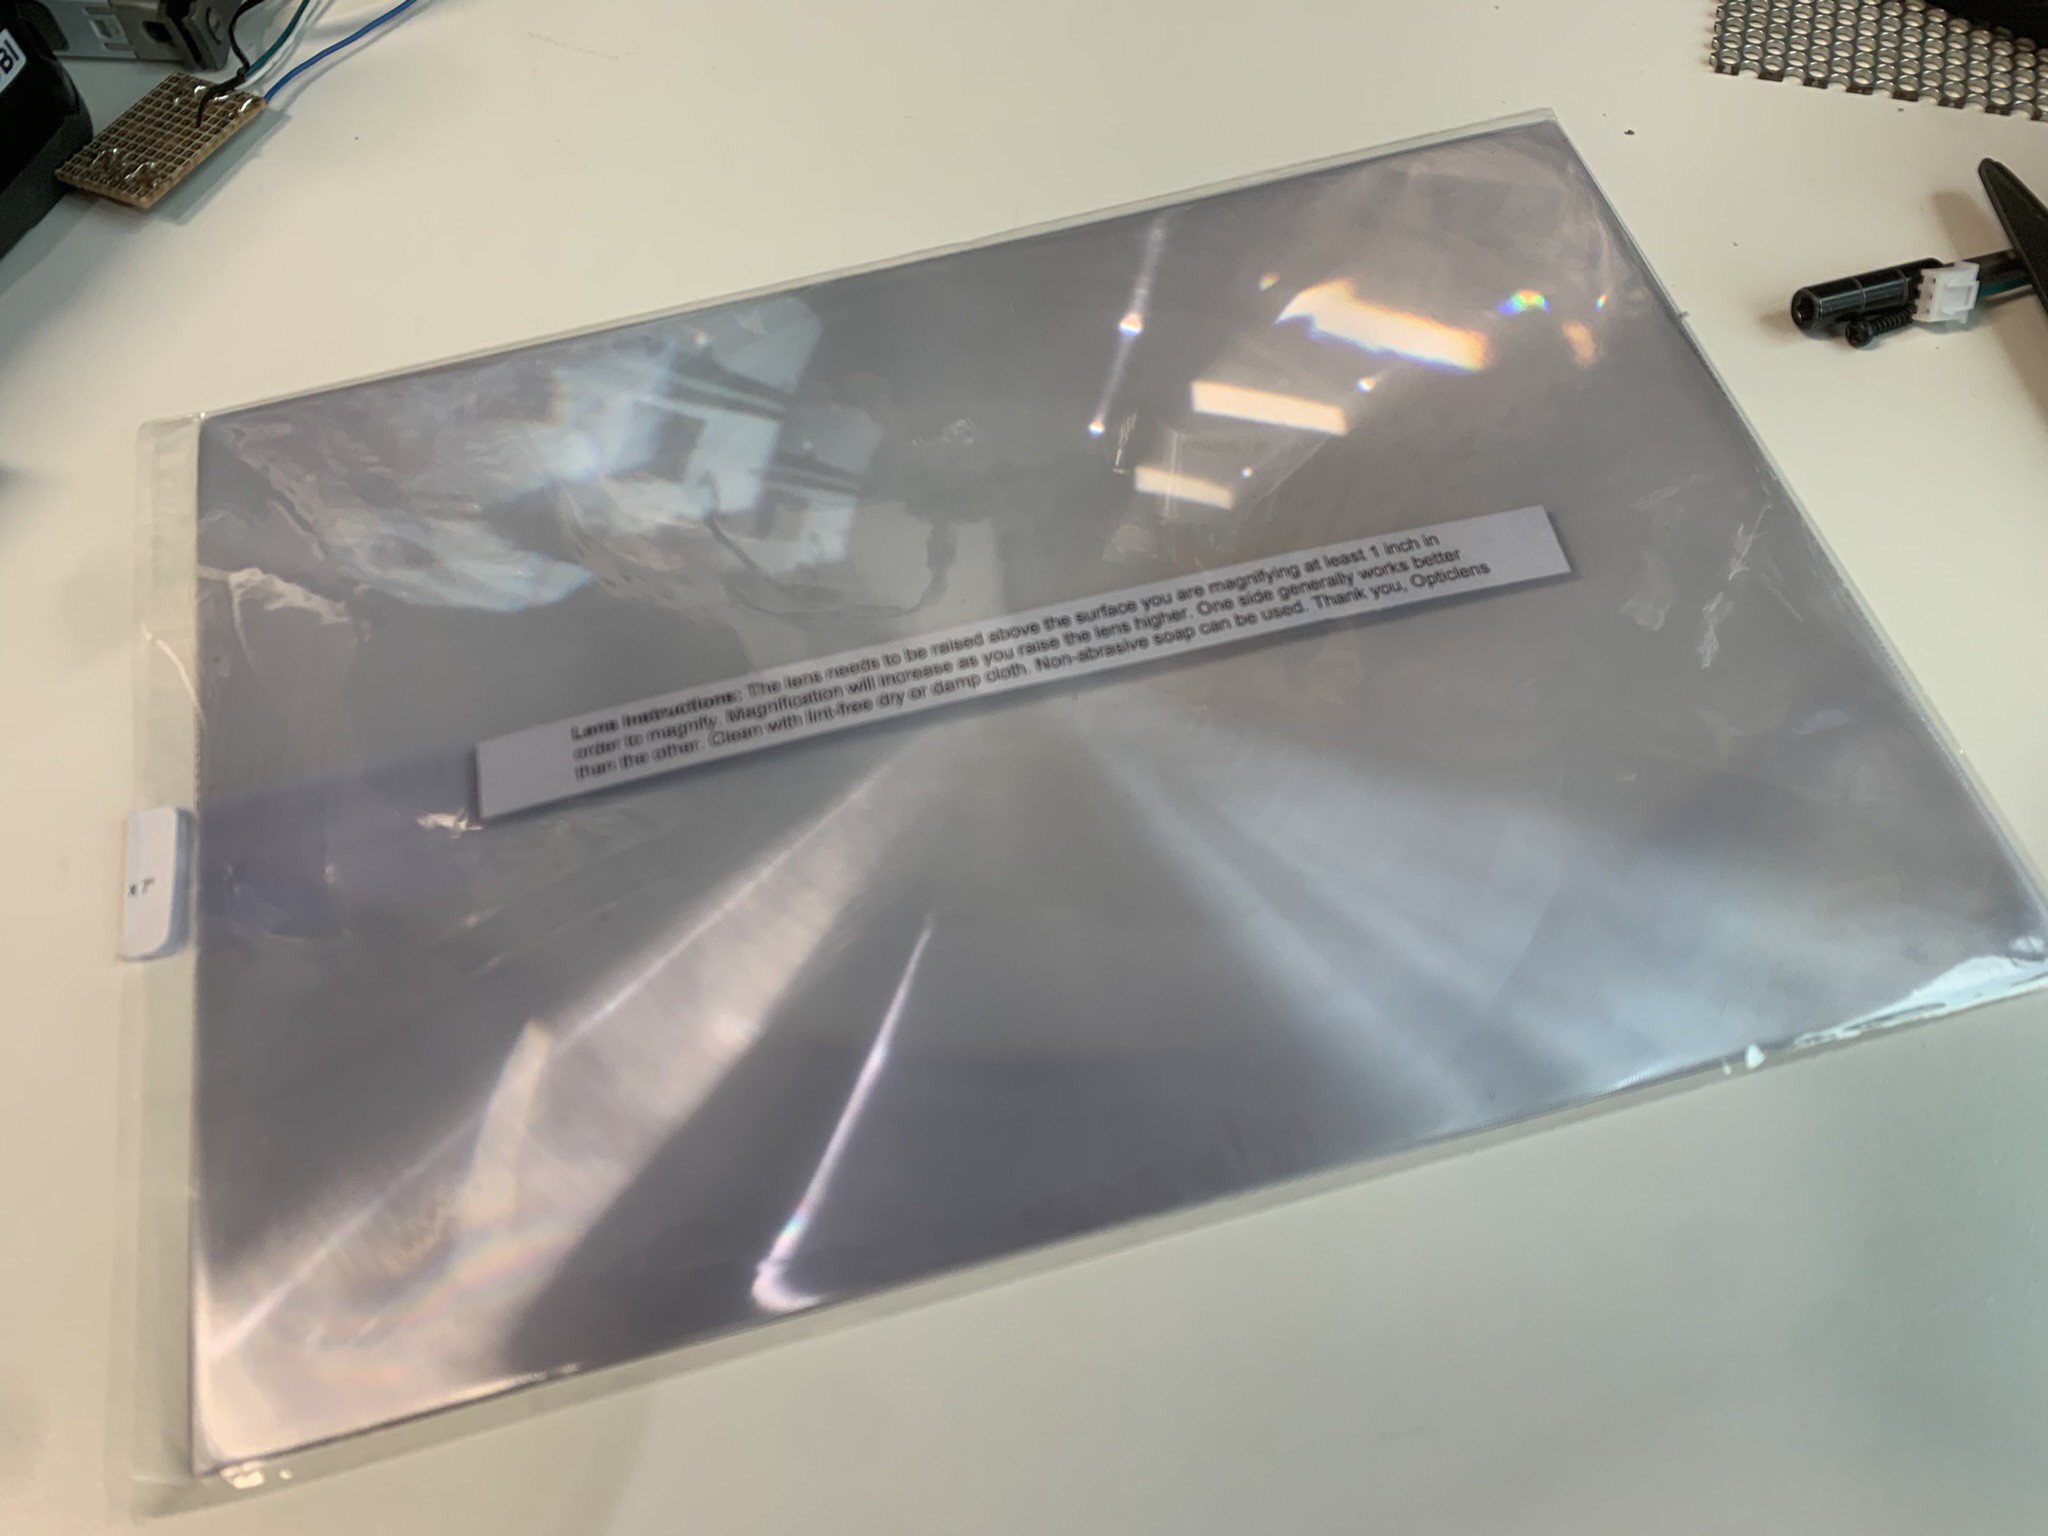
This mod can be done at the same time as the previous fan mod, since the printer is already taken apart. For this we need to purchase some relatively cheap Fresnel lens from either Amazon or eBay. I anticipate some craft stores might also sell them. The important part is that it needs to be at least 16x11.5 cm (6.29921 in x 4.527559 in) so that it covers the whole LCD screen.
Here's what I did:
Using the printer assembly, trace the aperture in a piece of paper and mark the center. This is important because we have to center the Fresnel lens in the opening to fully take advantage of the lens.
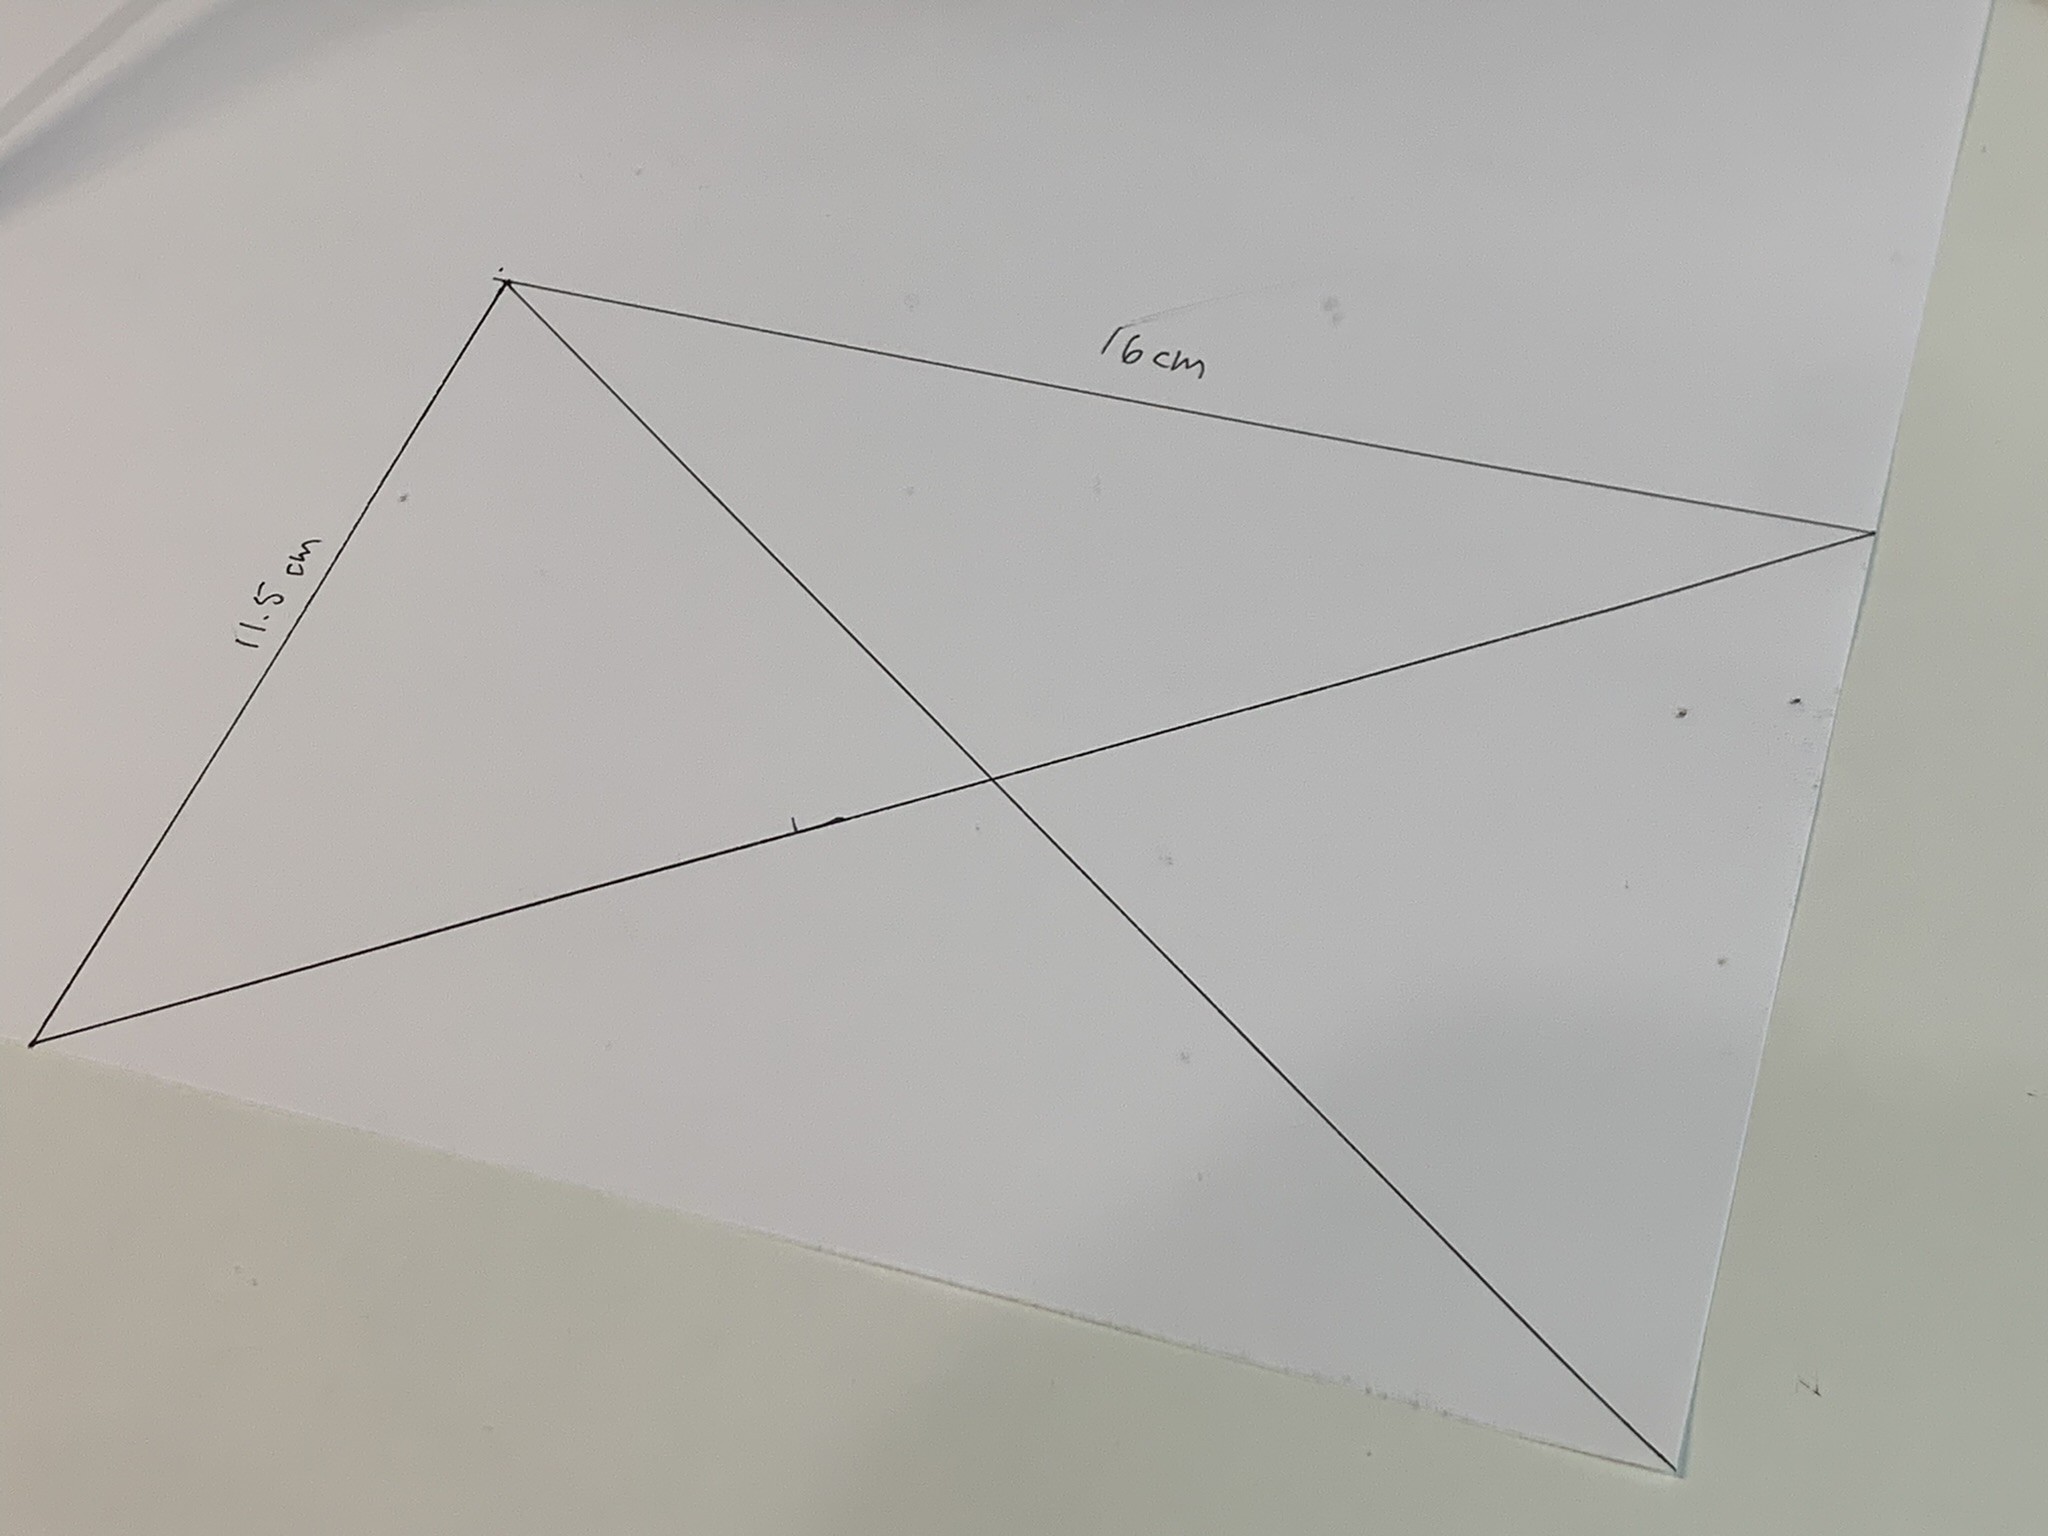
Cut the template and trace it in the center of the lens. The lens has a center point that is easy to spot against the light, align that point with the cross in the template

Use a craft knife and a ruler to cut through the lens, a few passes and its done.
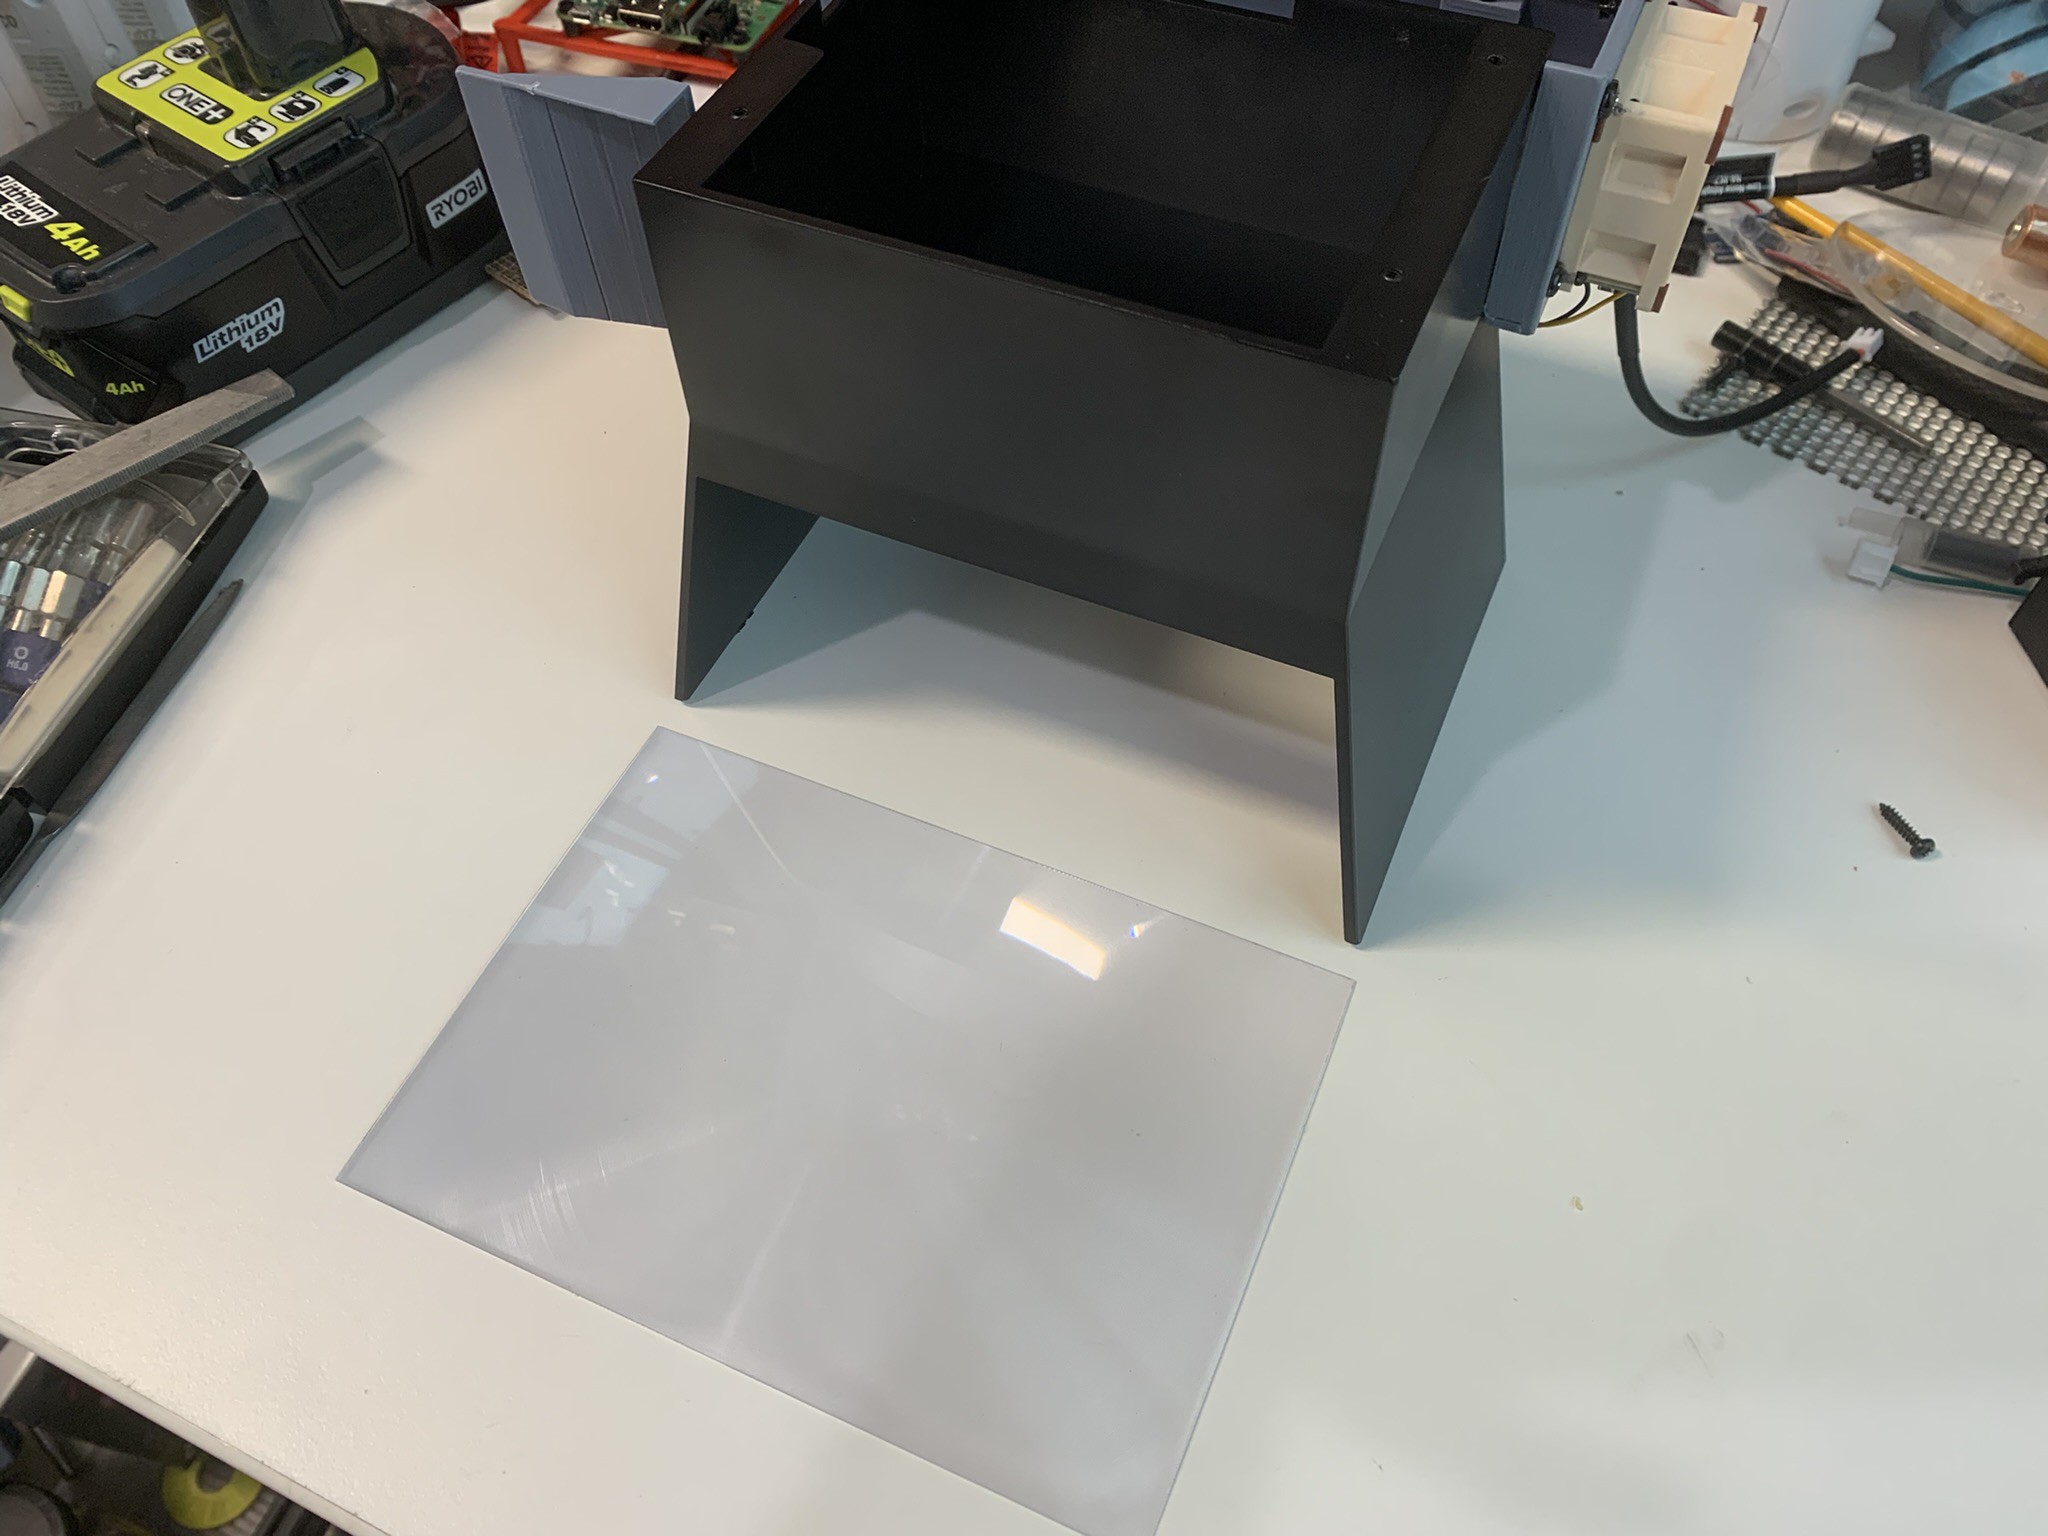
Last step is to glue it to the printer shroud/assembly thingy. Making sure the textured side is facing up away from where the UV LEDs are. Just like this:

That will ensure the light rays are straightened against the back of the LCD panel.
Glue it with some CA glue or whatever you prefer, make sure that the lens is as straight as it can be. The ones I bought tend to bend a little bit. since they are very thin. Try to get something with some 1-2mm thickness if possible.
Here is where I think I could have done a better job; Fresnel lenses have focal points that need to be found to optimize the light as much as possible. That can be done by shining a light in the "textured" side and finding how close the light should be to create a very sharp point in the other side. Just like when you use a magnifying glass to burn things with...
I decided to yolo it for now, with the idea to come back and figure out the proper focus point length later. I maybe want to create a frame for the lens once I find that distance to ensure it stays there.. #TODO
However, special care should be taking when testing for this distance if you decide to do it yourself. Apparently looking at the UV light can be dangerous for your eyes. So, make sure to use all the PPE available. Protect your eyes or use a different source to find out the focal point!

Put it all back and you should be earning that extra 2% of light uniformity that Elegoo is claiming this lens provides...

Put your printer back together and test it out!
Discussions
Become a Hackaday.io Member
Create an account to leave a comment. Already have an account? Log In.