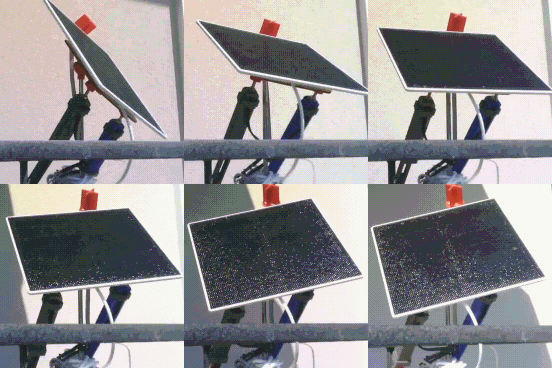
Finally we are ready to present the development result of the last month:

But, before continuing, we want to thank the jury for choosing our project.
This is further motivating us. Thank you!
We have complete the first round of tests, with encouraging results.
You can find the source code here: https://github.com/fulvioalessio/mysoltrk-solar-tracker/tree/main/SolarTrackerReinvented
Let's look at some snippet of code:
void loop()
{
    unsigned long startedAt = millis();

    workIsCompleted = false;
    readPhotoresistorValuesAndEvaluateMovements();

    Serial.println("Tracker start");
    while (!workIsCompleted && !isLowVREF())
    {
        movePanel();
        if (millis() - startedAt > MAX_MILLISECONDS_WORK)
        {
            Serial.println("Exceeded work time limit");
            workIsCompleted = true;
        }
        else
        {
            readPhotoresistorValuesAndEvaluateMovements();
        }
        delay(10);
    }
    Serial.println("Tracker complete");
    processMosfet();
    sleepForMilliseconds(SLEEP_DELAY);
}
The loop() code follow the flow chart that we had shown in the previous log.
Summing up:
- read photoresistors values and calculate movements
- move panel
- read photoresistors values (again) and calculate next movements
- if there are no moves or time is up, go to sleep; otherwise return to step 2
- after completing the movements, evaluate whether to turn on the mosfet based on the amount of light read
- sleep for a set amount of time
- repeat from step 1
Quite simple isn't it? Well, the hard work is to create a right combination between the reading of the photoresistors, the reading of the pin shunt and of VREF. And a lot of trying..
But how are the movements performed? Here is an example:
    if (moveUp)
    {
        Serial.println("move UP ^^");
        eos_br = false;
        if (!move(ACTUATOR_R_PIN1, MAX_MILLISECONDS_MOVEMENT, MAX_SHUNT_VALUE_R))
        {
            eos_tr = true;
        }
        eos_bl = false;
        if (!move(ACTUATOR_L_PIN1, MAX_MILLISECONDS_MOVEMENT, MAX_SHUNT_VALUE_L))
        {
            eos_tl = true;
        }
    }
To implement the upward movement, the two actuators are switched on one at a time. This way you get the desired result without consuming too much.
Variable "eos_tr" (Top Right), "eos_tl" (Top Left) are used to mark the limit switches. This is useful for movements calculation.
However, the code has been written for maximum readability and understanding.
Let's watch together the video made with a DYI esp32cam powered directly by the mysoltrk prototype:
Sorry for the low quality video. esp32cam provides low resolution images with little detail.
However we think it is enough to show how it works
Project completed ? That's all ? Well.. no!
Thanks to the award received, we now have the opportunity to extend the challenges we set ourselves at the beginning.
Our plans include the purchase of material useful for the construction of further prototypes
We want to explore these further aspects:
- What size of panels can we move with our actuators ?
- Is there a possibility to use the same technique to move large panels?
They seem like demanding challenges to us, but given the results we have achieved, we are quite optimistic !
 Fulvio
Discussions
Become a Hackaday.io Member
Create an account to leave a comment. Already have an account? Log In.