System Overview
The system is composed of three main components: the physical MorseMate device, the MorseMate webpage, and a central server to handle communication between all connected users.
The MorseMate device provides the ability to type messages in Morse code and then send them to a peer of the user’s choice. It has the ability to read back received messages by buzzing them out in Morse code via a vibration motor. It also incorporates an OLED screen to navigate a menu that allows users to check for the latest messages. reference a Morse code alphabet, and change various settings.


Finally, the server handles communication between all MorseMate devices and webpages, as well as storing all transmitted messages to text files for later viewing.

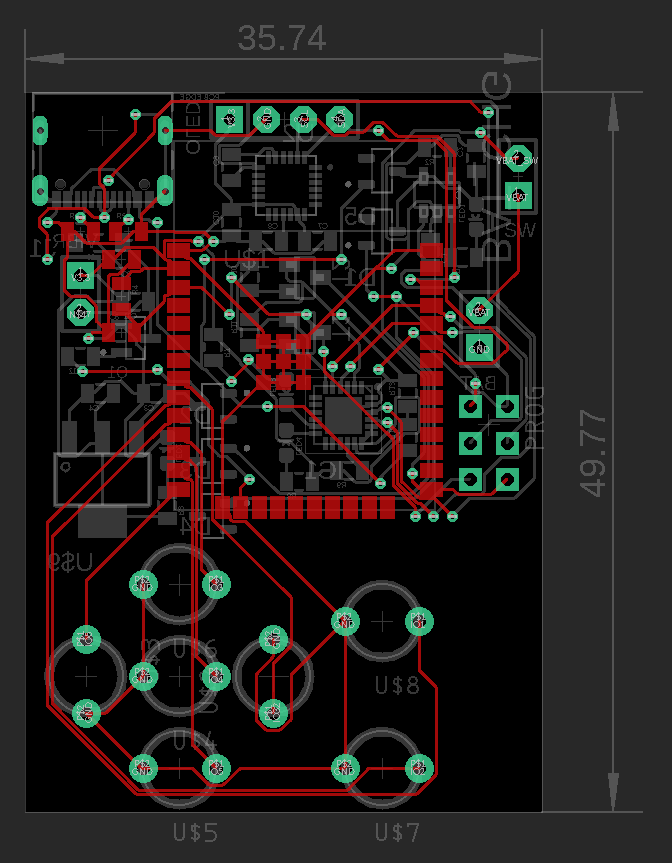
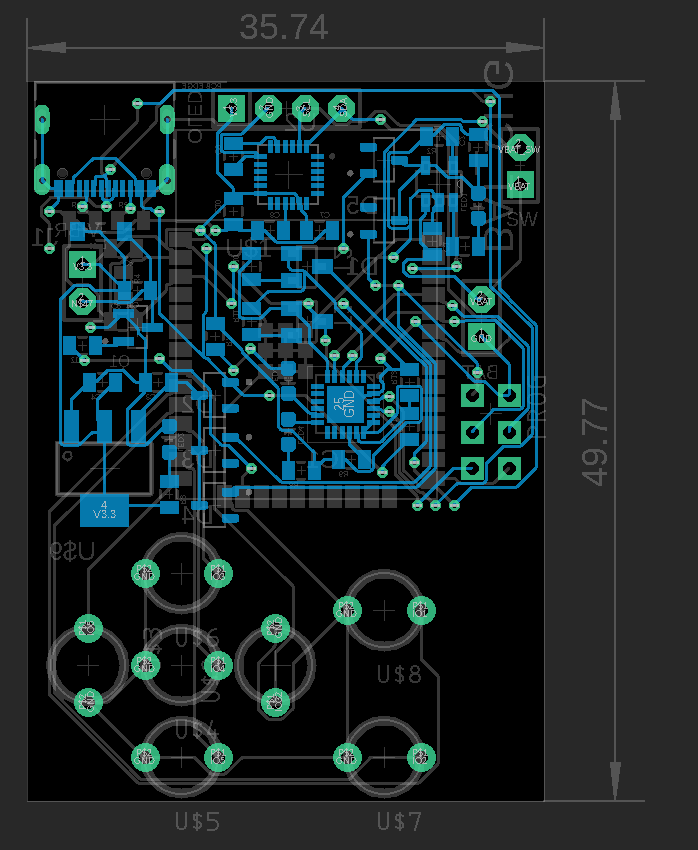
PCBs
The final PCB for the MorseMate device includes several components to support its essential functionality. The design centered around an ESP32 module and its power management circuitry, which included Schottky diodes to protect the power lines. Included in the design is a vibration motor alongside protection circuitry for it consisting of a diode and a transistor, five buttons for inputs, and an OLED display for the user interface. There is also a header for a JST connector for the battery in addition to battery charge circuitry, as well as a USB-C port to charge the battery and a slide switch to disconnect the battery and power down the device. In addition to the essential components, there are also several features that I decided to include that were not strictly necessary. I included a USB-UART module and automatic IO0 and reset circuitry so that I could reprogram the device using only the USB cable instead of relying on the programming headers. I also included two additional buttons for my own use cases outside of the scope of this project.
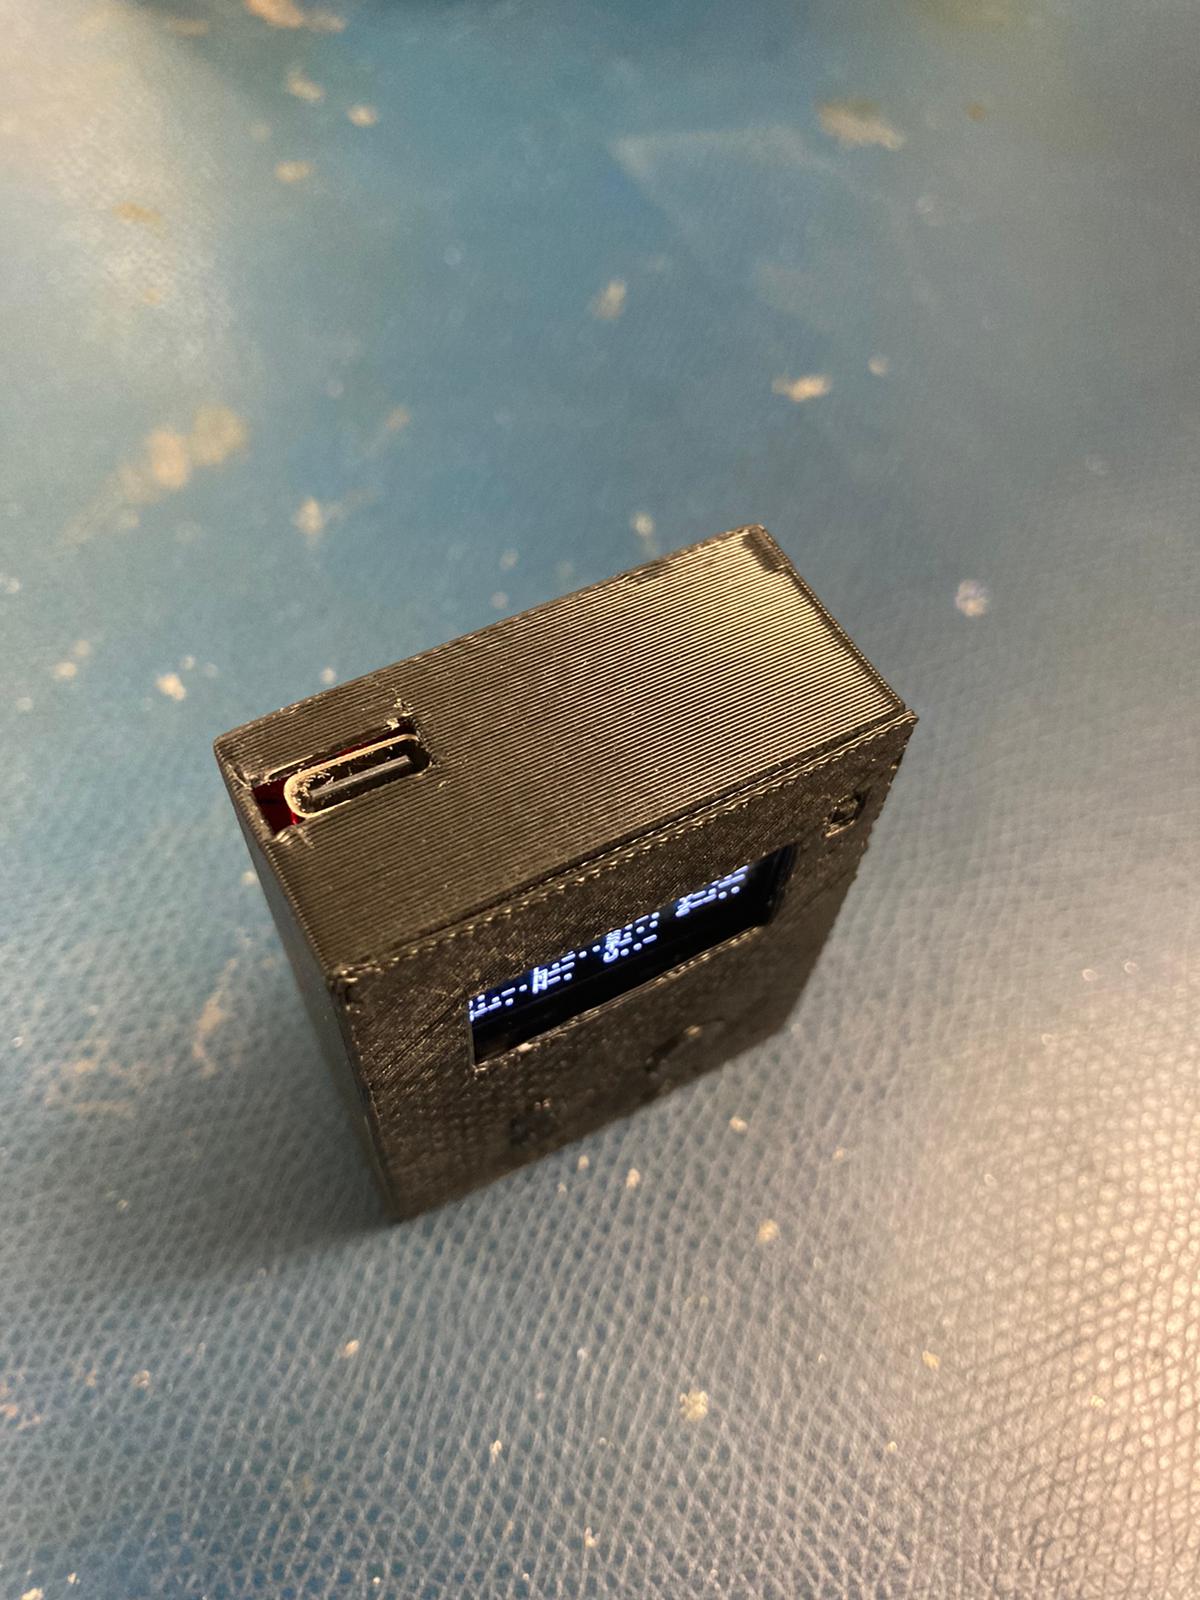
3D Printing
The enclosure for the MorseMate device consisted of a simple 3D printed design. I modeled the enclosure using Fusion 360, and it consists of two main parts: the base and the face plate. The base is a simple rectangular box with a hole aligned with the position of the USB-C port. The face plate has an inner lip that allows it to snap onto the base, as well as cutouts for the screen, on-off switch, and buttons. Finally, I designed and printed the three different types of buttons, which are meant to be distinct tactilely to allow the user to manipulate them without looking. These buttons fit snugly into the holes on the face plate, locking them in. The face plate has enough flex to allow the user to press down on the buttons, moving them down enough to actuate the buttons on the PCB inside the device, and the buttons are spaced out enough so that only the desired button is pressed.


 Dan Julio
 dariocose
 Christoph