 WJCarpenter
There are a million internet descriptions of how to flash the Sonoff S31. I won't cover all that ground here since all I know about it is what I learned from people who went before me.
- This video shows the simple process of taking one apart to expose contacts for flashing. The S31 is extremely accommodating for us nosy snoops.
- The ESPHome devices project provides a sample configuration file here. I have enough experience with this sort of thing that I was able to easily understand all of the ESPHome configuration.
One small hitch is that there is no USB interface in a device like this, so it has to be flashed with a USB-to-serial converter. I have one around here somewhere (in fact, I'm pretty sure I have at least 2 or 3), but I couldn't lay my hands on them when it came time for actually flashing the devices. I came across this description of how to use an ESP8266 board as an impromptu USB-to-serial converter. It won't work with every ESP8266 board, but it will work with (probably) a lot of them. The technique worked with the second ESP8266 board that I pulled out of my extensive collection (aka, junk box). (As the author warns, when using this technique, you want to wire TX to TX and RX to RX instead of the usual cross-over wiring with a real USB-to-serial converter.)
The next inconvenience is that, as you would expect, the S31 doesn't have any connector or pins for its serial port. It does, however, have reasonably sized pads that are clearly marked. You can tack-solder some leads onto those pads and use whatever collection of clips and wires you want to connect those leads to the ESP8266 board. Since I was only going to flash 4 devices, I was OK with using a rat's nest of Dupont wires. I also knew that I could do OTA updates once I got the initial ESPHome firmware flashed. I used M/F jumper wires, tack-soldering the male ends to the S31 pads and using the female ends to the ESP8266. To flash the S31, you have to push its button while applying power to get it into flash mode. So, you do that with one hand. With your other two hands, you plug the USB cable into the ESP8266 board. Yeah, it's tricky, but it can be done if you only happen to have two hands.
Flushed with how easily that went, I desoldered the wiring from the first S31 and tried to wire up the second one. That's how I found out just how easy it is to lift those pads off the board. Grrr.
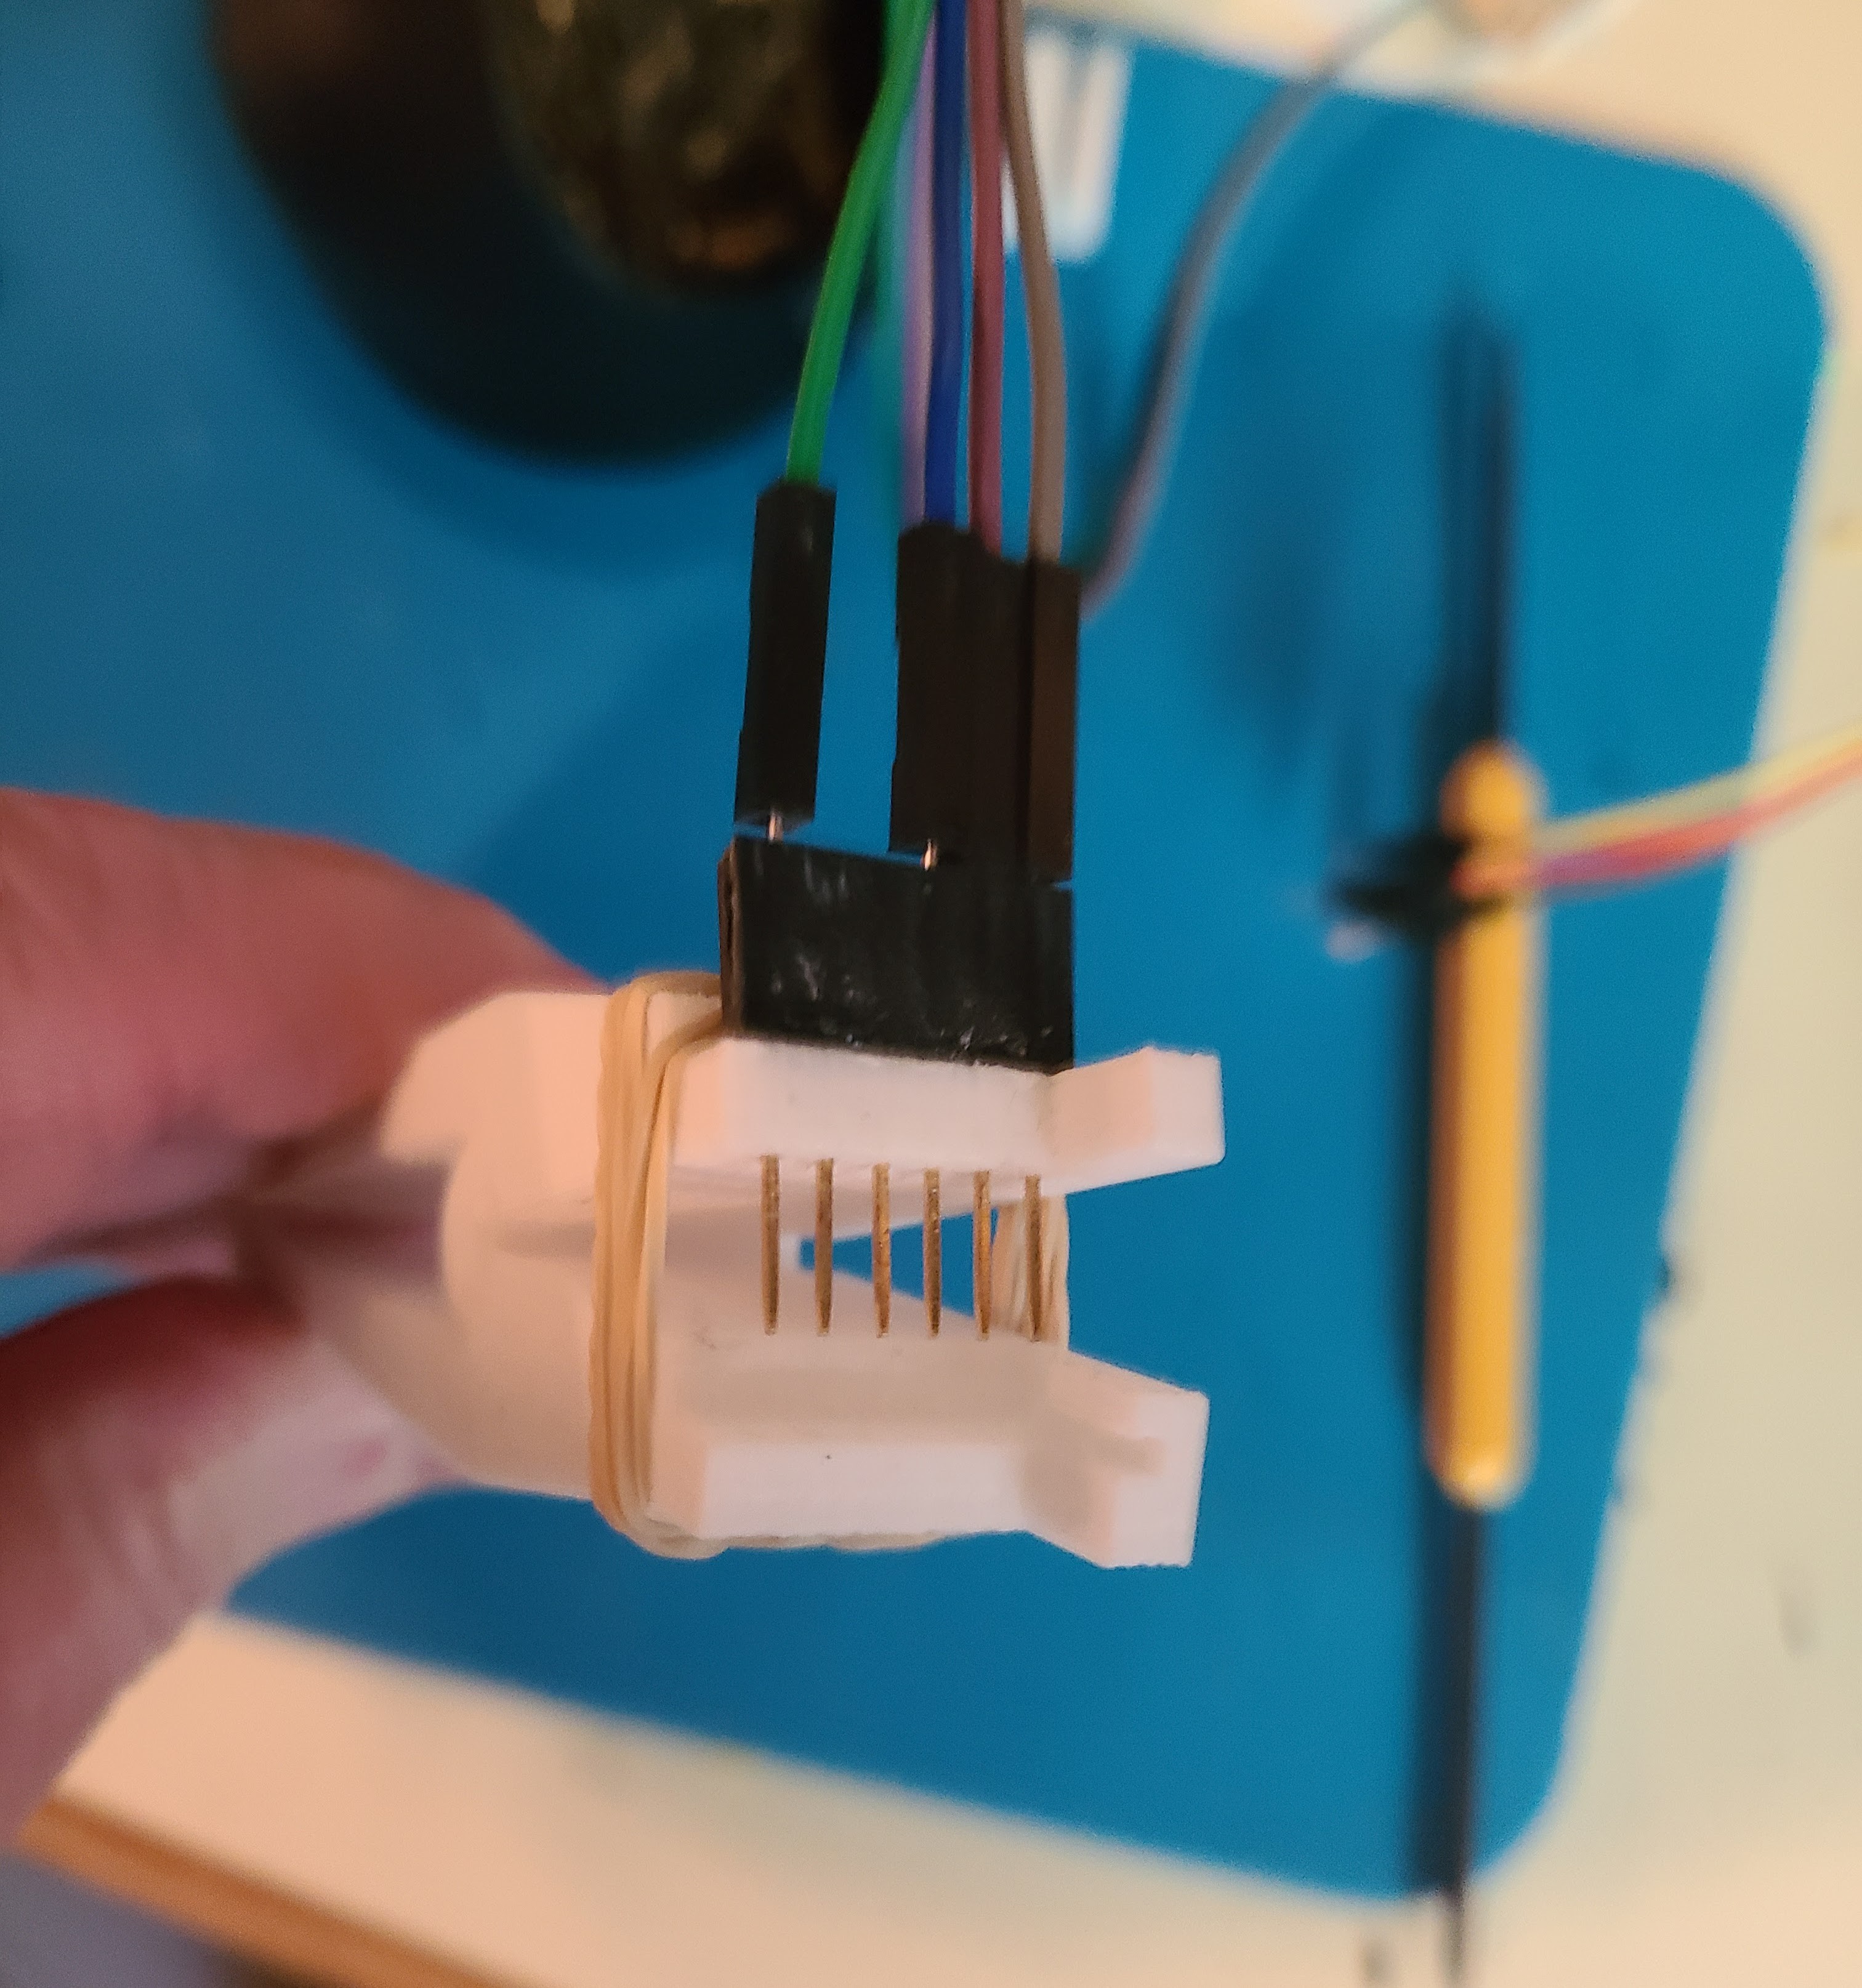
OK, I put that one aside and went looking for some kind of jig or clip or whatever so that I could avoid soldering. I have a couple different kinds of pogo pins on-hand from an unrelated project, so I went looking for something 3D-printable specifically for the S31. I found several without venturing outside Thingiverse. I decided to go with this one since it looked like an easy print and mechanically pretty simple. Instead of using pogo pins, I just used a stacking header glued to the clip. Rubber bands provided some extra squeeze. It was a little tedious to get good contacts on all 4 pads, but I only had two devices to flash, so I stuck with it.
What about that S31 with the lifted pad? I was hoping maybe there was some OTA way to do that first flash. While looking for that, I came across this mention of a PCB via location that could be used as a solder point. I did that and tack-soldered the other three pads in the usual way. The solder bond to the via was extremely flimsy, but it was strong enough and lasted long enough to get ESPHome flashed.
Discussions
Become a Hackaday.io Member
Create an account to leave a comment. Already have an account? Log In.