 WJCarpenter
It's not a very original thought that we sometimes forget that we have something in the washer or dryer or both, and it's not a very original idea to use automation to try to prod the household into remembering and reacting.
A few years ago, I cooked up my own solution with current sensors inside a power strip. That was kind of interesting (educational for me) and worked reasonably well for detecting when the machines were running. Although I was never completely happy with the aesthetics, it was electronically good enough. I originally designed it in an online tool (https://upverter.com/) that disappointed me with its bugs (at that time ... I haven't use it for years, so maybe it's fantastic now). I was collecting the data in another online system (Cayenne) for building dashboards of IoT data (I haven't used that for years, either).
In the intervening years, multiple things happened:
- I got familiar with using Kicad for schematic and layout design.
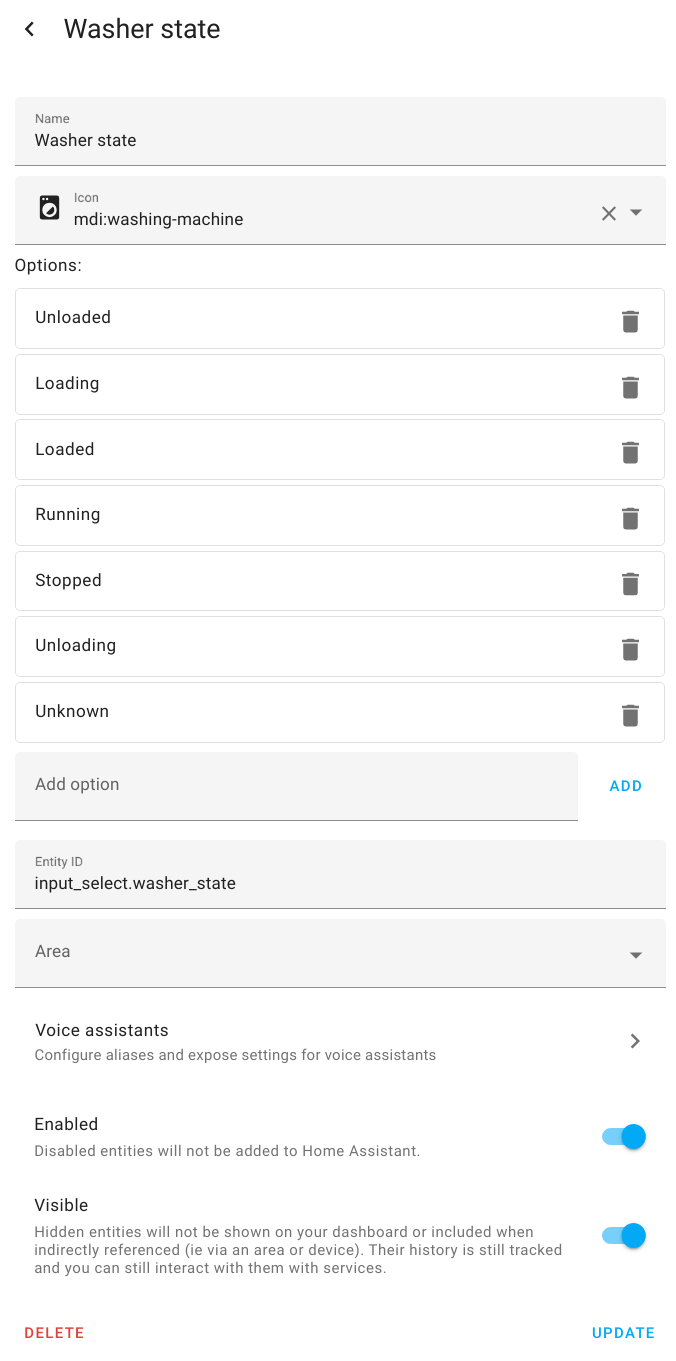
- I evaluated home automation frameworks and have now consolidated everything into a Home Assistant server that I run locally.
- I developed an even larger bias for local control instead of the cloud for automation projects.
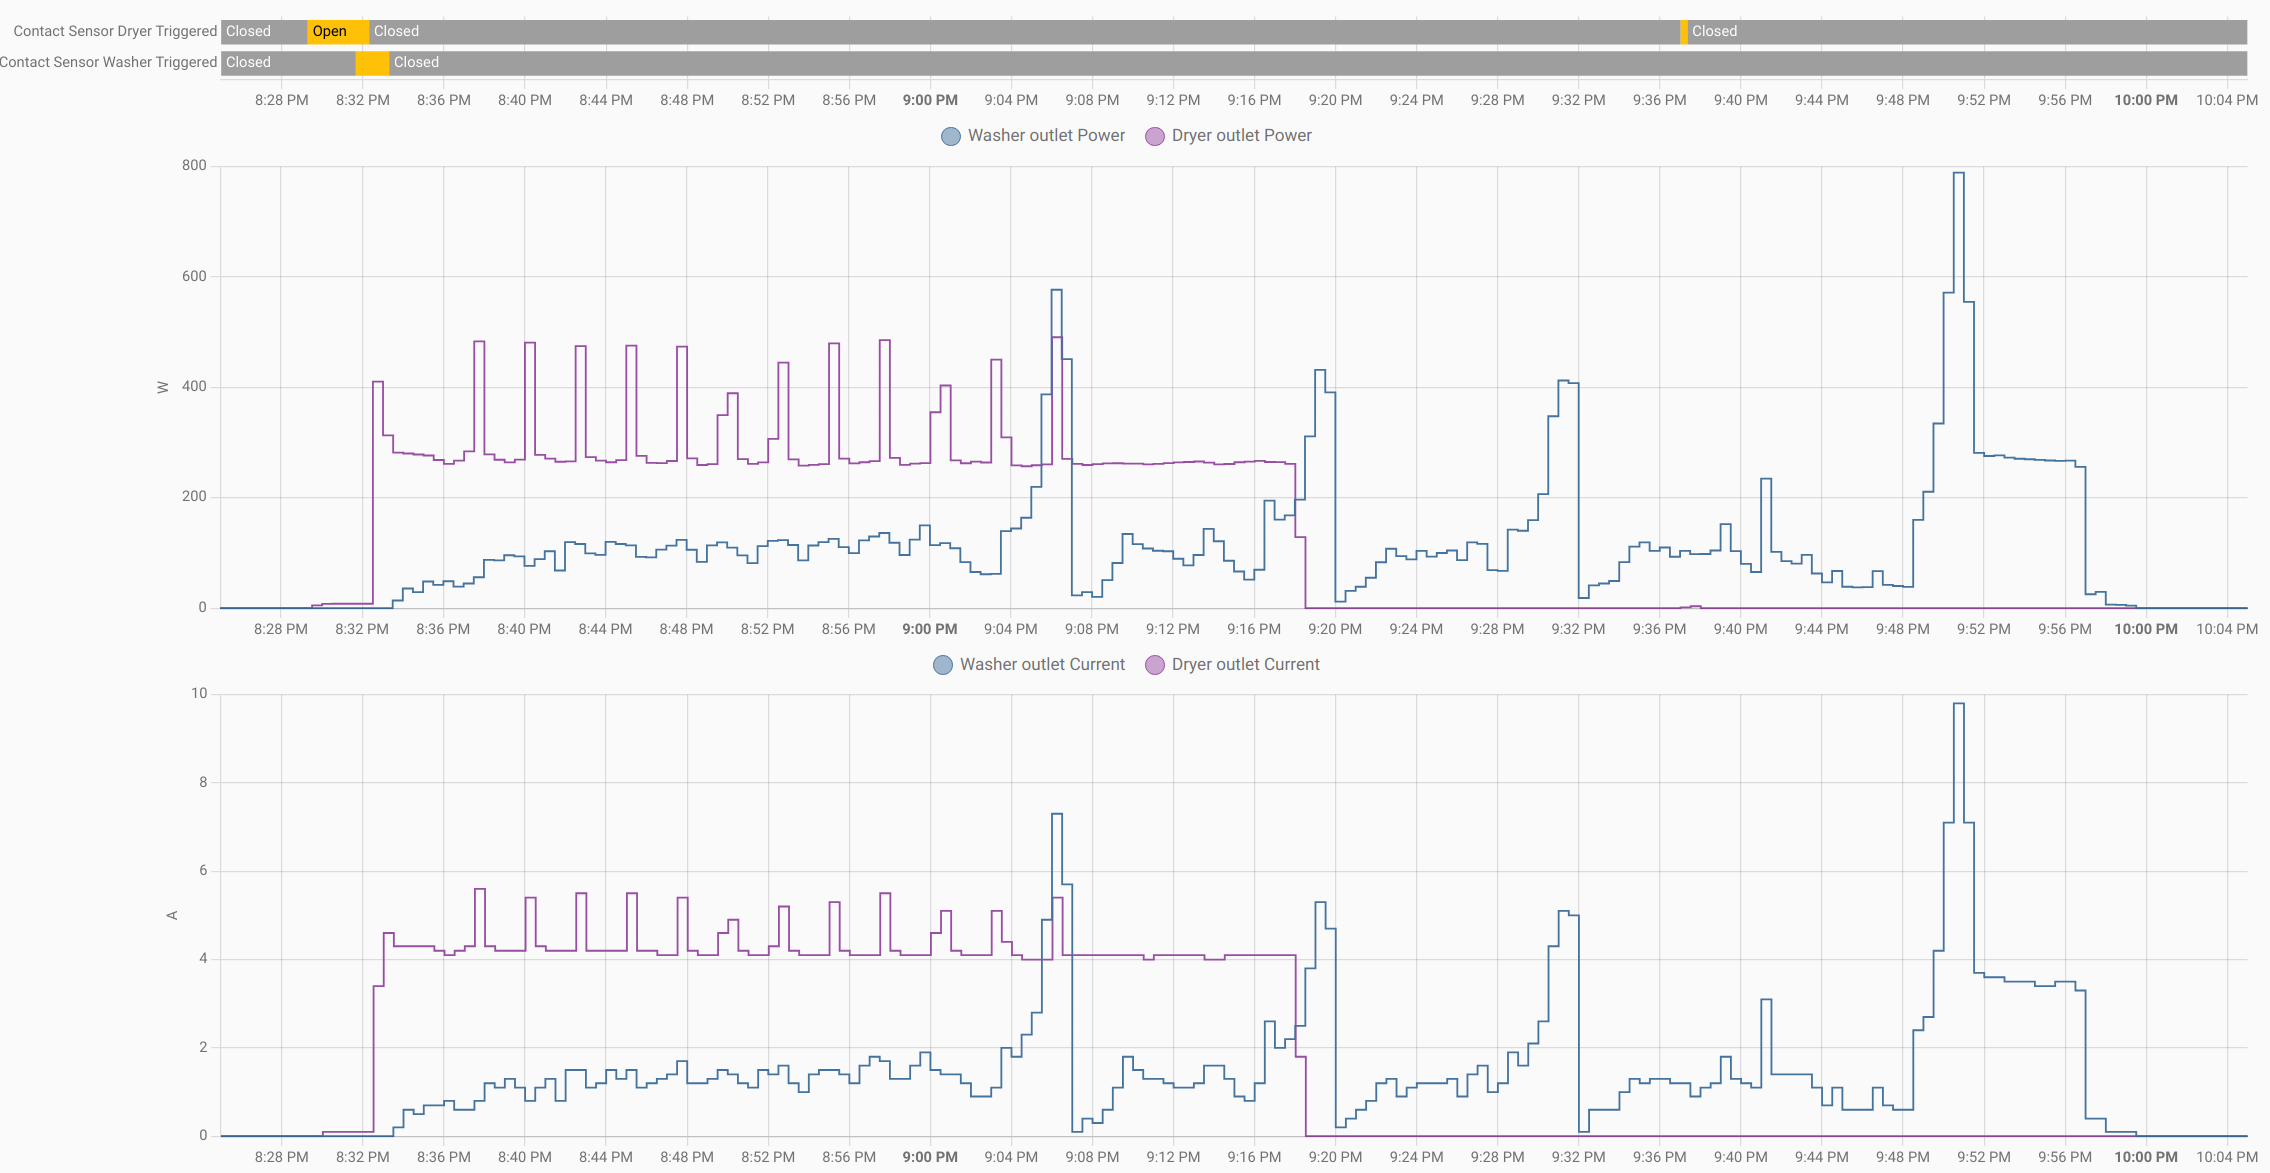
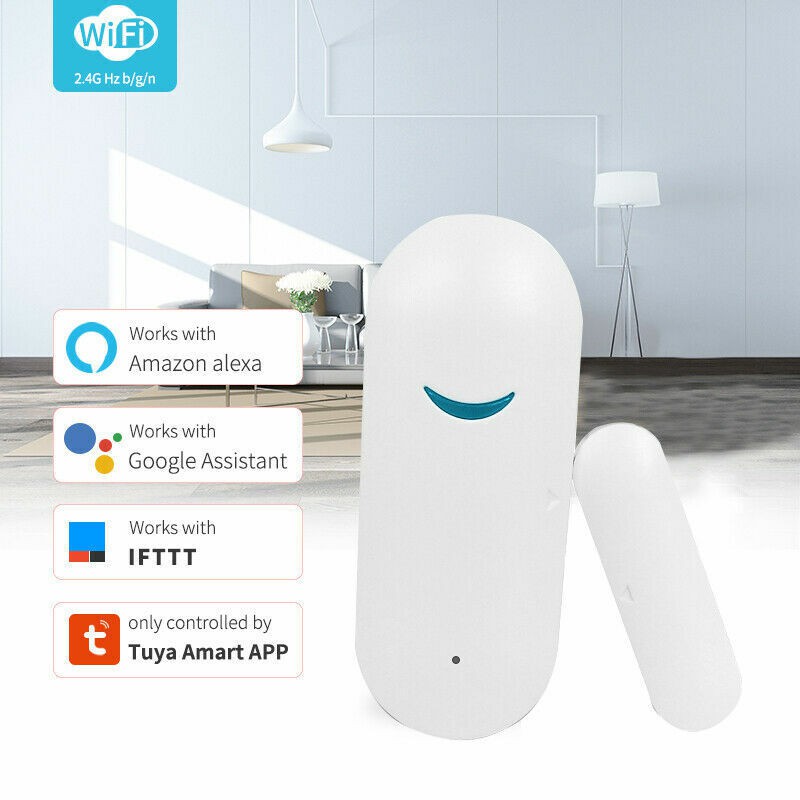
- Manufacturers provide many brands of low-cost smart outlets that include power monitoring.
- Helpful hobbyists and other helpful people have figured all of this out and left documentation all over the place.
Time to re-do this project with today's technology and infrastructure.


 Rob Lauer
 Florian Cliquet
 Al Williams
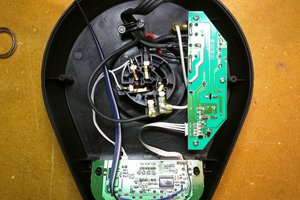
 luma
luma