 Nik Reitmann

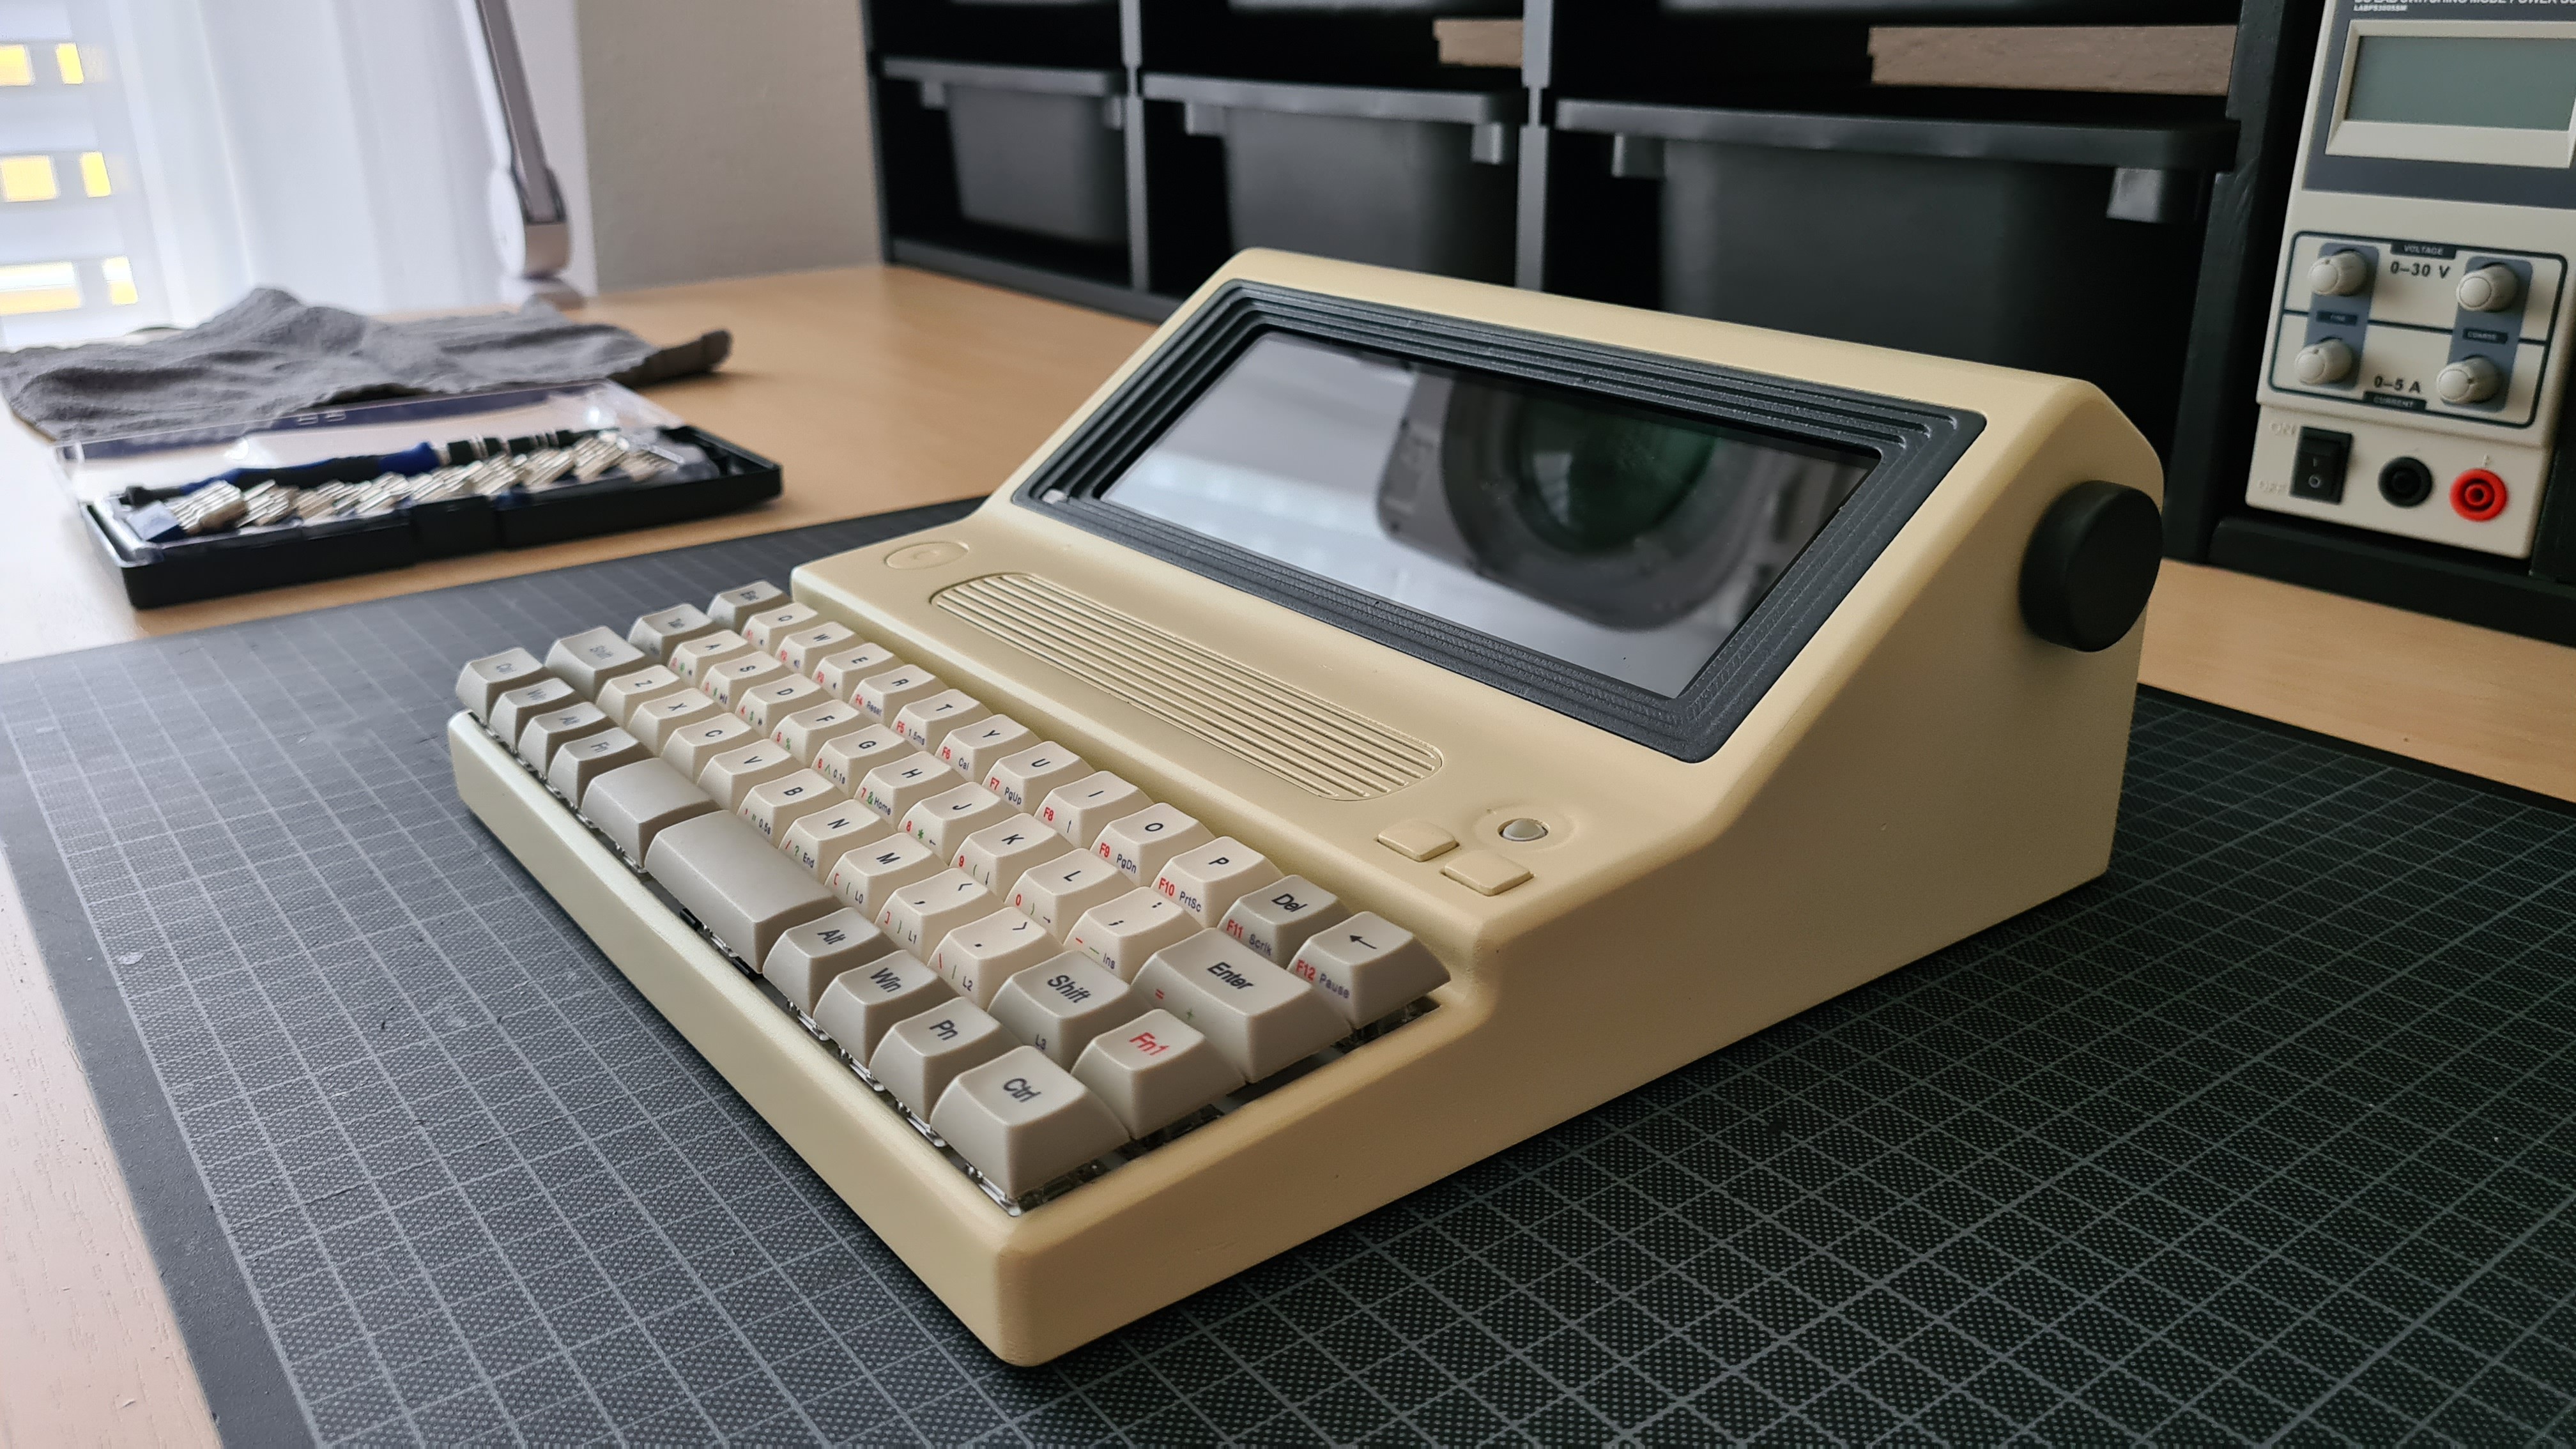
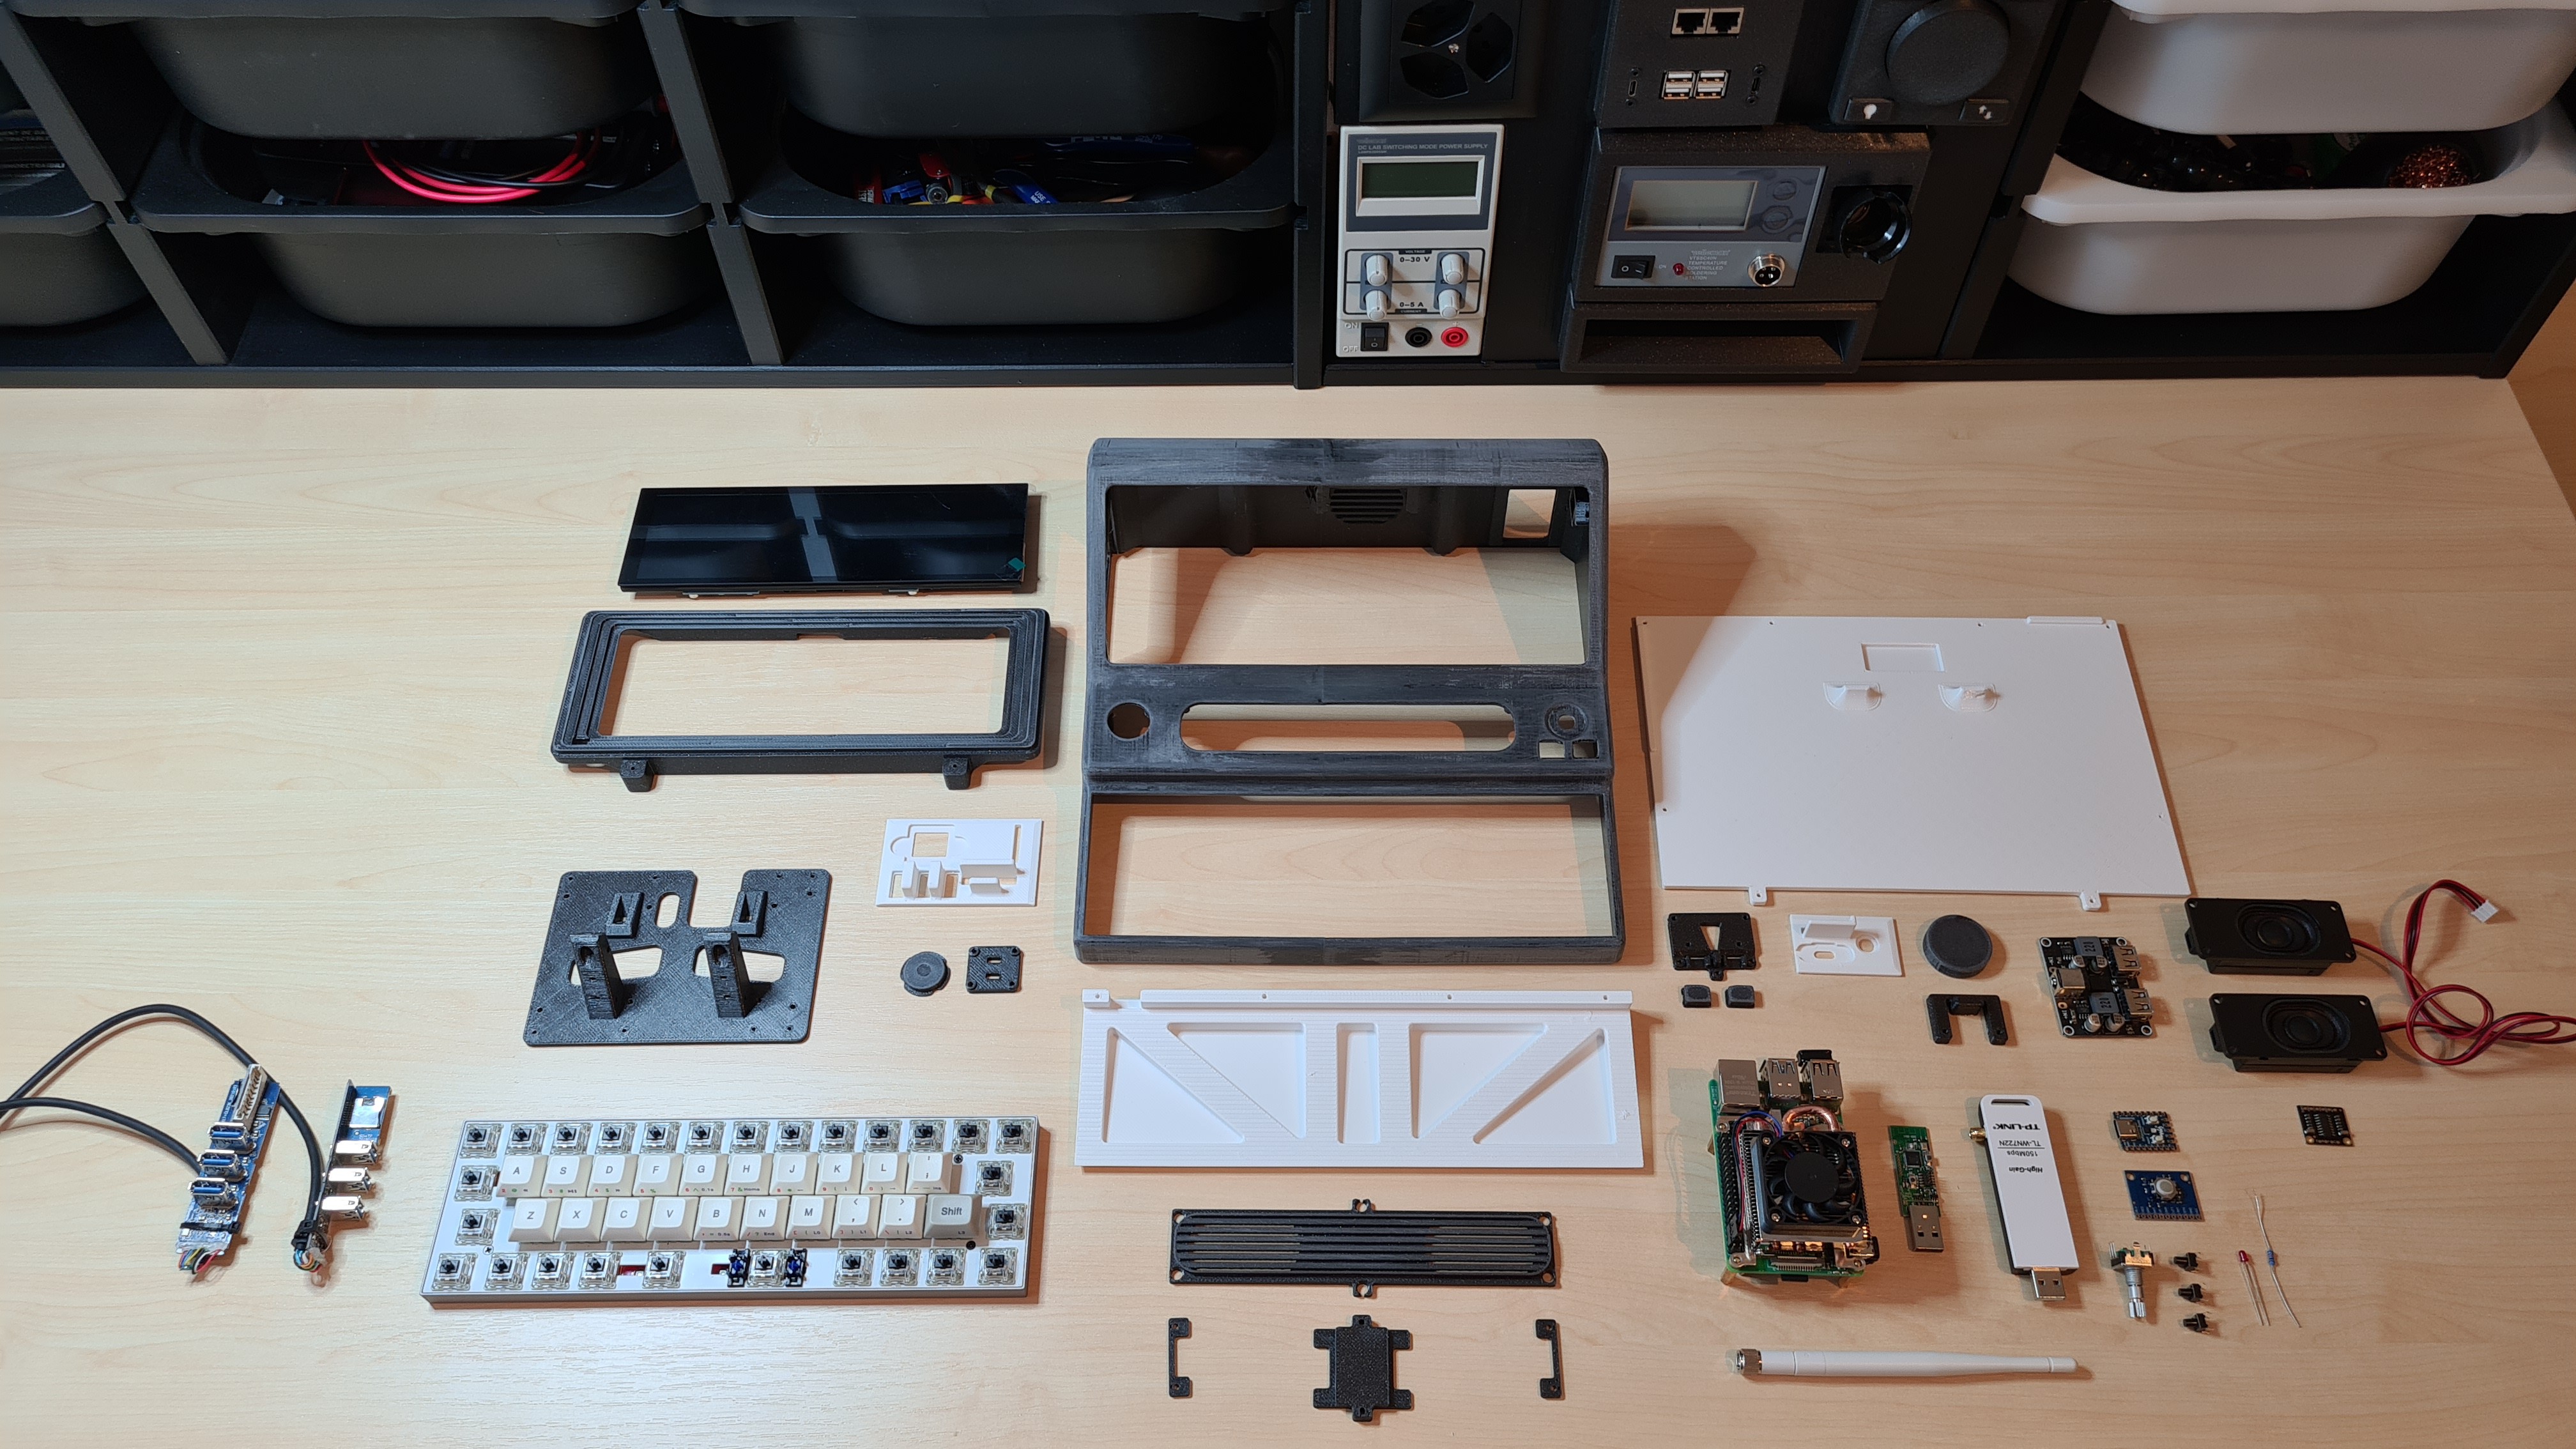
Special features
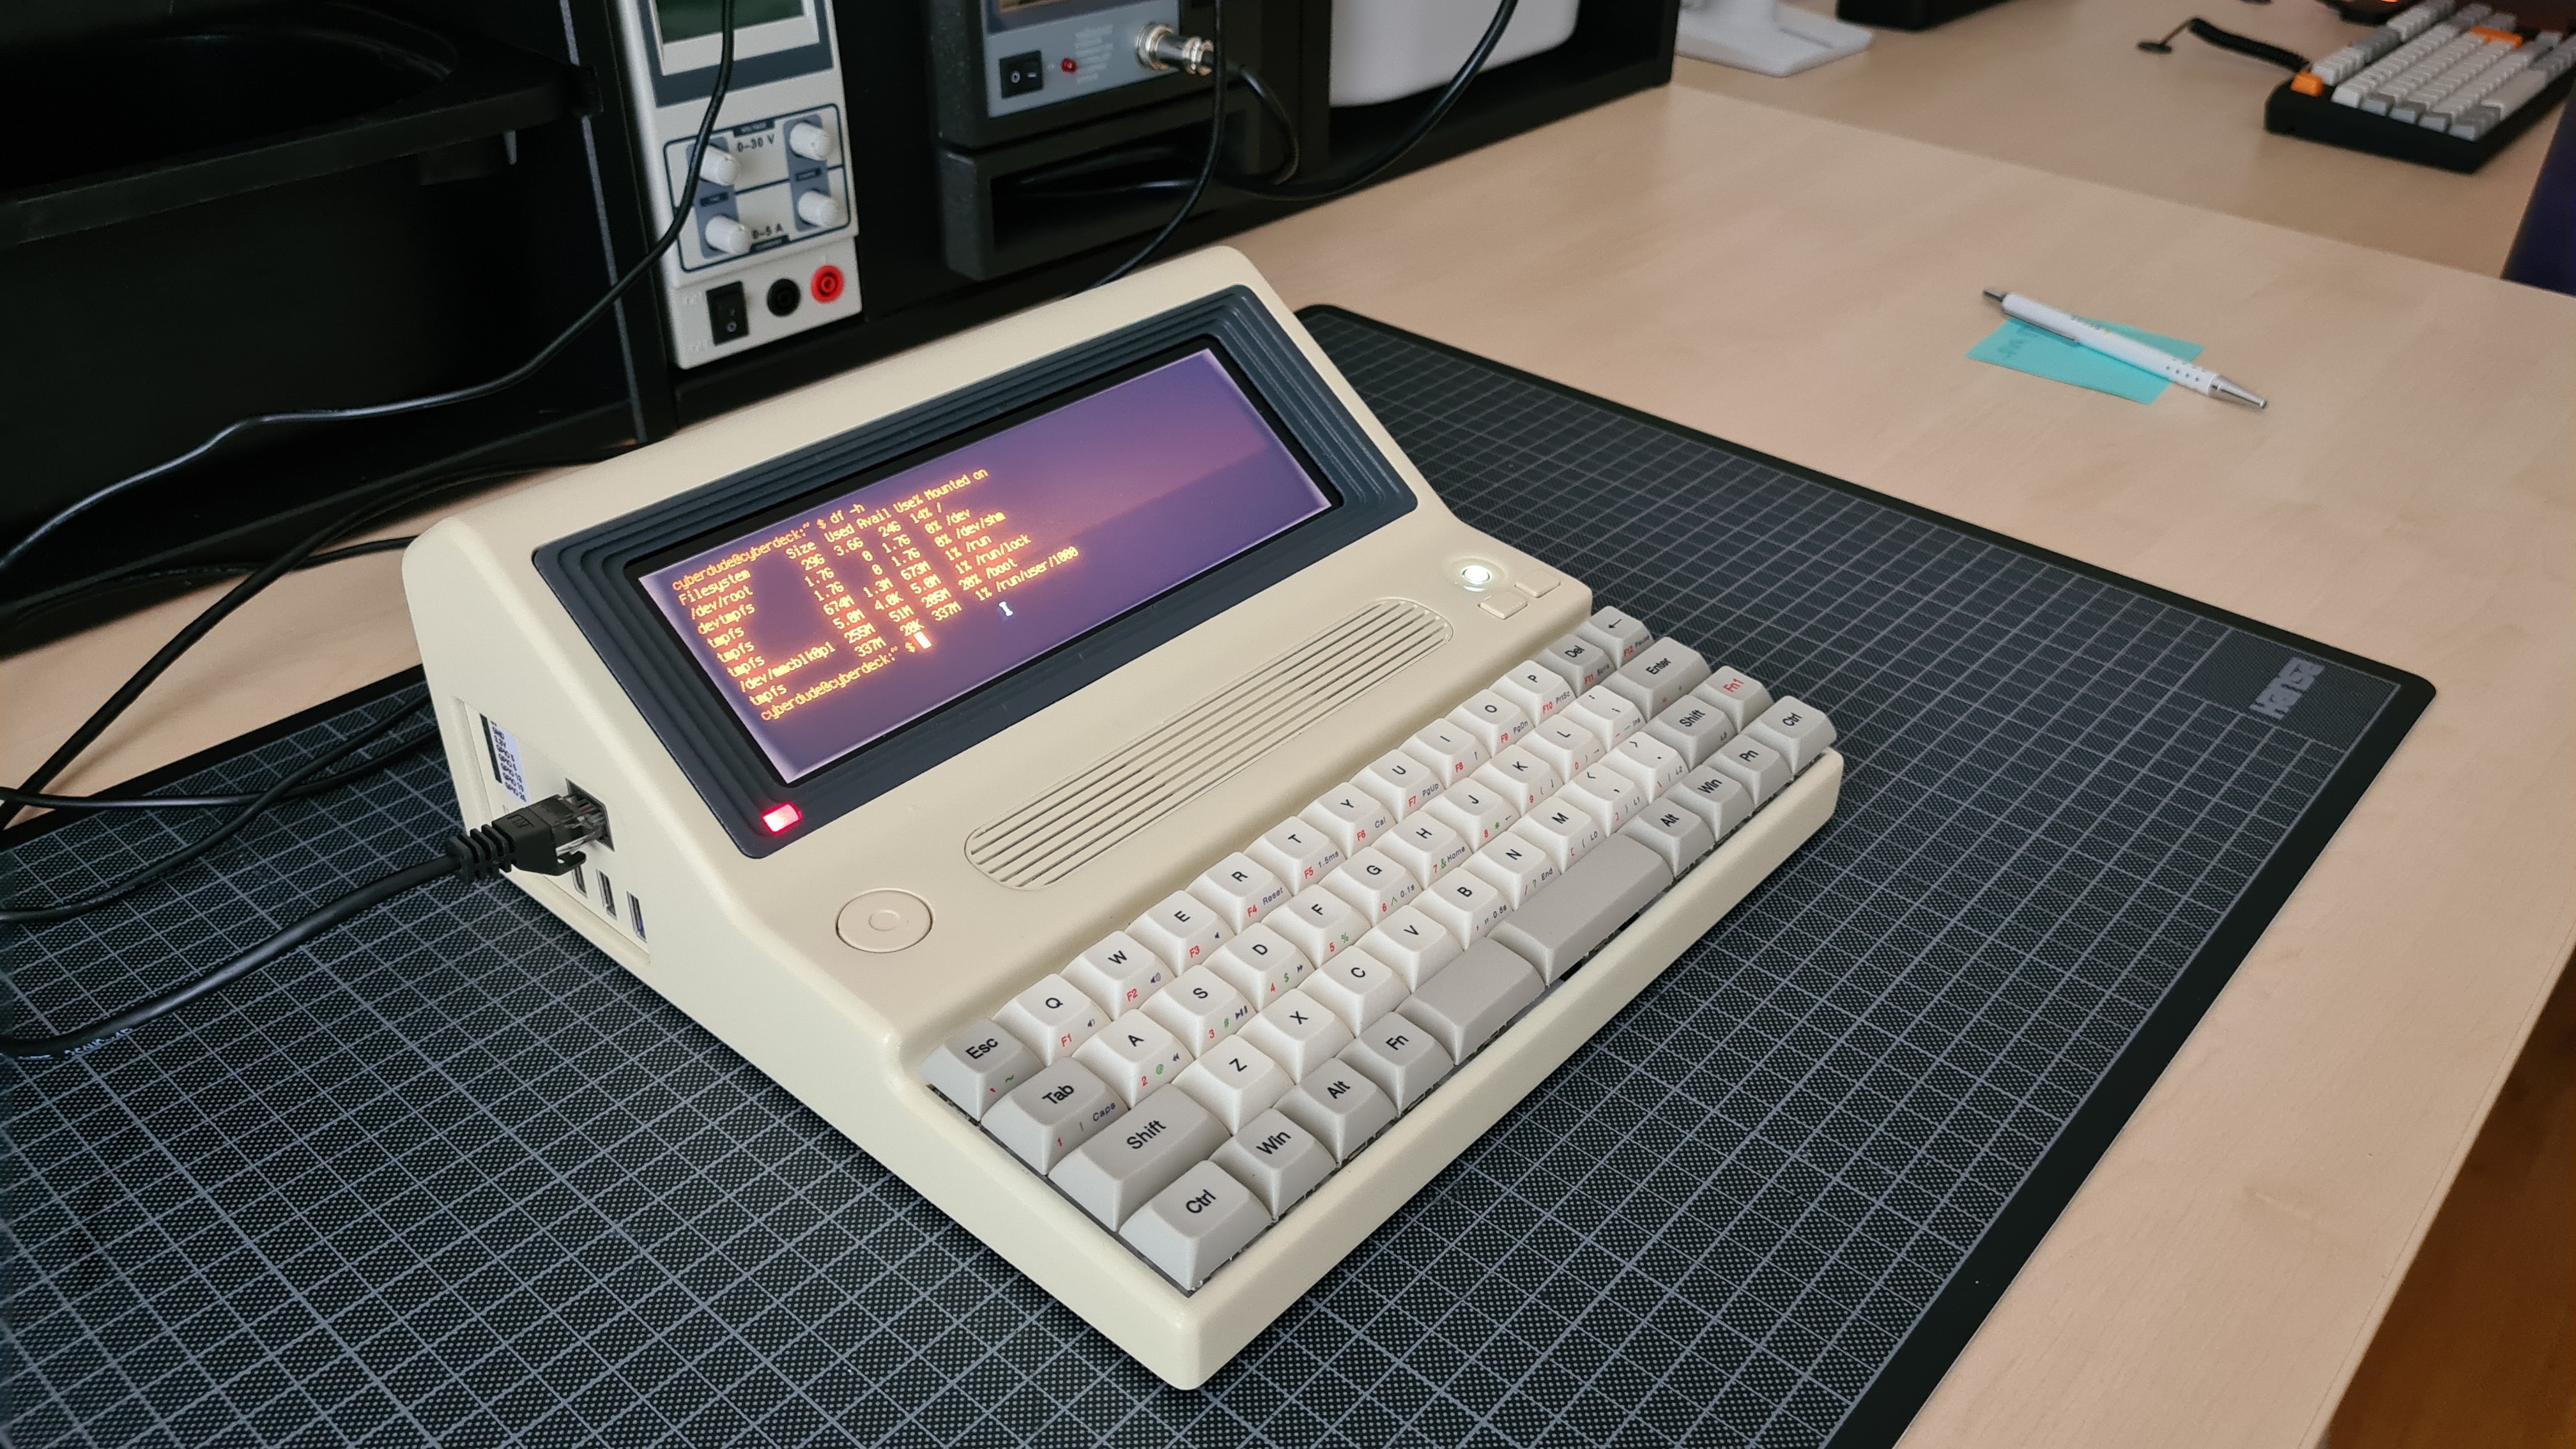
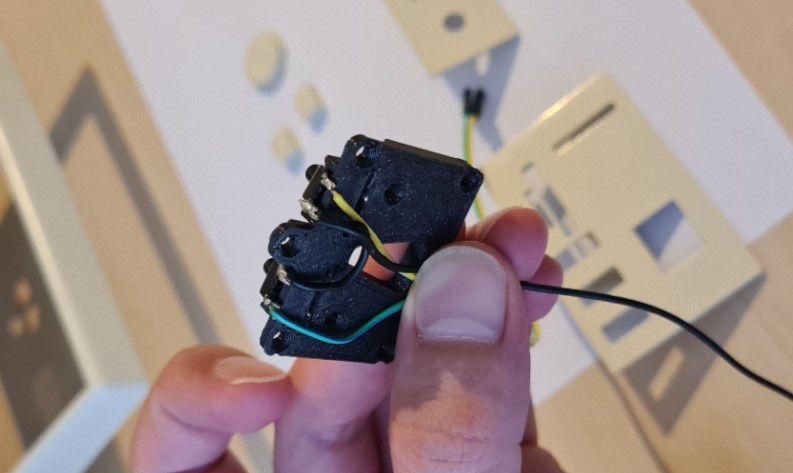
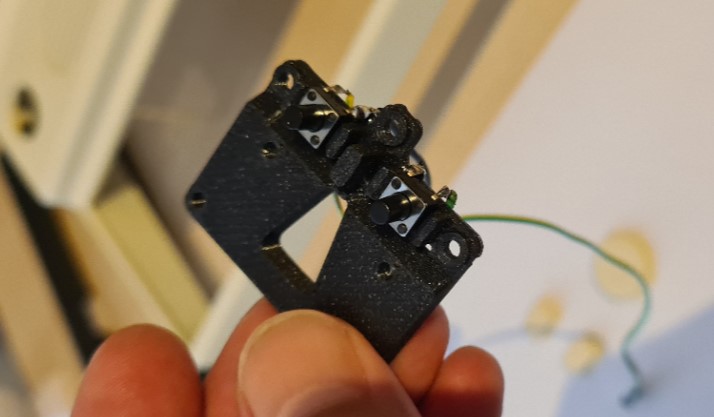
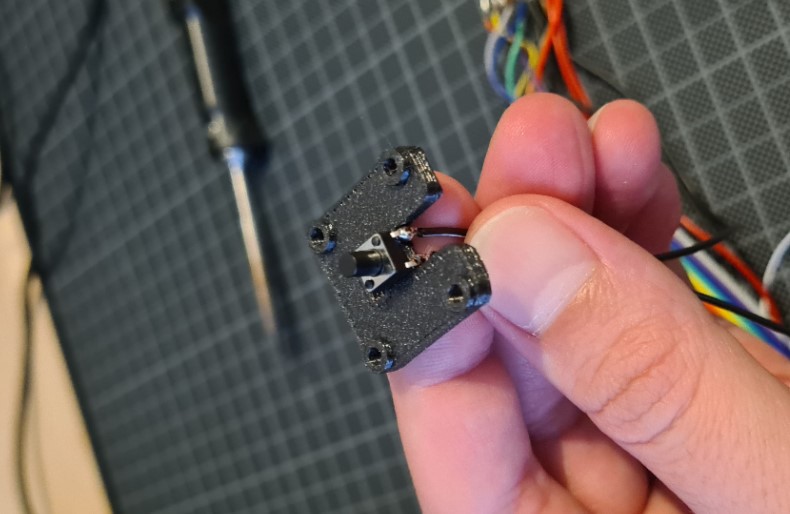
- side wheel with button for cursor keys and enter (useful in the terminal)
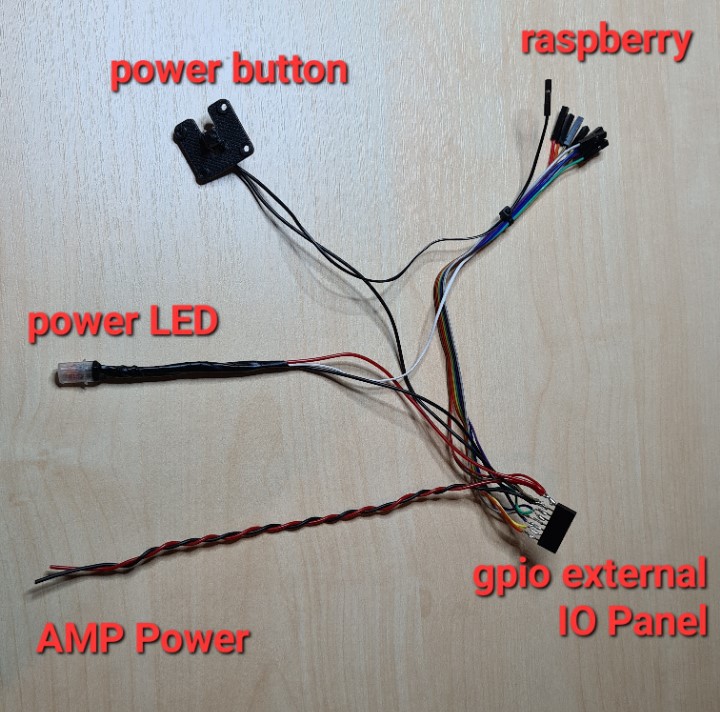
- very easily customizable IO and back panel (because I'm someone whose projects are never really finished)
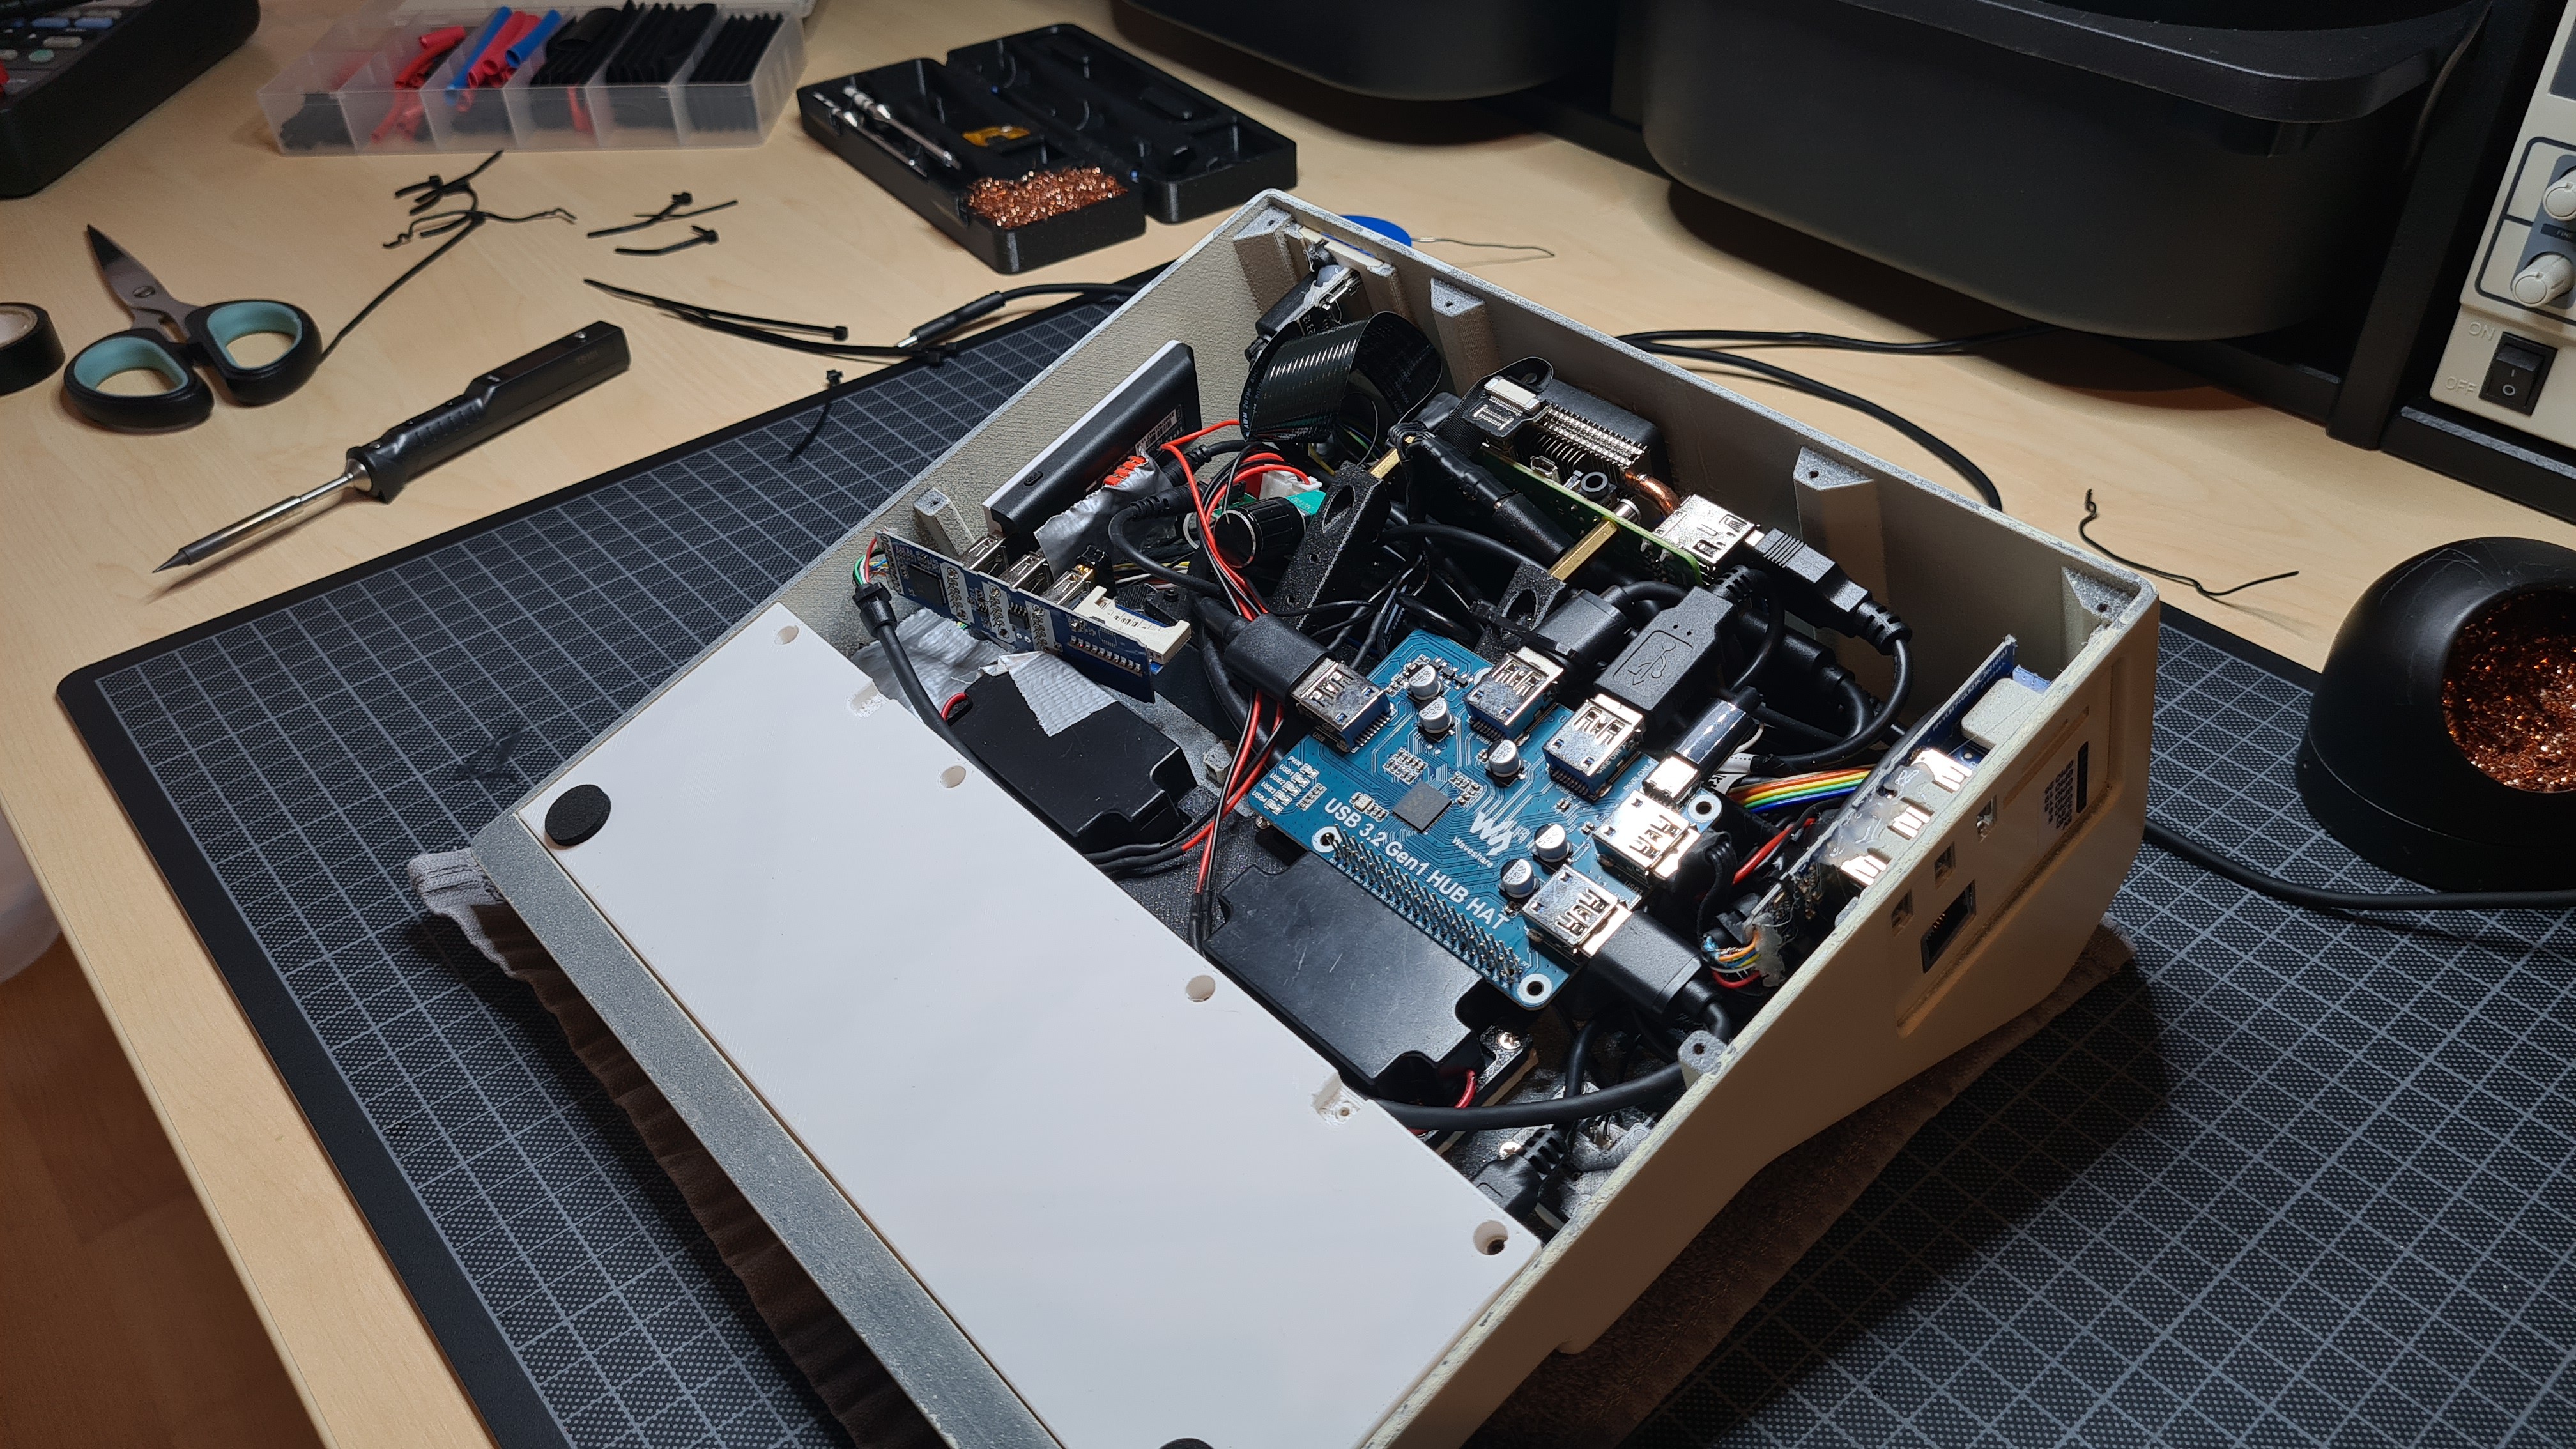
- two wifi adapters (USB and Raspberry builtin)
- two bluetooth adapters (USB and Raspberry builtin)
- zigbee adapter (to debug zigbee networks)
- internal SD or microSD memory
- three external usb ports
- external SD and microSDcard reader
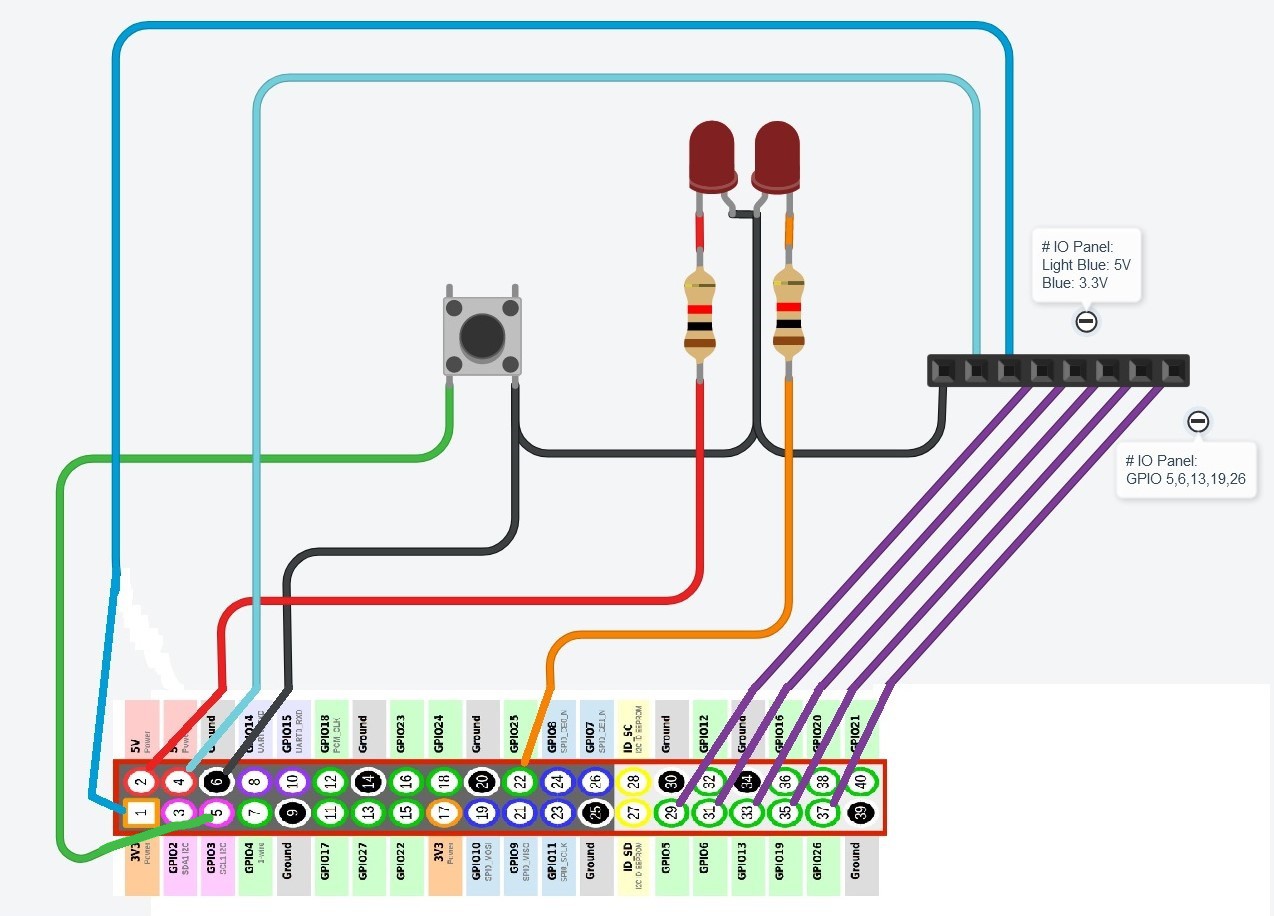
- external 5 gpio connectors, 5V, 3.3V, ground (so that raspberry tinkering can be tested quickly with a breadboard)
- can be used as a full desktop
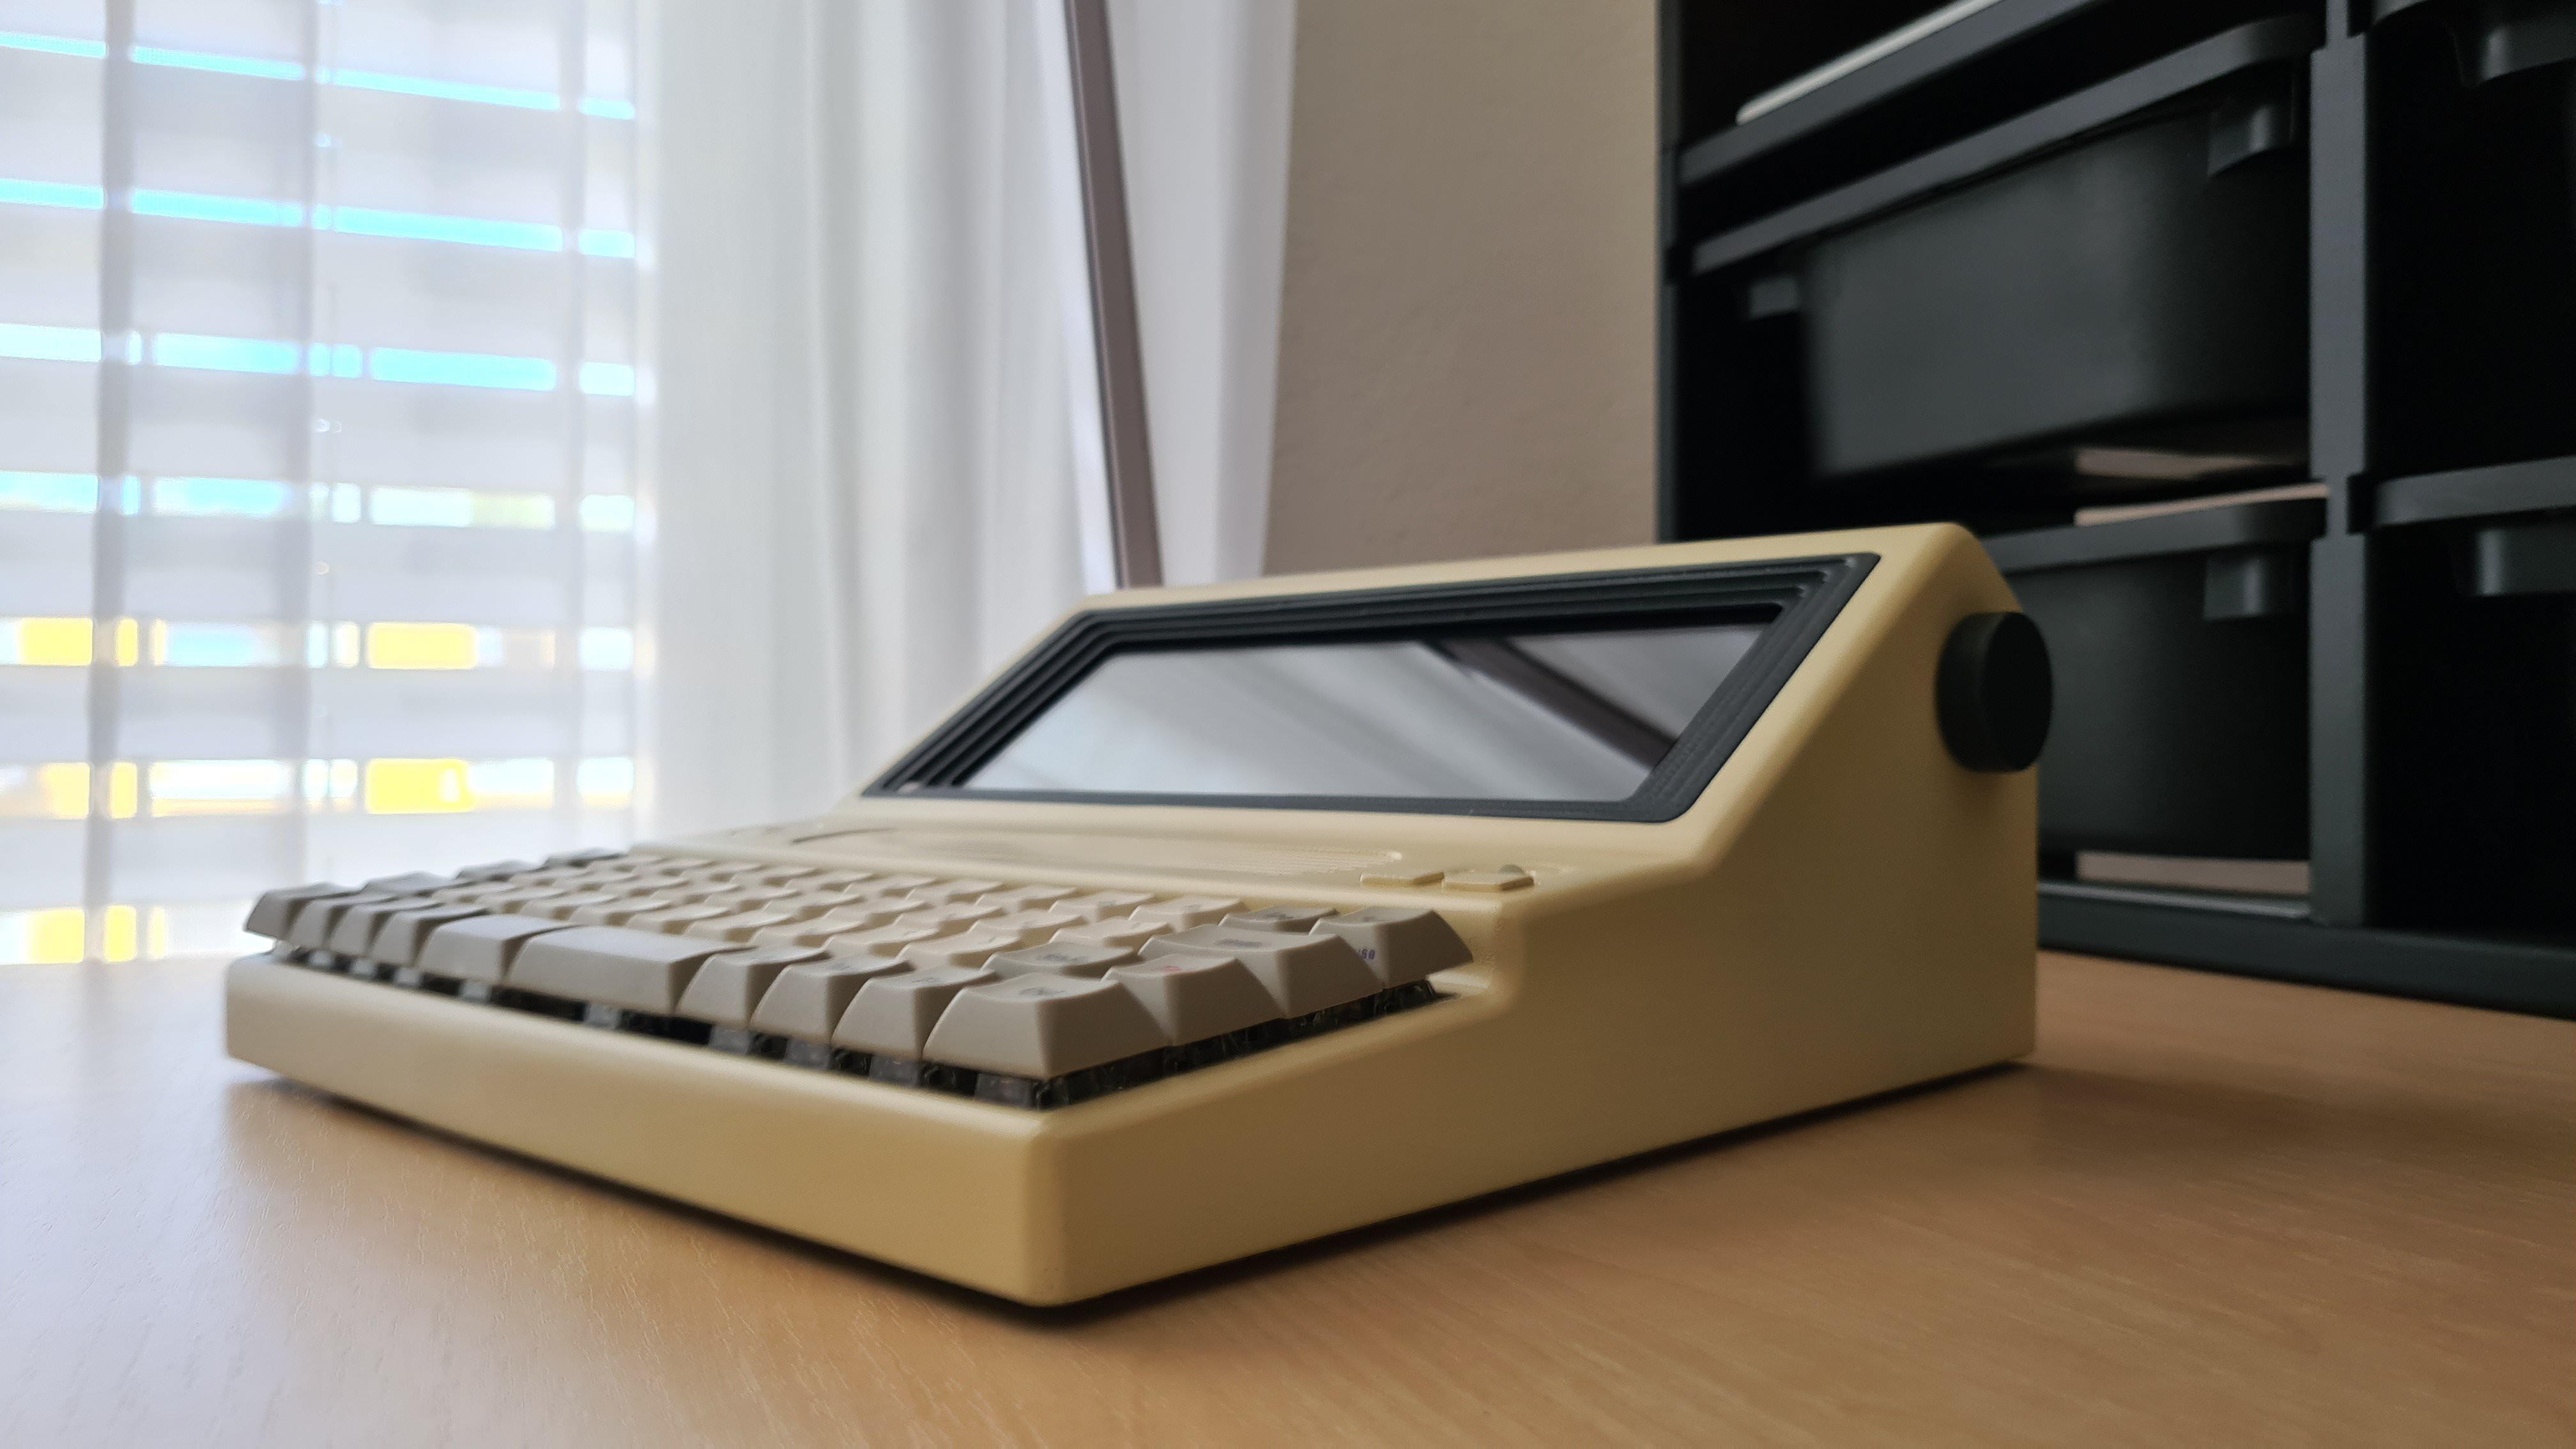
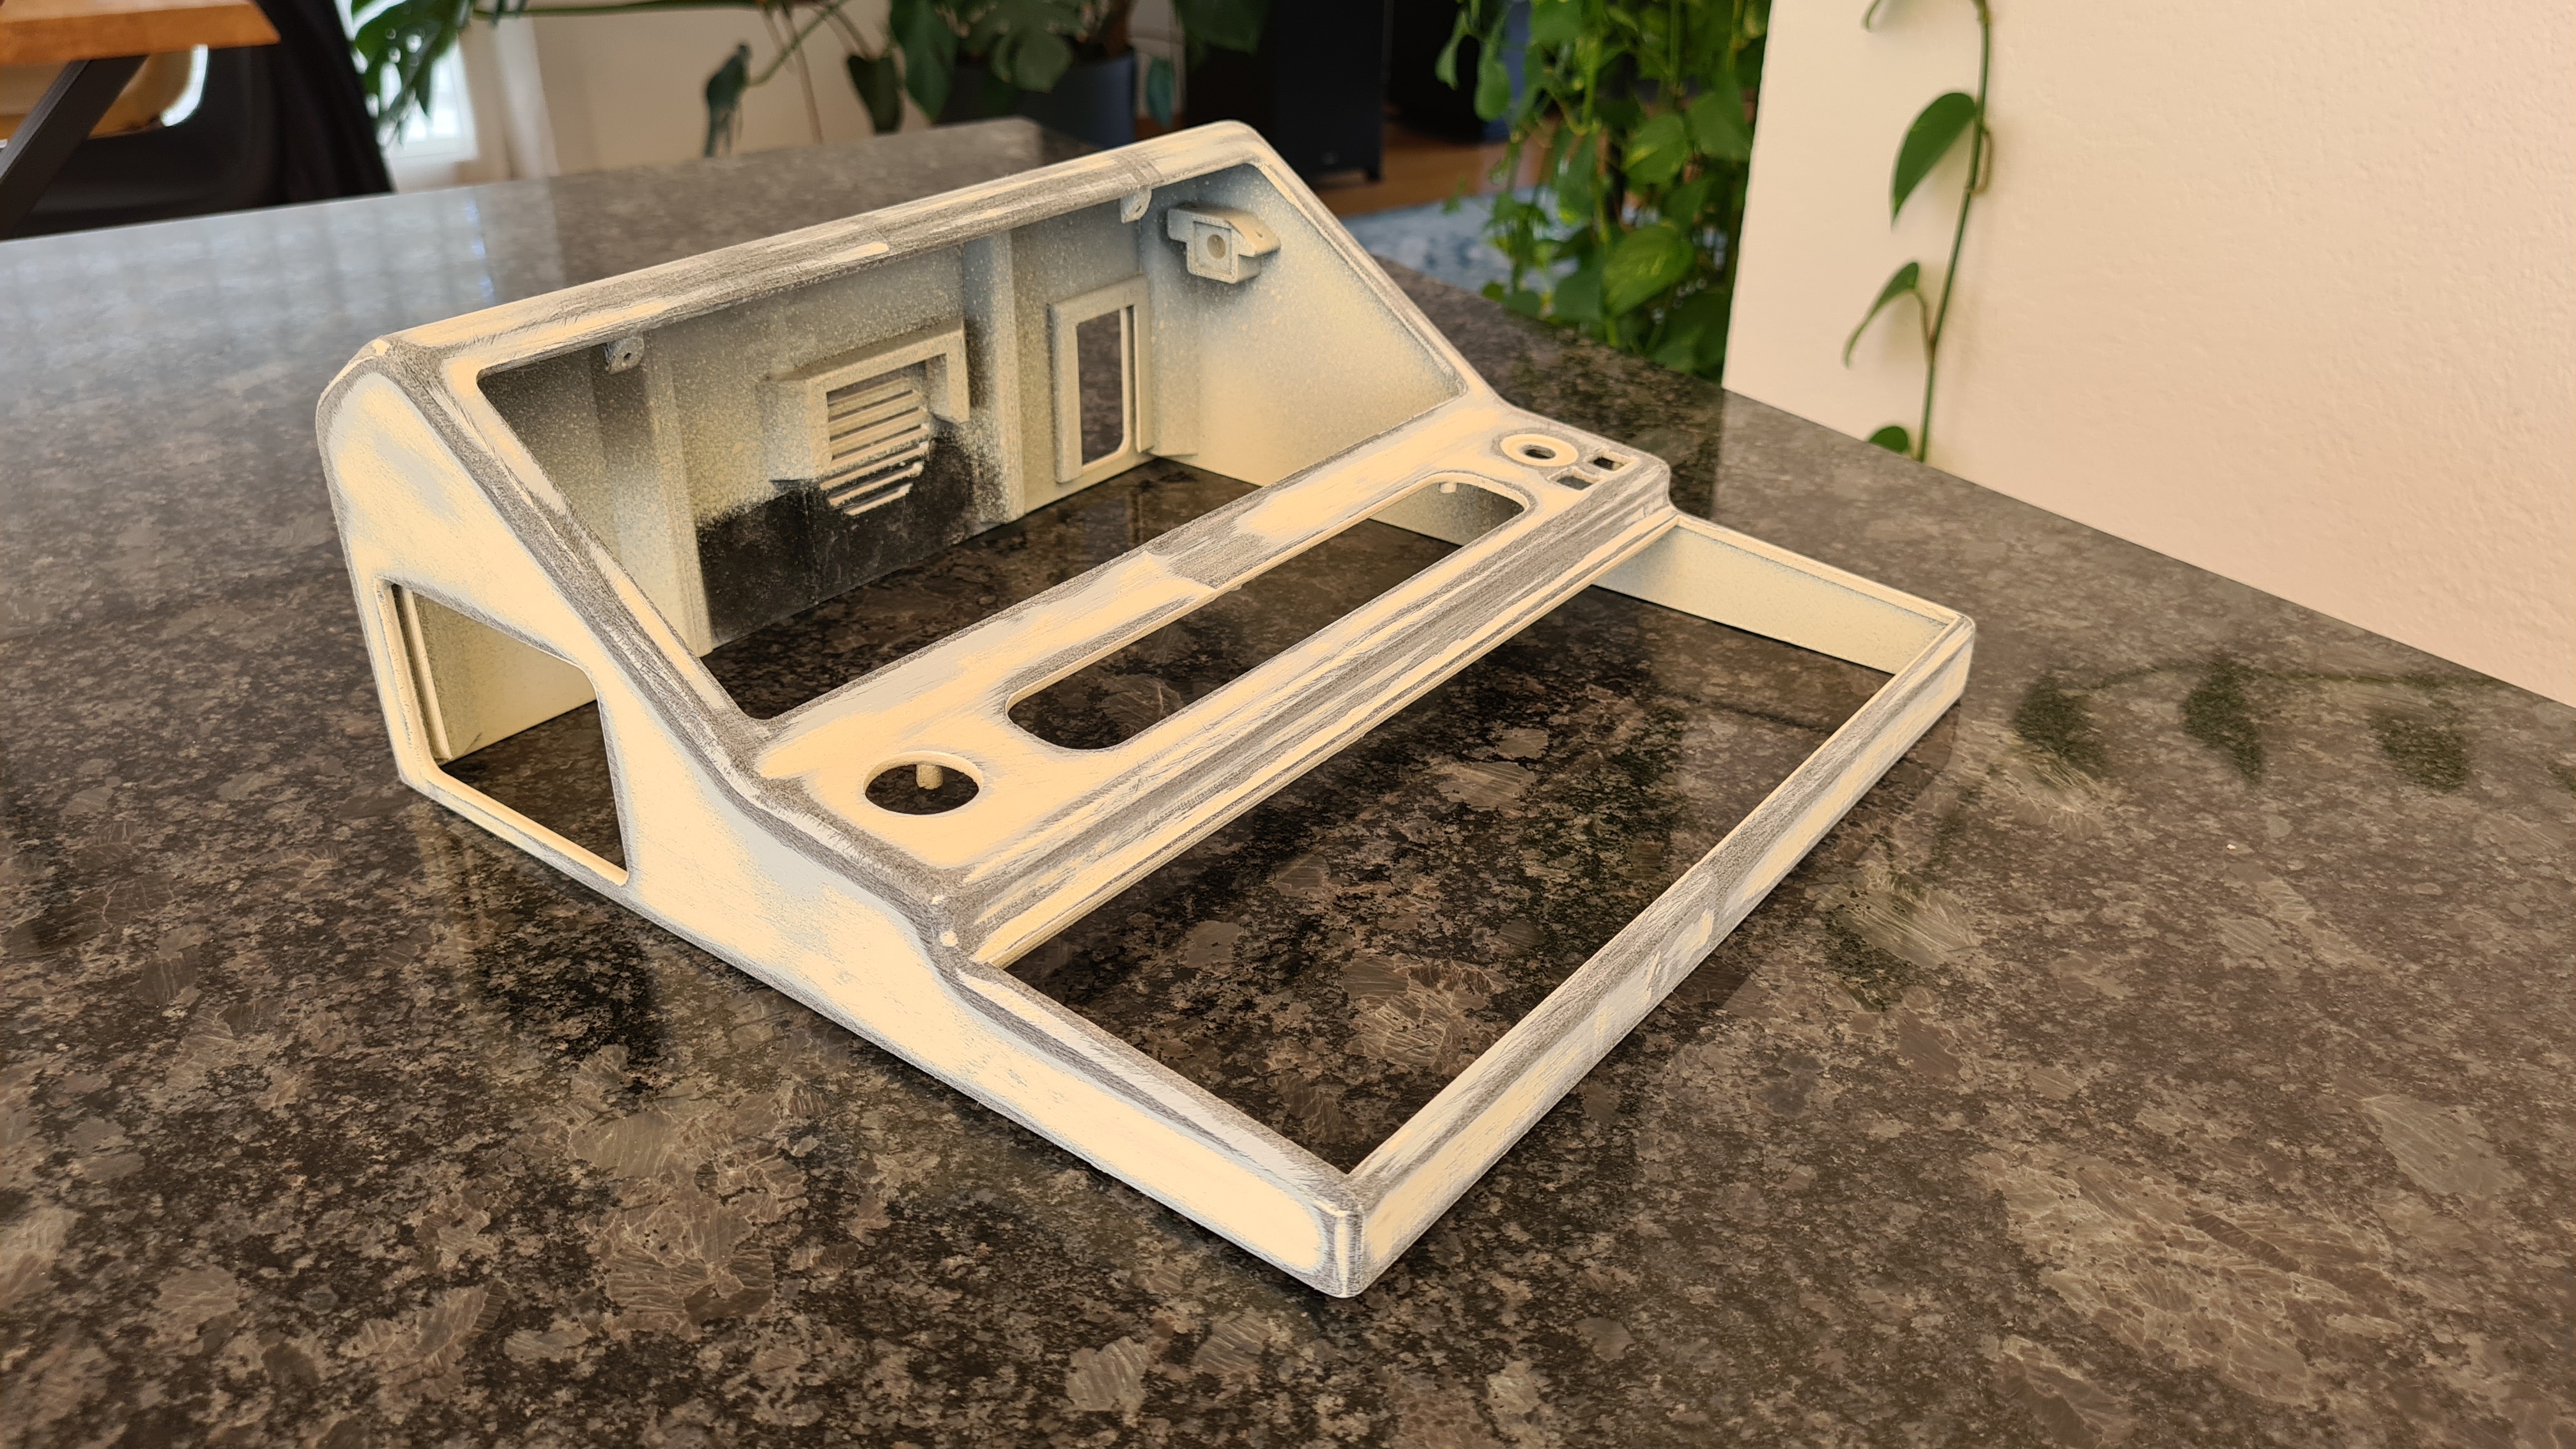
Design in general
- retro look
- sturdy
- compact
- easy assembly (without glue)
- easy access to the internal components
- customizable without having to reprint the case
- no screws visible from the outside
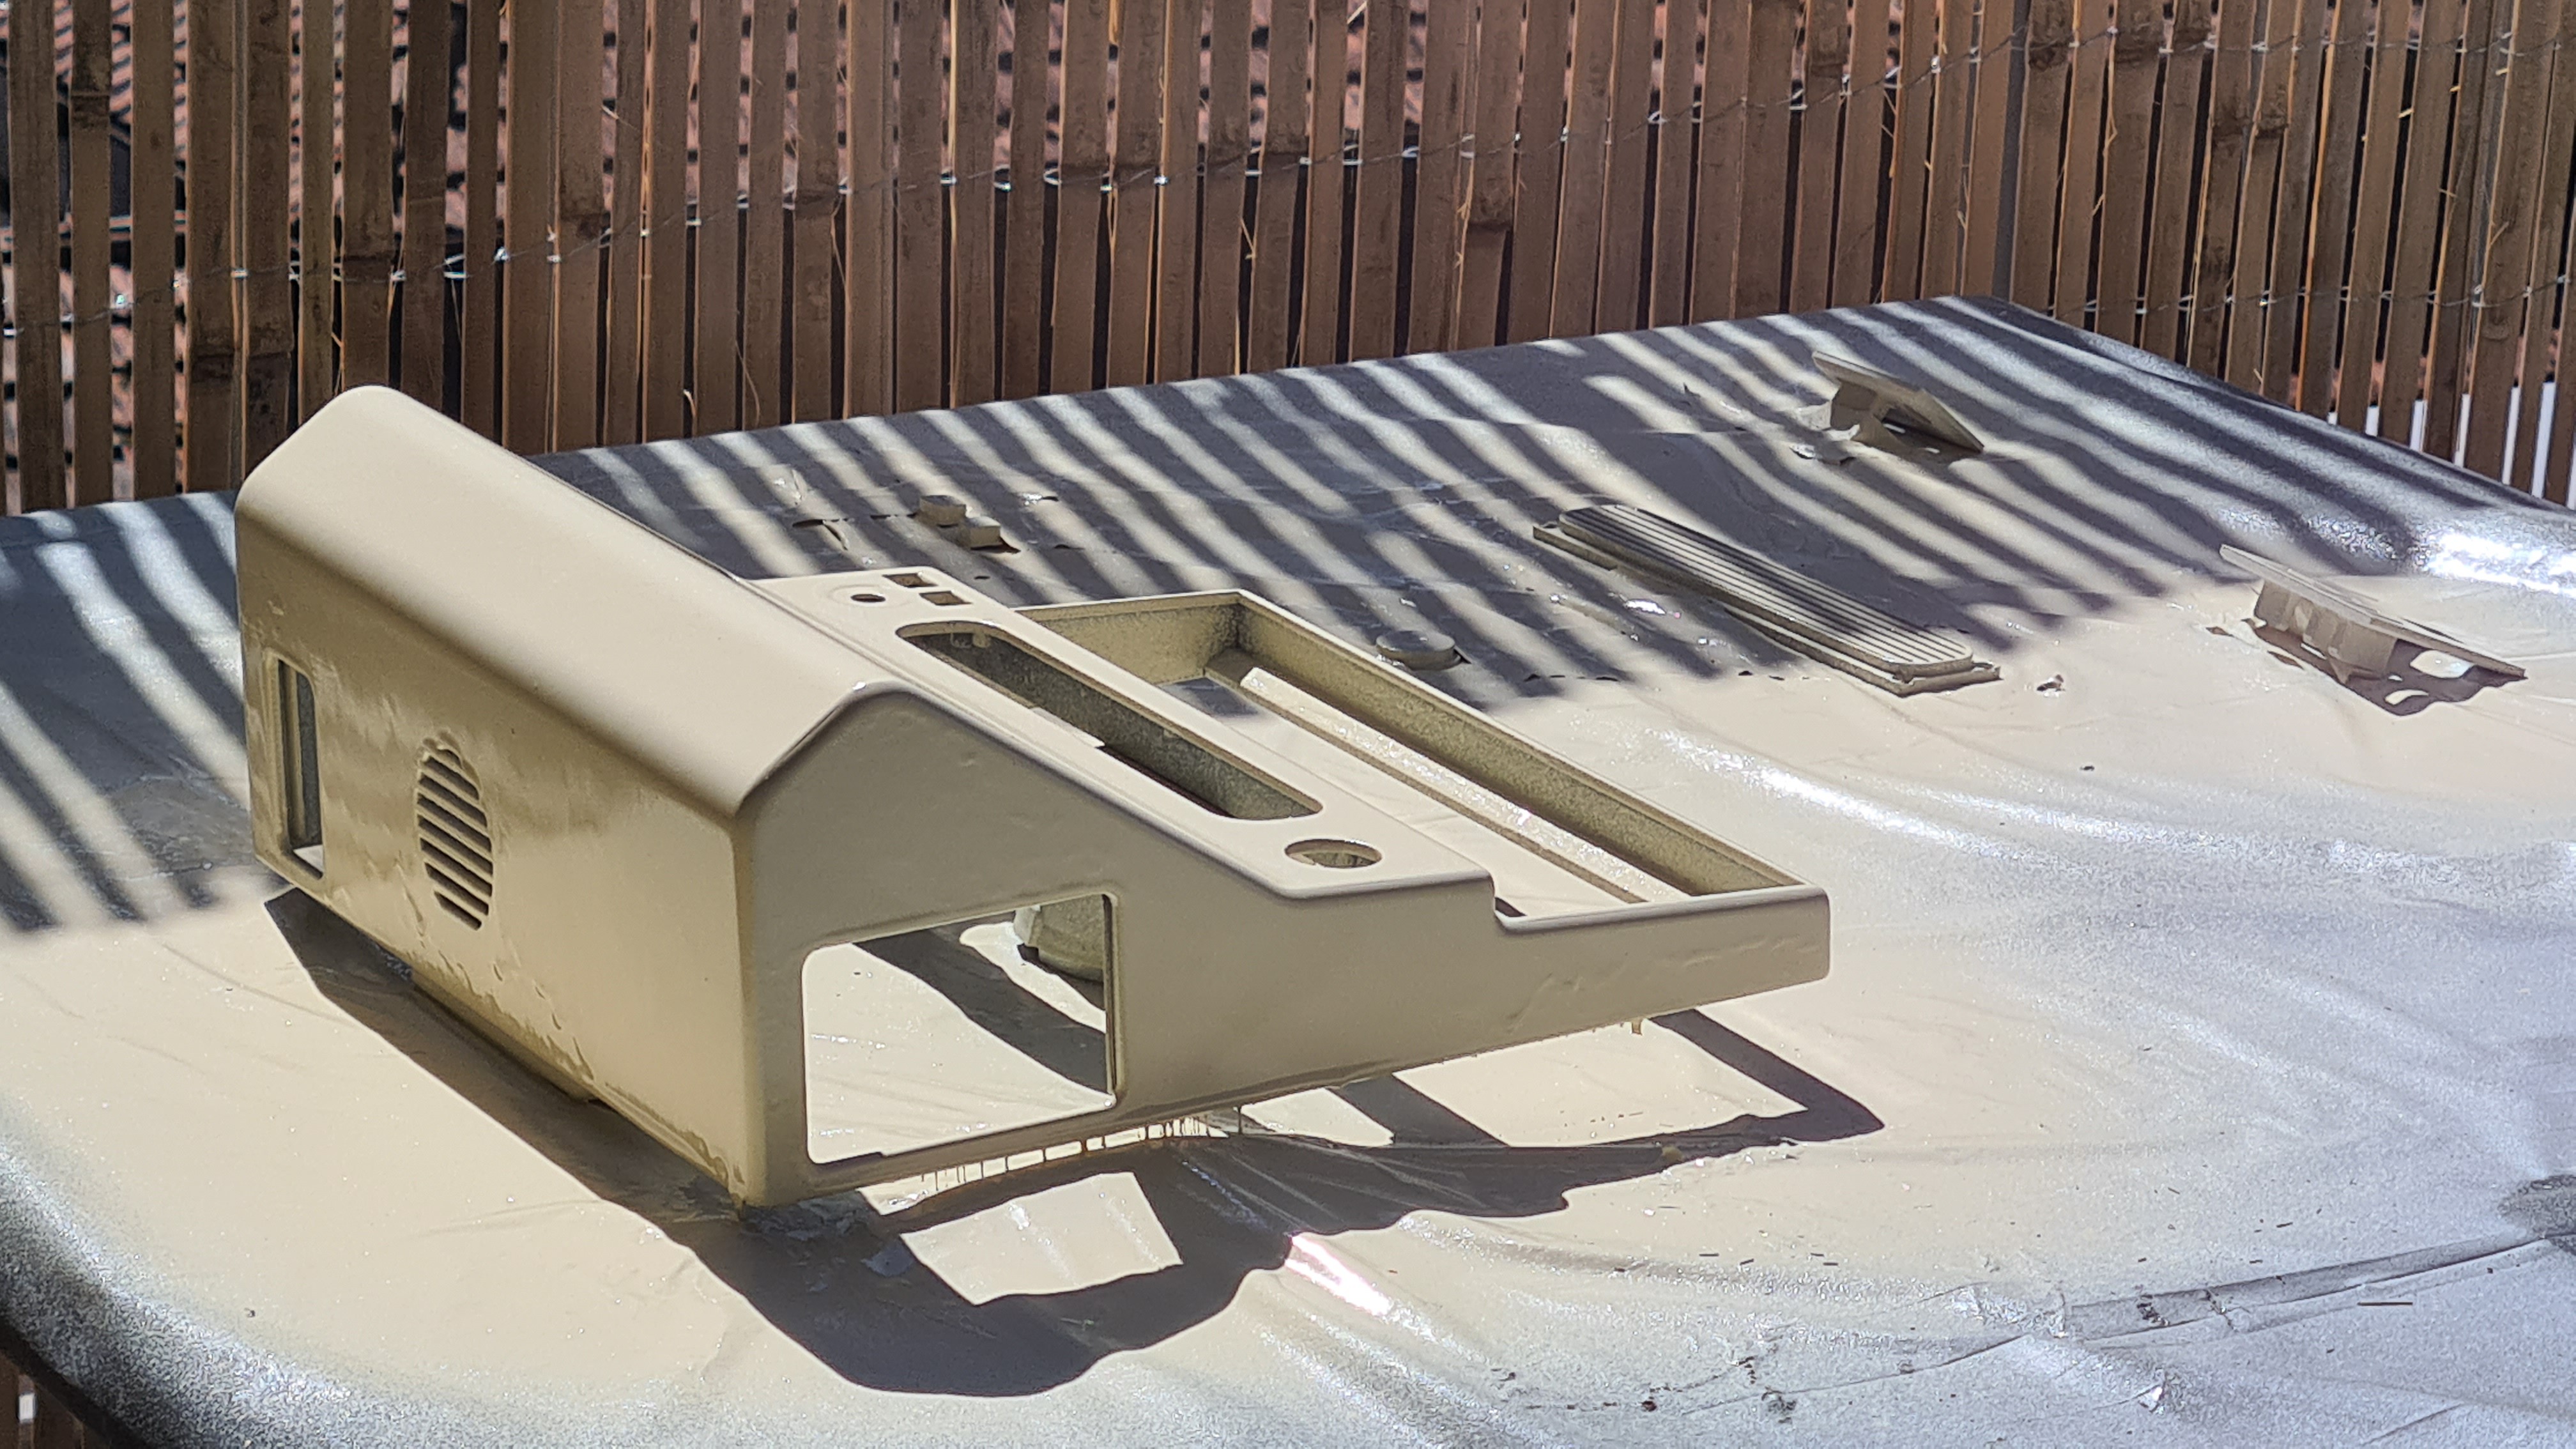
- dimensions 253x253x104mm
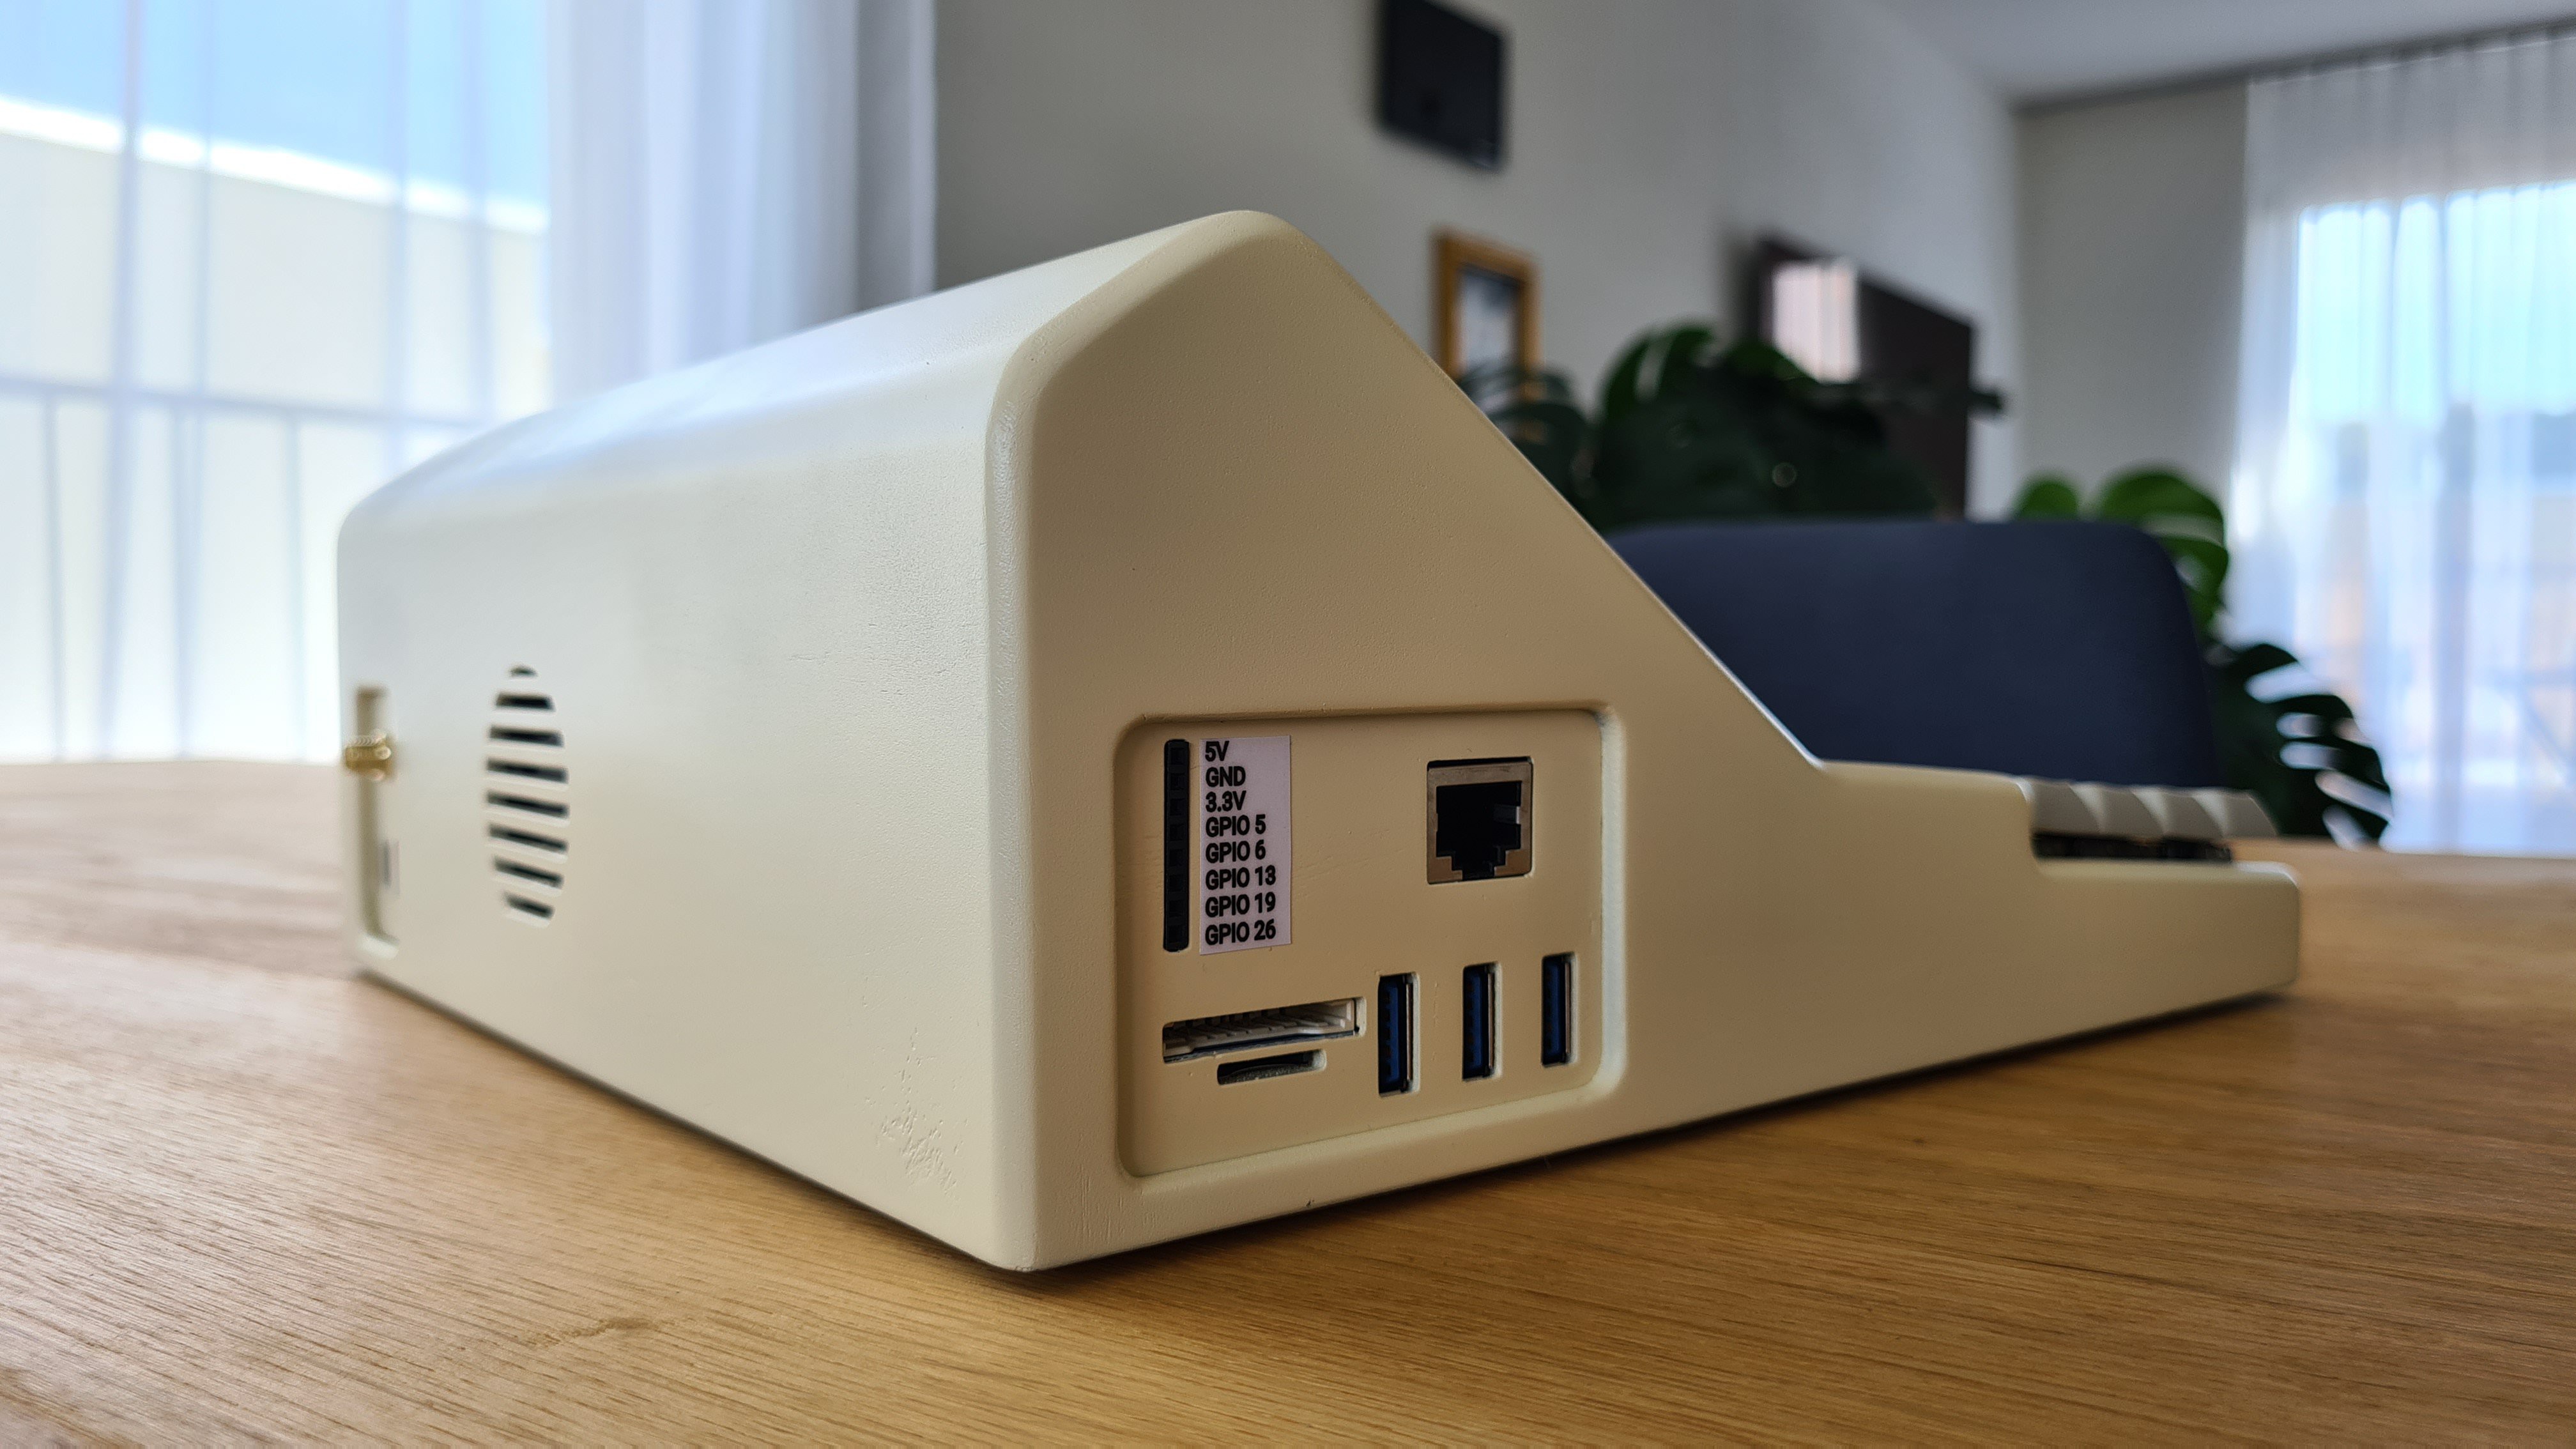
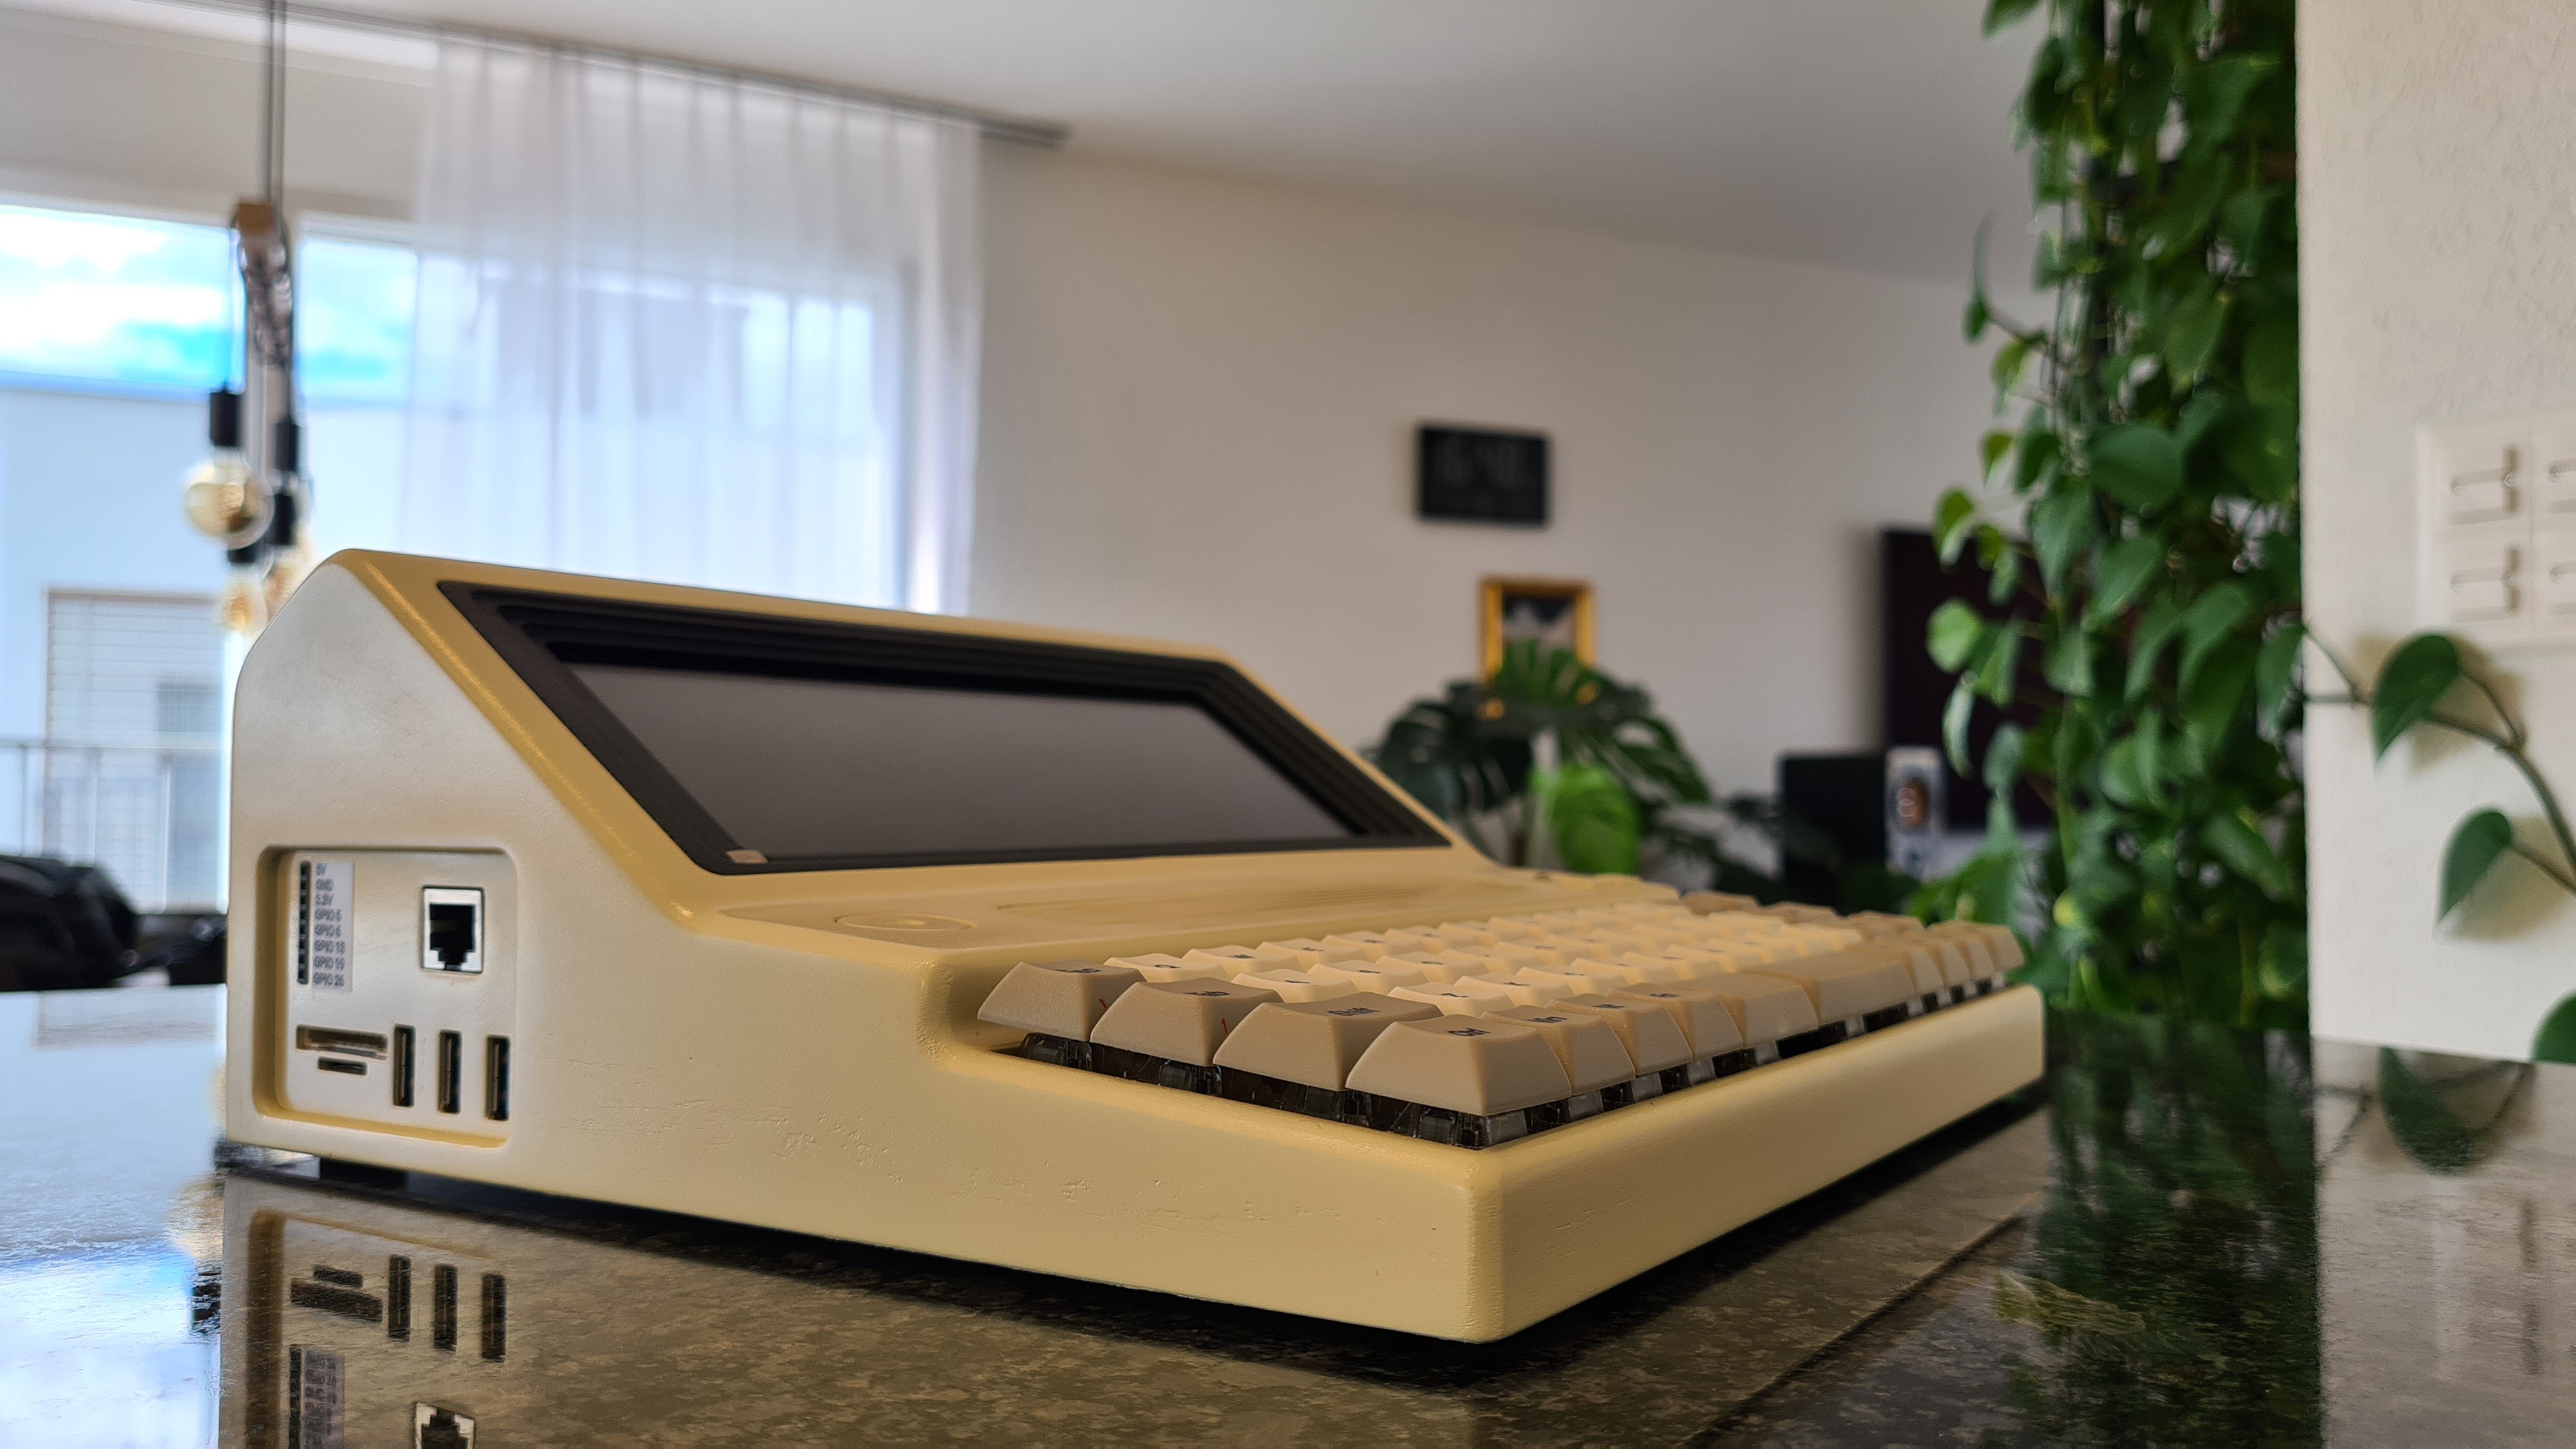
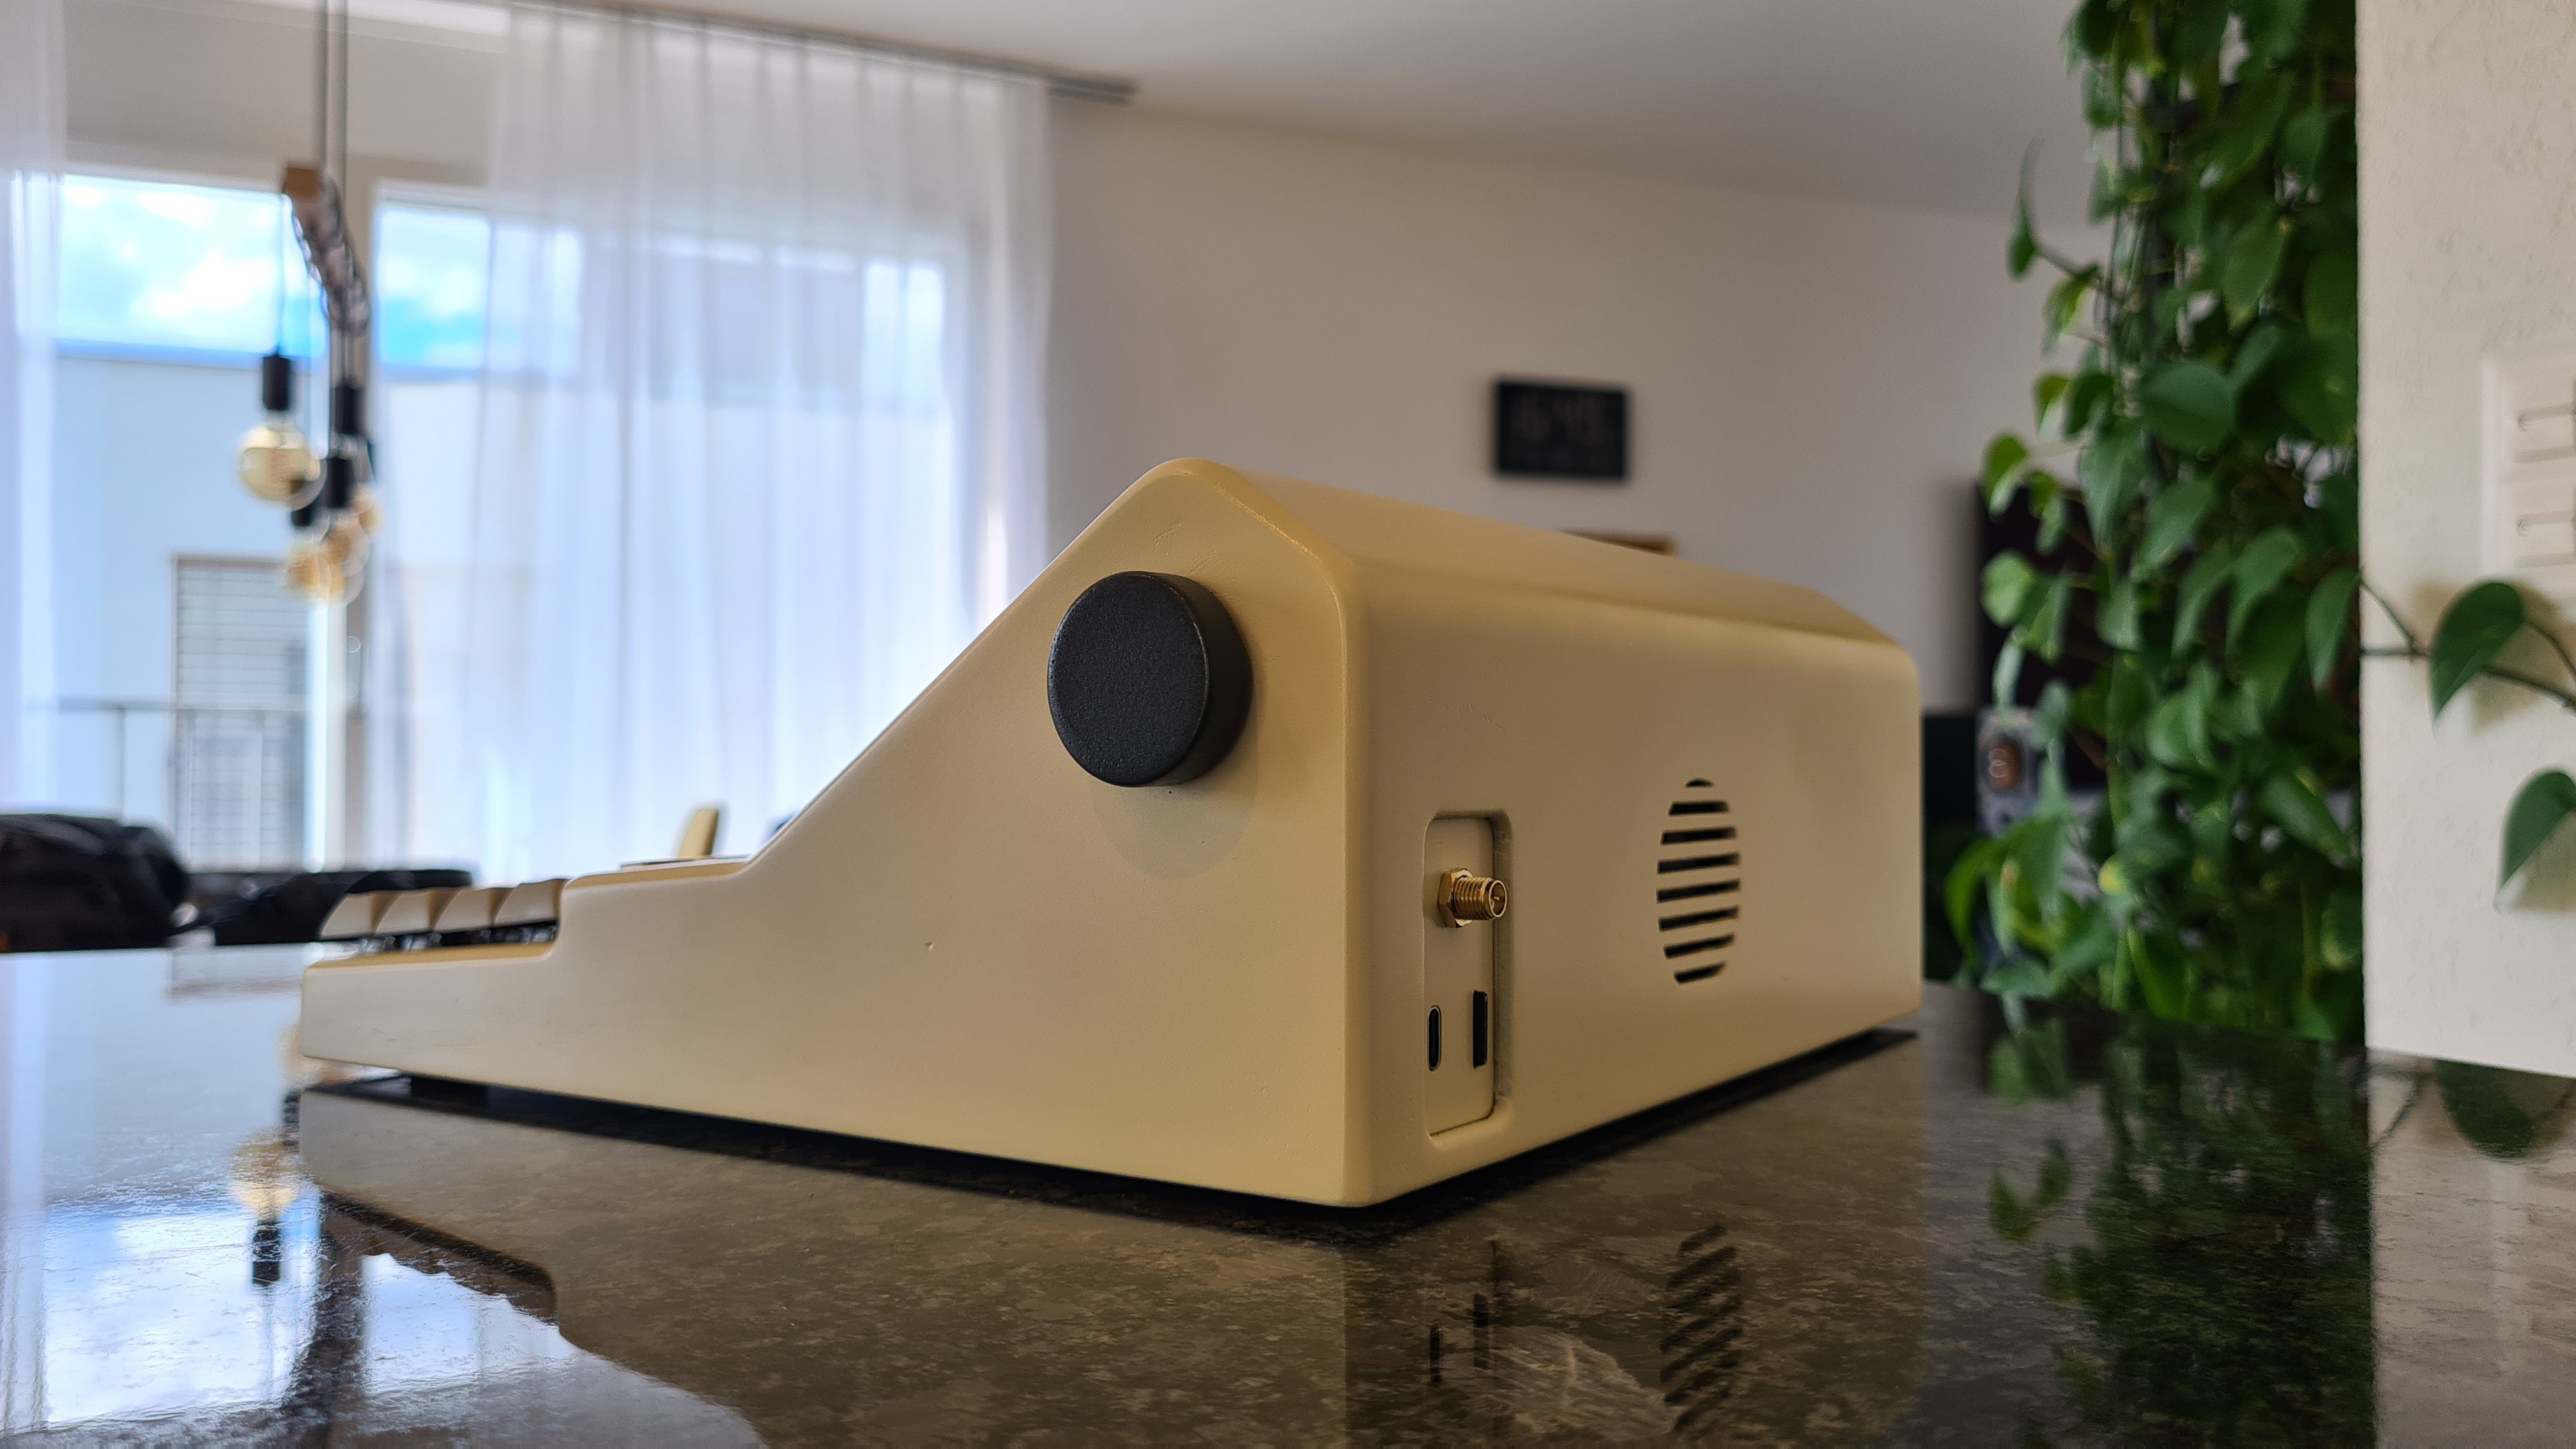
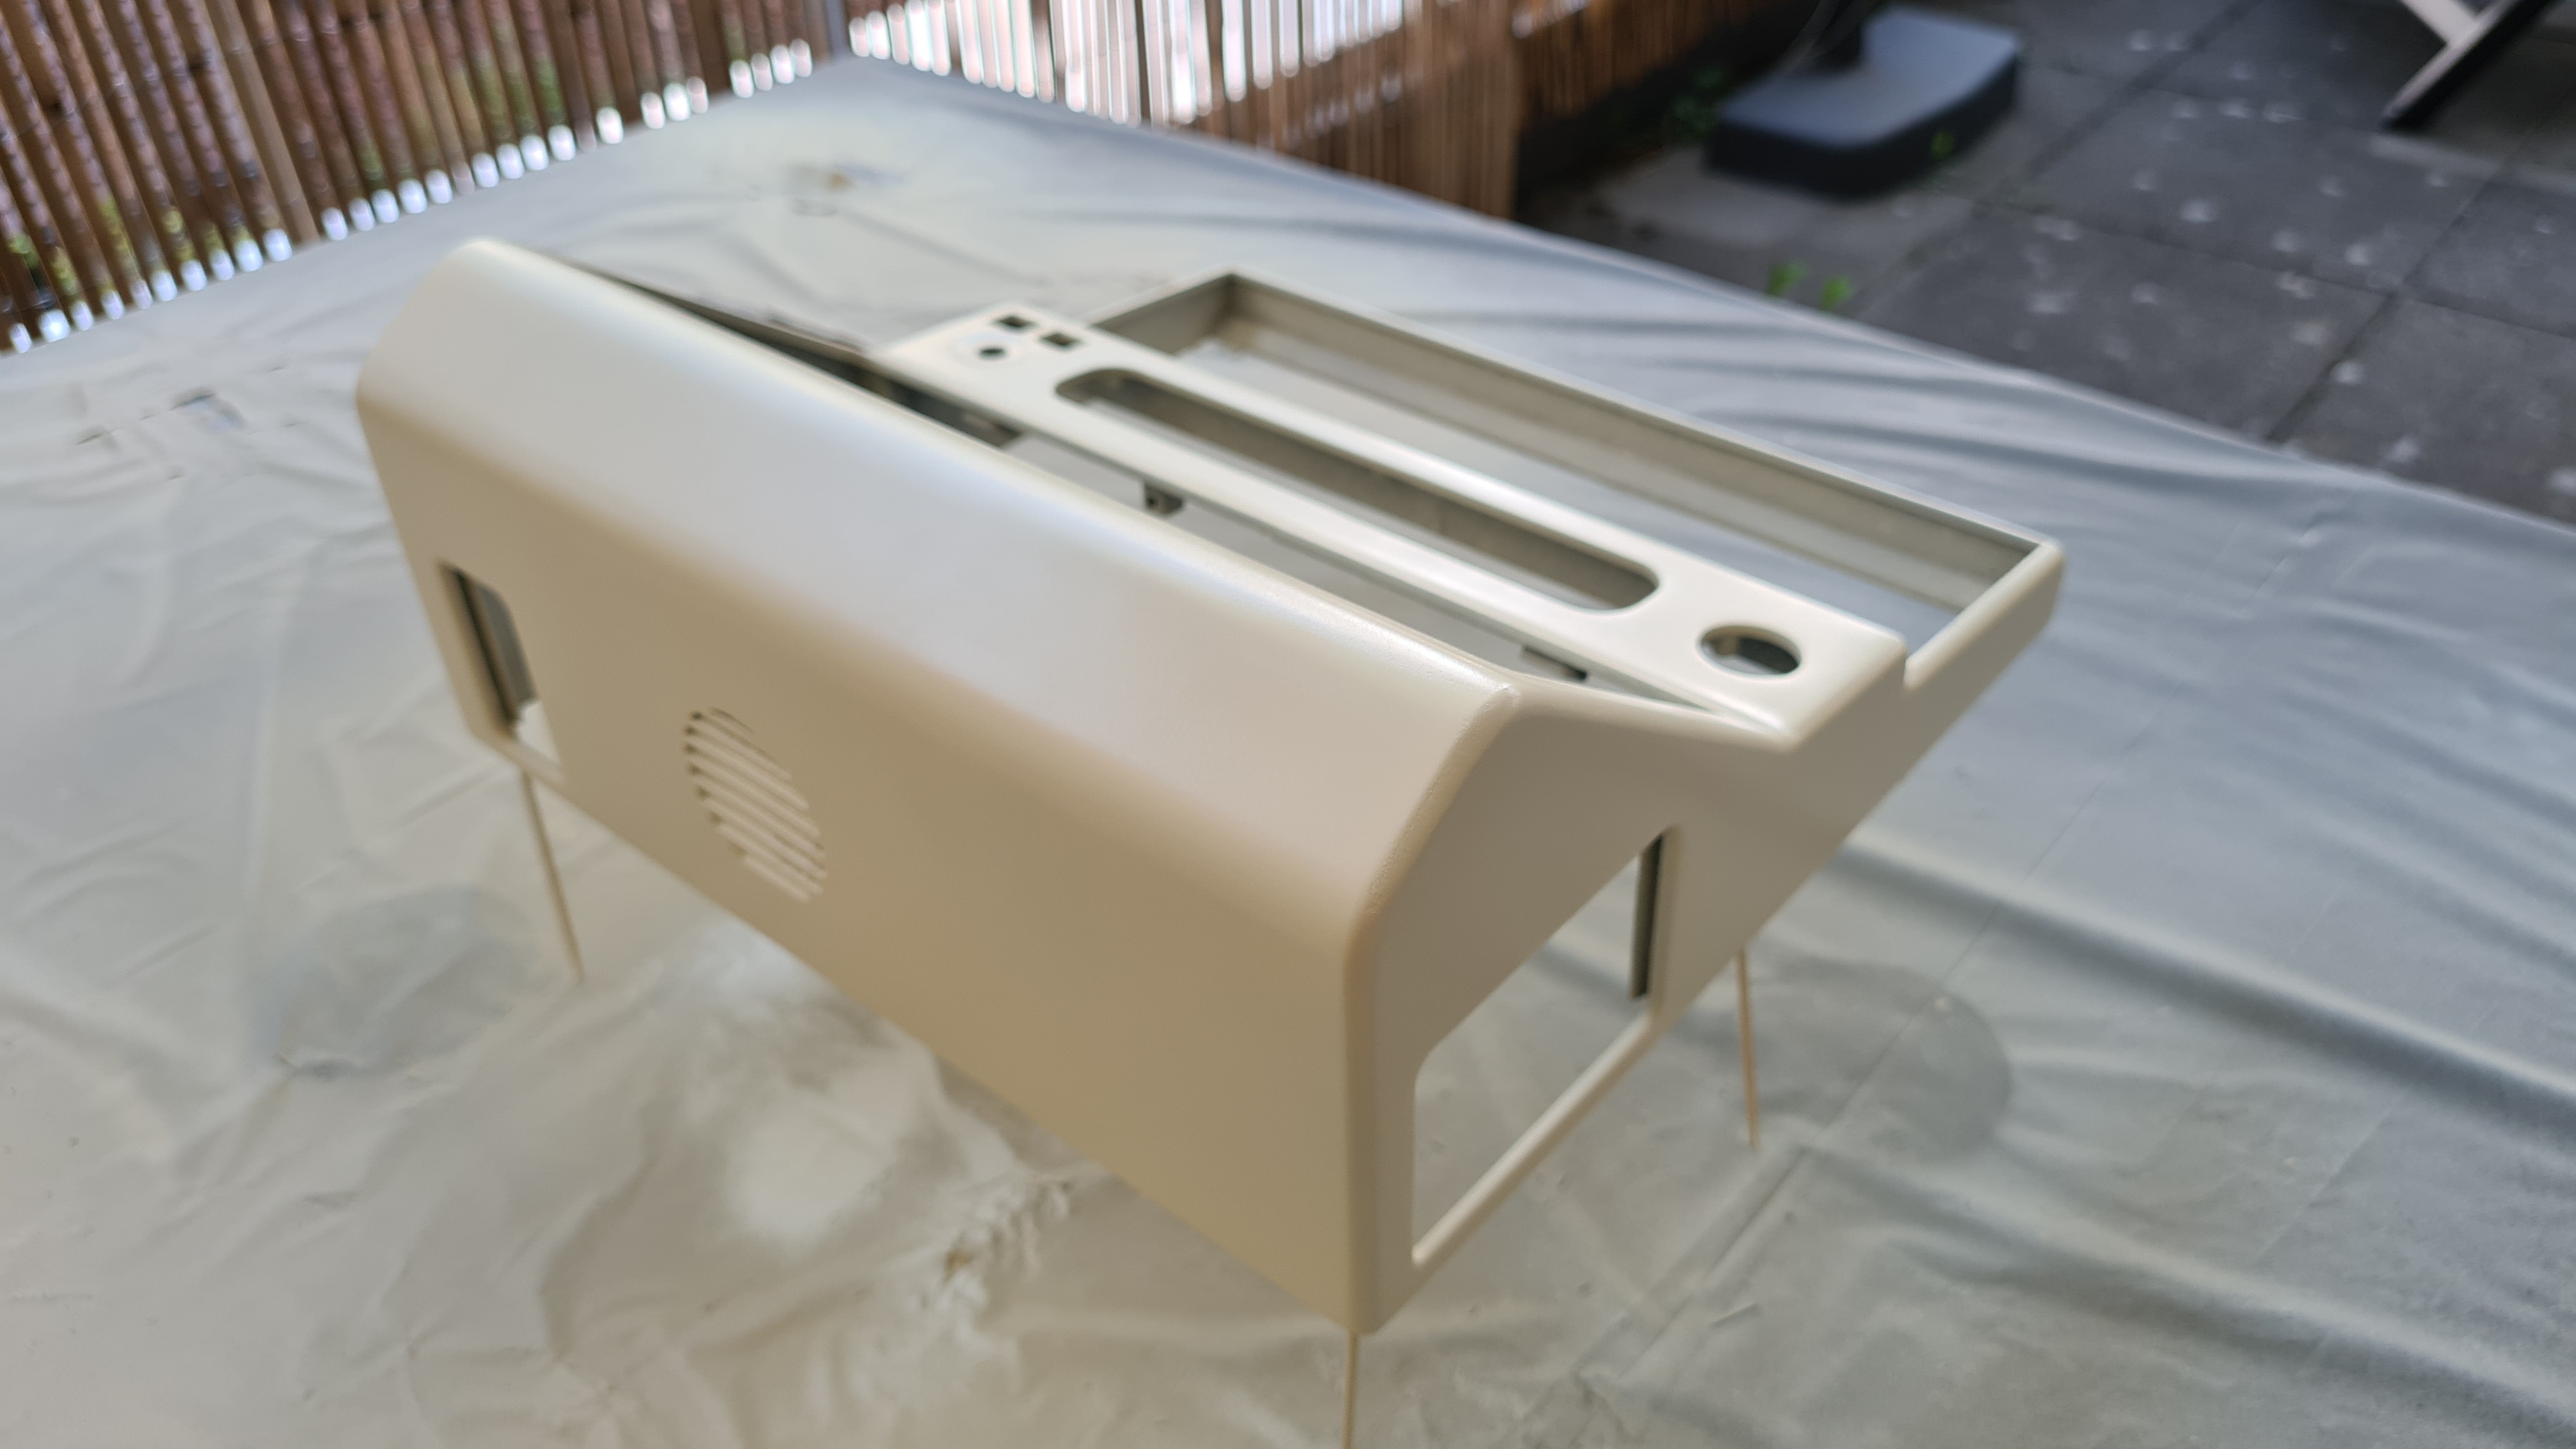
Rear panel
(can be slided into the case and is held in position by the bottom cover)
- raspberry microSD access
- "usb c" charging port
- external WiFi antenna
IO panel
(can be slided into the case and is held in position by the bottom cover)
- three USB Ports
- 8pin gpio (5v, 3.3v, ground, gpio's)
- RJ45 LAN
Peripherals
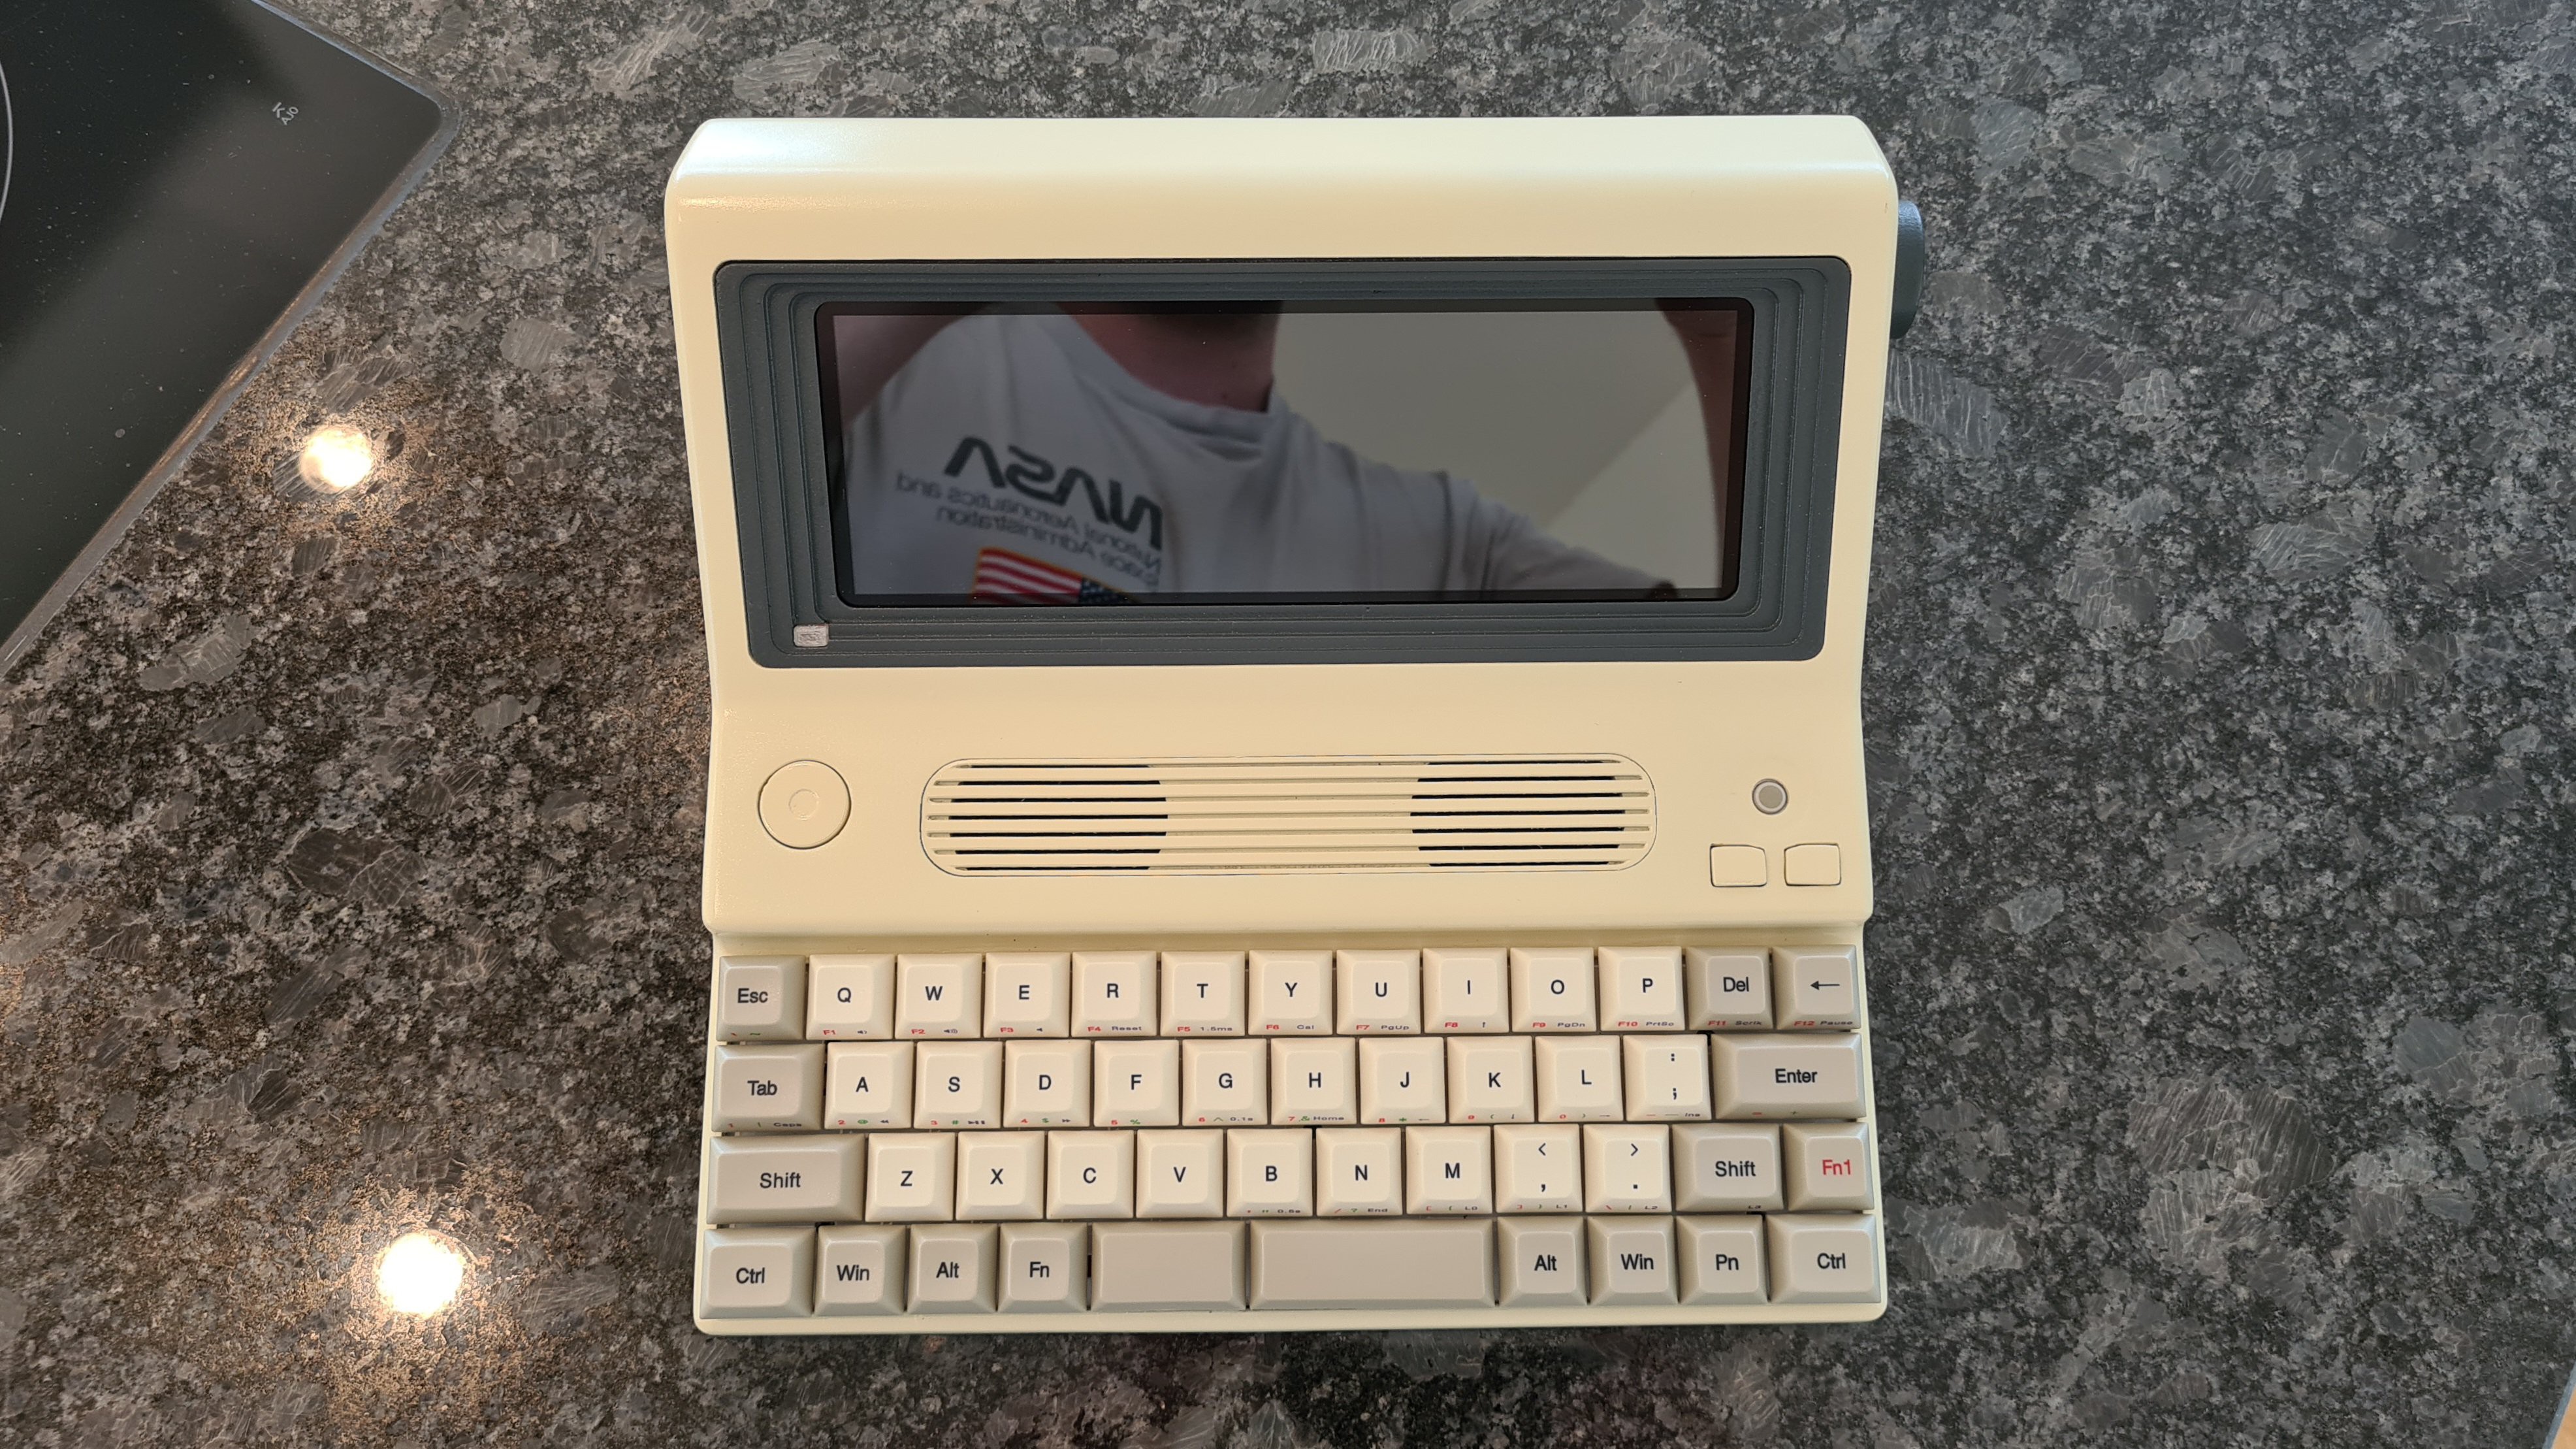
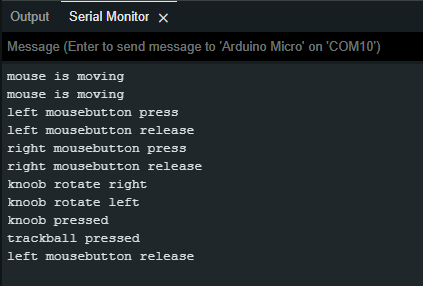
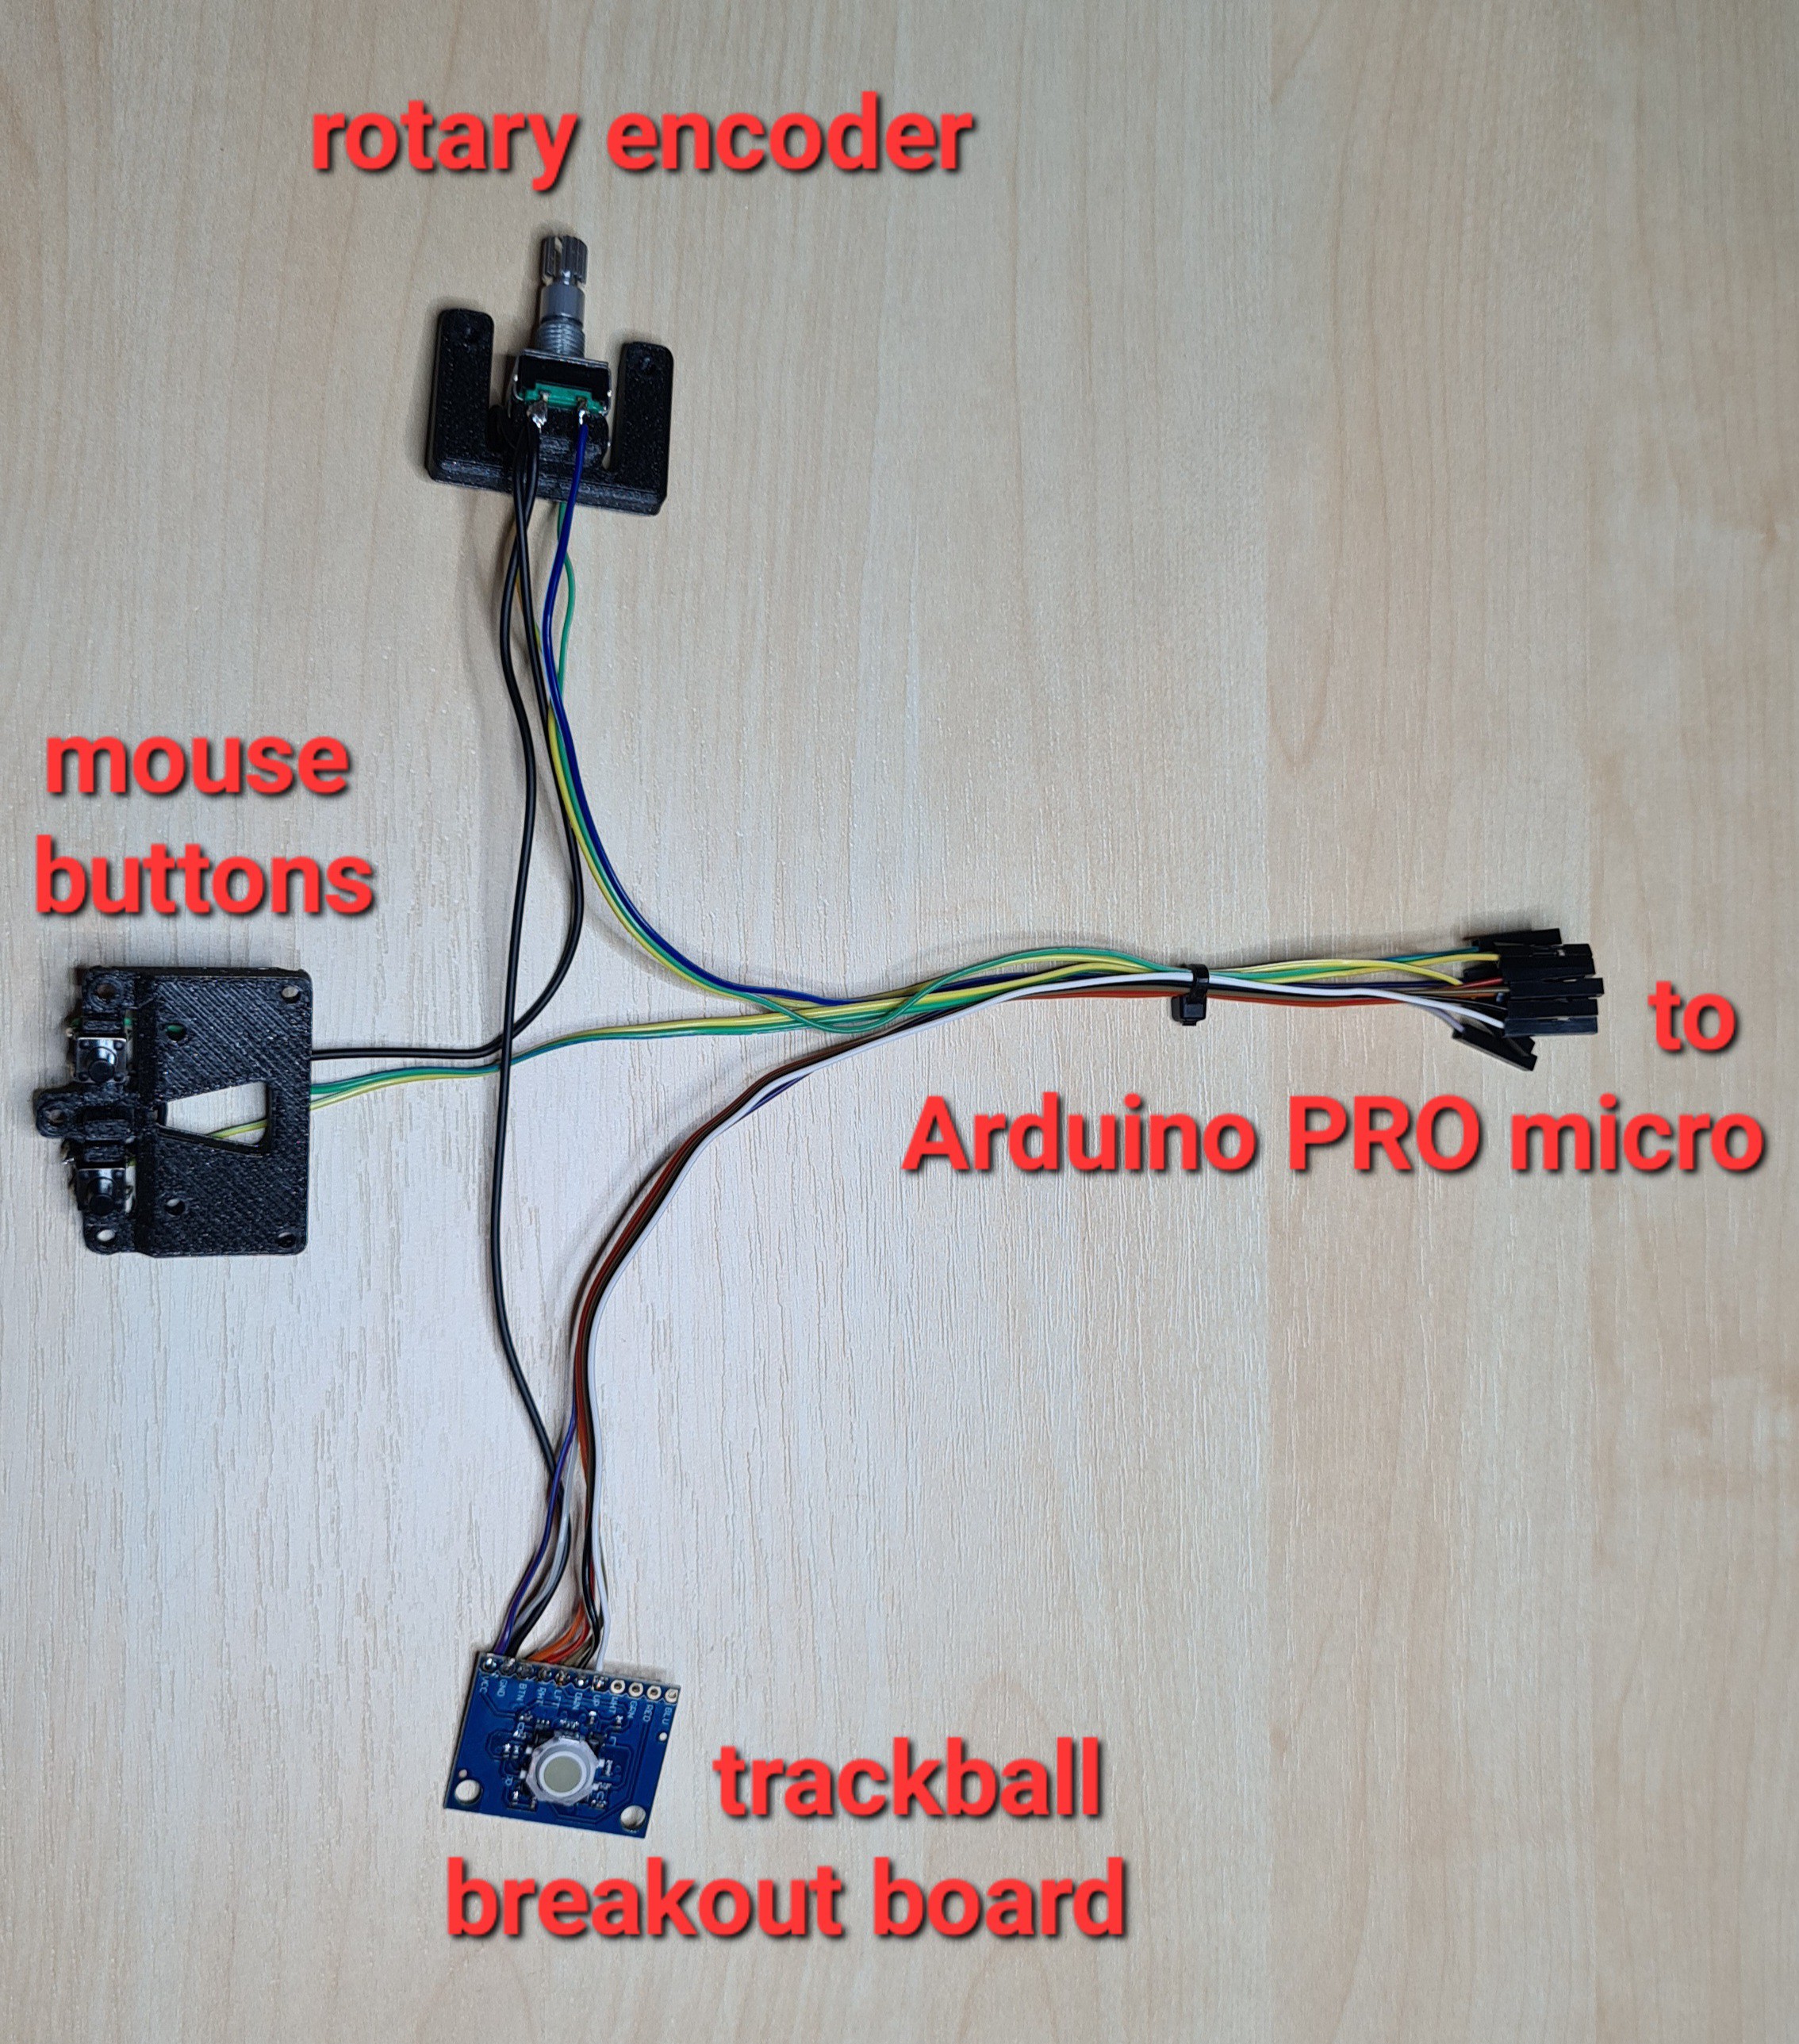
- trackball and mouse buttons
- knob (for cursor keys and enter)
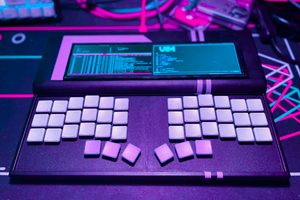
- full mechanical keyboard
Other properties
- good raspberry cooling (so that it is not throttled)
- stereo speakers
- capacitive touch screen
- power and act LED
Painting color
- primary color: RAL1015
- Secondary Color: RAL7016
future plans
- usb micro b and a wide range charging port (5-30V with banana jack (rear panel)
- HDMI output (IO panel)
- Battery (the UPS board which can be seen in the CAD drawings turned out to be a flop (aliexpress 52pi UPS plus)


 Michael Gardi
 0x17
0x17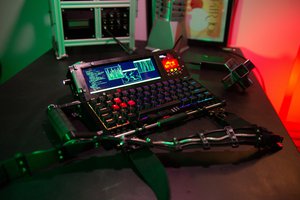
 Leandra Christine
Hi, amazing work, I love it. I'm going to have a go and building one. I may have missed it in your description, but what is the purpose of the tp-link device, is the PI's own wifi not sufficient or is it to minimise RF noise near the amplifier?