 Paul McClay
In the previous log page I walked through the history of the enclosure part of "frame+enclosure". This entry describes the latest iteration. It's all kinda deep weeds and I don't know if anyone will ever actually read it. I wrote a lot about this because it's been one of the more convoluted parts of working out something that might work well enough to call "done" for this project.
Many words and little proofreading follow, so I have no idea how this all differs from what I think I wrote...
In all previous flavors of storage/working enclosure, the doors fold 180° to collapse for storage, then close rather conventionally like doors. Another possibility was to have each door fold 90 deg then each door closes around the two open sides, one over the other. That would avoid having two edges meet at a corner -- which seemed like trouble before discovering that it worked quite well. Reasons I didn't do that in the first place included the hassle of making the hinges different between the two sides, and more significantly, with single-thickness door panels, that leaves no opportunity to attach anything to the inside of the outside door, I already wanted to avoid attaching anything to the outside. So that was going to complicate closure.
Then I looked for hinge options to get away from tape and decided to try these:
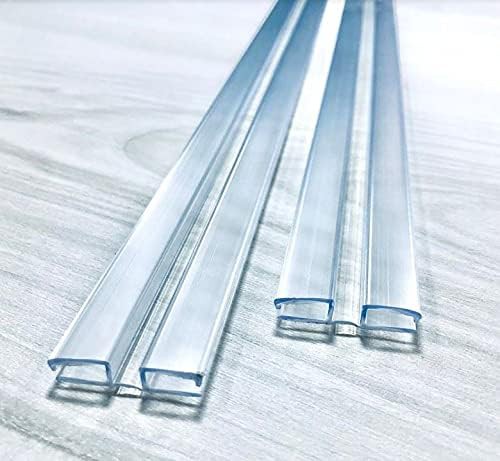
They multiply the panel thickness. Folding them double also adds the width of the web between the two panels, so the fold would be that much more than twice as thick. Quite counter to my earlier obsession with minimizing footprint @@@link.
That was a reason to reconsider wrapping the doors around the corner instead of folding double. Joining thin panels with thick hinges also relieved the problem being unable to attach anything to the inside of the outer door or outside of inner door (i.e. only to inside of inner door). So, giving that a try...
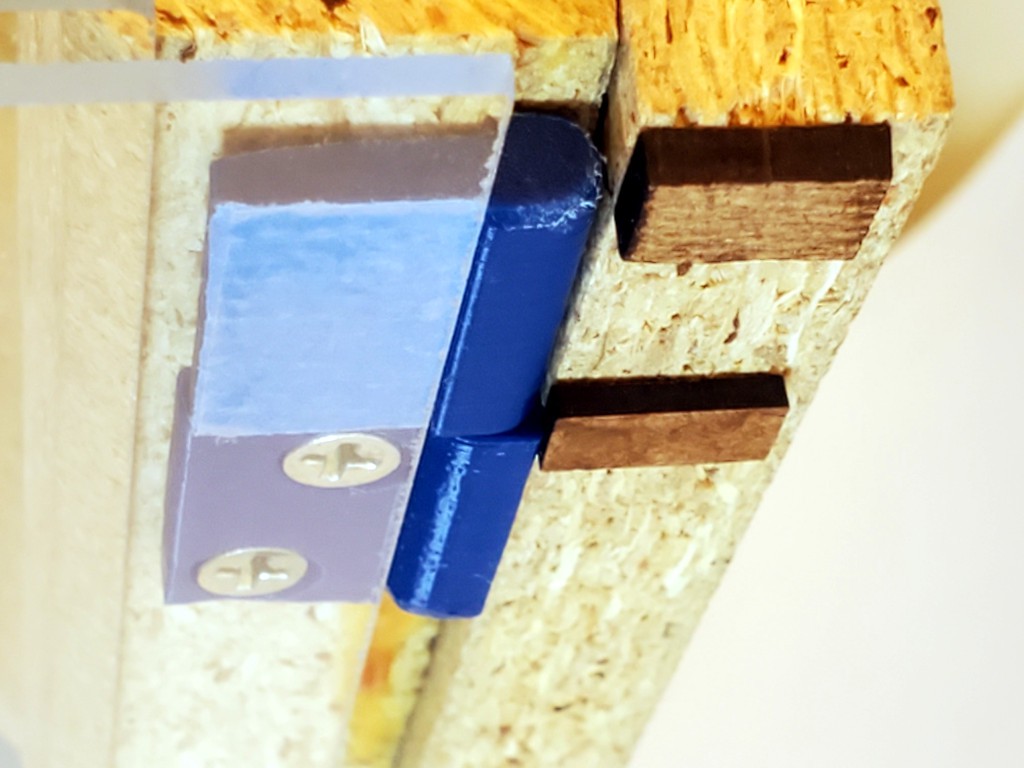
Those hinges fit between panels. Their thickness sets a "free" thickness for hinges at the frame. After looking at a lot of unsuitable hinges, I figured out that was enough to space for bespoke hinges.
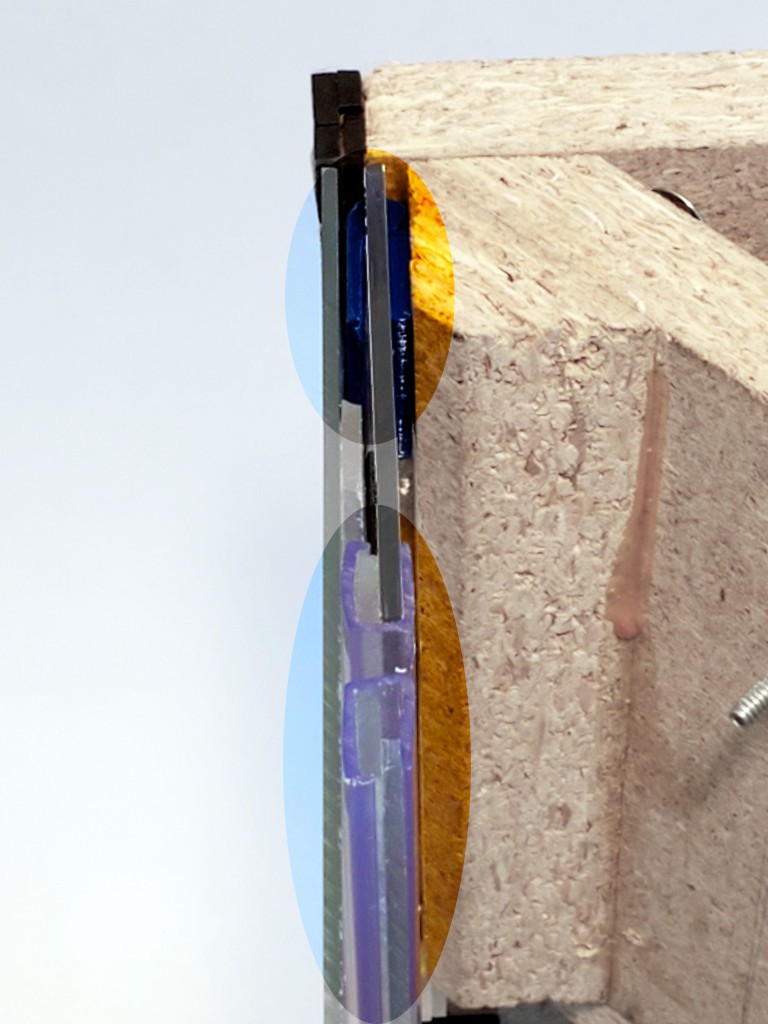
The dark material in that pic is just tacked on to show where the solid side would end if it were cut for the thicker panels. The outside door edge should bear directly against the solid side panel.
"bespoke hinge" really means three different hinges -- just for that side.
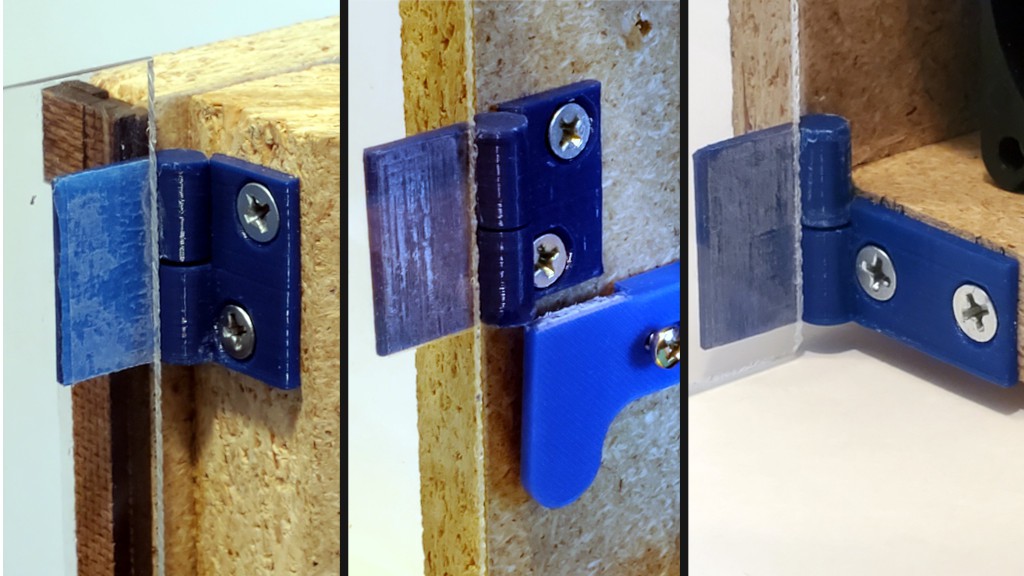
On this side the hinges carry the inner door while the edge of the outer door should bear directly against the inside face of the solid side panel. For the inner door, the hinges also back up against the solid side panel, and clearance between the fixed half and the edge of the door goes to zero with the door closed. When pushed in from the corner, the inner door should bear directly against the fixed parts of the hinges which bear against the solid side panels. A few small plastic parts will be more squishable than the whole door edge meeting the side panel, but the hinge in the inner door will buckle and/or compress before sending much load into that door panel anyhow.
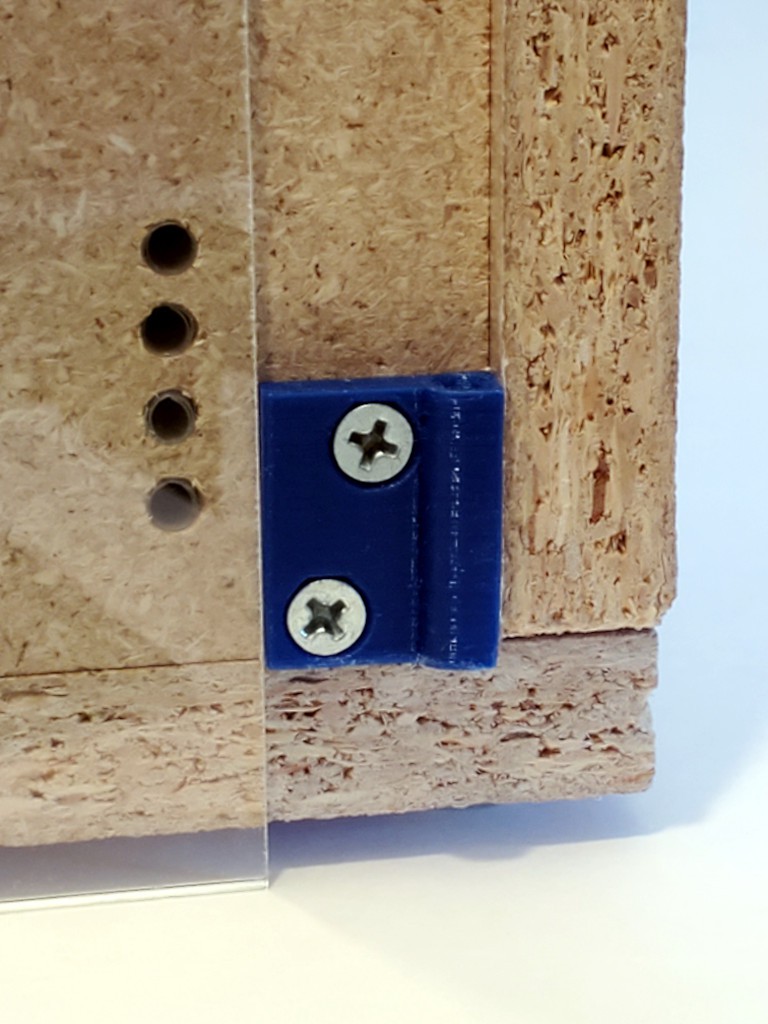
Then there are more different hinges on the other side to keep the hinges behind the plane of the outer panel.
Again for the hinged panel the clearance between the moving panel and fixed half of the hinge goes to zero with the door closed, to bear whatever load they get which will be moderated by the hinge between door panels on that side.
In that corner, the inner door panel bears against the thicker fixed parts of the hinges, which again bear against the frame side panel.
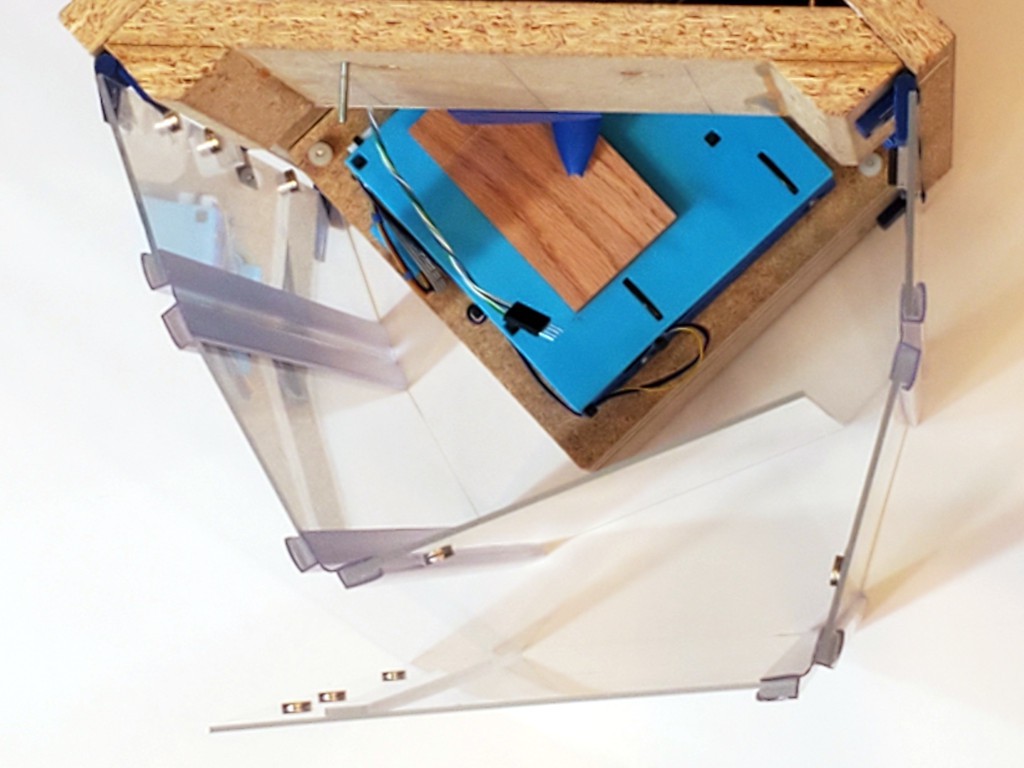
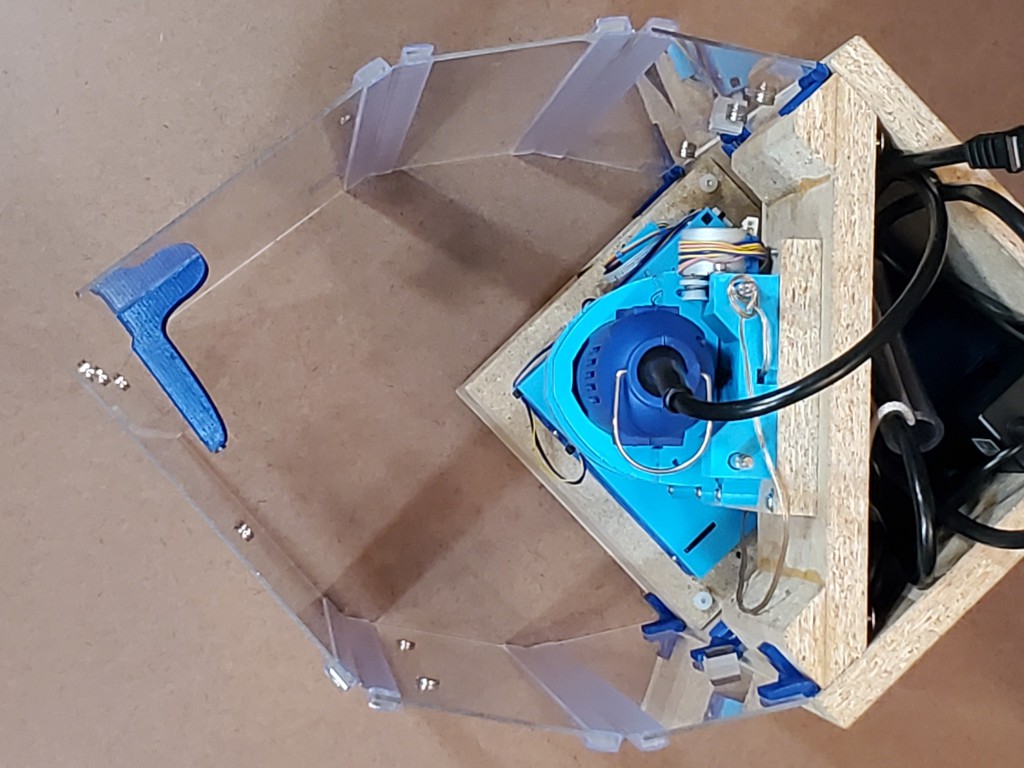
(This pic also shows how the enclosure panels extend below the hard box to the level of the bumper feet to sweep the work surface. That helps to contain the mess. And I think flat-ish smooth-ish surface is a reasonable requirement for what to have under this thing.)
That all adds a lot of bulk, especially where the folding hinges double up at the corner, kills the "snagless" smooth sides. At least the corner hinges keep flush.
Again the dark stuff at the frame corners shows what should be the extent of the solid side panels if that were cut with those hinges in mind.
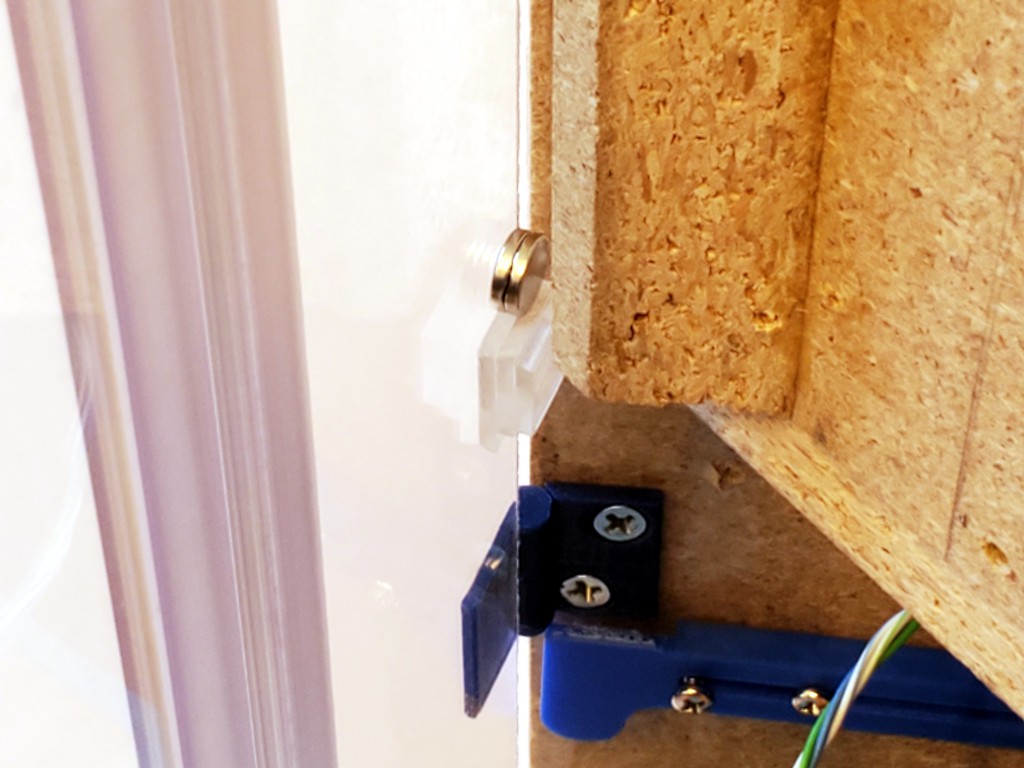
Magnets hold the outer door panel inward to what would be flush with or just behind what would be the edge of a matching frame. That gives the edge of that panel some protection from getting knocked open.
Lots of magnets because the magnets aren't used very efficiently in this first try. On the left they are separated by the door panel thickness so they attract weakly. Doubling the inside magnet helps. However, the magnets won't much resist the panel sliding sideways instead of pulling away, and the great big hinge sticking out of the opposite corner wants to snag any passing hazard and pull the panel away sideways. Another set of magnets around the corner help resist that because they would have to be pulled straight apart instead of sliding. On the right the magnets get closer but still don't meet unless one side is doubled. While the photo shows only one set of each, there are more sets spread along each corner. So, lots of magnets. Not a big deal, but the number could be reduced by using them more effectively. I got magnets that are a little thinner than the door panels, so they could fit into a hole through the panel which would solve the separation on the left, some spacers could solve spacing and planar orientation on the right. Cup magnets and striker plates would hold more with fewer magnets. But just using lots of magnets is simple for now.
As a consolation prize for letting the doors get thick & snaggy, hinges made to suit solve the awkward door problem decisively.

And these projecting blocks secure the doors in place in blocking them from lifting up when closed.
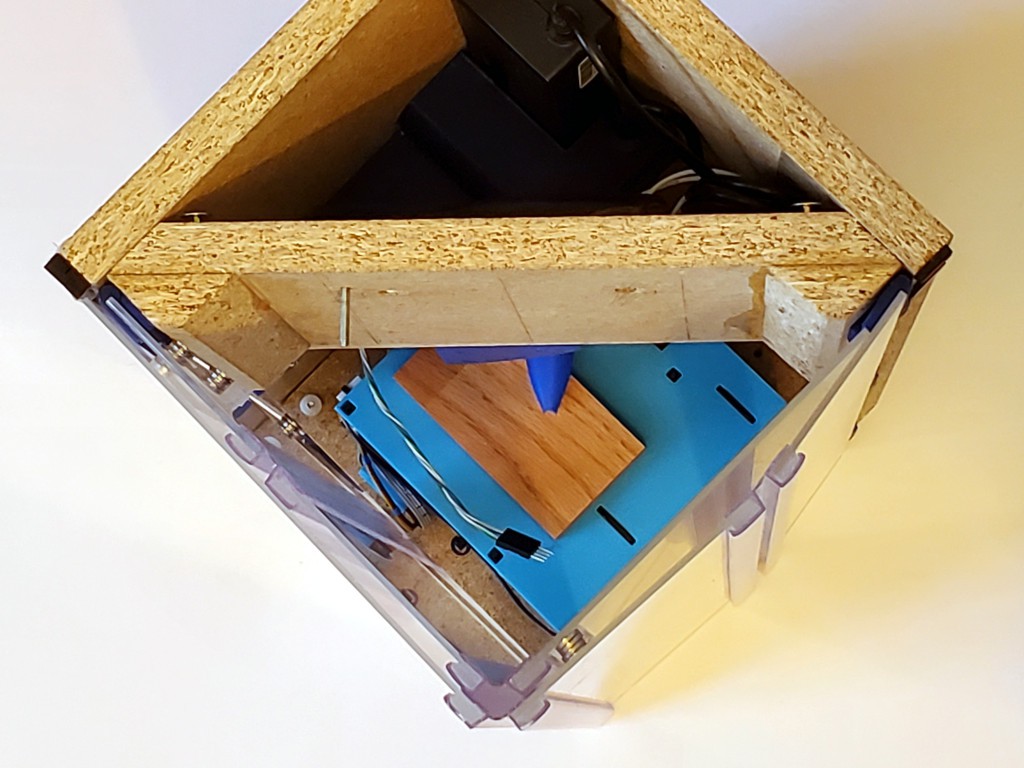
The flex hinges are pretty stiff, so the enclosure wants to be a couple of arcs instead of a square. Besides looking inelegant, they threaten to encroach the clearance required for the X+Y stage to move around.
That kind of a variation on the "fourth panel" problem described earlier. So I dug up and adapted the slide-out side guards made for abandoned intent to shrink the frame footprint to help keep the enclosure panels adjacent to the frame out of way.

Then squaring the corner where to two sides of the enclosure meet helps to force the first flexures near the frame into a sharper angle and straighten the second flexures closer to flat to make the box.

The blue thing in the corner is attached to the left side and attaches to magnets on the front panel to lever the corner close enough to square. Since it's attached to the inner face of the inner panel when closed, it can be big and fit in free space inside the closed-up box. It's also too long. I had a shorter dimension in mind, then second-guessed myself by imagining a problem while doing CAD away from the physical object to look at. Meh.
But, hey, even if I'm not thrilled with all of it, that's the first enclosure for this thing that hits some main points:
- closes when closed (storage)
- closes when open (work)
- not awkward to work on (doors removable in this case)
- not made of packing tape
And it has a convenient carry handle. It's more comfortable than it looks but the comfy part is clear and just fits in my hand so the corner you can see is hard to see.

Future?
I've already whinged about the thickness of these flex hinges. While these clip on the edges and add some to both sides of the joined panels, I"ve also found some that bond to one side. But they all add a lot of thickness. Some were kinda flat-ish, but none were flat. Meh.
Recently, and long since ordering the flex hinges used here, I found some actually flat acrylic+"polyester thermoplastic hinge membrane" co-extruded flexures about the same thickness as the material i used here. Check this loveliness:
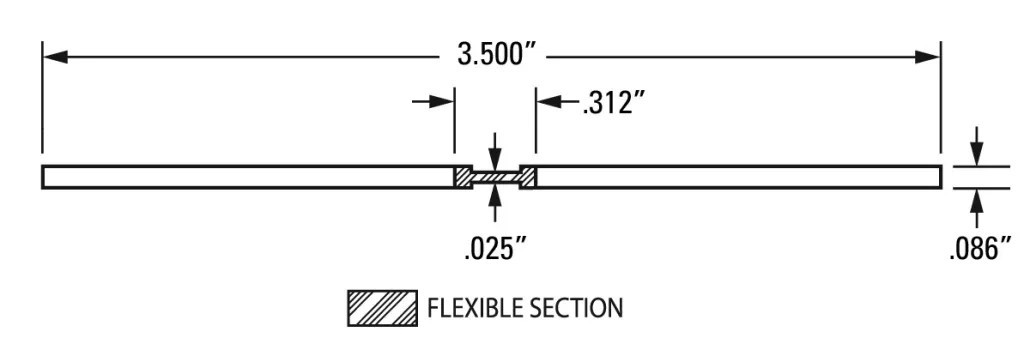
From Petro Extrusion Technologies, Inc. "DR" is a flavor of acrylic (TIL). And I've read that essentially perfect butt joints can be made between acrylic sheets. I don't know if that will be practical undertaking for me for this project, but it sure sounds like the closest thing I've found. The edge of a 180° fold will be more squishy than the earlier iterations with tape hinges, so maybe it wouldn't directly replicate this level of abusability...
... or maybe the flexy bit is tough enough to take that and add a little compliance to moderate shock. ?.
Or maybe UV resistant packing tape is the easy answer. ?.
Discussions
Become a Hackaday.io Member
Create an account to leave a comment. Already have an account? Log In.