 Paul McClay
Another log mostly about already-dead stuff that I took pictures of before breaking it down to make it different again.
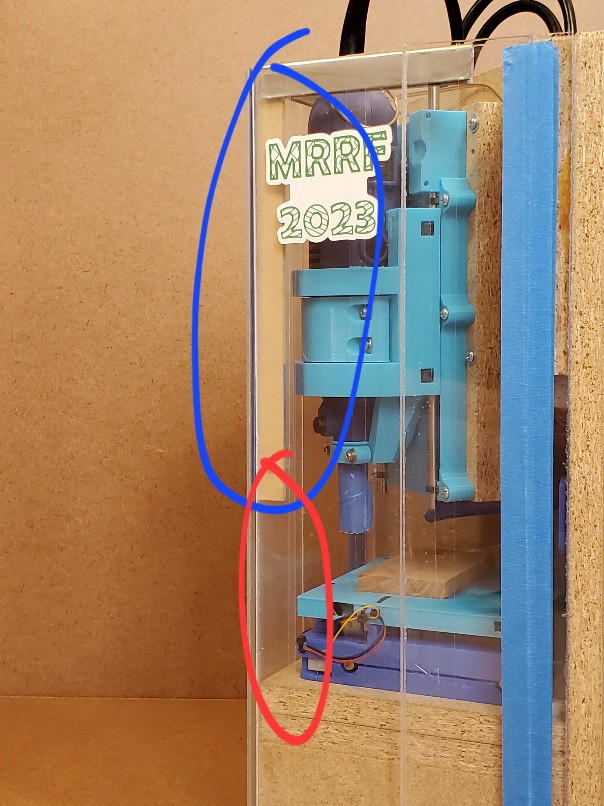
I tried to make this vulnerable corner at least not super fragile. It turned out to be super not fragile.
It will take a much harder hit without damage. But the under-developed closure is just a short peg that sort of gets close enough to a small magnet to be weakly encouraged to not wander away, and hitting it much harder was bouncing the doors open, and that would confound the point of this visual demonstration. So just a tap for show.
I think I'm going to miss that clean, durable arrangement. The problem is that it was hinged with packing tape and that's not a long-term solution. I've been noodling ideas for making hinges that should age better with least loss of compactness or acute durability.
I've had another go at it, and maybe found a thing to try next. But first, a little about how we got here.
Starting with some history from the preceding laser-cut designs up to what I liked about the last iteration before breaking it.
Before beginning
Way back in pre-history, a piece of paper on each side of the frame did the job.
CDROM discards are a perilous gateway drug.
One thing lead to another and I got started into the laser-cut precursor to this project, retronamed "Minamil 2dc".
Zeroth: zero
A couple of 2-axis test ⋅ cuts with just the first XY table encouraged me to:
- keep going with the idea
- rig up some sort of debris containment ...
First: pepakura
... so before cutting anything, the first 3-axis frame had a 3+-sided paper shroud.
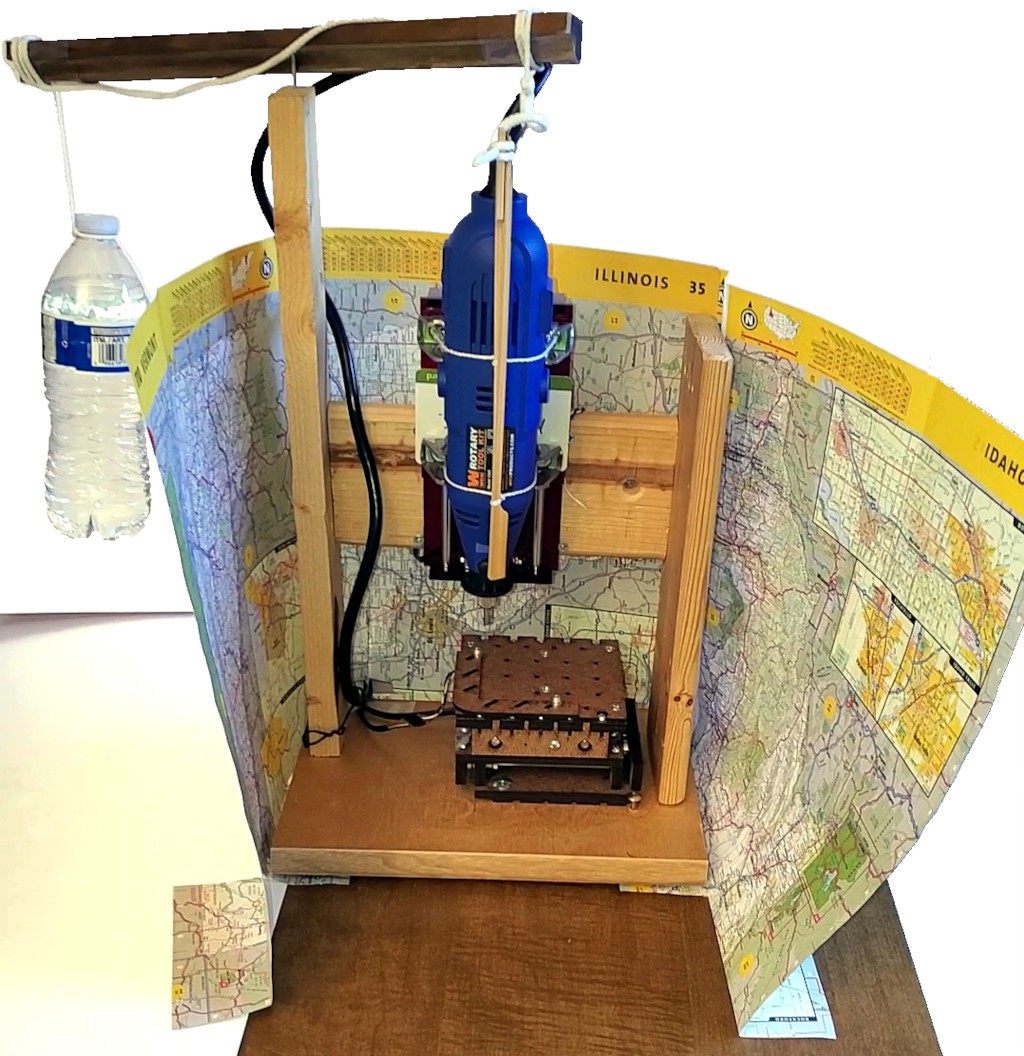
The "wings" projecting forward from the sides kept debris pretty well corralled to the tabletop. That actually got a little bit elaborate where it folded around and projected beyond the frame, and passed moving wires through without opening a big hole. (cable management has been a thing from the get go)
Aside: in this project I emphasize the distinction between the CNC mechanics and the fancy enclosure that you don't need to make the CNC part work. Here illustrated. You don't even need a road atlas if you don't mind a little mess.
Made from garbage-grade wood scraps, used uncut as found.
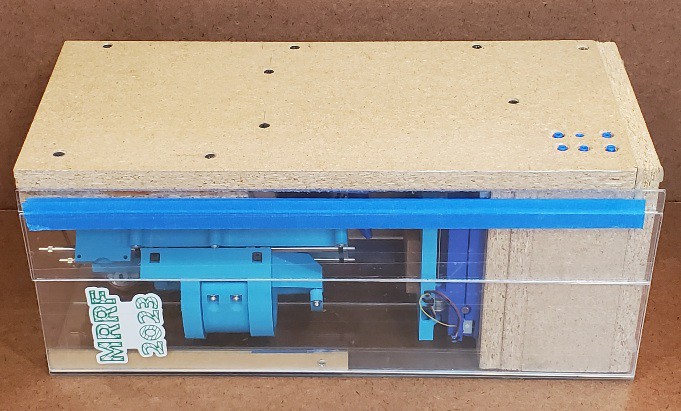
Second: win
This actually works really well.
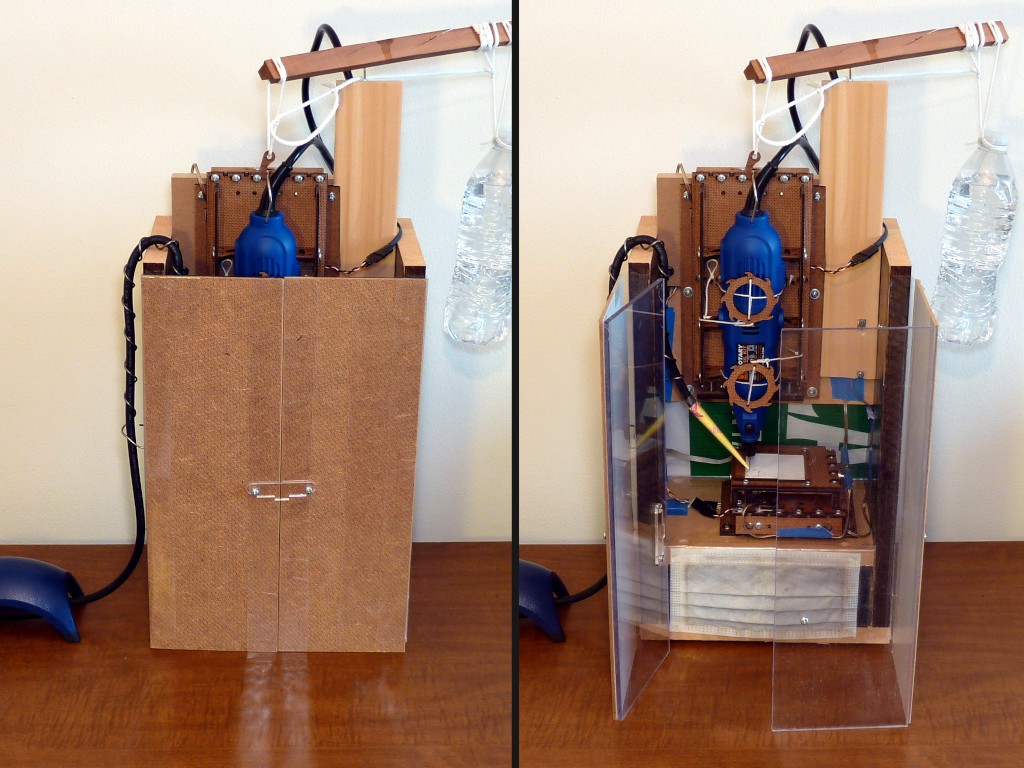
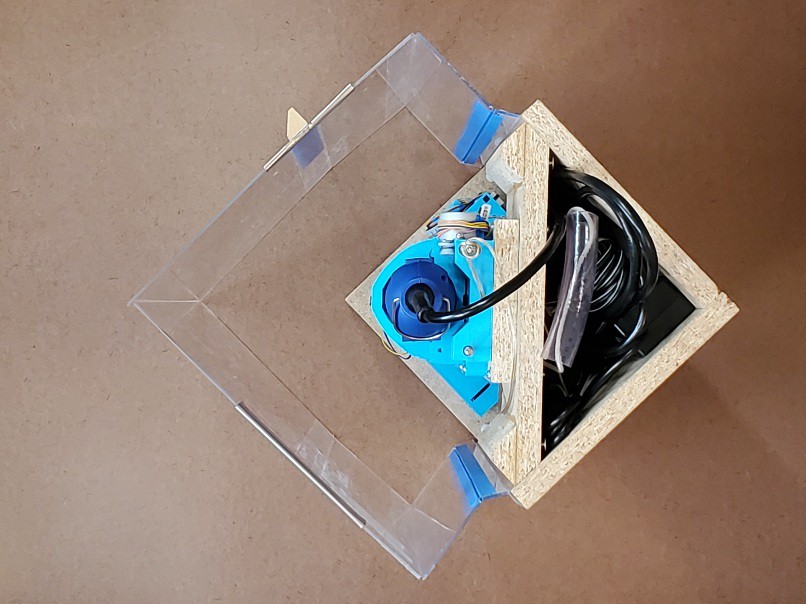
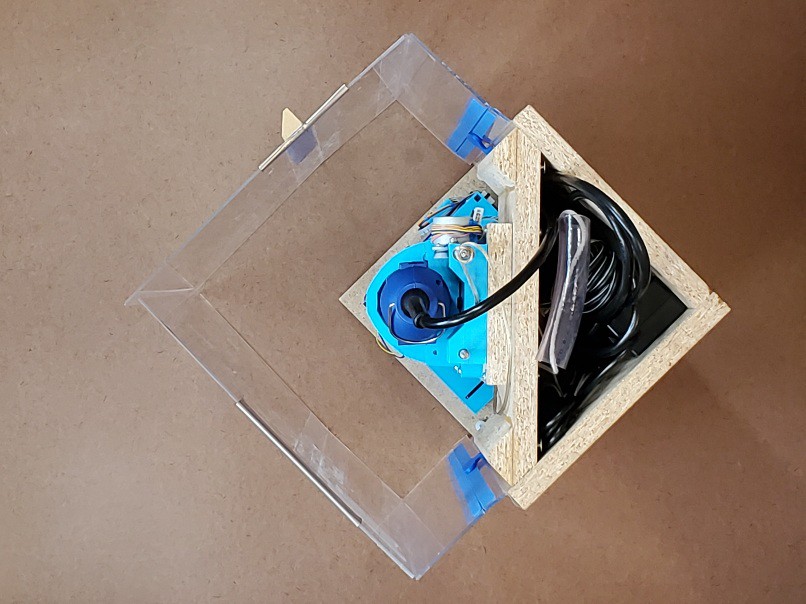
Four-sided enclosure. That really helped to make table-top work more simply practical. Taking advantage of how the horizontal axes collapse to a footprint smaller than needed in operation, the walls of the debris corral fold in to make a smaller box that doesn't have to occupy a bunch of space that it's not using.
Having the front panels cut before I had any idea what to use for hinges, I just taped the panels together to visualize the basic idea while I figured out what to do for hinges. That worked well enough to become the answer for hinges.
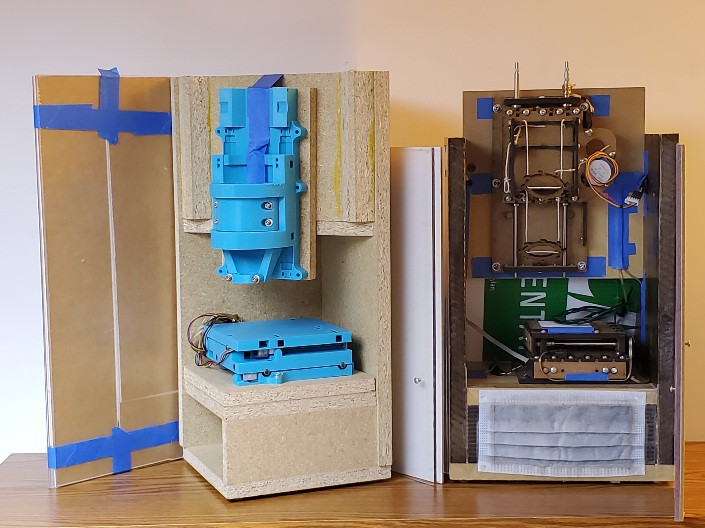
Aside: the side panels were cut tall enough to be taller than the raised Z axis (sans tool) and protect it for mindless storage. Then the Z axis got longer and broke that feature. The counterweight and its mast and beam fit inside[a] the closed box for storage -- until the counterweight got killed off.
[a] Sub-aside: that vid emphasized need to have a vacuum handy. That was self-inflicted by opening the doors outward then getting clingy debris up to my elbows after reaching in there. Later I got the clue that pushing the doors in, like the one on the left in the right half of the pic above, allows reaching in and doing stuff with much less hassle.
Made from less crappy wood, HDF, and acrylic scraps, cut on a table saw.
A relevant feature of this version is that the attached doors fold back flat against the side panels.
That proved really helpful when flipping the box around to do stuff with the doors open, and when handling a removed side panel without either removing then re-taping the door panels, or dealing with an awkward big thing that's either awkwardly floppy or awkwardly levering excess load on hinges that aren't supposed hinge that way.
Then: another
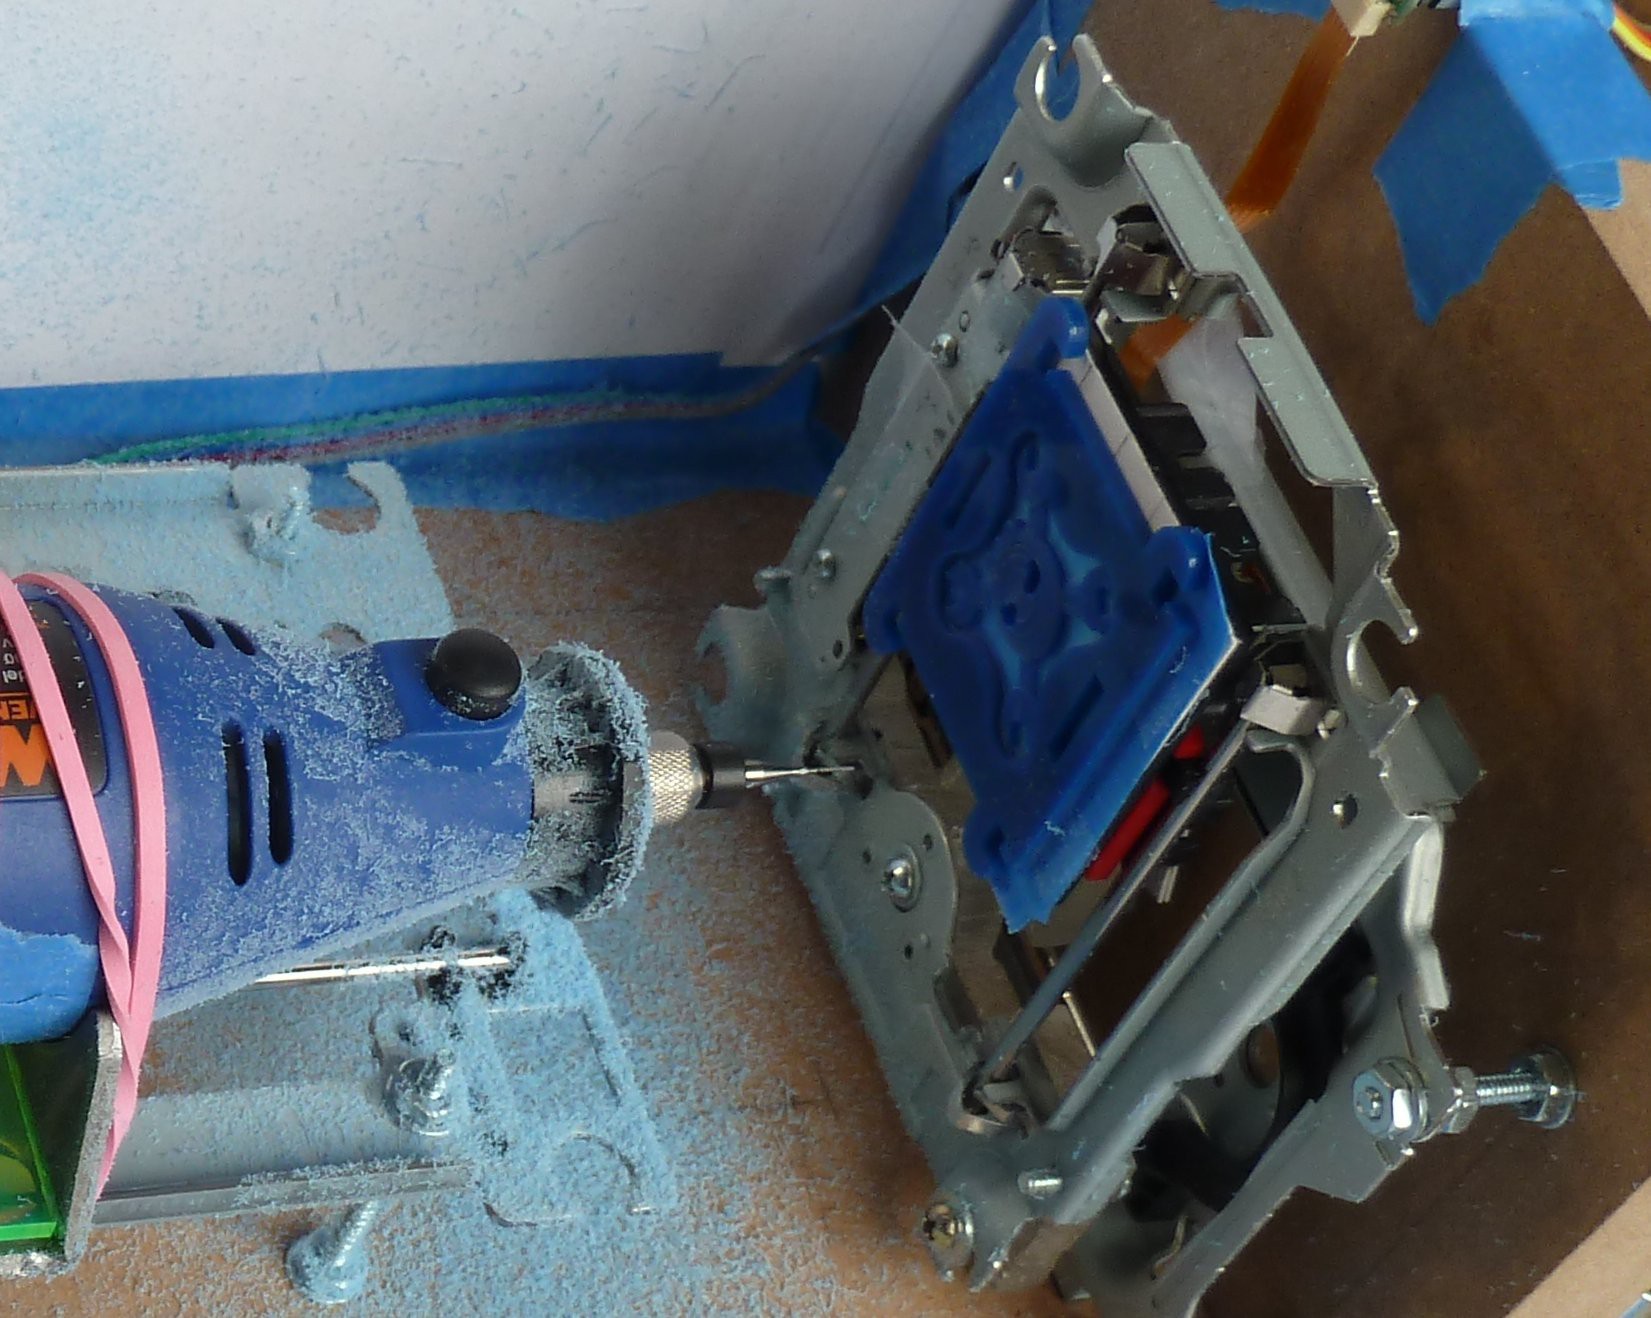
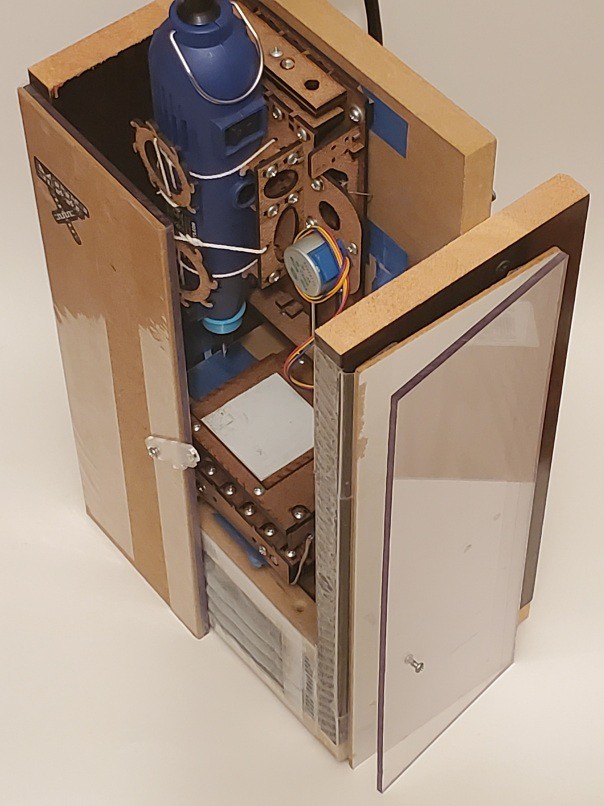
I accidentally made another frame as a side-effect of working up a 3d-printed adaptation of the laser-cut machine -- which turned out different enough to become a new (this) project. Oops.
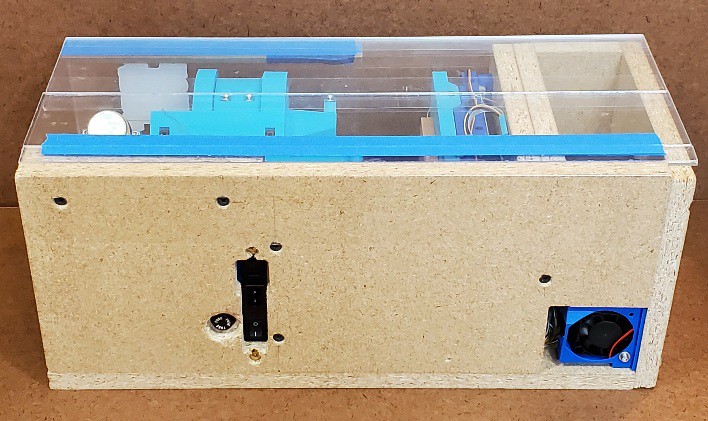
 Still didn't know what to do with the door panels. Here tacked on with some blue tape:
That was worse than it looks because the tape strips on the inside are too close together in the middle to constrain the panels from twisting away from the outside-only strips at the top and bottom. Meh.
When I cut parts for that frame, I still hadn't really figured out what to do with the door panels. I already knew that the ability to wrap the doors around flat to the outside of the frame was useful. Also I wanted to move the hinges in from the extreme corners of the frame for durability. I didn't find a great way to have both so I gave up the fold-flat idea figuring that at some point I -- or anyone replicating the idea -- would be mostly done flopping the thing or its parts around to work on stuff.
I wrote up tearing down that iteration of this enclosure earlier -- and said little about the door panels because they weren't much improved over the gif above.
Indeed awkward. You couldn't even lay the thing down on either of its solid sides without one door doubling the surface area and the other door stuck off in space prying its hinge apart. Awkwardness and feeble hinges combined poorly.
Otherwise, that was working well enough to think of taking it to MRRF -- but with the doors done differently!
Fourth: fourth
The next idea was adding a fourth panel, and so a third joint, to each of the three-panel doors.
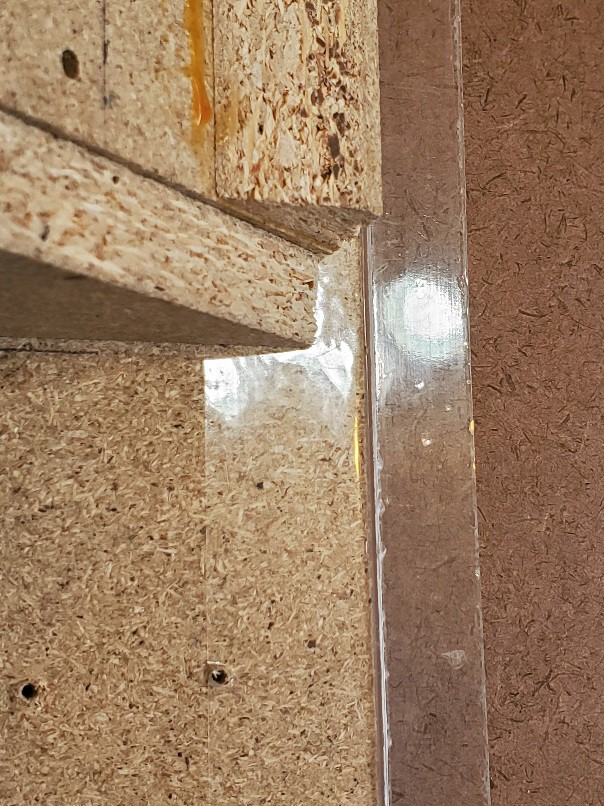
Just a little board-thickness strip, more "hinge" than "door".
In addition to allowing the doors to fold around, this also helped with better attachment. It wasn't done already because I had to disassemble the frame to tape the inside faces. That made the attachment semi-permanent. Making the awkward thing -- each side panel separately and the whole assembly together -- permanent wasn't attractive.
No such problem taping up the little stub panels. They could harmlessly become permanent(ish) appendages of the side panels. In fact, they're still there now because I left them as an undo option in case the next thing didn't work out.
That made it relatively simple to attach or remove the doors. I started with blue tape for simples, and that worked well enough for the duration. It would have been trivial to upgrade the tape if I thought I was done messing with that for a while. The blue tape re-sticks well to acrylic and I used the same four strips throughout. "Better" tape probably would have been a consumable at six feet per detach/reattach cycle.
So these were the doors that went to MRRF.
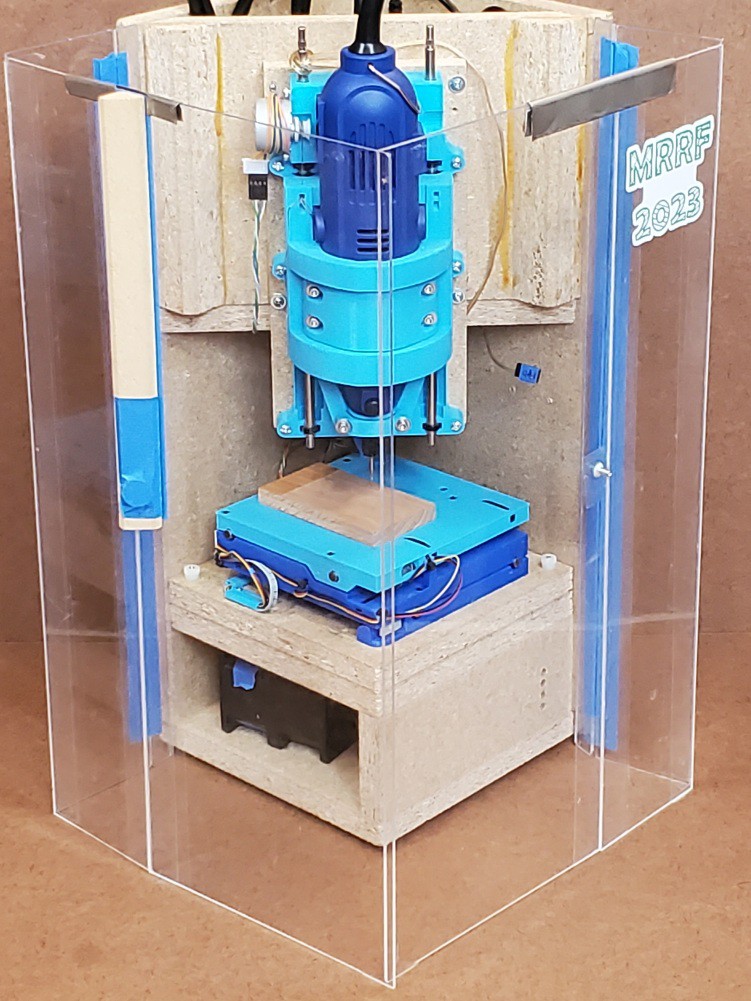
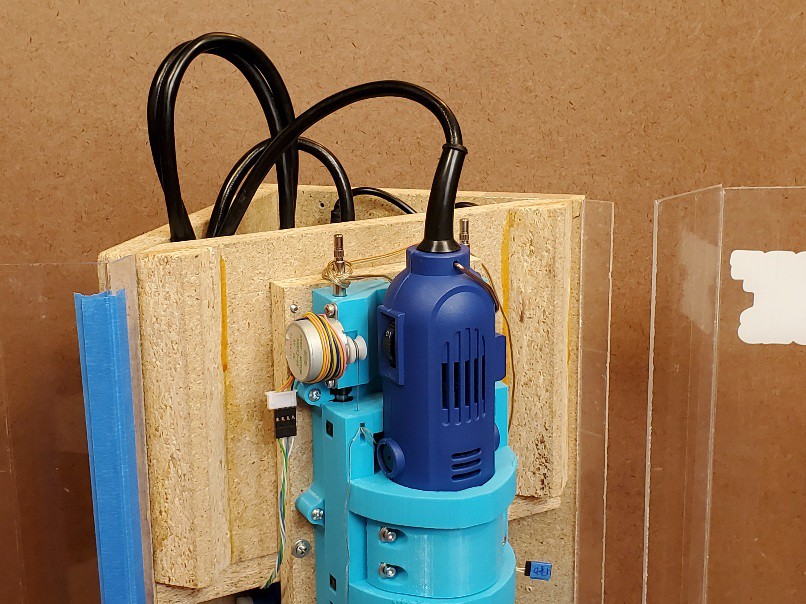
The metal clips on the tops of the doors were an interim fix for this problem:

(that wasn't necessarily bad but it was too easy for the unconstrained doors to collapse back into interference with the horizontal axes)
Like so:
I didn't like the loose (i.e. lost) parts but had a couple of ideas for solving that:
- (preferred) closure that forced the door edges to meet at a right angle, or
- (fall-back) pin-in-slot retainer for sliding clips; the front (bottom above) clips slides easily between working and storage positions and the left (top above) clip could be un-hindered to do the same)
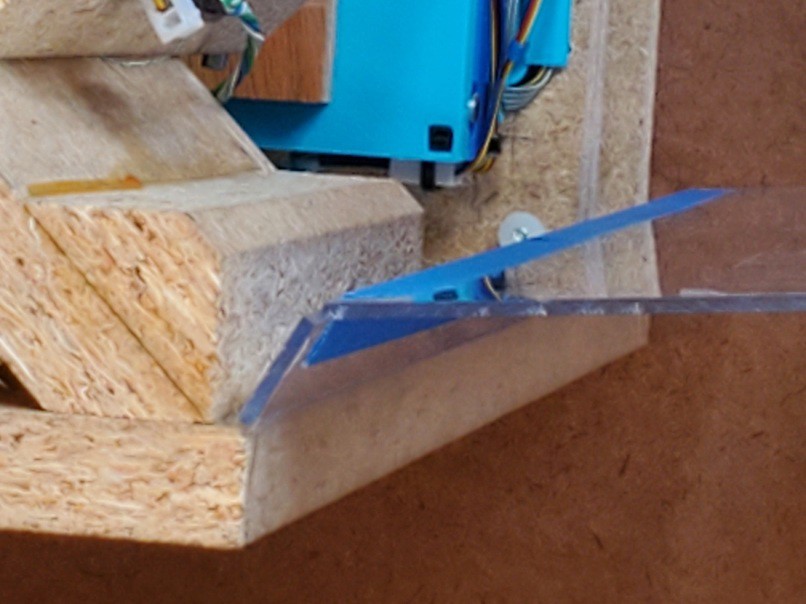
I also added a couple of slide-out retainers to flatten back the stub panels like so (look close...):
But those were really a superfluous left-over from abandoned aspiration to shrink the footprint by moving the X+Y stage back into the corner where the axes could hit the un-flat door panels. (but we'll see them again...)
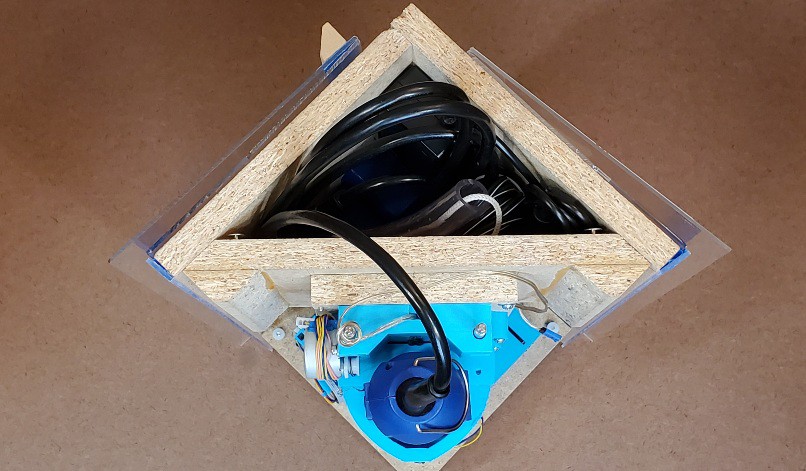
As mentioned up near the top of this log entry, the storage-closed closure was weak with just a little magnet weakly attracting a little peg (screw). But I like that the doors were content to stay closed and from the outside (laterally not above/below) nothing could get behind the doors to push them open.
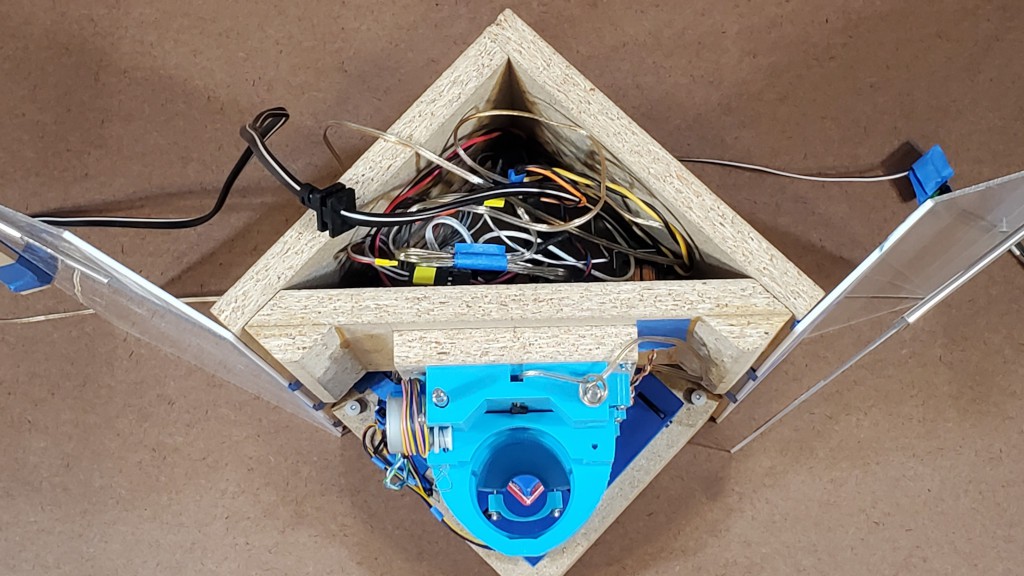
The doors, each folded double on one side, met at a "T" in the corner.
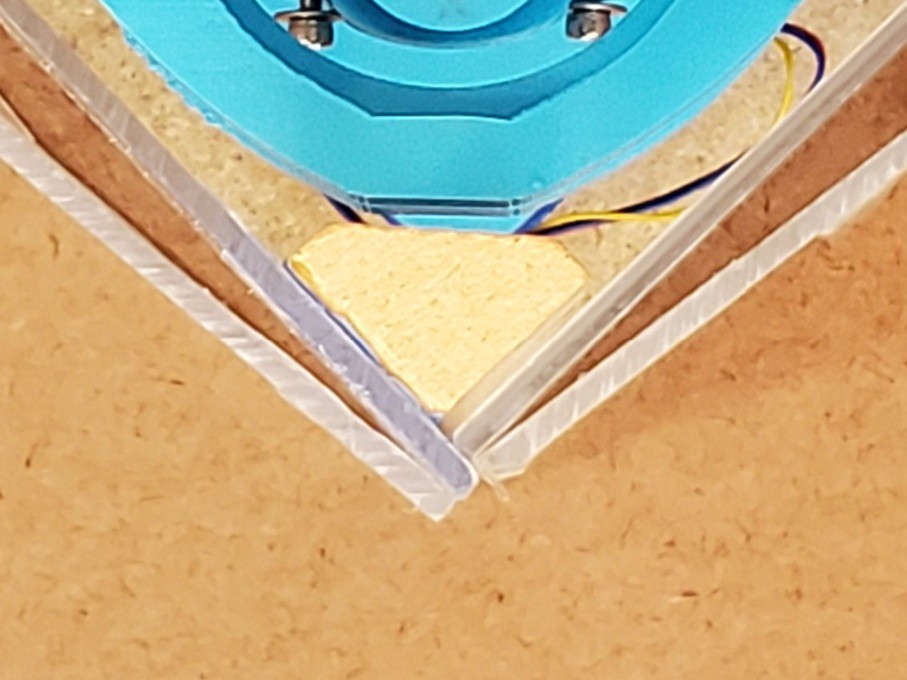
The peg-in-hole closure positively retained the left side against any oblique contact (from the right in the photo), it the positively retained left side protected the magnetically retained front from any oblique contact.
In addition to not adding any bulk, the "weak" tape hinges contributed to the strength of the closed box by their being invulnerable to compression.
The overlapped front door positively supported the overlapping left side against inward pressure. The front was less positively supported by the corner piece attached to the left side, but any rigid flat thing pressing against the front would bear on the edge of the left door instead of pushing back the front door. As a benefit of moving the hinges in from the corners, the other edges of the solid panel in each folded door bear directly against the insides of the solid frame panels.
From all that comes the bashability demonstrated at the top of the page. The solid panels in the folded doors won't yield until they buckle.
A bit part of gaining durability from resistance to compression comes from avoiding anything but simple compression against edges by keeping the four sides entirely flat (depressions allowed but not projections).
I mis-cut the vertical piece in the corner where the doors meet. The idea was to extend from the hard deck up to ~exactly the plane of the top of the frame, which the doors should be slightly below. Done better, that would have helped make the top of the box more solidly load-bearing for things with rigid flat bottoms stacked on top of the closed-up enclosure.
My plan at the time was to replace that with a (correctly sized) sliding latch to positively lock the doors closed in addition to bearing top loads.
There's a lot that I liked about this arrangement, and I had plans (but not time at the time) to fill in the blanks. But the whole packing-tape-for-hinges idea was always a bit shaky beyond proof-of-concept. At MRRF, a couple of guys with responsible adult product development chops (naming feels too much like name-dropping in this instance) gave generous time to kick around some ideas, but we didn't come up with a clear winner that maintained all that I liked about this arrangement -- like bashability -- beyond affirming that tape wasn't really the answer. (Ever left a taped box near a window for a few years?)
But maybe UV-resistant packing tape?
Next: different
Anyhow, I looked again at more hinge ideas and found some "Clear PVC Piano Style Living Hinge" to try between the door panels. That's a big change because it gives up a lot of what I liked about all the above. But accepting a more generous minimum thickness opens up options for attaching doors to the frame. Log page coming..
Discussions
Become a Hackaday.io Member
Create an account to leave a comment. Already have an account? Log In.