Follow these steps to get absolutely the best performance:
1. clean everything: vacuum out all dust and debris. Clean roller surfaces and the grooves they run in - any debris or flat spots here could leave surface defects in your prints.
2. adjust rollers: adjust the tension cams on every roller which has one so that you can turn the roller between your fingers with just a little effort. Too loose (freely turning) and there could be play. Too tight (can't easily turn at all) and the stepper motors will struggle. Check all axes move smoothly with no binding (especially the Z axis on machines with only one leadscrew) or play. It may be necessary to remove belts, leadscrews and other parts of the machine to be 100% sure everything is perfect.
3. 'tram' your printer's frame: using a machinist's square and digital calipers, ensure every part of your printer is straight, square and/or parallel to every other part (except the bed, which we'll come to later). If not, loosen bolts and nudge into position before re-tightening. Check leadscrews for straightness (watch to see if they wobble when rotating) and carefully bend straight if not. For machines with a single Z axis leadscrew it is especially important to check the uprights are straight and parallel otherwise binding will occur. You don't need the two-leadscrew upgrade kit! For those with two Z-axis leadscrews, ensure the two screws are in step by manually turning one until the gantry is exactly square to the uprights. Finally, check everything is tight - every last screw and nut - don't rely on the guys on the assembly line to have done this for you.
4. calibrate extruder: set the machine so that you can run a long piece of filament through the extruder without pushing it through the hotend (which would be slow and wasteful). E.g. remove the Bowden tube, or take the extruder assembly off the machine. Accurately mark out a known length of filament (e.g. 100mm) and use the machine's controls to extrude up to the mark. Read out how far the 'E' axis has apparently moved (e.g. 108mm). Adjust the transmission ratio accordingly (e.g. 100/108 = 0.926) and repeat. Keep tweaking until you get as close as you can to the expected distance. If you're struggling to get this to work, check that the extruder is not skipping/slipping, e.g. due to worn rollers.
5. calibrate X and Y axes: (optional) If belts have stretched it's possible that X and Y need calibrating. Check/adjust belt tension. Move the head a large, known distance - as far as you can measure - and use digital calipers to measure carefully the exact actual distance travelled. Again, adjust transmission ratios until the actual distance matches. It's unlikely that you'll need to calibrate Z (unless it's belt-driven) because leadscrews don't really stretch. :)
6. check Z-homing is repeatable: Perform Z-axis homing. Place two pieces of tape on the Z-axis drive, one on the stepper body and one right next to it on the screw. Use a pen to mark both pieces of tape, either side of the gap, so that the marks line up perfectly. Repeat Z-axis homing several times to ensure the two pen marks line up perfectly every time. If they don't consider replacing the Z-axis microswitch or adding debounce circuitry to it.
7. clean the bed: scrape off any debris and then wipe a cloth with some isopropyl alcohol (IPA) on over the bed to clean off grease and other contaminants. Do not touch the bed with your fingers. Do this at least once every 2-3 prints or if not used for a while. You don't need glue, hairspray, etc.
8. level the bed: use a G-code script like this one to move the nozzle to a number of places on the bed (having pre-heated both for 5-10 mins first). Using a feeler gauge (4-thou, 0.1mm*) between the nozzle and bed, adjust the levelling screws until there is a little resistance felt when moving the feeler gauge. Do this similarly at each location. You don't need a bed-levelling sensor**! If the centre...
Read more »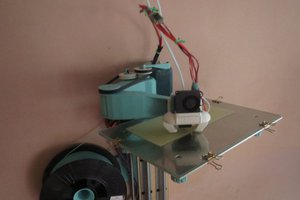
 dekutree64
 Dylan Radcliffe
 Adam M
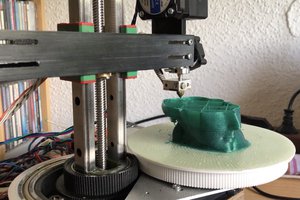
 heinz
heinz