 simon
simon
Project Purpose
To reduce food waste and promote various cooking activities by recognizing the contents of the user's refrigerator, recommending possible cooking menus and providing related cooking videos.

_lDM4j7lEEm.gif?auto=compress%2Cformat&gifq=35&w=740&h=555&fit=max)

Main Features and Components
Raspberry Pi and the Pi Camera
Capture the contents of the refrigerator and use object recognition to identify ingredients.
Object recognition system
Use YOLOv5 to accurately recognize ingredients from images.
OpenAI API
Recommend possible dishes based on the recognized ingredients.
YouTube crawling module
Automatically search and fetch YouTube links to cooking videos related to the suggested menu.
Telegram notification system
Sends menu recommendations and YouTube video links to users in Telegram messages.
Expected Benefits
- Reduces food waste by efficiently utilizing the remaining ingredients in the refrigerator.
- Helps users easily try different dishes, adding interest and enjoyment to cooking.
Respberry PI & Pico Setting
Raspberry PI 4

We utilized Raspberry Pi to power our AI model and create data.
From the Raspberry homepage, you can save the Raspbian OS to an SD card, boot it, and install the necessary modules.
You can install the camera module by following the link above.
Hardware connection
- Enable the serial interface: Run sudo raspi-config and select 'Interfacing Options' > 'Serial' to enable hardware serial.
- Write Python code or other code that can send and receive data through the serial port.
Raspberry PI Pico (W5100S-EVB-Pico)

Pico communicates and receives the data inferred by Raspberry Pi 4, and utilizes Ethernet communication to make menu recommendations using chatGPT.
Connect Ethernet, power and set up the UART to communicate with the Raspberry 4.
Hardware connections
Connect GPIO pin 14 (TX) of the Raspberry Pi 4 to the UART RX pin of the Pico.Connect GPIO pin 15 (RX) of the Raspberry Pi 4 to the UART TX pin of the Pico.Connect the GND pins of both boards to each other.
Connect GPIO pin 14 (TX) of the Raspberry Pi 4 to the UART RX pin of the Pico.Connect GPIO pin 15 (RX) of the Raspberry Pi 4 to the UART TX pin of the Pico.Connect the GND pins of both boards to each other.
YOLOv5(Object Detection)

We detect the object refrigerator. Obviously, fast reference frames in object objectification are good for real-time detection, but we'll simply be objectifying and uniquing class values to create data.
1. To create the object detection model, I first created a dataset. Through crawling, I built a dataset of images related to food ingredients or containers. I spent about 5 hours drawing bounding boxes for each object element in the photos.📷

2. We trained with the YOLOv5n.pt nanomodel. The reason is lightweight. Then, we switched to Onnx TFLite. However, the capacity itself is not much different and the reference speed is not different, so we used the YOLOv5n model.YOLOv5 Train.ipynb
# pt to onnx to -> TFlite file !pip3 install tensorflow==2.3.1
!pip install -r requirements.txt
!python3 export.py --weights result.pt --img 418 --batch 1 --include onnx tflite
3. Object recognition using Raspberry Pi 4. Create a reference using the appropriate code. I used RaspCam, so RaspCam, which I set to '0', which is data, enters the source part and makes an inference. Then, I post-process only the class value and bounding box coordinates of the objects detected through save-txt in the parameter and send the data to Pico.


We've coded the appropriate preprocessing in the main.py file, and we can use it to send data to pico.We've also coded the UART communication.(The author is Korean, so there is code to preprocess the label values in Korean.)
from machine import UART
import time
import sys

uart = UART(0, 115200)

while True: if uart.any(): data = uart.readline() print("Received:", data.decode().strip()) sys.stdout.write(data.decode())...
Read more »
 kutluhan_aktar
 Podge
Podge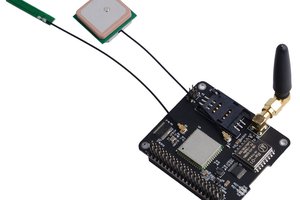
 yoyojacky