November 30, 2023
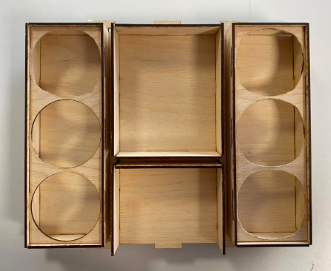
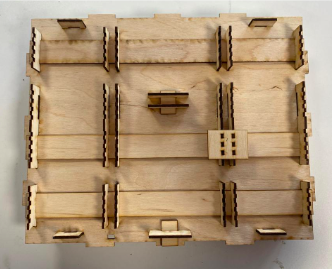
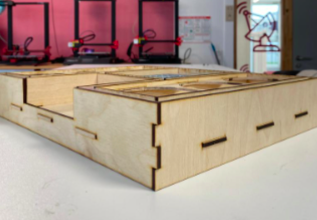
The main objective this week is to develop the structure based on the final design (Figure 8, previous log). It will be printed from 3mm MDF boards and will have castellated edges to assemble the parts. Tests were made to find the accurate thickness of the teeth to get the perfect fit between the walls. The finished base of the machine is seen in Figure 9.
a)
b)
c)
Figure 9. Wooden base. a) top view, b) bottom view, and c) lateral view
The Arduino and screen programming was started. The screen will present a mexican-themed menu which the user will be able to explore by pressing on the arrows on the bottom corners of the screen. Each page will contain a drink title as well as the ingredients. The user can choose the desired cocktail by pressing on the "SELECT" button located in the bottom center of the screen. This selection will serve as the input signal to activate the Arduino, which has a program that, according to the selected cocktail, activates relays to close the circuit of the corresponding pumps for an interval of time to pour the exact amount of each ingredient in the glass.
In order to provide the user with a friendly experience, each drink page will have a unique design. An example of a menu page can be seen in Figure 10. The complete digital menu can be seen in Appendix 3.
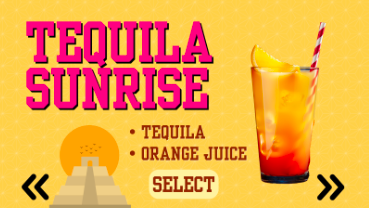
Figure 10. Example of a page from the digital menu
Discussions
Become a Hackaday.io Member
Create an account to leave a comment. Already have an account? Log In.