 mircemk
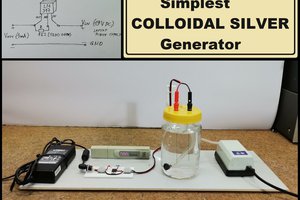
A colloidal silver generator is a device used to produce suspension of tiny silver particles in a liquid, typically water. Colloidal silver is believed by some to have antibacterial, antiviral, and antifungal properties. The basic principle behind a colloidal silver generator is electrolysis. The generator consists of two electrodes, usually made of pure silver, immersed in distilled water. When an electric current is passed through the electrodes, silver ions are released into the water, creating a colloidal suspension of silver particles. In one of my previous videos you can see the basic features it should have such a device, as well as the simplest way to make it yourself.
This time I will describe how to make an advanced colloidal silver device with Arduino, which has all the features of such commercial devices. The device has a PWM based variable current limiter, automatic polarity reversal of the electrodes, as well as a timer that turns off the device when the desired ppm concentration of the solution is reached. Unlike the previous device mentioned earlier in the text, to make this device you need some knowledge of electronics and microcontrollers.
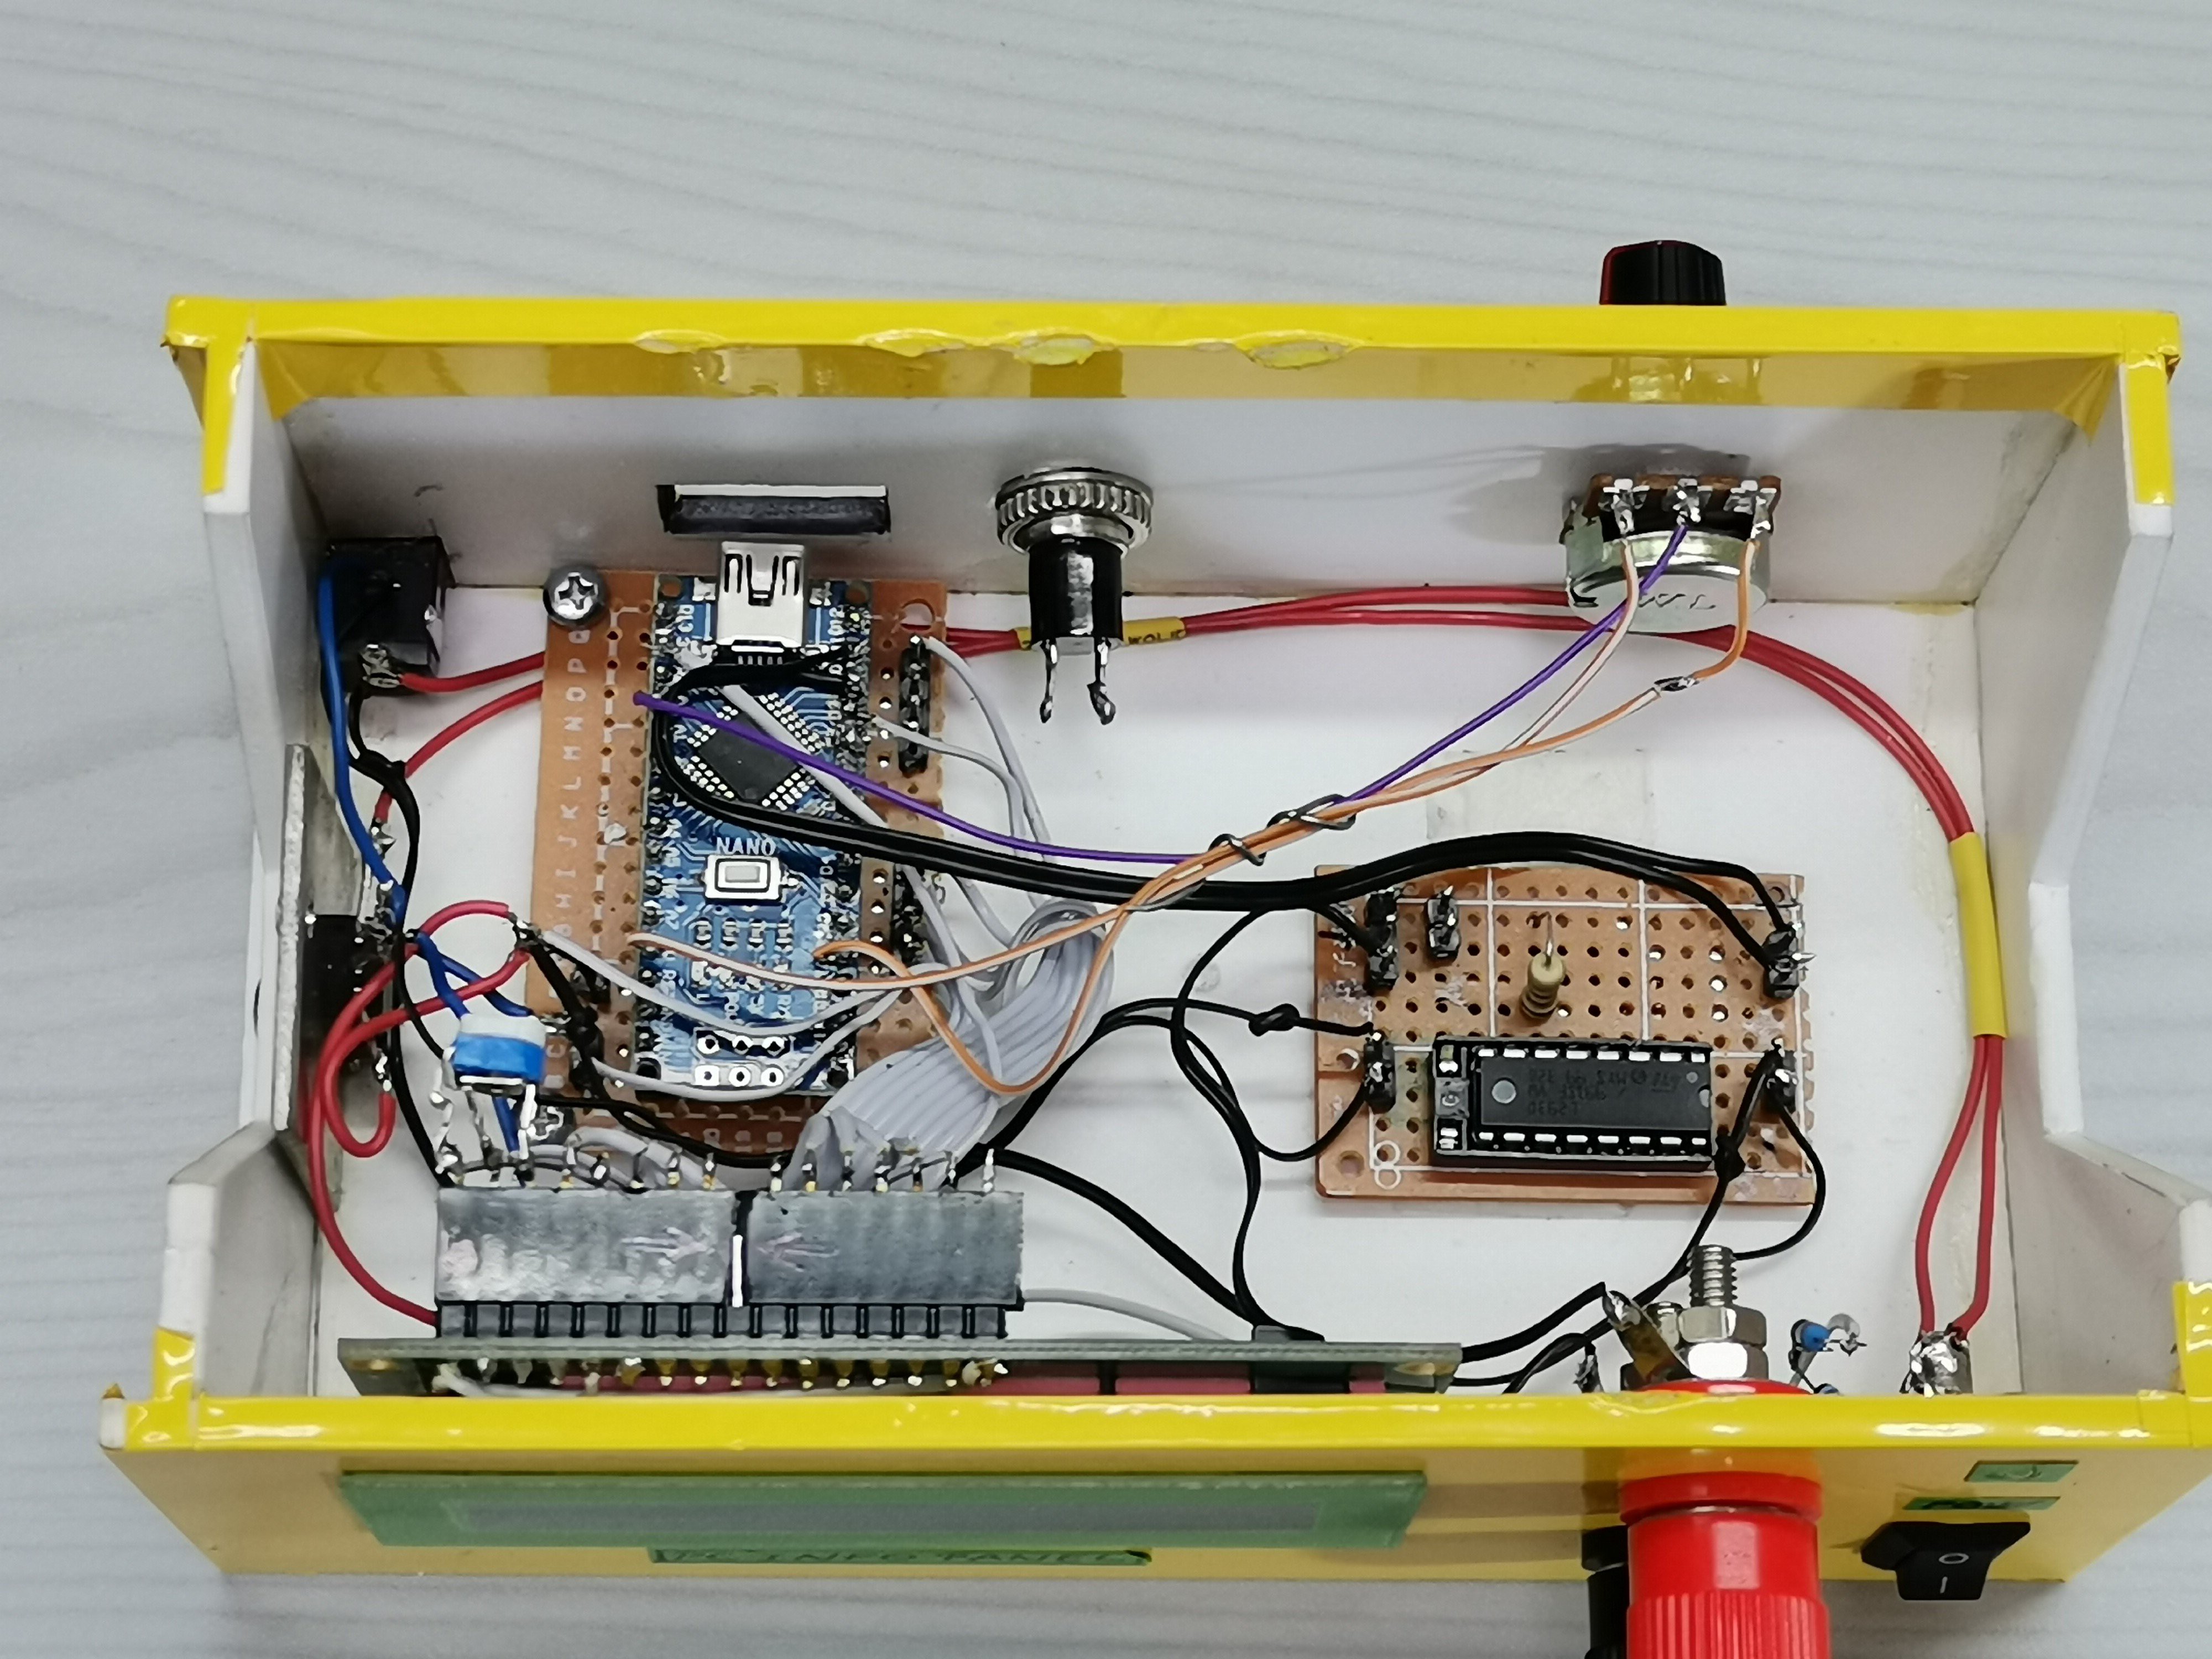
The device is relatively easy to build, and consists of several components:
- Arduino Nano microcontroller
- 16x2 LCD Display
- l293d motor driver IC
- 7805 Voltage stabilizer
- A Potentiometer
- 19V power supply from old Laptop computer
- Aquarium air pump
- And two silver electrodes
If you want to make a PCB for this project, or for any other electronic project, PCBway is a great choice for you. PCBway is one of the most experienced PCB manufacturing company in China in field of PCB prototype and fabrication. They provide completed PCB assembly service with worldwide free shipping , and ISO9001 quality control system. Also, on their site there is an online gerber viewer where you can upload your gerber and drill files to render your board.

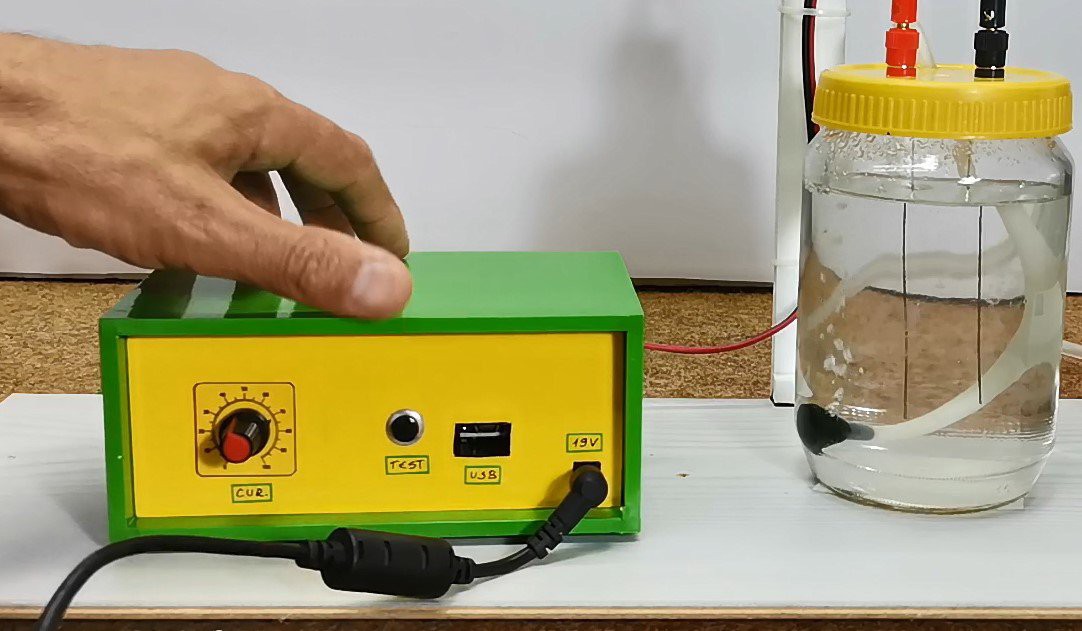
Now let's see how the device works in real conditions:
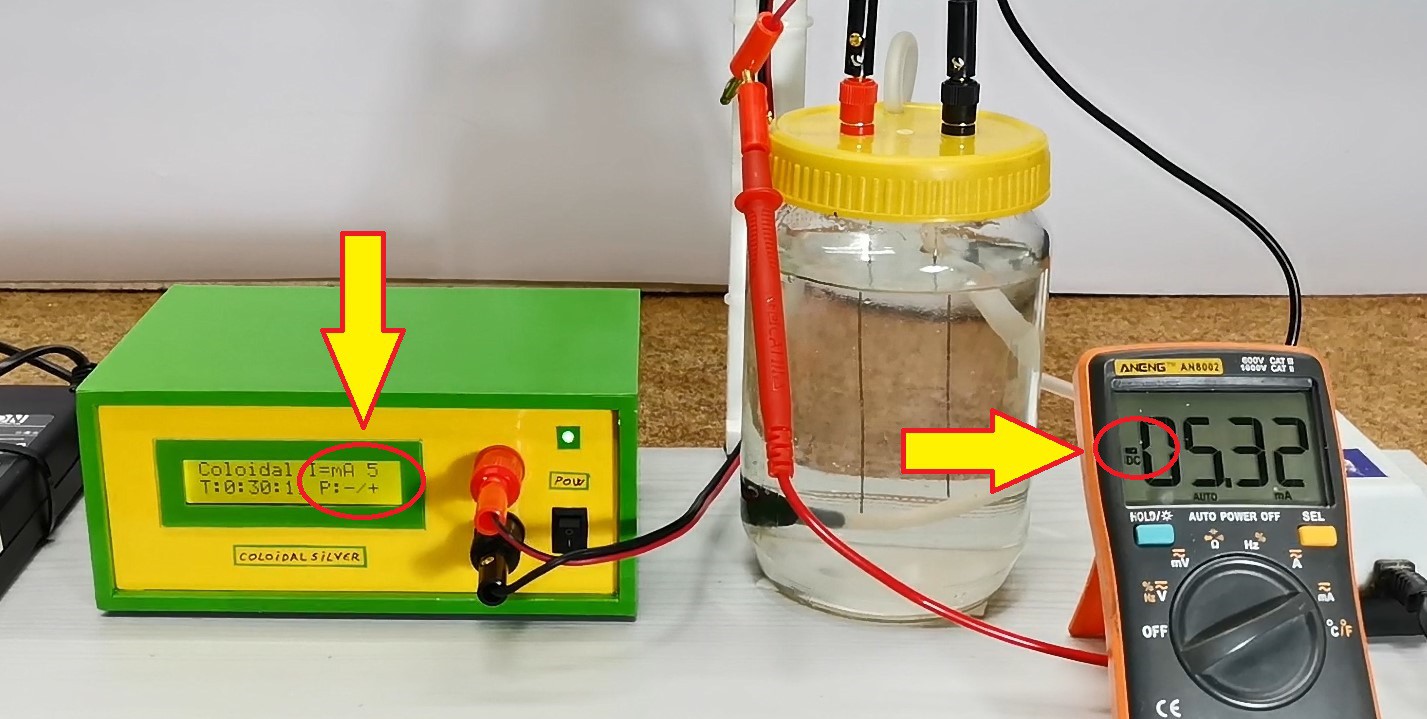
First, we need to fill the glass container with distilled water, which has a ppm concentration close to zero. Then we connect the electrodes and start the device. Some basic information appears on the LCD display
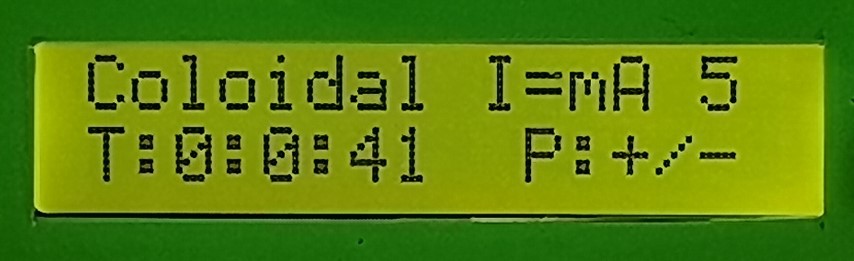
- The current flowing in the circuit in milliamps
- The polarity of the electrodes
- And the elapsed time since the device was turned on
The current can be changed continuously in the range from 0 to 10mA, using the potentiometer located on the back of the device.
At a higher current, the time to reach a certain ppm concentration is shorter, but it is still recommended to use a lower current.
Тhe interval for changing the polarity of the electrodes can be set in the code, and in this particular case it is 30 minutes.
The duration of the operation of the device is(also) defined in the (code) line
if (hours>=3){
and for this amount of water, at a current of 5 milliamperes, three hours are needed to obtain the desired concentration of the solution.
Now we can check the current in the circuit using an Ammeter. As can be seen on the instrument, the value of the current in the circuit is the same as the one shown on the display, which means that the connection is OK, and the electrolysis (actually the silvering of the water) has begun.
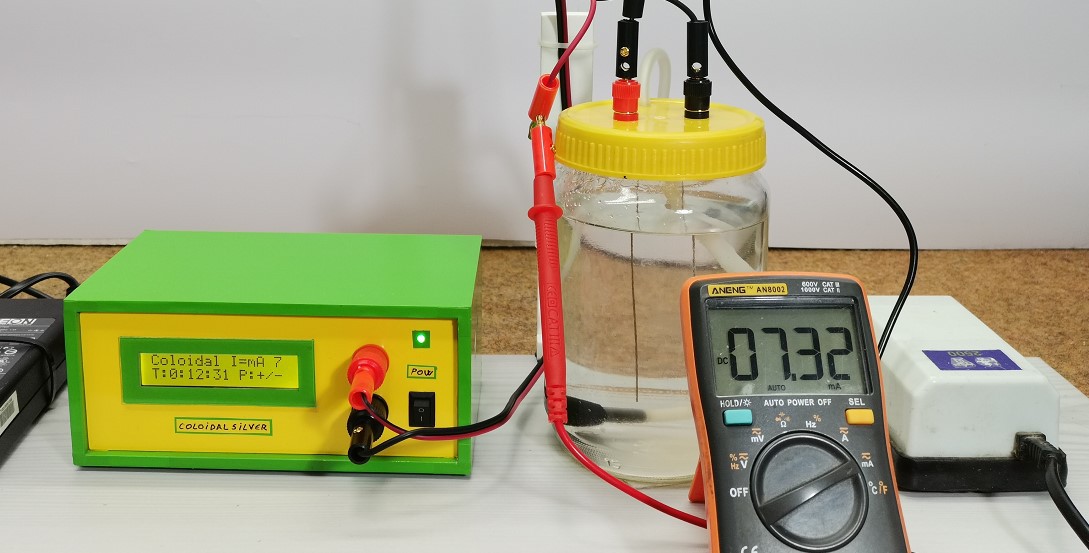
As you can see on the screen, after 30 minutes the polarity of the electrodes changes automatically, and this can also be seen on the ammeter, where the current now has a negative sign.
Next, after two hours from the start of the operation of the circuit, I will measure the ppm value with the help of this TDS meter, which is otherwise mostly used to check the quality of water in aquariums. We see that currently the value is 17.7ppm, which means that some more time should pass to get the desired value...
Read more »
 parkolay