 M. Bindhammer
1. Animatronic robot head
10 servos provide different facial expressions, associated with taste and smell. 3D printed parts were completely dispensed with. The head consists of cut plastic plates, aluminum brackets, and two aluminum discs, whereby the upper one is guided by four mini furniture rollers to absorb the shear forces that would otherwise be transmitted entirely on the shaft of the pan servo.
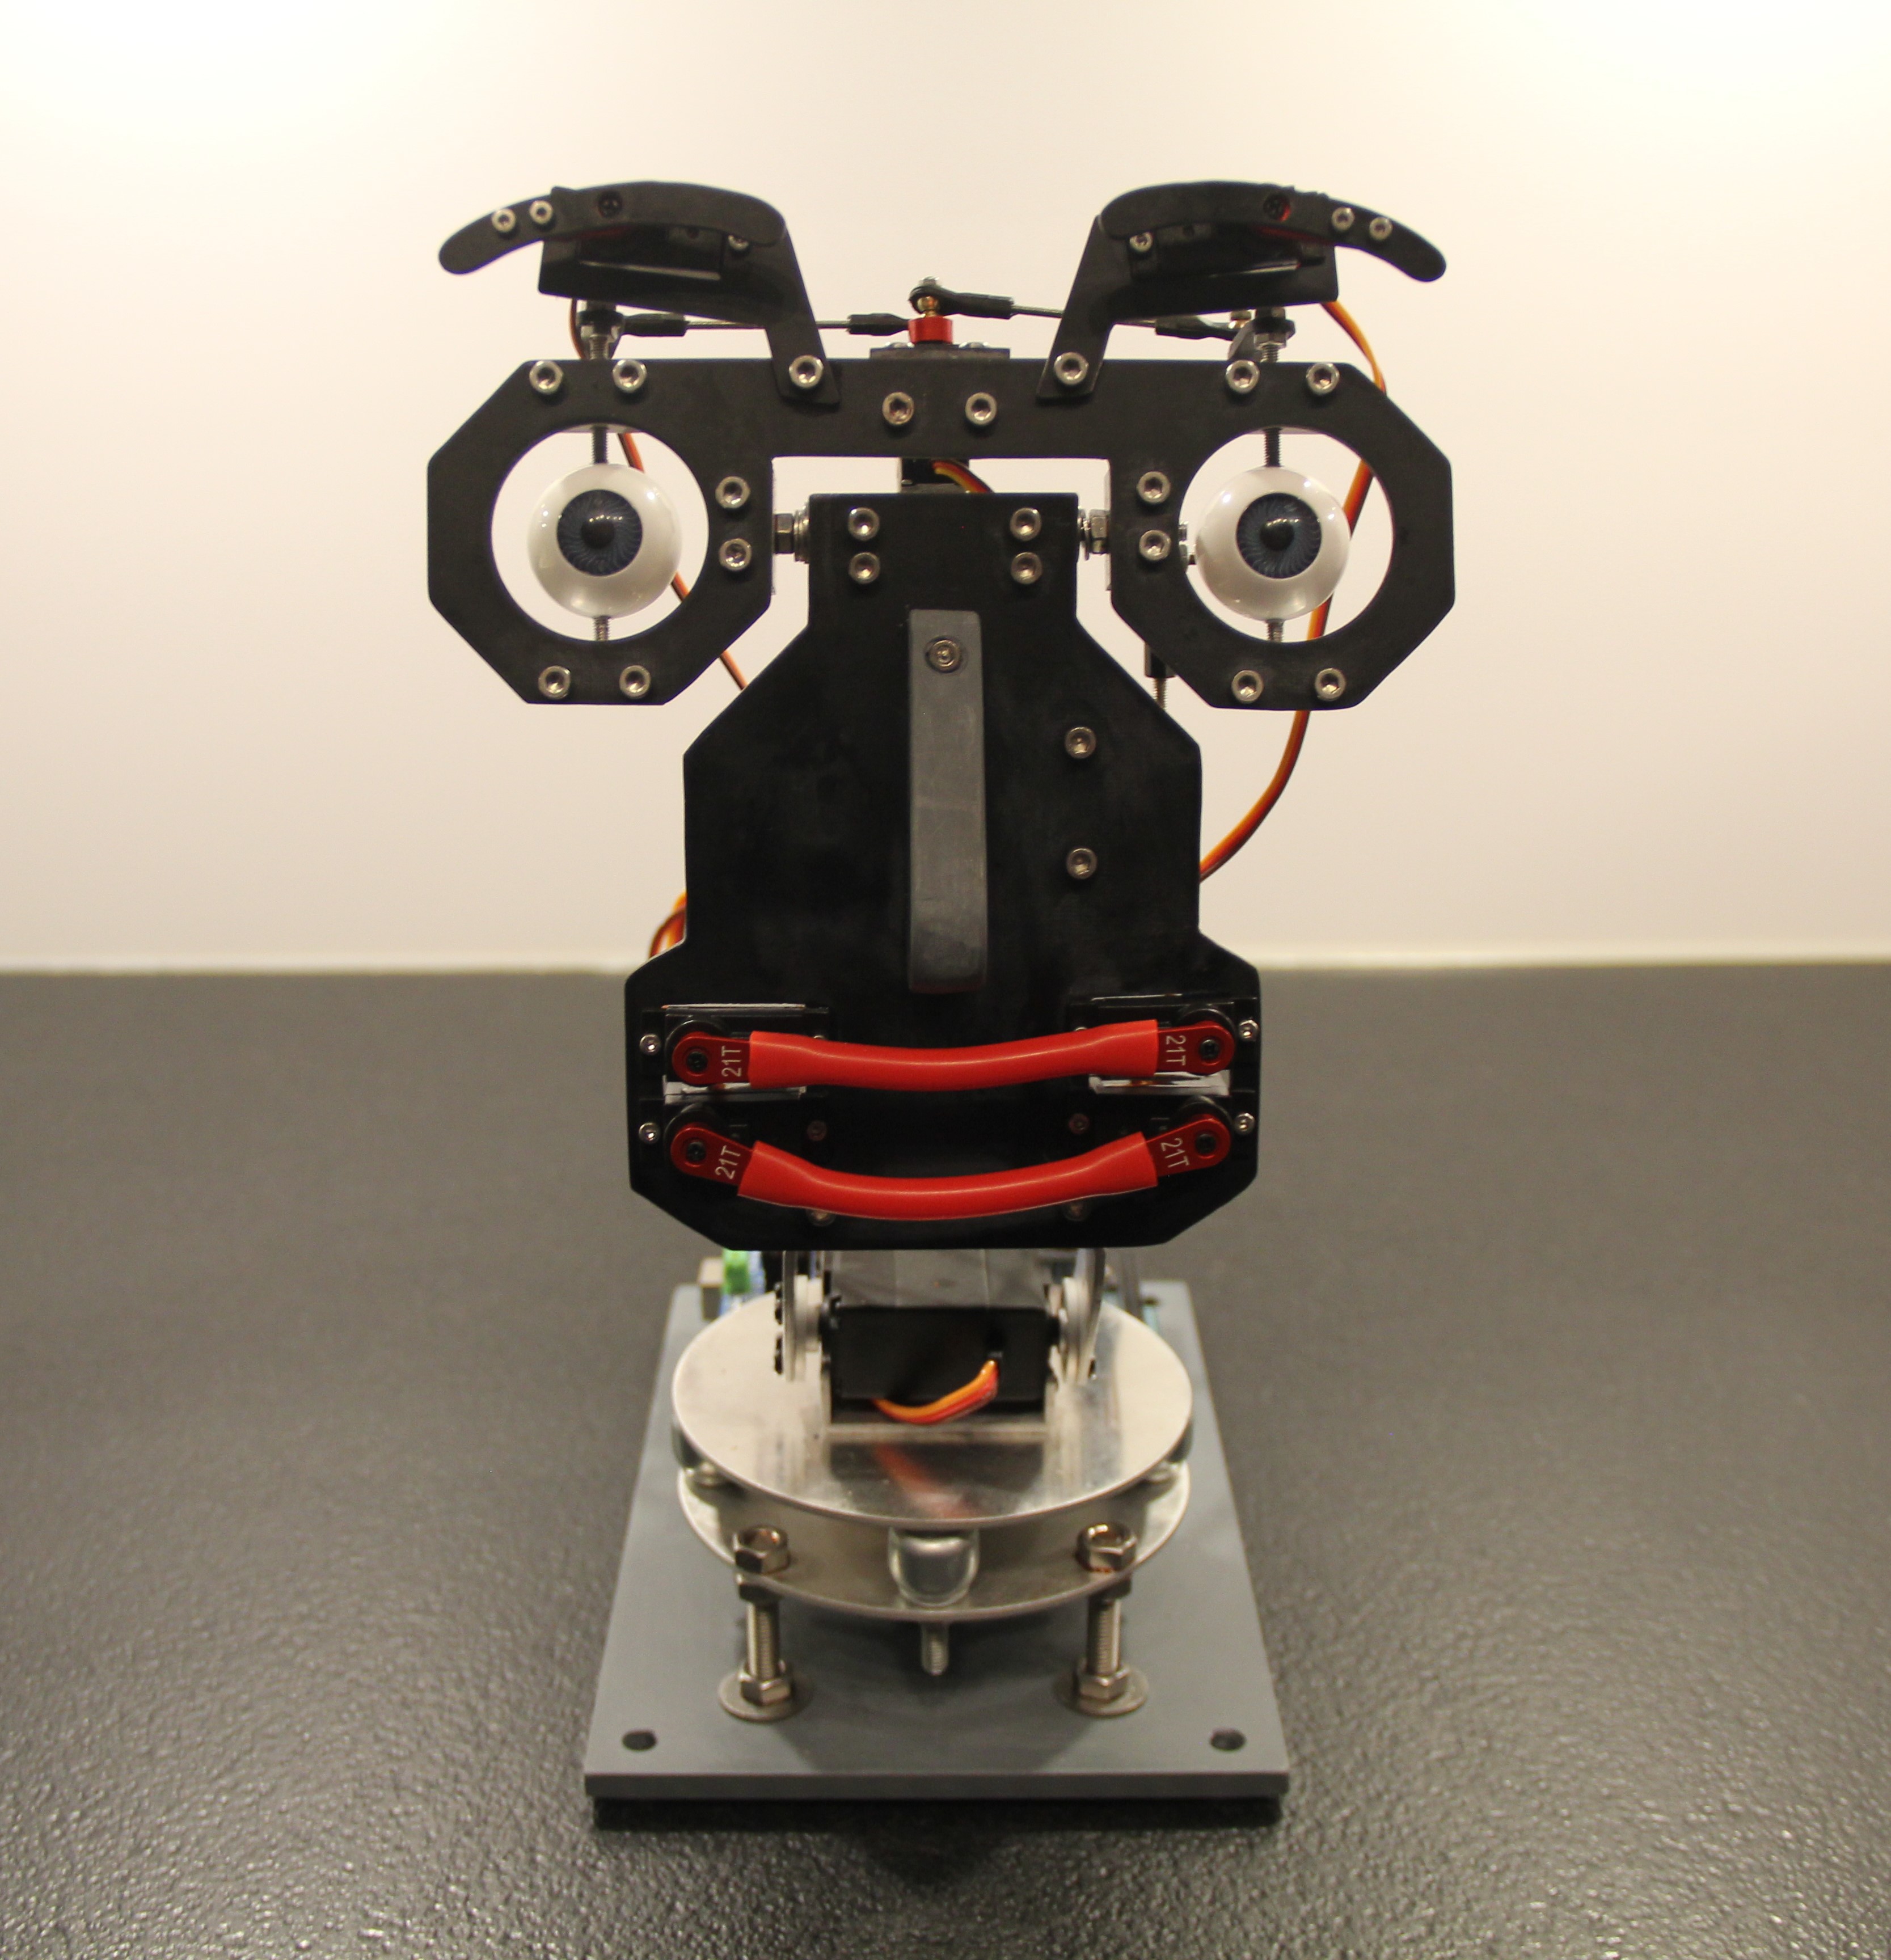
Fig. 1.1
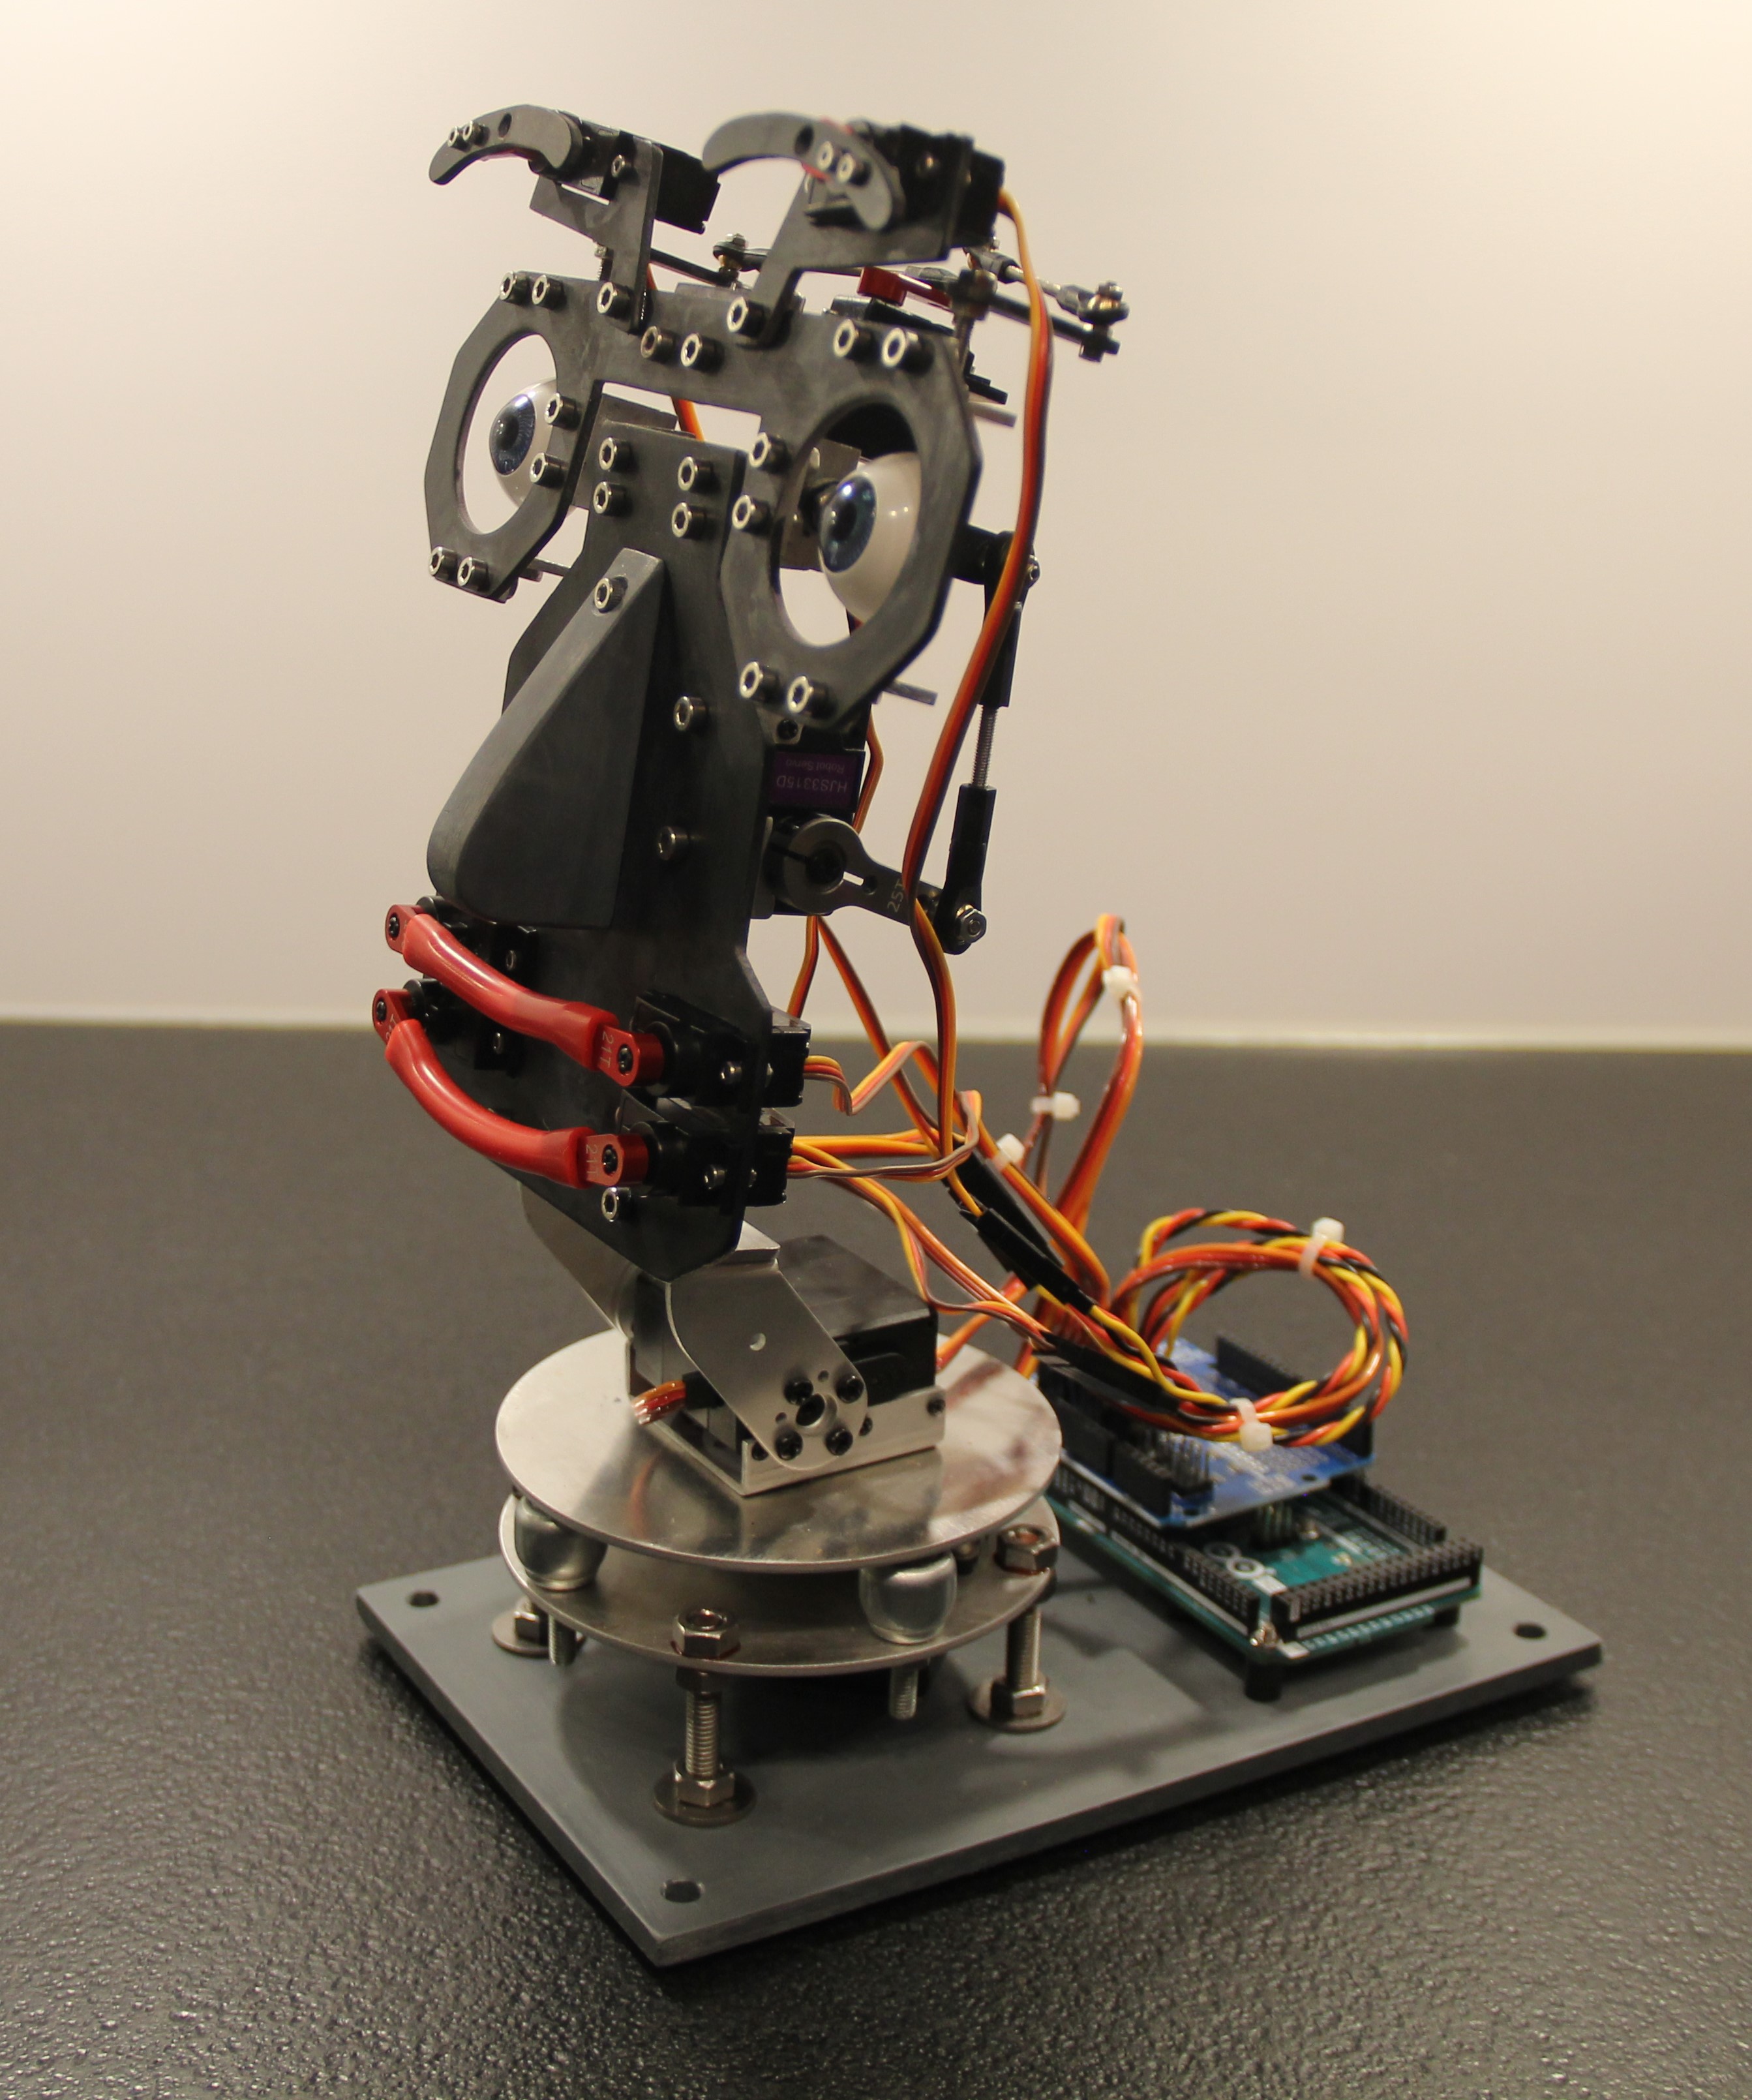
Fig. 1.2
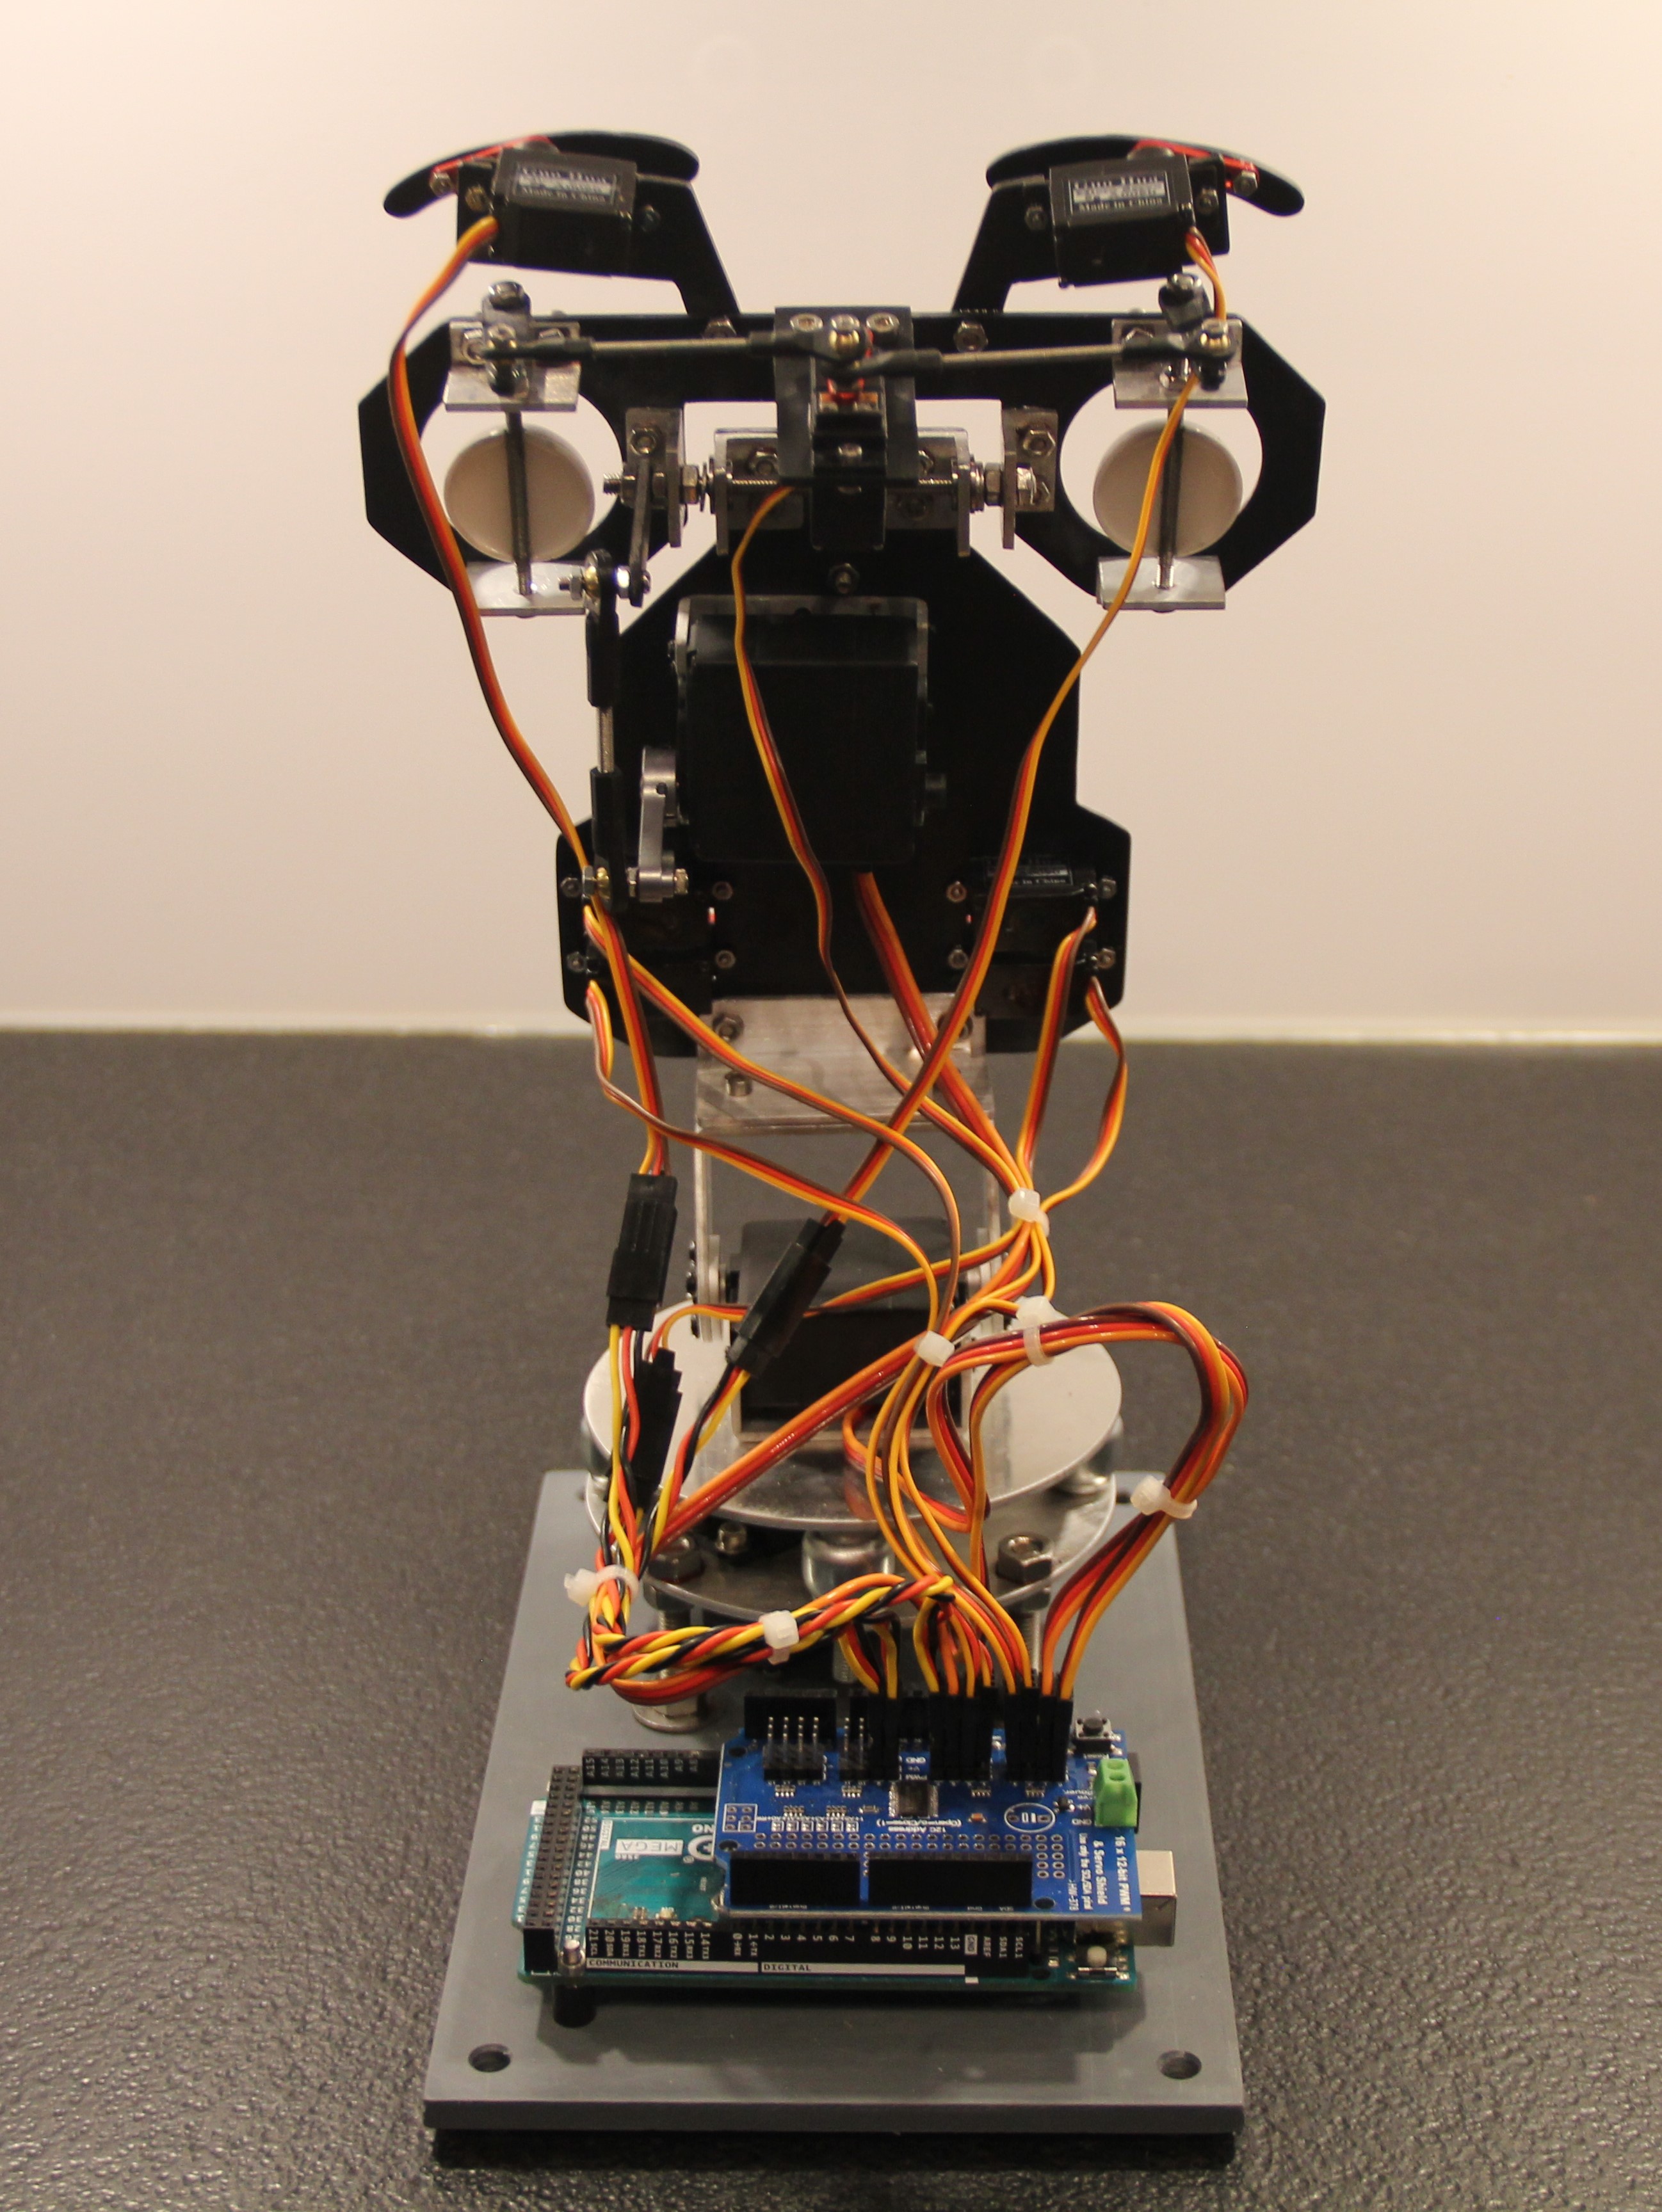
Fig. 1.3
Since I still had a brand new EMIC2 lying around, I decided to use it to realize the speech synthesis. A PAM8302 breakout board is used as the audio amplifier, which sits together with the EMIC2 on a carrier PCB board to make it easier to mount. The loudspeaker box was constructed from an ABS box, which you can get cheaply on Amazon and a VISATON K28.40 loudspeaker.
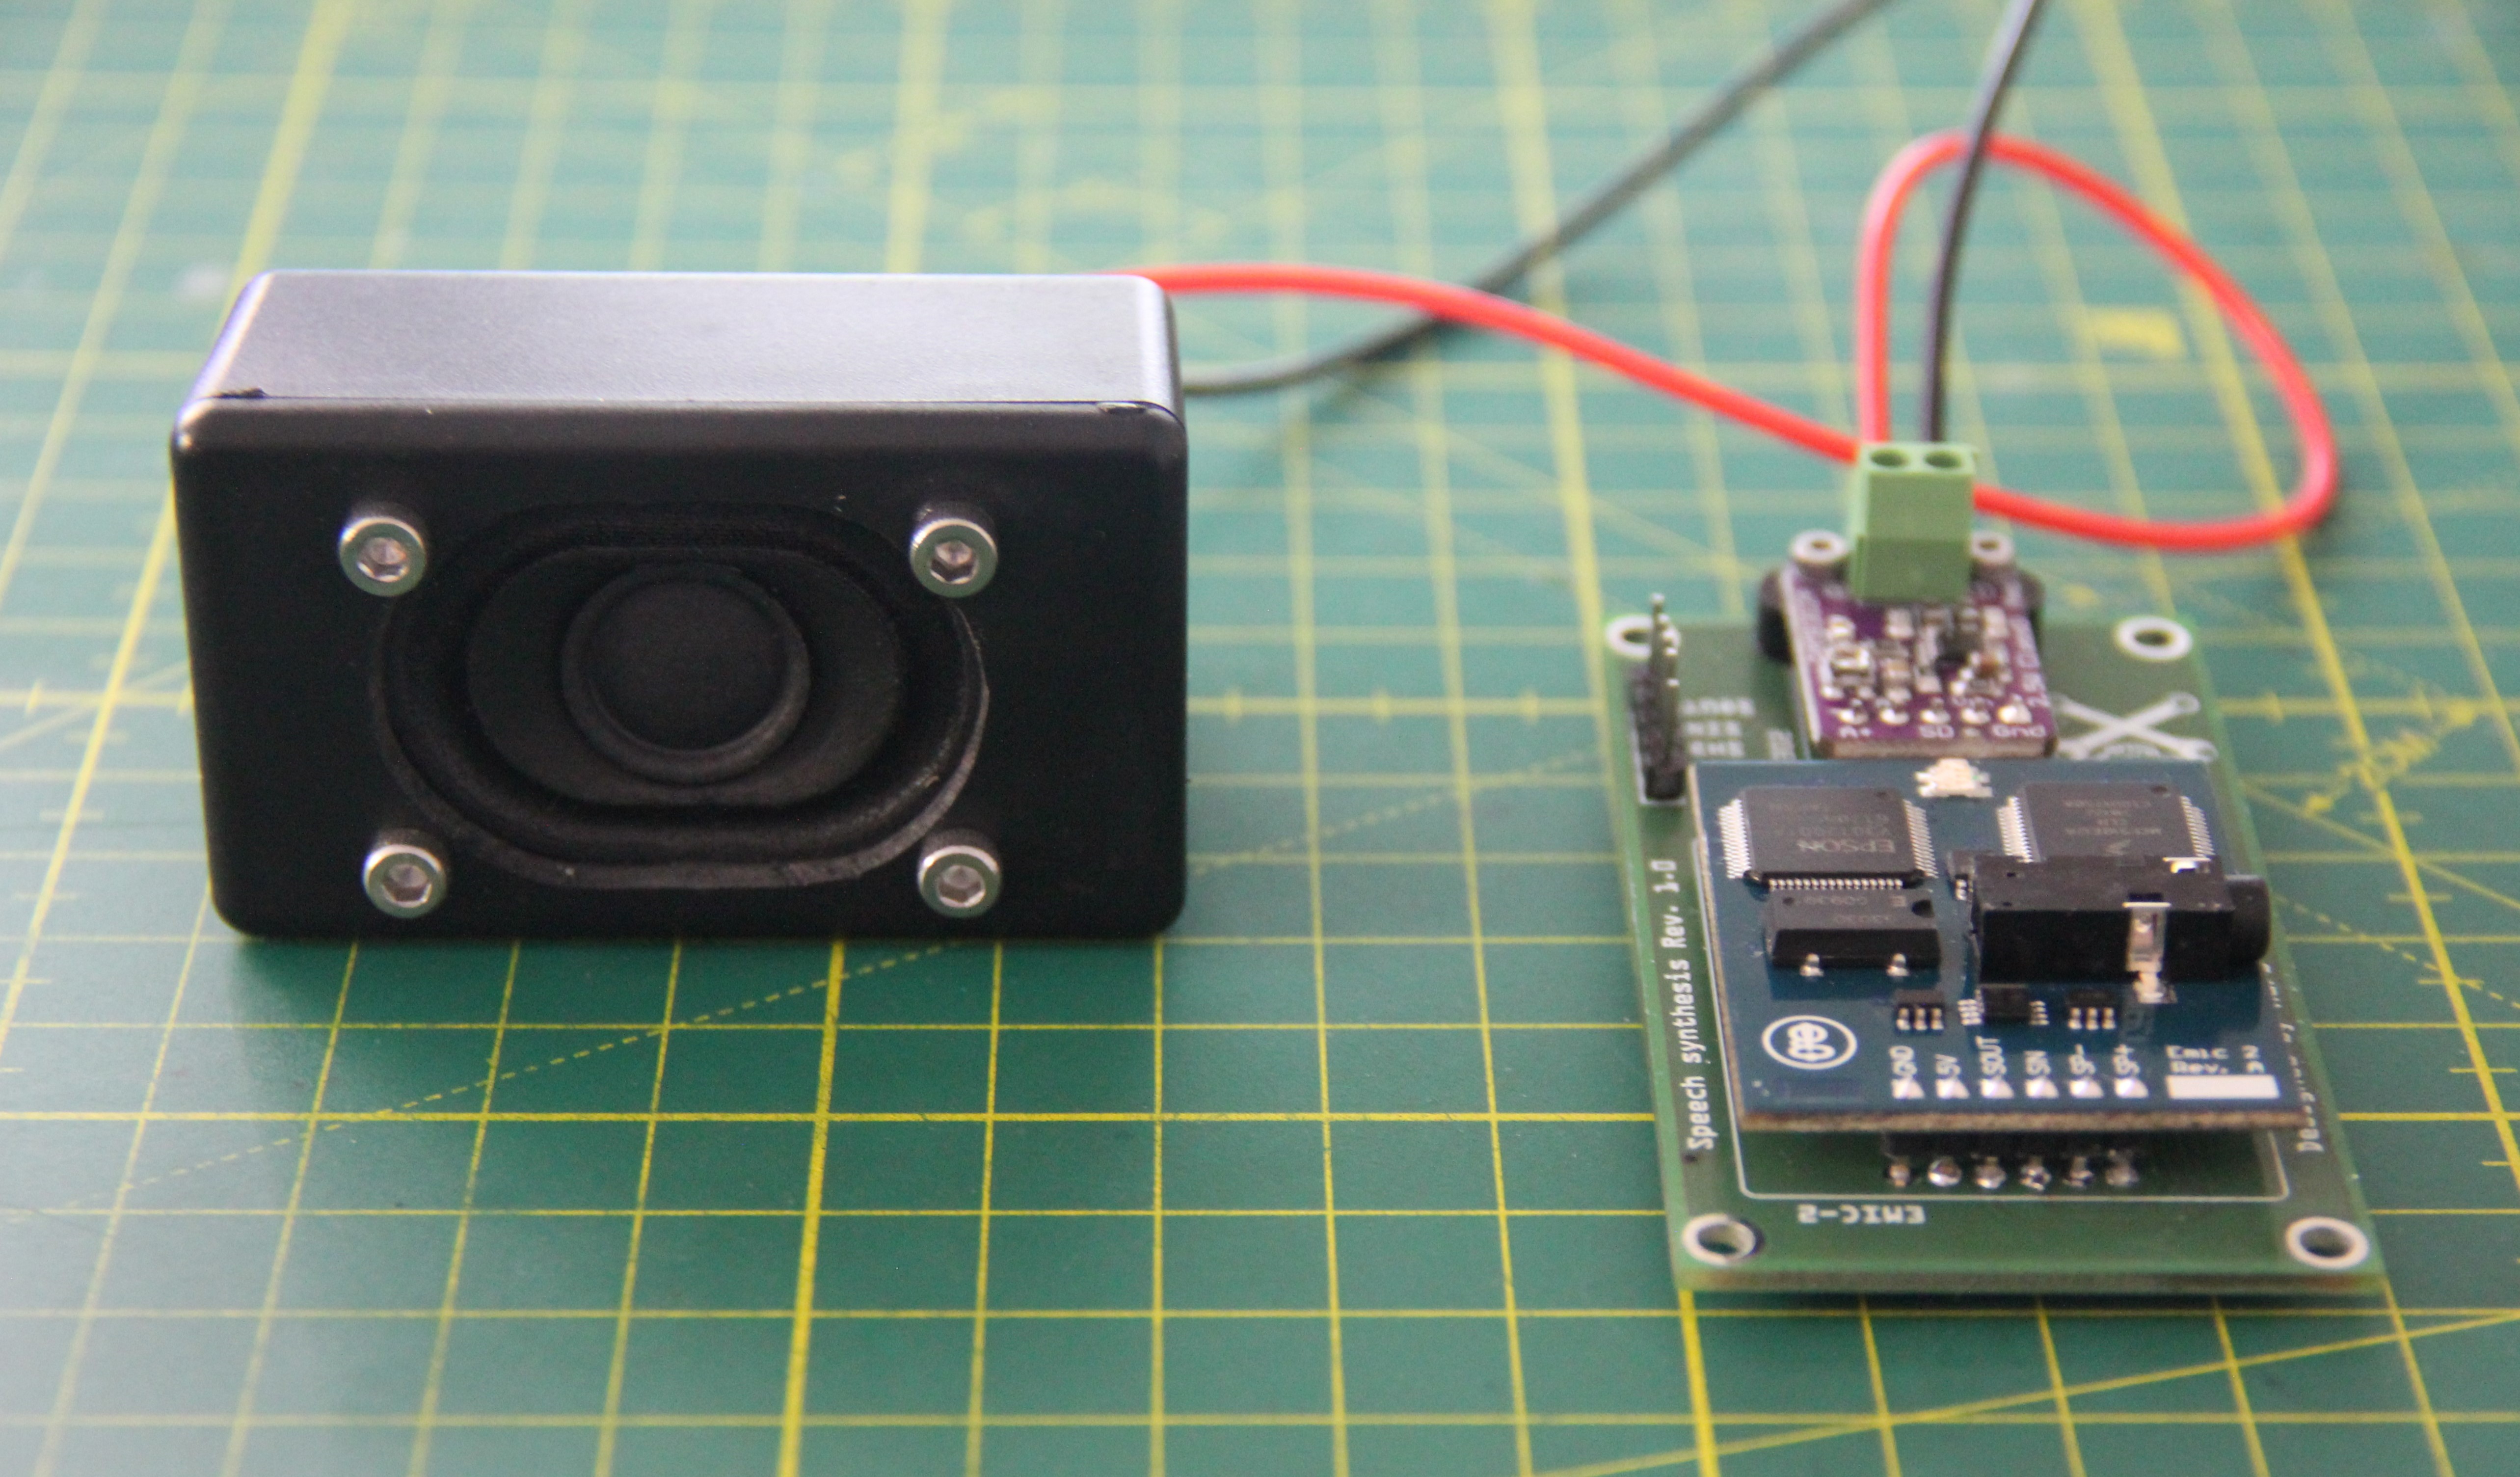
Fig. 1.4
2. Colorimetric receptors
Each colorimetric receptor is made of aluminum (AlMgSiBi) square material measuring 20 x 20 x 52 mm. A 10 mm test tube can be inserted into the upper hole. Another hole forms an optical channel through the test tube, in front of which color sensors or spectrometers can be placed. If the chemicals need to be mixed, a vibration motor can also be attached to the aluminum block.
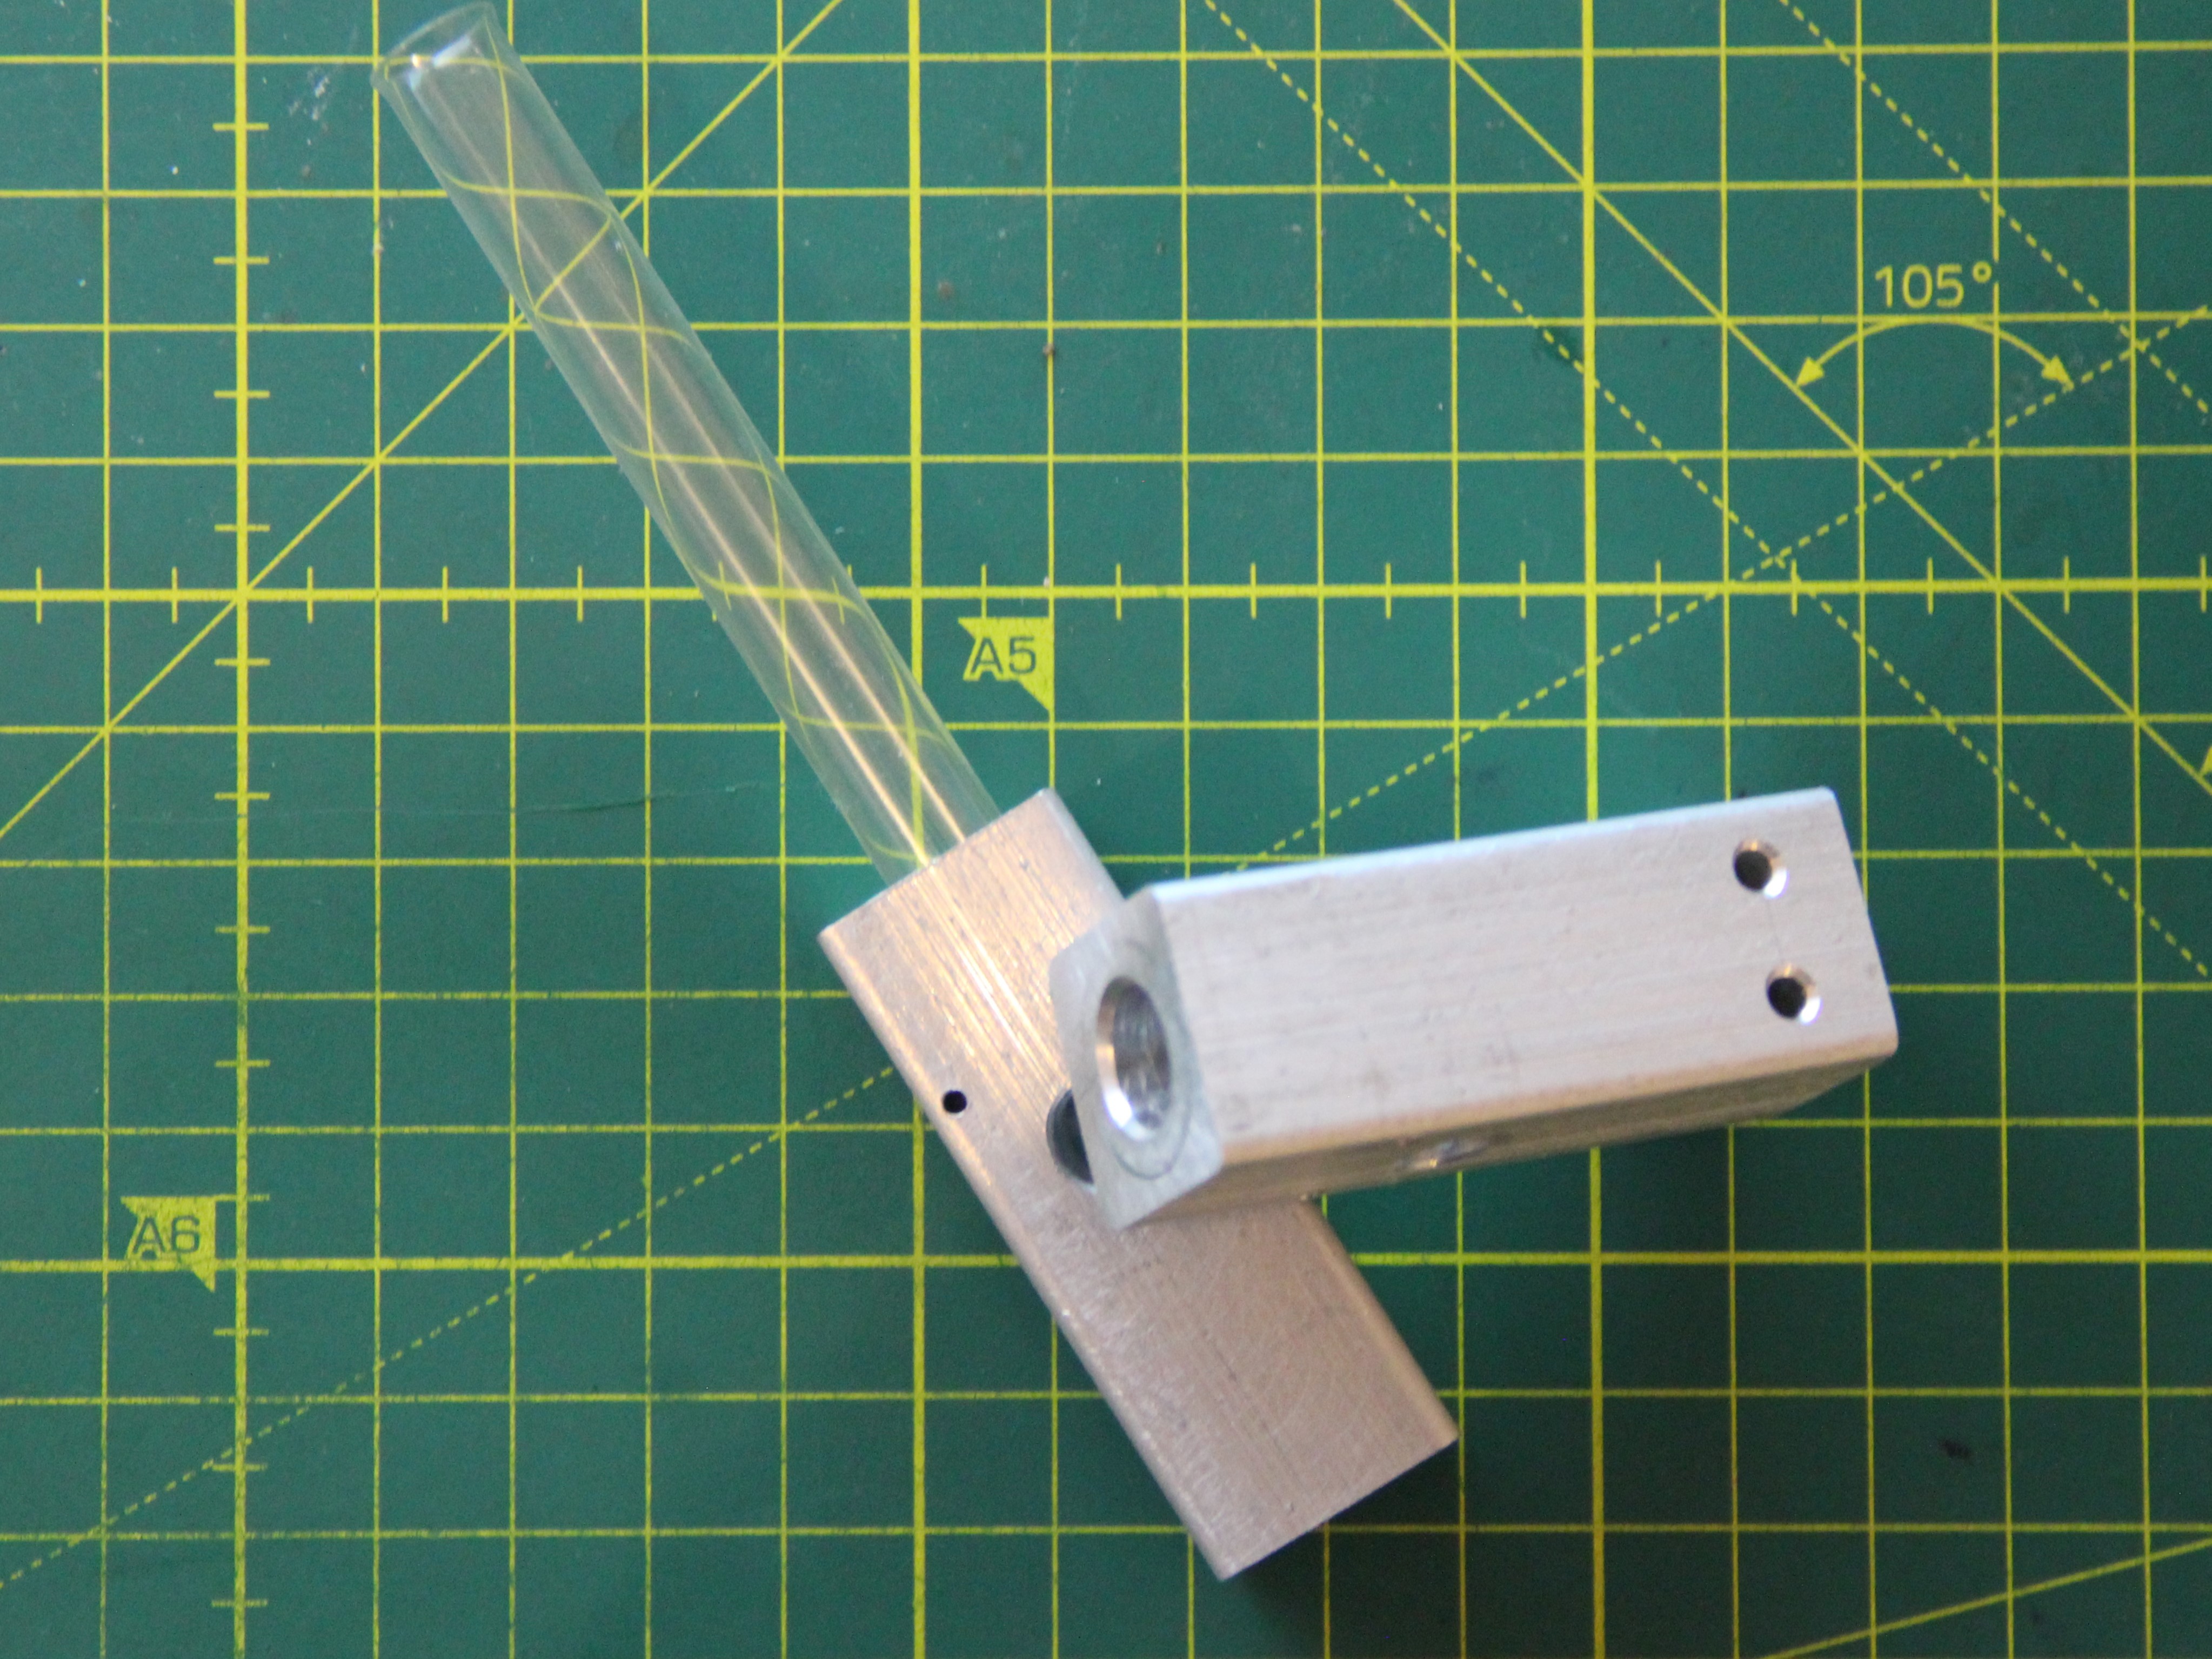
Fig. 2.1 Colorimetric receptor
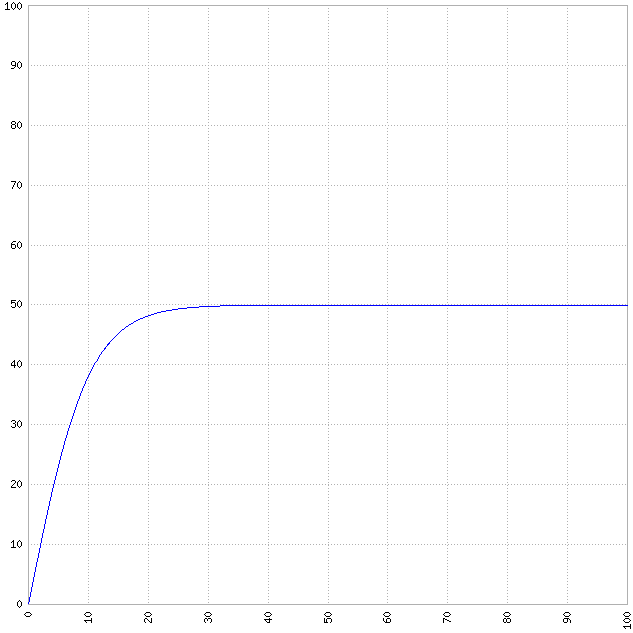
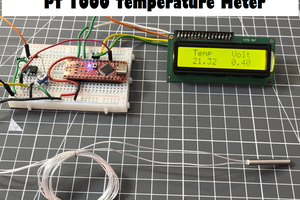
Some chemical detection reactions require heat. This is why some colorimetric receptors can be heated. A 3D Hotend heating cartridge with the dimensions ⌀6 mm x 20 mm serves as the heating element. The heating cartridge can reach a temperature of up to 500°C. An encapsulated Pt1000 serves as the temperature sensor.
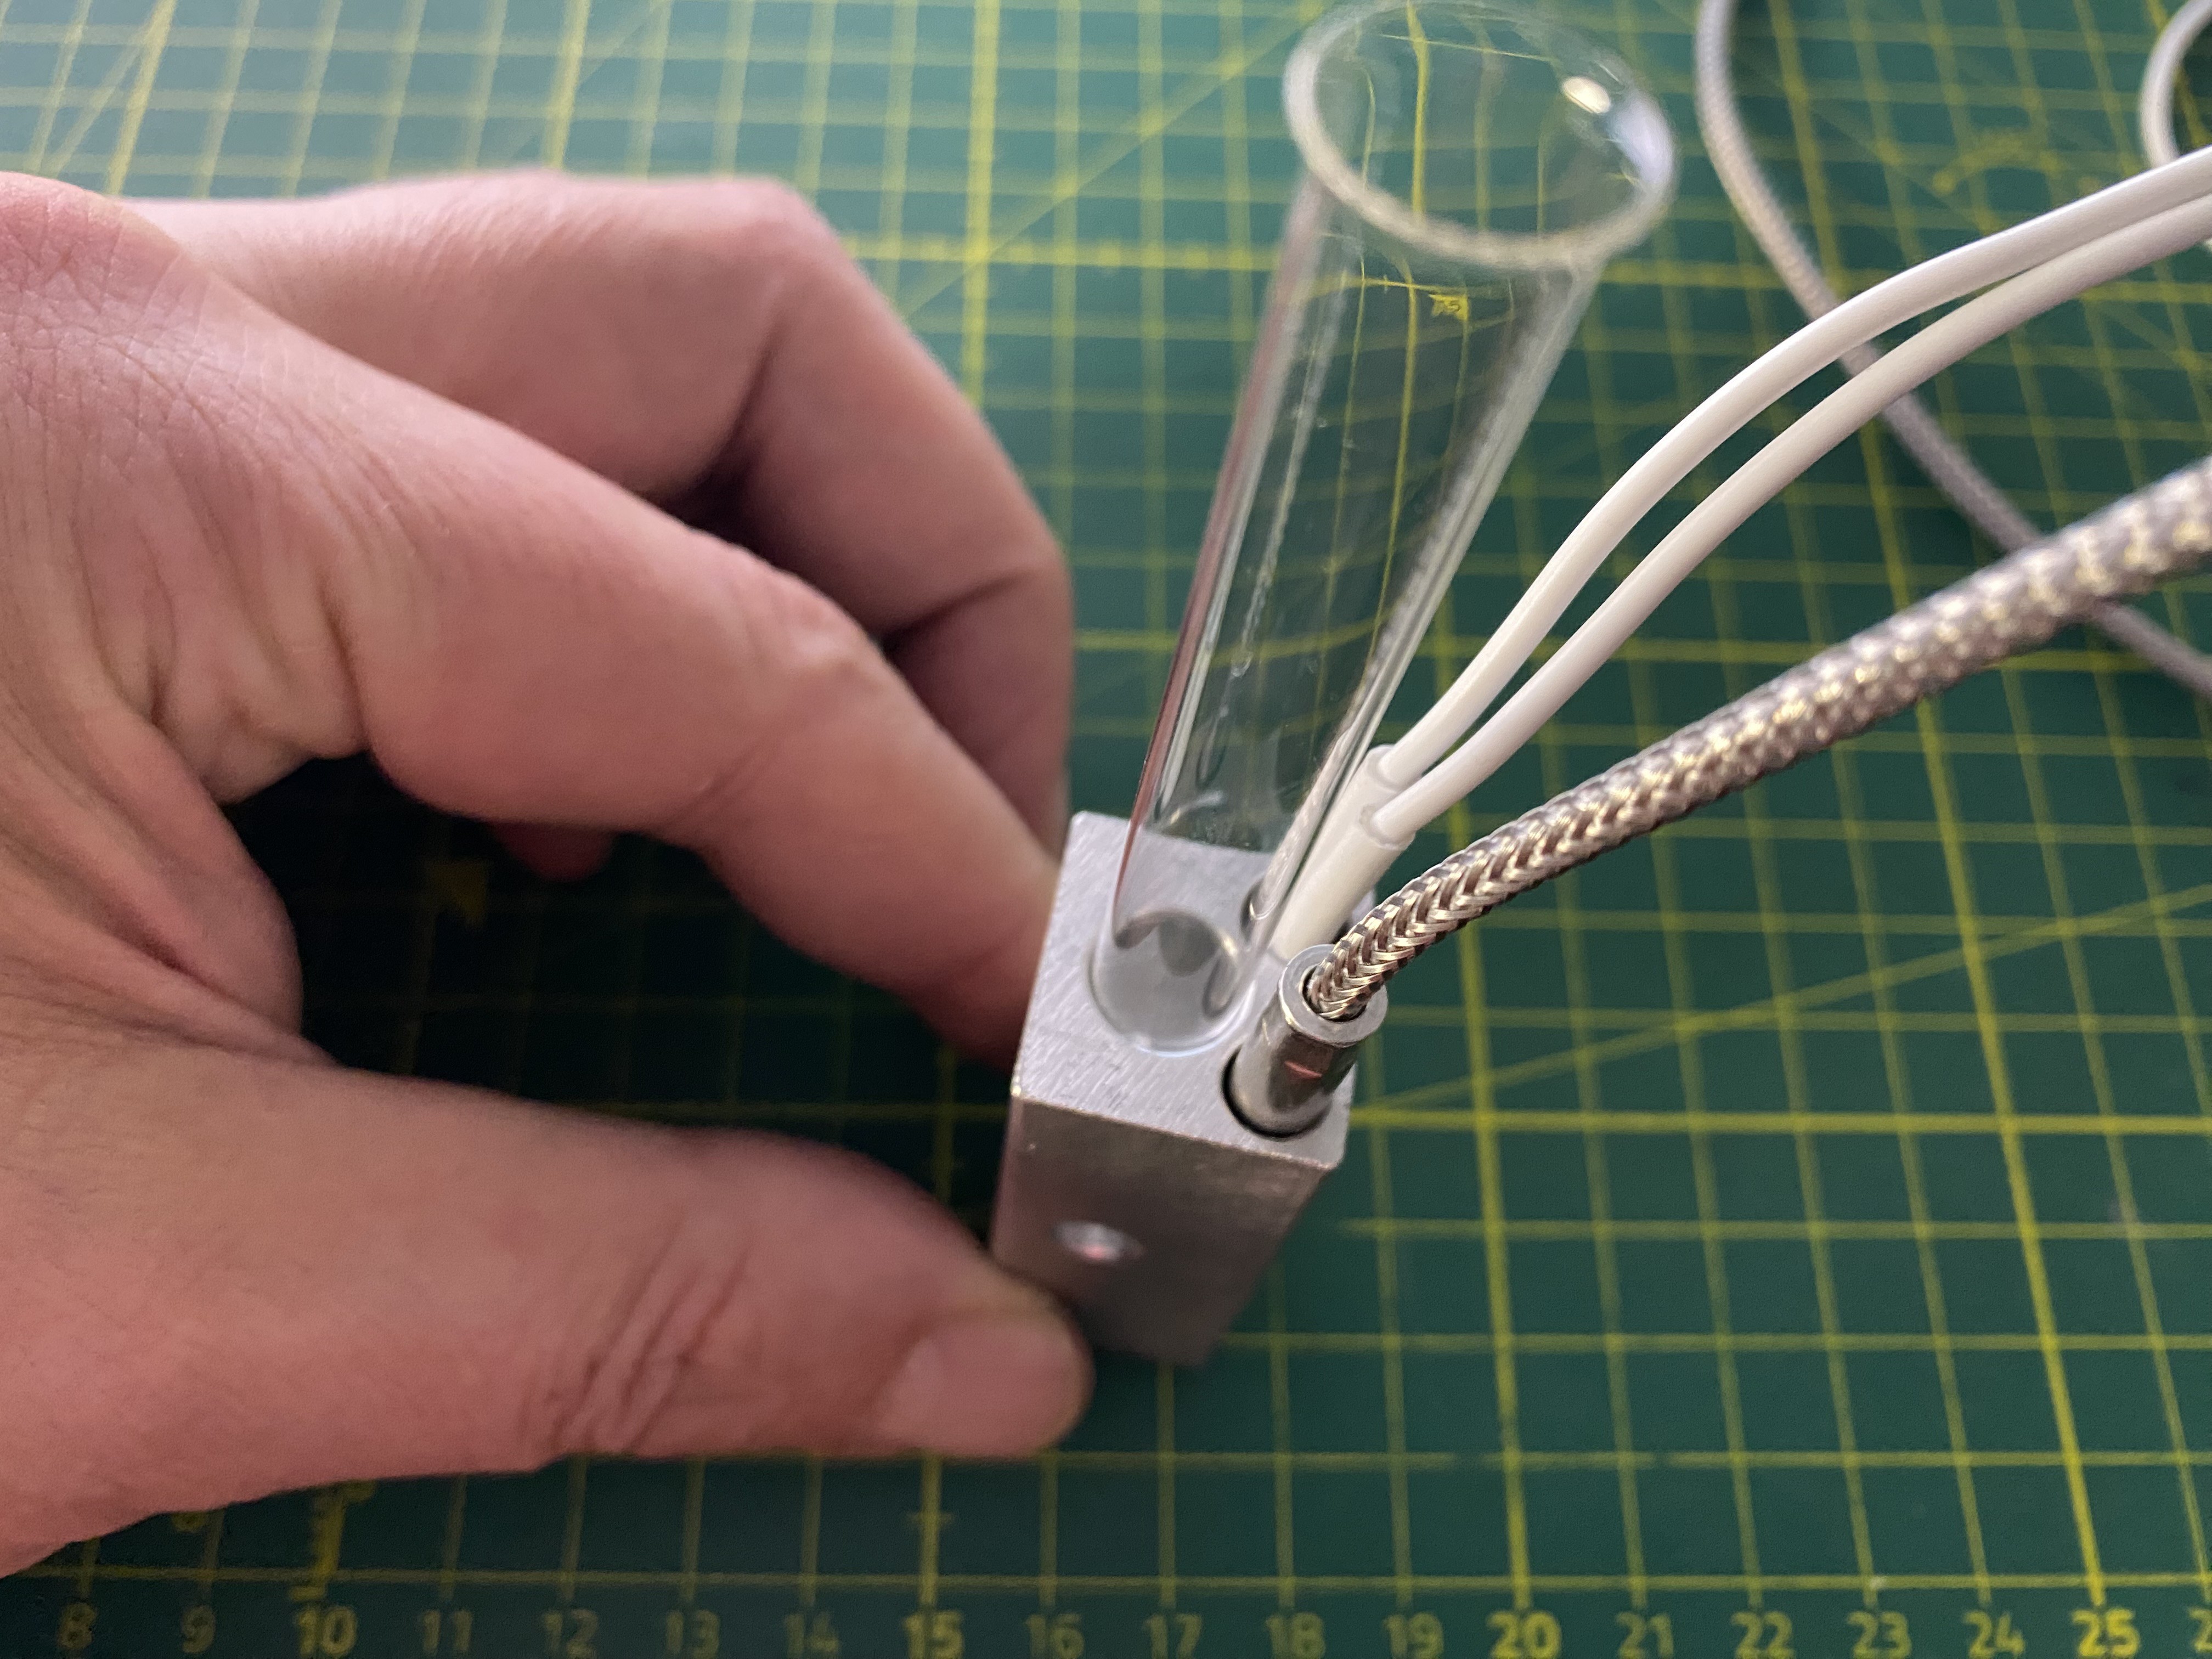
Fig. 2.2 Colorimetric receptor with heating function
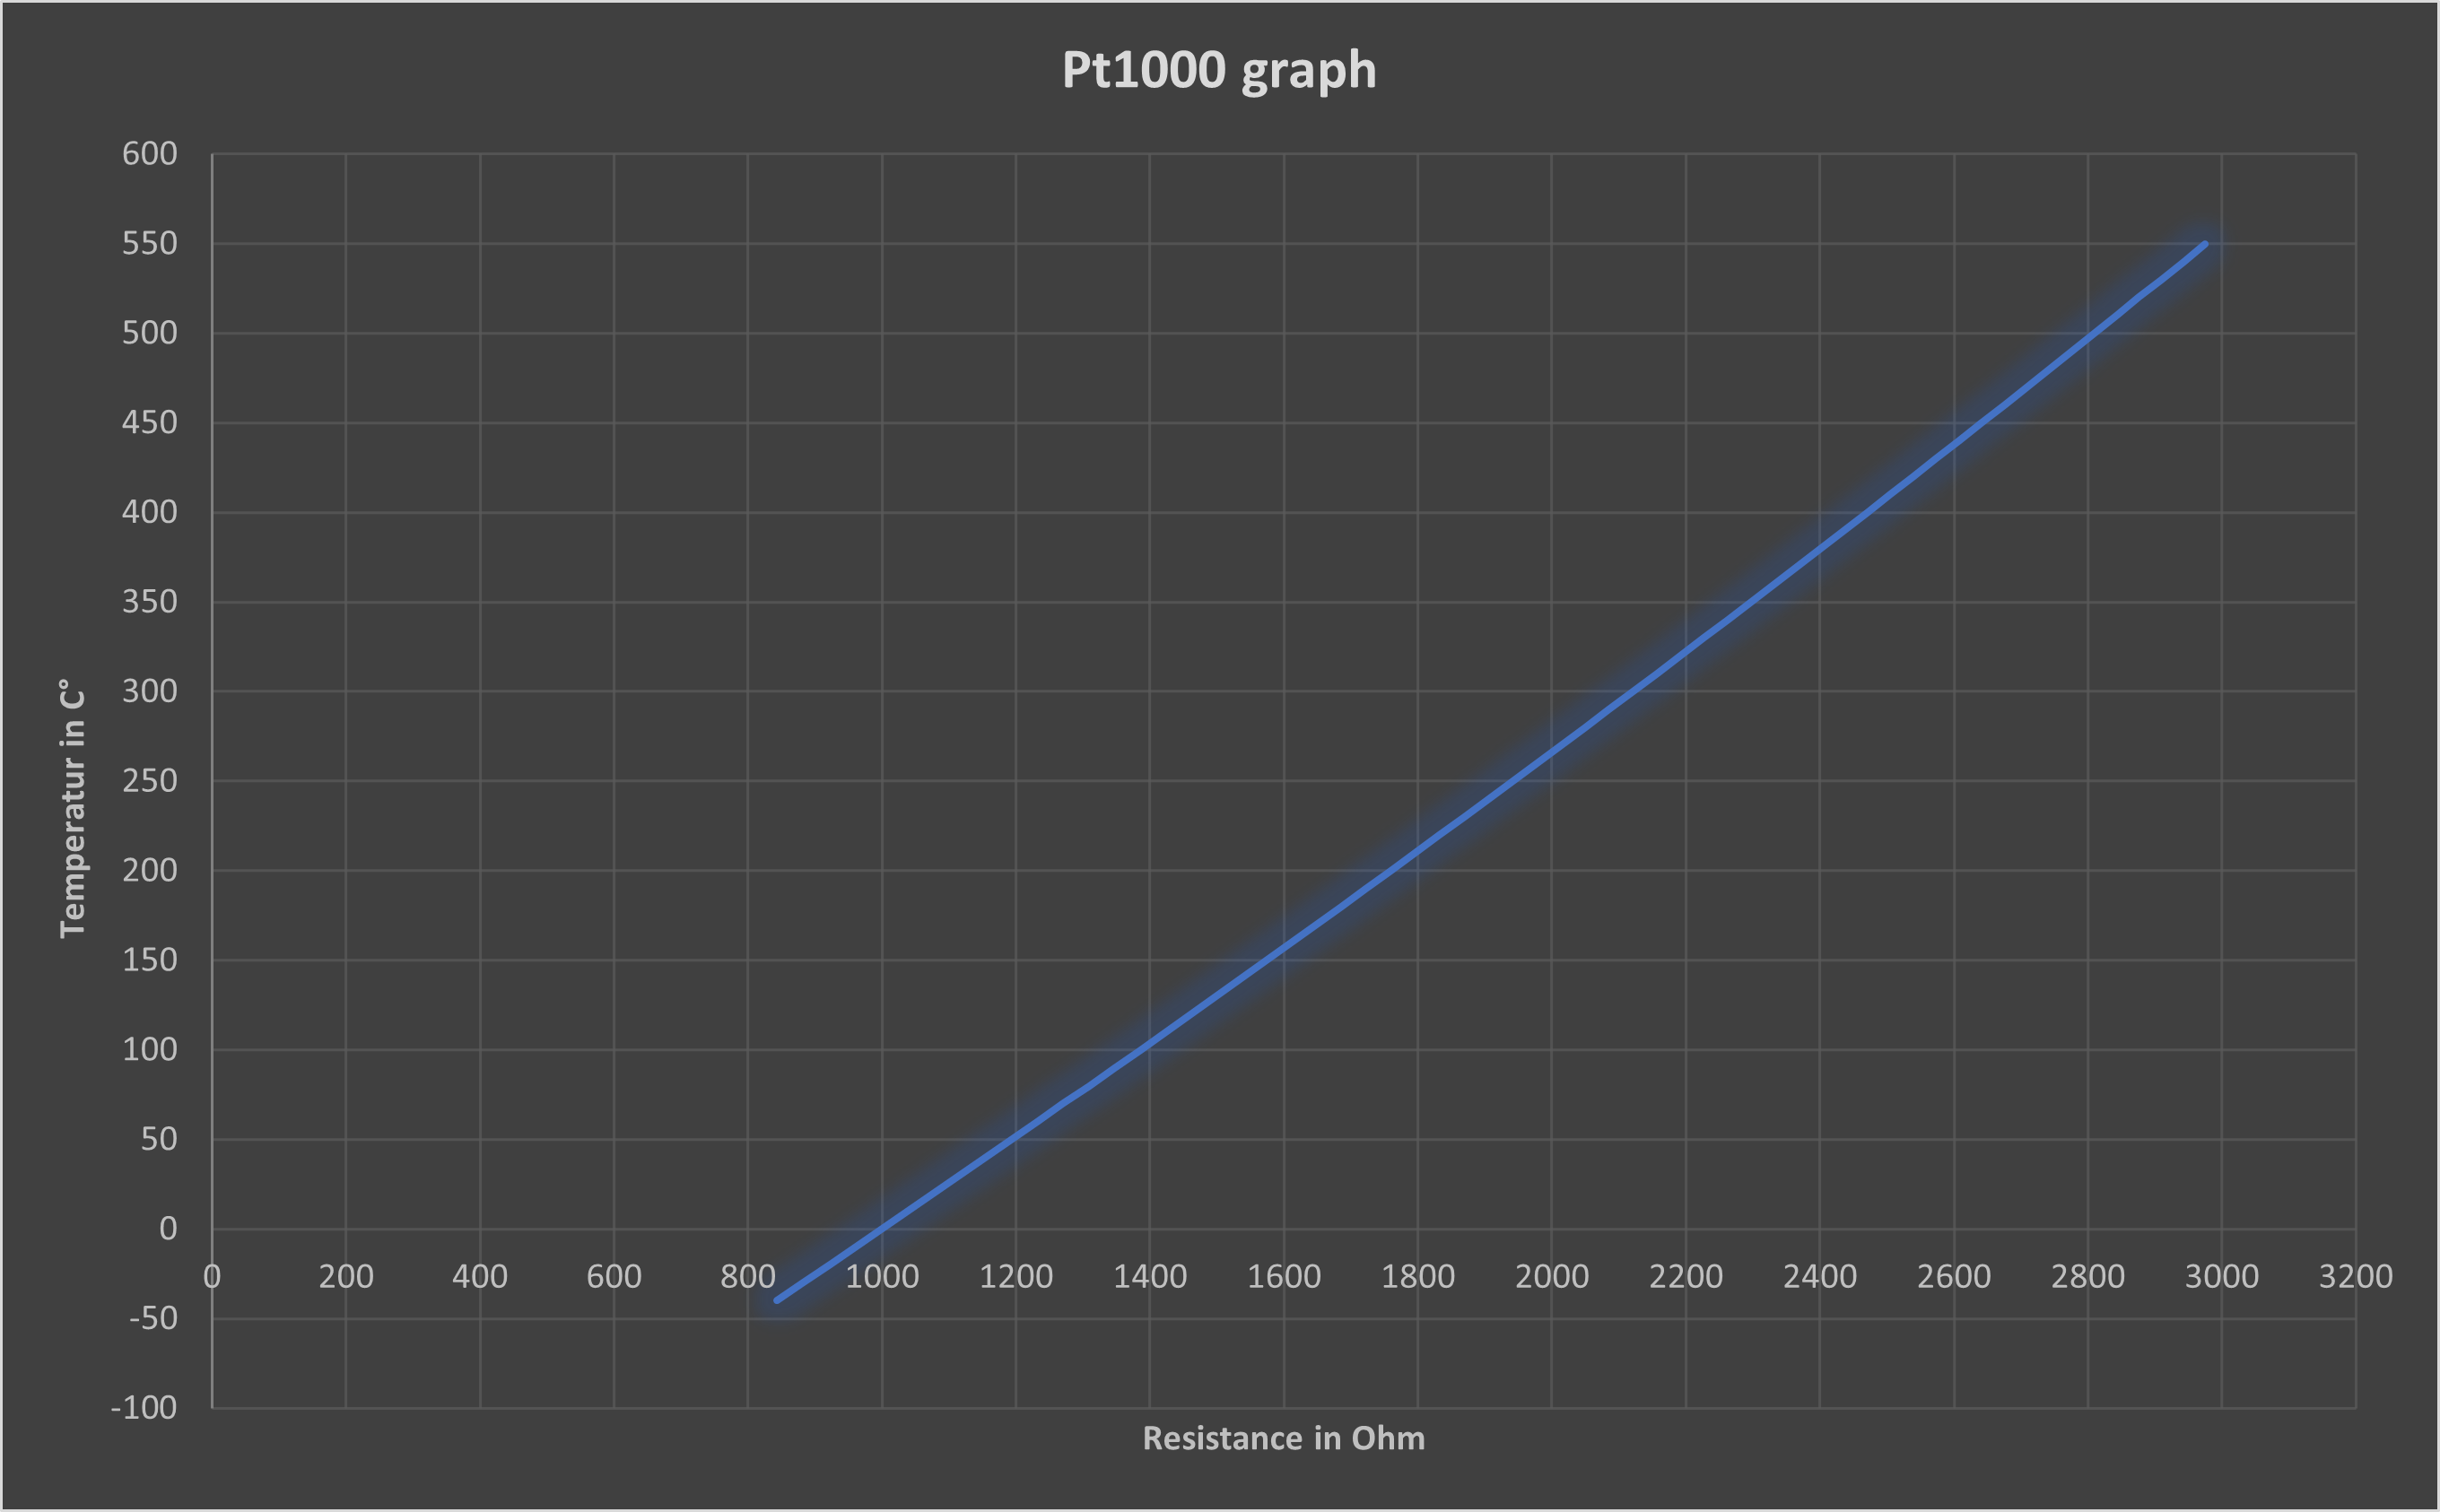
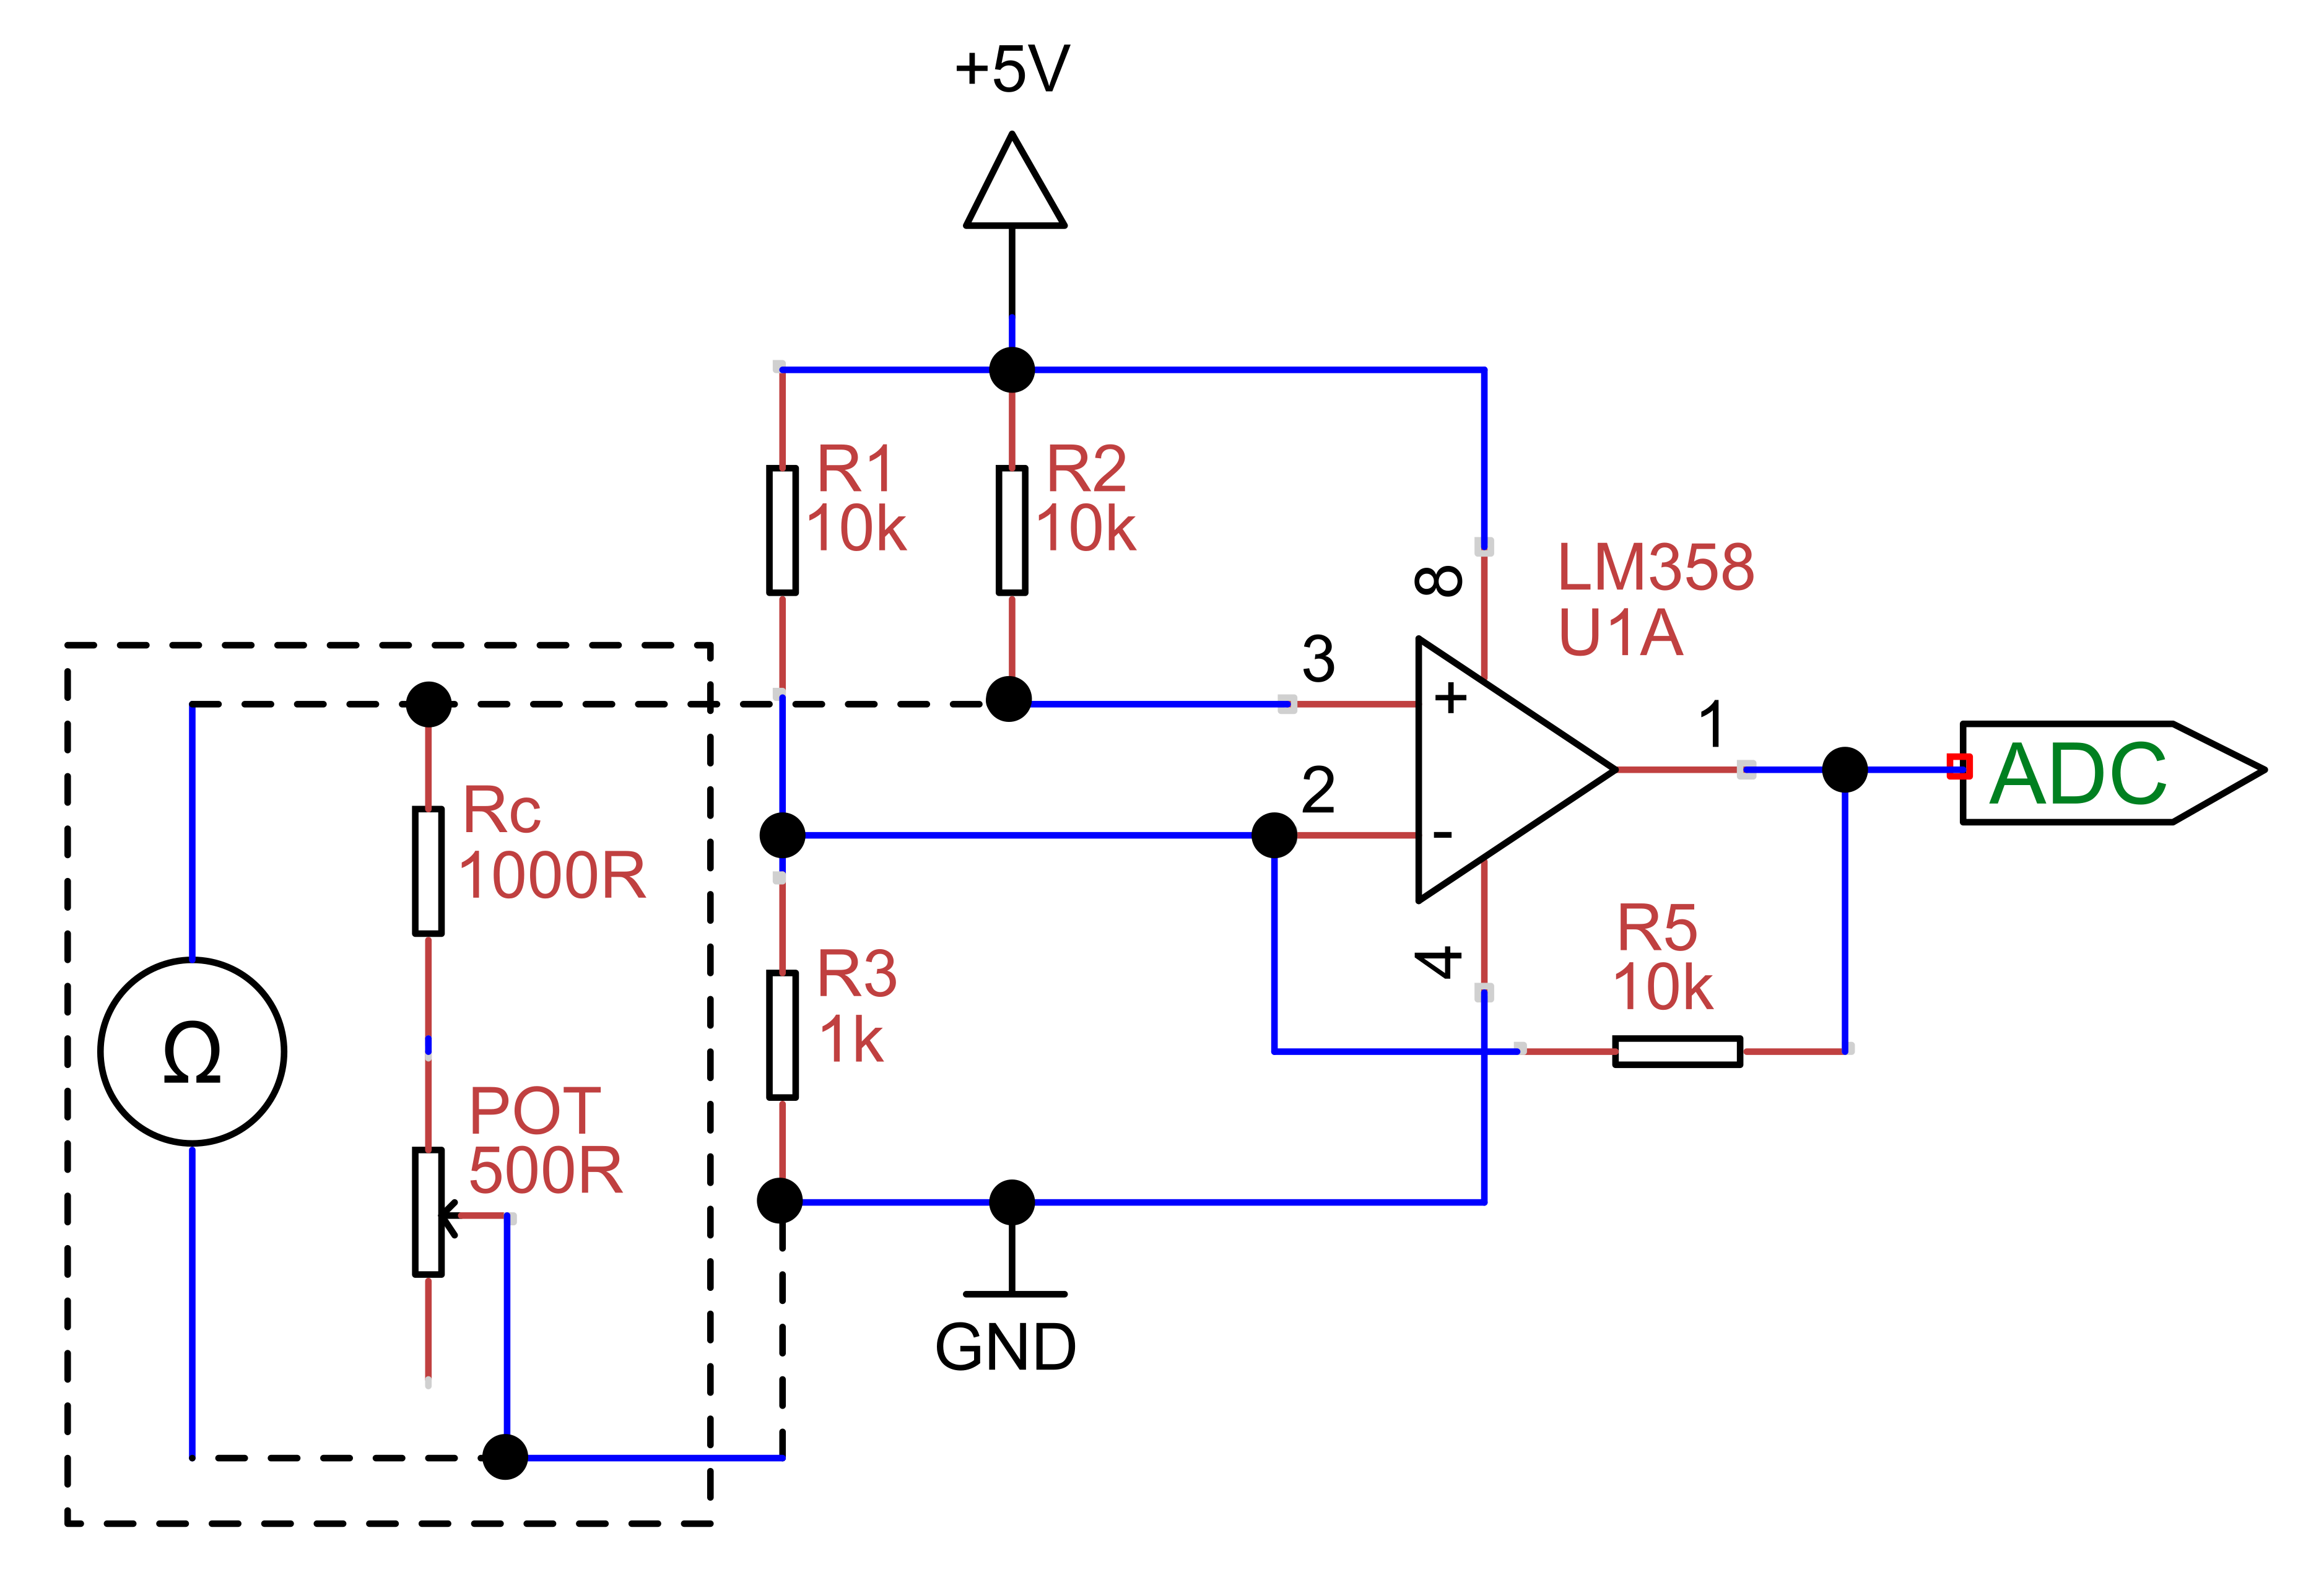
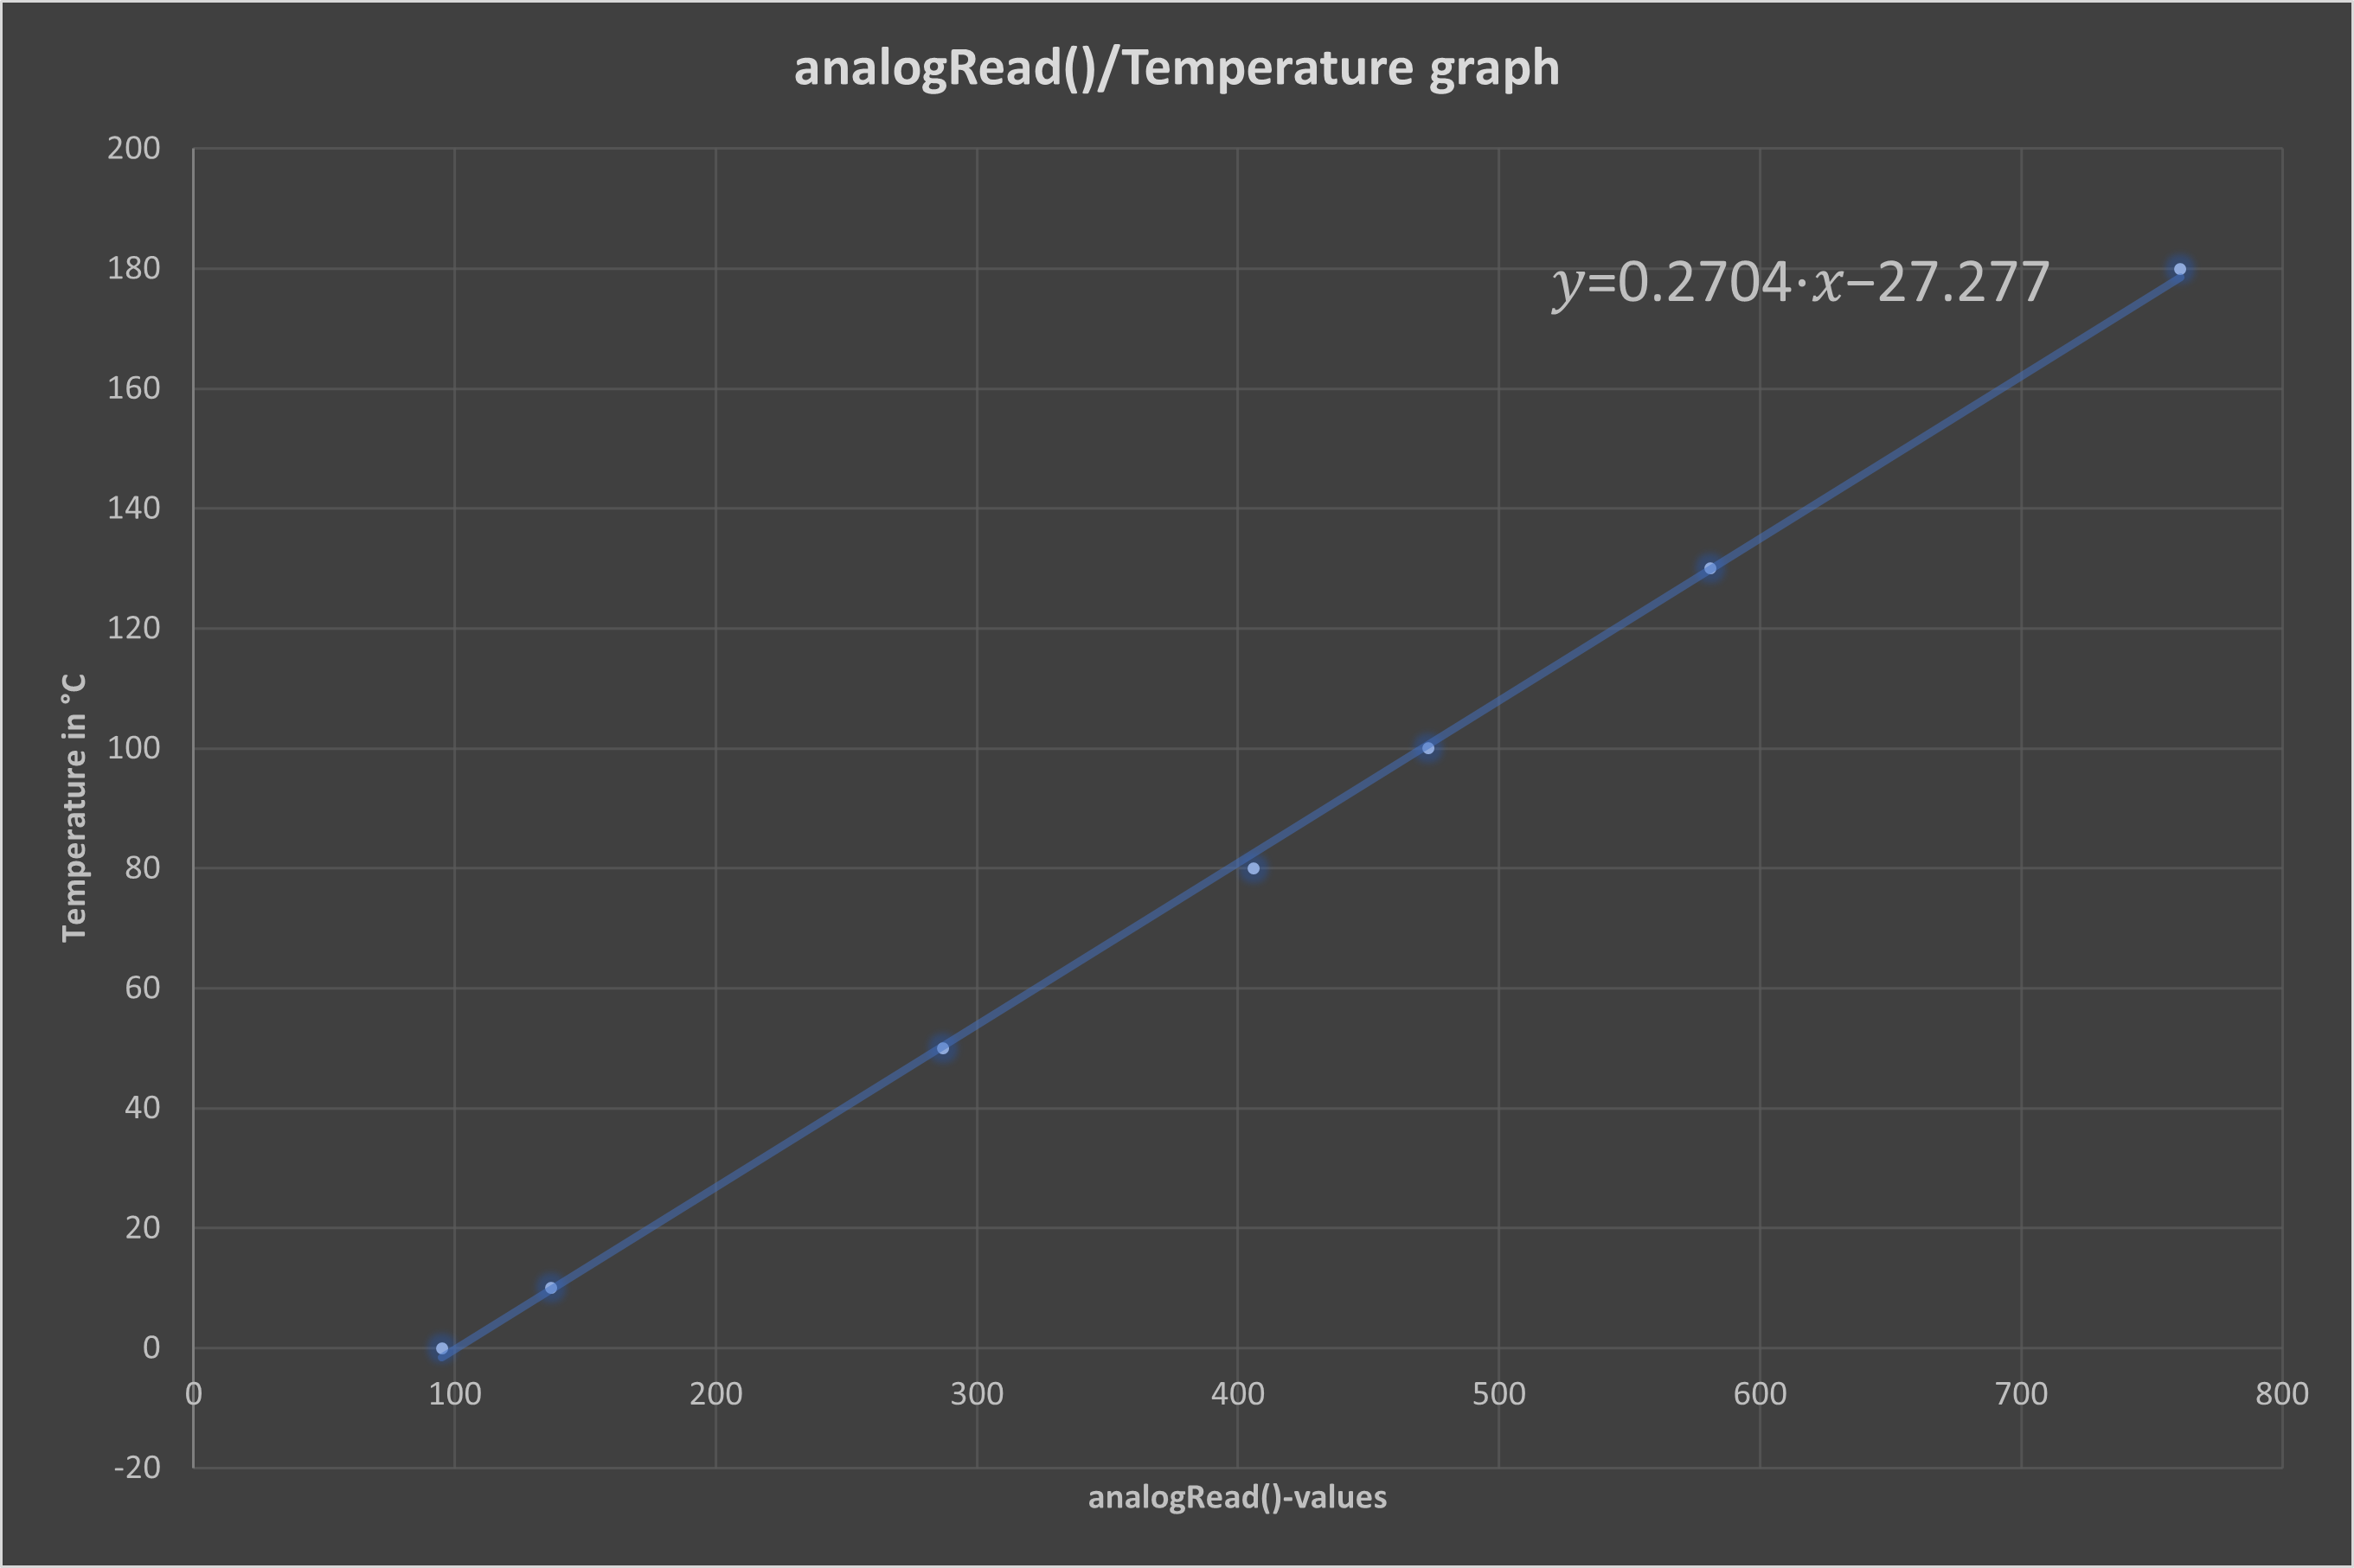
The Pt 1000 provides very accurate measurements and can be used at high temperatures. Another advantage is its linearity. As the voltage change is too small for a usable resolution, a corresponding amplifier is required that is linear to the input voltage. The following circuit diagram shows such an amplifier using an LM358 op-amp.
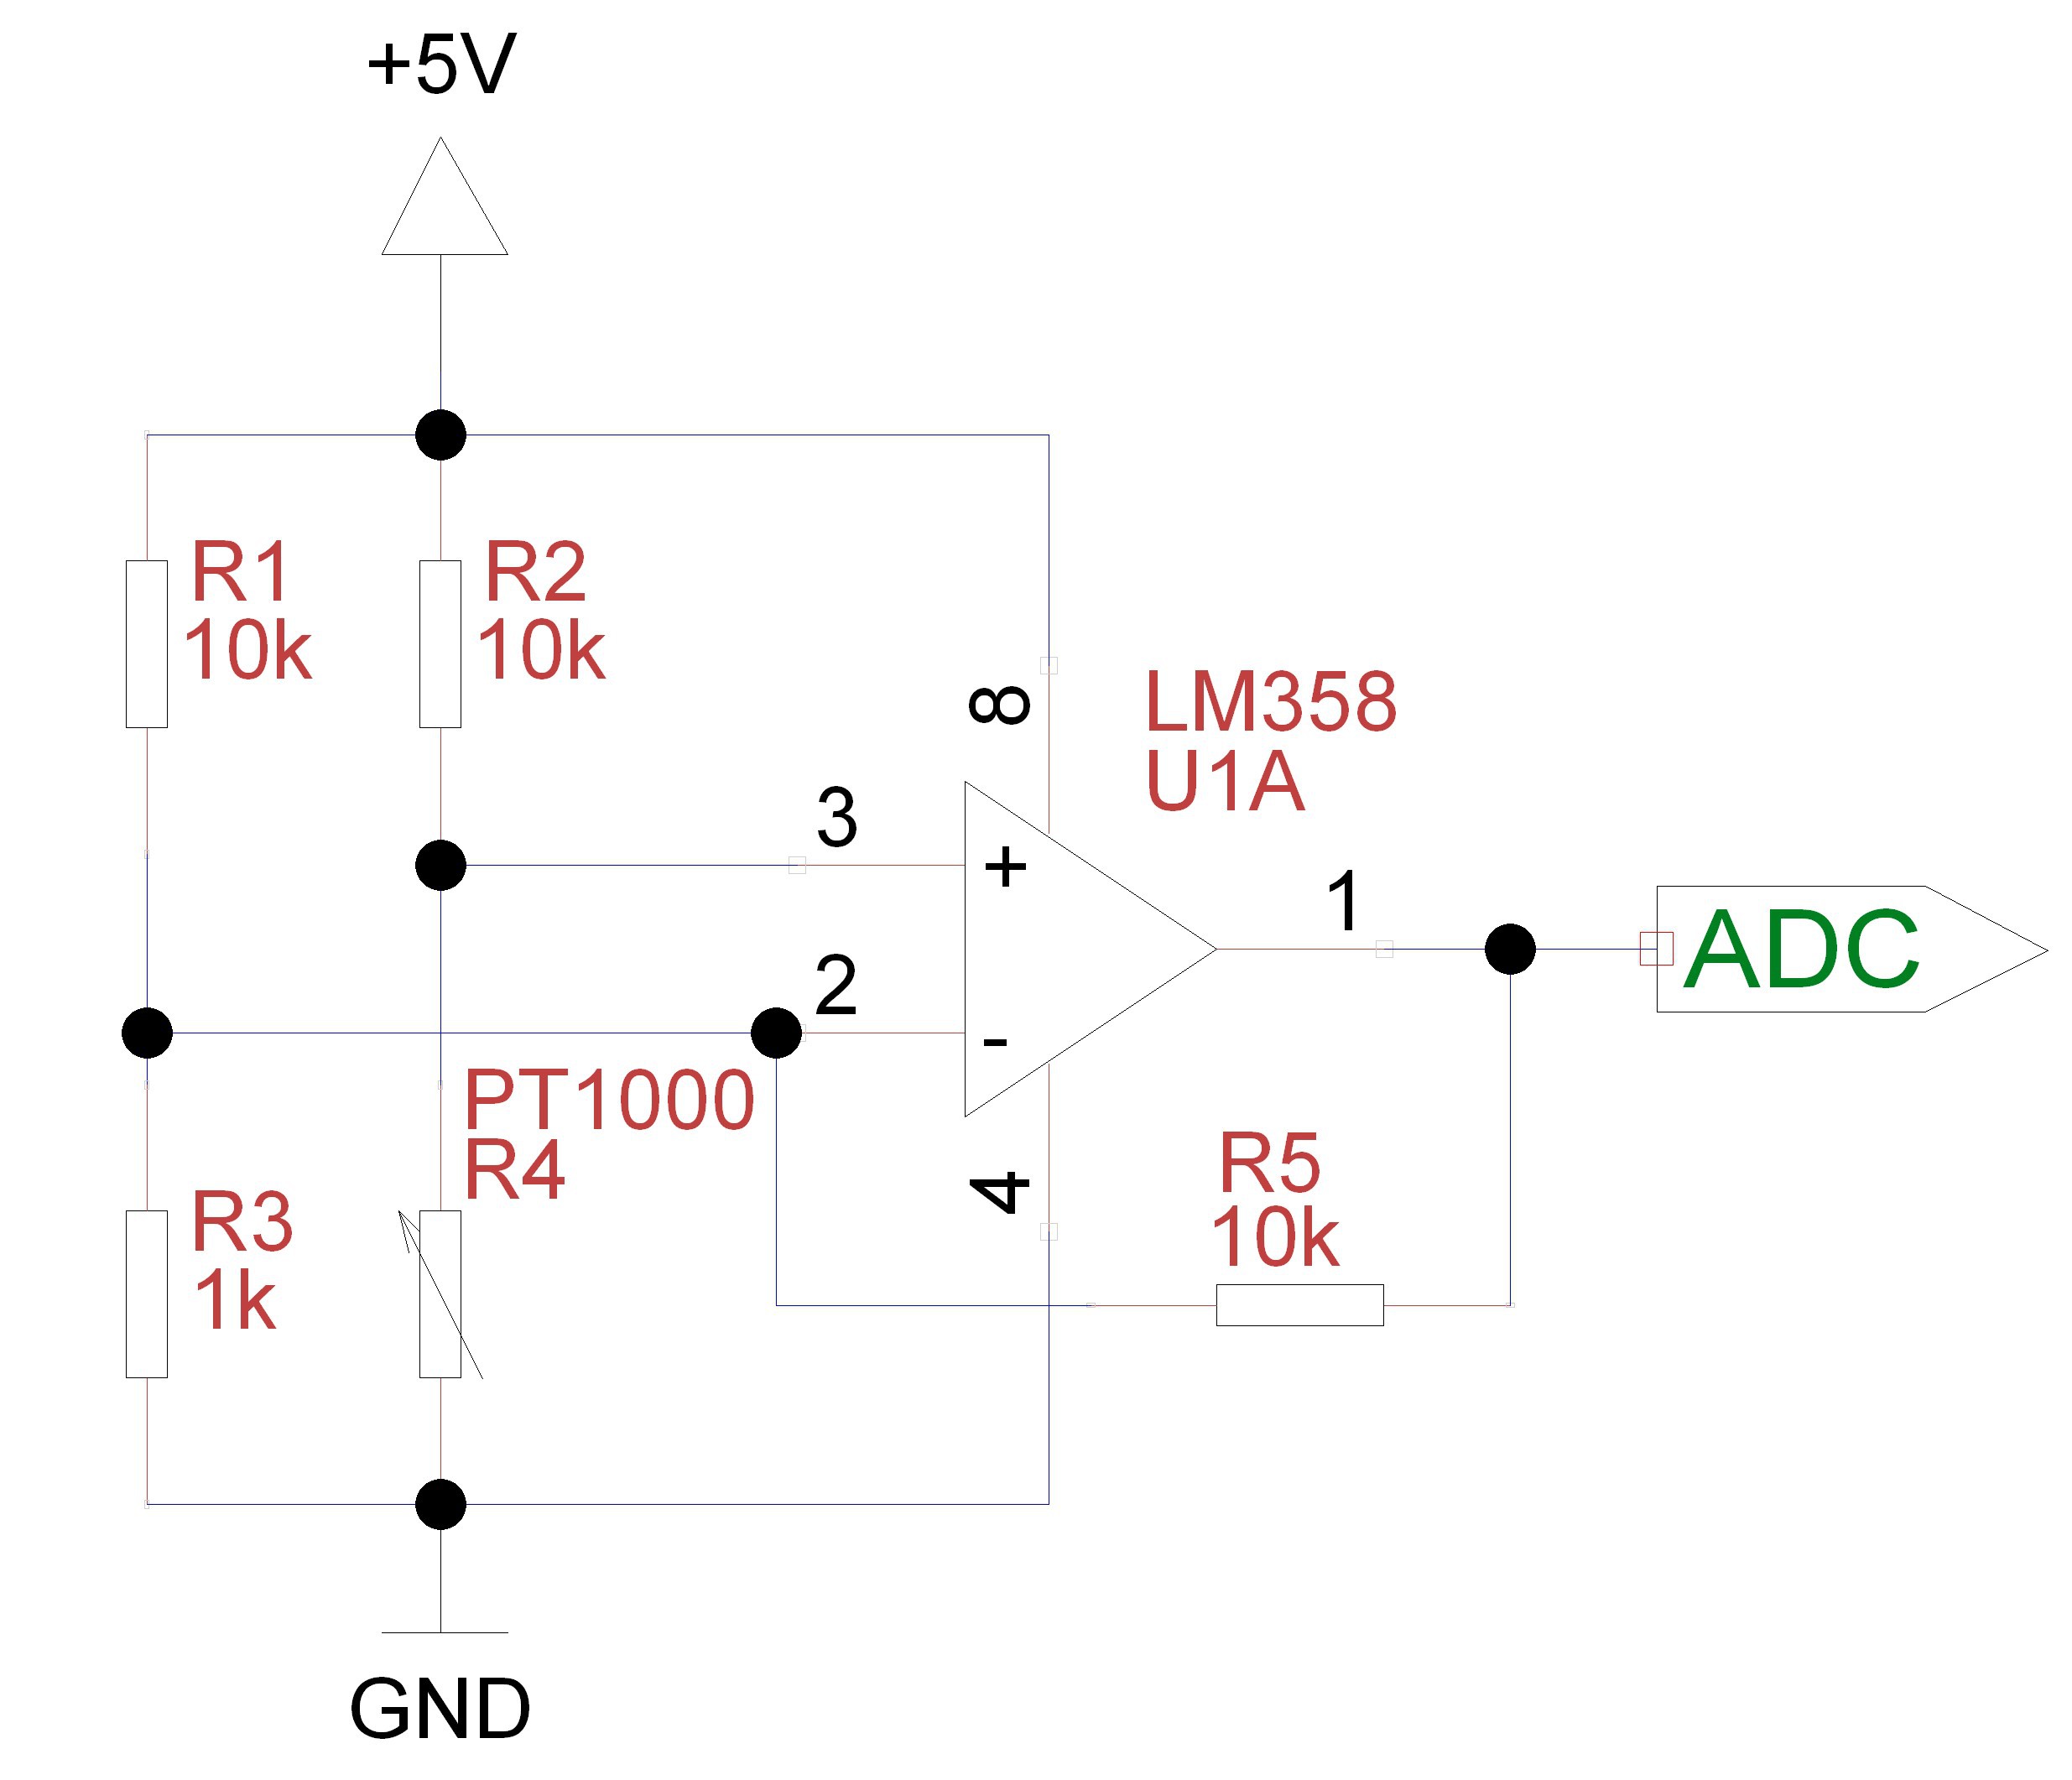
Fig. 2.3 Non-inverting amplifier with constant offset
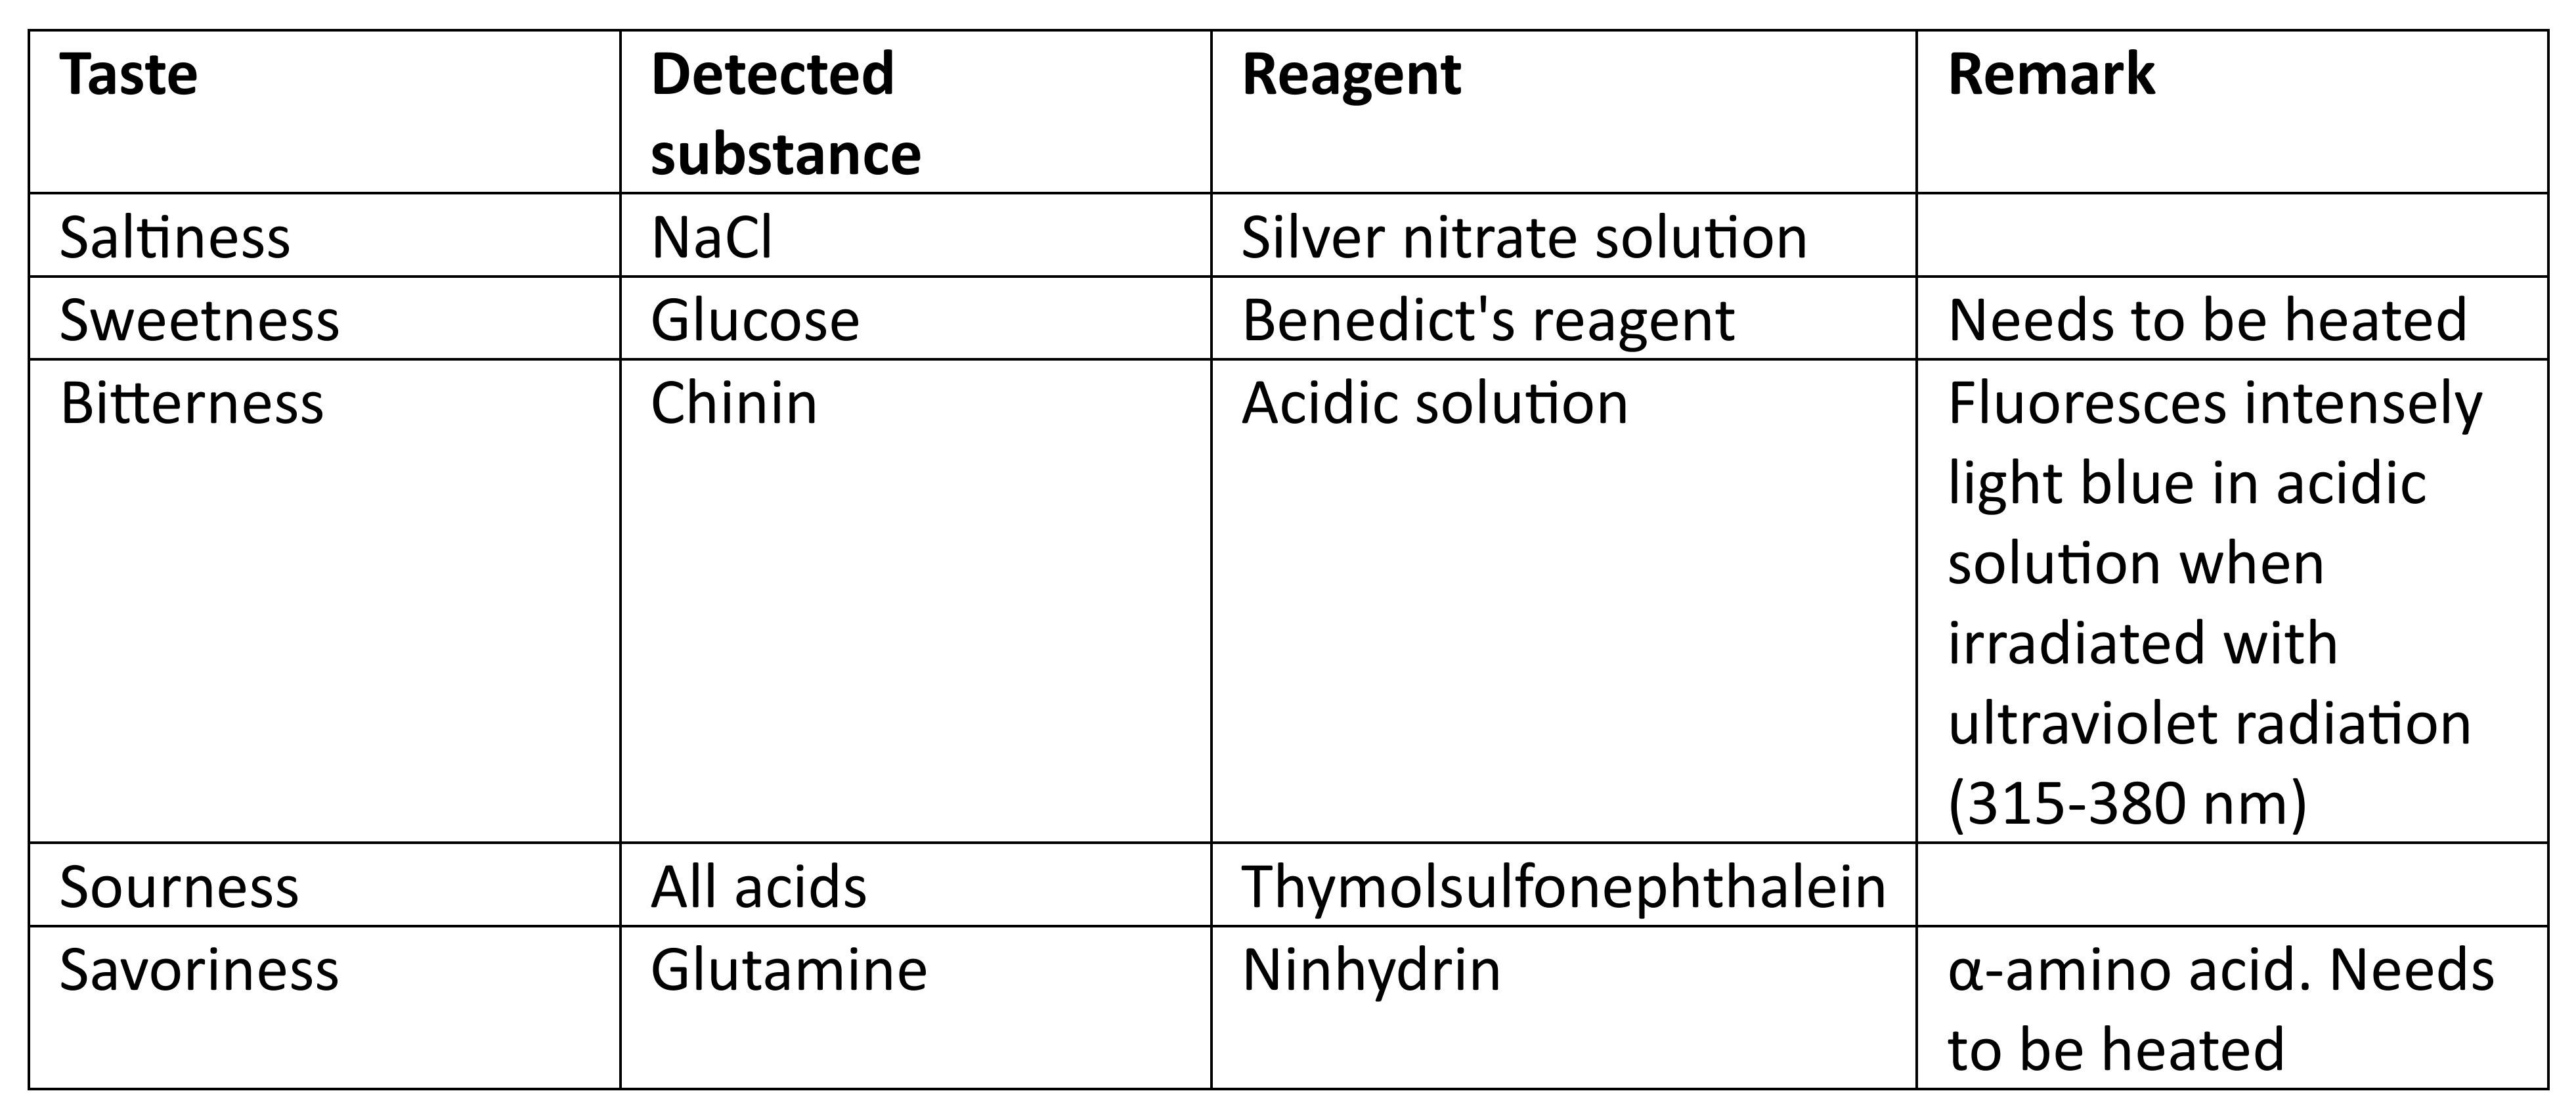
The five specific tastes are detected by the colorimetric receptors:
Piperine detection would also be possible using Dragendorff's reagent, but like the glucamine test, it is not specific. The alkaloid can be extracted from black pepper with ethanol or isopropyl alcohol and then crystallized.
Instead of thymol blue, a universal indicator can also be prepared from 20 mg phenolphthalein, 20 mg methyl red, 40 mg thymol blue, and 40 mg bromothymol blue dissolved in 100 ml ethanol.
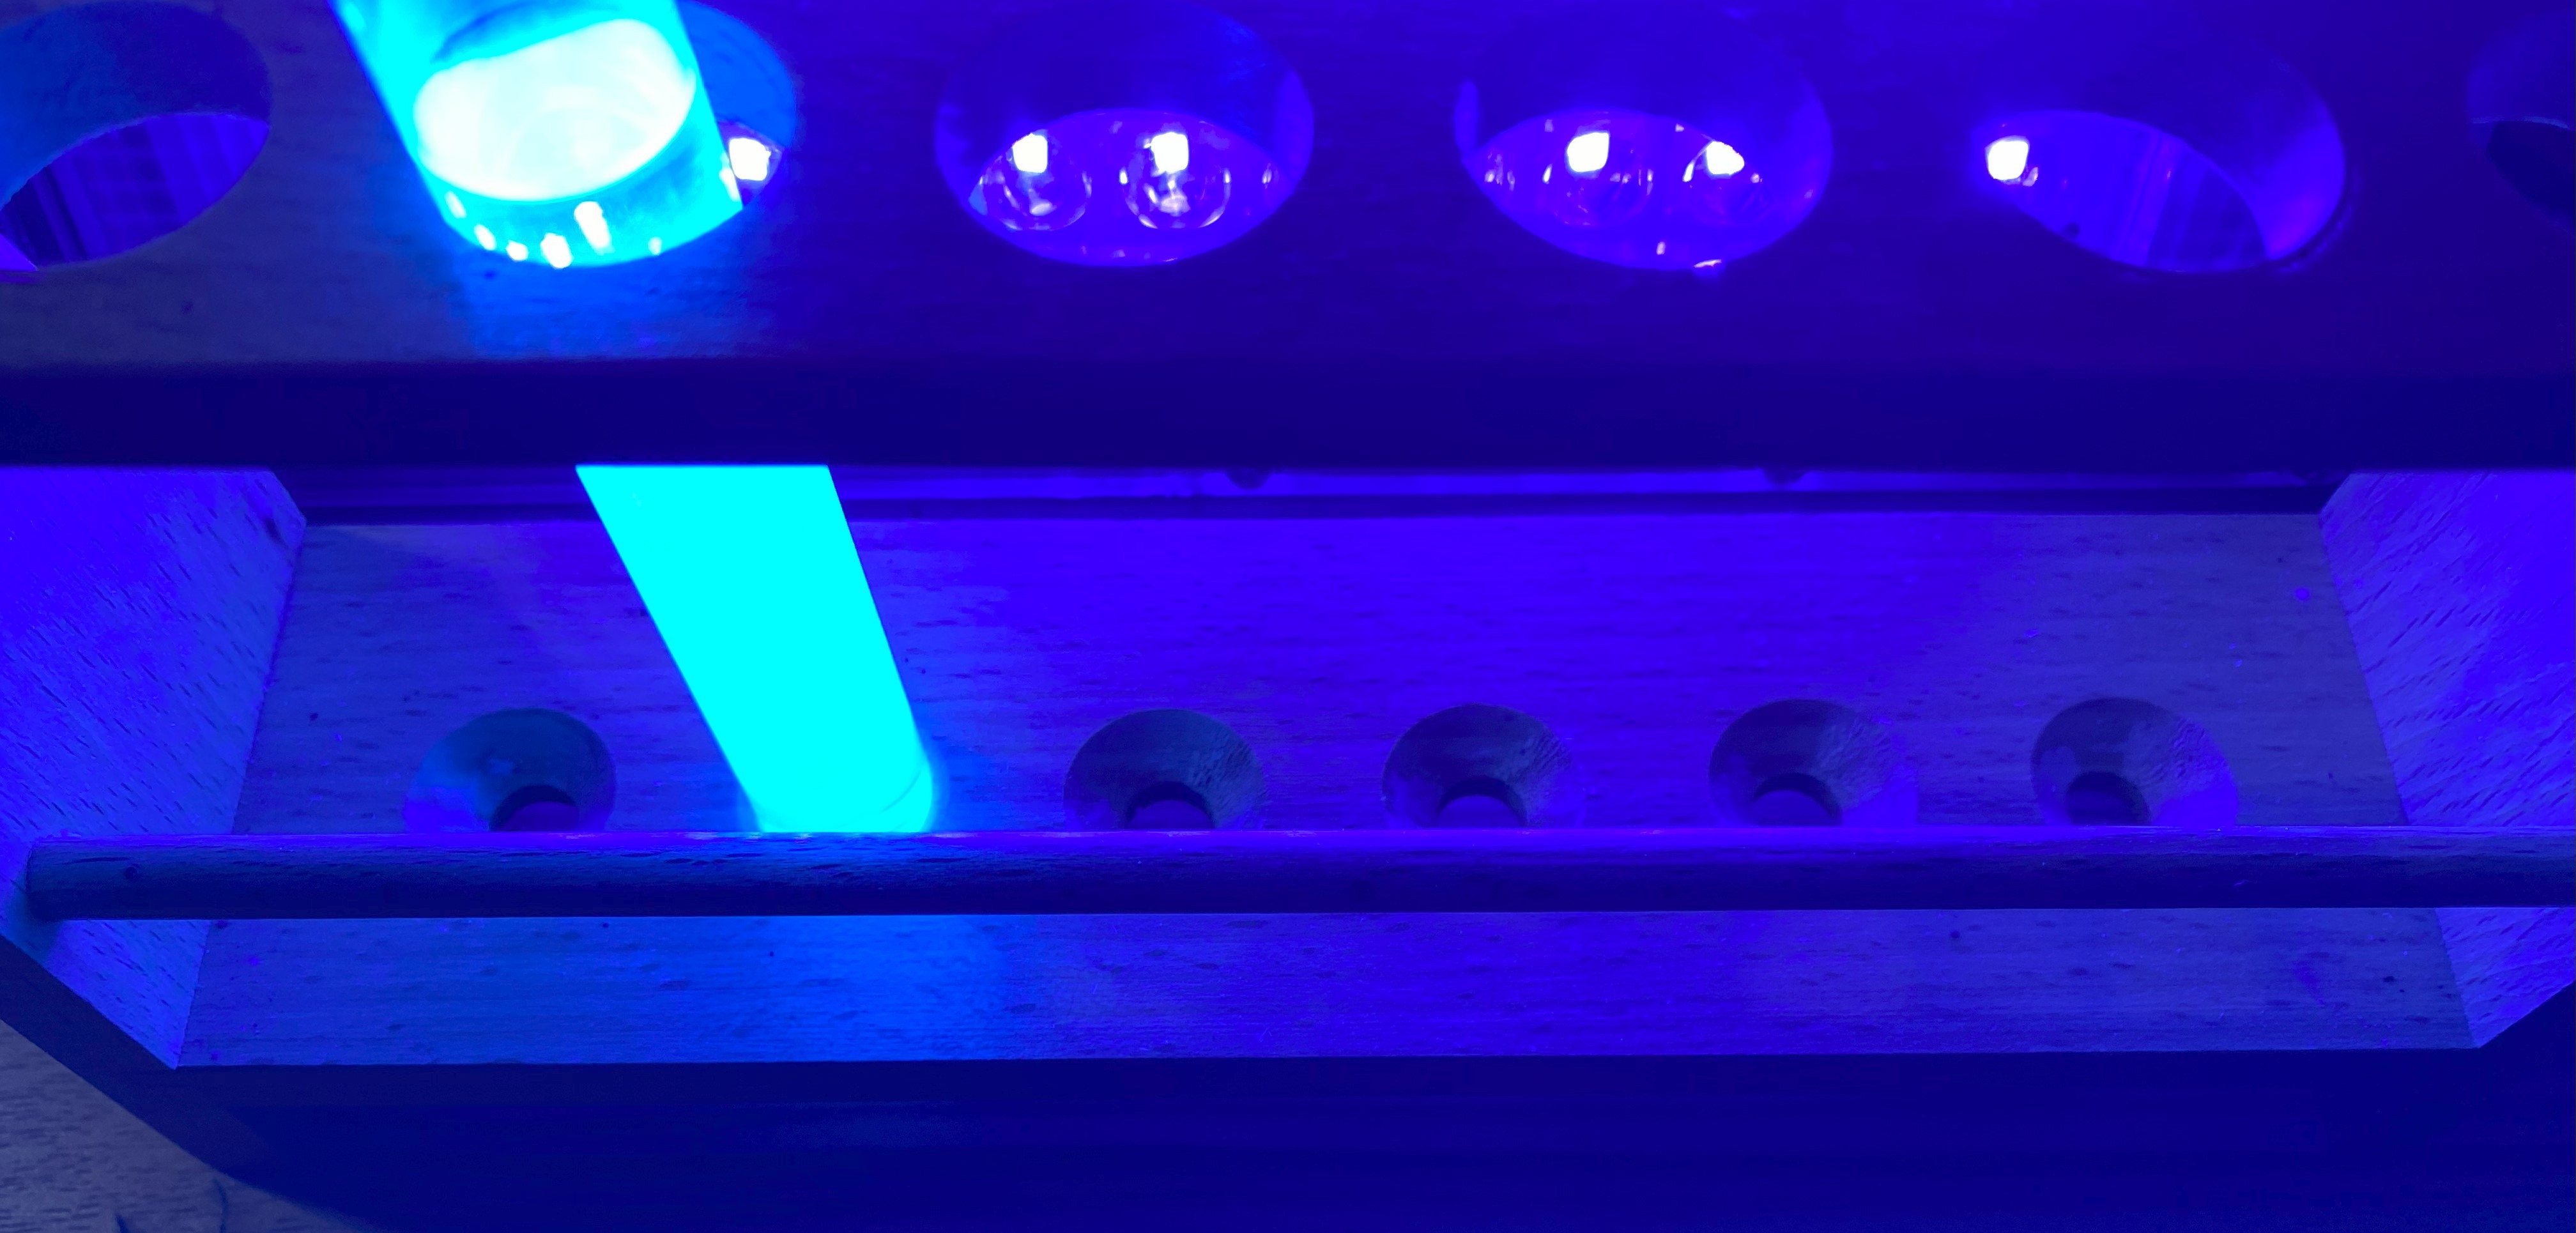
Fig. 2.4 Fluorescence of quinine dissolved in ethanol and acidified with formic acid under UV light
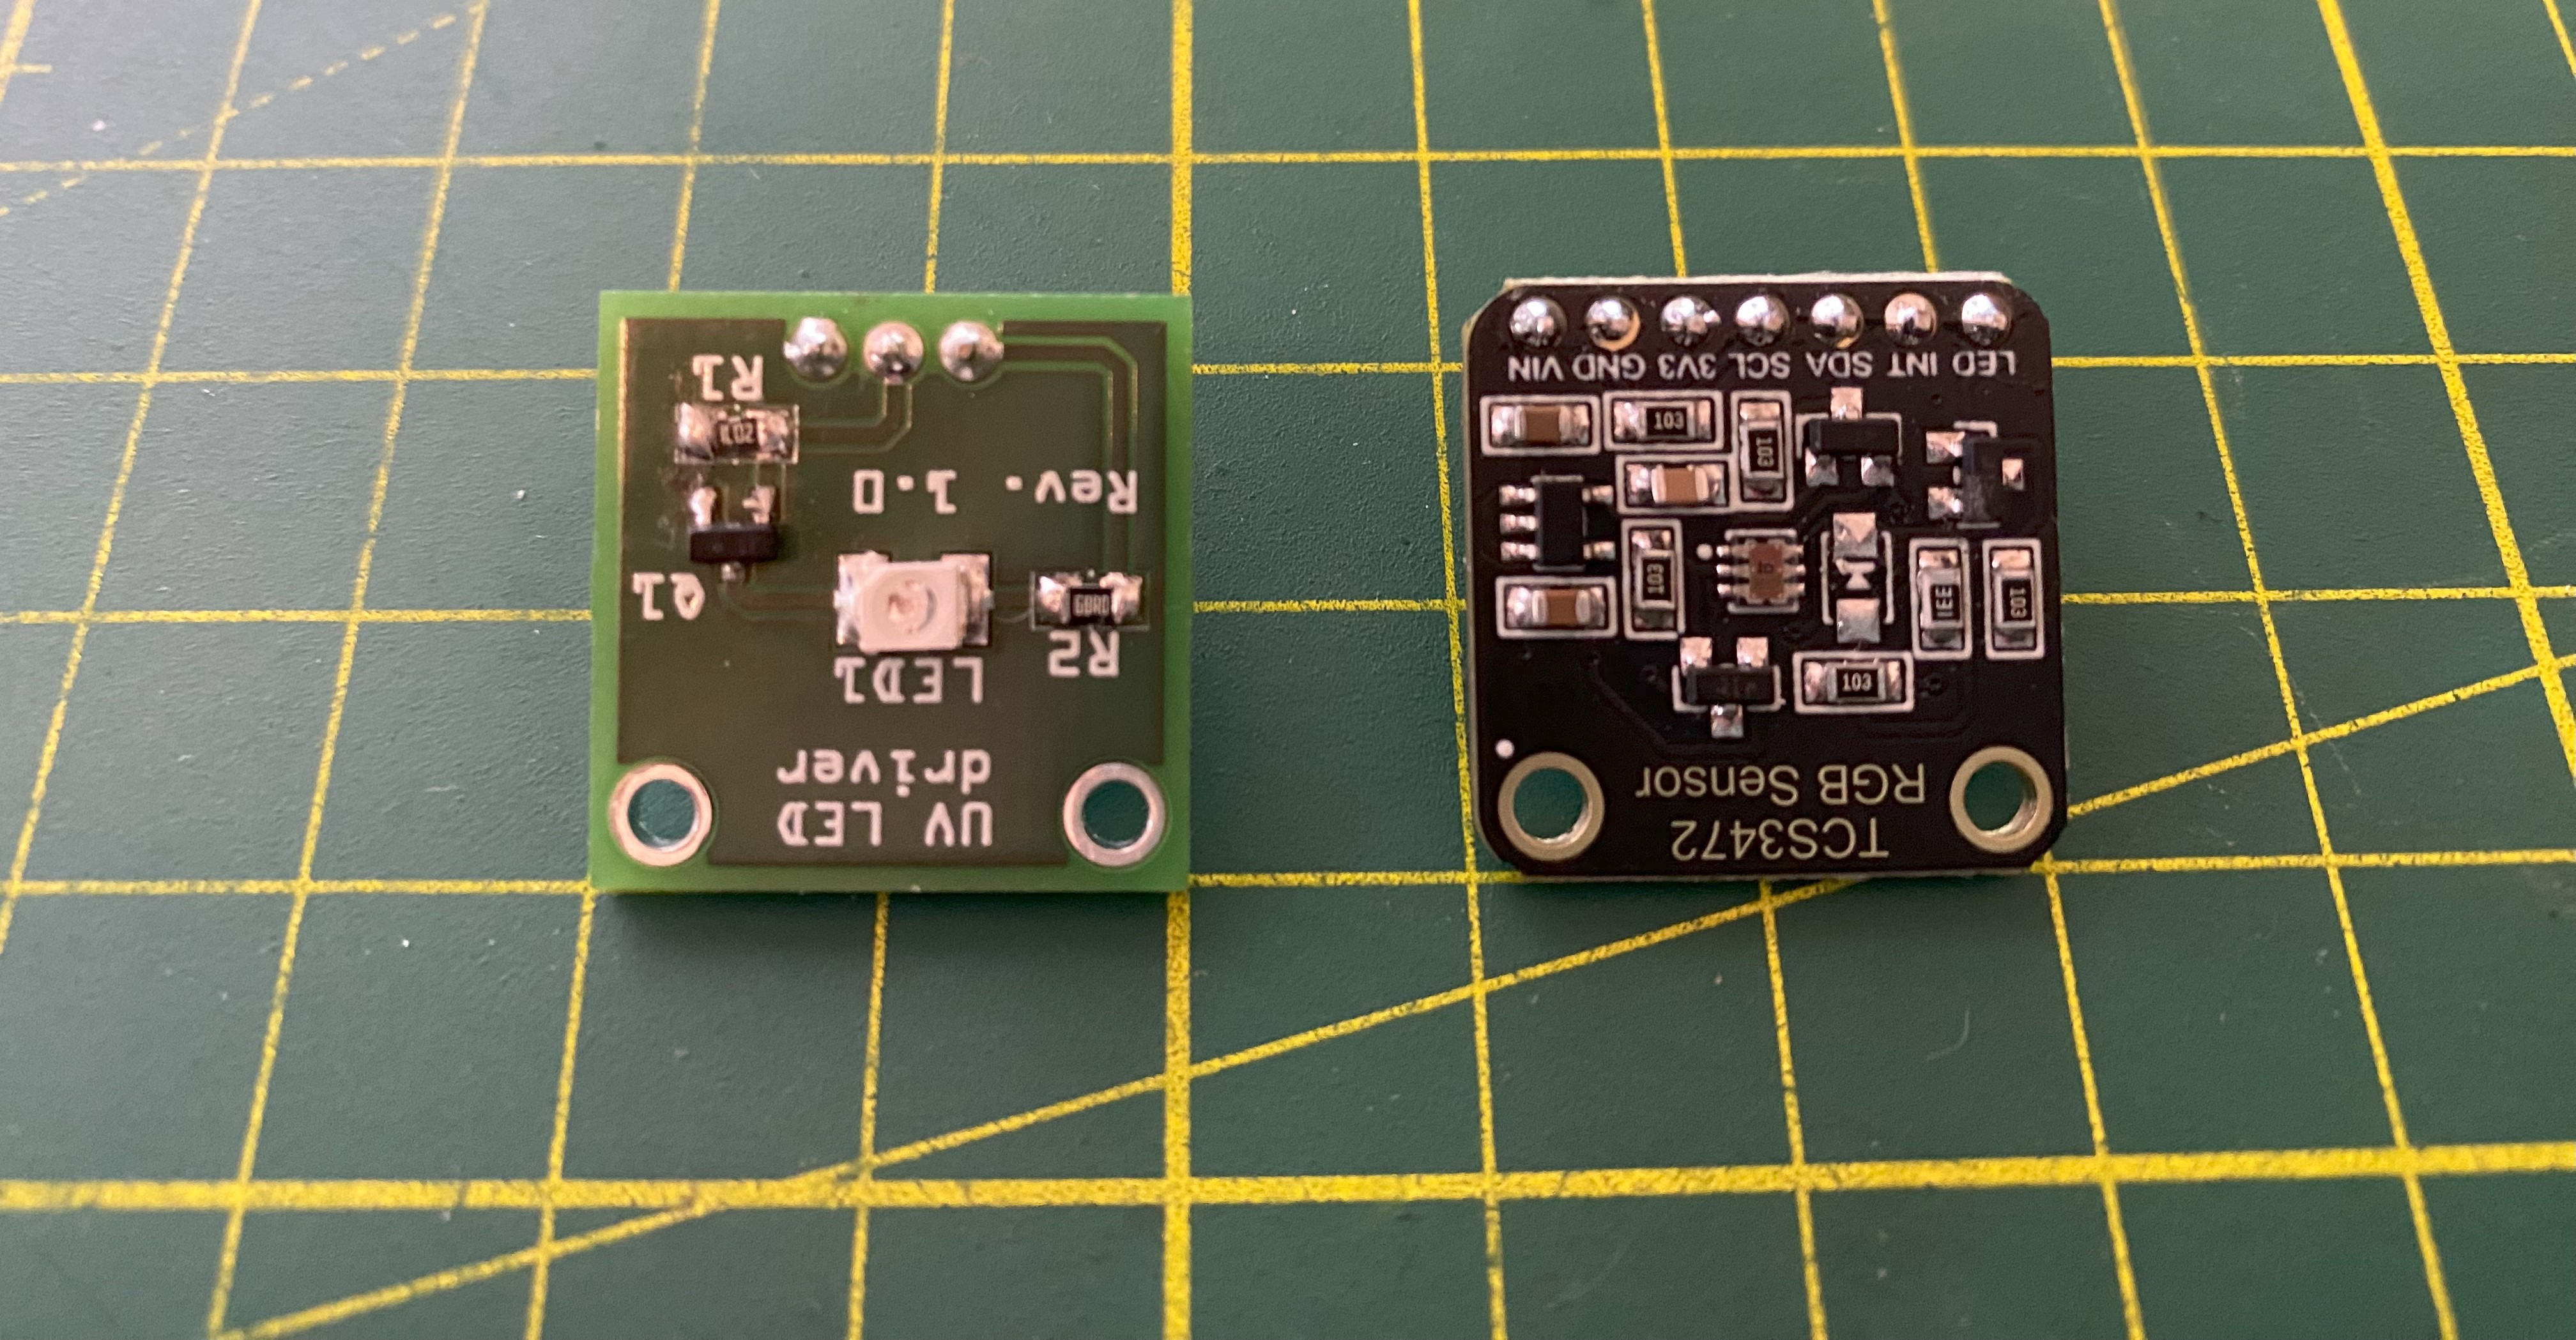
Fig. 2.5 UV-LED and TCS3472 color sensor breakout with desoldered LED
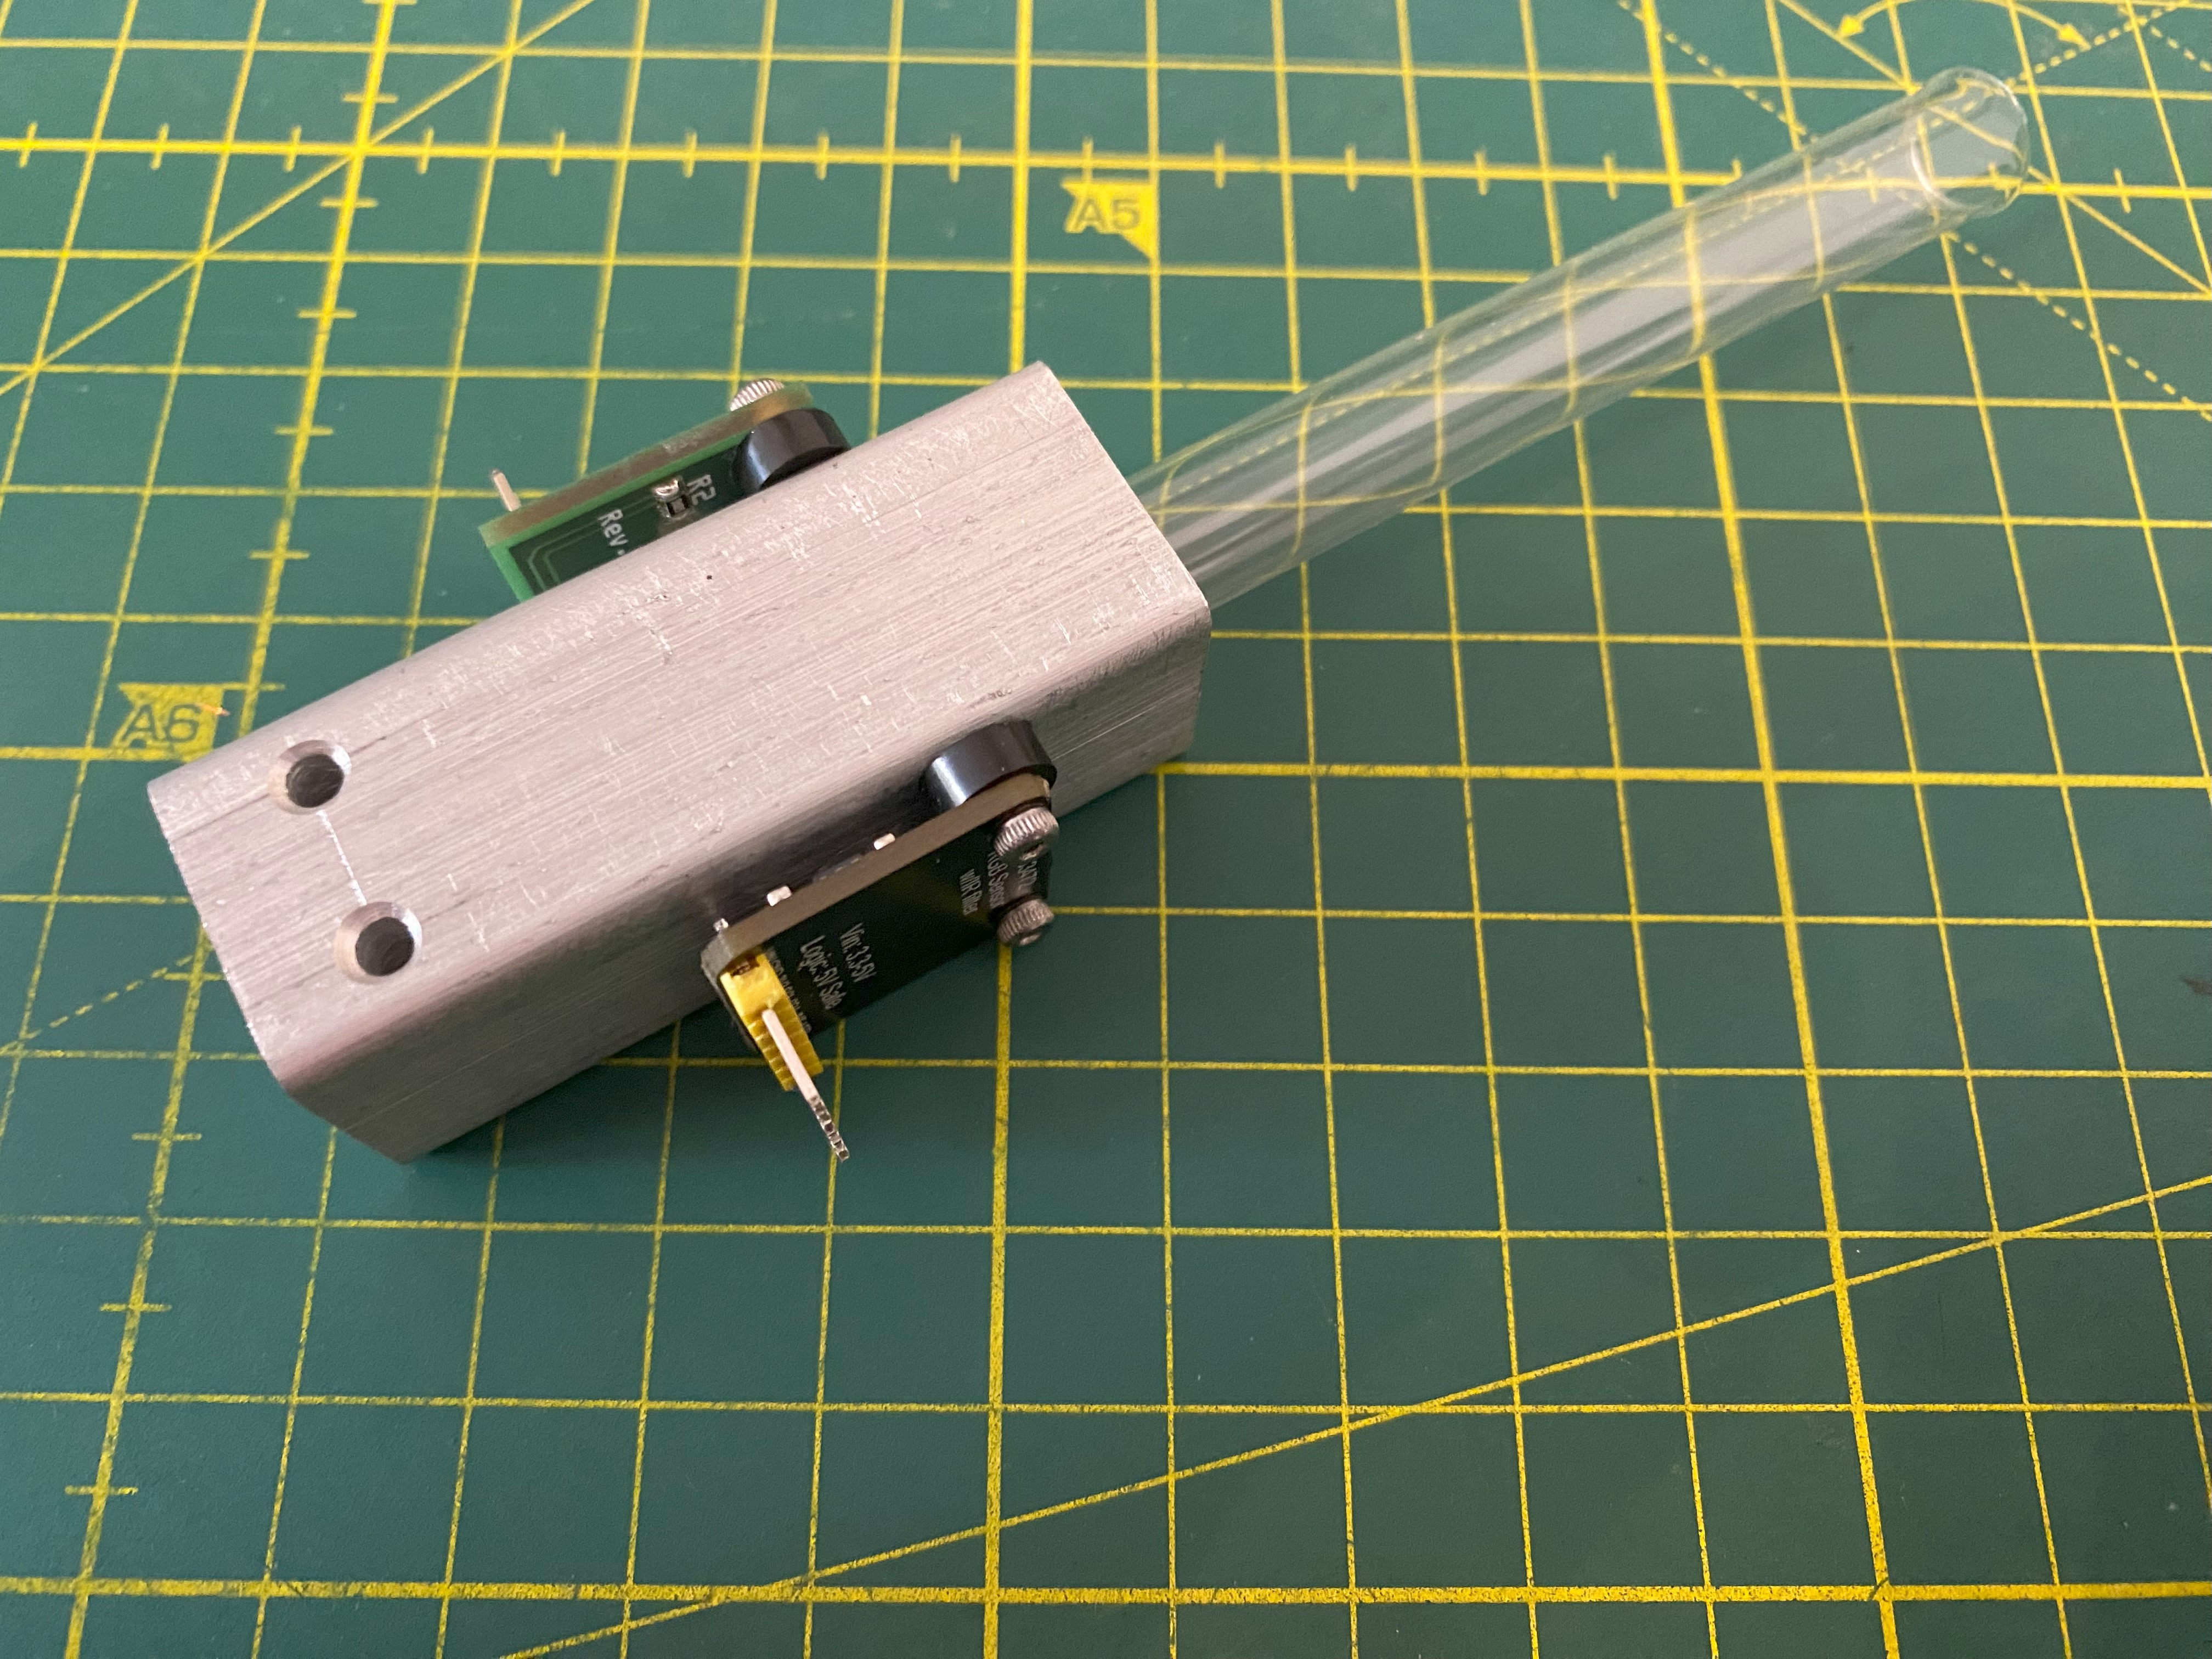
Fig. 2.6 Completely assembled quinine sensor
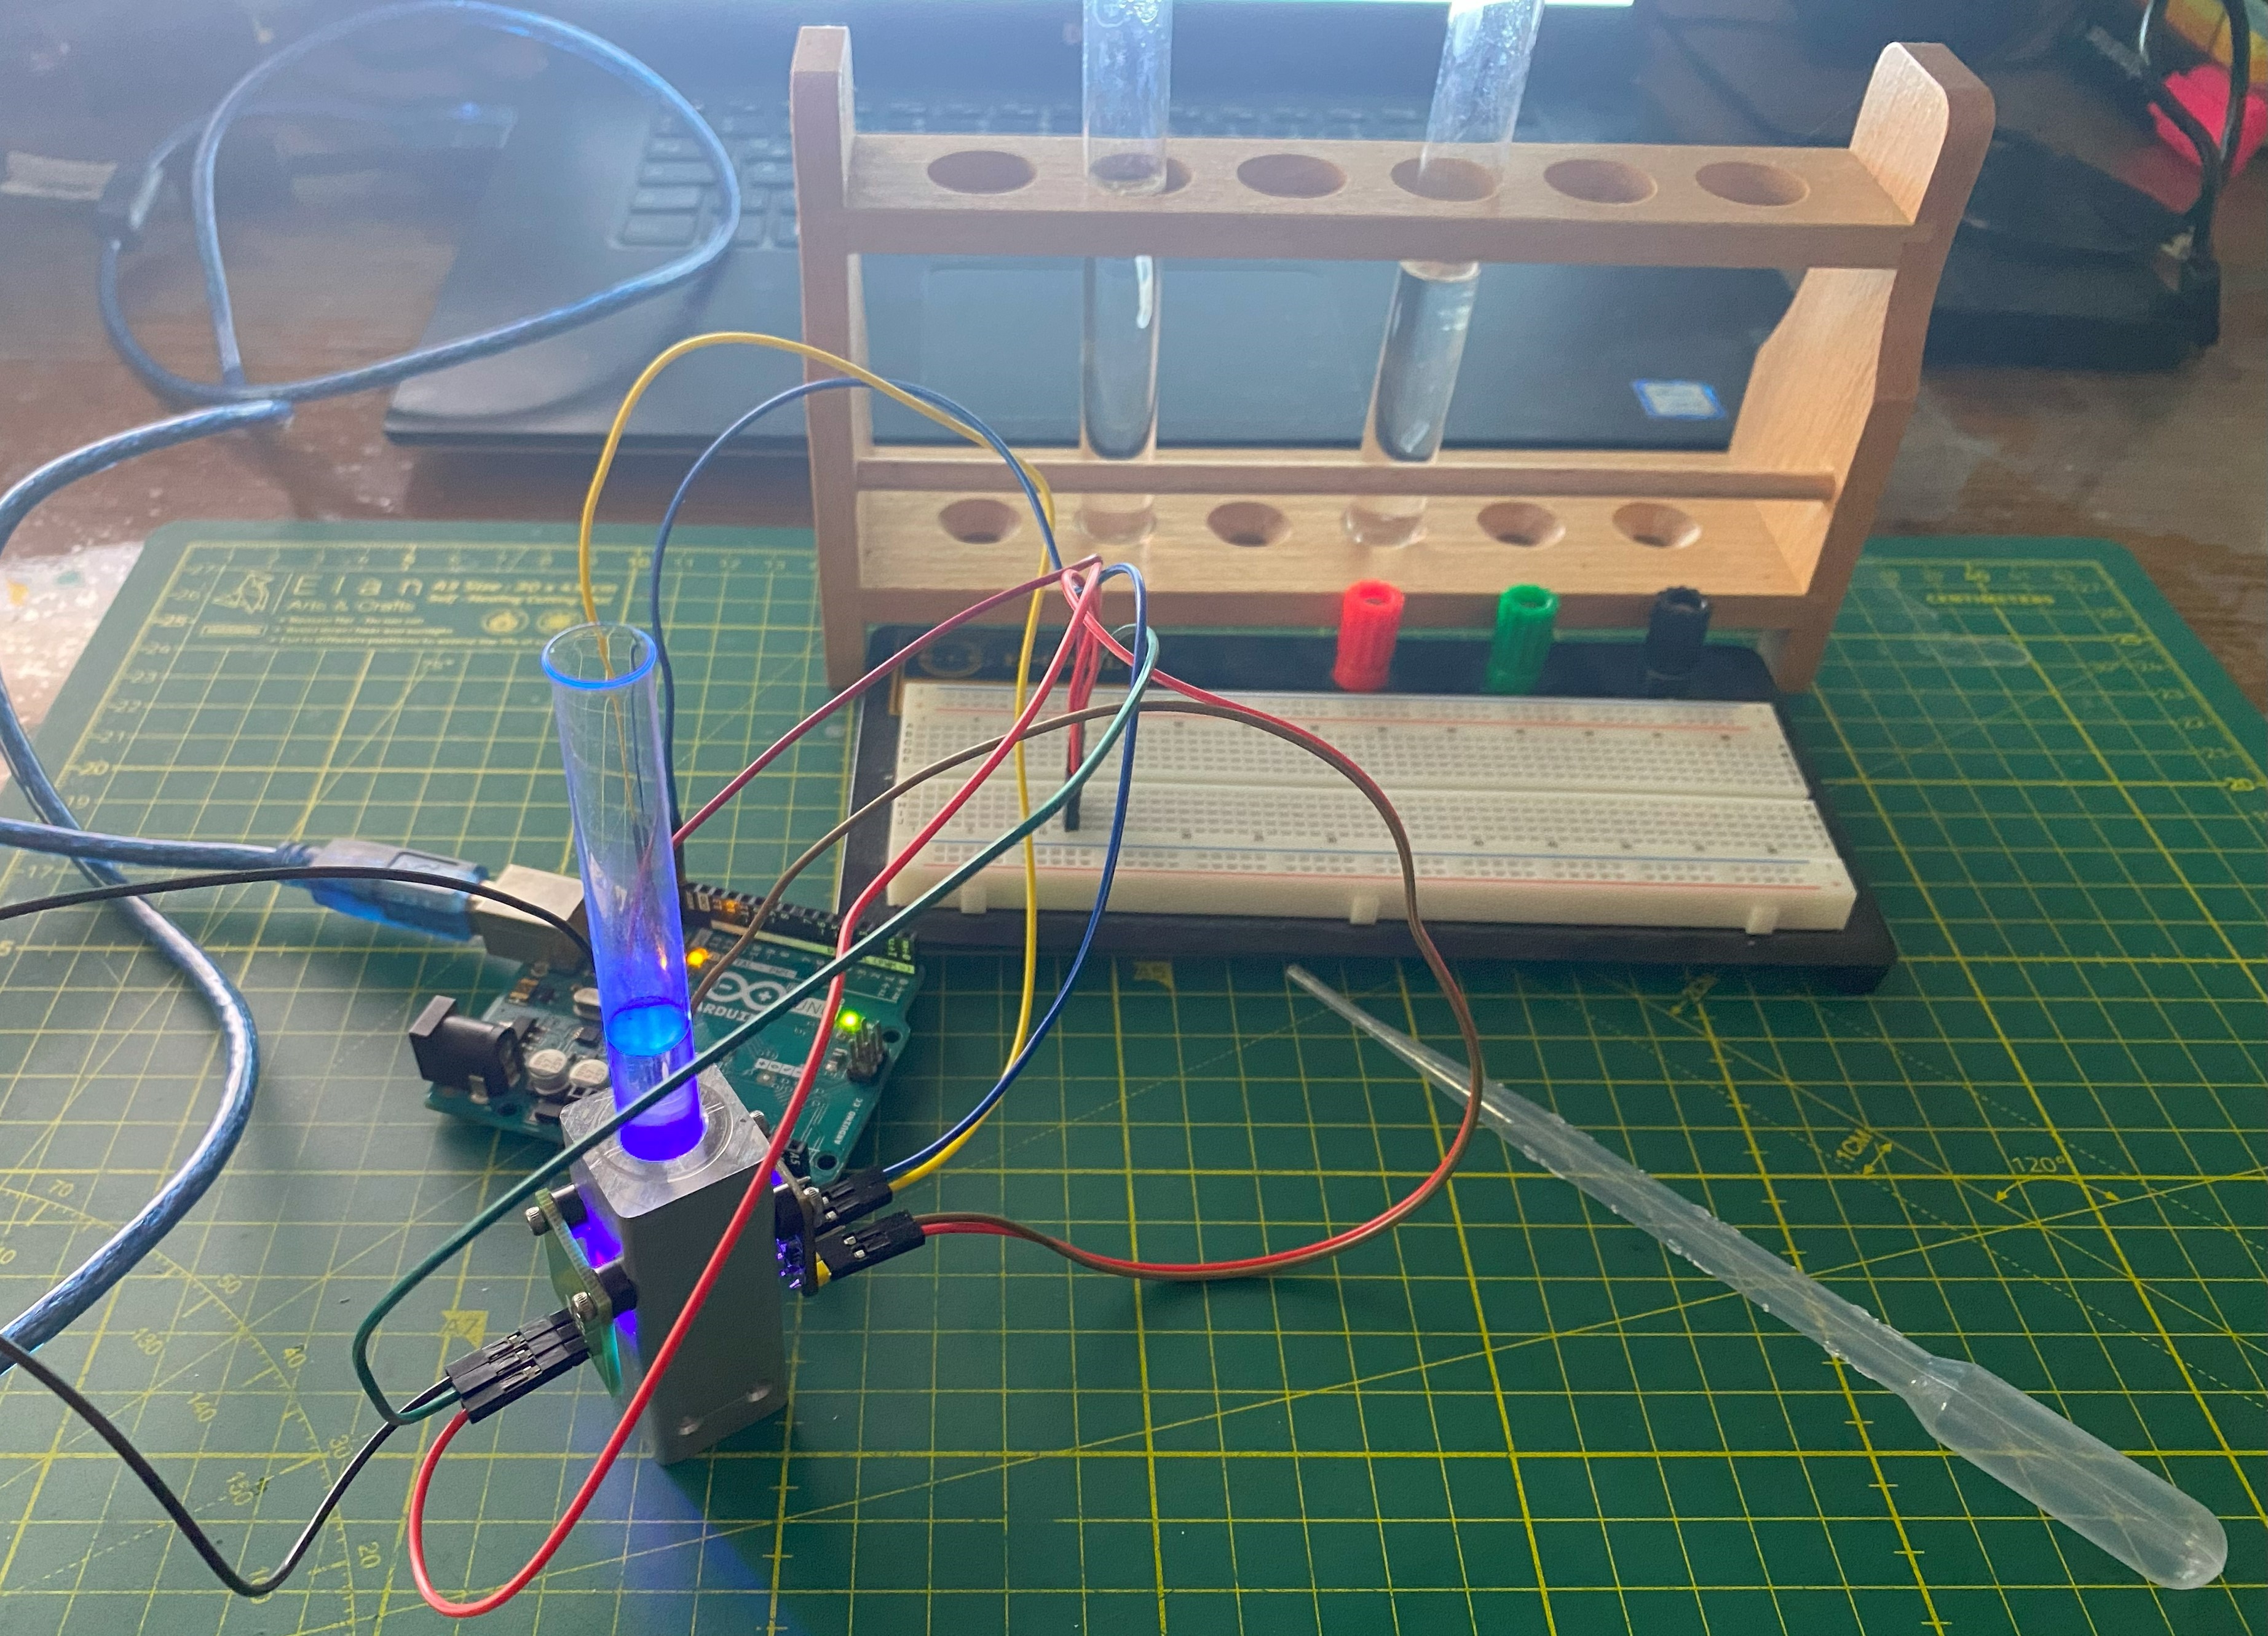
Fig. 2.7 Testing the quinine sensor
After several attempts, an ideal acid indicator was found. To do this, 40 mg bromothymol blue is dissolved in 20 ml ethanol and then diluted to 100 ml with tap water. The solution turns deep blue, as tap water is slightly alkaline. When diluted acid is added, the color immediately changes to yellow. This can be easily detected by the color sensor.
The Benedict reagent is prepared by dissolving 10 g sodium carbonate, 17.3 g sodium citrate, and 1.7 g copper(II) sulfate in 100 ml distilled water. It is recommended to use a magnetic stirrer.
The ninhydrin reagent is prepared by dissolving 0.5 g ninhydrin in 50 ml pure ethanol. Surprisingly, the ninhydrin reagent for glutamine turns an intense purple color within one minute at room temperature. That means that no heating is required.
3. Electronic nose
The multichannel gas sensor from Grove is used as the sensor. Four gas sensors are sitting on the top of the breakout board:
- GM-102B MEMS NO2 gas sensor
- GM-302B MEMS ethanol gas sensor
- GM-502B MEMS VOC gas sensor
- GM-702B MEMS CO/H2 gas sensor
Of course, all four gas sensors are also sensitive to other gases but are particularly sensitive to the gases...
Read more »


 Lithium ION
 Kyle Gabriel
 Beaglebreath
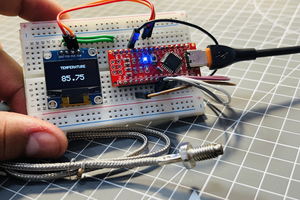
Great project! I have always wondered if there is a cheap way to "electronically sniff" whether a target substance is in a room. Like if you could create a device that could detect the presence of bananas in an environment. I would even settle for something that could detect bananas in the room while a banana was in a food processor or hot pot open to the air.