 The Young Maker
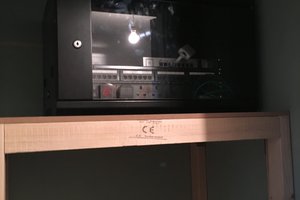
Disclaimer: While TinyNAS bears a resemblance to a Synology NAS with Synology's logo on it, it's crucial to clarify that this project is not sponsored by Synology. The inclusion of the Synology logo on my project is purely for the purpose of enhancing realism.
What is TinyNAS?
TinyNAS takes inspiration from Tobychui's original USB form factor WebStick designed for the ESP8266. I've adapted and enhanced the concept, transforming it into a TinyNAS specifically built for the ESP32, offering improved performance and support for up to 3 SD cards. Resembling a miniature NAS, TinyNAS serves as a web server that connects to your home WiFi. It enables local access through mDNS in your network and can be accessed remotely by configuring port-forwarding settings on your home router.
Functionality:
Designed with the limitations of a compact form factor in mind, TinyNAS boasts an interface reminiscent of ArozOS File Manager. It provides a user-friendly platform with utilities allowing you to store, stream music, videos, and photos directly onto TinyNAS's SD card. Additionally, it facilitates hosting static web files like HTML, CSS, and JS, offering a web programming interface for easy website modifications without the need to unplug the SD cards.
Project Origin:
This project is derived from Tobychui's original WebStick, which featured a USB form factor and was designed for the ESP8266. Recognizing the potential for enhanced performance with the ESP32, I've modified and optimized the concept to create TinyNAS. While it maintains the spirit of a real NAS, it distinguishes itself by its compact size and the power of the ESP32.
Note: While this project has made significant progress, there are still some issues that require resolution. Your assistance is invaluable in addressing these challenges. If you're interested in contributing, please reach out via email at loicdaigle31@gmail.com.
Note: While this project is capable of serving a personalized homepage, it has certain limitations in handling a large number of simultaneous visitors. If you're keen on establishing a web server designed to accommodate a broader audience, I encourage you to explore my dedicated tutorial on this subject, accessible on my website: Creating Your Own Apache Server. Additionally, if you spot any errors or feel that something is missing, please share your feedback in the comments. Your input is invaluable, and I'll promptly address any corrections or additions suggested.
 Simon Betts
 Vinny Mannello
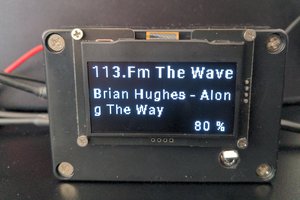
 Grégory Paul
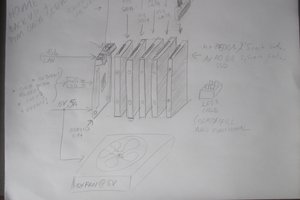
 mrozo
mrozo