 Nick Hehr
I would hate to be this guy at work during an important interview or meeting.
My son is starting become more mobile and explore all the different spaces around my house. I've always wanted some sort of indicator to him, my wife, and anyone else in the house that I'm currently in a meeting without needing to remember turn it on or off. It would also be useful if it could help me remember when the meeting has started; I think we've all been there when a reminder for a meeting comes up 5 minutes before it starts and then it completely slips your mind until 5 minutes after it starts. 😅
To accomplish this task, I used a cardboard box, an ESP32, an RGB LED, and a USB battery (along with the wires and cables to connect them all together). The ESP32 is a very popular microcontroller because it provides Wi-Fi, Bluetooth, plenty of GPIO, and a solid amount of memory and storage for its form factor while staying relatively low-power, so it can run all day using the USB battery. Since I didn't need to worry about connecting to an outlet, the light can be mounted wherever I like.
This also gave me a chance to try the latest release of the Viam micro-RDK, so I could securely connect to and program the device with my choice of languages. Typically, when a network-connected device in a home (or office) needs to communicate with the world wide web, there are a few methods to do it:
- Some code on the device could check in with a cloud service to see if there is any relevant information with which it can take action; this is called "polling", which is a quick and valid approach when you're not worried about power or checking the service too often for updates.
- The device could also "subscribe" to updates from a messaging service in the cloud using MQTT or another "pub/sub" protocol. This is more efficient for the device and can be useful for scaling those updates to many devices, which is not a concern for my project; plus it adds a layer of complexity to the stack to maintain this project over time.
- There is also "hard mode": opening a public port on the network router and forwarding a request to the public IP address to the device, which could have security implications if done incorrectly and it's not guaranteed that the IP address will always stay the same since typical home service providers can reassign them at will.
Devices connected to Viam take a different approach entirely. The RDK and micro-RDK use gRPC to establish a secure peer-to-peer WebRTC connection with the Viam cloud service and any programs using one of Viam's SDKs. This means any communication goes directly to/from the device without worrying about exposing private networks to the public internet or managing additional cloud services in-between.
To control the light automatically based on my Zoom status, I created a webhooks-only app written in Python connected to my account. I deployed it to Fly since they make it so easy to launch web applications for free.
Check out the working demo video below and read the build instructions to learn how to set up a smarter on-air light for yourself!
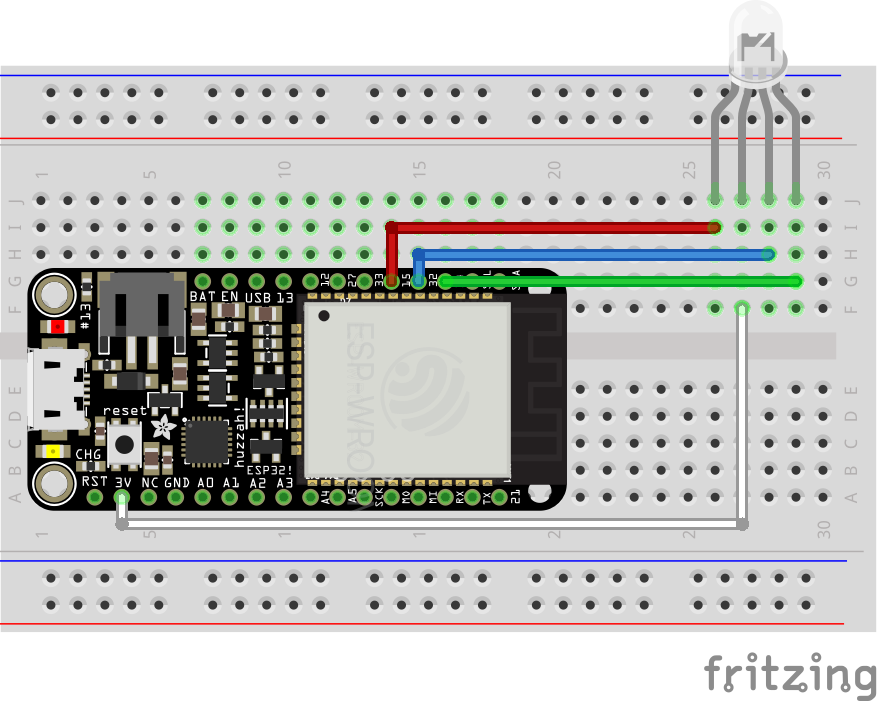 The diagram above shows a breadboard for clarity, but the RGB LED and ESP32 could be wired directly together using male-to-male jumpers if you choose.
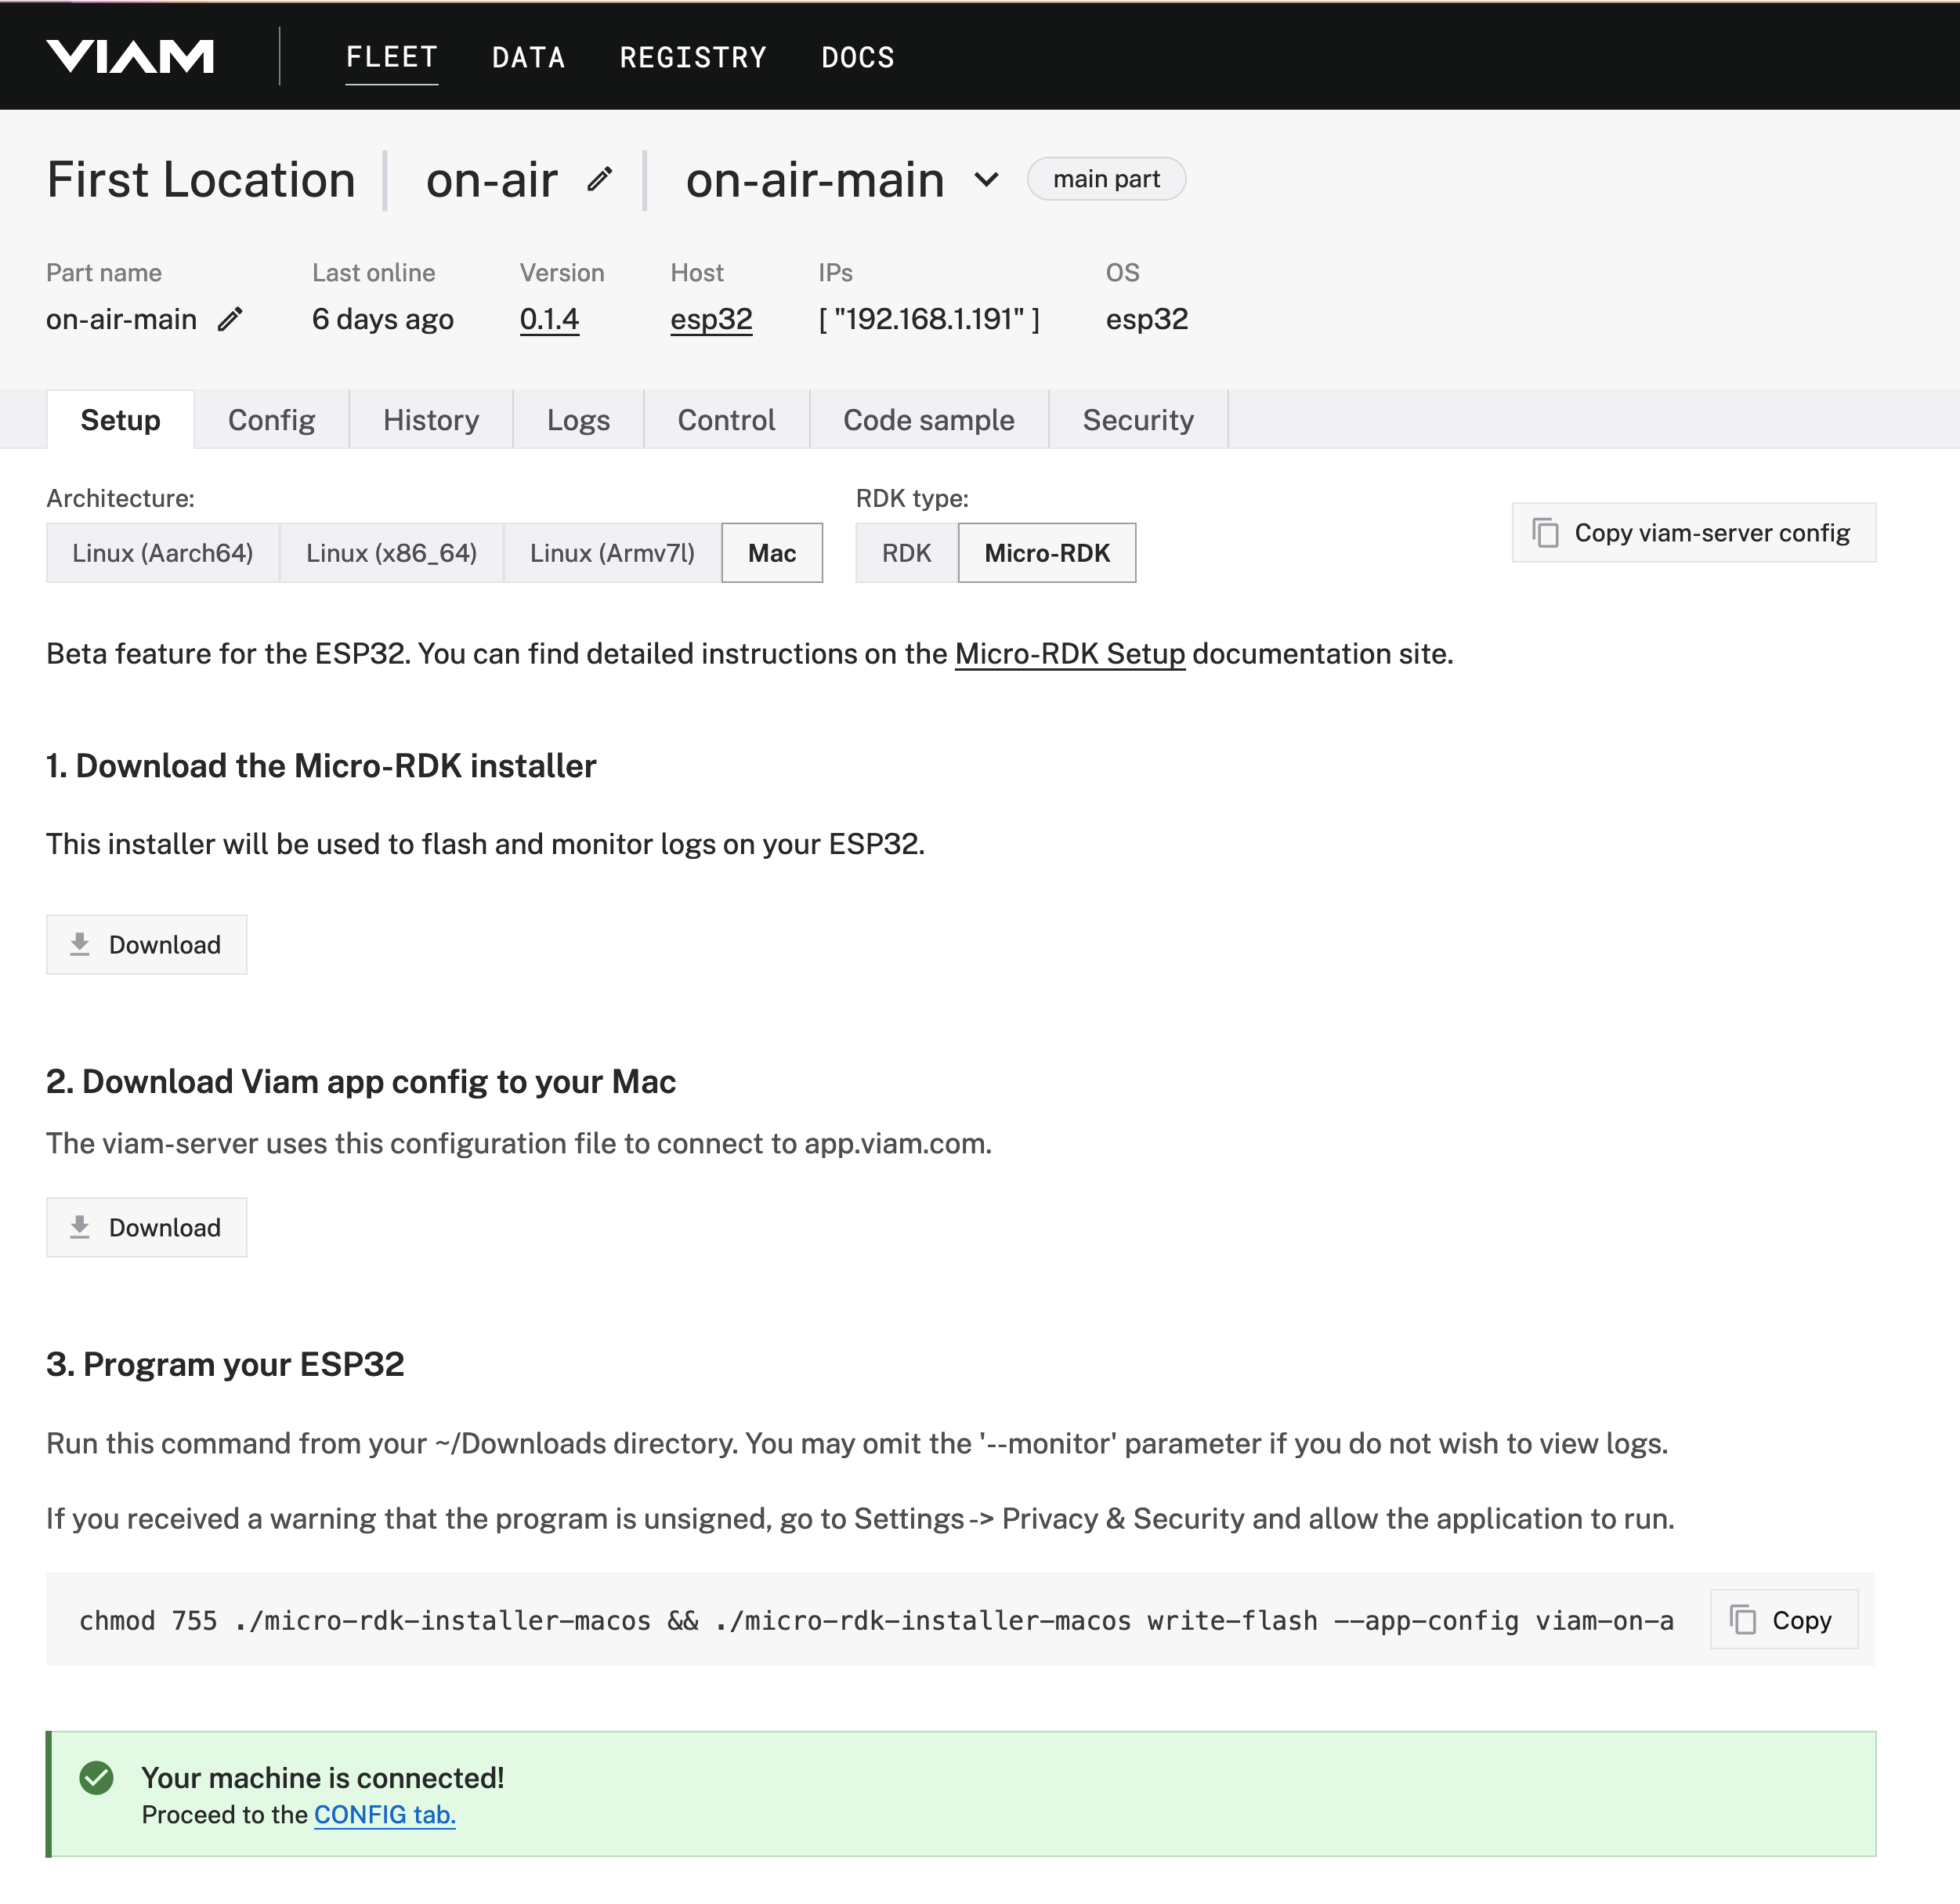 Once you've confirmed that it is connected to Viam (you should see a "Live" status under "Last online" in the header of the app),
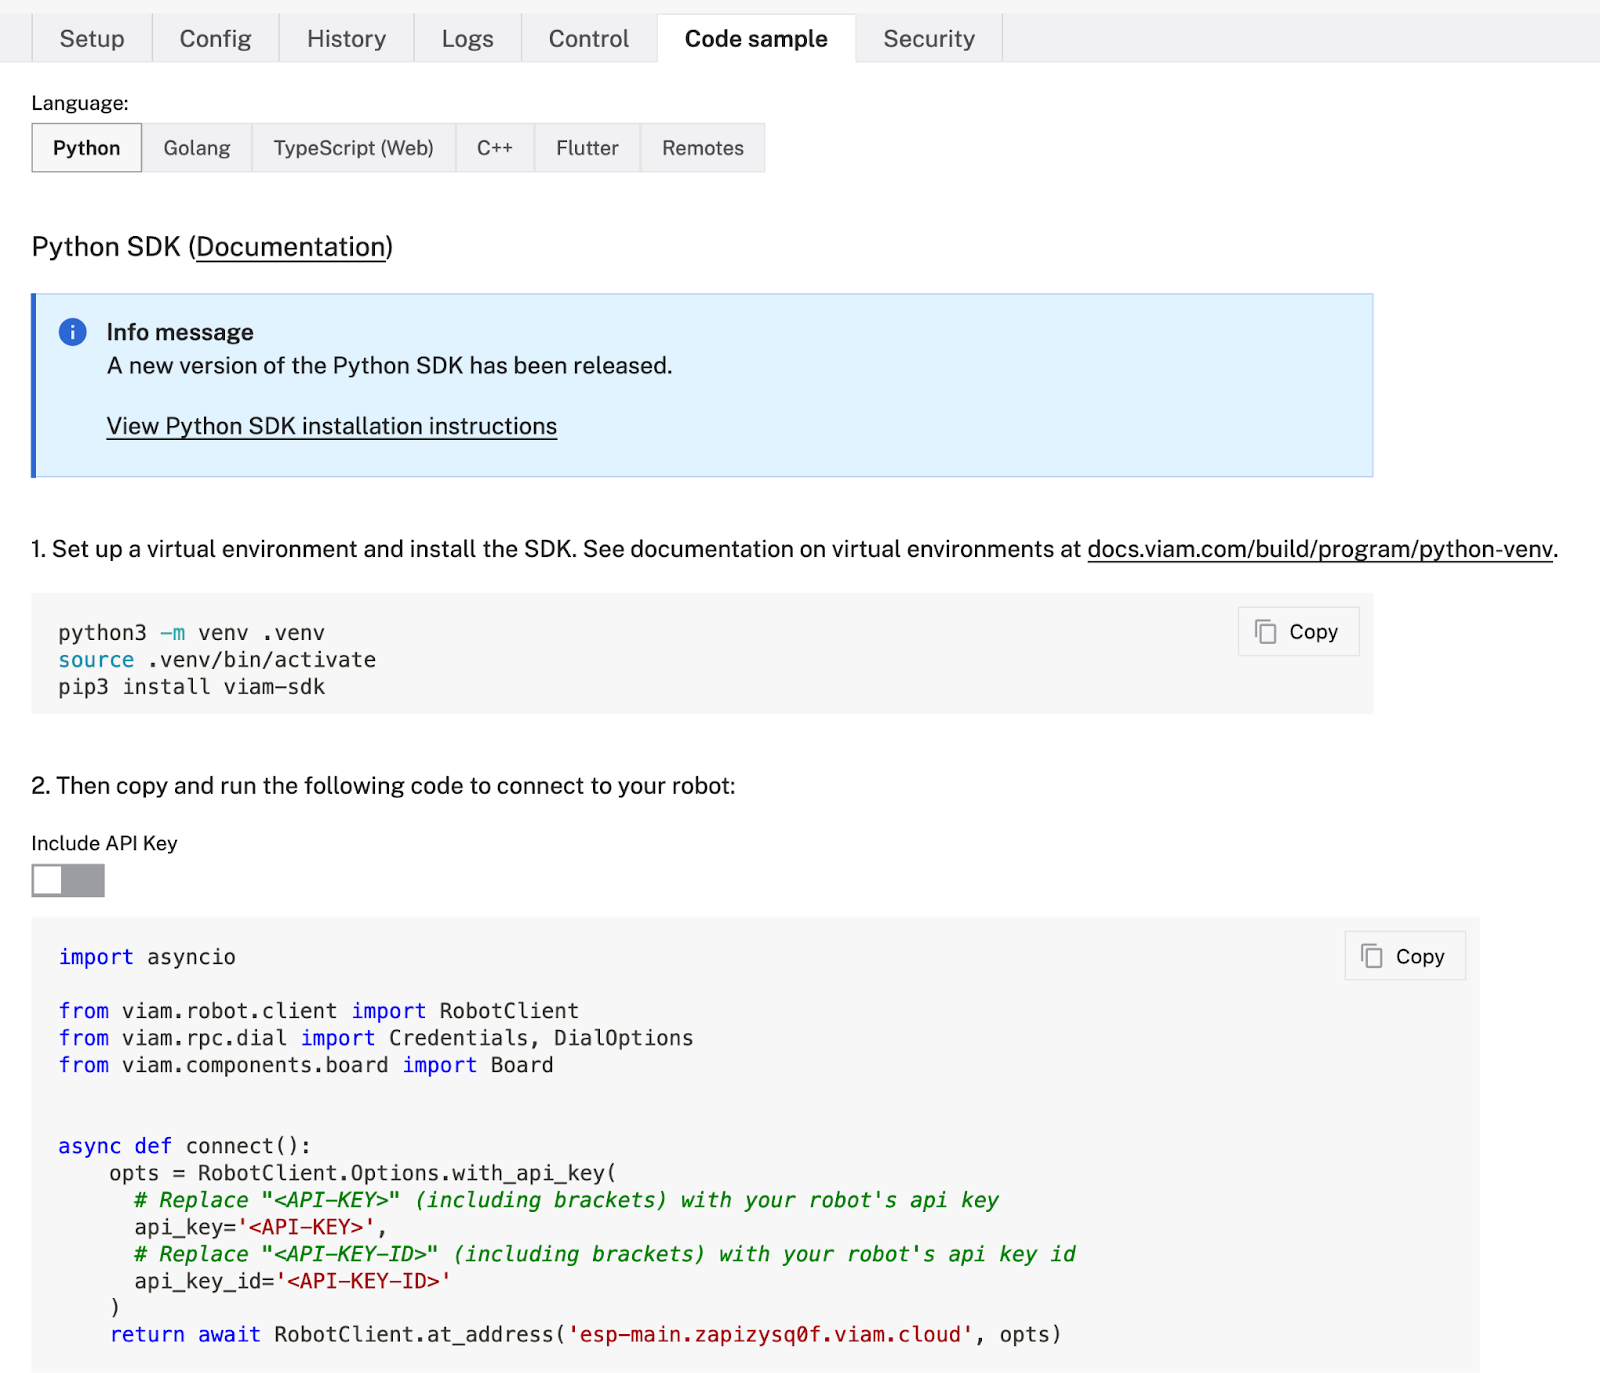
 Update the `.env` file with the relevant values, including the configured pins from Viam as `RGB_PINS` and your Zoom username to make sure the light only updates when you join or leave a meeting.
 Amine Mehdi Mansouri
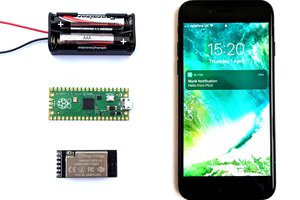
 Sylwester
 Roman V
 Sumit
Sumit