 Jeroen Brinkman
The monitor shows the daily routines of one month, but stores the entire year. When the routine is accomplished, just press the corresponding day button. This changes the LED light on the button from white to green. I picked the colors green and white, because green feels good and white is neutral. I also took into consideration that I won't be able to do the routine every day. The growing number of green lights are a positive reinforcement that keeps me motivated.
Usage
The monitor shows the daily routines of one month, but stores the entire year. All the months before the actual month are stored in memory, the current month is set by the latching day-buttons, the future months are always zero. The daily routine monitor has two displays, 31 day-buttons and only three controls. It works as follows:
Left button, short press -> toggle percentage and totals
The green display will toggle a percentage view and a total number of accomplished daily routines. This percentage is calculated with the number of days up to and including the last day the routine was successful executed (last green day).
Left button, long press -> toggle month and cumulative view
When pressed, the green button light will dim. When a long press is detected, the light will turn on again. The long press switches from the month view to the cumulative view: it shows all the daily events since January first. With a short press of the left button, this cumulative number of routines can be shown in total or as a percentage.
Middle button, rotation -> decrease/increase the month
Rotate to the right will increase the shown month, to the left will decrease the shown month. Depending on the chosen month the white day lights for 29, 30 and 31 will turn on or off.
Middle button, short press -> enter settings
Enter the settings: brightness left display, brightness right display and leap year. Rotating the button will increase/decrease. Pressing the button will go to the next setting. With the leap year setting, the number of days in February (28 or 29) can be set. The settings are stored in EEPROM after 10 minutes. Anly then they will be also available after the next power down/power up cyclus. When successfully stored, the left button LED will blink.
Middle button, long press -> store actual month
When a middle button long press is detected, the left button LED will turn off. Then the number of successful days for the actual month is stored. The actual month is increased.
Right button -> power on/off
The right button toggles the 5V USB-c power.
The design
I wanted an appealing design and a physical box: seeing the green lights on motivates me. I chose an aluminium case, because that is strong and durable. Associated disadvantage, however, is that not all sizes are available. I wanted no text on the front, the number and placement of buttons must be minimal and self-explanatory. I designed the enclosure so that it could stand upright or lay flat down. If you wanted, you could also hang it on the wall. Black is an easy color, because black is always black and there are no color differences. However also a blank aluminium enclosure and metal buttons could work. The enclosure could even be 3d printed. Also, the LED colors (white and green) can be changed. Yellow, red and blue are commonly available.
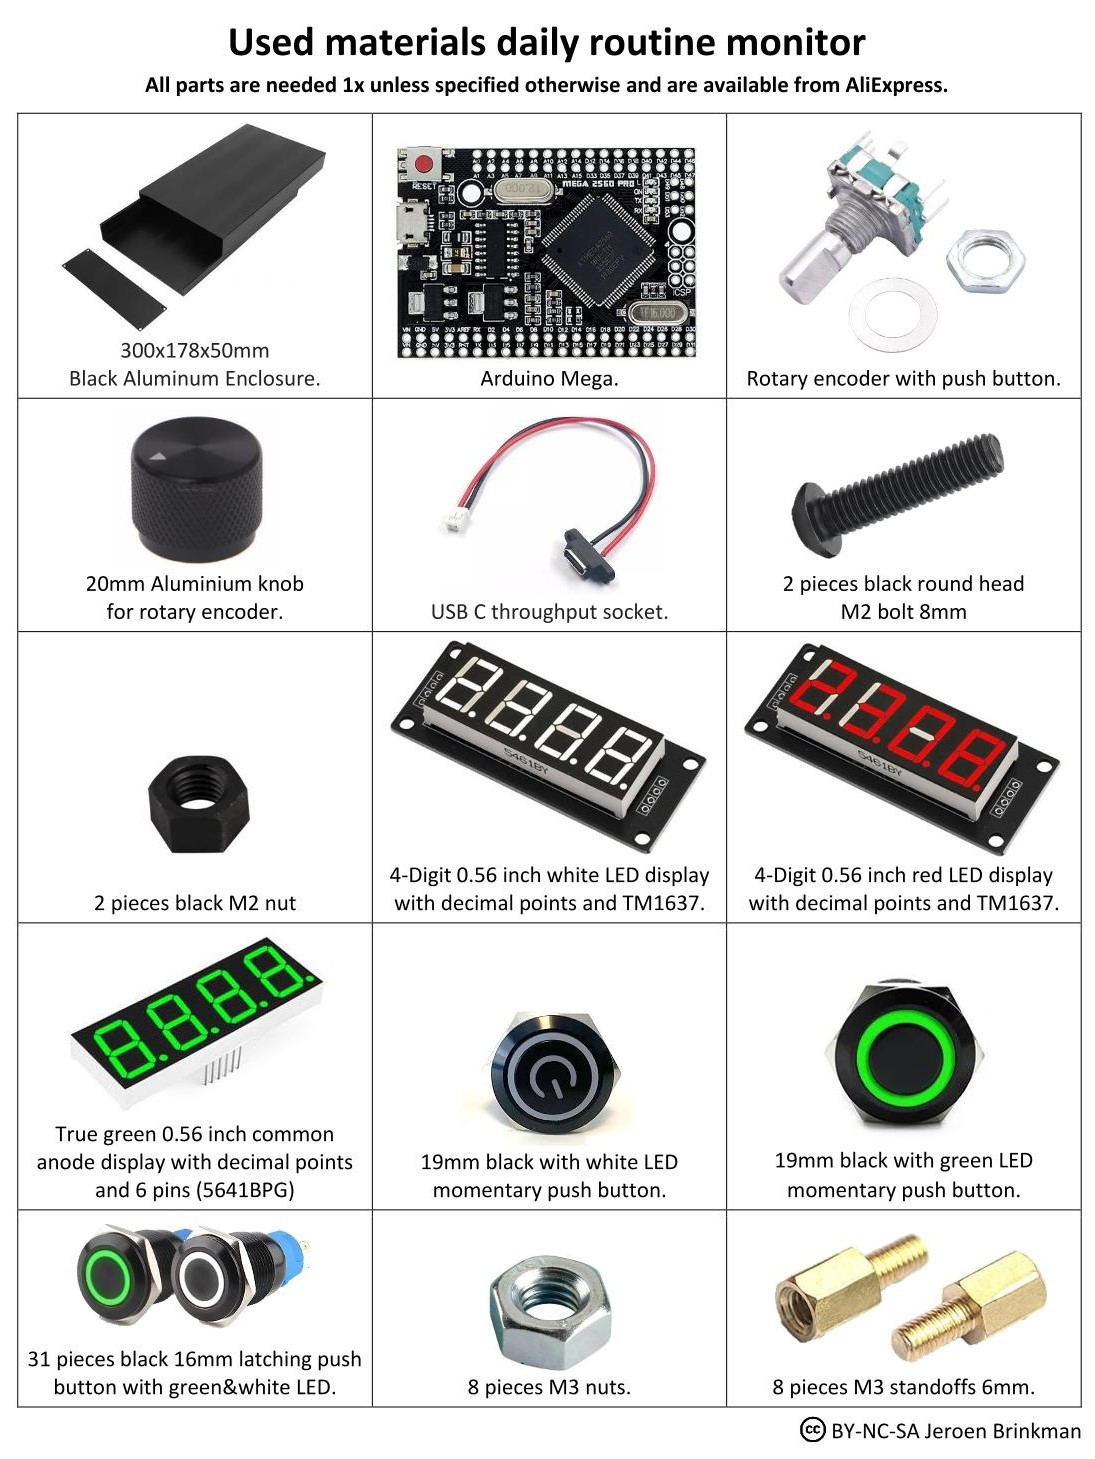
The construction
I bought all the materials on AliExpress. Be aware of the fact that there are two colors green: yellow green and true green. Both are named green. That is why I bought a red display unit, desoldered the red and soldered a true green 7-segment LED display. Also notice that there are LED displays for clock use (88:88) and for number use (8.8.8.8.). The latter is used. The two color LED buttons are not common available, also the quality may be poor. I bought the good ones from the FY Global Electrical Store.
Used materials
I used my CNC router to make the holes. The enclosure was milled from the inside. The zero point...
Read more »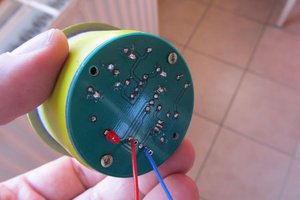
 Alain Mauer
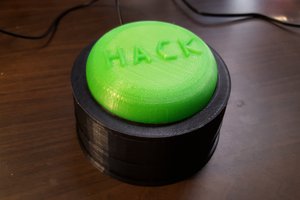
 Eric
Eric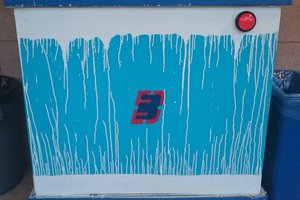
 aalves
 Lex Kravitz