 h4rdc0der
MOTIVATION
When it comes to making own PCBs, there's always (along with that soldering smell) a little magic in the air... A lot of creativity ends up with a device which will be used to resolve a problem and make life easier.
In my old apartment I had basic power outlet setup controlled via a 433MHz radio controlled by ESP8266 (you can find it in my projects as Raesp Gateway).
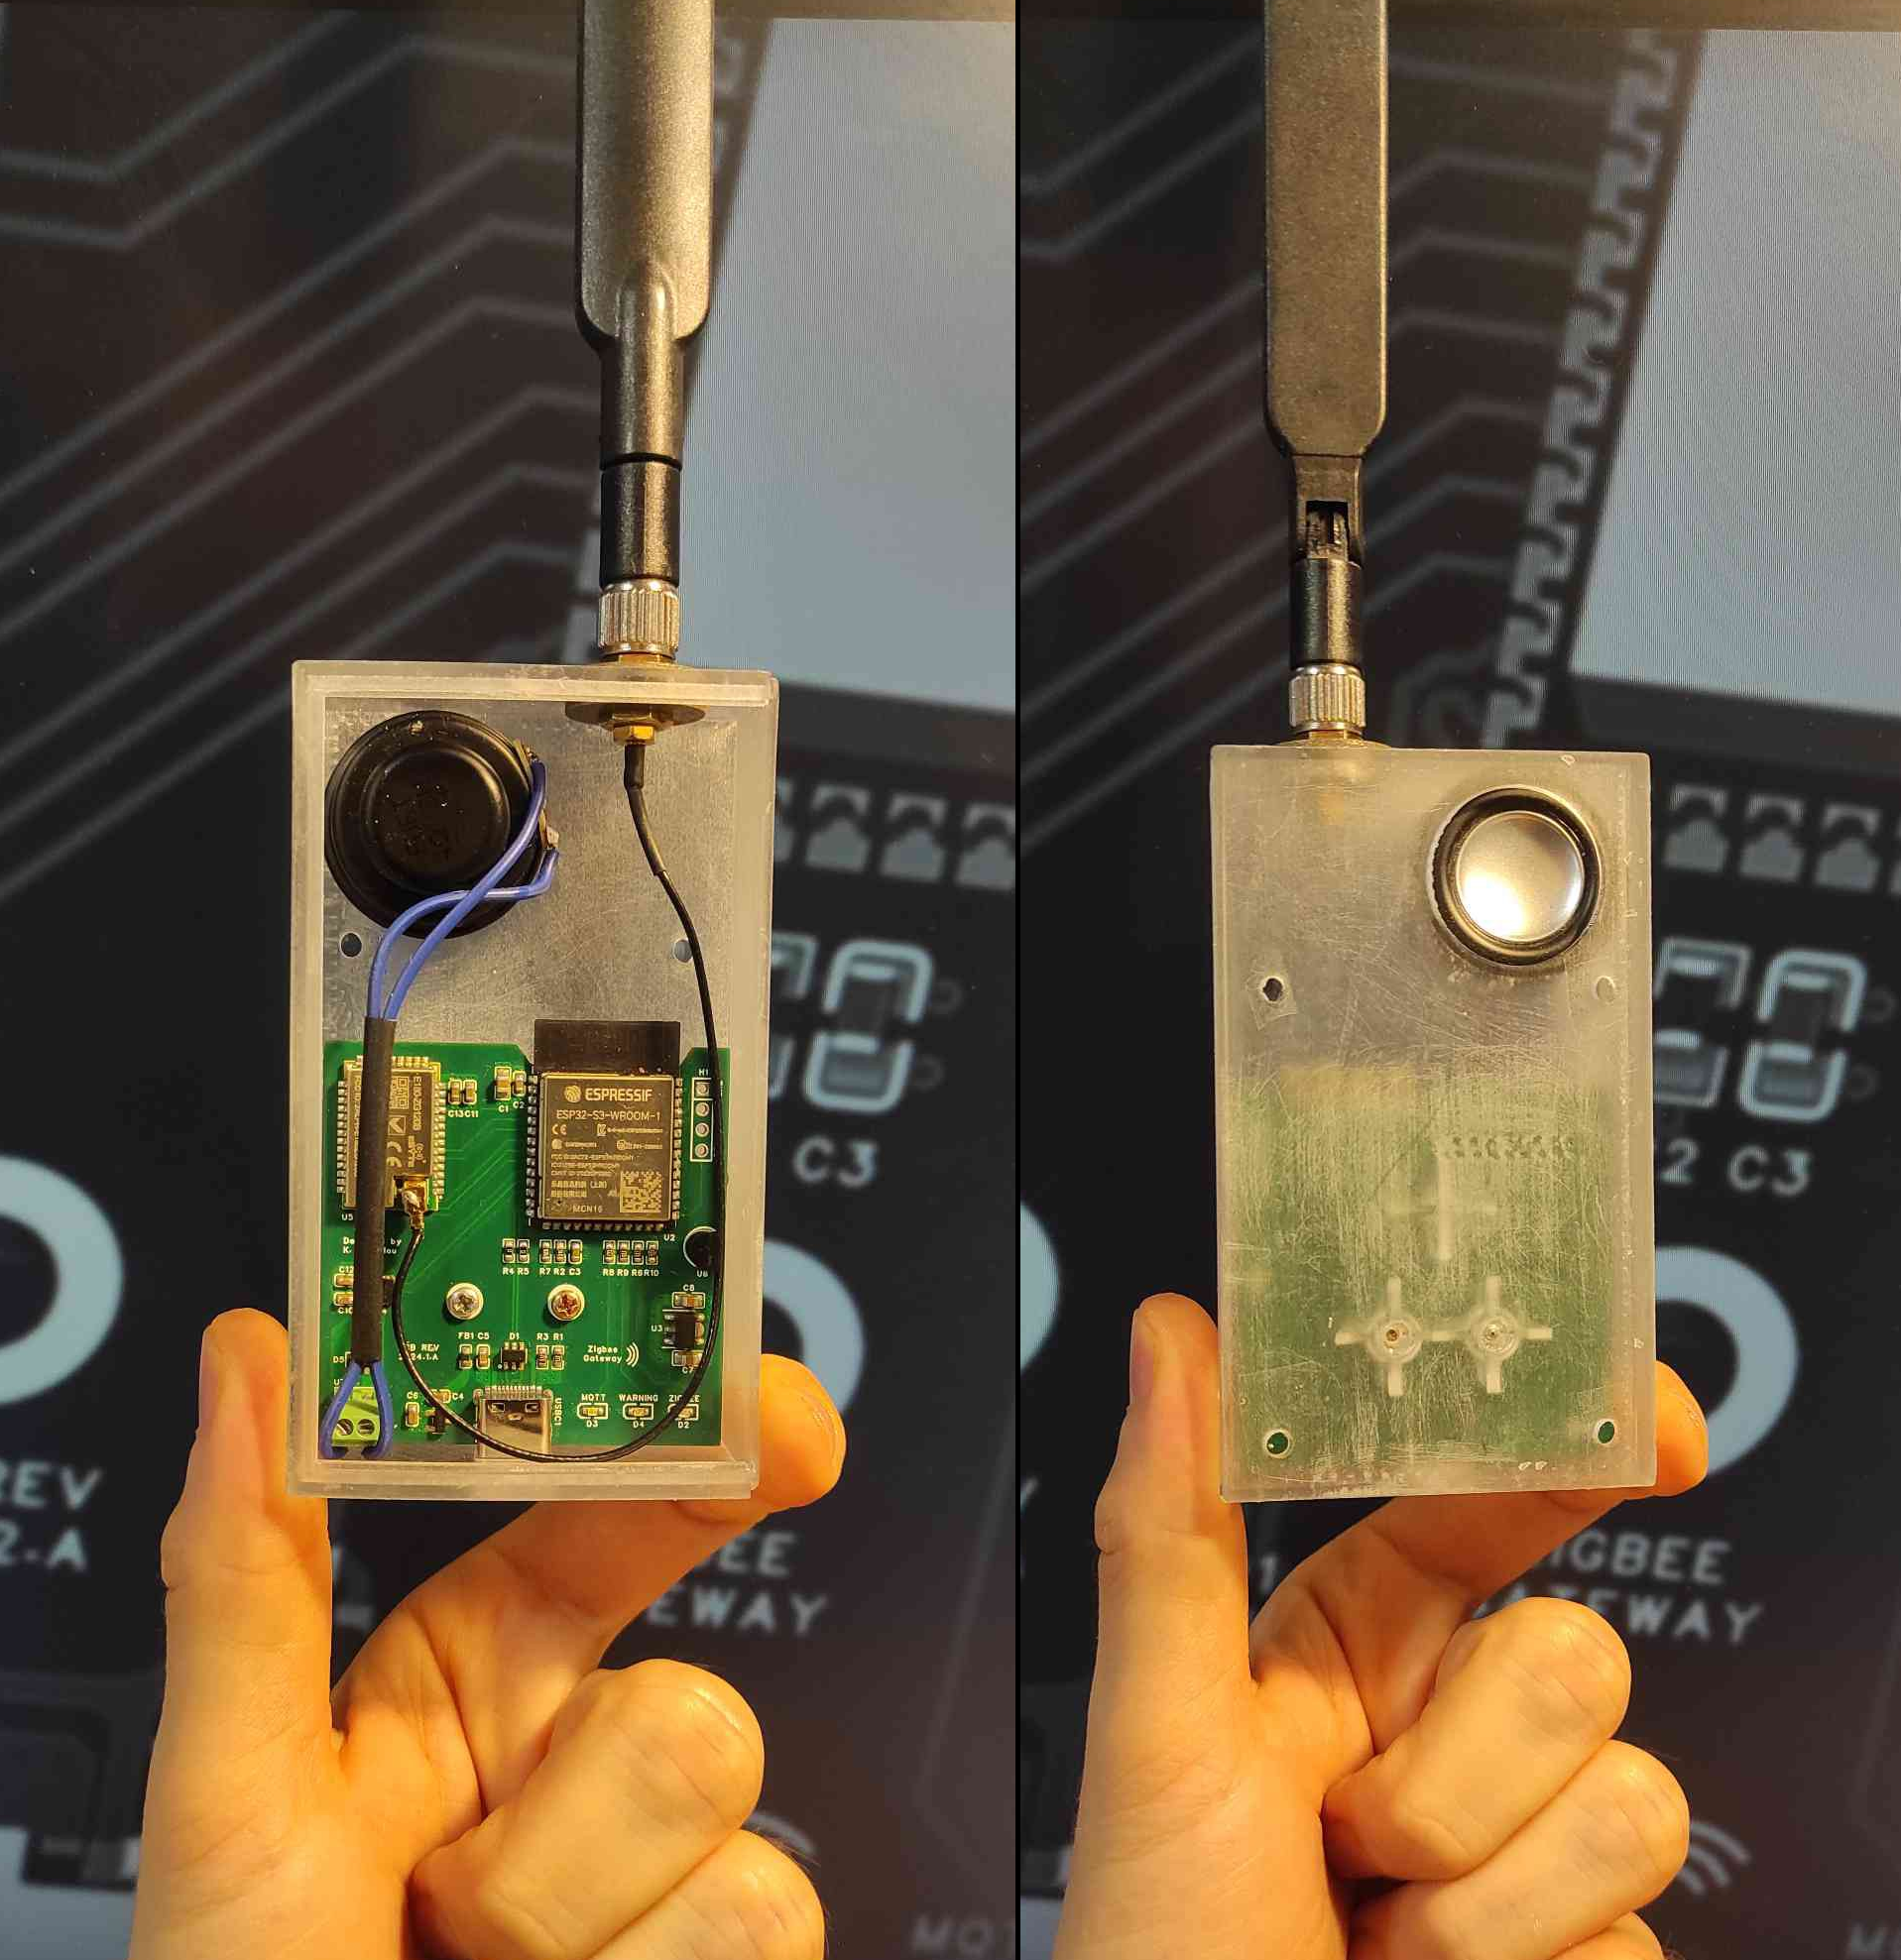
However, as we're reaching another life milestones with my amazing wife ♥️, some inspiration grown in my head and I've challenged myself to build my own Zigbee Gateway.
BUT WHY JUST DON'T BUY A ZIGBEE USB STICK?
I would like to have full control over devices, control over the flow between Zigbee and the internet, and voice notifications in one device.
ROADMAP
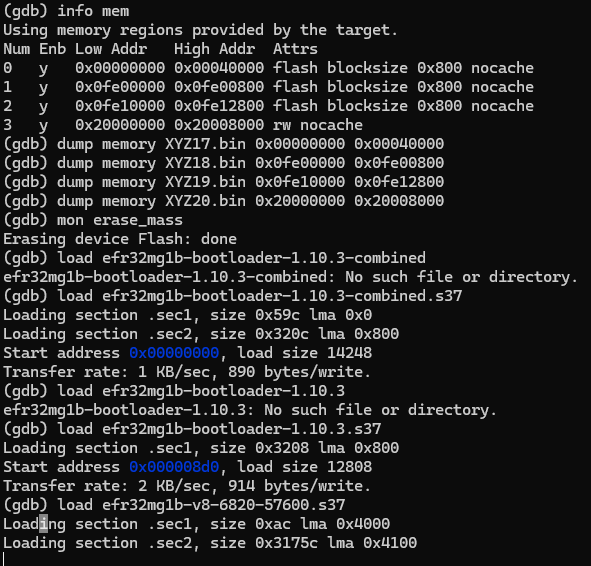
First step known also as MVP is to create a device which works as serial-to-network agent (remote serial port) and is able to handle HomeAssistant built-in ZHA integration. The device should also support audio notifications and onboard temperature sensor. Zigbee Network should be validated by successfully pairing a Zigbee device into a network hosted on the gateway.
BOARD FEATURES
- Wi-Fi and Bluetooth 5.0 connectivity
- Full speed USB 2.0 to flash code and resources
- Independent Zigbee 3.0 network processor
- 3W output capable audio codec chip
- Onboard digital temperature sensor
- Various protection measures (overcurrent, short circuit, soft-start)
- Easy to pair with Home Assistant (EZSP)
 rawe
rawe
 andriy.malyshenko
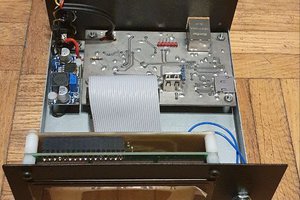
 Marek Więcek
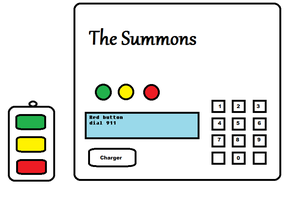
 dodgedart270