gokux
gokux
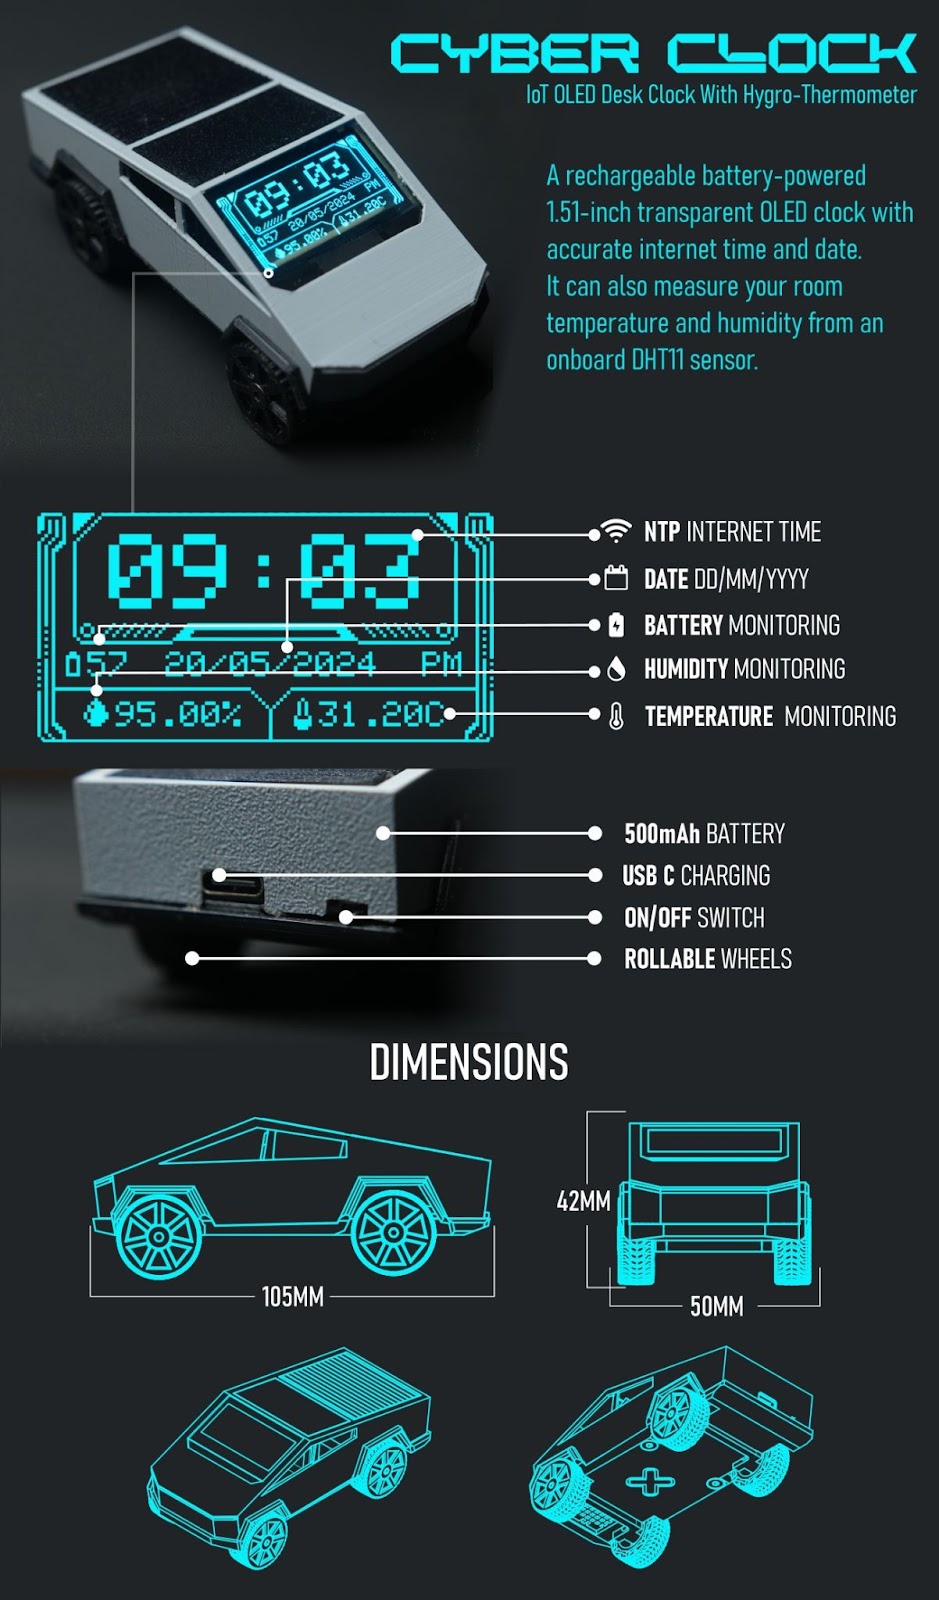
“The Cyber Clock” A rechargeable battery-powered 1.51-inch transparent OLED clock with accurate internet time and date. It can also measure your room temperature and humidity from an onboard sensor. It can show the battery percentage as well, with a fully 3D-printed Cybertruck body. It also comes with rollable wheels so you can play with it. It is also possible to lock the wheels by tightening screws so it wouldn't fall from the desk by accident !.
I took inspiration from Flipper Zero UI elements to design this watch head
Through these instructables, we will learn how to build one yourself and customize it to your time zone. so let's get started with the cyber clock build.
Supplies
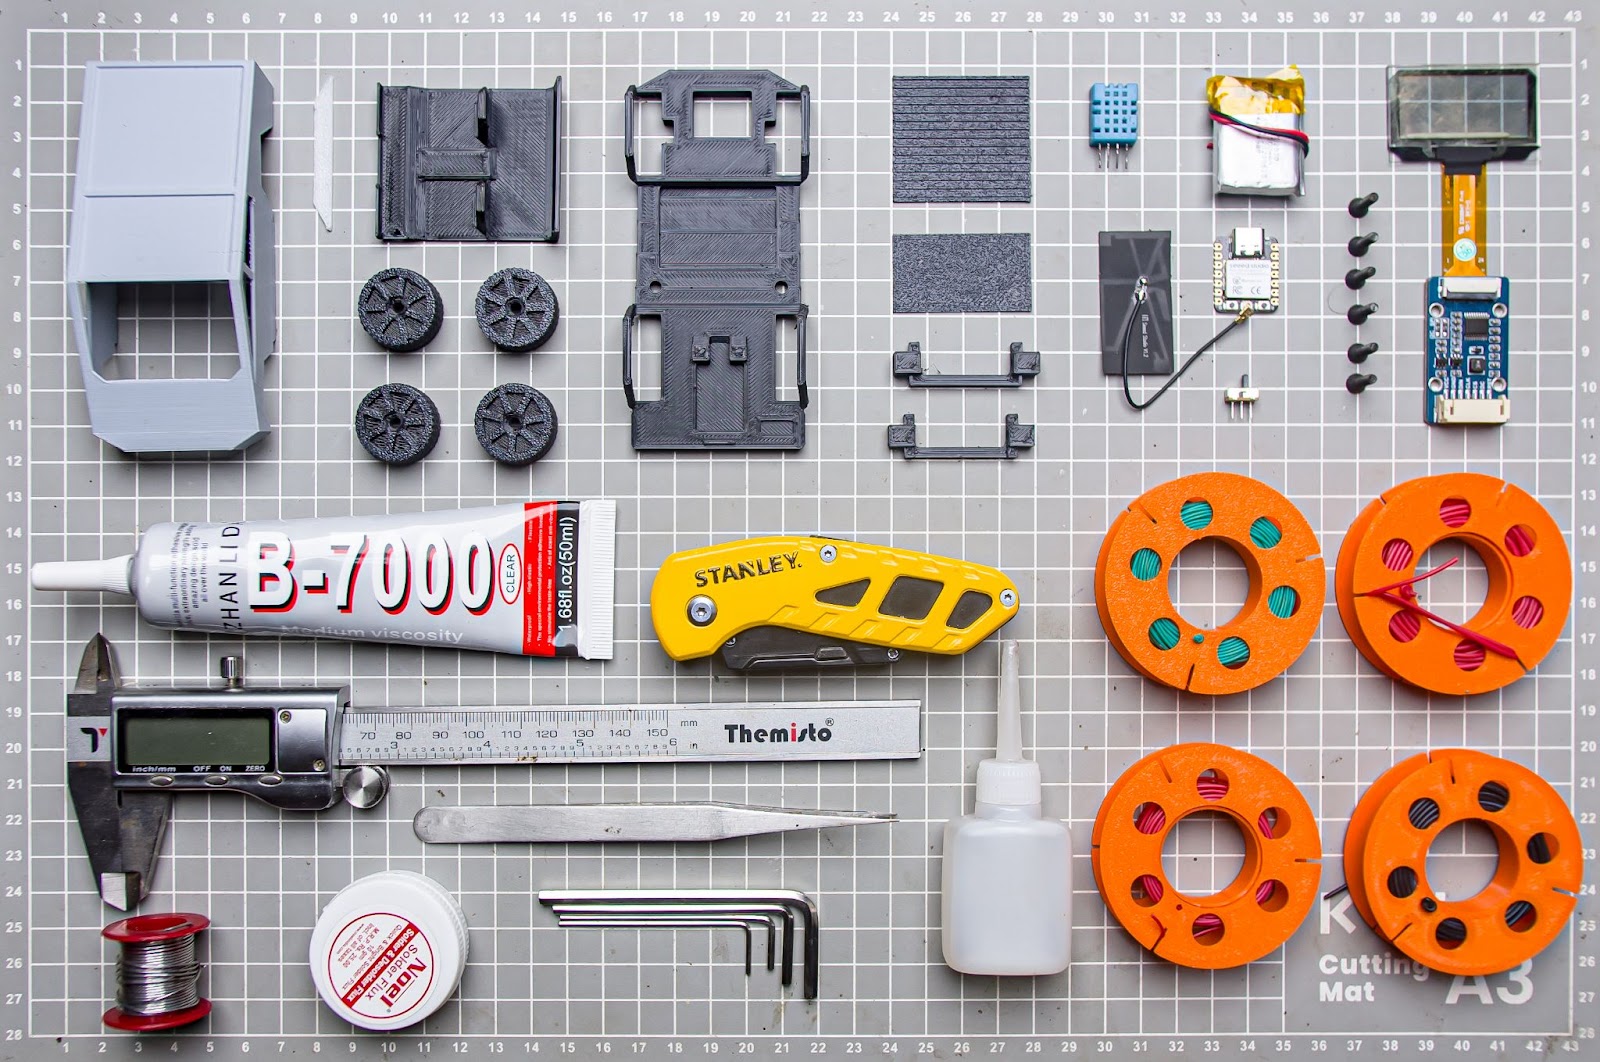
Part
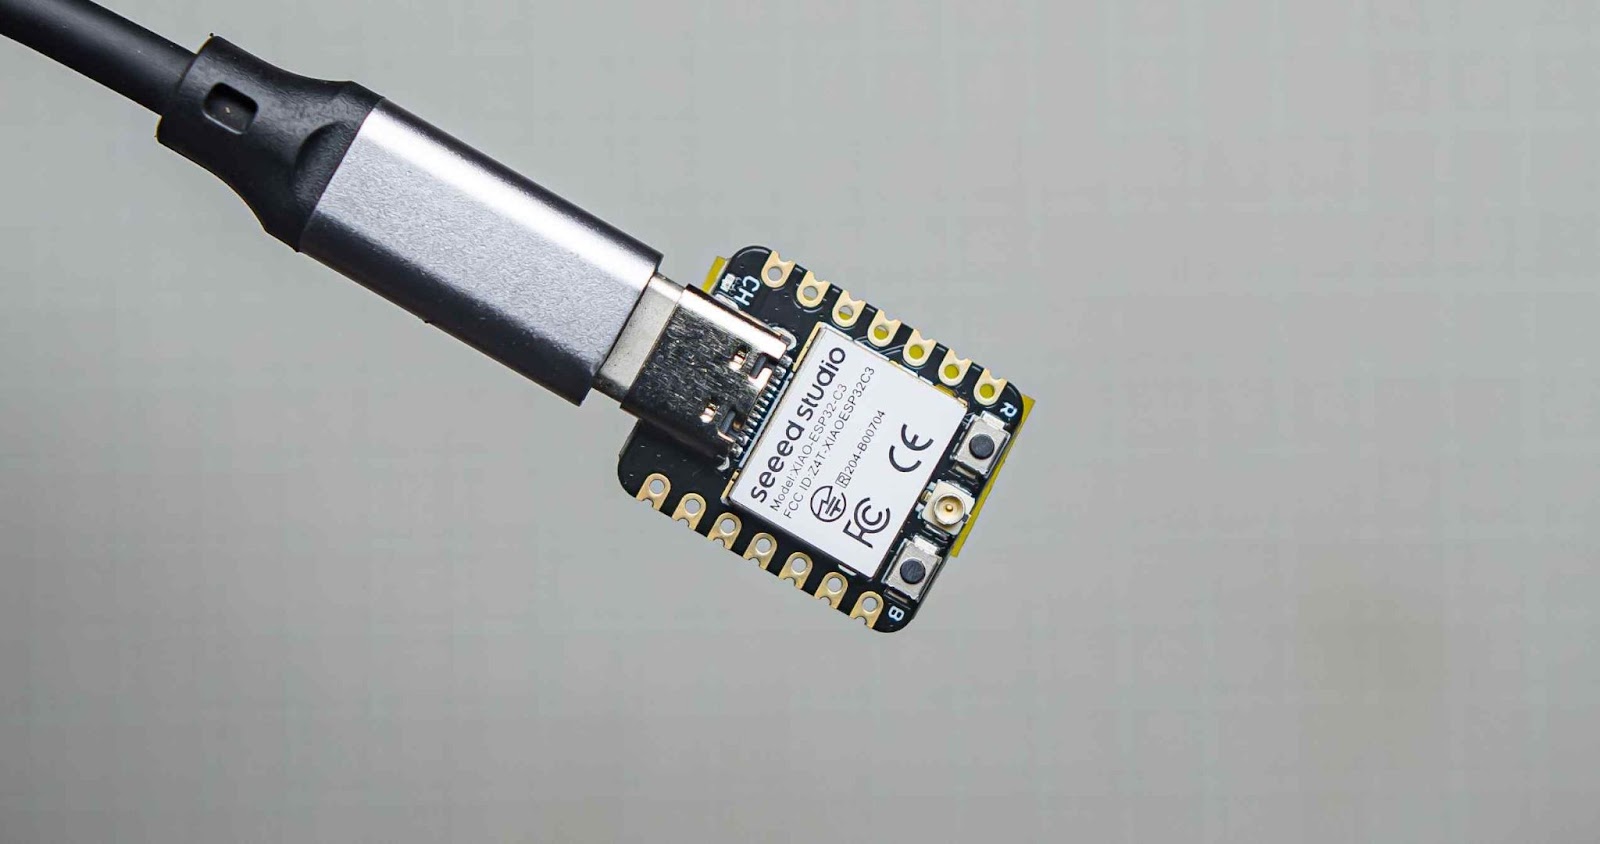
- Seeed Studio XIAO ESP32C3
- DHT11 Humidity & Temperature Sensor
- 1.51inch Transparent OLED
- Slide switch
- 500mah 3.7v battery (identical battery with 600mah)
- 30awg wires
- 3*10k Resistors( you can use both SMD type or through hole Resistorsfor it .iam using smd 0805 Resistors)
- 6*CSK Allen M3 x 10mm Screws
- B-7000 Multi-Purpose Glue
- Super glue
- Kapton tape 10mm
Tools
- Allen key
- Soldering iron
- Wirecutter
- Glue gun
Used 3D printer
Used 3D printing filaments
Step 1: Modeling in Autodesk Fusion 360
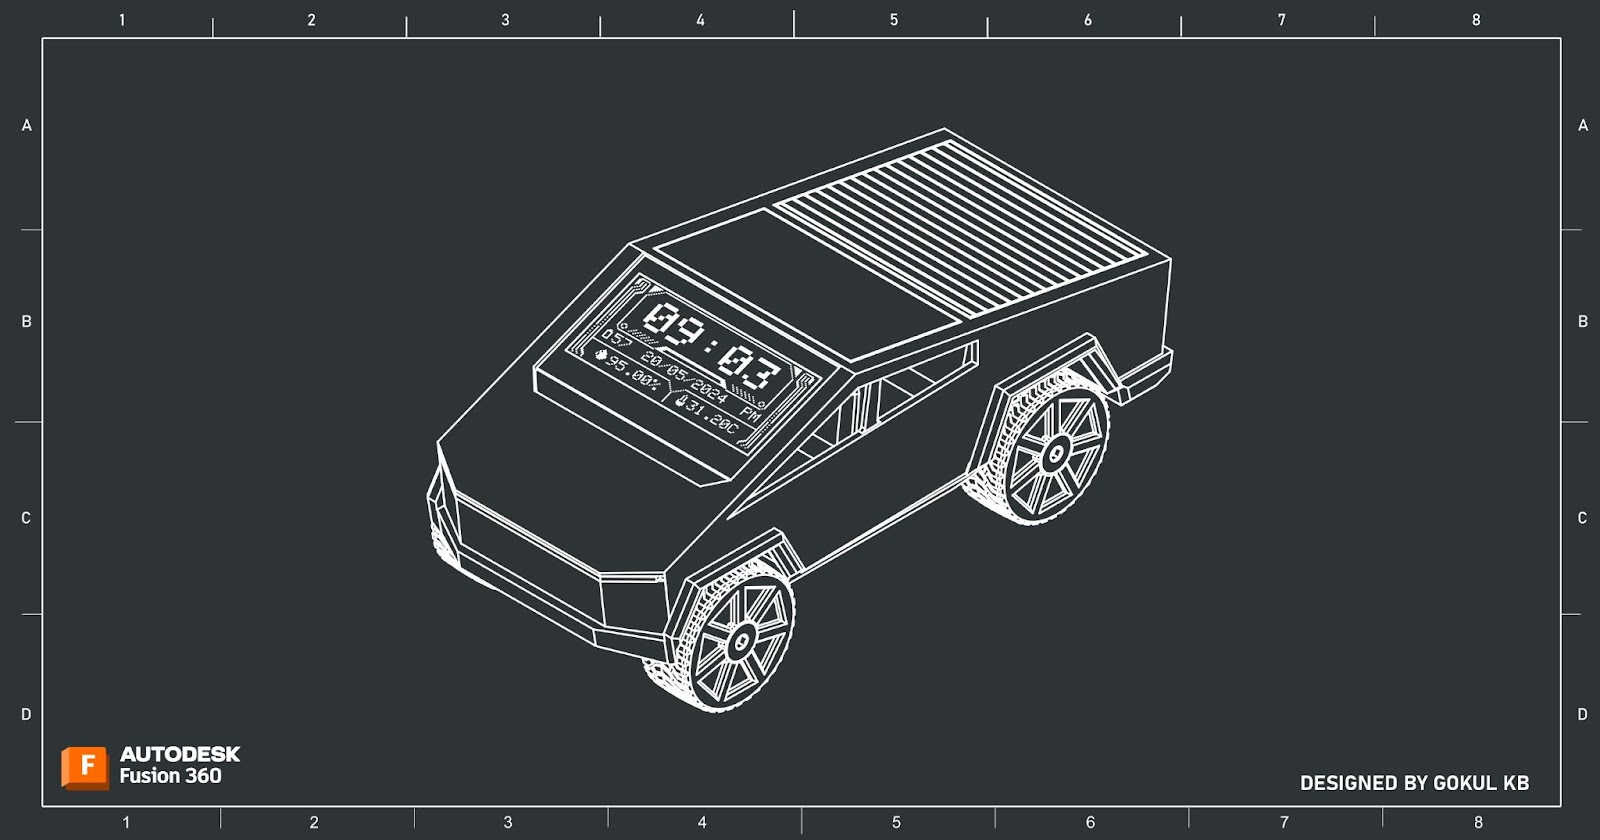
I used Fusion 360 to plan and design my project. I design this project with 2 things in mind, one easy-to-assemble and the other easy to 3d print. I broke down the body of the project into several pieces for this purpose. By importing accurate models of electronic components I was able to predetermine the position of the components and modules on the body. so I was pretty sure that everything would fit and work together even before I built the prototype. That saved a lot of time and effort. all design files are given below
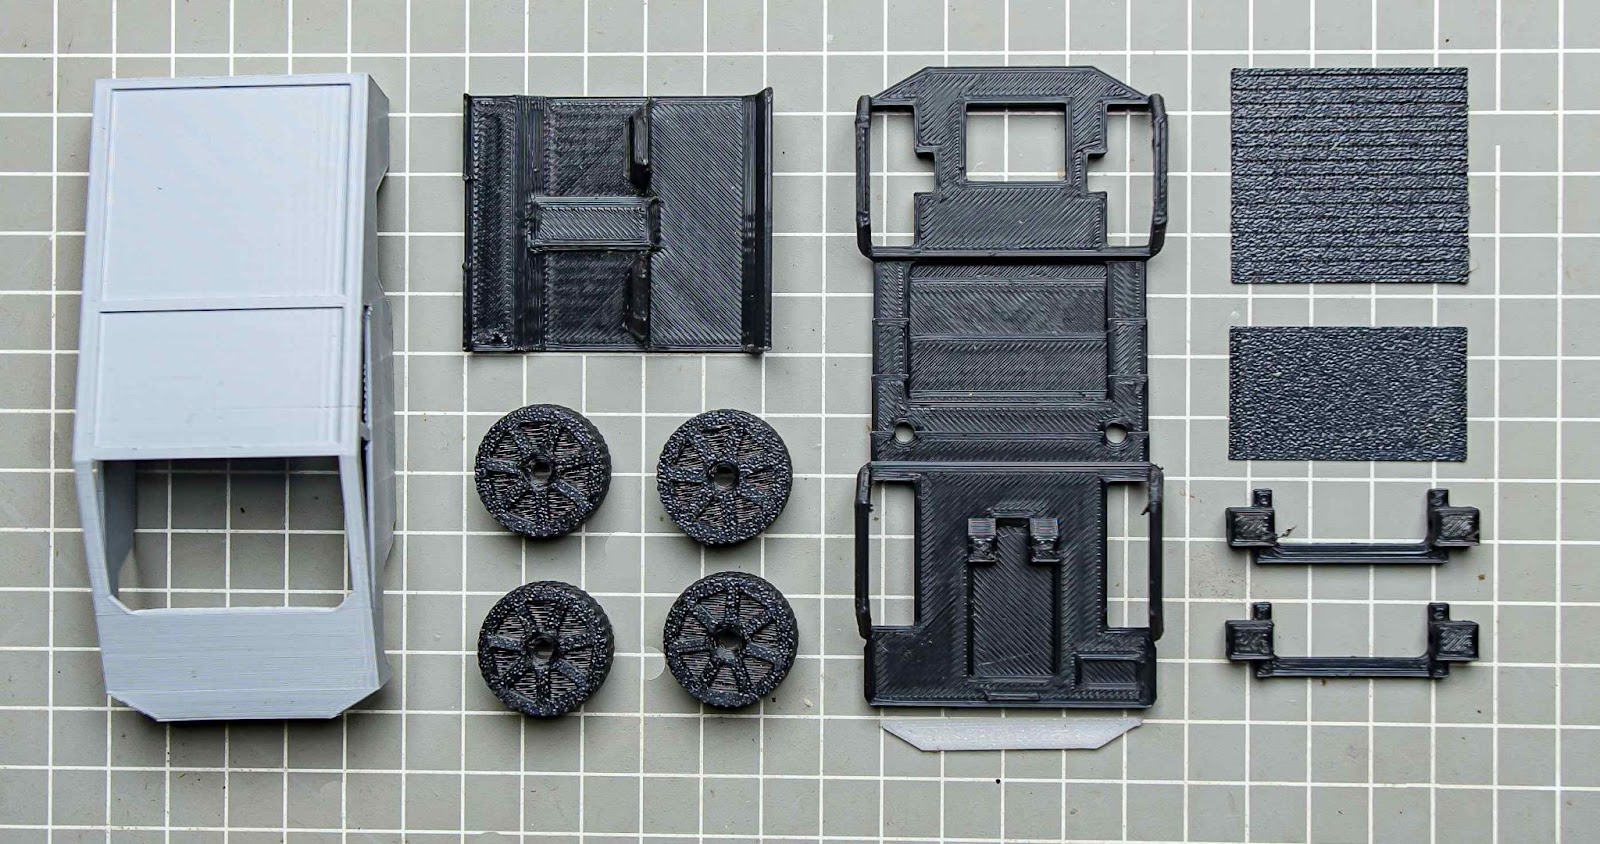
Step 2: 3d printing
After exporting all models into.STL files. I 3d printed it using my Anycubic printer. I had to use 3 different colour PLA filaments for this project, Black, Gary, and white. You can find .stl files from step 1. The top body needs some support material when you print.
Step 3: flashing code to Xiao esp32c3
I always like to upload the code to the microcontroller before assembly. I am using Arduino IDE for flashing the code. follow these tutorials for setting up IDE for Seeed Studio XIAO ESP32C3 and learn more about this board
Make sure to install all required libraries into Arduino IDE
libraries for DHT11
How to install library tutorial video link
How to set your wifi password
We need to have an internal connection to get time data from NTP servers . so we need to connect this clock to your wifi network. you can enter your wifi credentials on 46,47 lines
const char* ssid     = "ssid";
const char* password = "password";
How to set your time zone
The time zone is configured using your GMT offset in seconds. My GMT off-set is GMT +5:30 , now we need to convert it into seconds which is 19800sec. Just google it for easy conversion
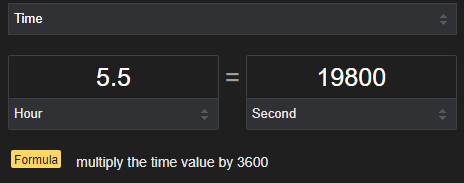
You can enter your GMT offset in seconds in line 65 of the code
NTPClient timeClient(ntpUDP, "pool.ntp.org", 19800, 0);
The complete code
#include <WiFi.h>
#include <SPI.h>
#include <NTPClient.h>
#include <WiFiUdp.h>
#include <Adafruit_GFX.h>
#include <Adafruit_SSD1306.h>
#include <DHT.h>
#define SCREEN_WIDTH 128 // OLED display width, in pixels
#define SCREEN_HEIGHT 64 // OLED display height, in pixels
#define ANALOG_PIN D1      // Analog pin connected to the voltage divider
#define ADC_MAX 4095      // 12-bit ADC
#define REF_VOLTAGE 2.8   // Reference voltage of ADC (3.3V for Xiao ESP32C3)
// WiFi credentials
const char* ssid     = "ssid";//your ssid
const char* password = "password";//your wifi password
// OLED display SPI pins
#define OLED_MOSI    D10
#define OLED_CLK     D8
#define OLED_DC      D4
#define OLED_CS      D7
#define OLED_RESET   D5
Adafruit_SSD1306 display...
Read more »
 Hari Wiguna
 Hacker404
 surfingsteve