 Rick Pannen
I designed it in Fusion 360 and split the parts to fit on my printer. It took 75 hours of printing time and 2.2kg of filament.
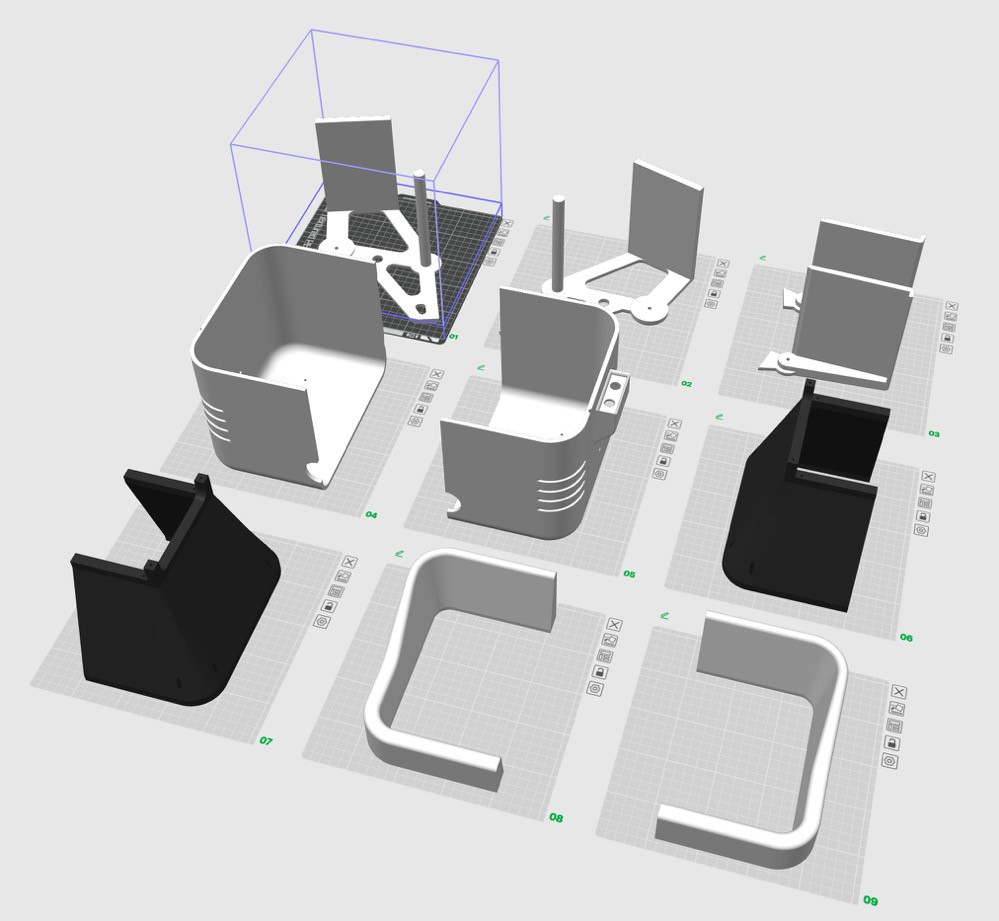
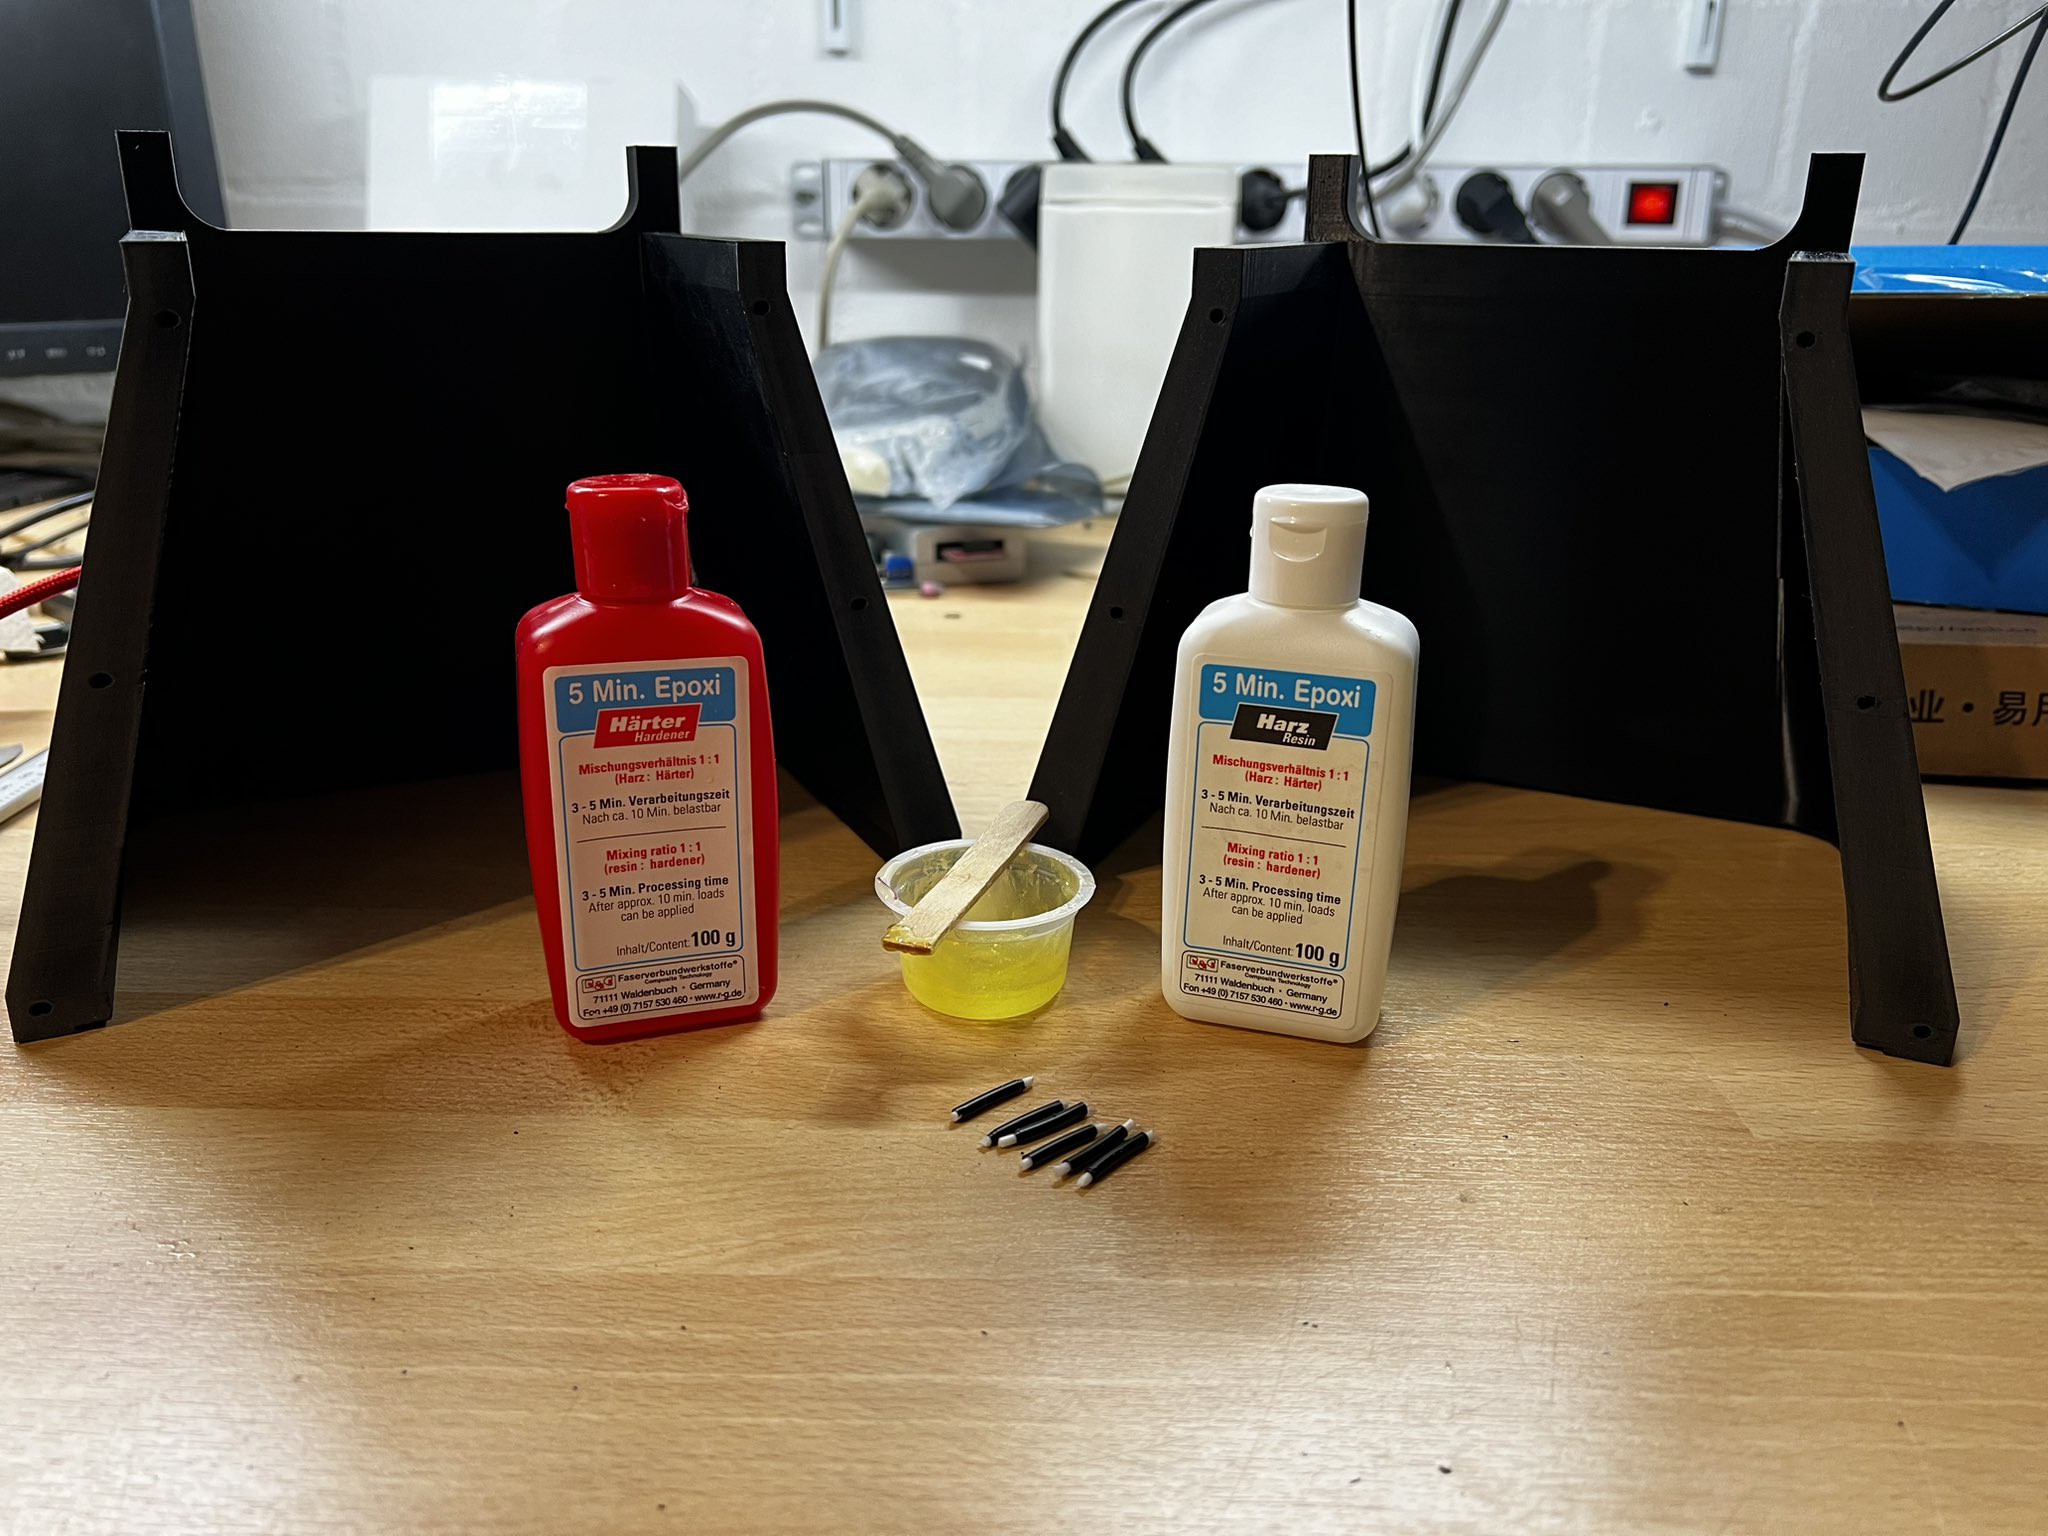
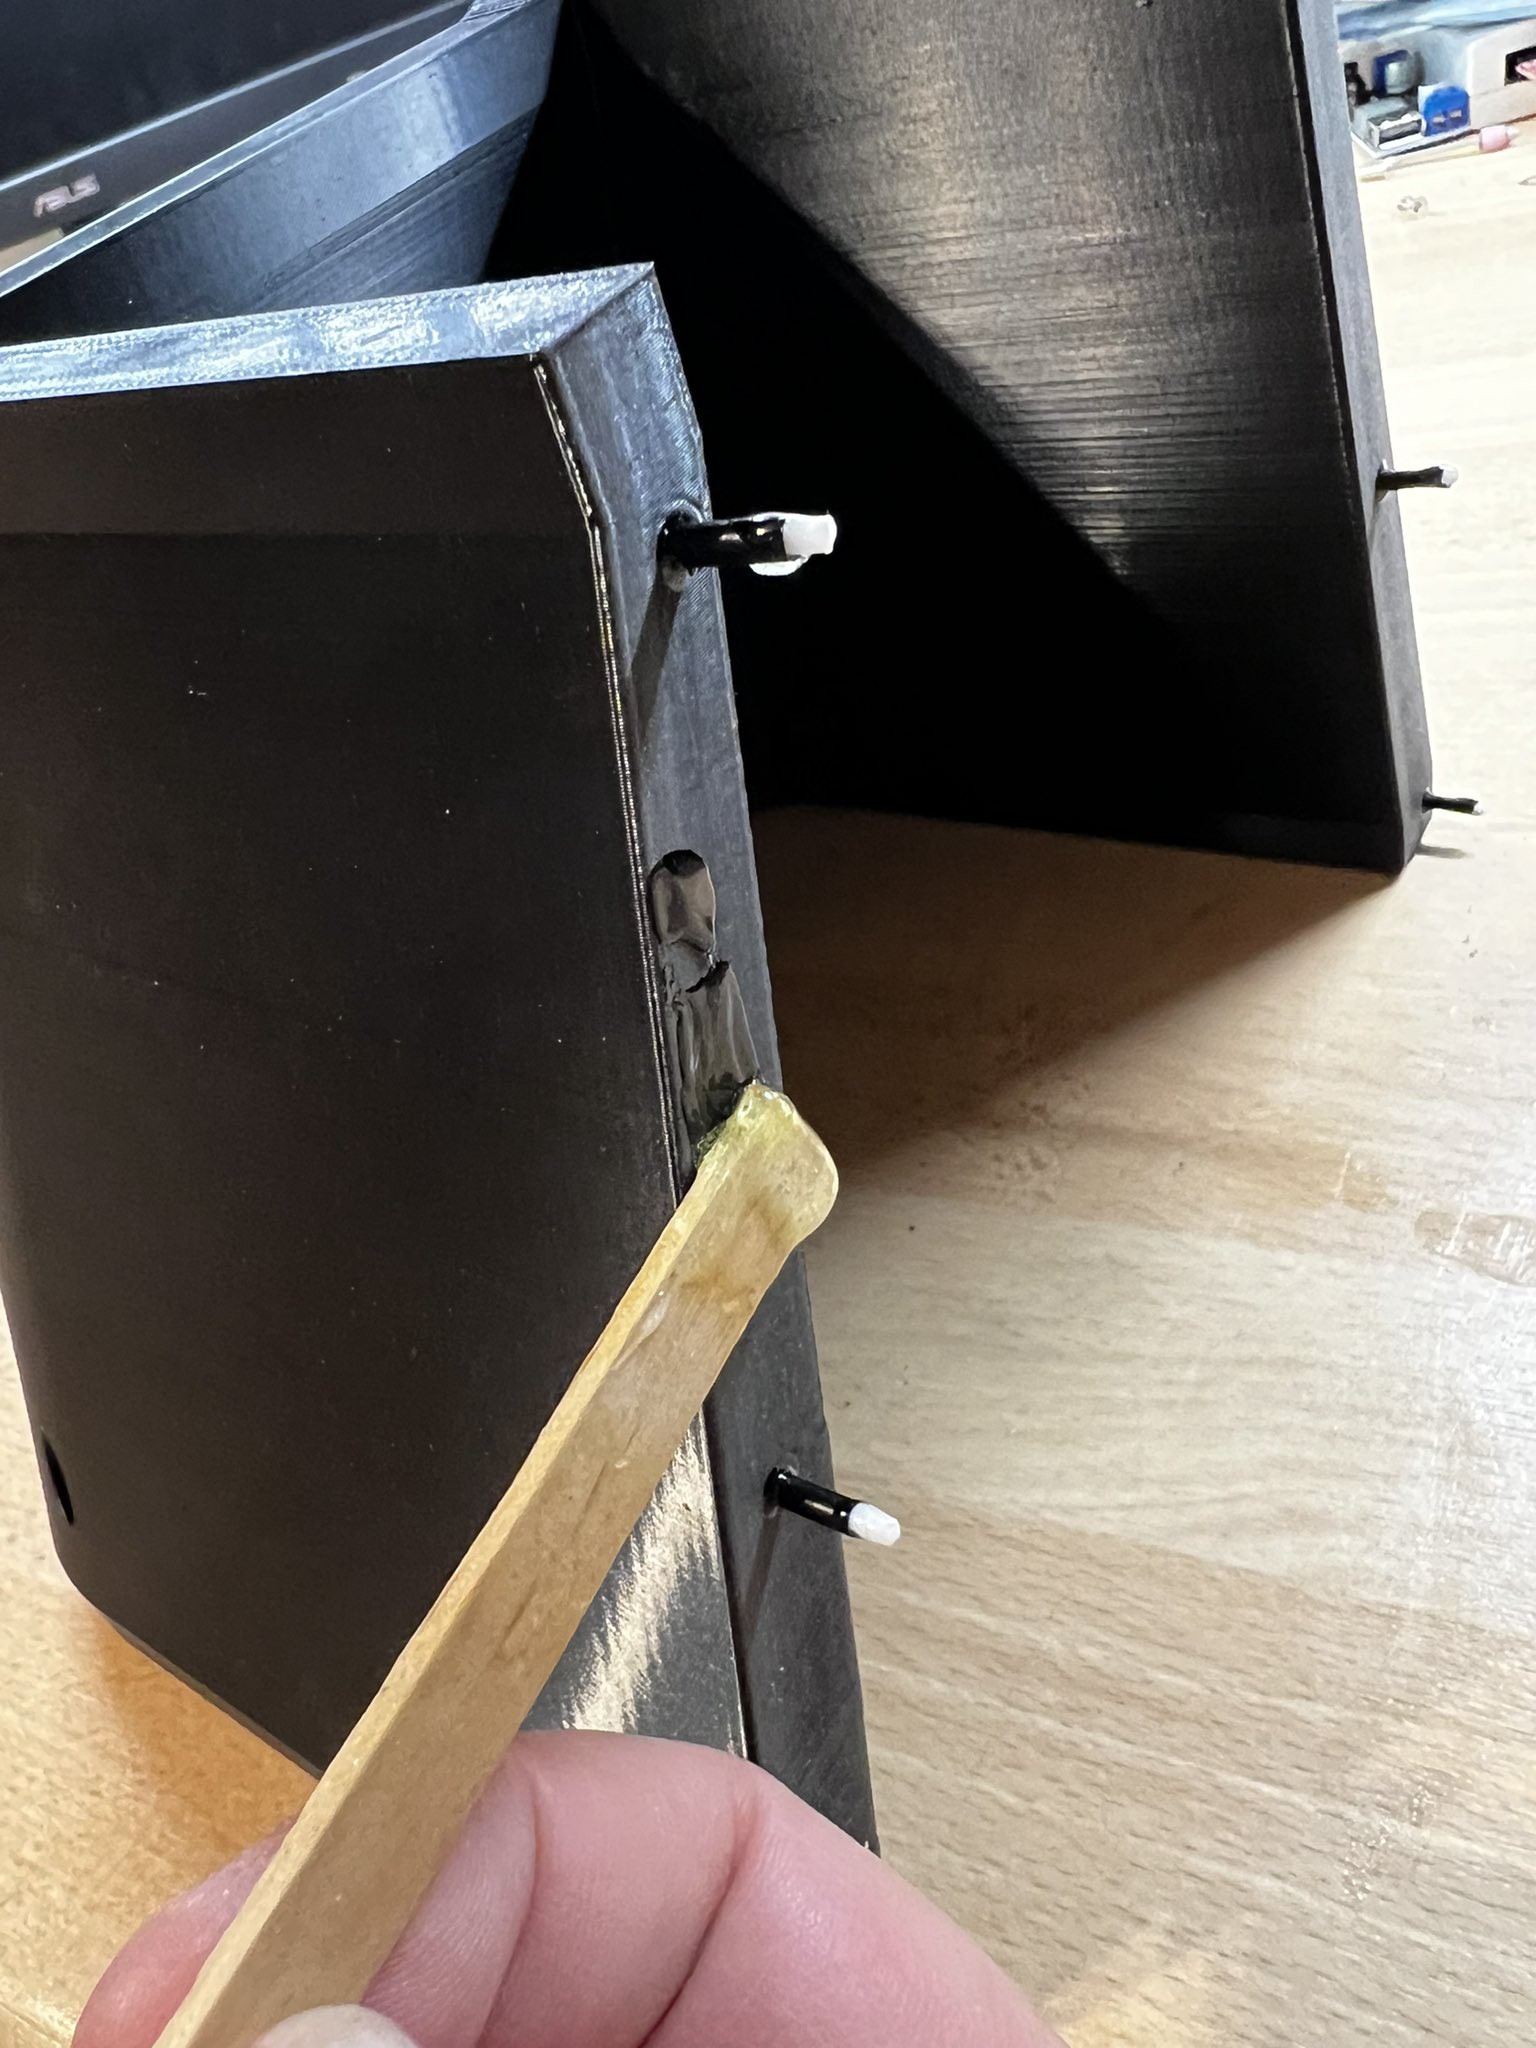
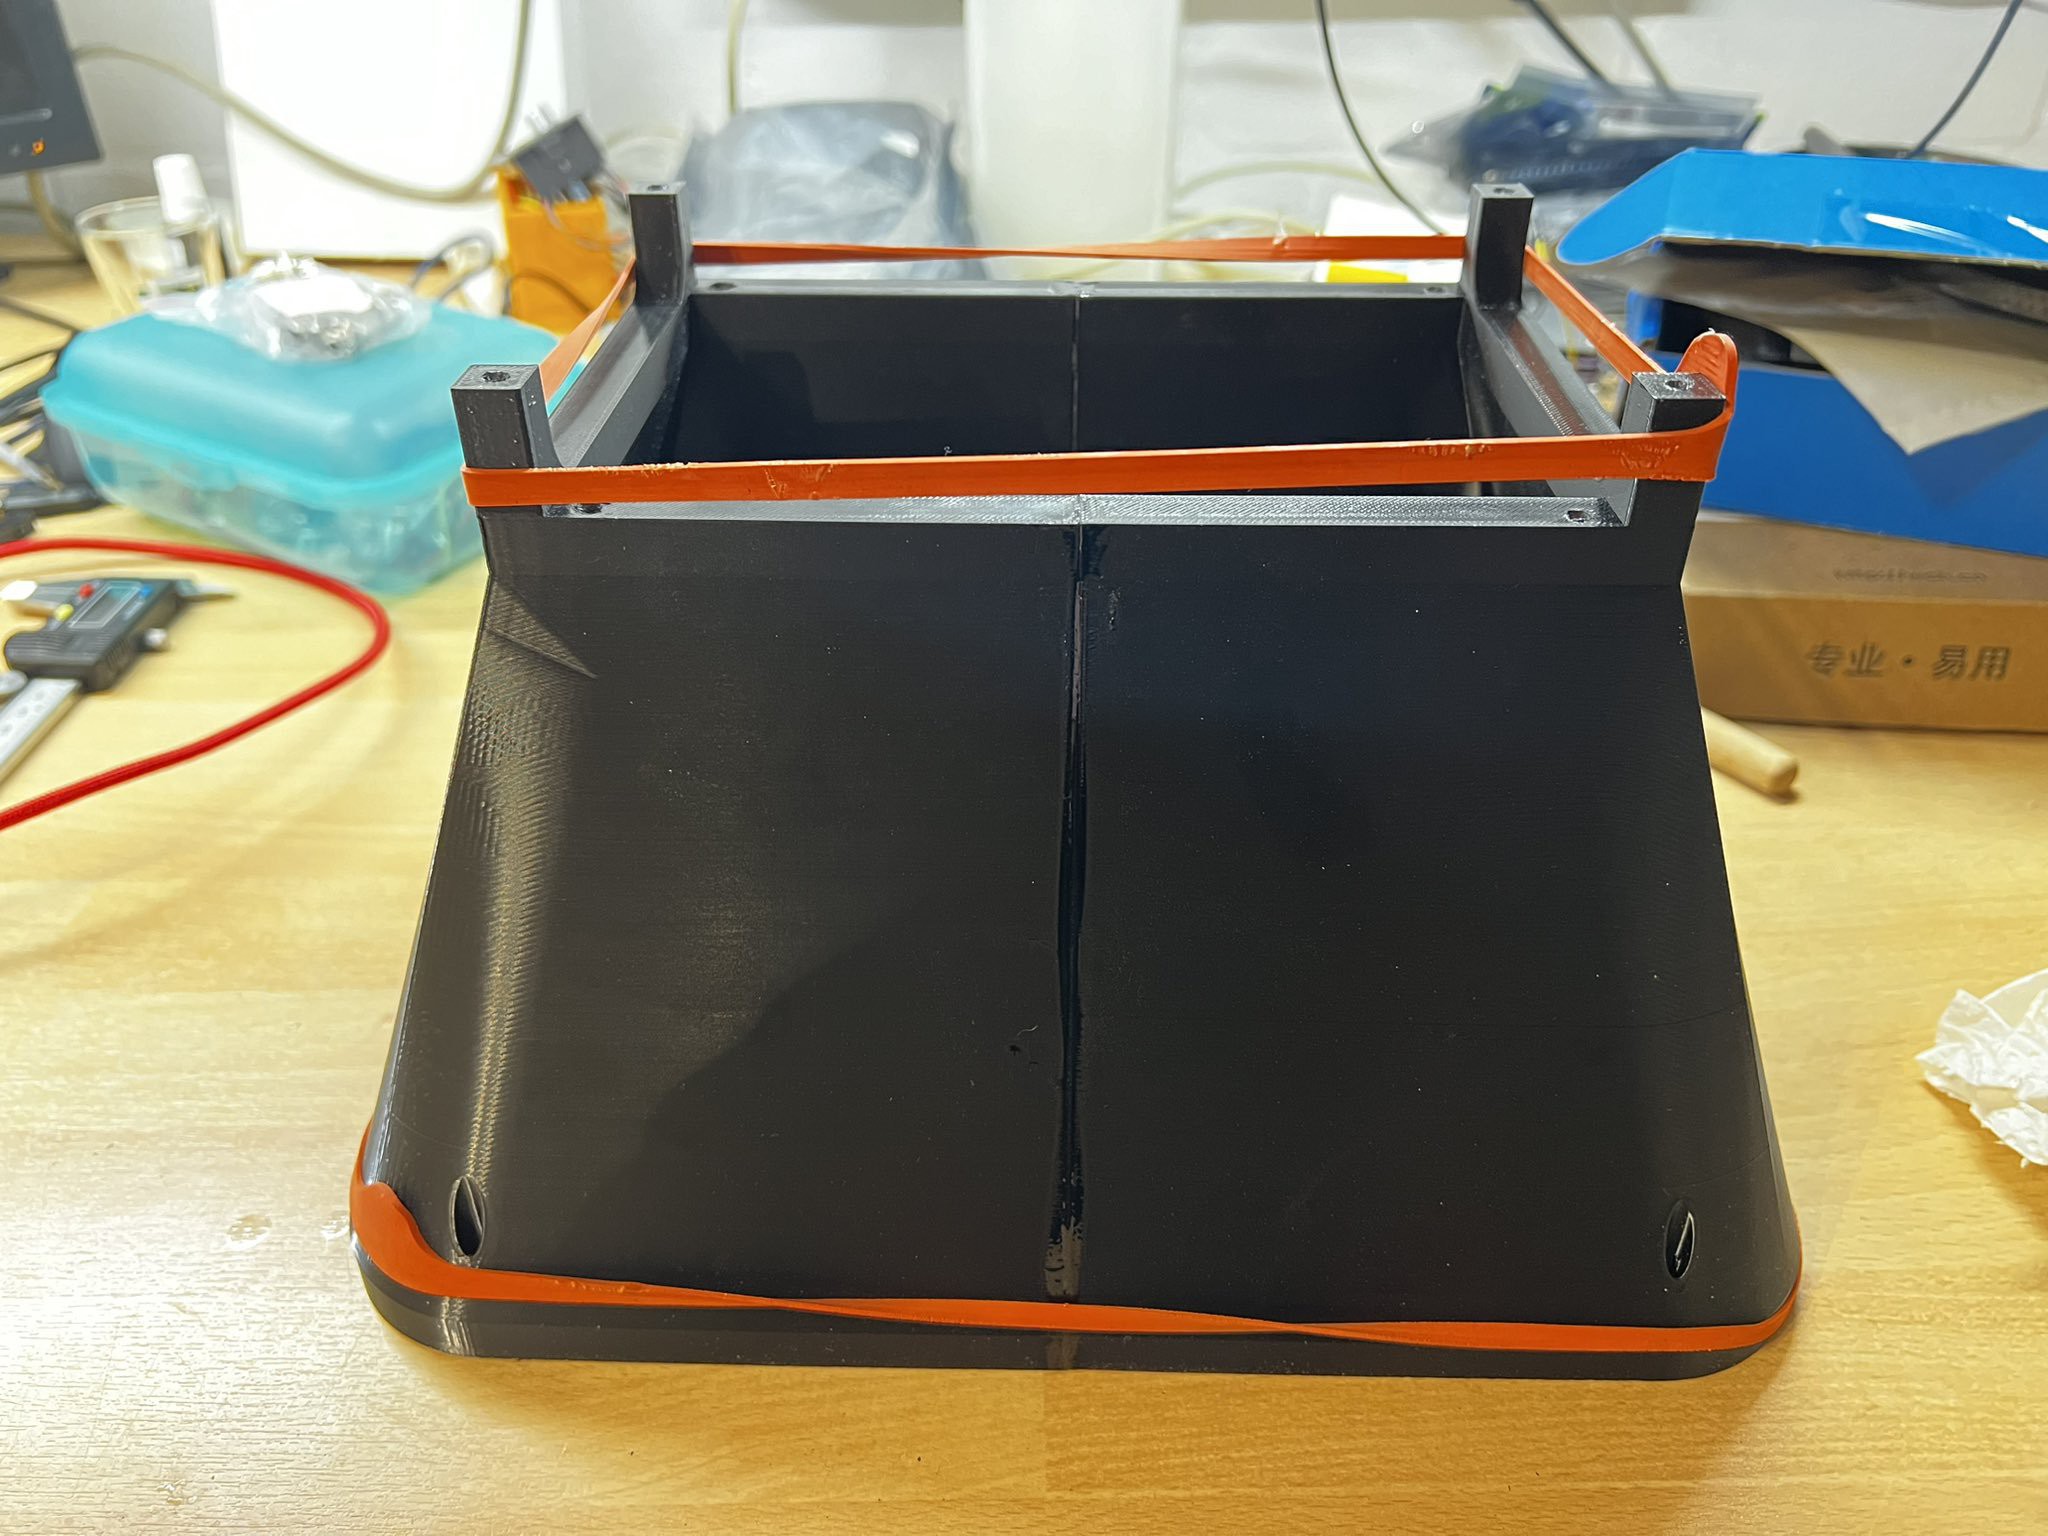
Had to split the parts in Fusion 360 because my printer is too small. Here‘s how I glue them together. I added holes on both pieces in CAD and put in plastic bolts made from filament for positioning. Then I use 2k epoxy to glue them together and rubber bands till cured.
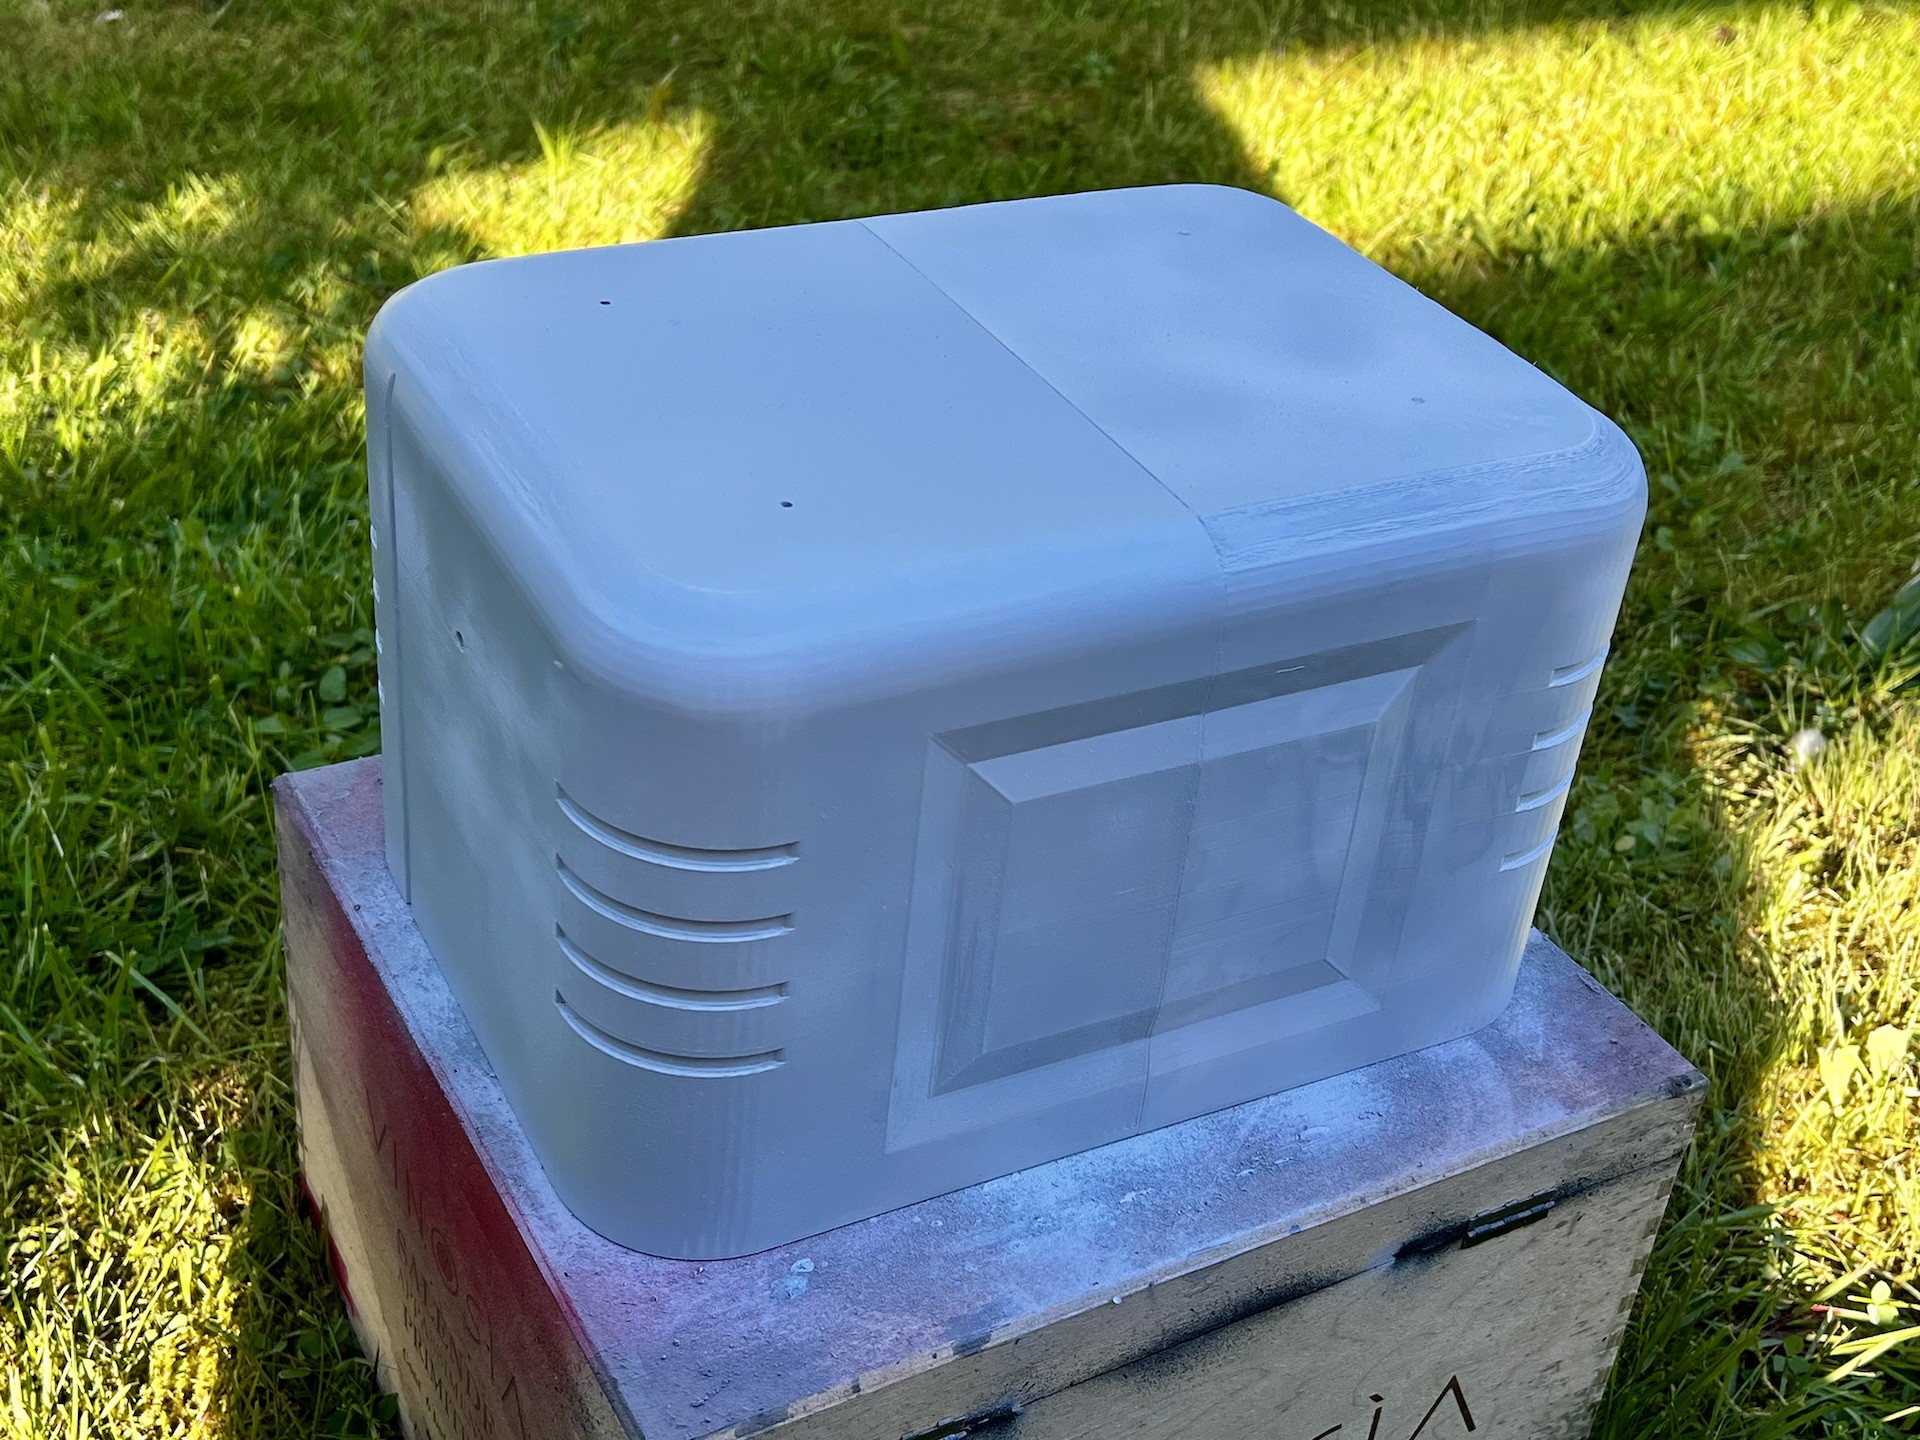
All parts except for the black monitor holder inside the case were sanded, primed, sanded, primed again to get a smooth surface.
Here the left part was done while the right part was still printing.
The main case was painted in copper color, then a few places were covered with toothpaste and another layer of paint applied.
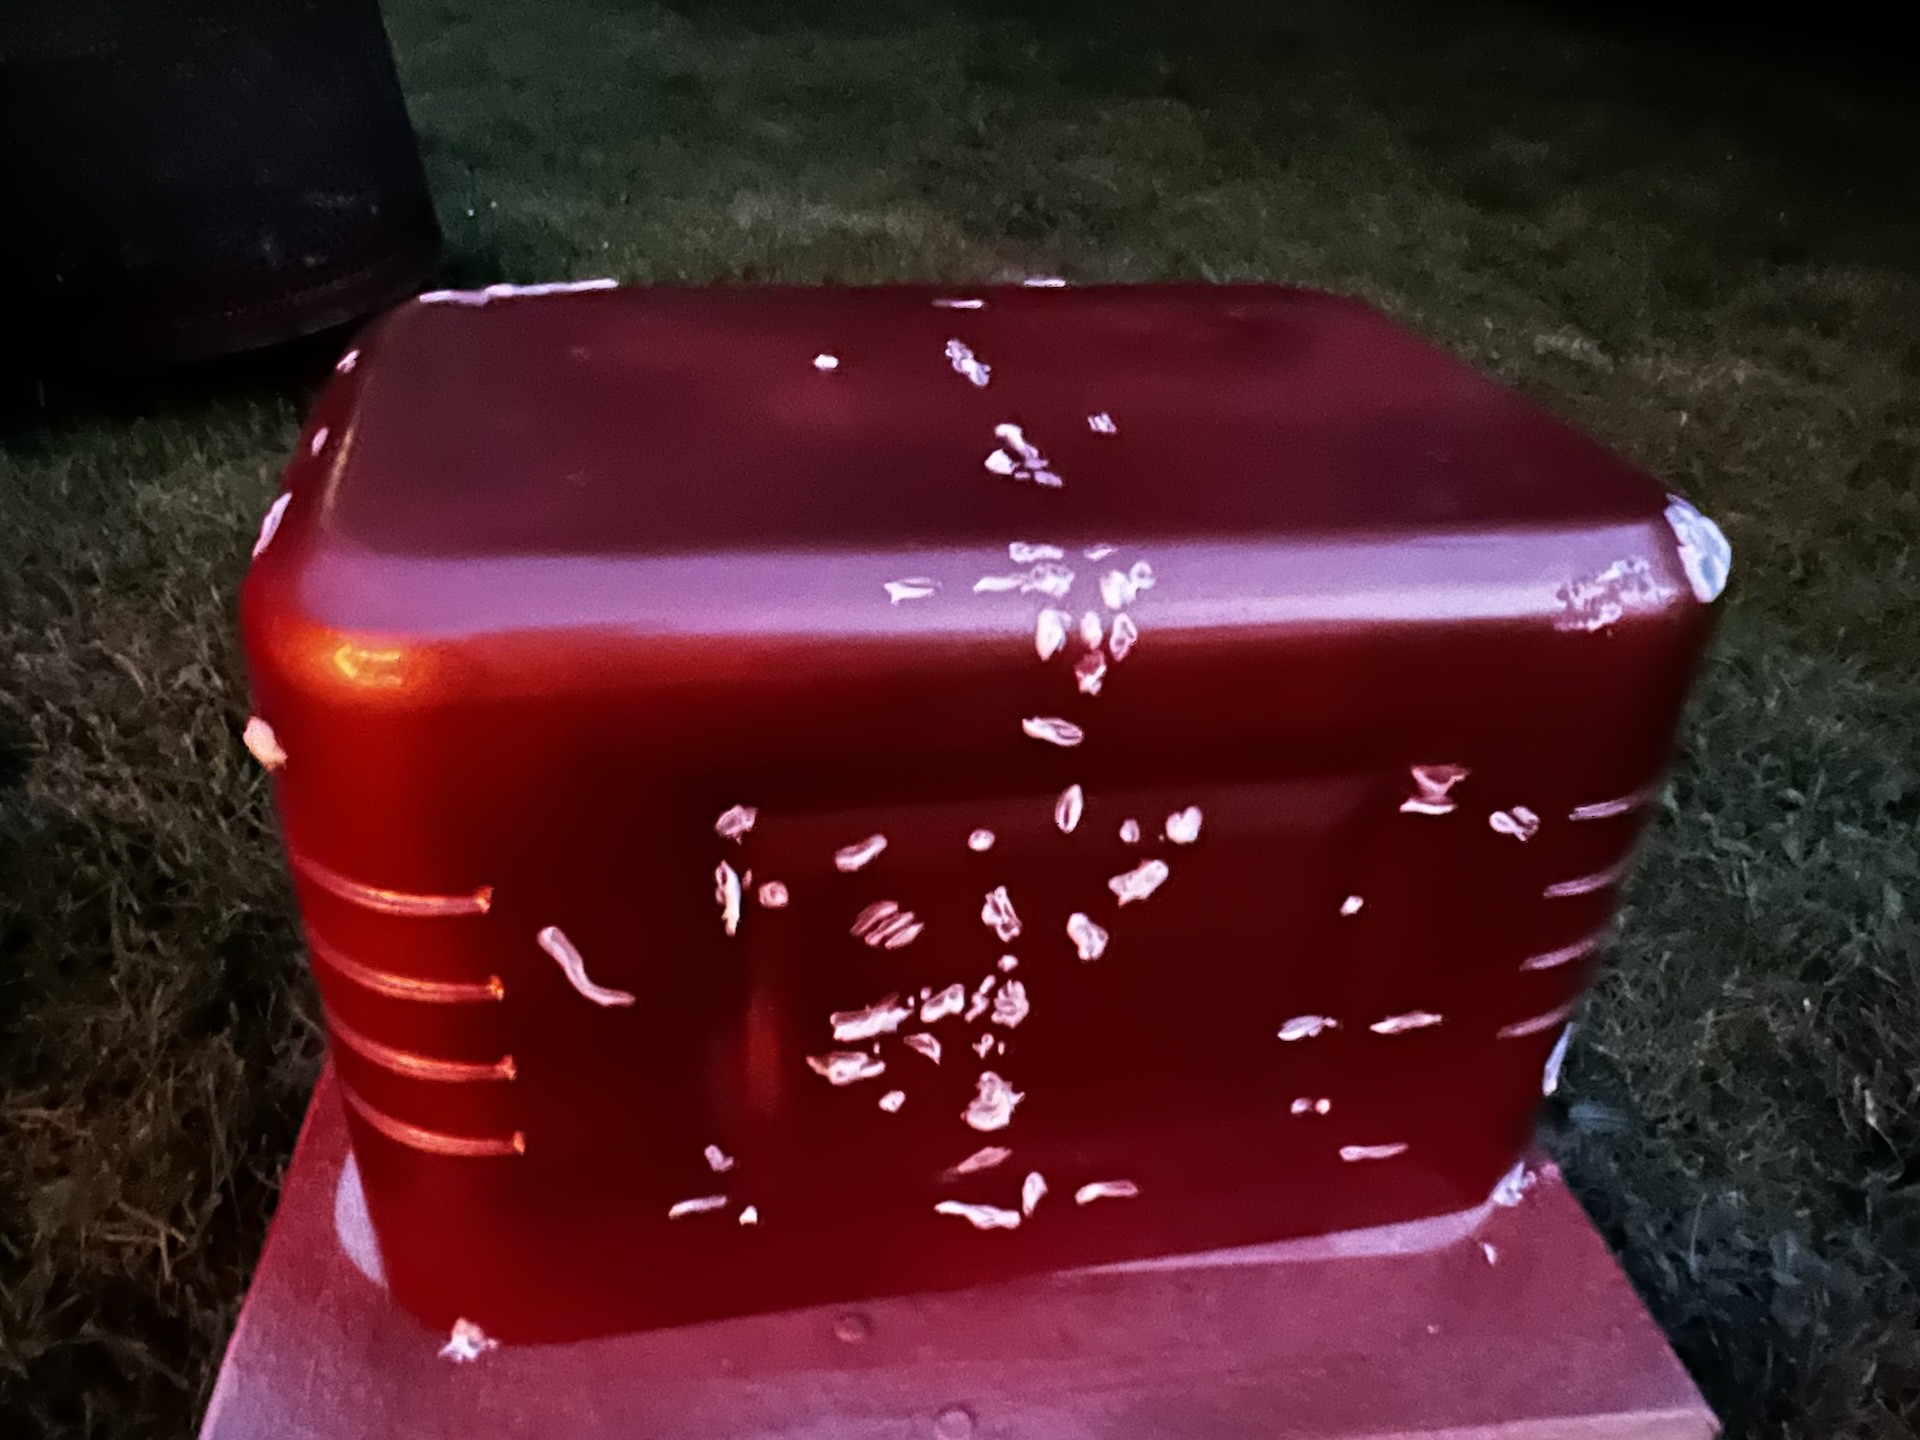
After washing off the toothpaste there are some nice paint chips
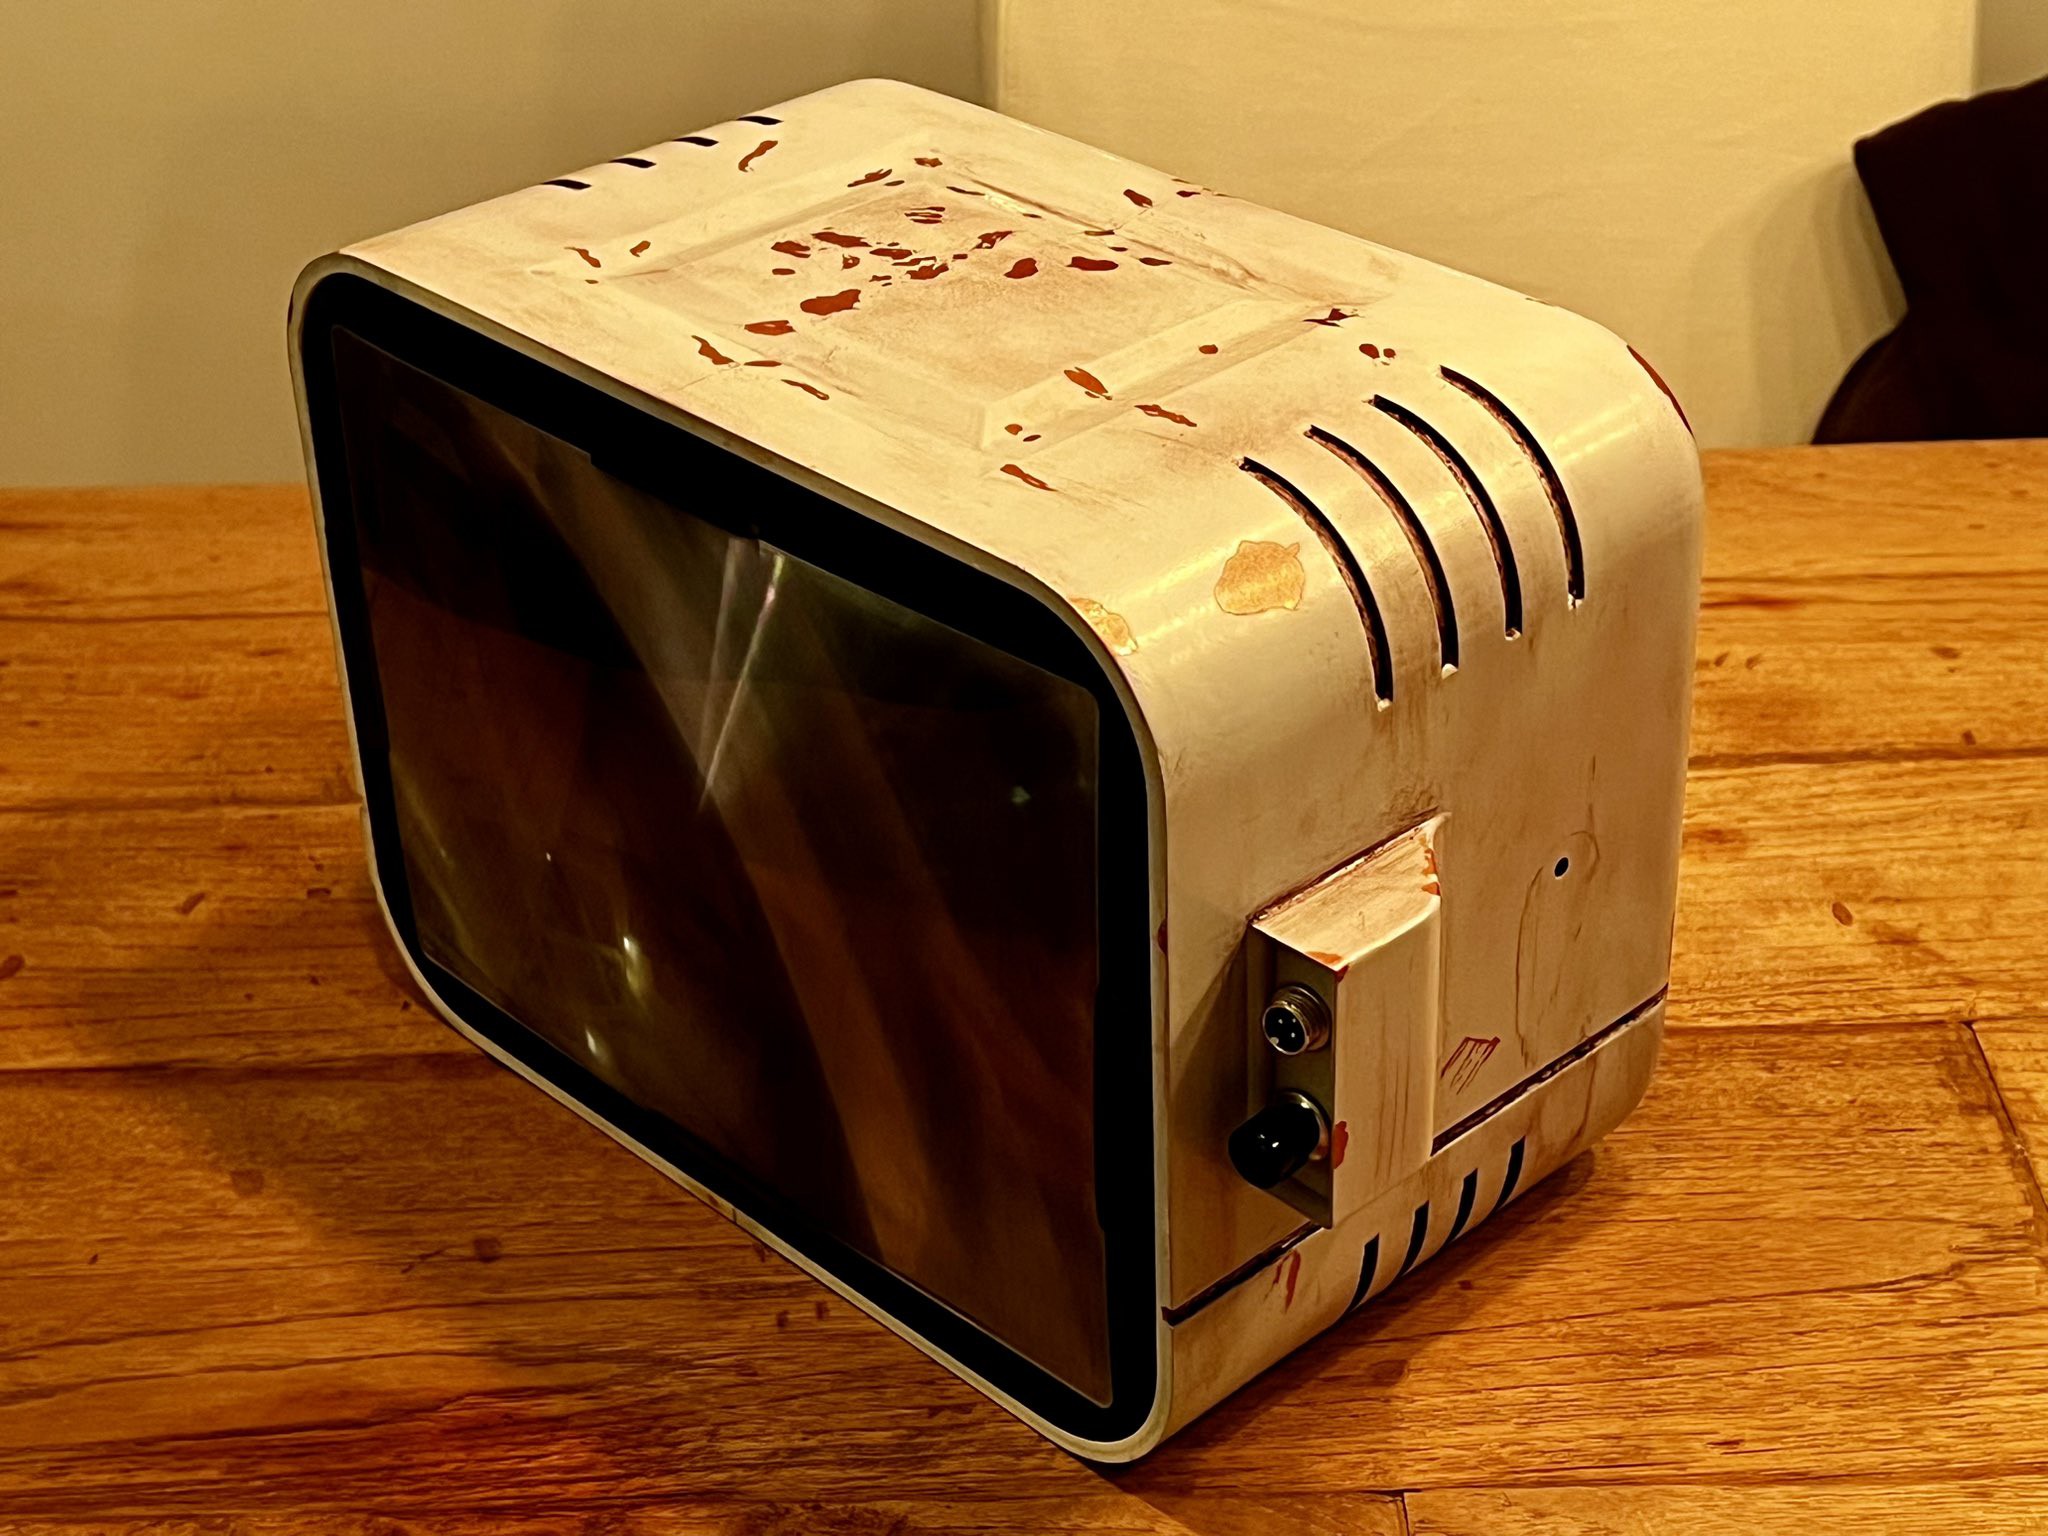
The weathering was done by applying some amount of a mixture of acrylic floor finish and garden soil and then wiping it away/rubbing it in with a cloth and letting it pool in some places.
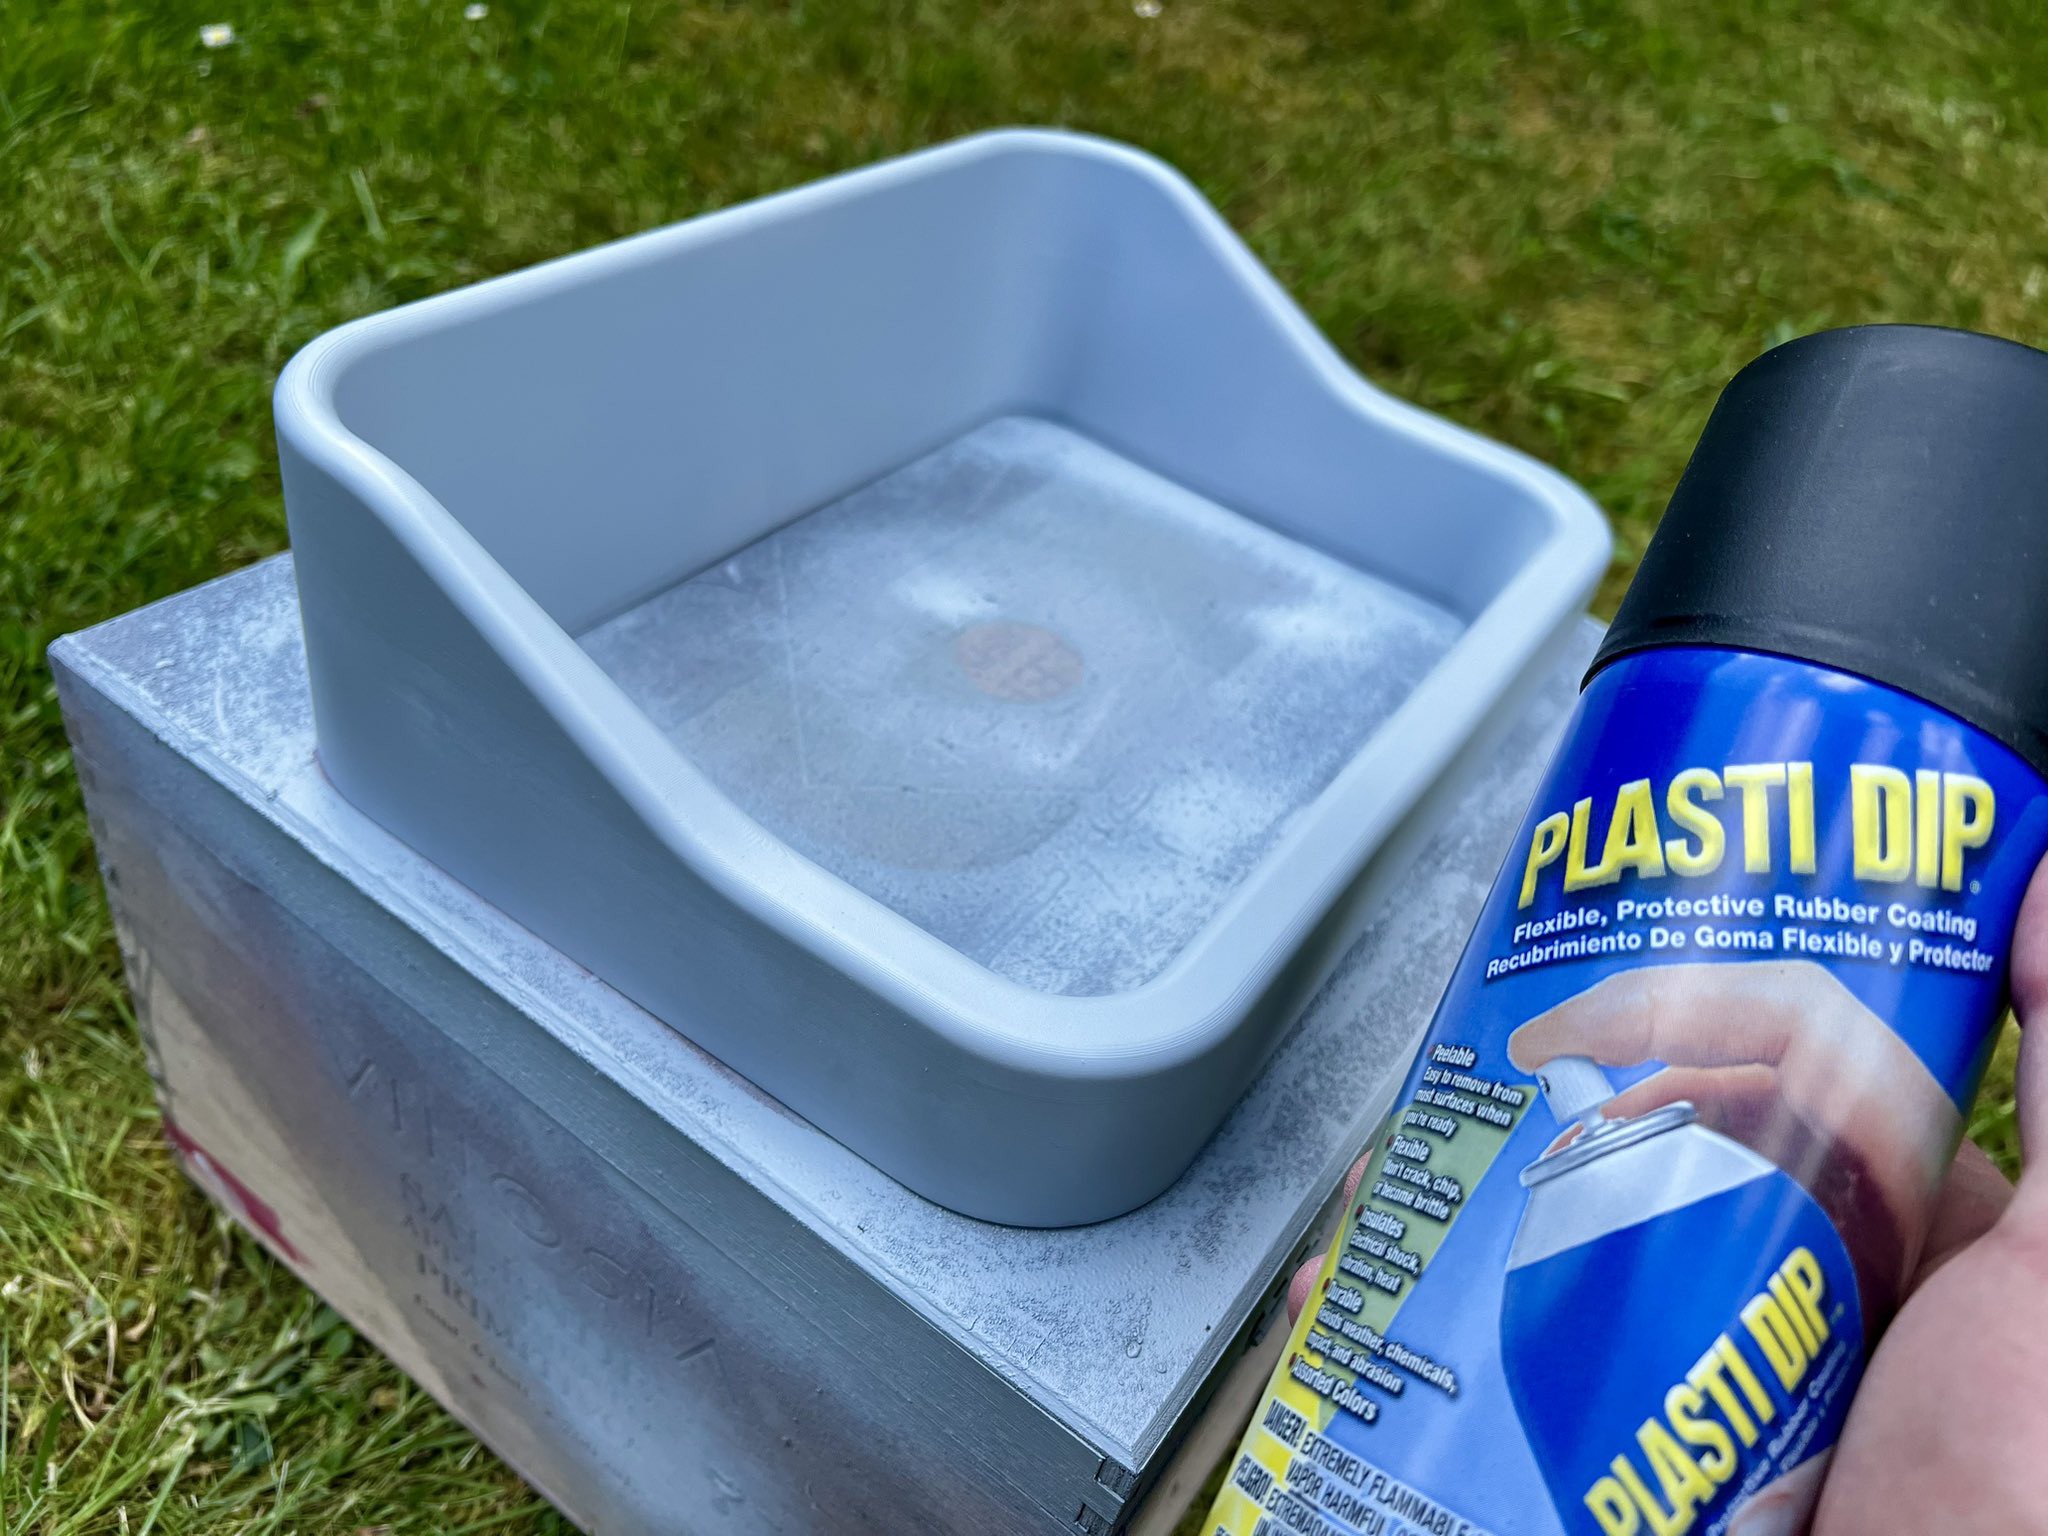
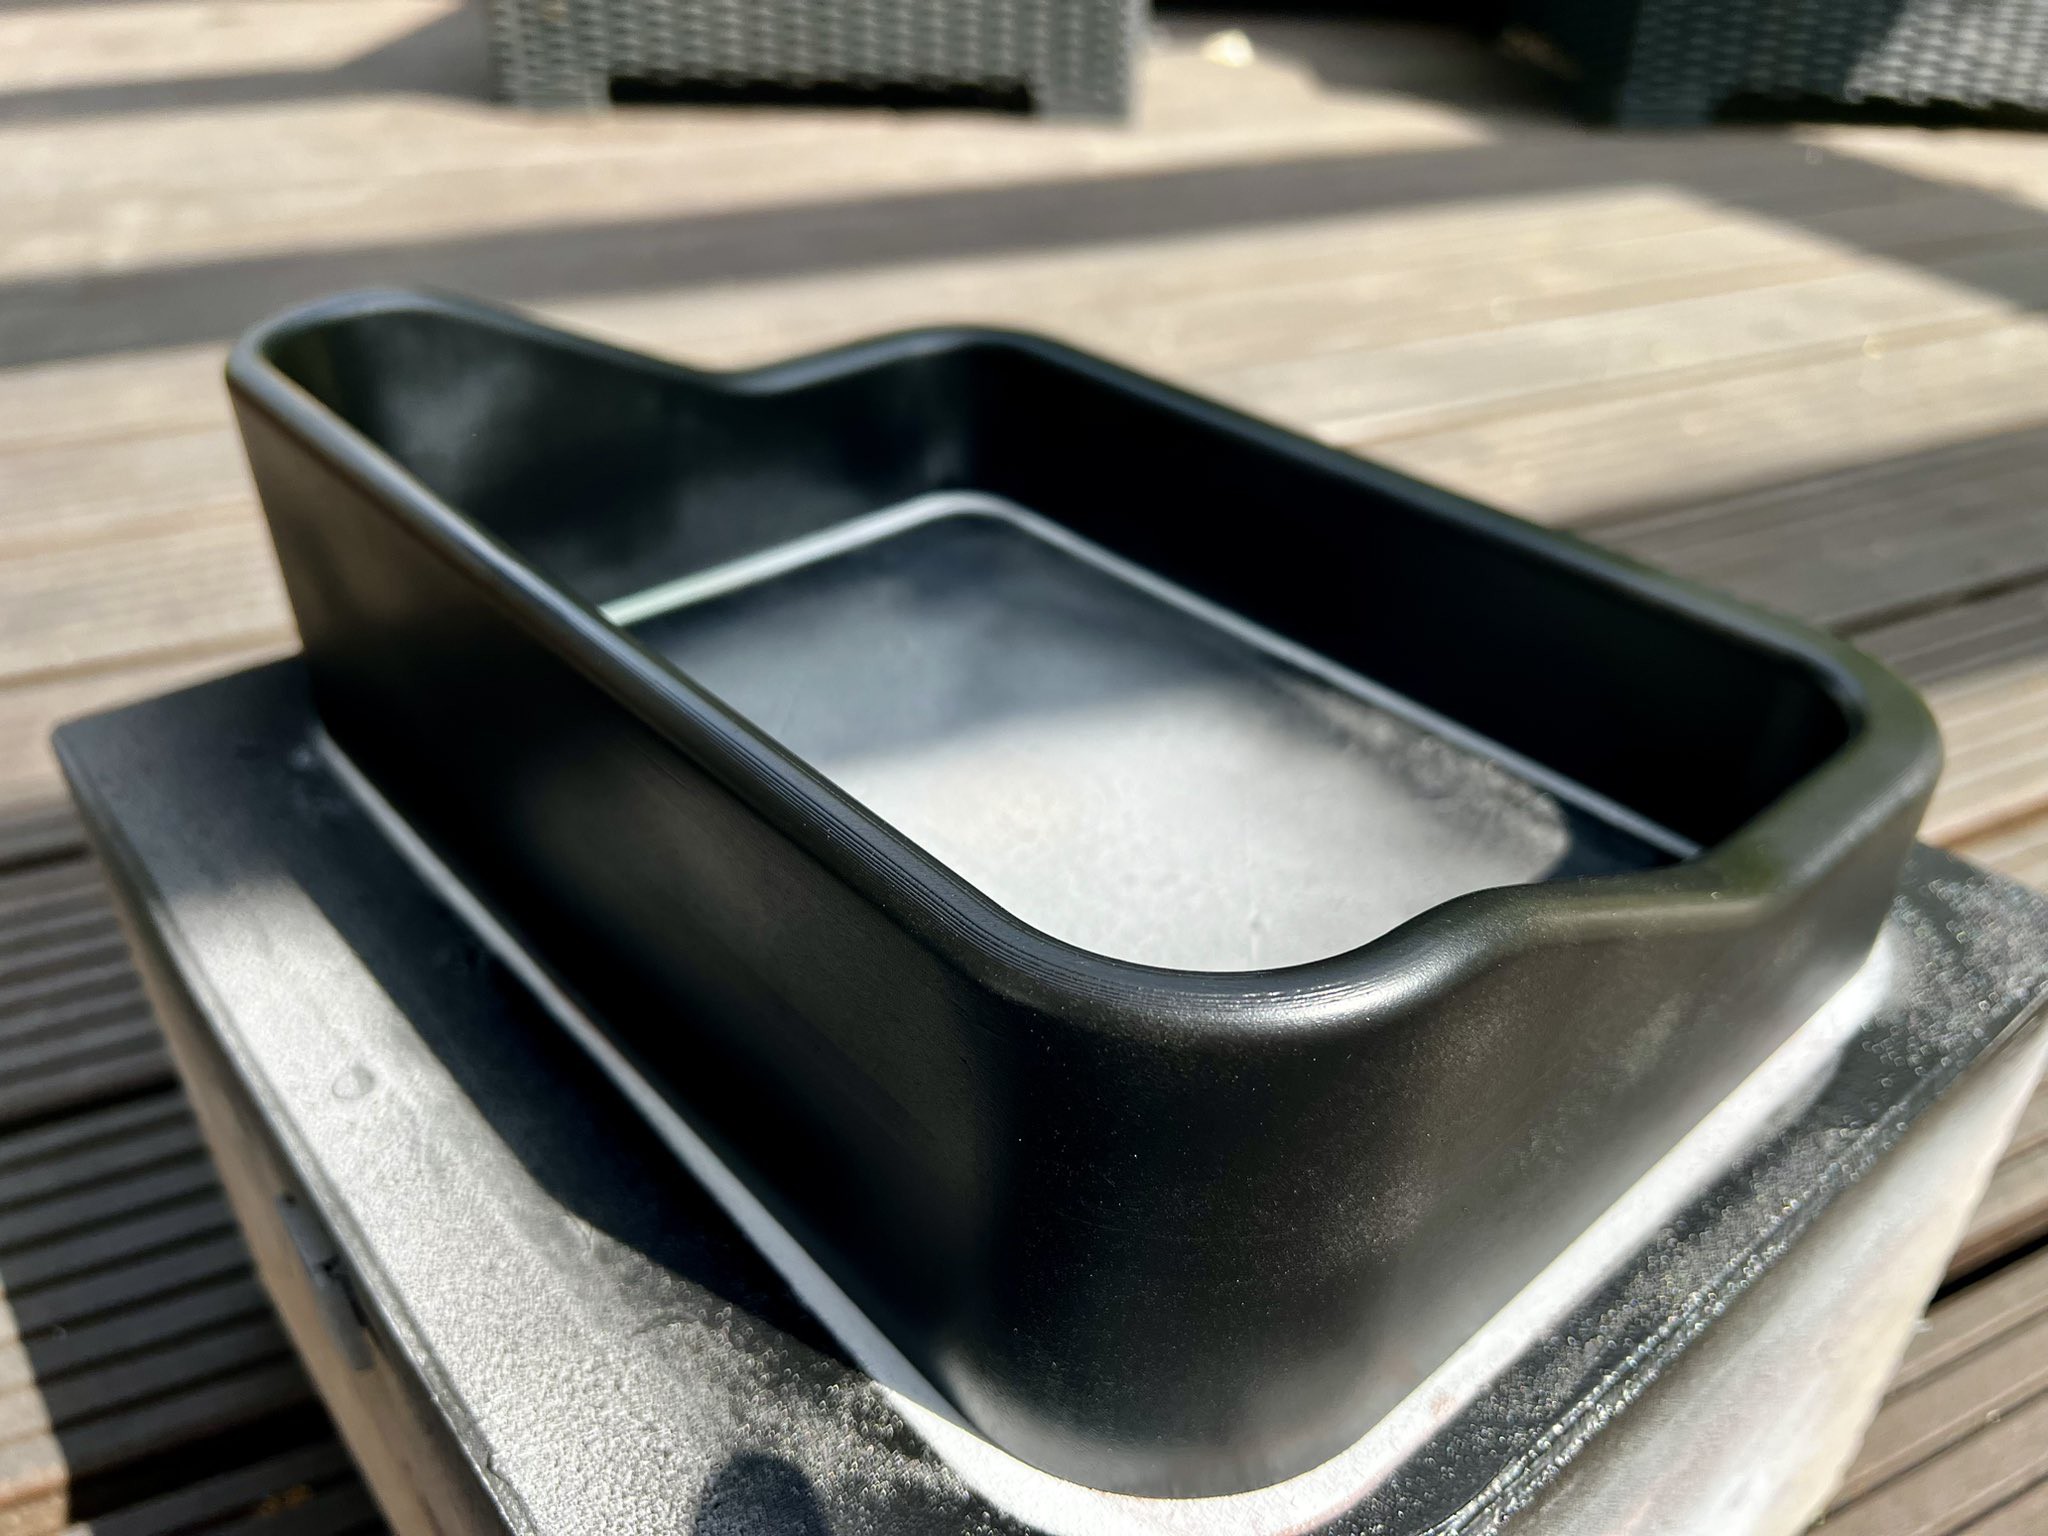
The bezel was sprayed in multiple layers with „PlastiDip“ liquid rubber.
The holder is glued together from four parts, painted with iron particle paint and rusted with an oxidiser

The keyboard was weathered with the same method as the monitor.
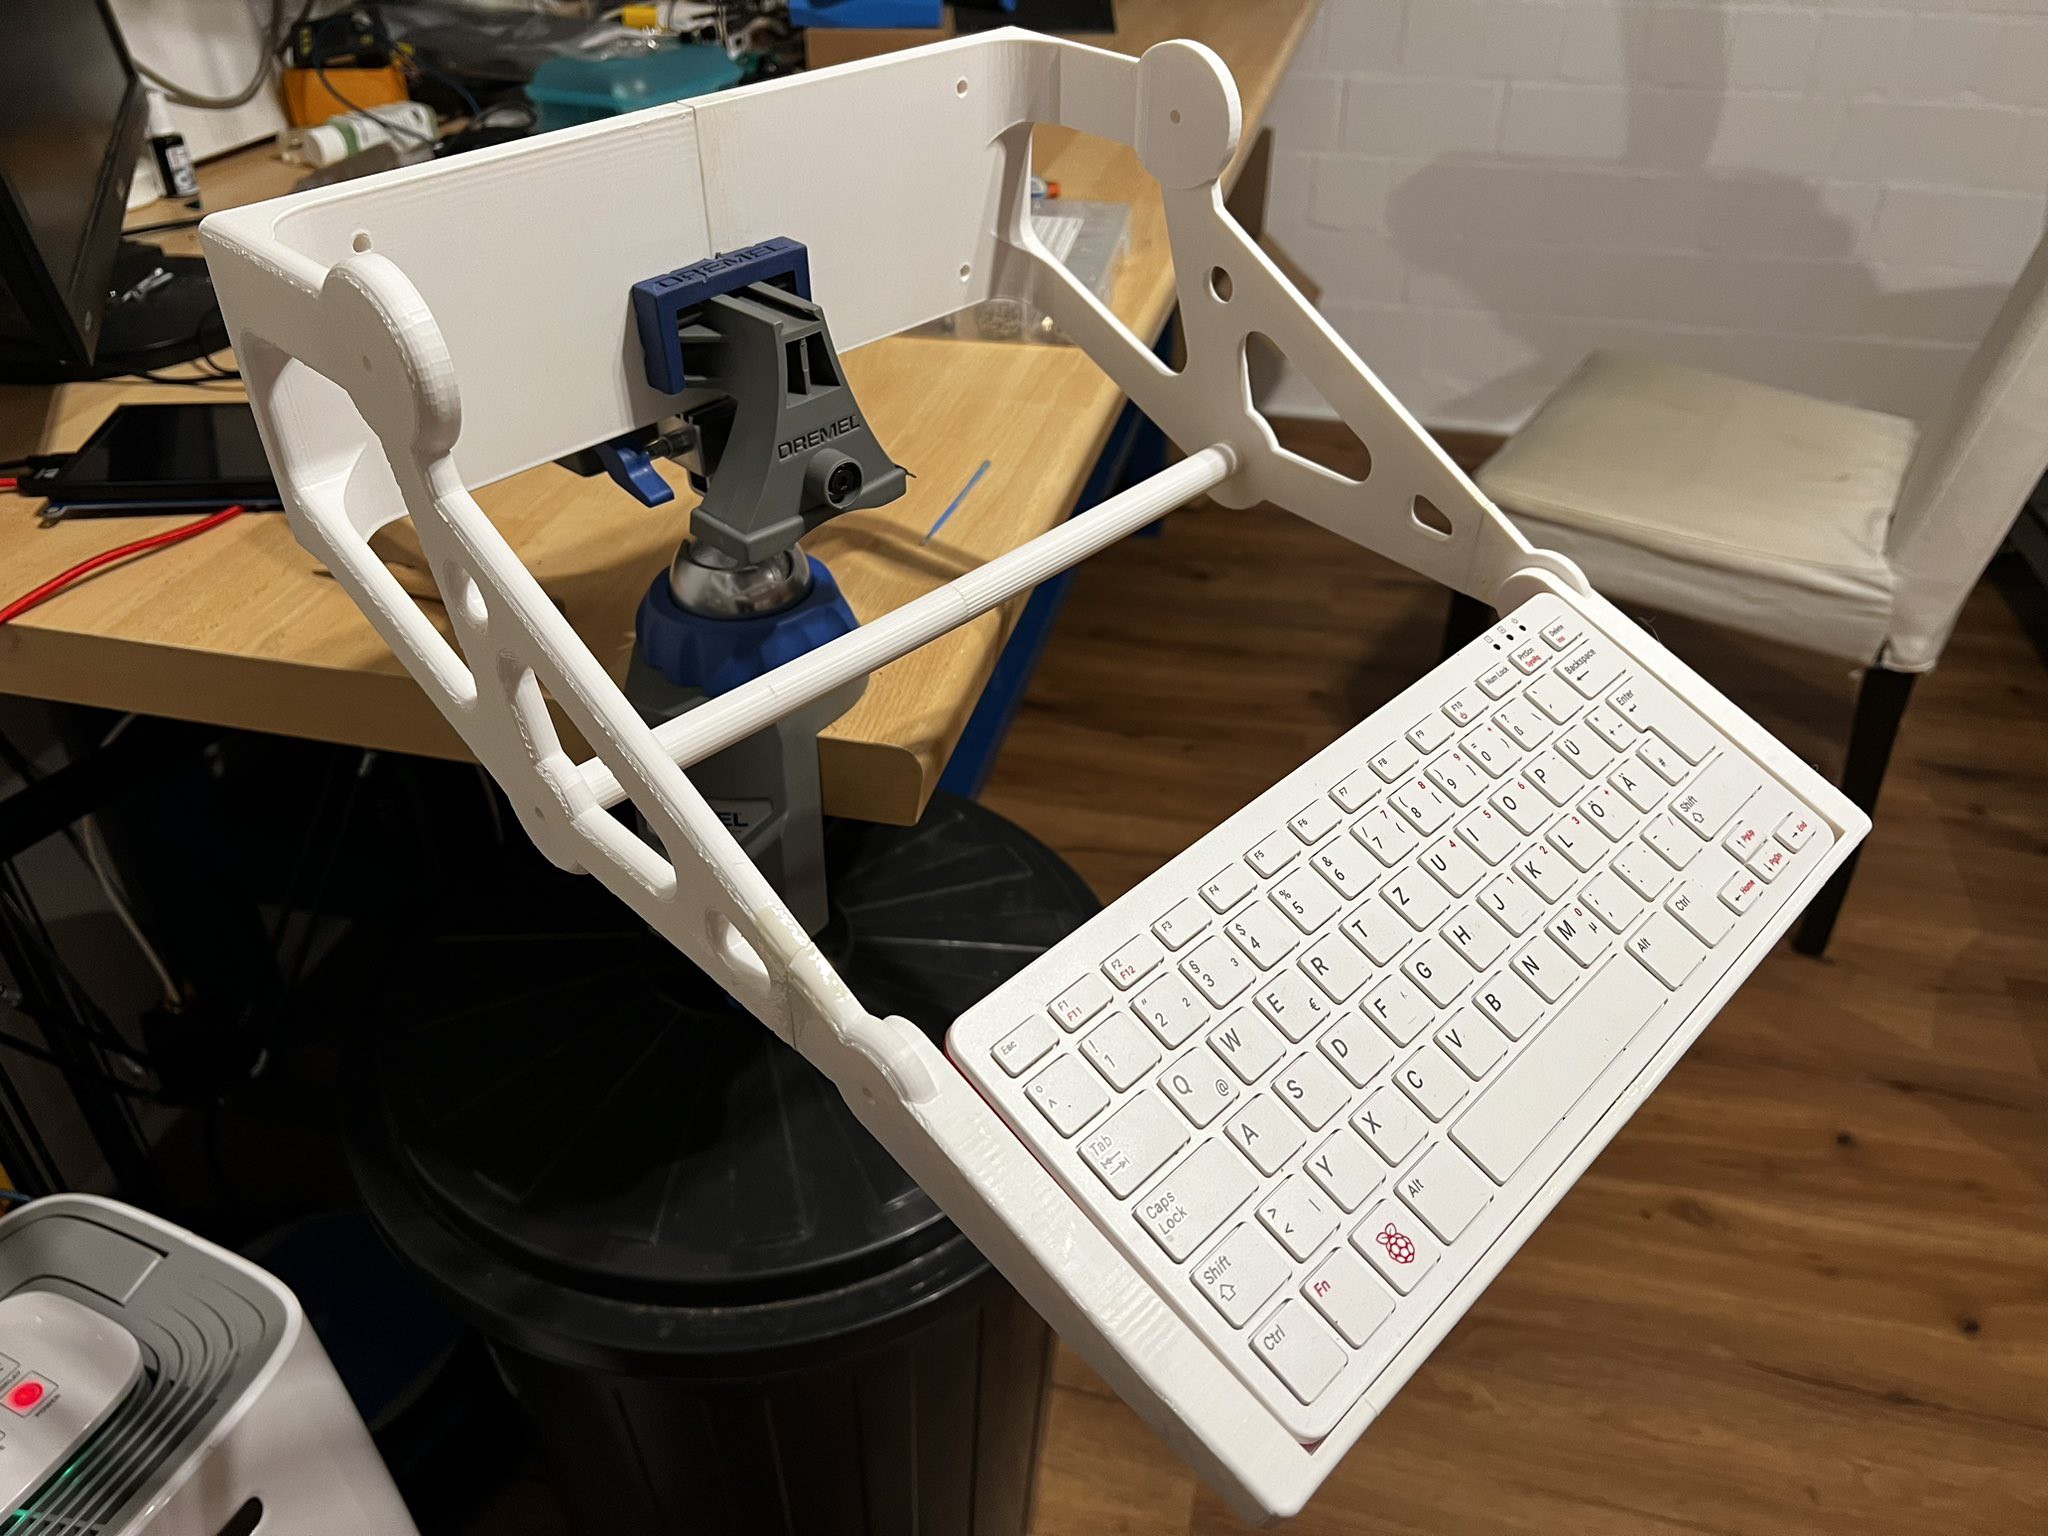
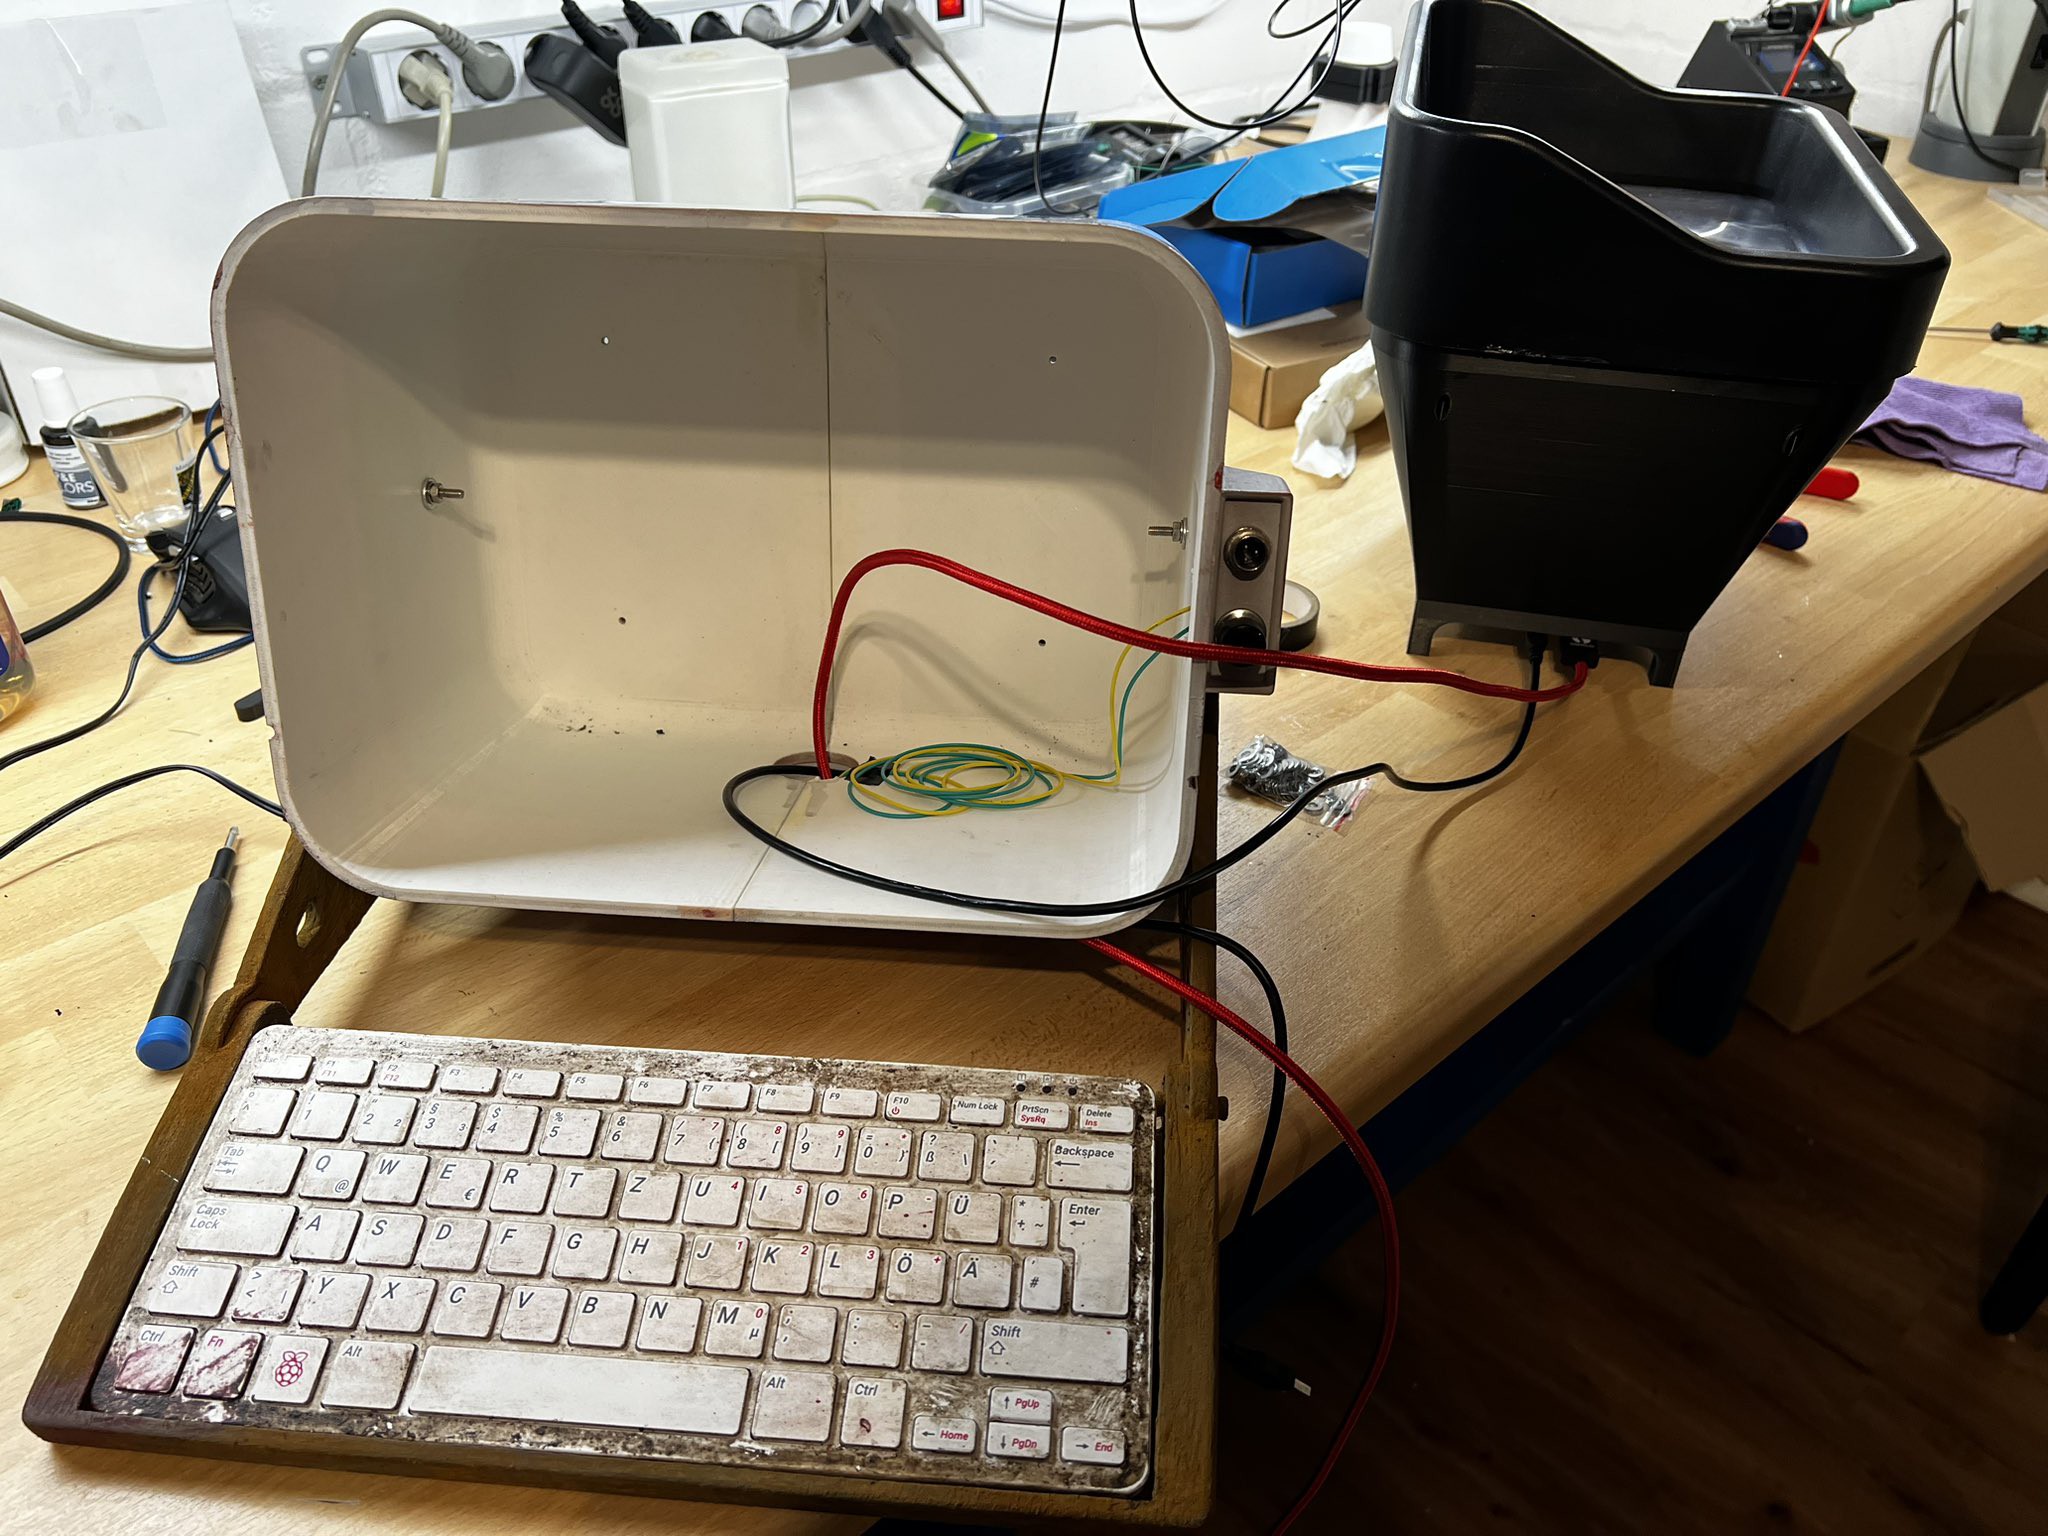
This is how it‘s assembled. The part with the monitor, lens and bezel is slid inside the monitor casing and screwed in place at the back.
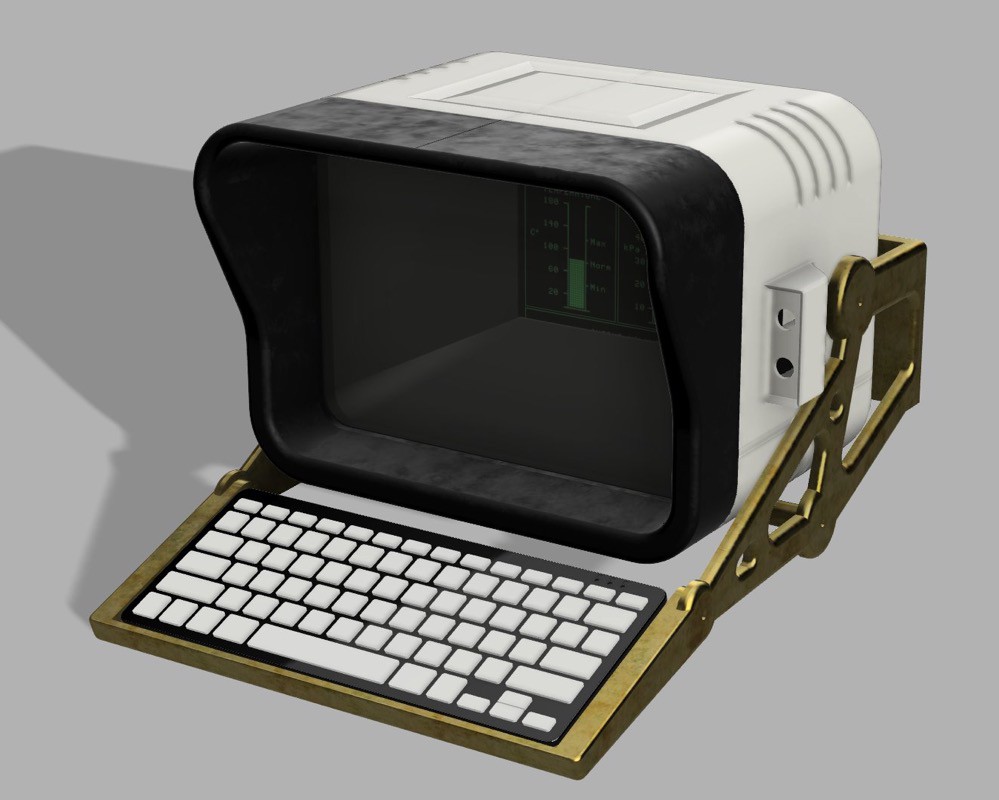
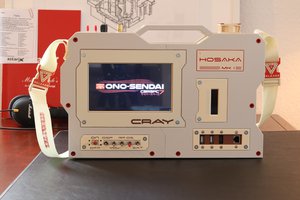
The finished terminal

 Chris
Chris
 iHally
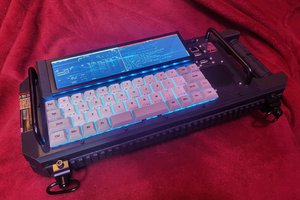
 Garra
Garra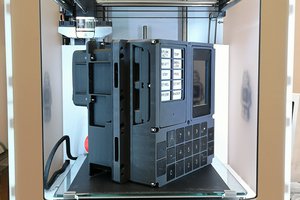
 M.daSilva