 shlonkin
Software: As you can gather from the pictures, the basic algorithm has been implemented and it works well. But it is far from complete. Here I'll describe what I have so far and present the (probably buggy)code to you.
An outline, in graphical format to reduce wordage.
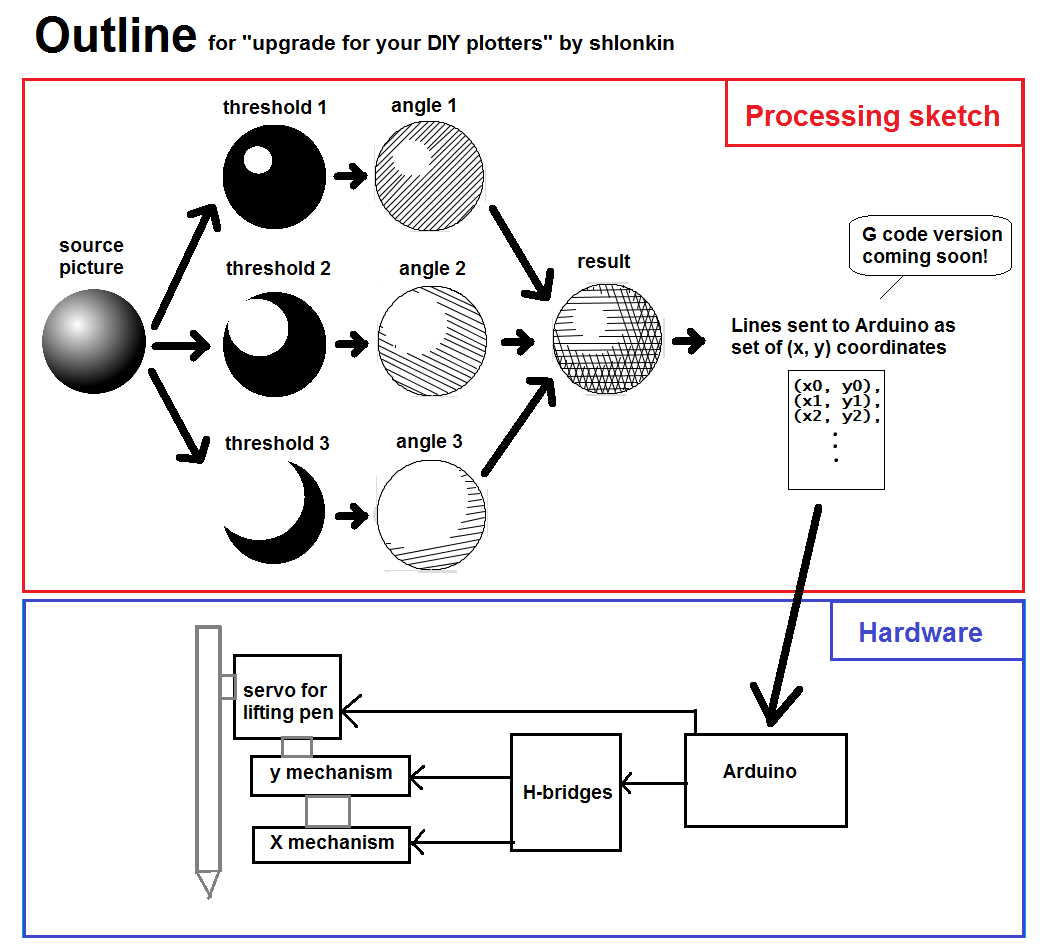
I hope that makes sense. If not, ask questions.
For now the coordinates are sent to the Arduino using a protocol I made up long ago for another plotter. It is simple and works well enough, but I know that's not what you want, so I plan to make a G-code/Grbl type version to make it more useful for you. Just wait a while.
Here's the package: HatchPlotter.zip (also found in the files section)
It contains the Processing sketch in its current form as well as two example picture files. Just extract the HatchPlotter folder into your Processing sketch folder and run it. It should draw the example picture.
Hardware: Those X and Y mechanisms are DVD drive assemblies. They contain small stepper motors which move the laser carriage in the usual way. The carriages, the chunks that hold the laser and optics, are attached firmly to each other so that their motion is perpendicular. One outer frame is stationary and the other is free to move in the horizontal plane. The moving one carries the pen and servo parts.
I'm sorry for this vague text description. It will be clear once I get things put together and take pictures.
Discussions
Become a Hackaday.io Member
Create an account to leave a comment. Already have an account? Log In.