 Gareth Coleman
This project began with a request from the Incredible AquaGarden, who were busy building an aquaponics system as part of their project located next to the high school in Todmorden, UK. After researching the subject I advised that the available solutions were only half what they needed and suggested that instead I build them a system. I thought I'd be finished by Christmas - and here we are, a year later and the system still isn't quite finished!
But during this year I've had more fun (and more frustration) than I could imagine, I've been able to work with Naomi (who is a genuine programming wizard) which has been fab; and together we've made an amazing system that's fully open-source. I can honestly say that I'm really proud of what we've achieved, and that's priceless.
Now we're ready to tell the world about our project, hopefully gaining qudos, improvements and collaborators. We've learned a lot with our first system that will make our second system (under construction) a hundred times better.
One of the first things I did was to try to get a grip on the detail of what the system was going to be. An initial design decision was whether to base our project on Arduino or Raspberry Pi. Only these platforms seemed to offer the easy-to-access libraries we would need to interface to the wide variety of sensors we needed. I resolved this dilemma by choosing them both! I used a system diagram to help me plan out each sensor and how it would connect:
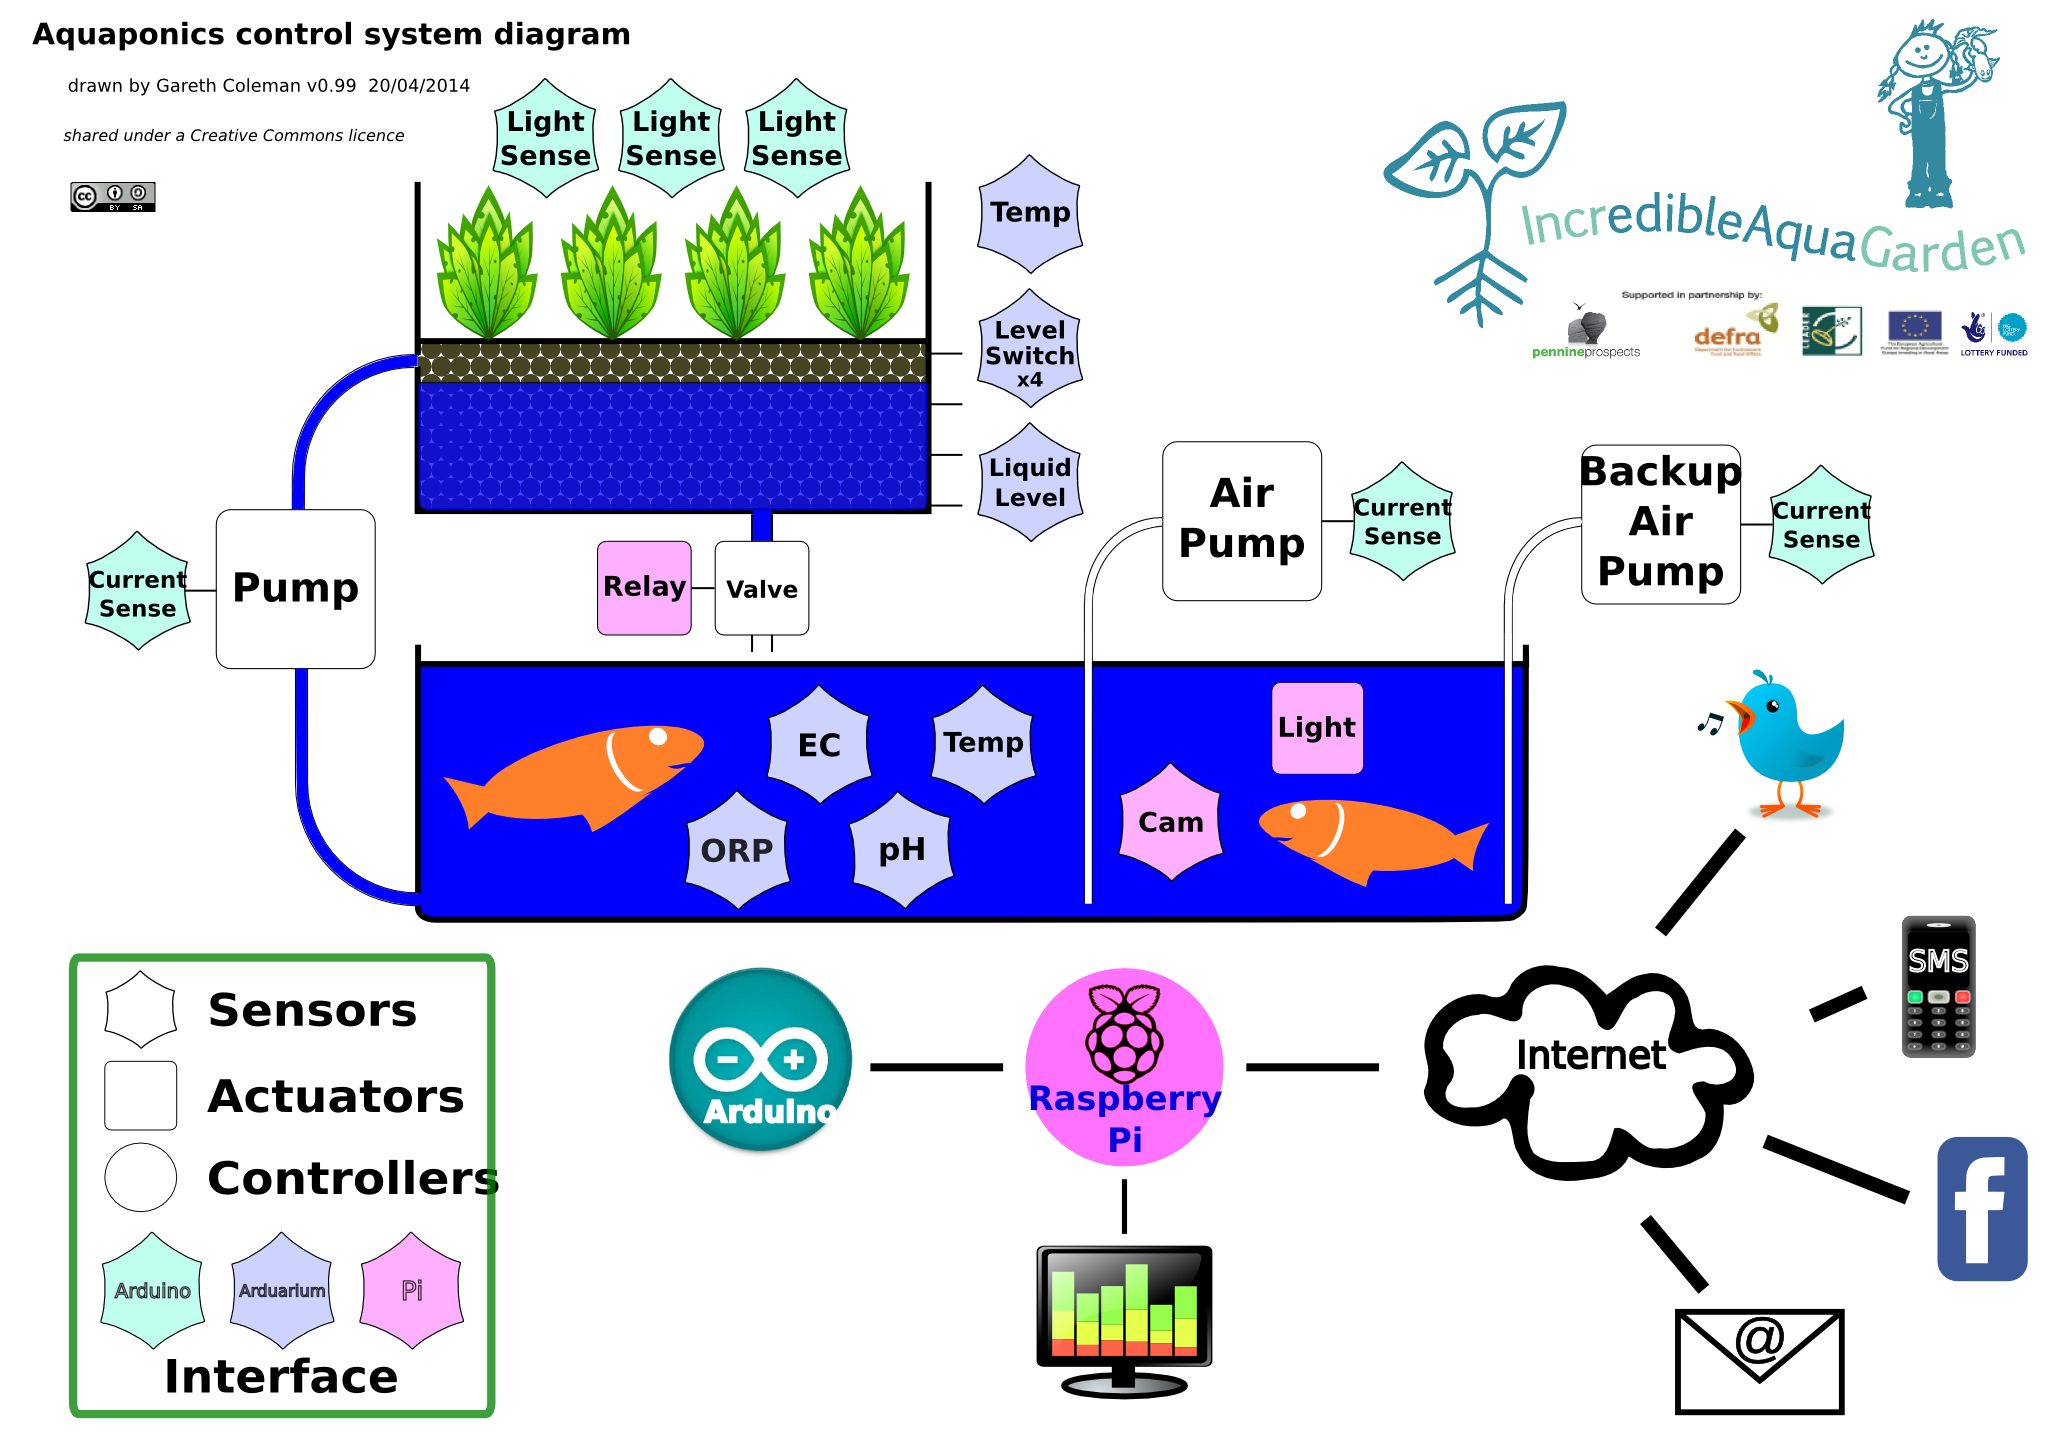
The system uses an Arduino Mega (massive 'rispetto' to them!) to connect to most of the sensors. We wrote code that collects sensor readings every second and sends them over ethernet using the MQTT protocol. We chose MQTT because it's a lightweight solution that's a great fit for our needs, and there are high quality libraries available for Arduino and Raspberry Pi.
Something we appreciate is that although there is a boat-load of great code available for these platforms, not all of it is ready for production. We've learned the hard way that you have to review the code you use and where it's coming from to get confidence that it's going to work - day in, day out. There is a big difference between a quick proof-of-concept sketch and a well tested, debugged and maintained library.
Some of the sensors connect directly to the Arduino such as the water and air temperature, the power measurements and the analog and digital water level switches. Some of the more specialised sensors connect via the Aquarium Ultra shield from Practical Maker:
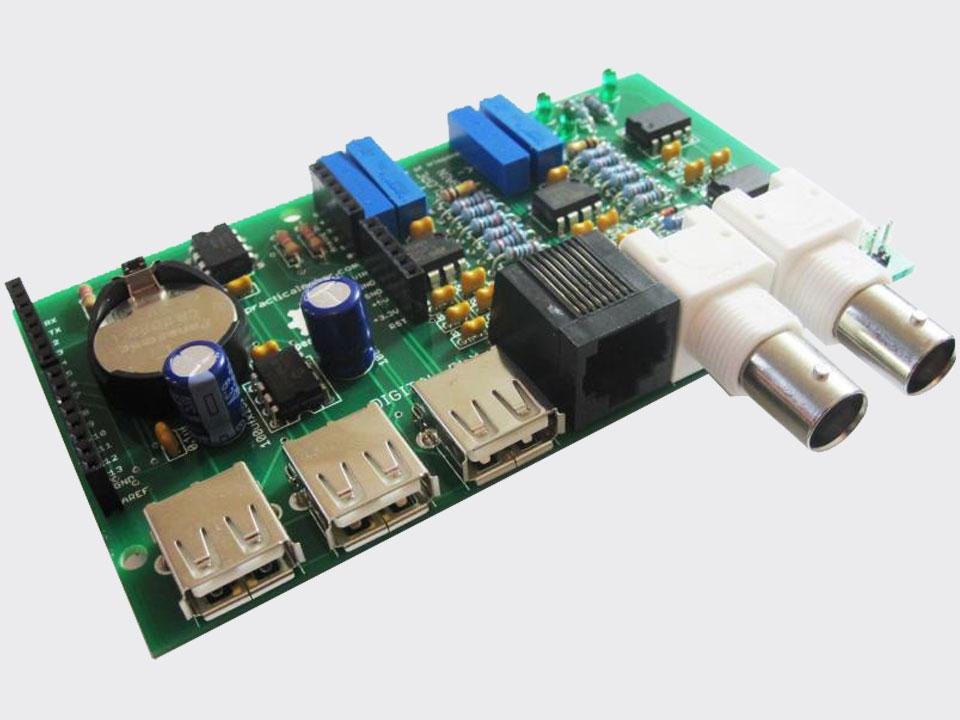
This open source shield provides an interface to a pH probe, an ORP probe (for sensing Oxygen level) and an EC probe (for sensing dissolved nutrients). It also gives a nice set of connections to many of the Arduino's other I/O pins. Since we got a shield last year the design seems to have changed and the price reduced.
The Raspberry Pi receives the data from the Arduino but also has some sensors to monitor itself - and the control elements that affect the system. I designed and built a board that drives a relay and LED lights, and provides an LCD interface. In the end we used a separate relay board and decided not to use the LCD - and the lights are still awaiting a good solution to underwater video! But the experience was very useful - both in terms of circuit design/build and system design.
During installation I found out that the sensor cable lengths had to double to 10m - and this caused problems with the pH sensor and the light level sensor. I decided that the way forward was wireless, and so I designed and built sensors based on JeeNodes from JeeLabs. As they are derived from Arduino it was relatively easy to transition to them, and soon we had a light sensor and pH sensor communicating over wireless to the Raspberry Pi.
I used the excellent pH sensor board from Sparky's Widgets but had to hack it in
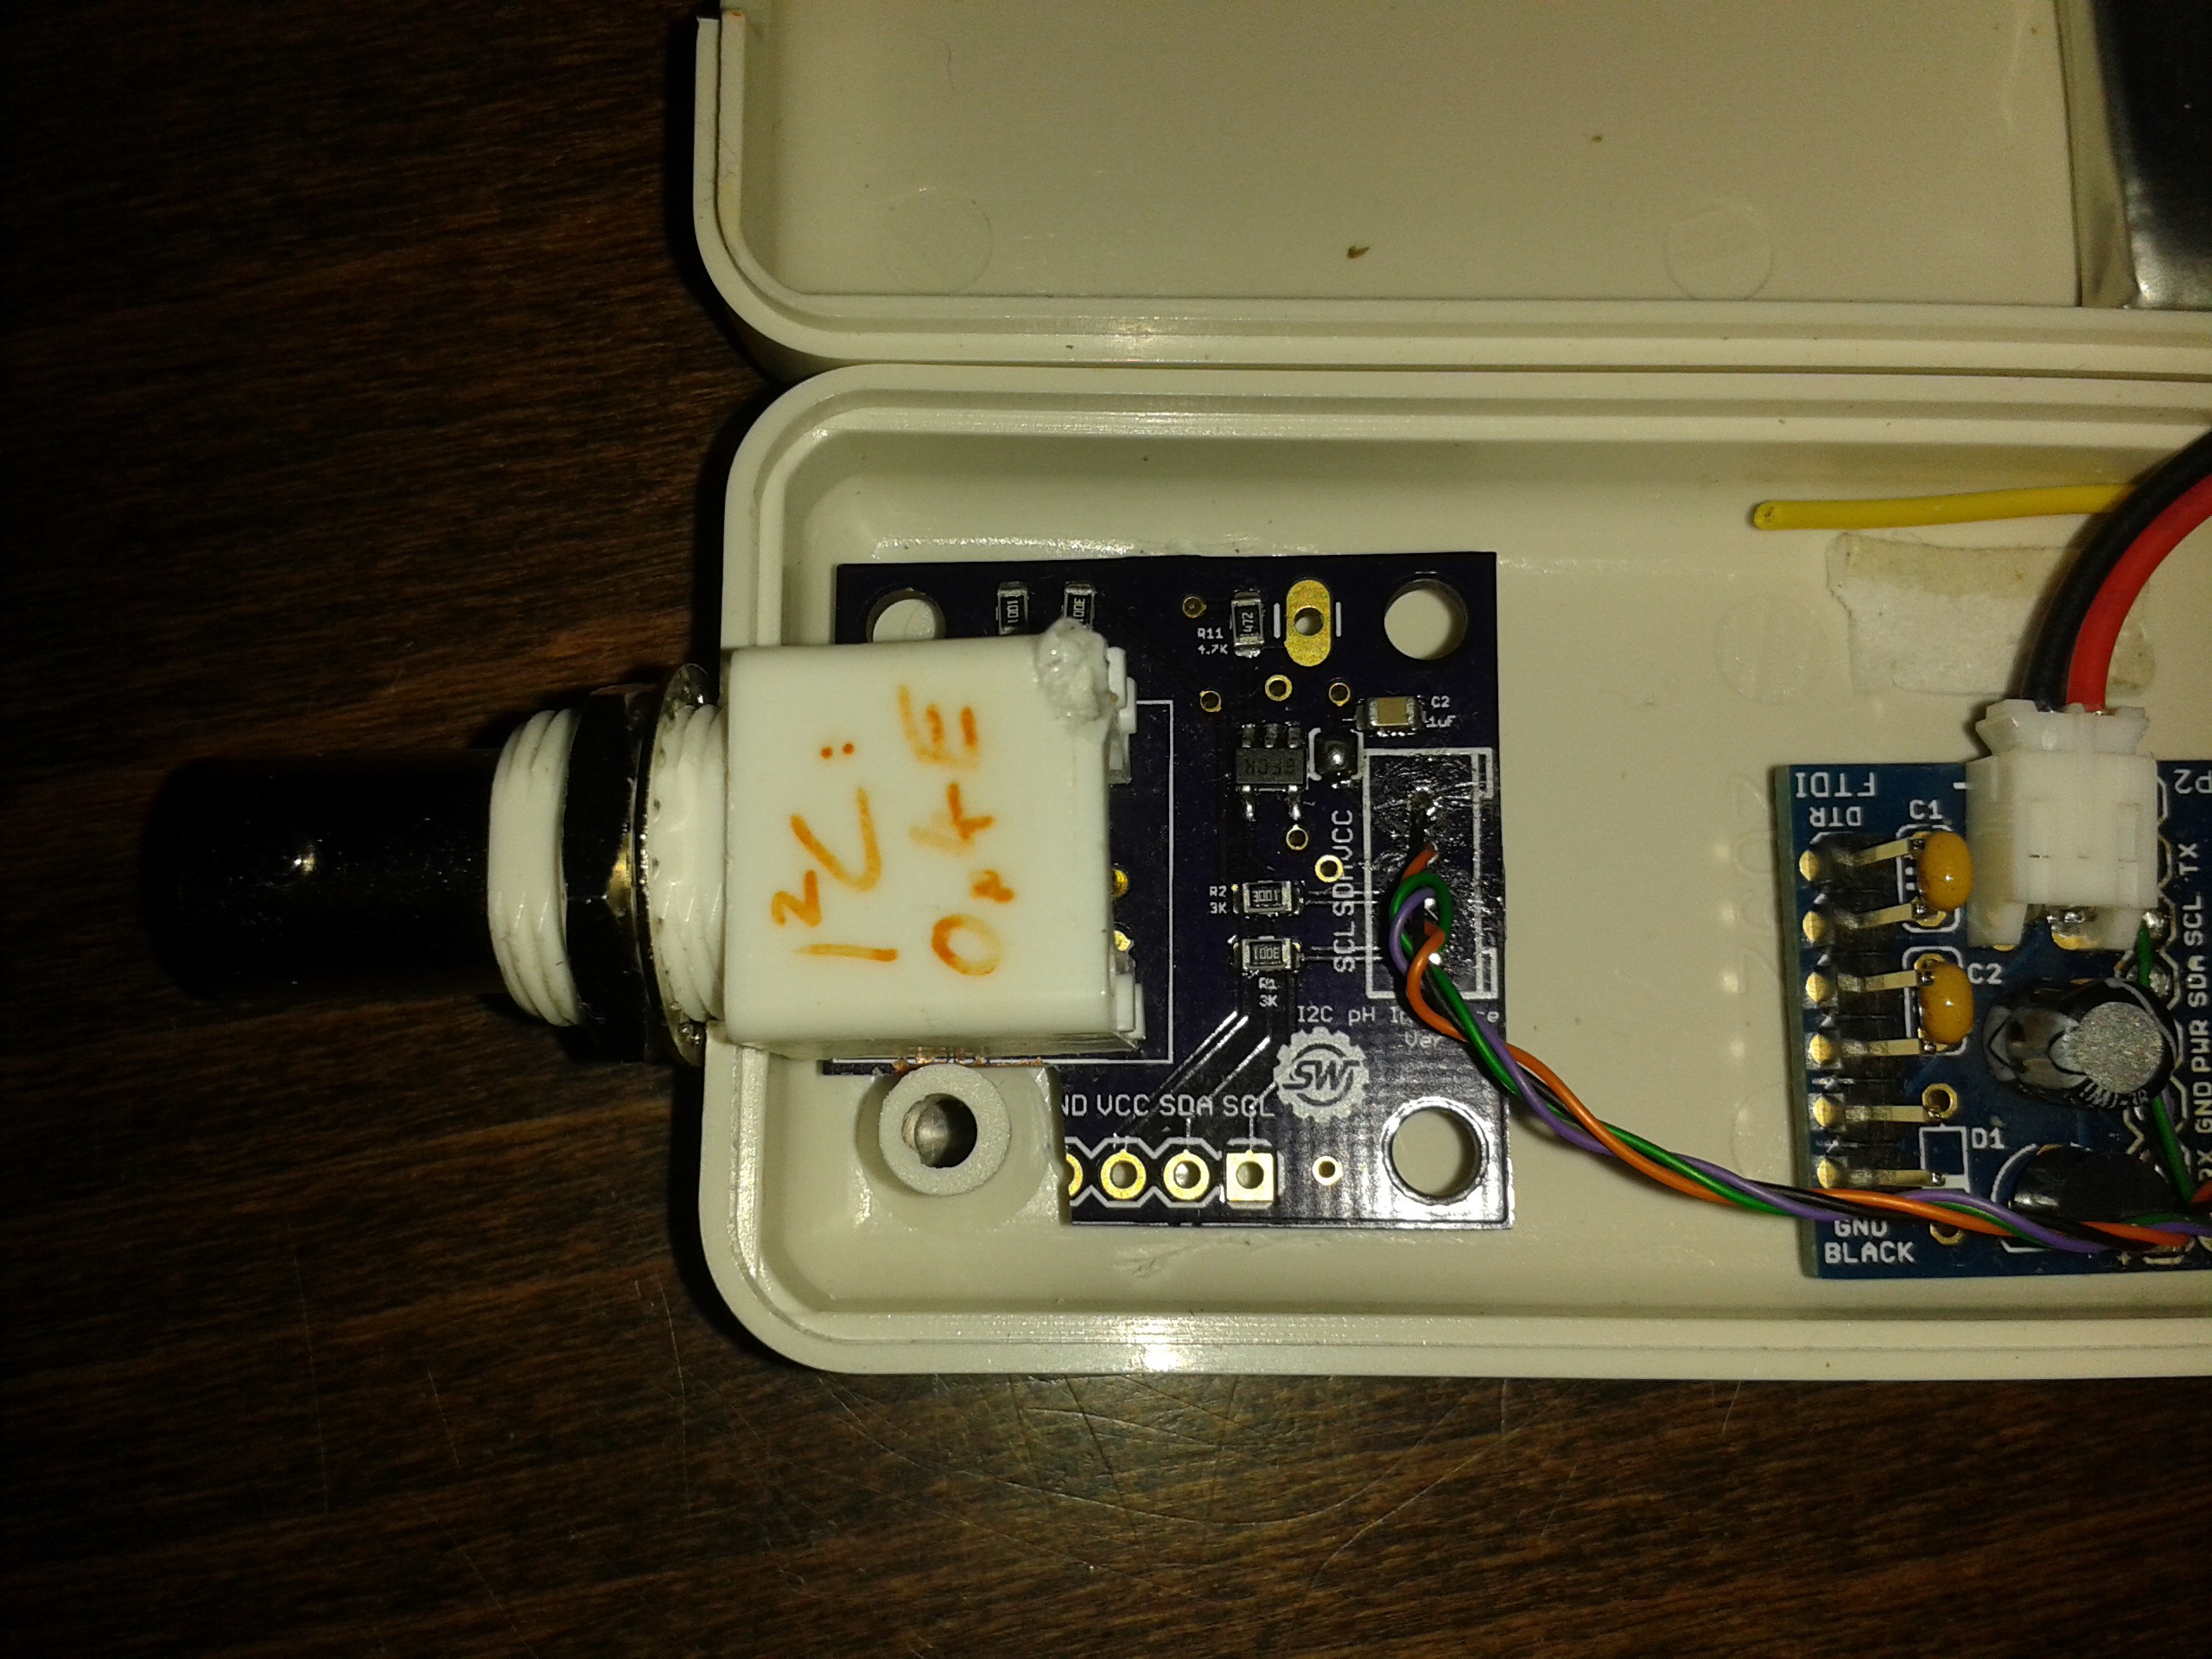
the literal sense - with a hacksaw! - to make it fit into the case I wanted to use. Luckily the board files are available (another win for open source hardware) which made it easy to verify that the circuit would work fine minus a corner of the ground plane.
Now that we've got confidence with the wireless sensors linking directly to the Pi, we're ready to say 'arrivederci arduino' - and slim down the system to make it simpler, more reliable and cheaper. We're referring to this as 'System 2'.