Dmitry
Virtual machines are very popular in PC world and have a lot of applications there. But this is not true for Raspberry Pi. RPi has a different CPU architecture comparing to usual PC – it is based on ARM CPU instead of x86. That is why common solutions for PC world will not work – VMware and VirtualBox support only x86 architecture. Although Raspberry Pi is the most popular mini PC device, developing such sophisticated software as a virtual machine would require much effort. |
Installing and using the open-source VMs that support ARM (like QEMU or KVM) may be rather tricky. But even if you overcome all the obstacles you will face another issue – you can not run x86 software inside your VM. This happens because modern virtual machines can not emulate another CPU, they just allow Guest OS system to share hardware resources with the host OS. One can recall cross-architecture solution of QEMU, but QEMU does it with huge performance overheads and with a lot of limitations. This makes it useless in most cases. So, here we could give up, but fortunately, we have Exagear Desktop!
As you’ve probably understood from the info above, Exagear Desktop is a virtual machine that supports x86 translation to ARM architecture. To be more precise, Exagear Desktop is an application-level virtual machine. What does it mean? It means that ExaGear Desktop emulates x86 environment only for applications, but not for x86 OSes. So, you can not run x86 Windows or x86 Linux itself, but you can run almost any x86 application (in case of Windows – application using Wine) with the help of Exagear Desktop. Why did we make an application-level VM, but not a full-level VM? There are two main reasons:
1. An application-level VM works faster and consumes fewer resources of RPi (such as CPU and memory)
2. Implementation of a full-level VM is much harder
As long as users need certain apps more than some OS, an application-level VM looks more valuable for end-users. So we decided to start from this approach. But for sure, we are also planning to implement a full-level VM. Stay tuned for updates
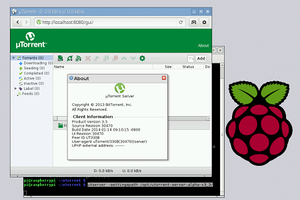
This way of using Exagear Desktop allows you to easily launch x86 programs, including Spotify, Skype, Teamviewer, TeamSpeak 3 Server, Dropbox, Telegram, uTorrent and many others on your Raspberry Pi (as well as on Odroid, Banana Pi, Pine64, etc.).
Moreover, with Exagear Desktop you can create a heterogeneous environment where both ARM and x86 applications can work simultaneously and communicate with each other as usual linux applications. This allows you to make your Raspberry Pi more flexible, combining programs with different architecture in one system.
ExaGear Desktop installation is very straightforward
1. Put ExaGear Desktop archive with installation packages and ExaGear Desktop license key in the same folder. Open Terminal (command line), move to this folder and unpack the archive using the following command:
$ tar -xvzpf exagear-desktop-rpi2.tar.gz |
2. Install and activate ExaGear on your ARM device by running install-exagear.sh script in the directory with deb packages and one license key:
$ sudo ./install-exagear.sh |
That’s it!
Now you can launch the guest x86 system on your ARM device
3. Enter the guest x86 system using the following command:
$ exagear Starting the shell in the guest image /opt/exagear/images/debian-8-wine2g |
You are in the x86 environment that can be checked by running the ‘arch’ command:
$ arch i686 |
4. It is recommended to update apt-get repositories on the first launch of the guest system:
| $ sudo apt-get update |
Now you can play with your x86 virtual machine and install your favorite PC applications!
After installing an x86 application in the guest x86 environment you can just go to the Start Menu of your Raspbian and run this application simultaneously with native ARM applications.
For example, you can run Spotify on Raspberry Pi with ExaGear Desktop virtual machine. You can even use Spotify Connect on your Android or iOS device to remotely control the music on your Raspberry Pi....
Read more »