 Adam Gulyas
(This project is 6 years old. I want to revise it to take out the pot and use panel mount through hole right angle components. That way everything can just be mounted on a PCB. Then if I replace the face plates with PCBs I should have a really quick to assemble product I could potentially sell.)
Features
- switch between two different inputs
- switch between two different outputs
- volume control
- completely stereo design
I have both a laptop and a desktop and I was getting annoyed at having to switch my headphones between them when I used both at the same time. So I made this. It let's me switch between two different TRS 3.5 mm inputs and outputs. (The standard audio connector.) I also added a volume control for when the volume difference in the two inputs is too large to be comfortable.
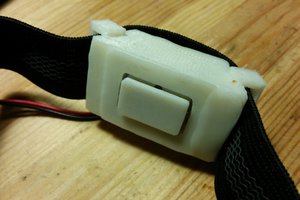
The jacks I used are a bit interesting. I ordered them from somewhere in Asia about two years ago, and they didn't come with nuts. I took one of them to an audio place in my town and the guy there couldn't find anything that fit. Apparently the manufactures made up a thread that isn't a metric or standard size. I resorted to securing them with hot glue, and it seems to be standing up well. For my next audio project I will just buy different jacks. (What do I do with the rest of the 50 jacks I ordered? I guess the moral is to get samples first.)
This is the first thing I've made with a volume control pot. I used a dual 50k log taper low profile one. From what I've read online, it's hard to match the resistance vs. turn curves of the two resistive wafers inside the pot. It's kind of apparent here, with the right channel sounding louder than the left. I guess the only option is to buy a better pot? Either that or try adding some extra resistance in series or parallel to minimize the discrepancies. Come to think of it, I could have mapped the VI curves on my oscilloscope...
For the faceplate, I drew the graphics in Inkscape and printed them on a sticker. If I had to do it again, I would laminate a paper with the graphics and then use a good glue to attach it to the enclosure. This would waterproof it and hopefully decrease the effects of ageing. (I saw this technique on youtube, but can't find the video again.)
In other news everything fit in the enclosure, which hasn't always been the case for me. I'm getting better at spacial planning.
 Bothwell
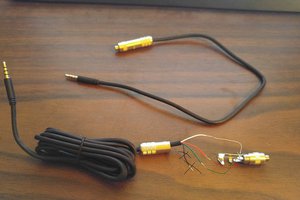
 Matt Stanton
 Michael Wessel
 shlonkin