 Kenny
KennyFull Tutorial from iotbreaks.com
Hardware
- Raspberry Pi 3
- Camera Module V2
- Sandisk Micro SD card 8GB
- Power Supply 5V, 2.5A
- Optional: Heat sinks
- Optional: Simple case or Fancy Case
Or you can buy all-in-one set here.
Specification
This section explains the specification of application including app structure, and general flow chart. You will have a clear vision about what application does.
Application Structure
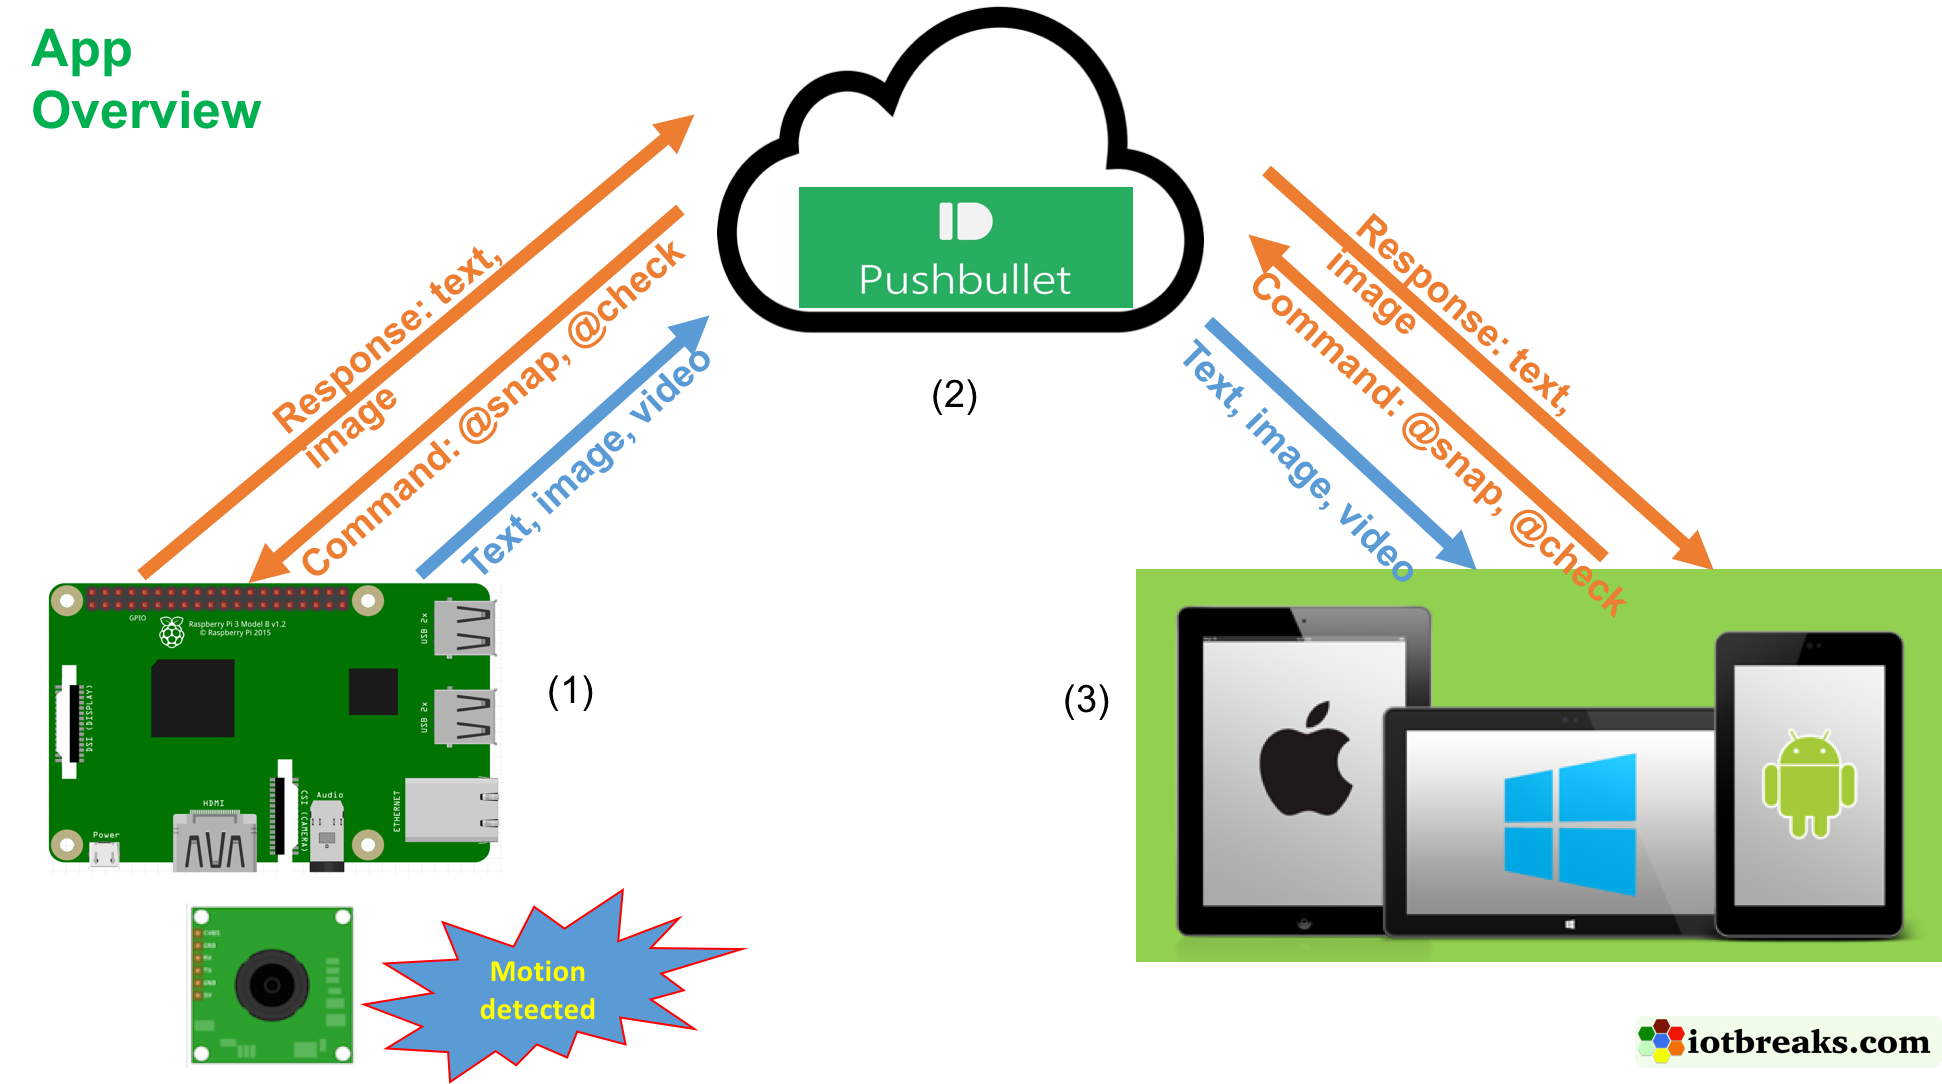
There are 3 actors play together to build up the application. (1) RaspberryPi&Camera module as the data source that continuously scan for motion and recording video at the same time, (2) PushBullet as the message-broker to send messages(text, still image, and videos) back and forth between RaspberryPi and Mobile/Web, and (3) mobile/web acts as “notifyee” who receives the still image and video of motion. The communication is two ways though. It means you can send a command from mobile or web to Raspberry Pi for particular action such as “@snap” (for instantly take a photo) or “@check” (to get current system information of Pi).
General Flow Chart
When the script launch, it takes 2 seconds to warm up the camera to make sure everything works properly. Then jump right into motion scanning. If moving happens, The Pi will capture a still image and send notification to phone immediately. At the same time, Pi keeps recording the moment for a few more seconds. After that a mount of time, if moving is still there, Pi re-capture a new image and send a new notification. Until no motion anymore, the recorded videos will be pushed to mobile to confirm the motion end. The system goes into motion scanning state. The program loops again and again as this flow.

Just Work
If you can’t wait to see it works for you, this section is for you. You will understand the source code later. For now, everything you need is to make the application up running.
Step1: Setup Pushbullet
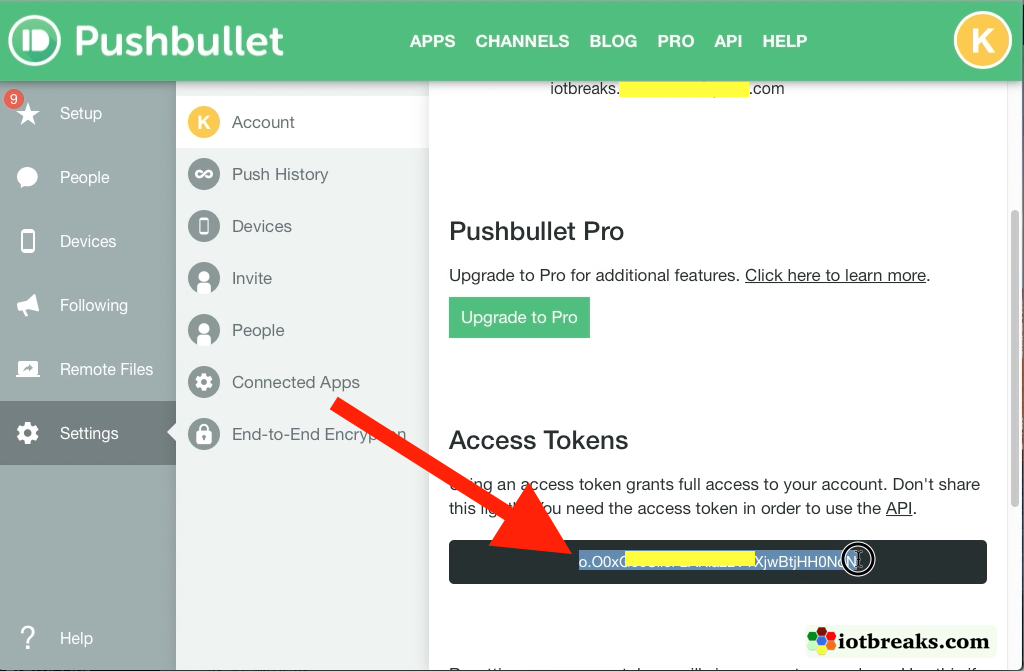
First, you need to register a pushbullet account get the key for notification. Goto https://www.pushbullet.com, you can either register with google email or facebook. In my case, I use gmail. After successful signup, Let login and goto Settings–> Account to create a API access token. We need this token for Raspberry Pi to push notification. Just note them down some where.
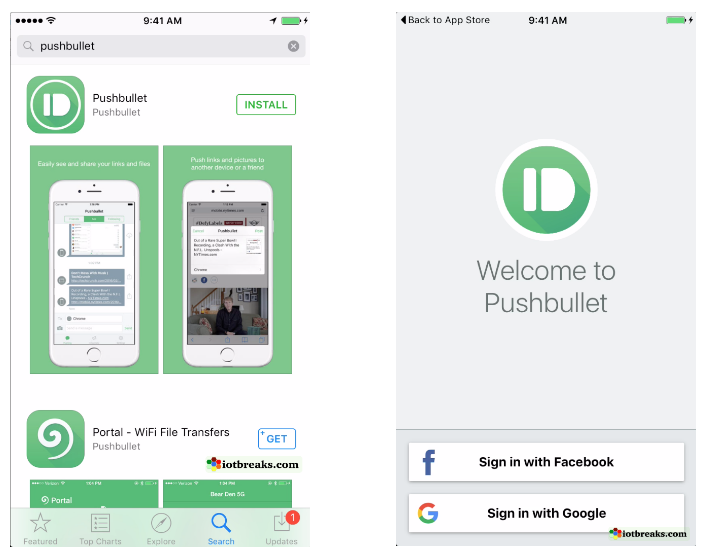
Second, on mobile, the bushbullet application is ready for both iOS and Android. So, install it. Make sure you login with the pushbullet account that you just registered.
Step2: Download software
I recommend you download and install the ready-to-work image in Resources section to save your ton of time for setup necessary software and libraries. Otherwise, you can setup from the brand-new Jessie. That’s fine.
This application builds on top of standard Raspbian Jessie released on 2017-04-10 that downloads from official website of raspberry pi. You also need ffmpeg for video convert from h264 to mp4 to view directly on your phone or web browser, and pushbullet python library for notification. One note for ffmpeg that it is not ready for install via “apt-get” command on Jessie, you have to compile it from source code. The compilation time takes about 3 hours. The source code of application is mostly written in Python.
Now let download the ready-to-work image, this file size is huge, it’s about 2.7GB. So now should be the coffee time.
Step3: Flash Image to Pi
Oh right, you have downloaded the image successfully, now let unzip and flash it to your SD card. I used the sandisk micro sd card 8GB. I’m using MAC. In case you don’t know how to flash image to SD card, check this tip. If you’re on windows, you can flash with WIN32DISKIMAGER. The flash takes about 20 minutes, coffee again. (make sure you don’t drink too much)
Step4: Enter the pushbullet access token
Now is show time, let take a look how it works. Insert the SD card, power Pi up. The application source code is placed right on the Desktop. You only job now is enter the pushbullet key as following:
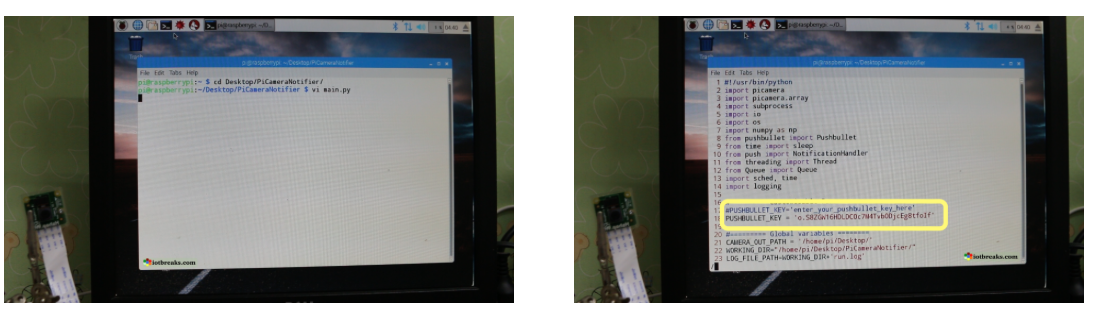
Save the main.py and reboot the...
Read more »
 Matthew Gorr
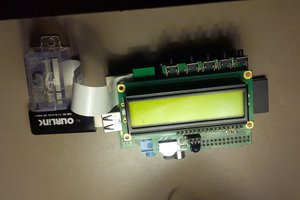
 Brenda Armour
 Jim Bennett