Morning.Star
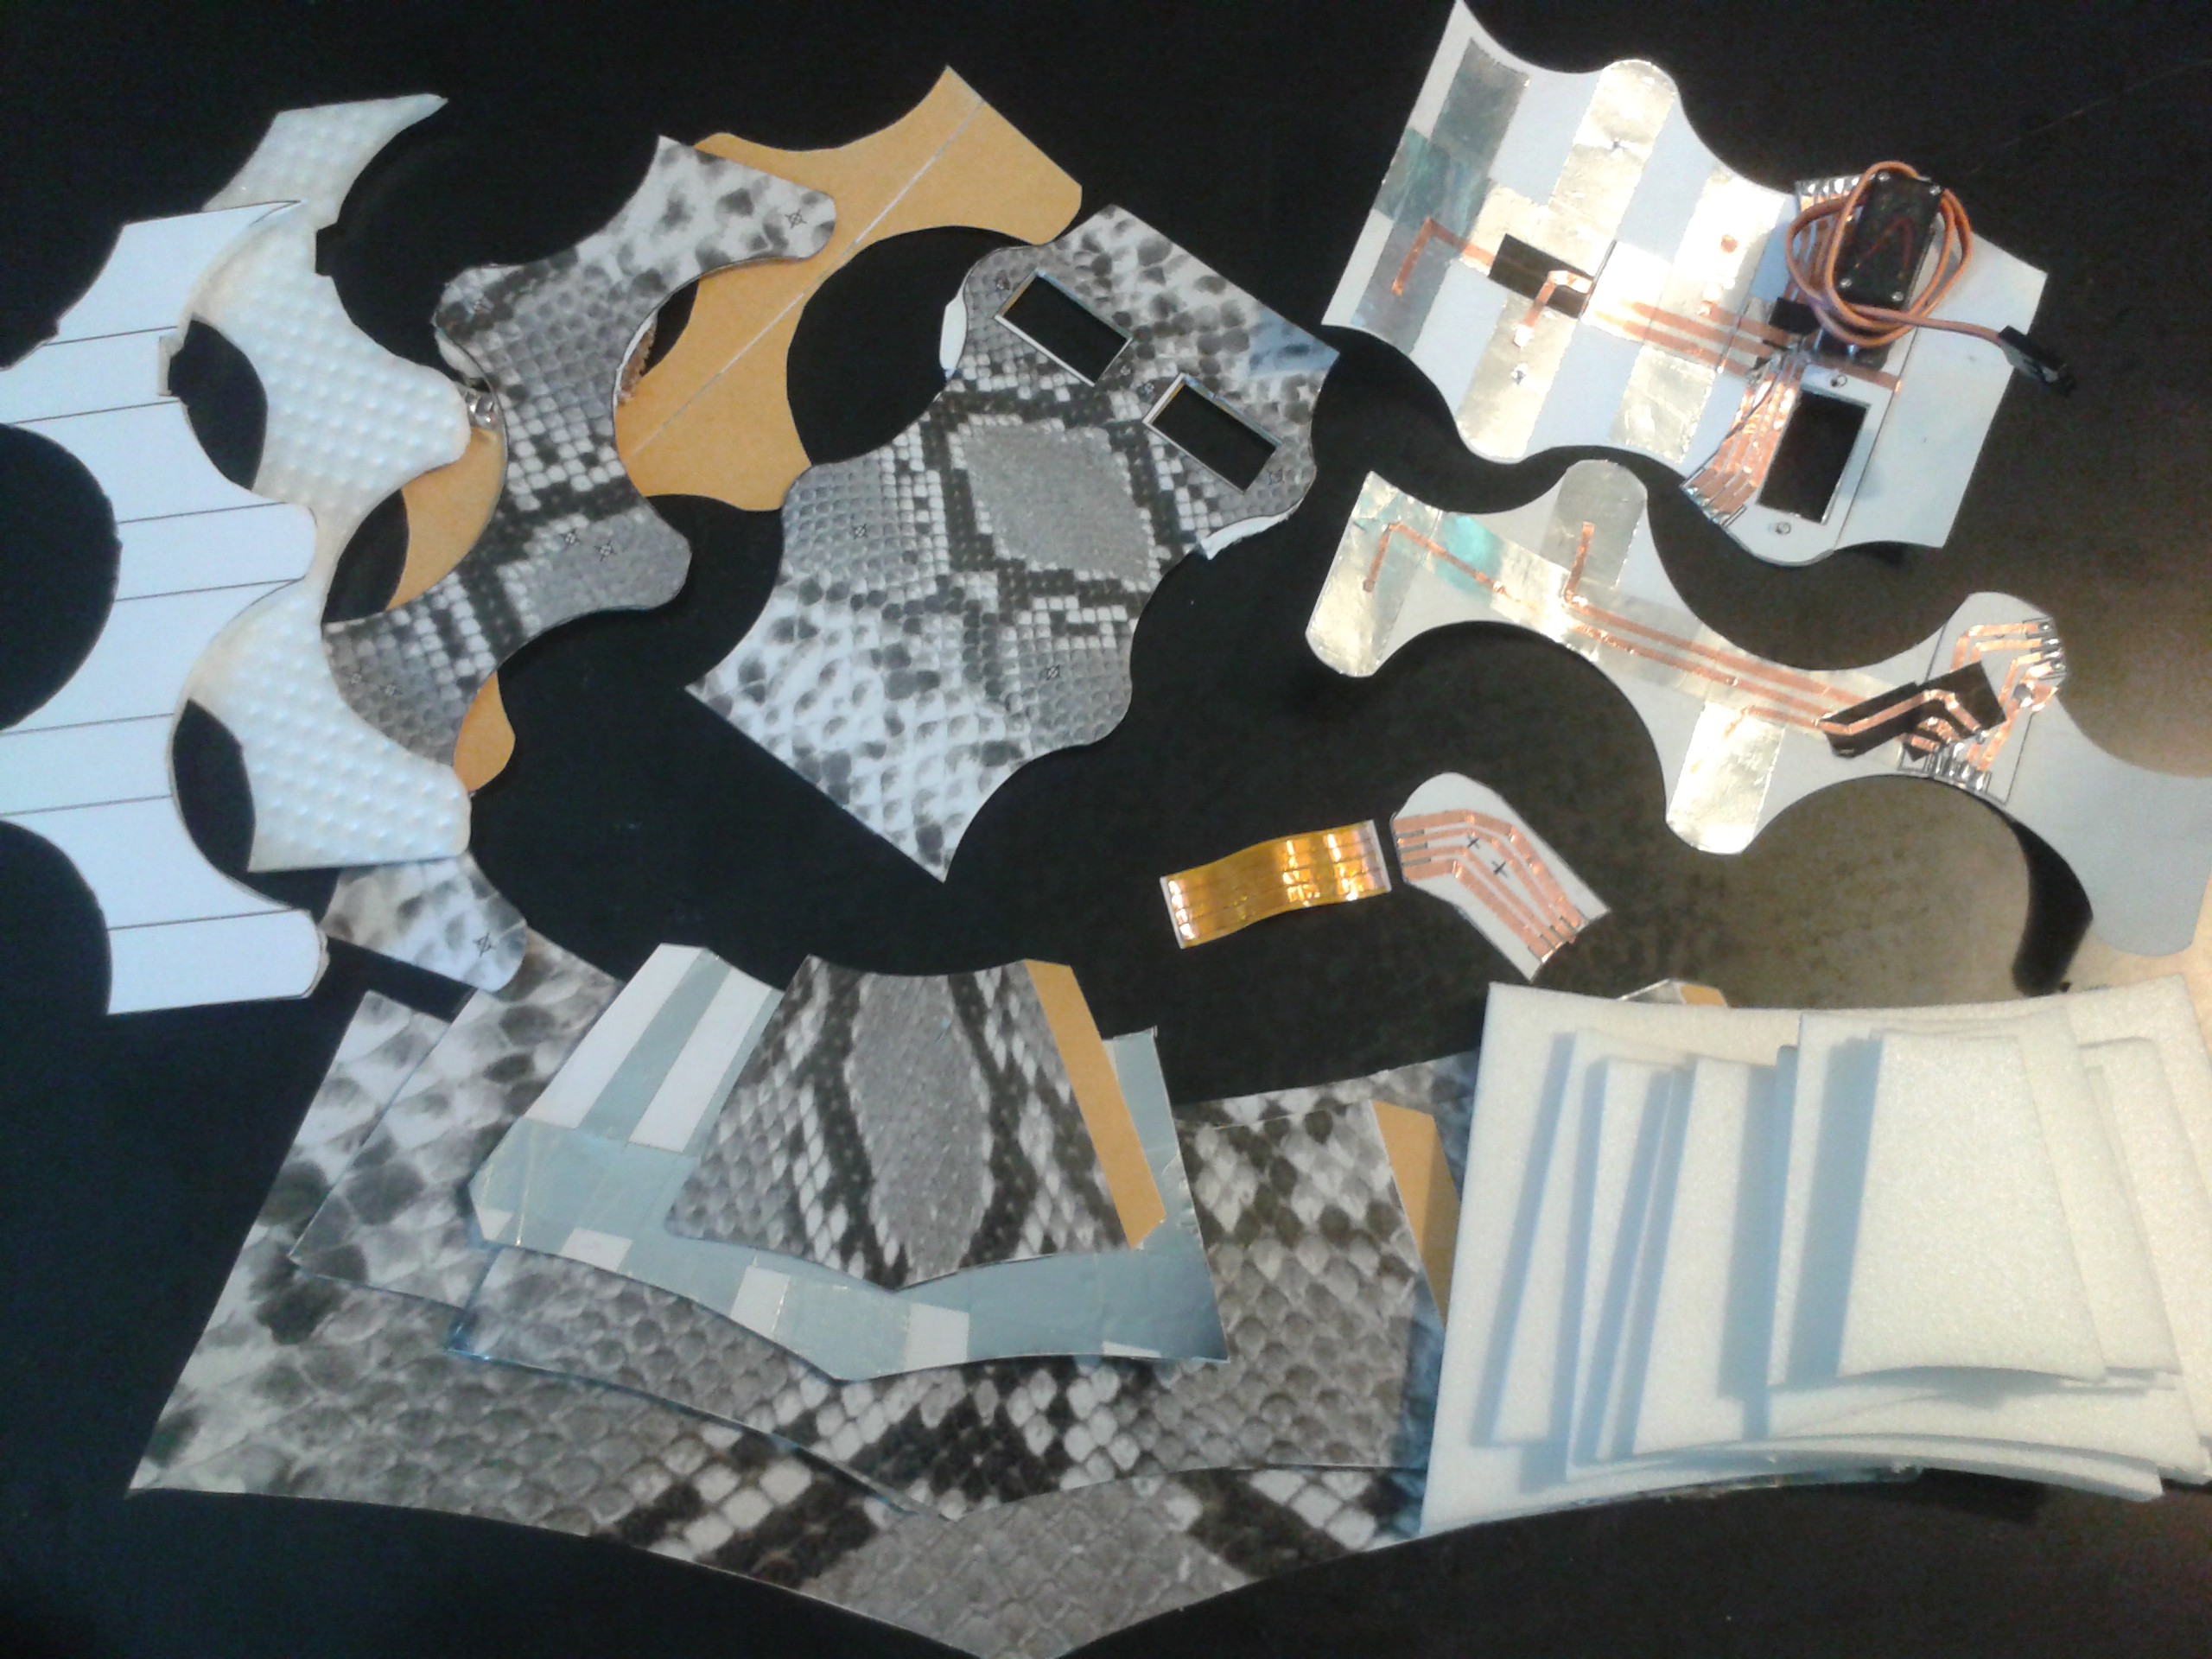
Further to the concept of #Cardware, DECAL leverages environmental resources for construction. Many lessons have been learned from the project.
- Complex folds and numerous tabs to locate are gone
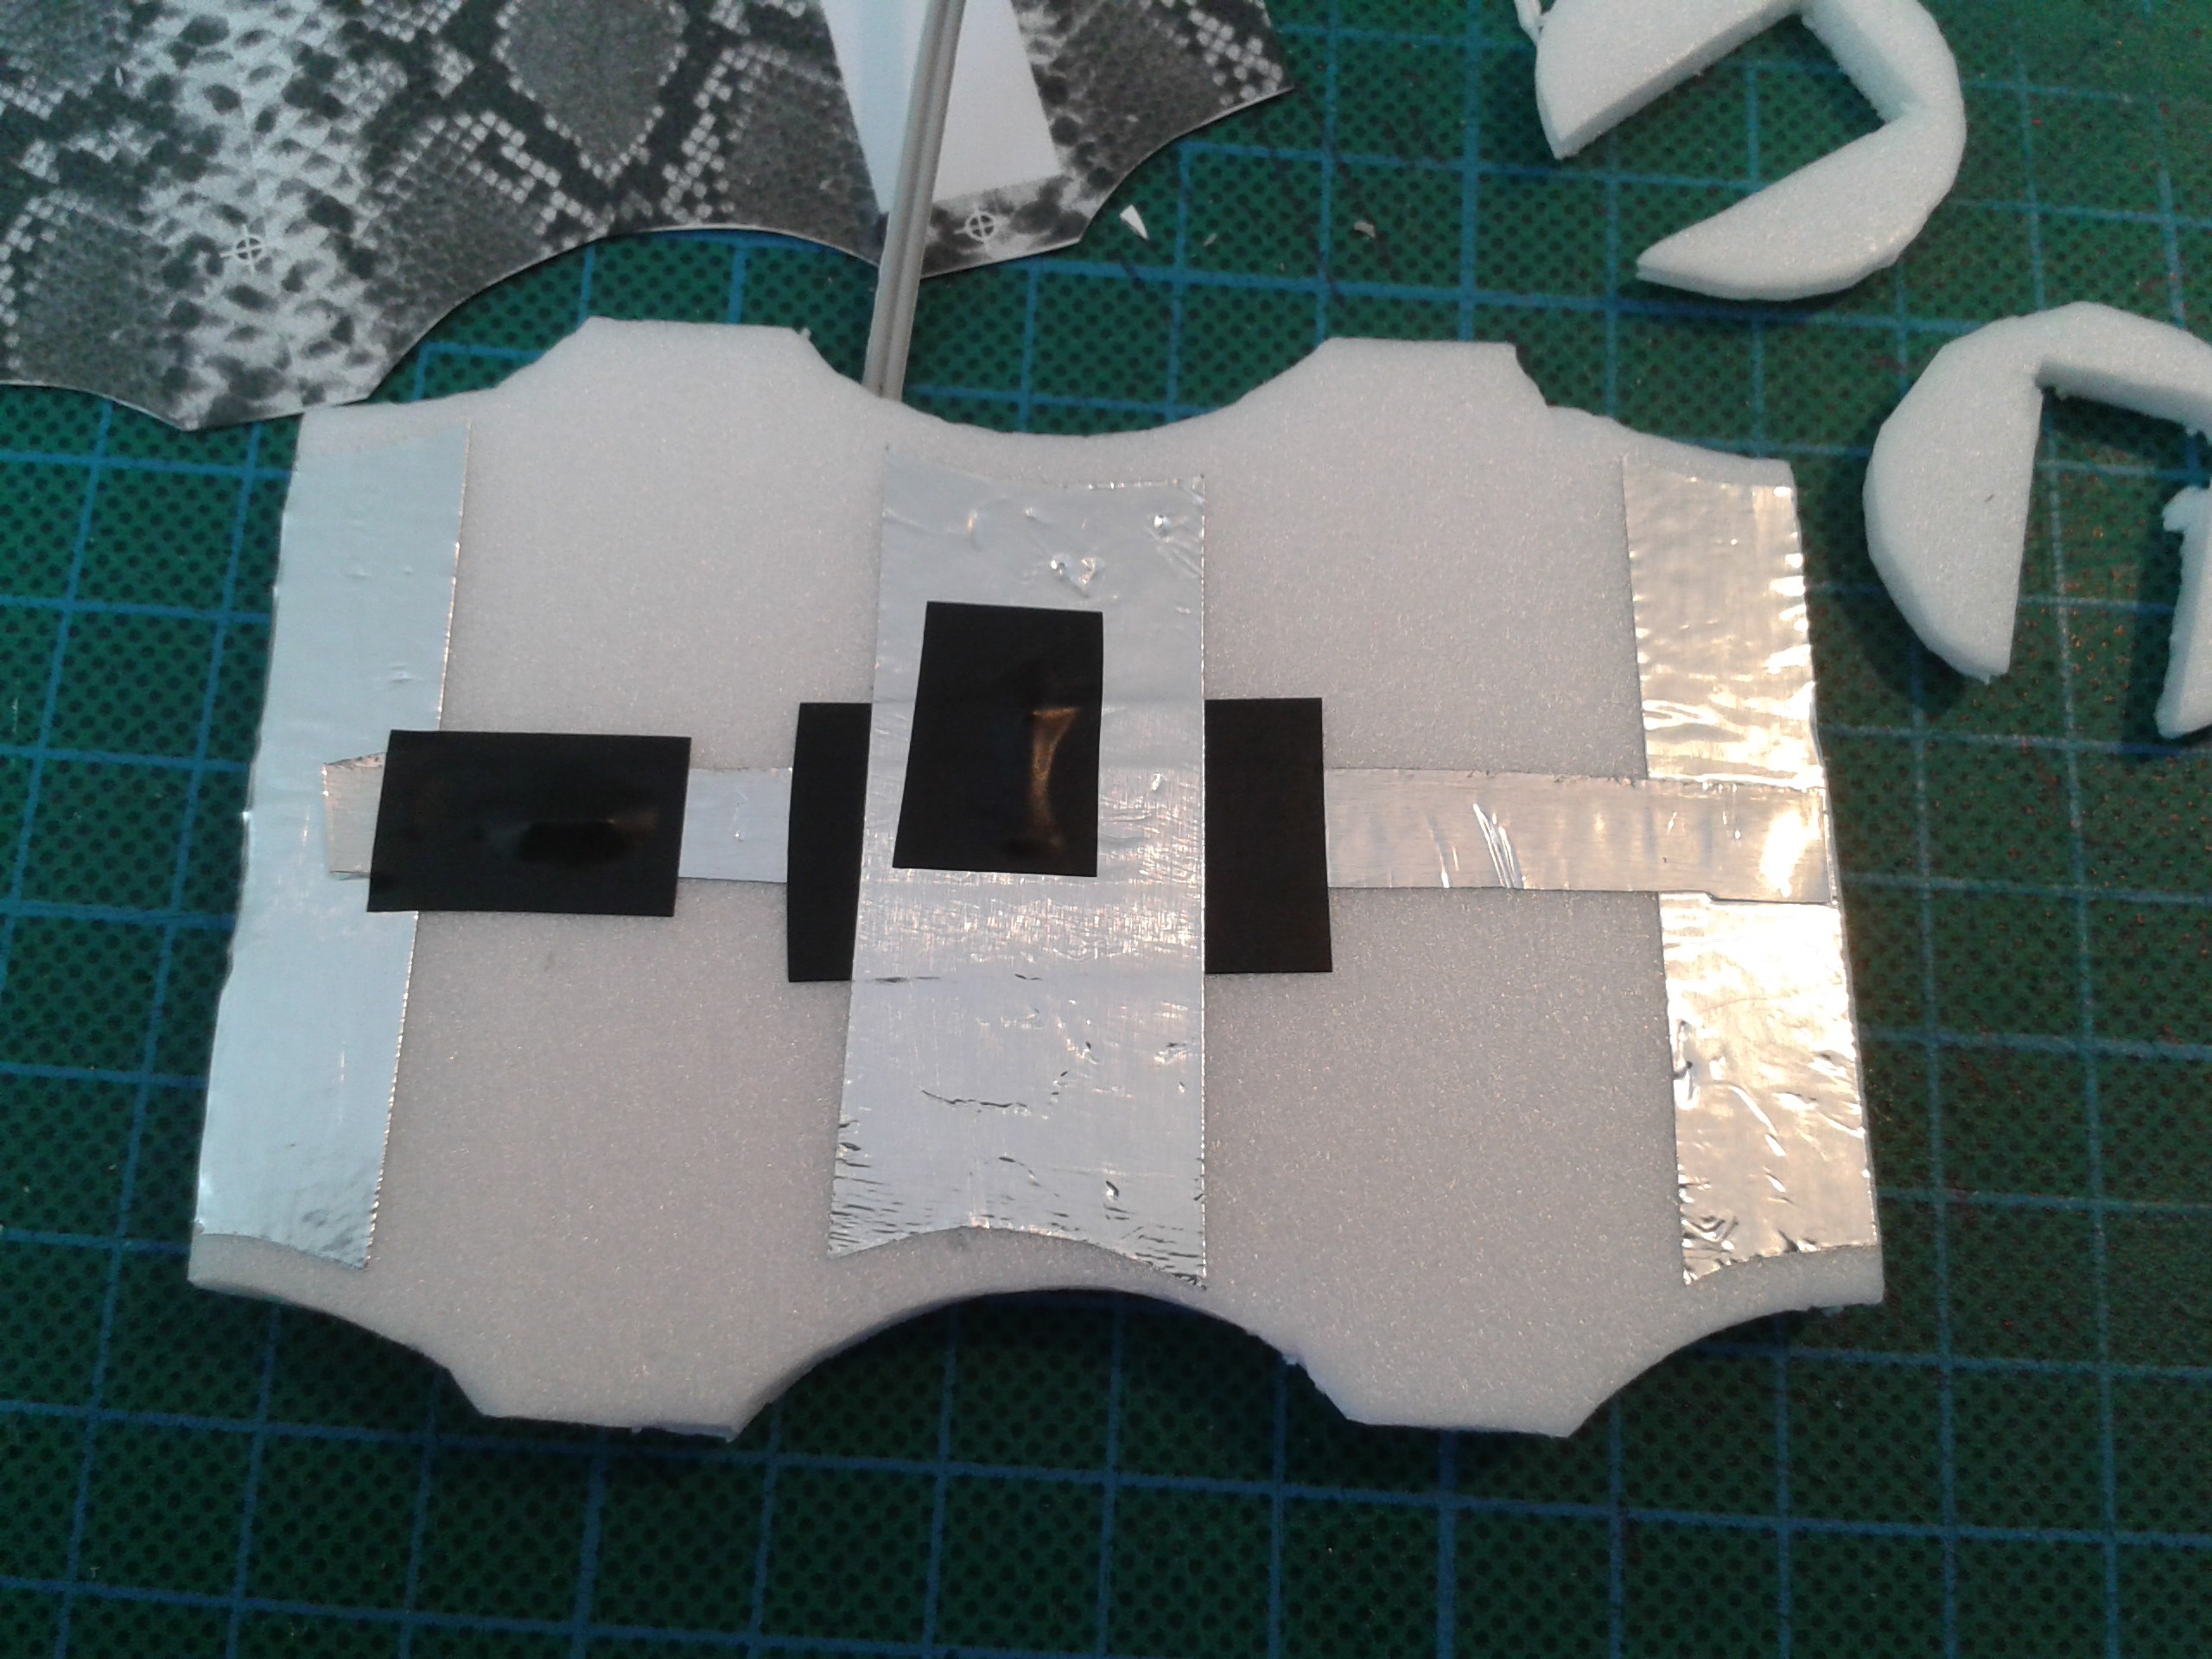
DECAL uses laminar material geometry for structural integrity. Surfaces are now formed from a flexible exoshell bonded to a foamed substrate that is then curved to compress the foam against the shell, making it rigid.
- Glue is gone
The system includes all the adhesive required. Parts just require forming into a curve and joining with a single pre-glued tab after cutting around them.
- Complex wiring is gone
Use of foils and ribbons and integrated circuits in a single layer make construction simple and easily transferable to many materials without a retool.
- Hard to find card stock is gone
DECAL uses inexpensive manufacturing processes and builds on even cheaper resources, but looks more professional and contains many improvements to Cardware's philosophy. It is also a lot more durable for the same weight than card stock and has a cleanable surface.
DECAL's composite architecture goes under the hammer.
Working out the geometry
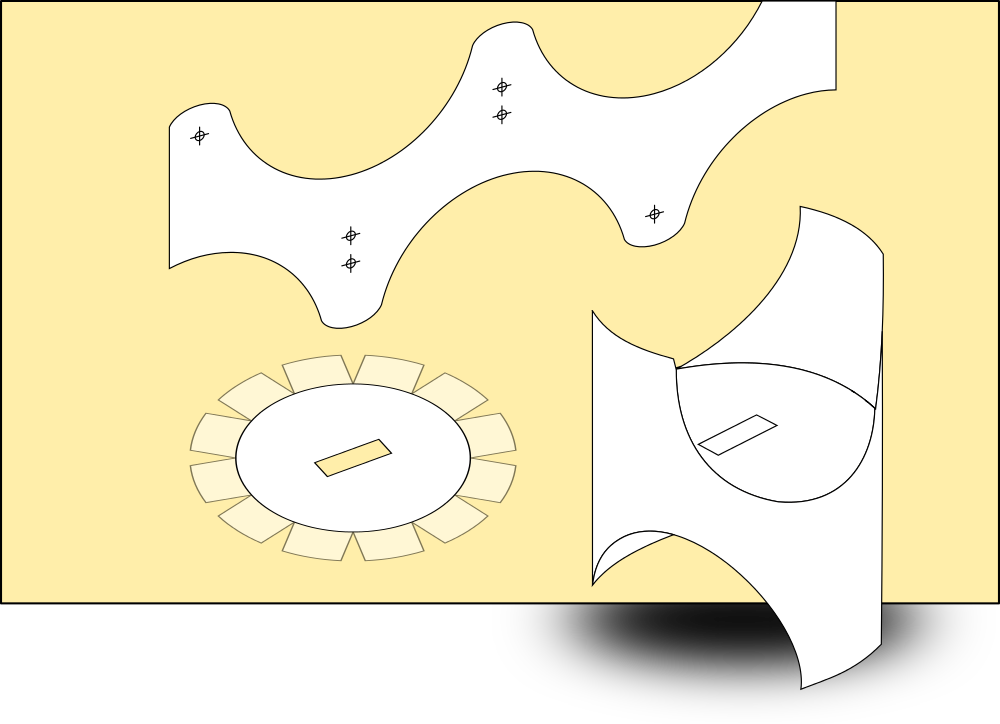
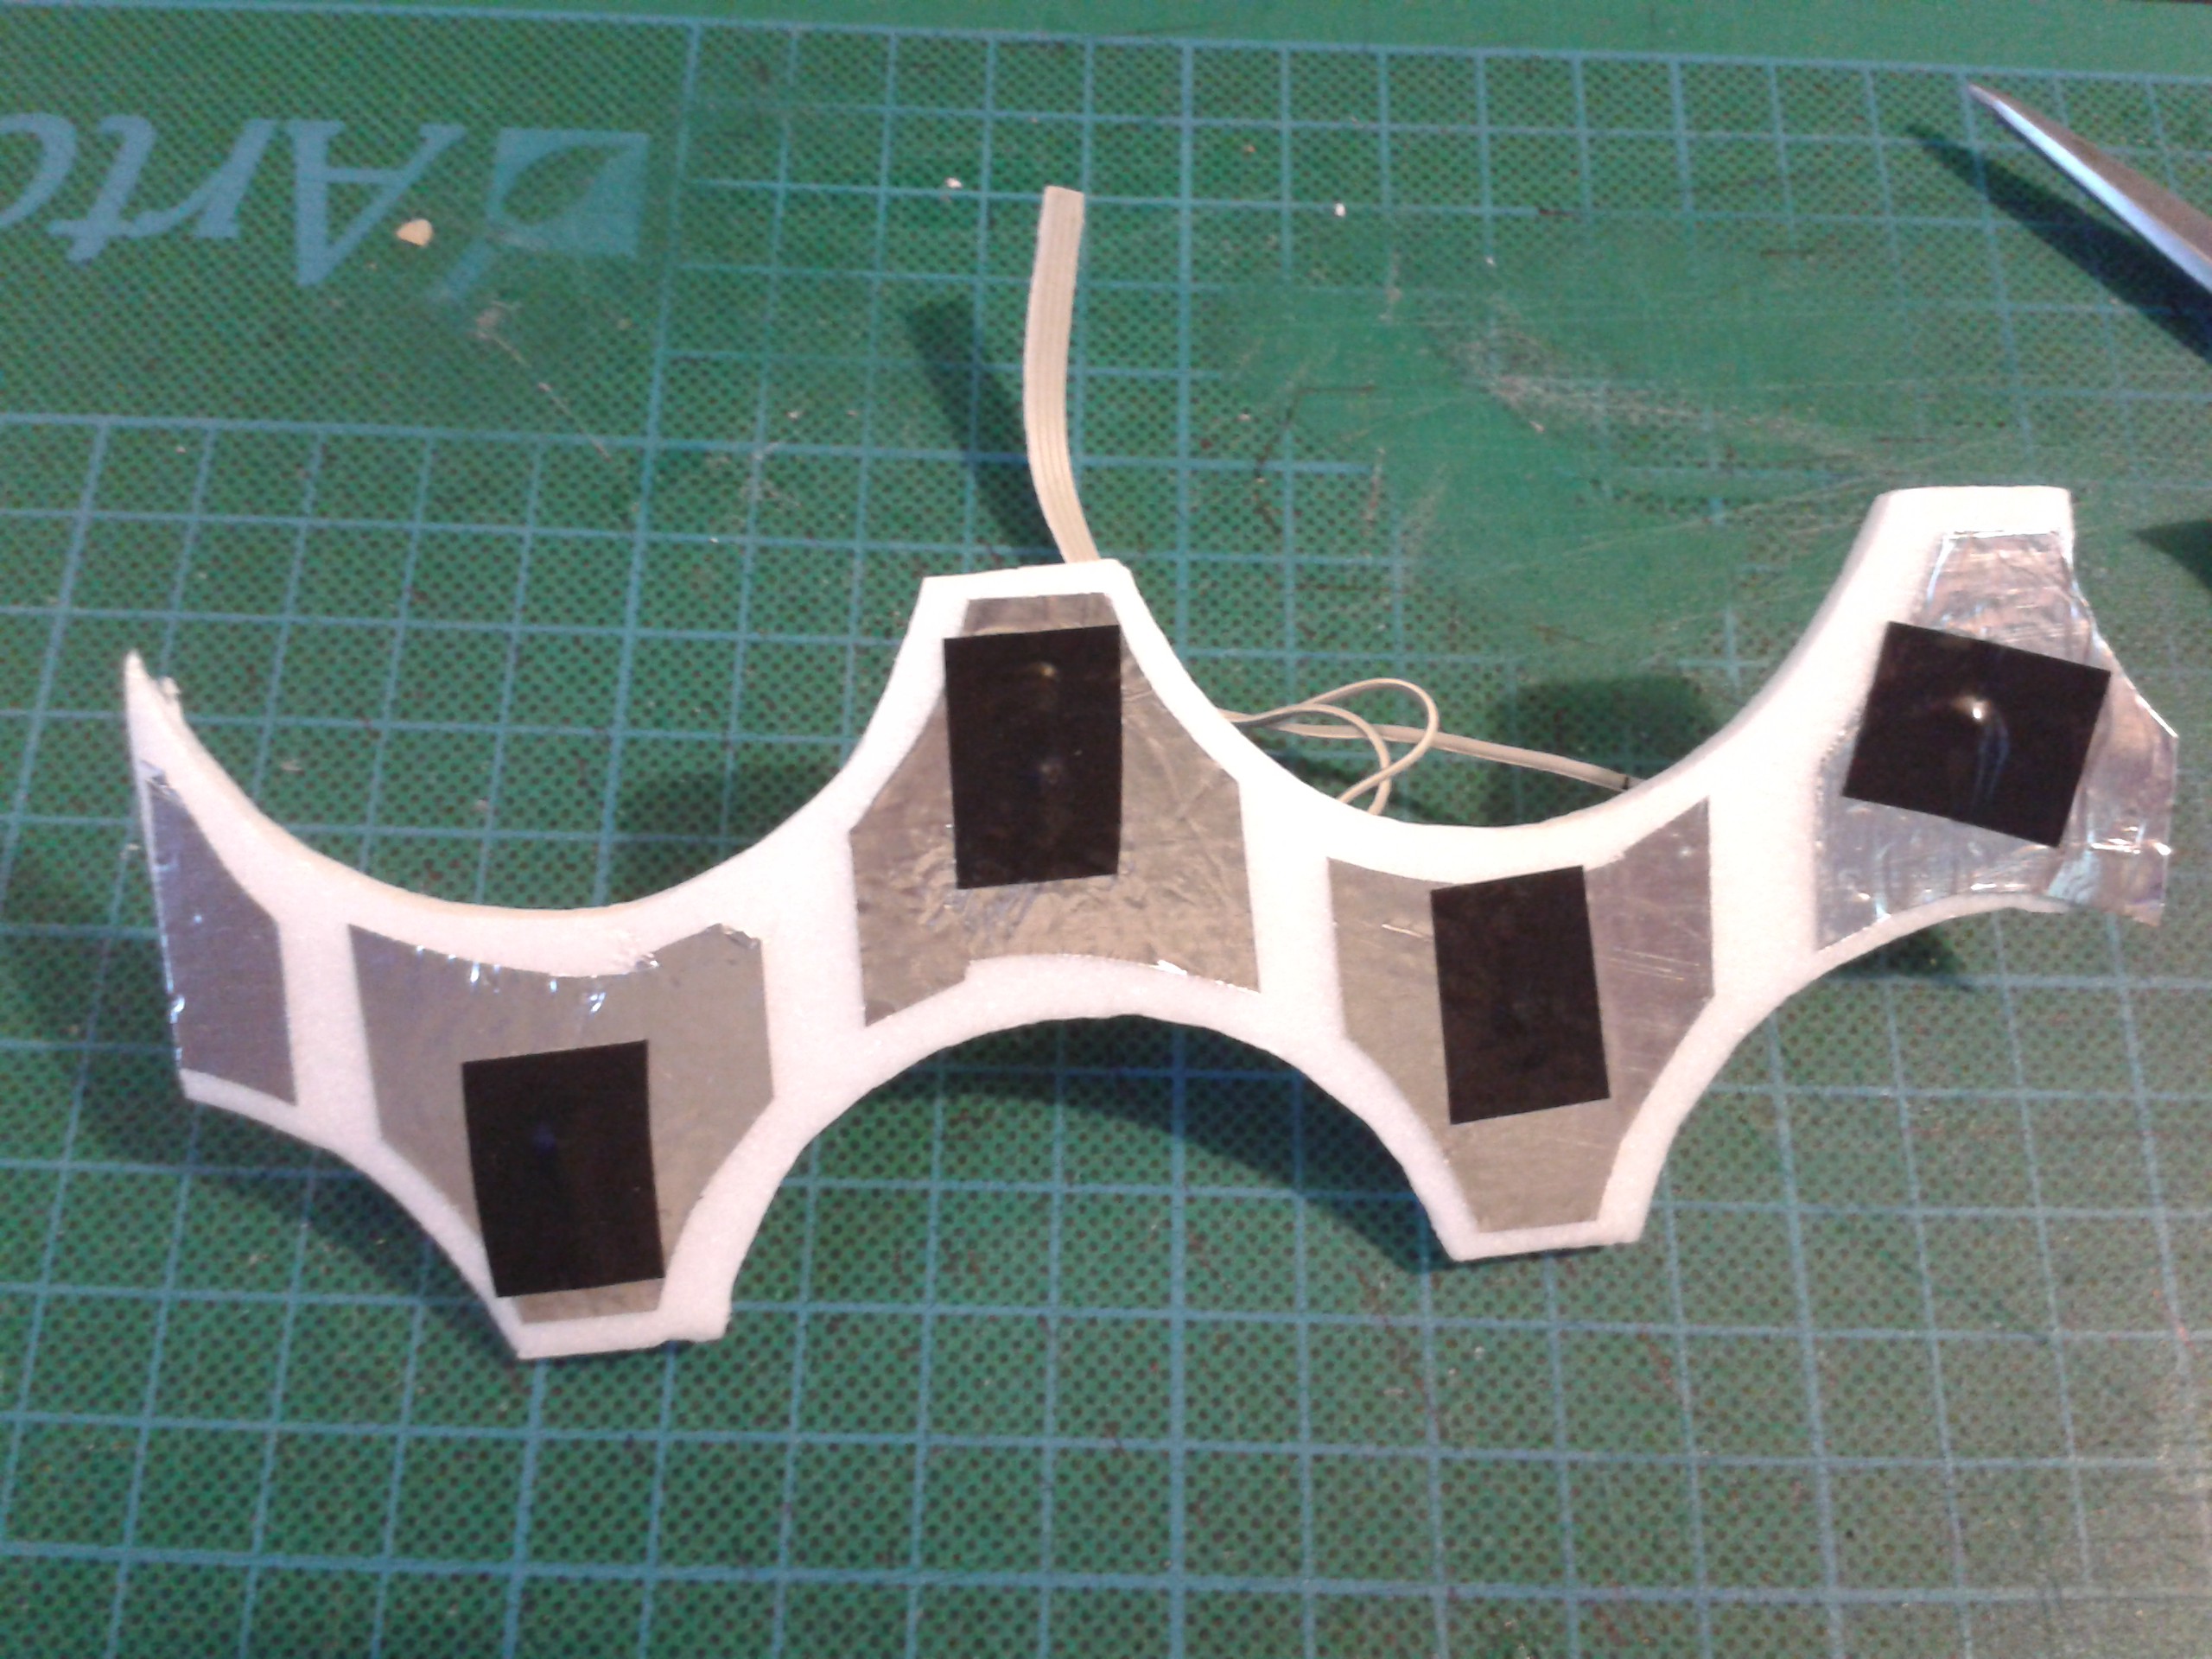
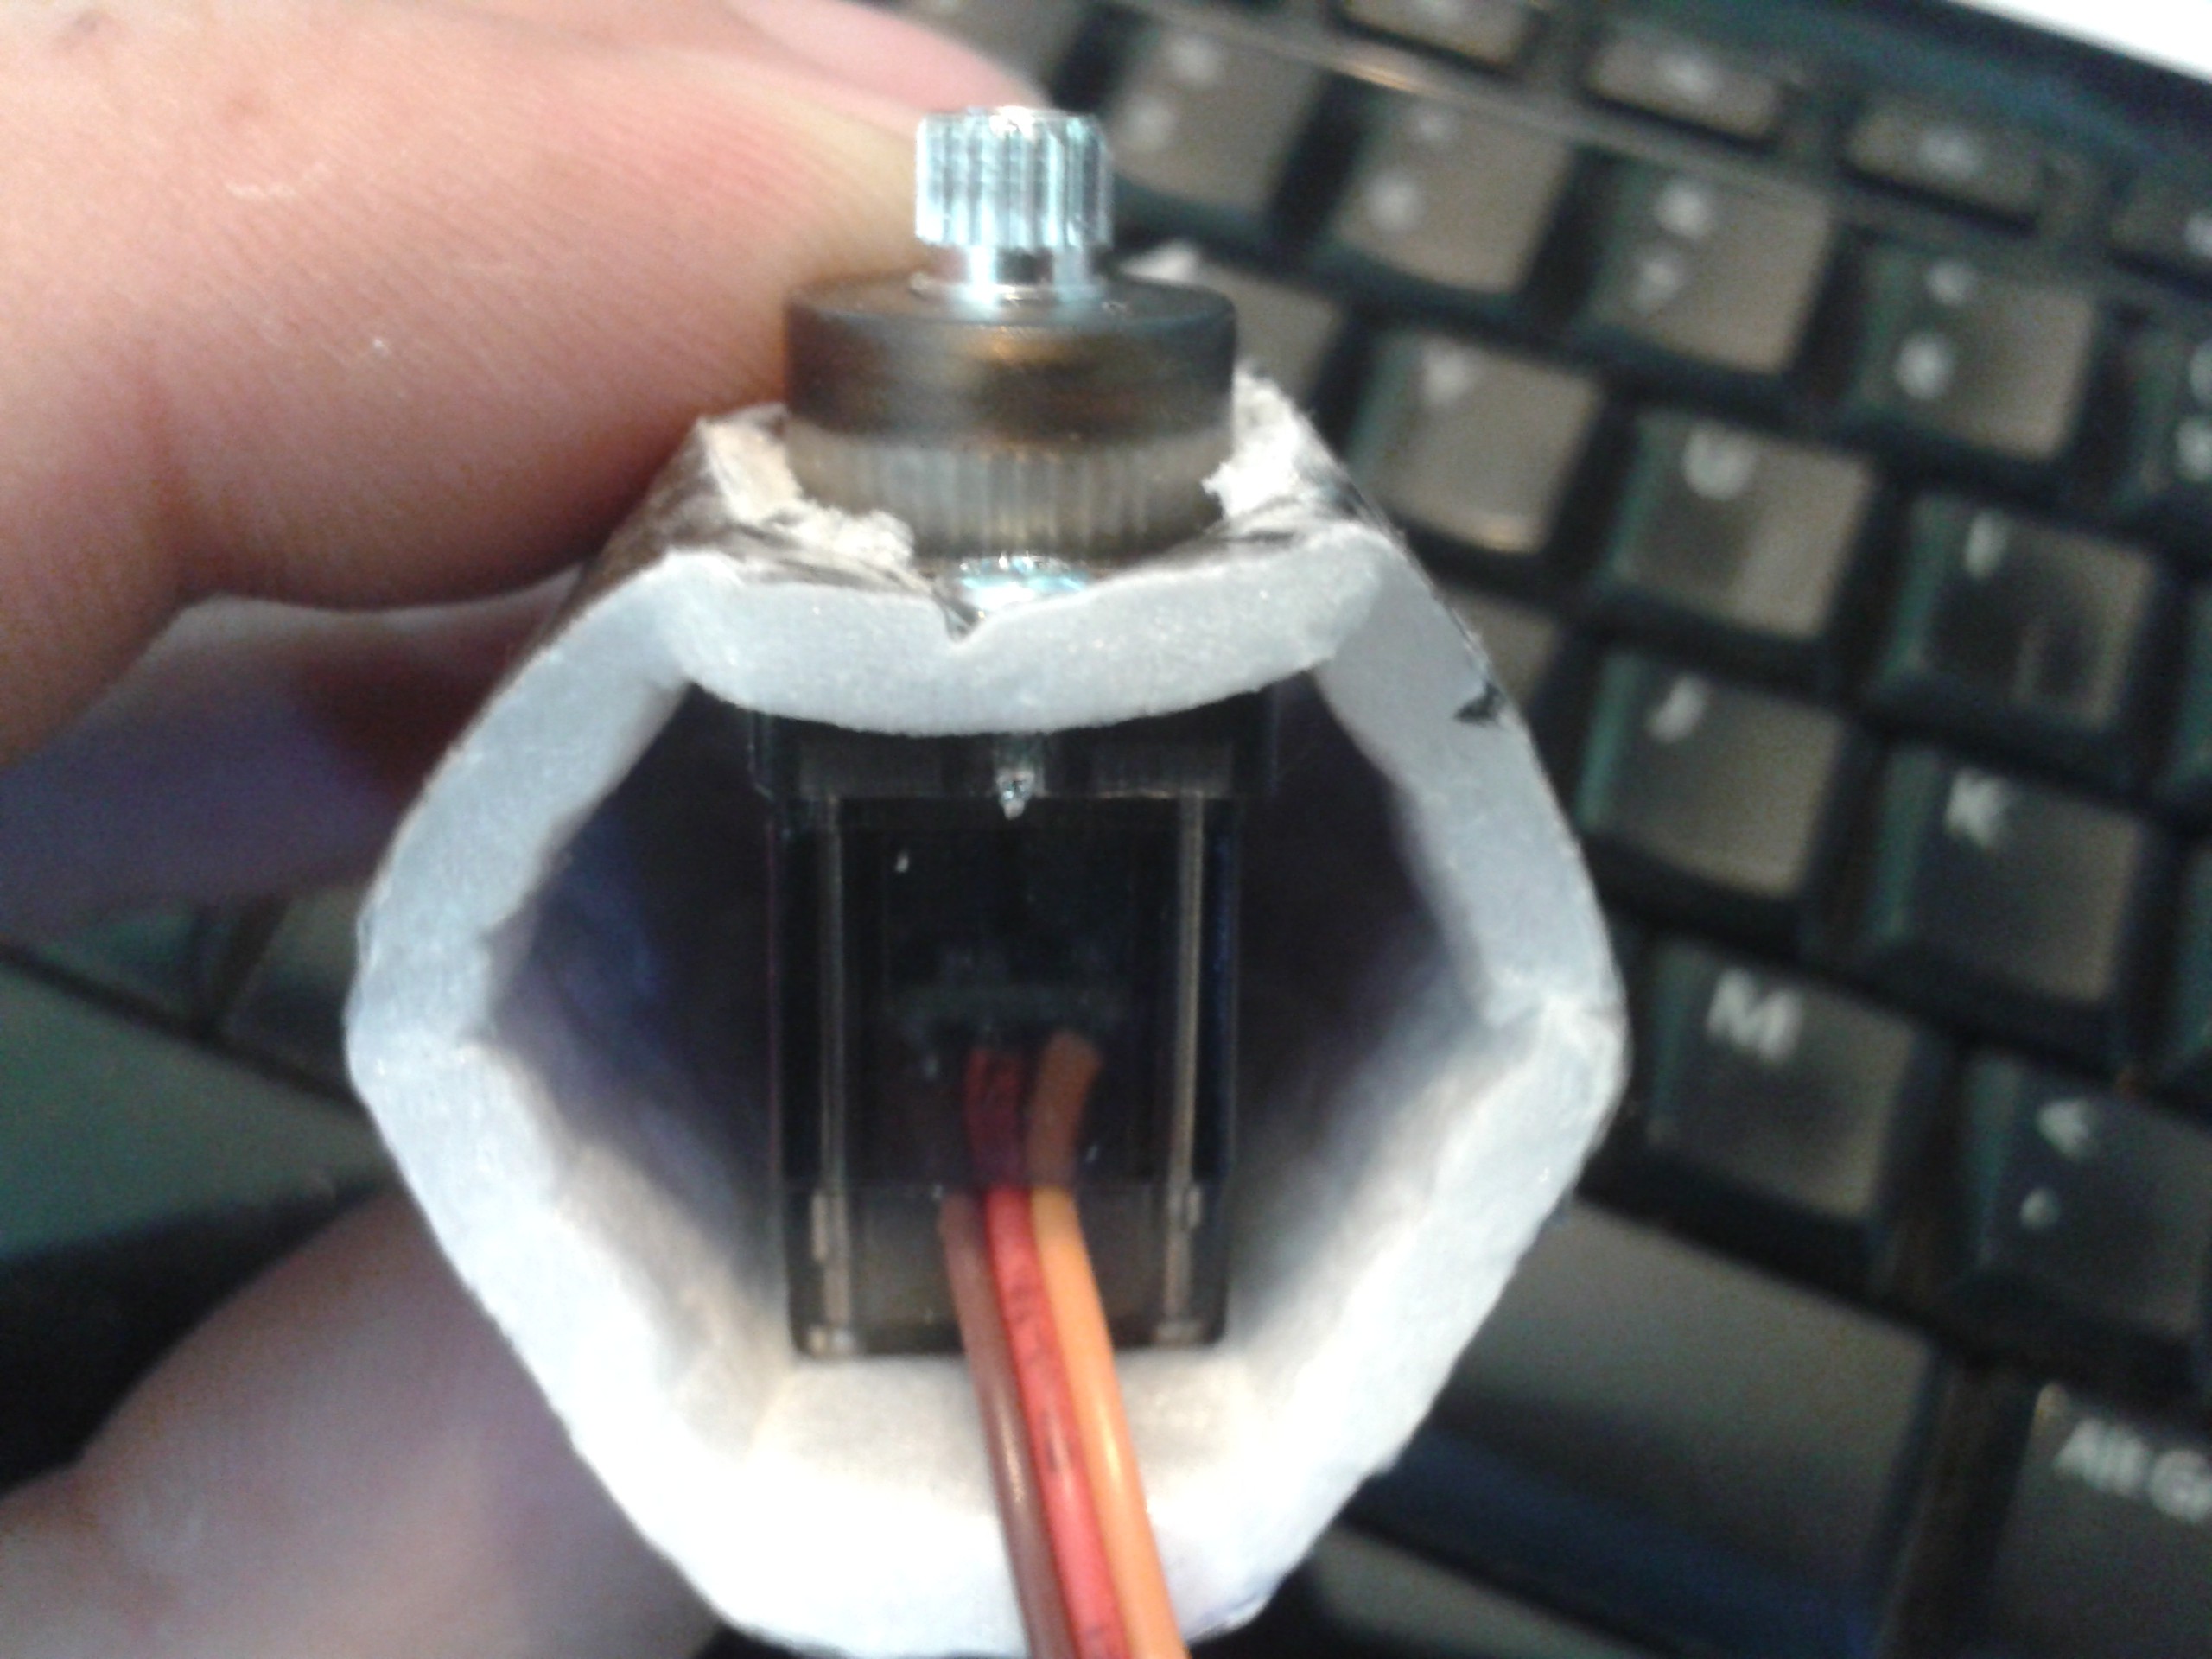
The complicated hip unit from cardware reduced to its bare minimum now assembles in two operations - form the templated material into a circle and reinforce the cylindrical shape with a cross-brace. Using a foam against a curved surface braces it in all directions, stiffening the surface and increasing the density of the material at no cost to weight.
DECAL's adhesive sandwich
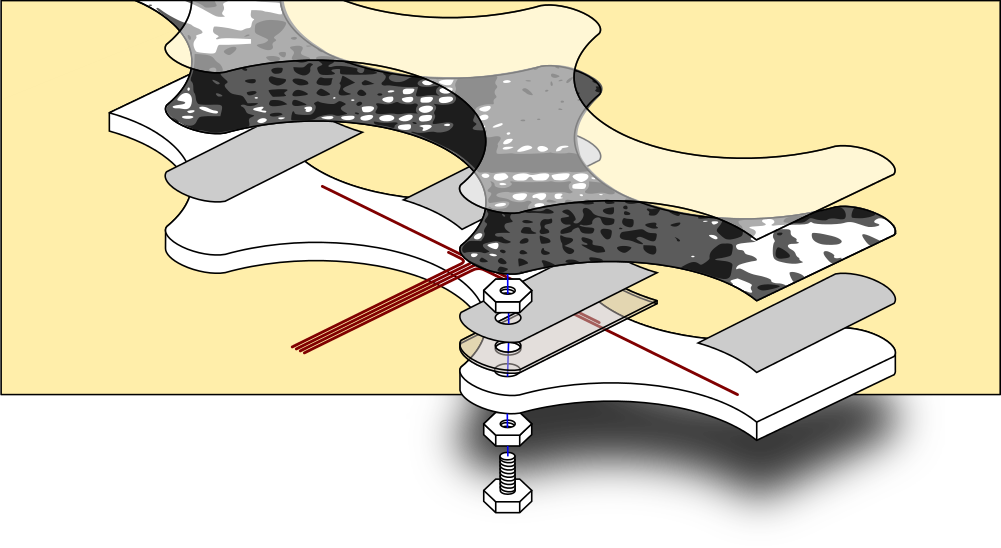
Construction is simple; layers of material and adhesive bonded together are cheap and easy to assemble and as an end product can be supplied as a wallet of stickers and foam shapes and a bag of servos and screws.
Proper terminators for the sensor cables would be nice.
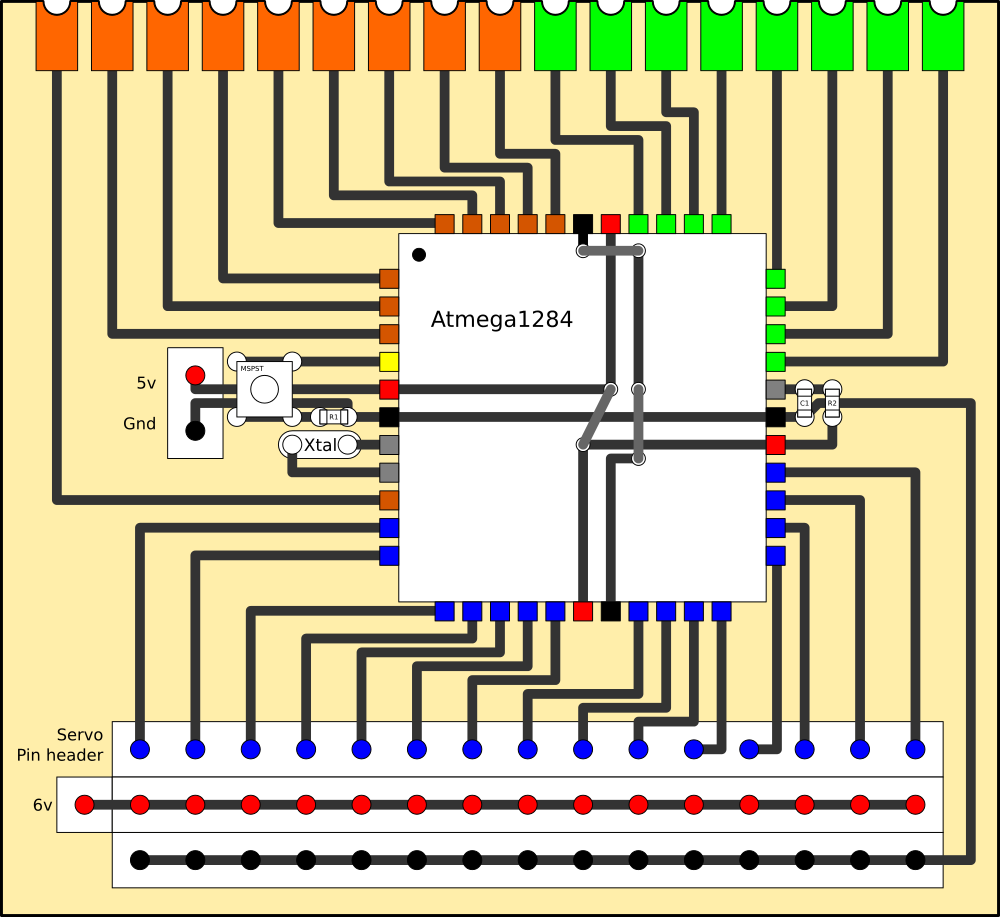
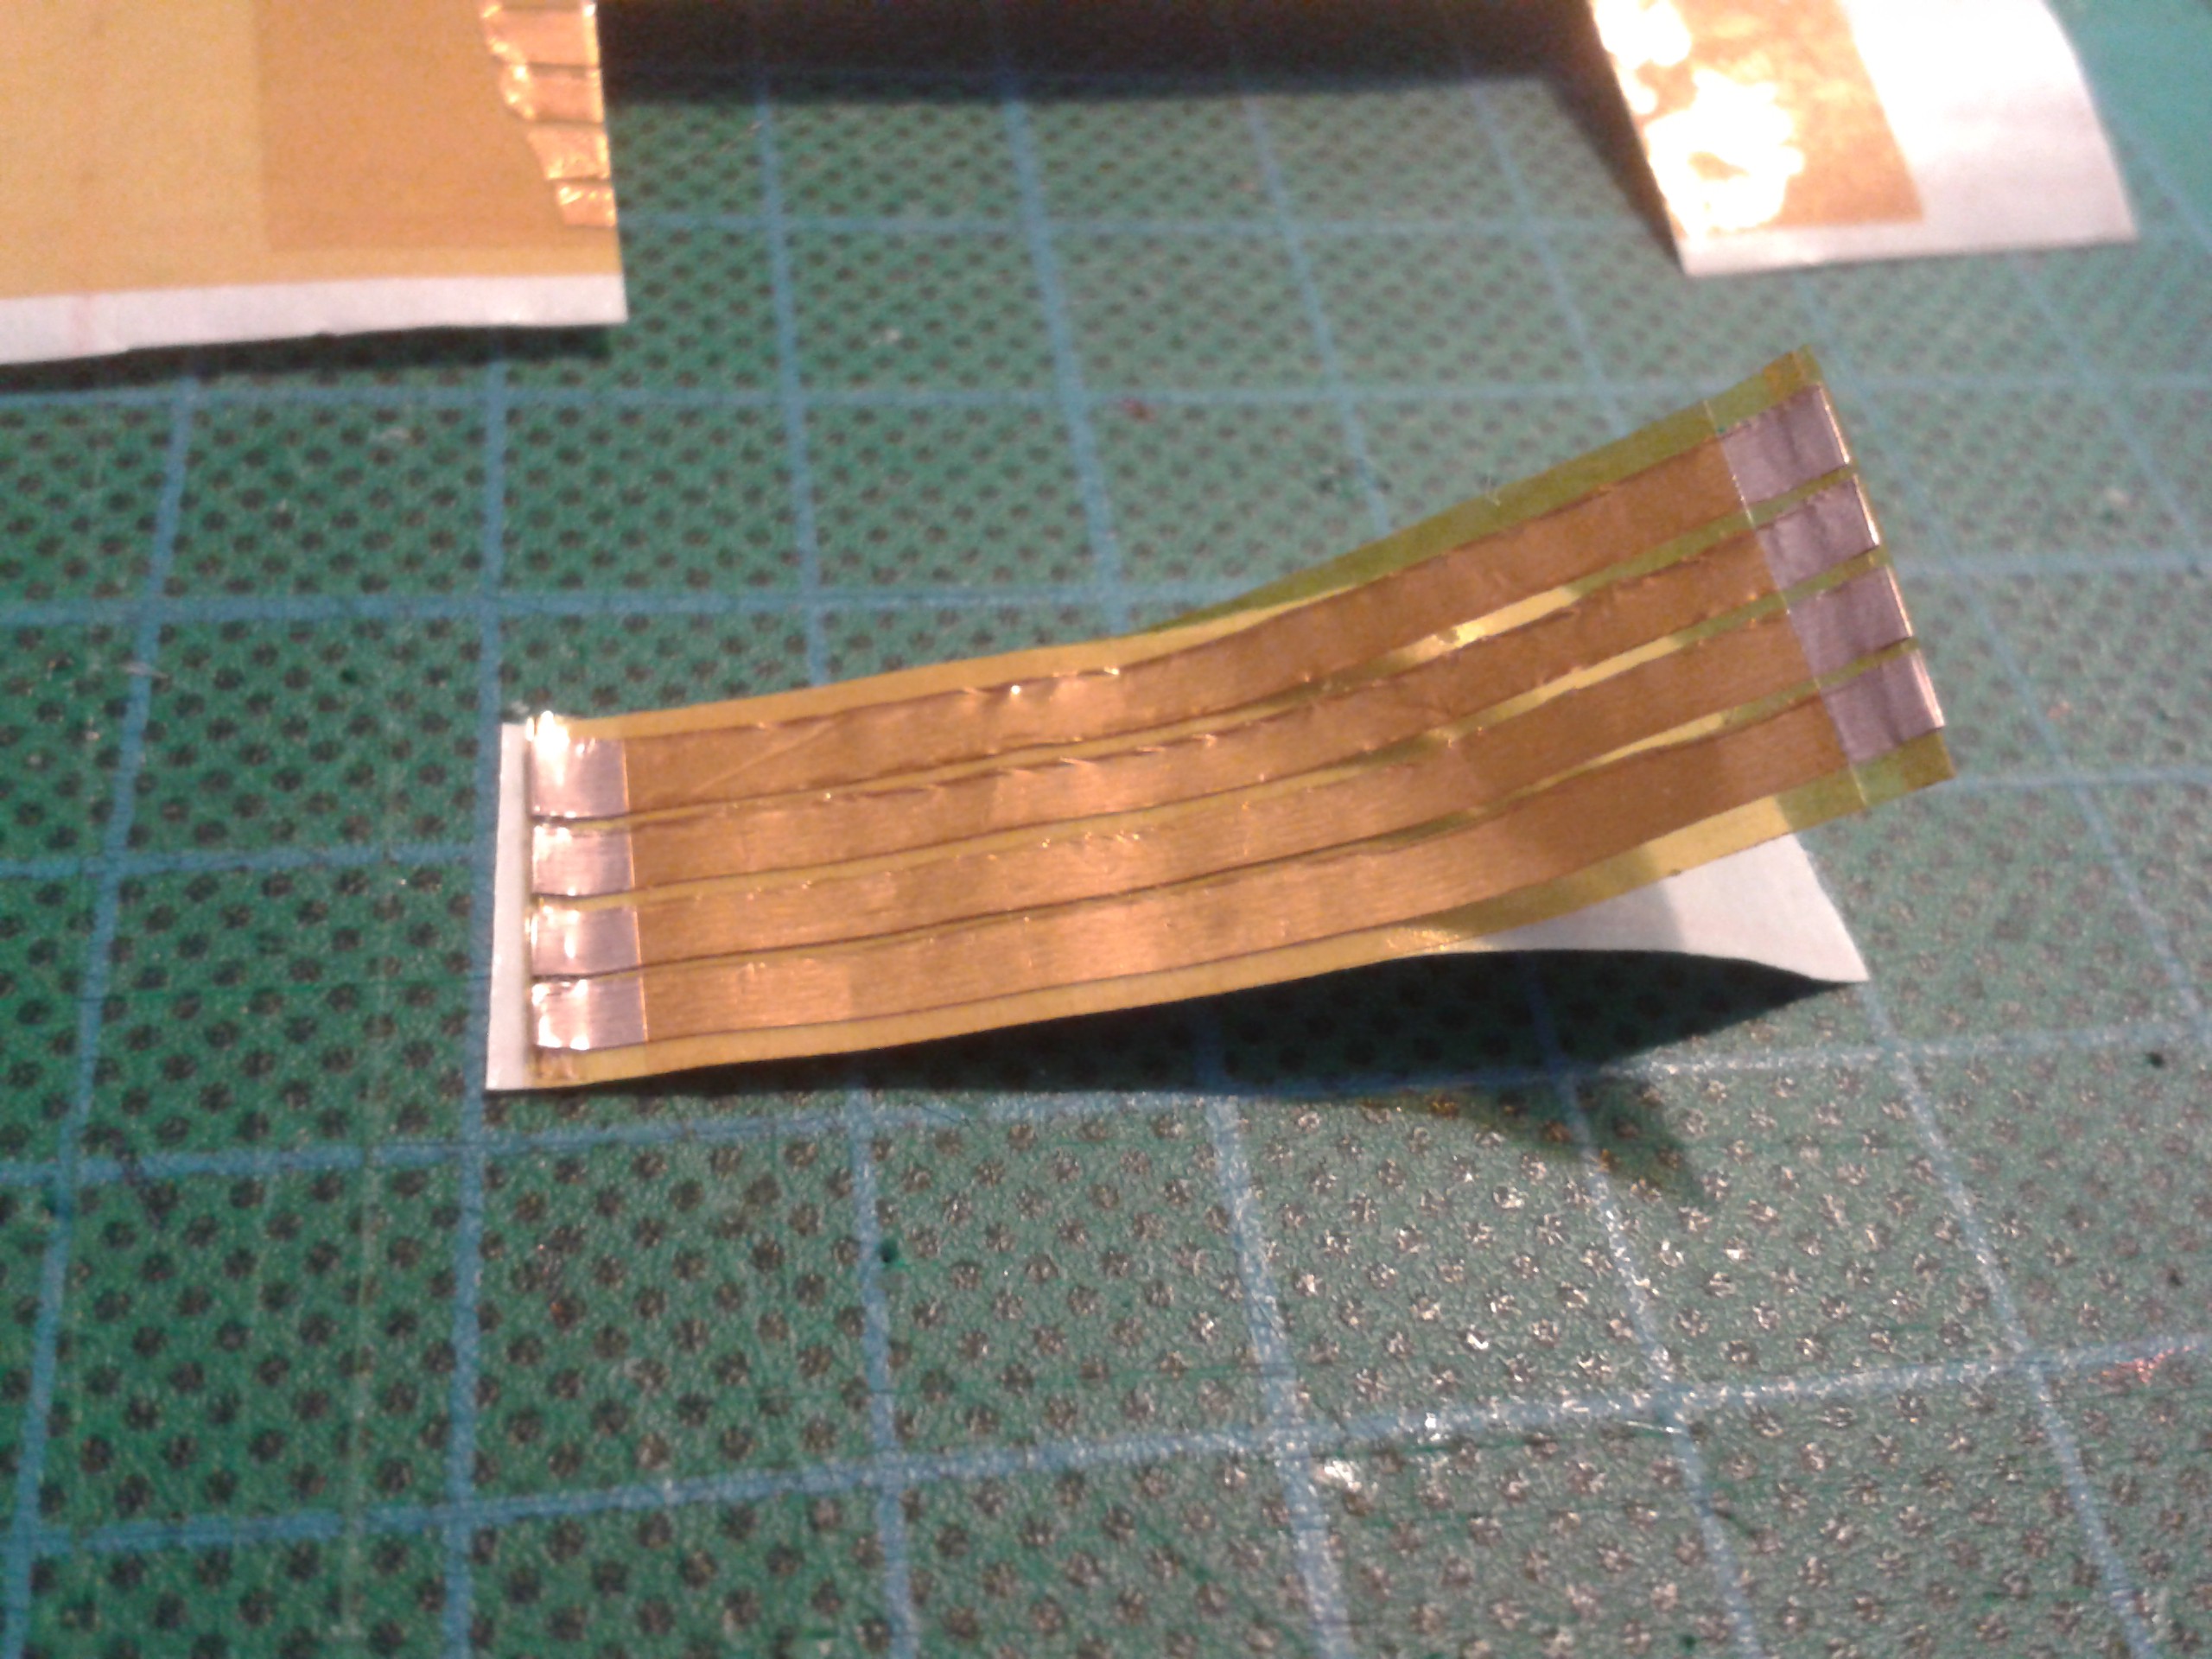
Circuitry can be built into the stickers by adding an etching stage for the foil, then soldering in SMD components before laminating. Things like LEDs and surface connectors for the wiring harness on the limbs can be interfaced to surface-mounted processors using a breakout: This has a 0.1" pitch edge connector and double-sided tape to bond it to DECAL's laminar circuitry, plus a standard 0.1" Dupont header for the servos. Sensor buses in orange and green, servo bus in blue. C1 and R2 are a filter for ARef.
Hacking SMD into Decal
I wonder if 0.1" Plated Half-Hole edge connectors in purple are even possible? :-)
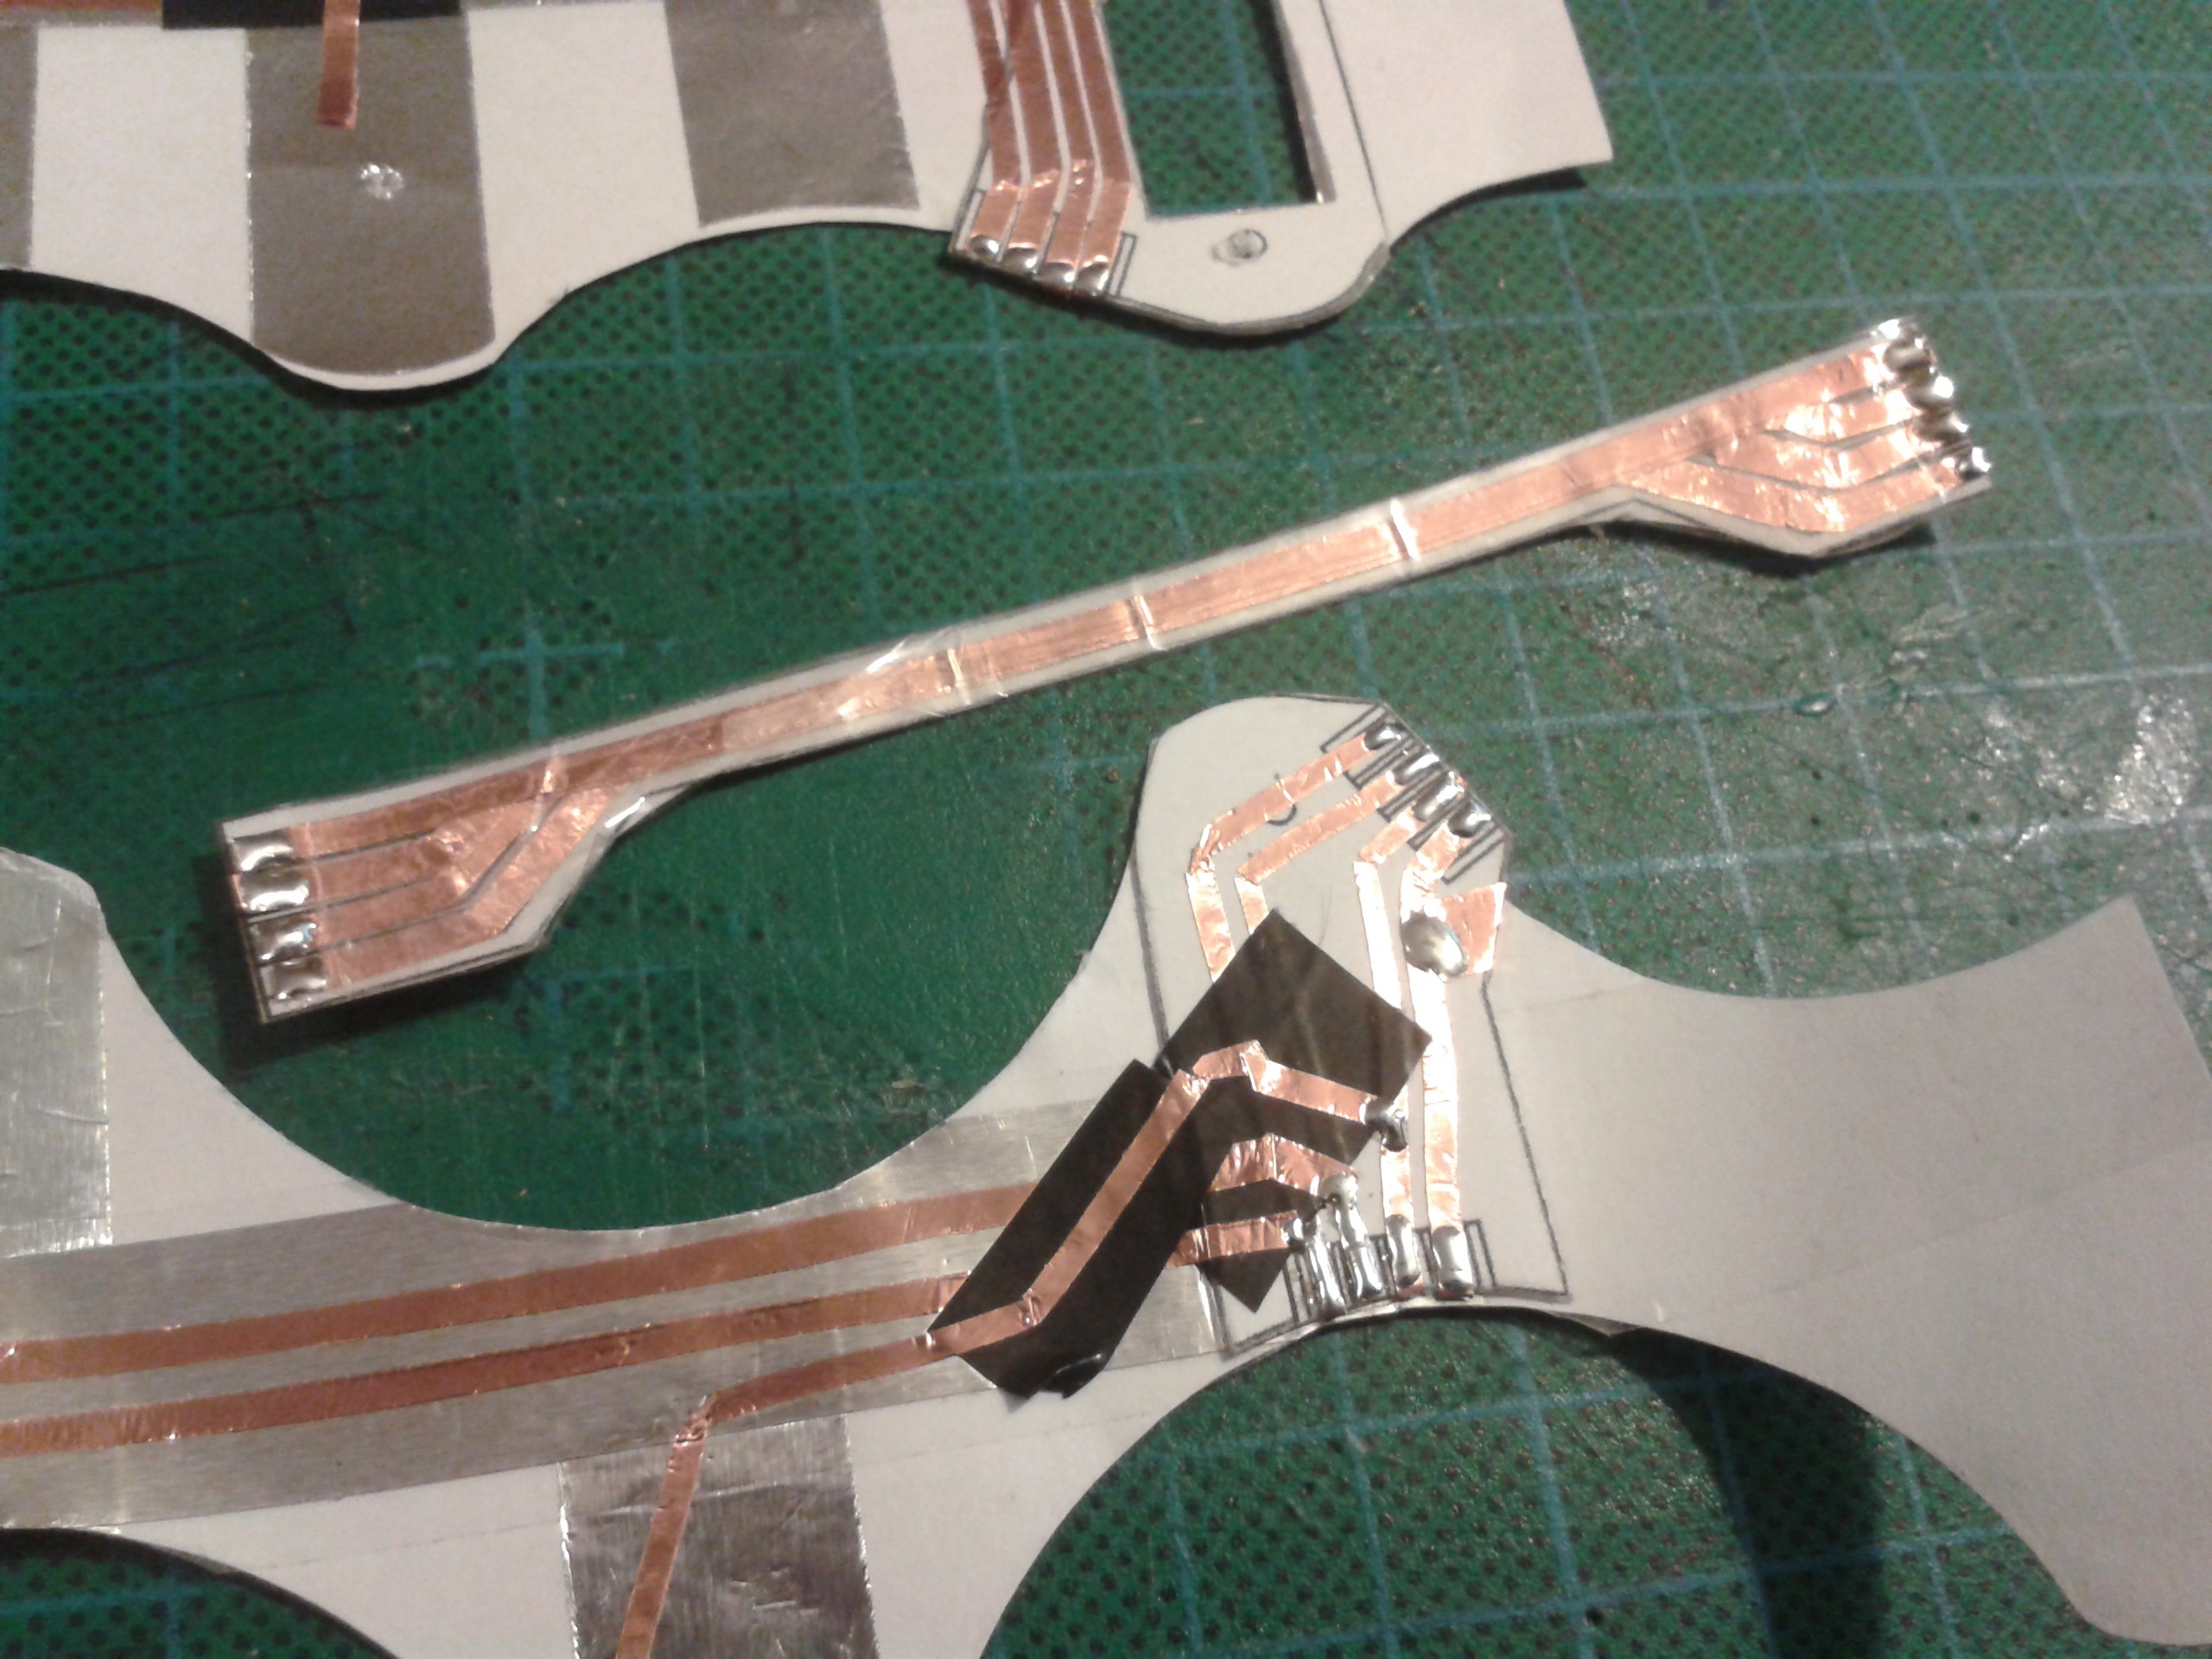
This is much easier with Kapton, particularly if you stick it to a pre-printed backing paper. I've used the backing from the sticky-back plastic for this, because one side is plain paper printed with a red grid, and the other is transparent plastic of some sort. The entire thing is half-opaque so I can see the print clean through it and several layers of Kapton if necessary.
A light-box would be useful for this.
- Idea - Build a really thin light-box with a TFT panel under a sheet of glass from a picture frame that can display tracings directly through a piece of paper and make circuit layout easier. Multiple layers can be displayed one at a time and without disturbing the artwork on top. It can also double as an exposure box for the photoresist, being as TFTs are lit by fluorescent tubes that throw off enough high energy photons to do the job.
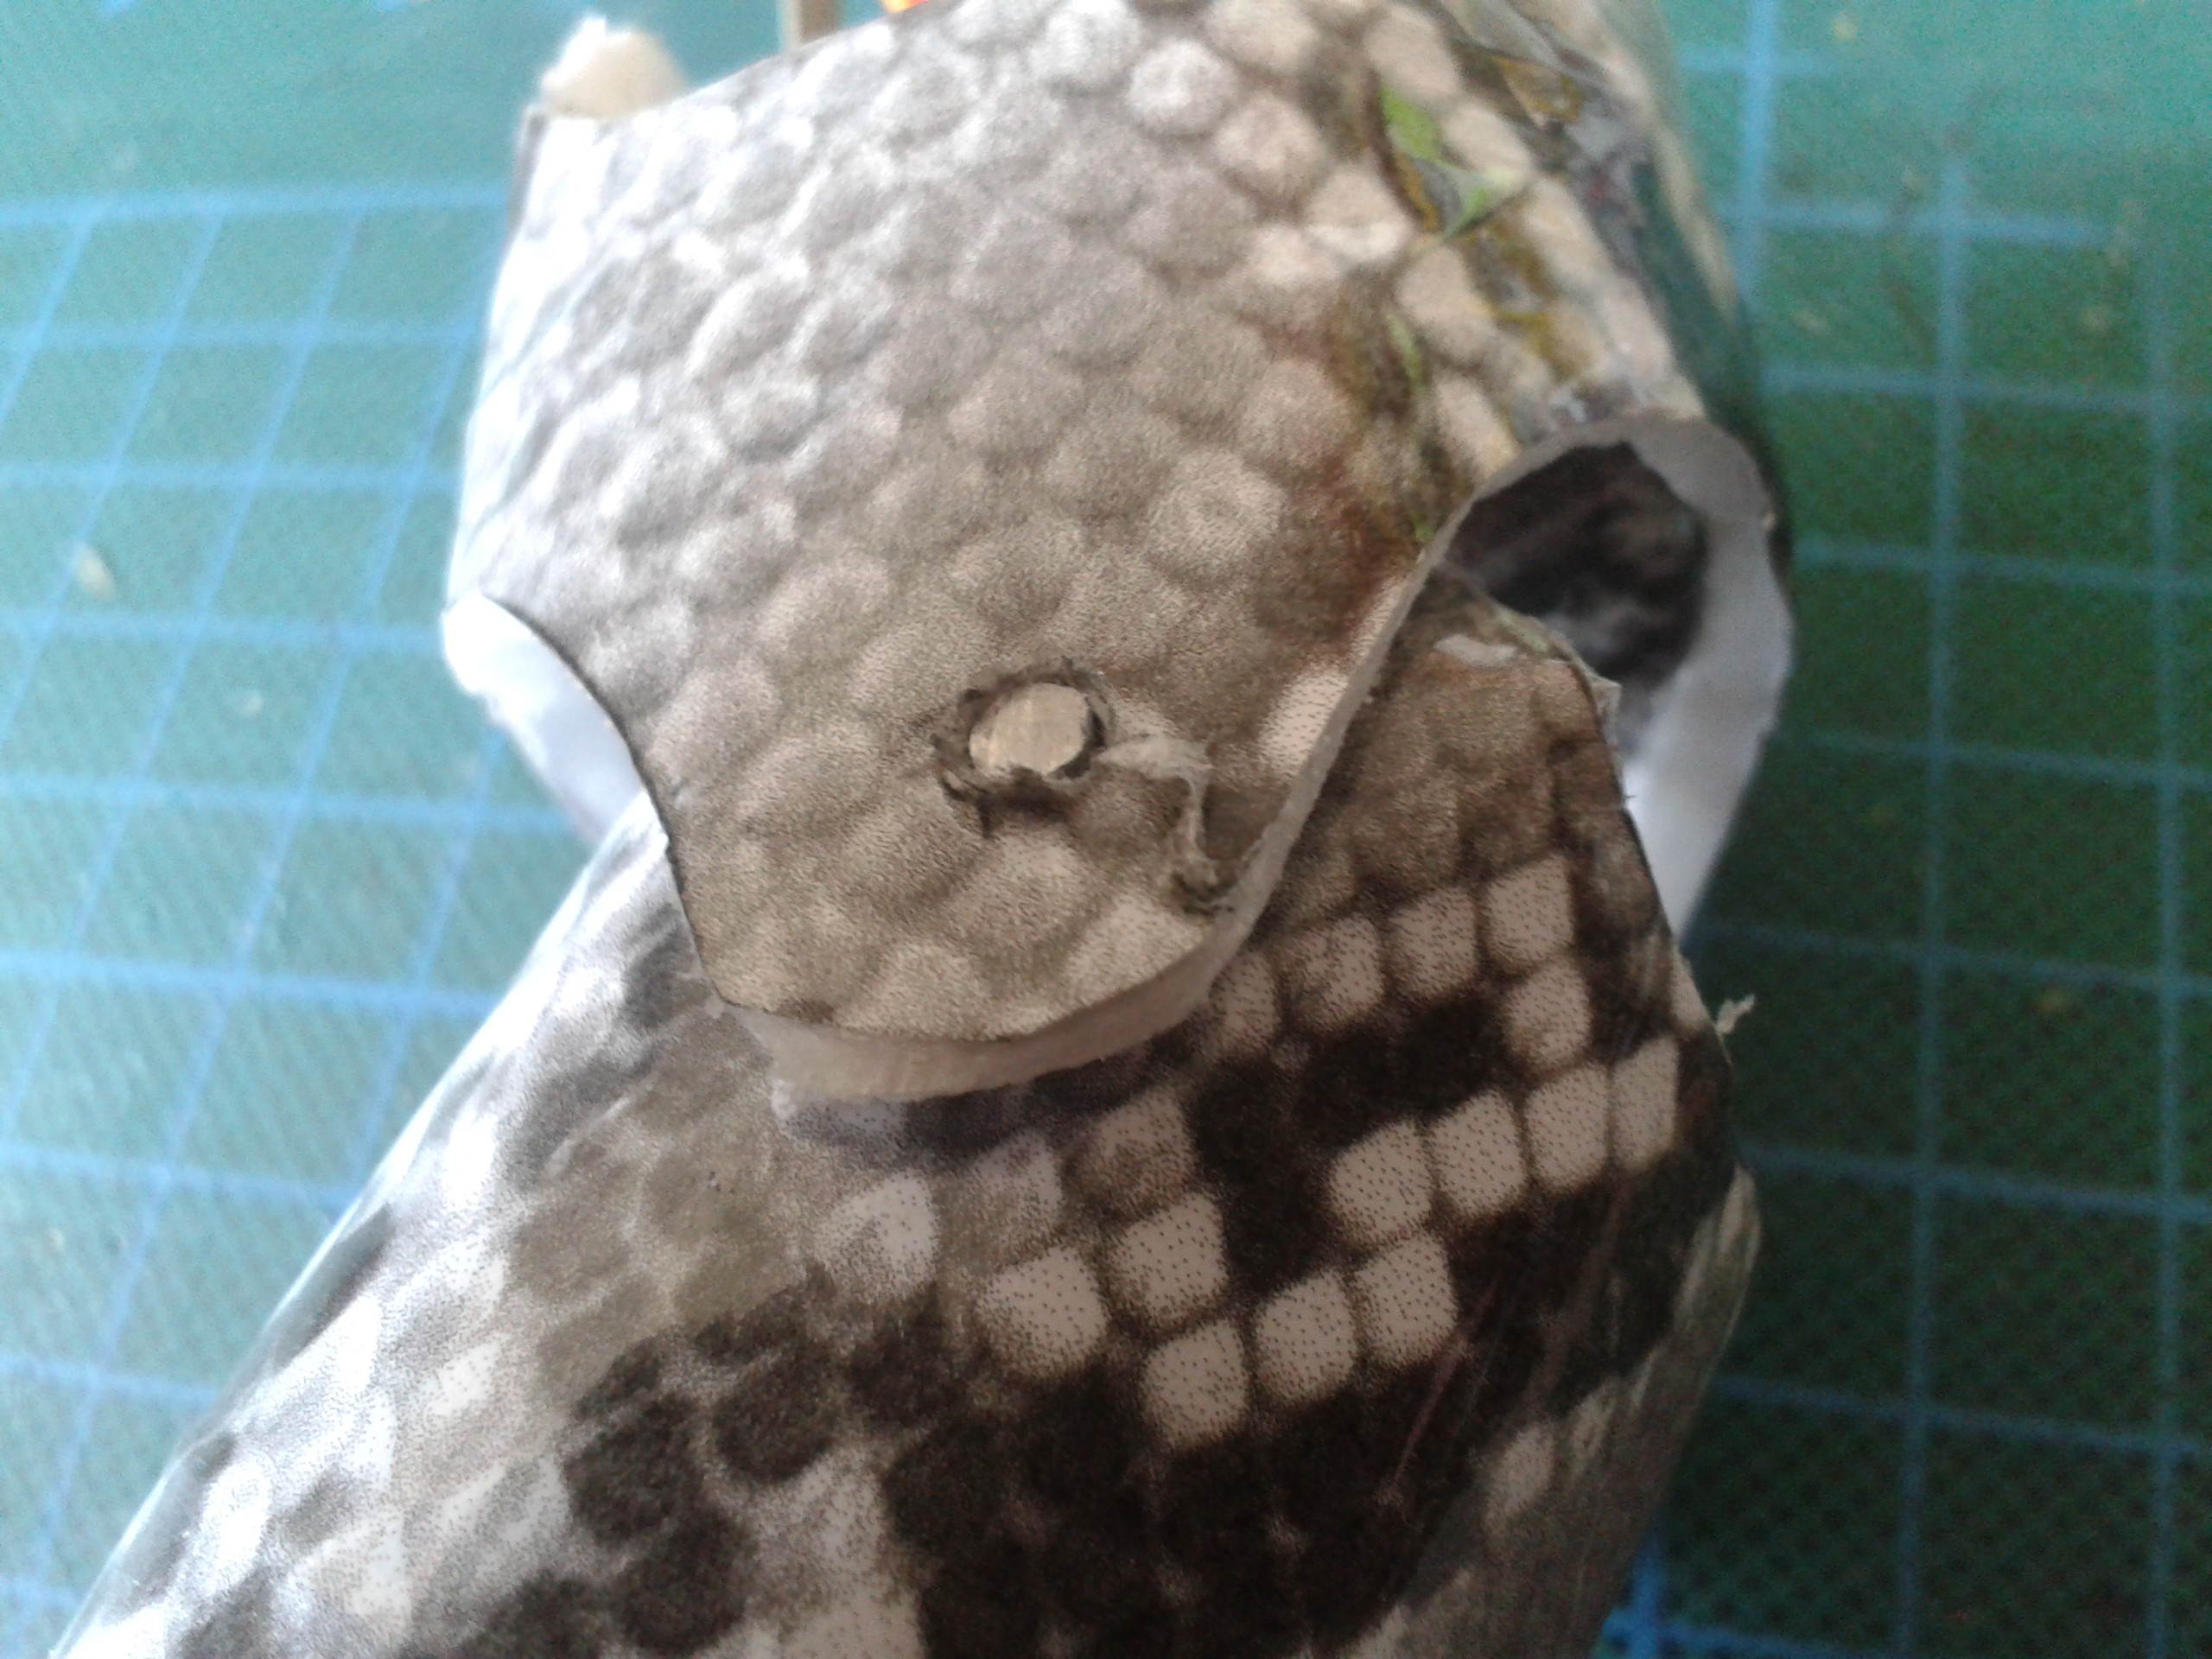
Servos attach to the system via screws that go through the shell and fix into the mounting flanges. Simple, and sturdy.
I've also paid close attention to the way that the system looks and moves. Servos have a throw of around 190 degrees and DECAL accommodates this where Cardware could not, I managed to squeak around 170 degrees from the cardstock version and had trouble with positively locating the artwork with the template because its double-sided and domestic printers are not very good at registering the paper for multi-pass prints. Here they are combined into one print, avoiding the problem altogther.
Integrating the template and artwork together also means I can use photographic resources and skin the shapes properly, previously the artwork was planar and vanished into folds and cutouts in the design.
Snake Hips
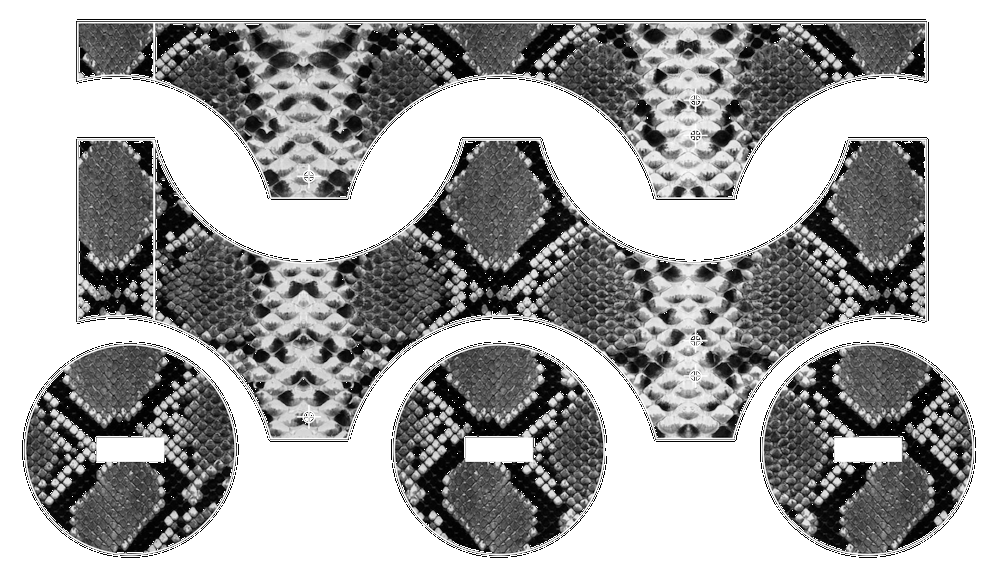
I chose the skin design because I used to have a Ghost Reticulated Python and it caught my eye while browsing for Internet of Condoms' Kooga print, before I found the fabric itself.
Who wouldnt want a walking Python, I so very nearly called the project BOA Constructor XD