Close
0%
0%

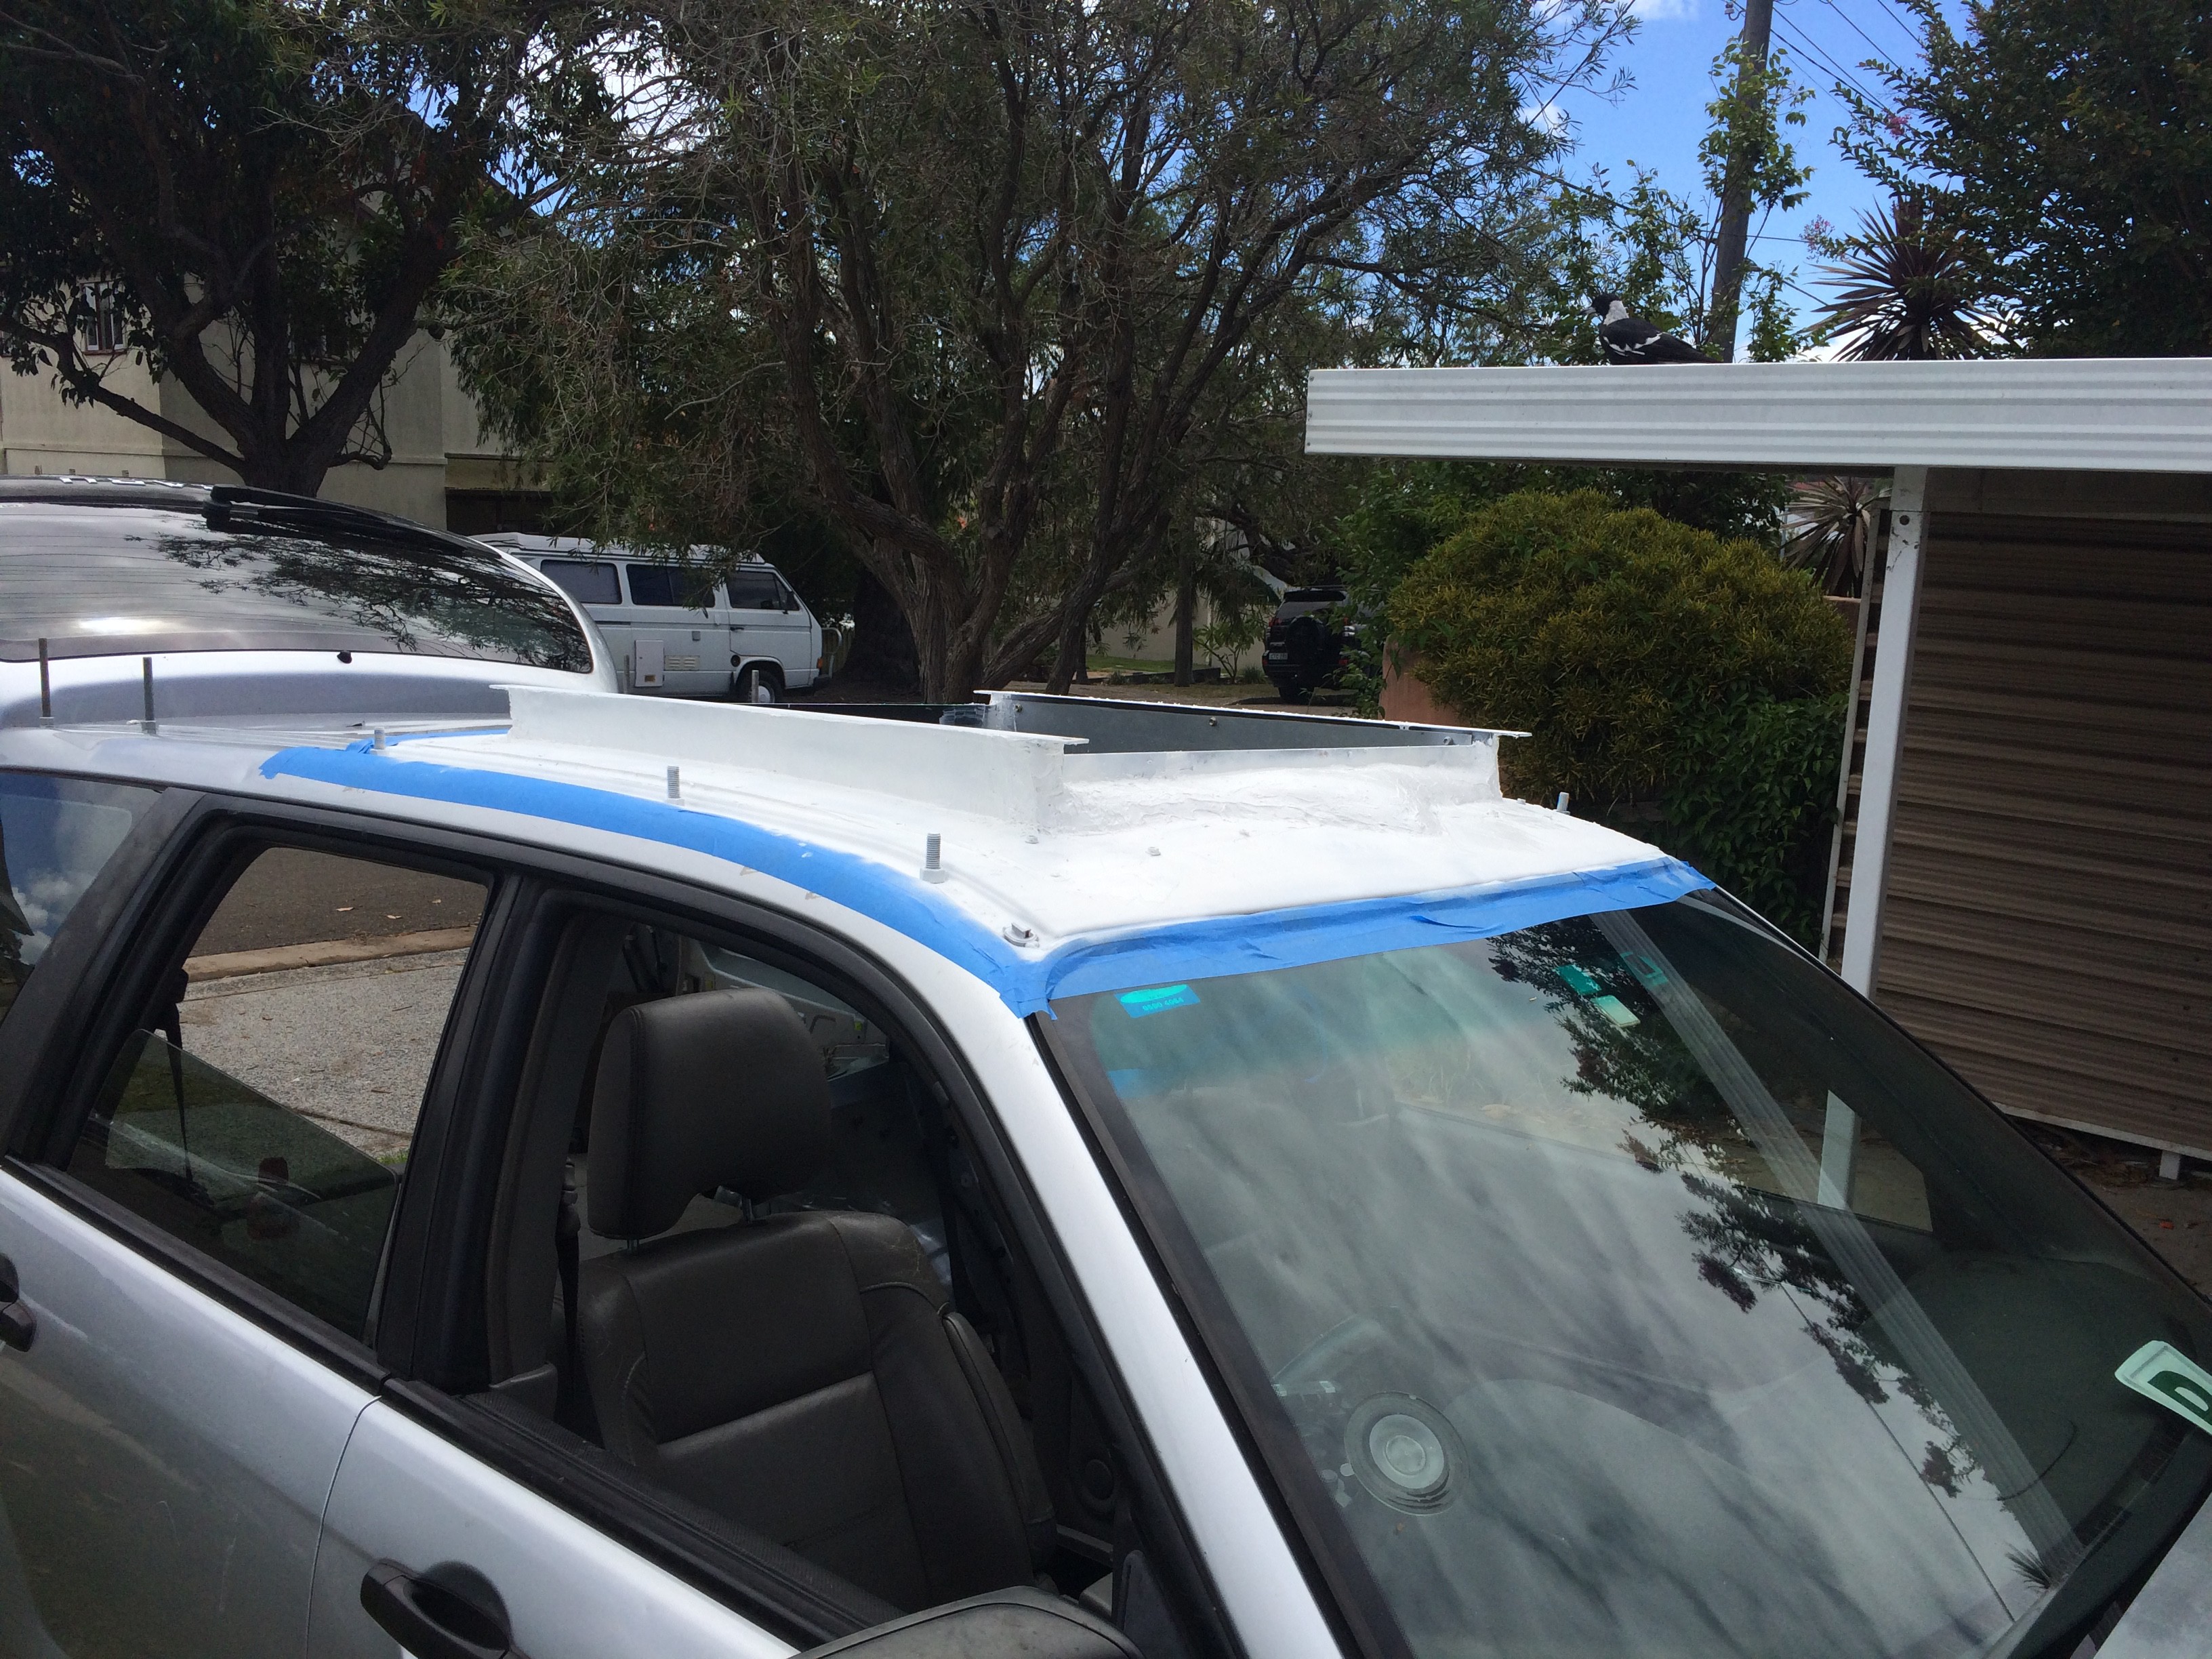
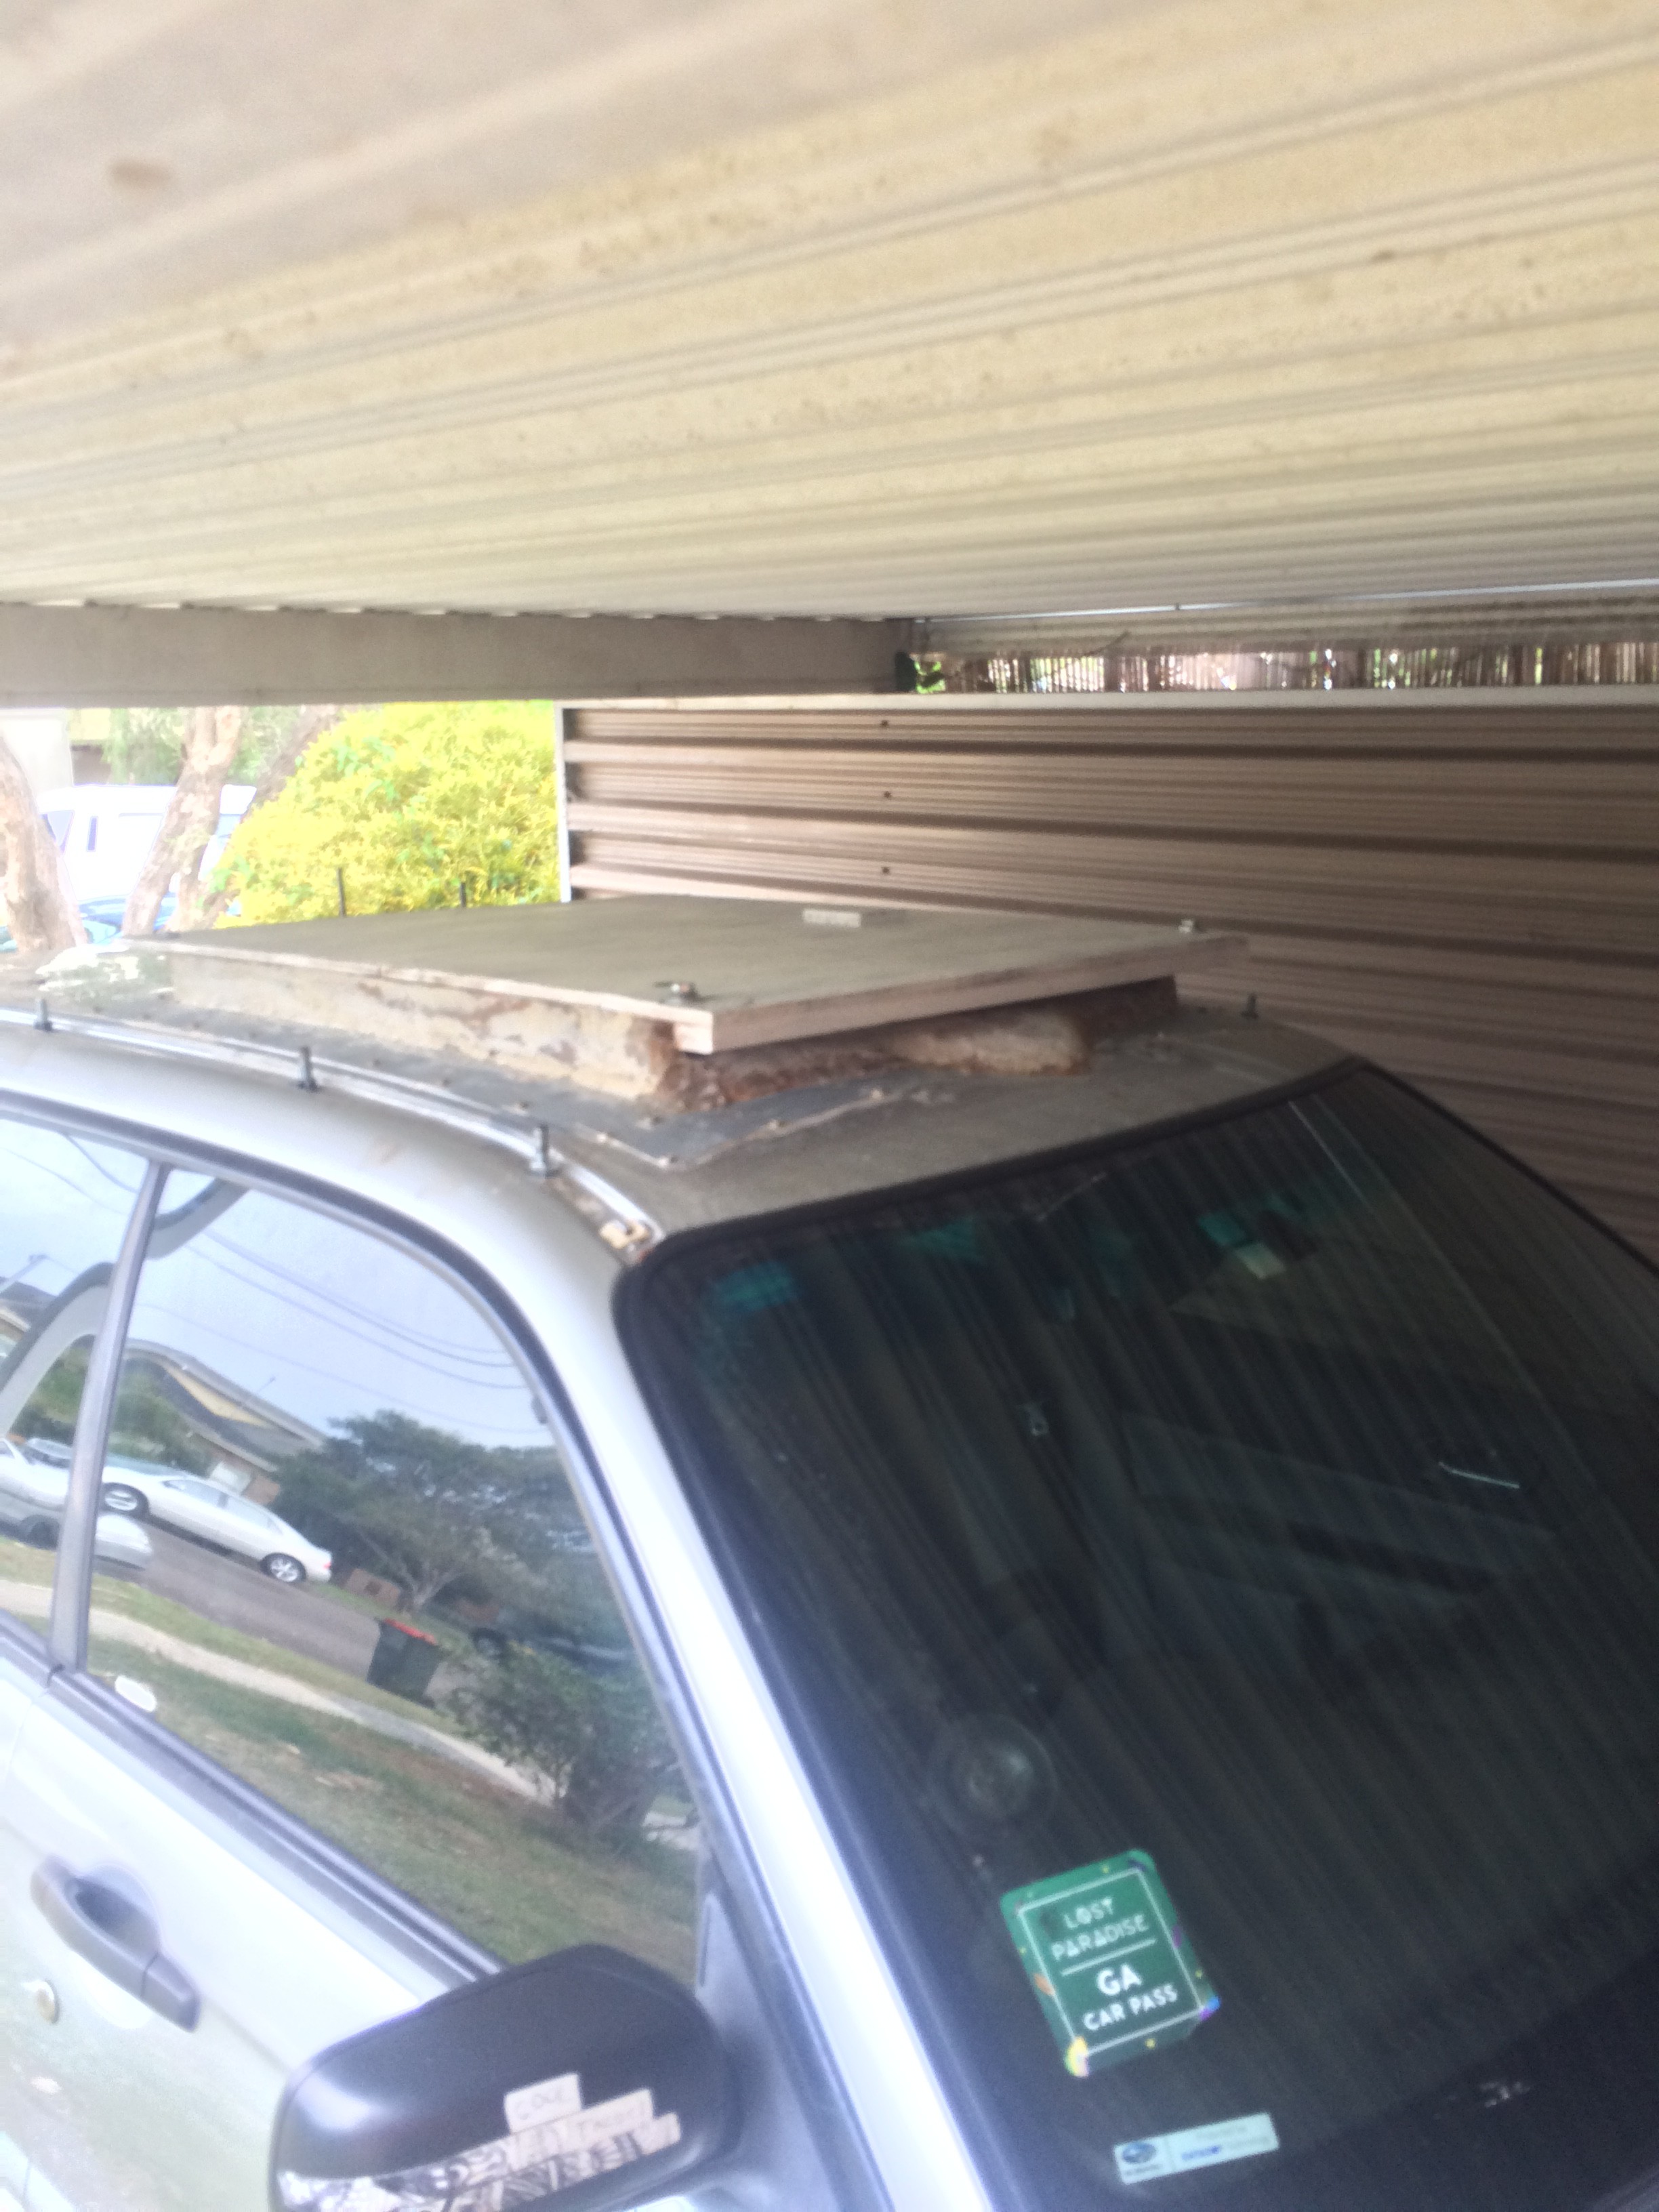
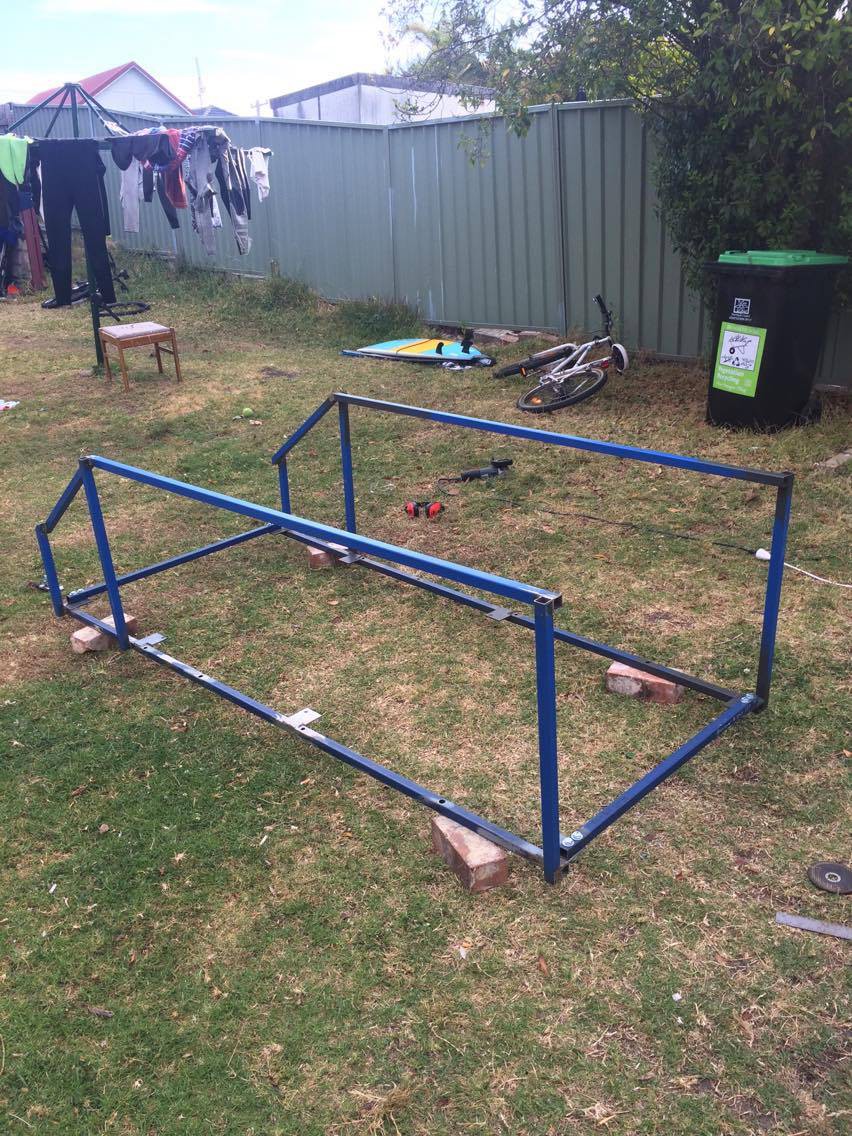
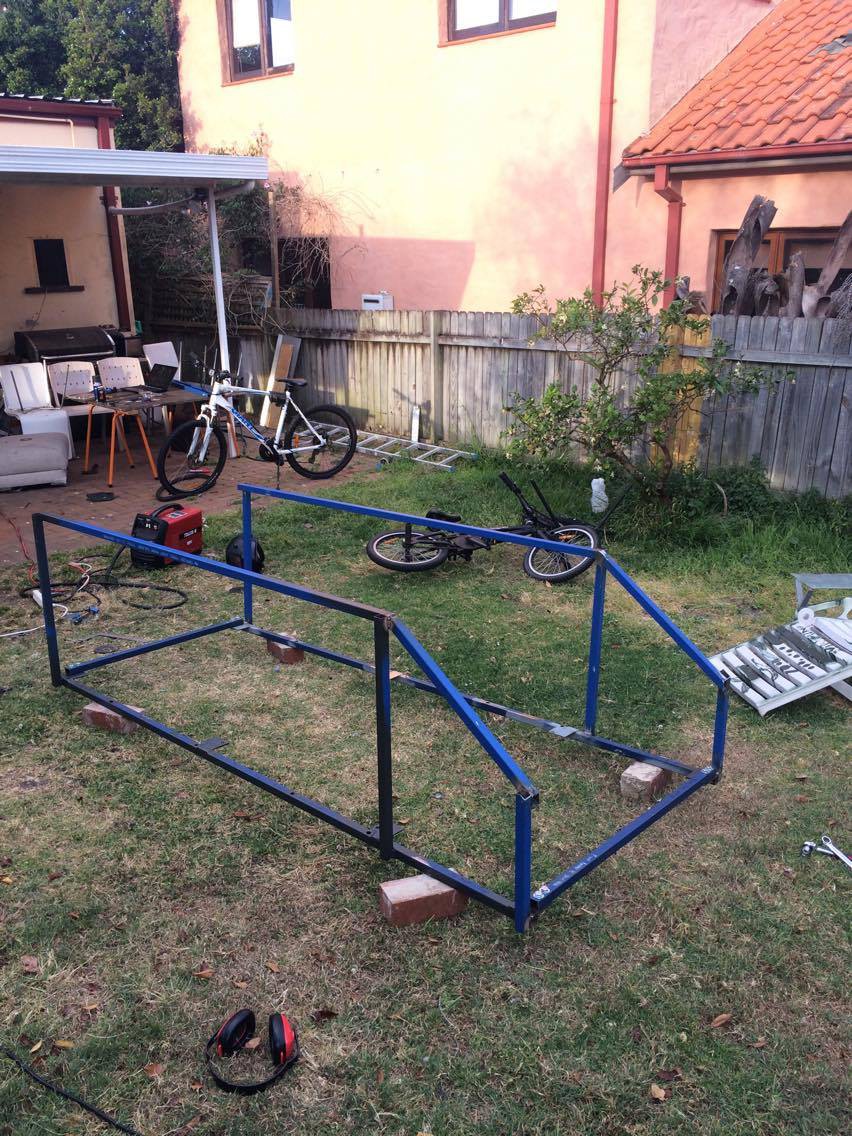
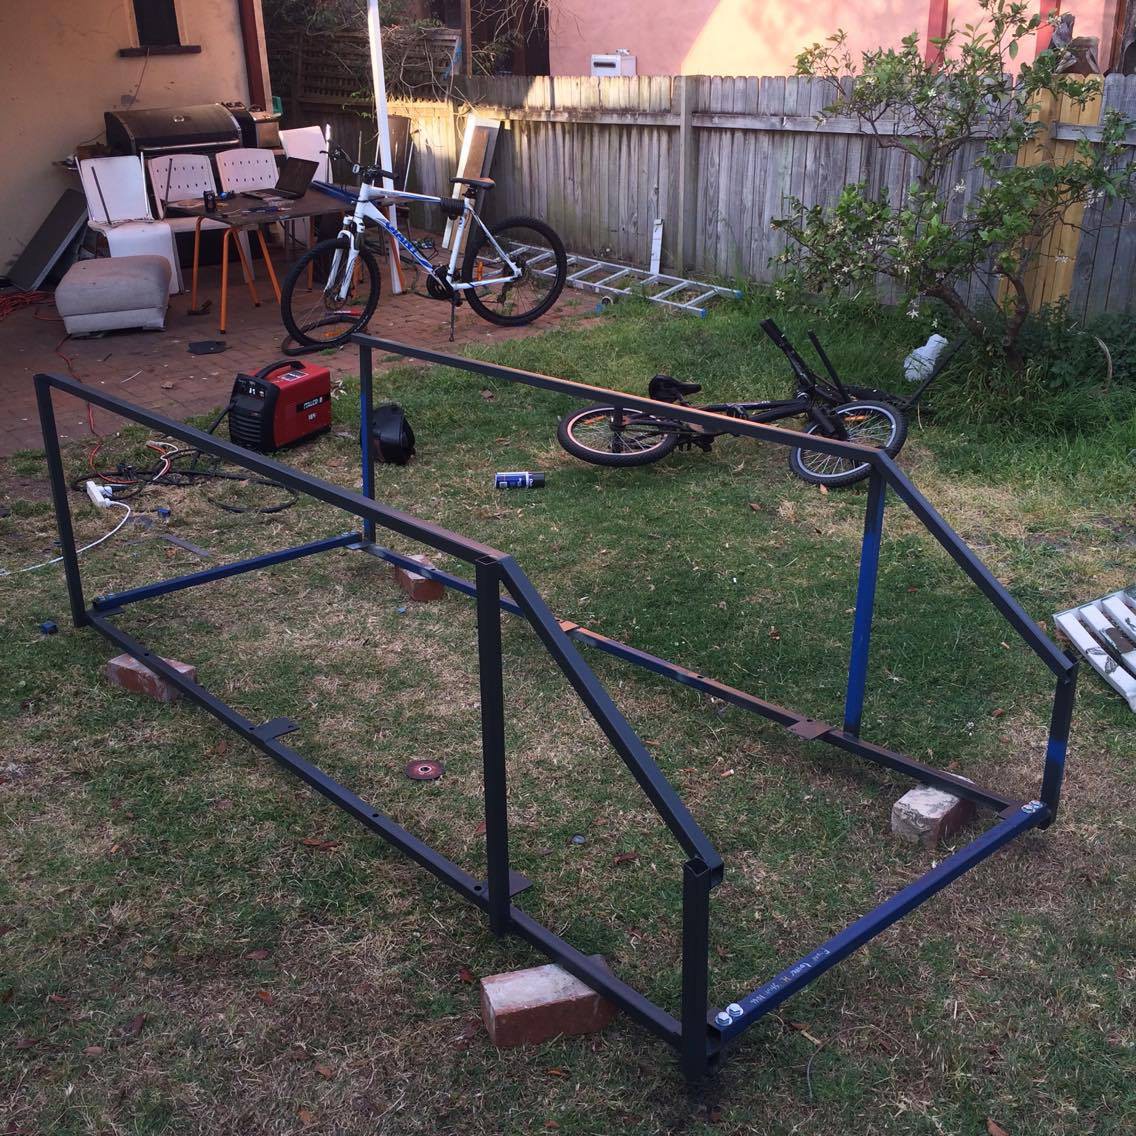
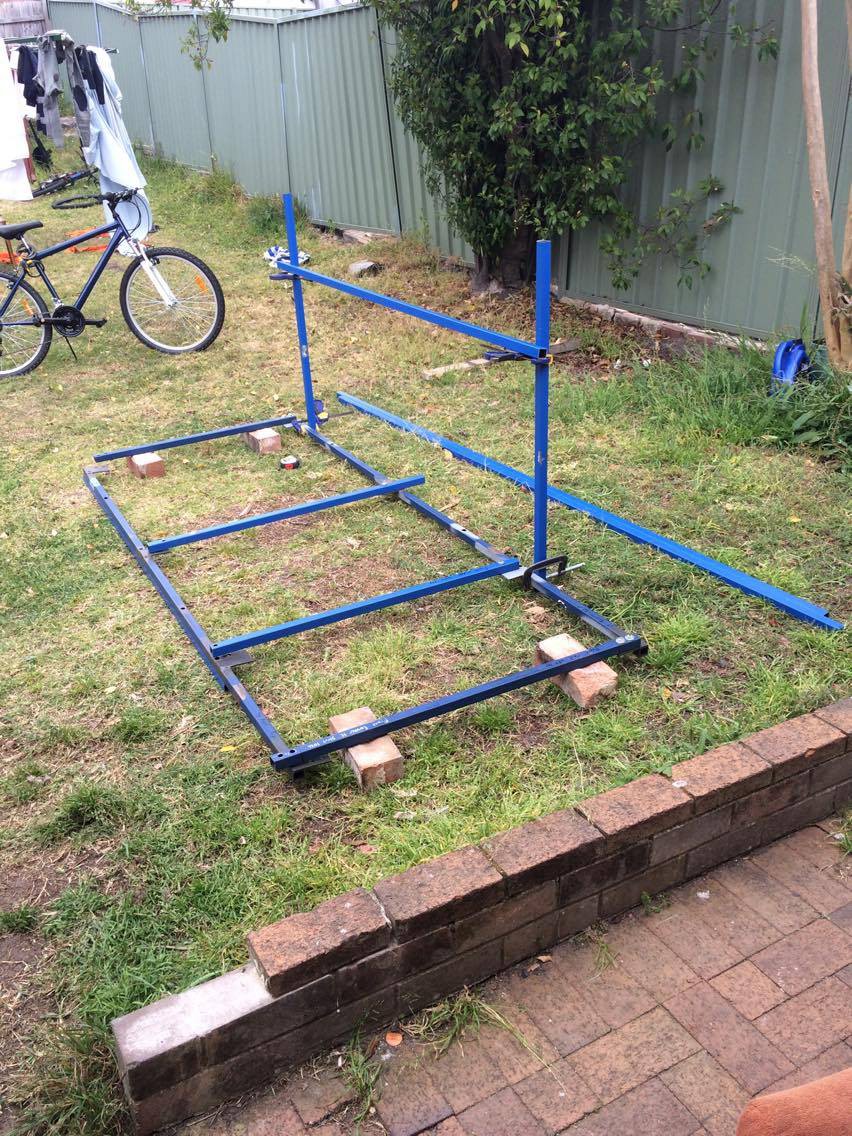
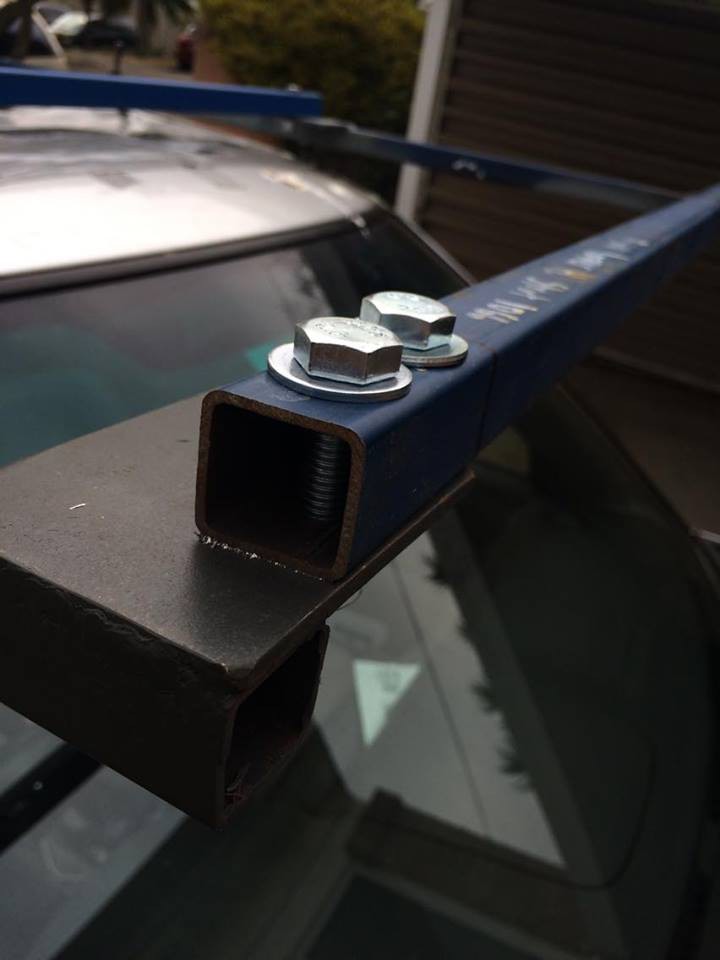
Suburu Forester Rooftop camper

The goal is to build a hard shelled sleeping unit for the roof of my suburu forester.

Similar projects worth following
The goal is to build a hard shelled sleeping unit for the roof of my suburu forester.

I will be using the sunroof for entry as well as an emergency exit at the rear.

I will fit the car with a battery bank, water tank and fuel tank and other things I find appropriate.

-

  • Re- enforcement

    null02/26/2018 at 23:01 0 comments

    The re-enforcement will consist of a piece of steel angle spanning the from the front support bolt to the 3rd support bolt from the front. The support bolts will go through this angle.

    This angle is then attached to two attachment points by three 16mm d round steel bars.

    The attachment points

    I have chosen are the the old back seat bolt locations.

    The steel angle will have to be notched, bent and welded to fit the contour of the roof

  • Completed car-cabin interface

    null02/26/2018 at 22:51 0 comments

    so I have completed the car cabin interface. First by spray painting white and then applying white silicone.

    I should coat it with white again. I probably won't though.

    Next step is the internal re-enforcement

  • Progress

    null01/24/2018 at 09:48 0 comments

    I  have made quite a bit of progress since the last log.

    This is how I made the car cabin interface. There are a few things I would not do again if I could redo. But when it is complete I think I will be happy with it.

    1. Welded a square frame using steel angle and flat bar.
    2. Welded bolt flanges on the front and rear
    3. Cut steel angle  to make it flat on the ends so that it can sit on top of a square tube cross bar
    4. Painted
    5. Fitted the main frame to test fit the CCI
    6. Drilled holes in the flanges on the CCI
    7. Put shims under the flanges.
    8. Test fit the bolts
    9. Dis-assembled everything after writing down shim configuration.
    10. Siliconed bolt holes, shims and flanges
    11. covered the gaps on the side with sheet aluminum, siliconed and tex screwed down (Will probably change to rivets)
    12. Used expanding foam to re-enforce thin sheeting
    13. covered expanding foam in fibreglass body filler  (I would not do this again)
    14. Now Ive covered the fibreglass filler with normal filler and I am working at getting it smooth.

  • Top bars added, ebay purchase.

    null10/24/2017 at 23:52 0 comments

    I welded the the bits where the top bars connect and drilled the holes for the bolts.

    Looking good.

    I purchased these Linear Guide Rails from Hong Kong. There were cheaper ones from china however their shipping date was estimated for 2 months.

    The next step for me is to fit the frame to the car and start working on the car-cabin interface.

    I can also start fitting plywood to the side walls only.

    I need to purchase a circular saw to achieve this task.

  • Welding outer frame walls

    null10/03/2017 at 08:05 0 comments

    Over the weekend I got a chance to weld the frame for the sides.

    The final I decided on was 740mm with 340mm for the front.

    I'm definitely improving my welding. I think I've got a kink in my mig wire feed liner.

    If anyone knows how to change the liner in a Italico mig 200 let me know.

    I loosely assembled the frame to see how I did with symmetry and squareness.

    Verdict, Not too bad. It is not 100% however but I don't know why I would need low tolerances as I'm designing everything to fit as I go.


    (The right side looks on like it is on an angle in the photo because the bottom bolts are loose.)

    I gave it a quick splash of paint to protect the welds, I thought I might as well coat the whole thing but I started running out of paint so I'm going to save it for new welds.


    The next step is to weld the top flanges and bolt in the top struts

    However after that I need to choose what the best thing to do is.

    • Plywood base
    • Interior frame and carriage
    • Car->Cabin interface

  • Choosing height

    null09/24/2017 at 08:46 0 comments

    I have decided the height of the frame will be 740.

    The maximum vehicle height in NSW is 4.6m.

    The smallest tunnel in Sydney is 4.4m

    My car is already 1.6m

    so 1600mm+10mm standoff +740mm frame height + 10-100mm shell

    comes to a maximum height of 2450mm.

    Well below the legal limit and tunnel heights.

    However I will need to watch my center of mass. I am hoping installing a battery bank, water tank and fuel tank as low as possible where the rear passenger seats were will be enough to stop me tipping. 

    I would like to possible sit down comfortably inside possibly on a fold out lounge.

    I measured my sitting height on a low lounge to be 1200mm.

    If am able to extend it out vertically at least 500 which allows 200mm for the linear bearings, guides or however it going to be guided.

    In the end the internal roof can be higher this if need be.

    I've also have to take in to account the width of the mattress, unless I have my feet going through the trap door.

    II am going to cut a 3m length in to 4x750mm

  • Swapped rusted nuts

    null09/24/2017 at 08:15 0 comments

    I thought whist I had the rails of I should swap the rusted painted steel nuts

     for zinc plated.

    I've really got to chuck some silcone in the joints soon

  • Getting the shape and removing from the roof

    null09/24/2017 at 00:41 0 comments

    I completed drilling the holes and through the horizontal struts and main rails.

    Now when I remove it from the roof I can re-assemble it on the ground and it will have the same shape.

    I labeled all the pieces before removing. including direction

    I took off all the nuts on the rail studs. A lot of them are rusting. I should change them to zinc coated.

    I had to loosen the studs, Front left, 2nd Front left. And middle right. because they were tight. I will have to re-loosen them to install the rails again


View all 8 project logs

Enjoy this project?

Share

Discussions

Dr. Cockroach wrote 12/04/2017 at 11:14 point

Looks very interesting. I have been thinking of building a solid camper/sleeping insert for a small utility trailer so hope to learn from what you are doing :-)

  Are you sure? yes | no

Similar Projects

Does this project spark your interest?

Become a member to follow this project and never miss any updates