deʃhipu
-
The Stage Library
11/03/2017 at 20:47 • 0 commentsThe hardware is just a very small part of a project like this one. Of course in the game console the most important part are the games that you can play on it. And the most important part for the games is the development environment and libraries available for the game makers. The better and the easier to use the libraries, the more games you can make with the same effort, and the better they are. So software is actually more important here.
I'm basing my software on the CircuitPython project, which is itself based on MicroPython. But I need to add the parts that are specific to game development to it. One of the most important parts in this case is the tile and sprite engine. There is only so much you can do by drawing pixels directly on the screen, after all.
The library for that is now published at https://github.com/pewpew-game/circuitpython-stage and the part of it that needs to be compiled into CircuitPython is waiting to be merged into the main repository — you will still need to build your own firmware to enable it, as it's not generally useful on other boards, of course.
This is just the first version, that supports tile grids and sprites. There is a lot more to add there — advanced dirty rectangles handling, collisions, text layers, menus, etc. I will work on that gradually, as I'm working on the example games.
-
Delays are Inevitable
11/03/2017 at 01:16 • 0 commentsBoth of my prototypes stopped working. Just like that. And that happened just as I was going to show them off in Adafruit's show-and-tell. Oh well, bad luck I guess. I decided it must be the flex ribbon connecting the displays to the PCBs, and I re-did the connection with my soldering iron, inspecting it carefully for shorts, etc. They started to work again. For a moment. Then the newer one stopped responding completely, and no amount of re-soldering helped. So I de-soldered the display from both, and put the one from the old prototype on the new one. It worked for two hours, and then stopped again. This time I decided it must be broken traces on the flex ribbon, because I bent it too much. Since I don't have any more displays with 14 pins, but I have a couple of modules with the same display but with a different connector, I decided to continue work by using one of those modules and a Trinket M0.
The displays stopped working with the Trinket too, even though I didn't touch the flex ribbon or the connections at all.
So I began to poke at the non-working display, trying slower SPI speeds, different commands, etc. At some point I got it to work — I was sure then that the problem is not with the display module, but with my code.
Turns out that the display working or not was a completely random thing. The problem is that some of the SPI commands, such as reset or wake up from sleep, require a lot of time for the display to perform, and delays are needed. I added those, and also lowered the SPI speed during the initialization sequence, and it works on the Trinket every time. So I compiled the firmware for the "dead" prototype, uploaded it — and it works too! I bet that when I solder the other display it will also work.
One more obstacle out of the way.
-
Another PCB
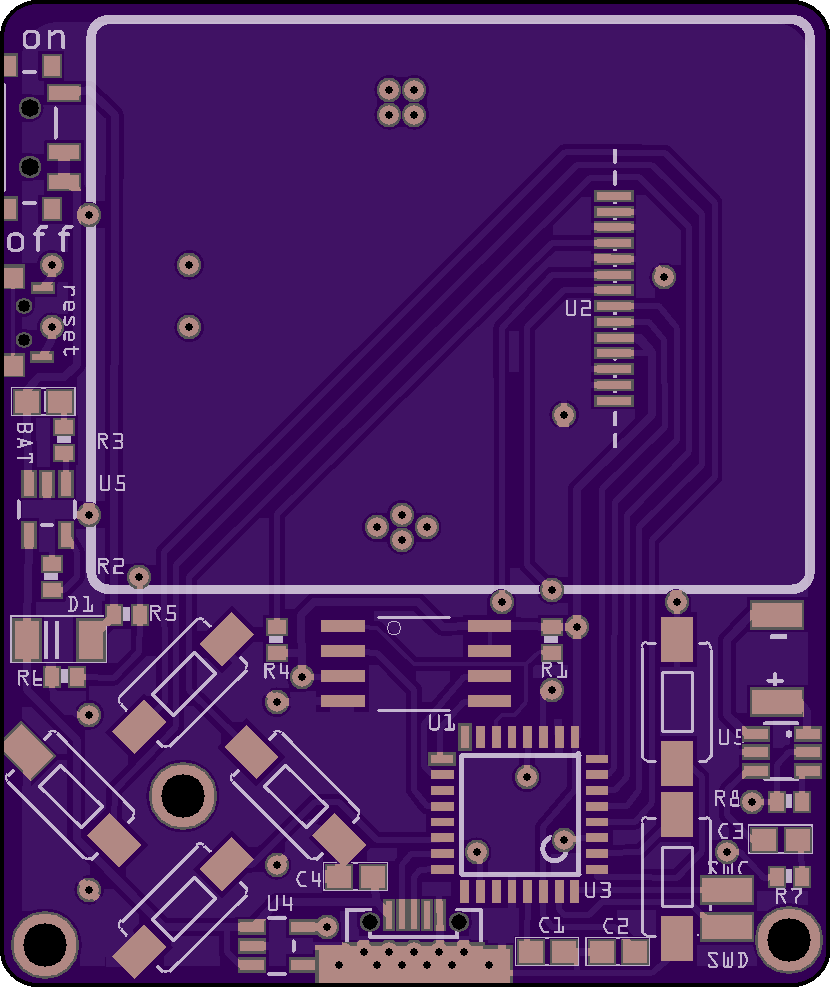
10/30/2017 at 23:53 • 0 commentsToday I received a big batch of PCBs from OSHpark, and one of those was the next revision of the µGame PCB. There is a number of improvements there:
- The PCB is wider (42x50mm) giving me more room, but still fits in the 5x5cm limit of many board houses.
- The buttons are spaced a little wider.
- I used non-clicking buttons this time.
- The only parts on the back side are the battery and the speaker.
- I used a smaller reset button.
- The active part of the display is centered on the PCB.
- There are footprints for 2 different battery holders.
- An analog pin connected to the battery through a voltage divider, for monitoring charge levels.
- Two of the button pins are swapped (left and down).
![]()
Immediately after assembling the board I realized one more change: the USB 5V rail is connected directly to GND. Oops. That happened when I moved the button pads around, and made one of them touch the 5V trace. Fortunately cutting the trace and replacing it with a wire fixed it, and there was no damage.
But that means I need yet another version soon. To not waste my OSHpark coupons, I quickly tested the last feature of the board — sound. This one has a piezo speaker directly connected to the DAC pin. As you can expect, it's really quiet. Hmm, ok, that means that the next version will need a magnetic speaker and an amplifier. But where can I fit them?
![]()
After taking some measurements of the new boards, I found a solution. I moved the fire buttons further from the edge (they aren't very comfortable they way they are now), and put the audio circuit in the freed space. It's not even very cramped — each component has lots of space around it. Of course the tiny 4mm speaker won't have great quality, but should be better than the piezo, and now I only have the battery on the back!
I need to finish a couple of other boards, and then I'm making another order.
-
The Power of Plain C
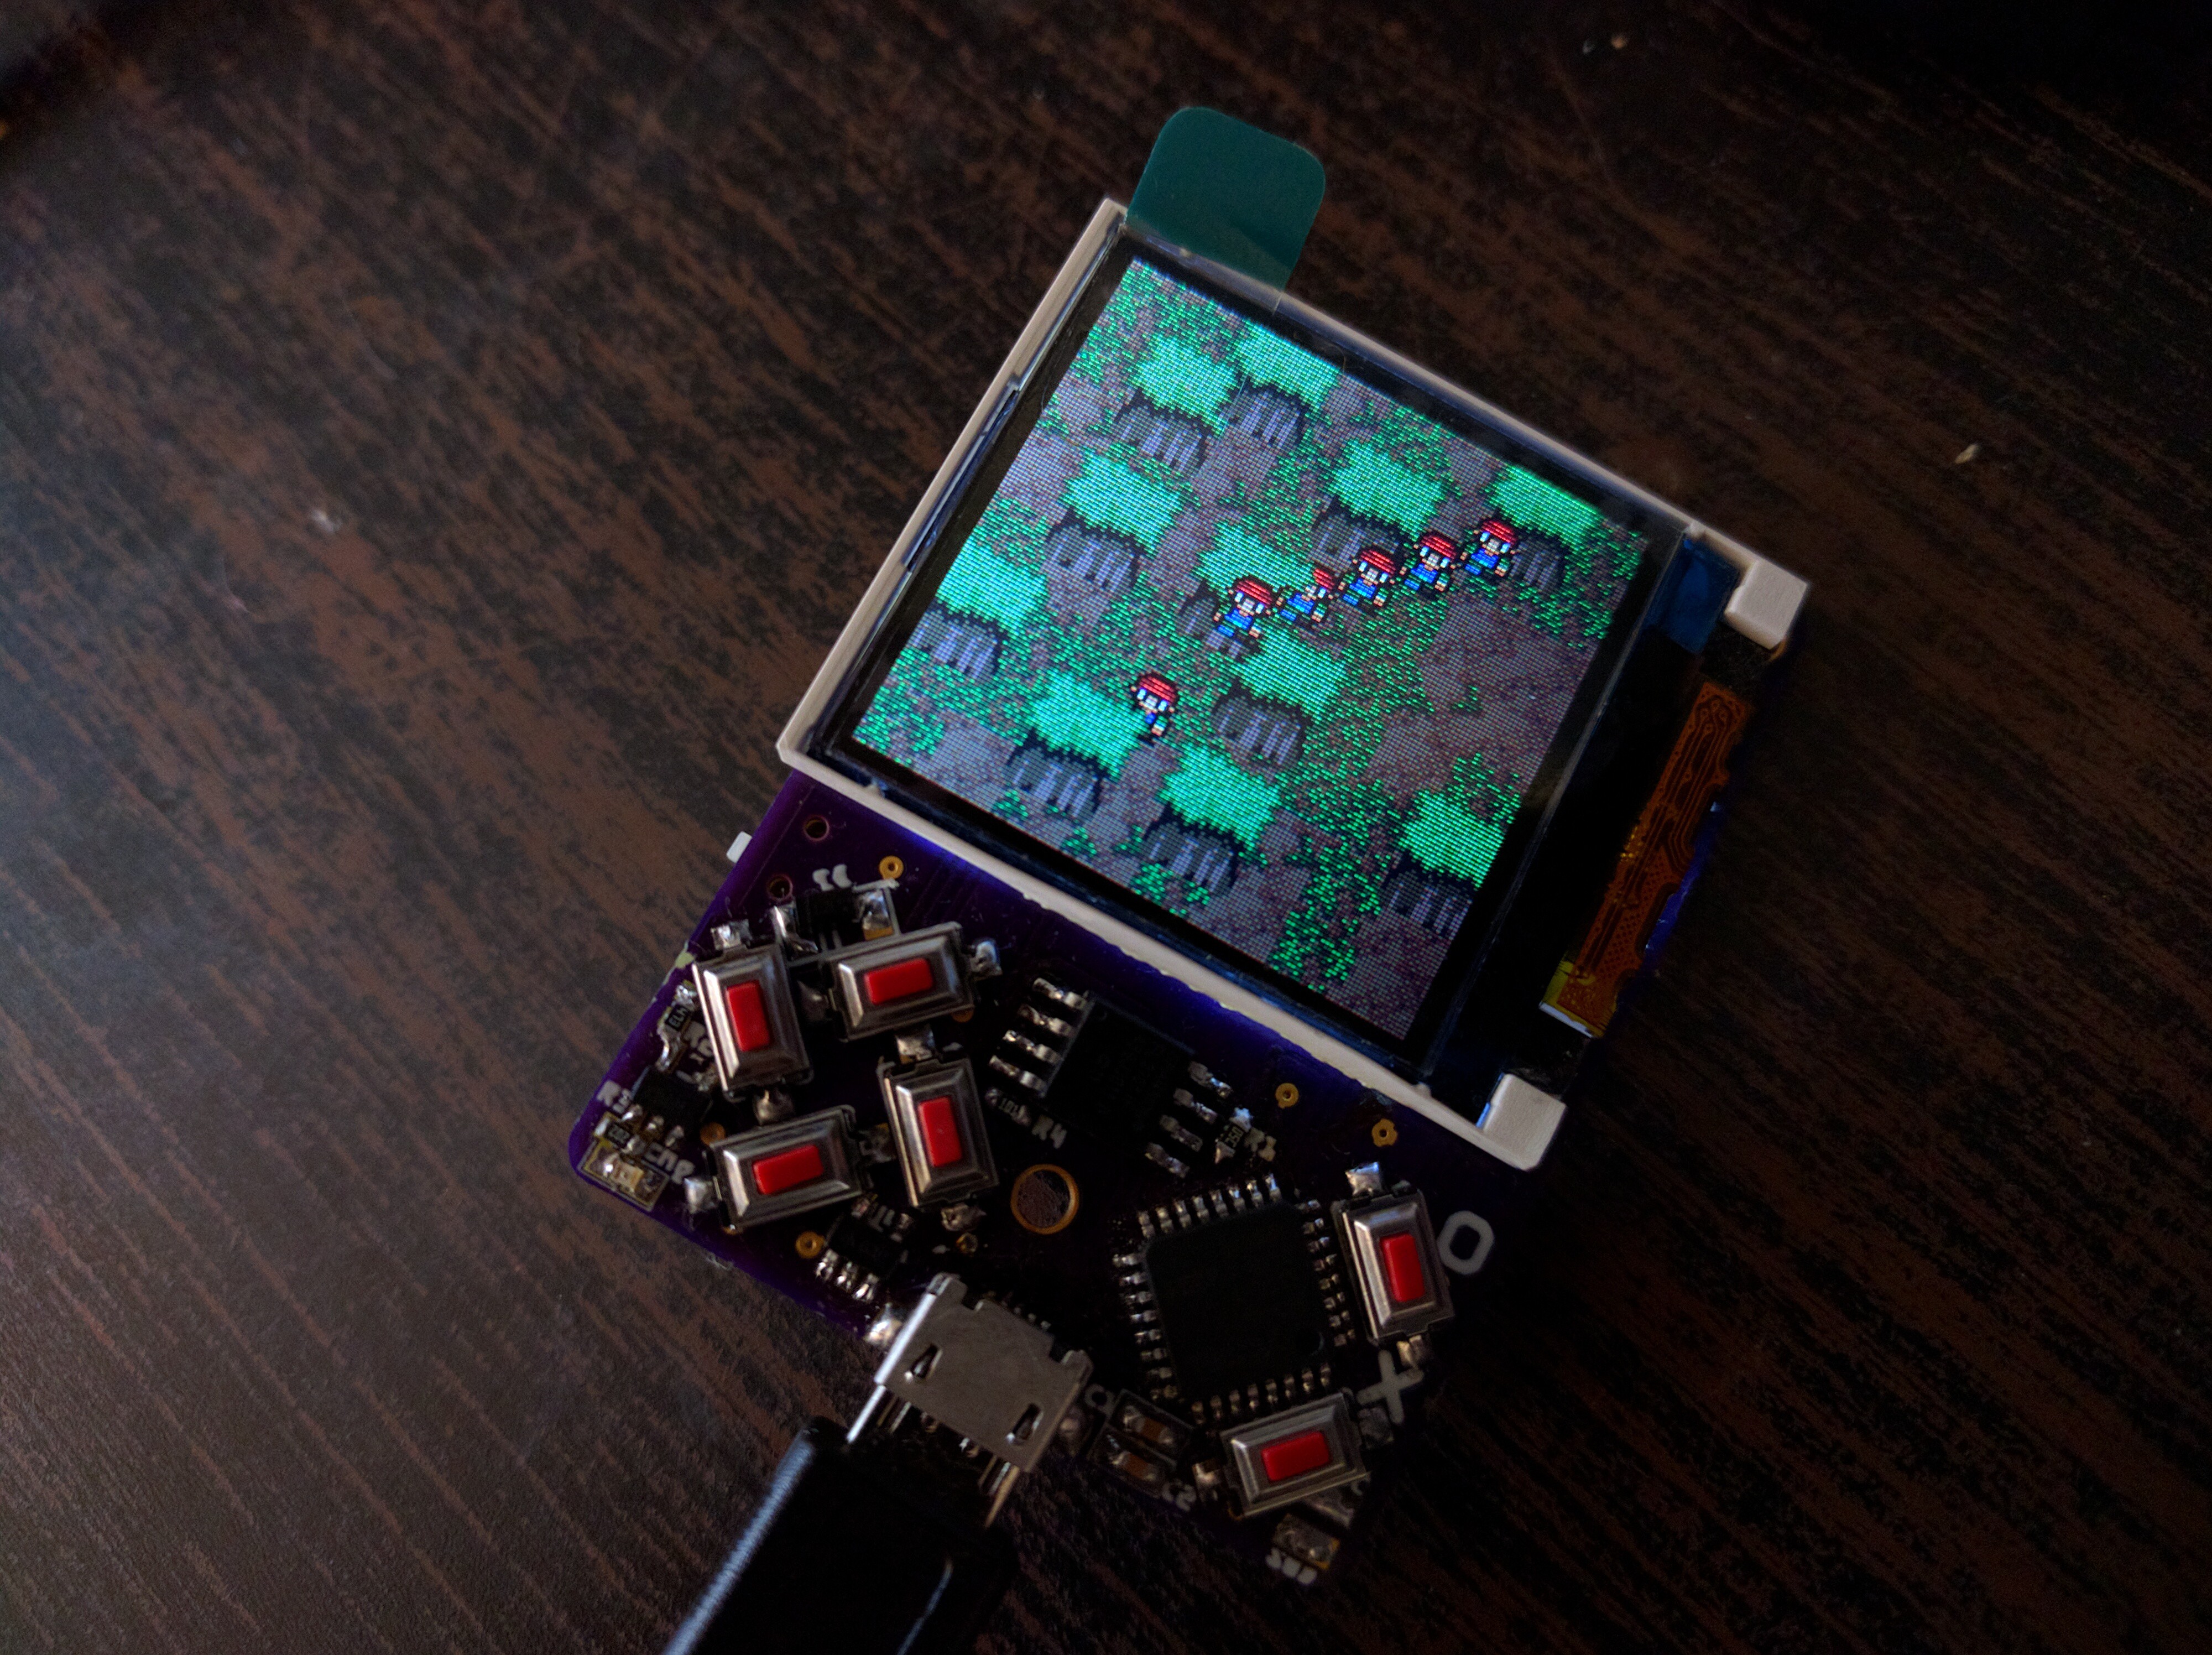
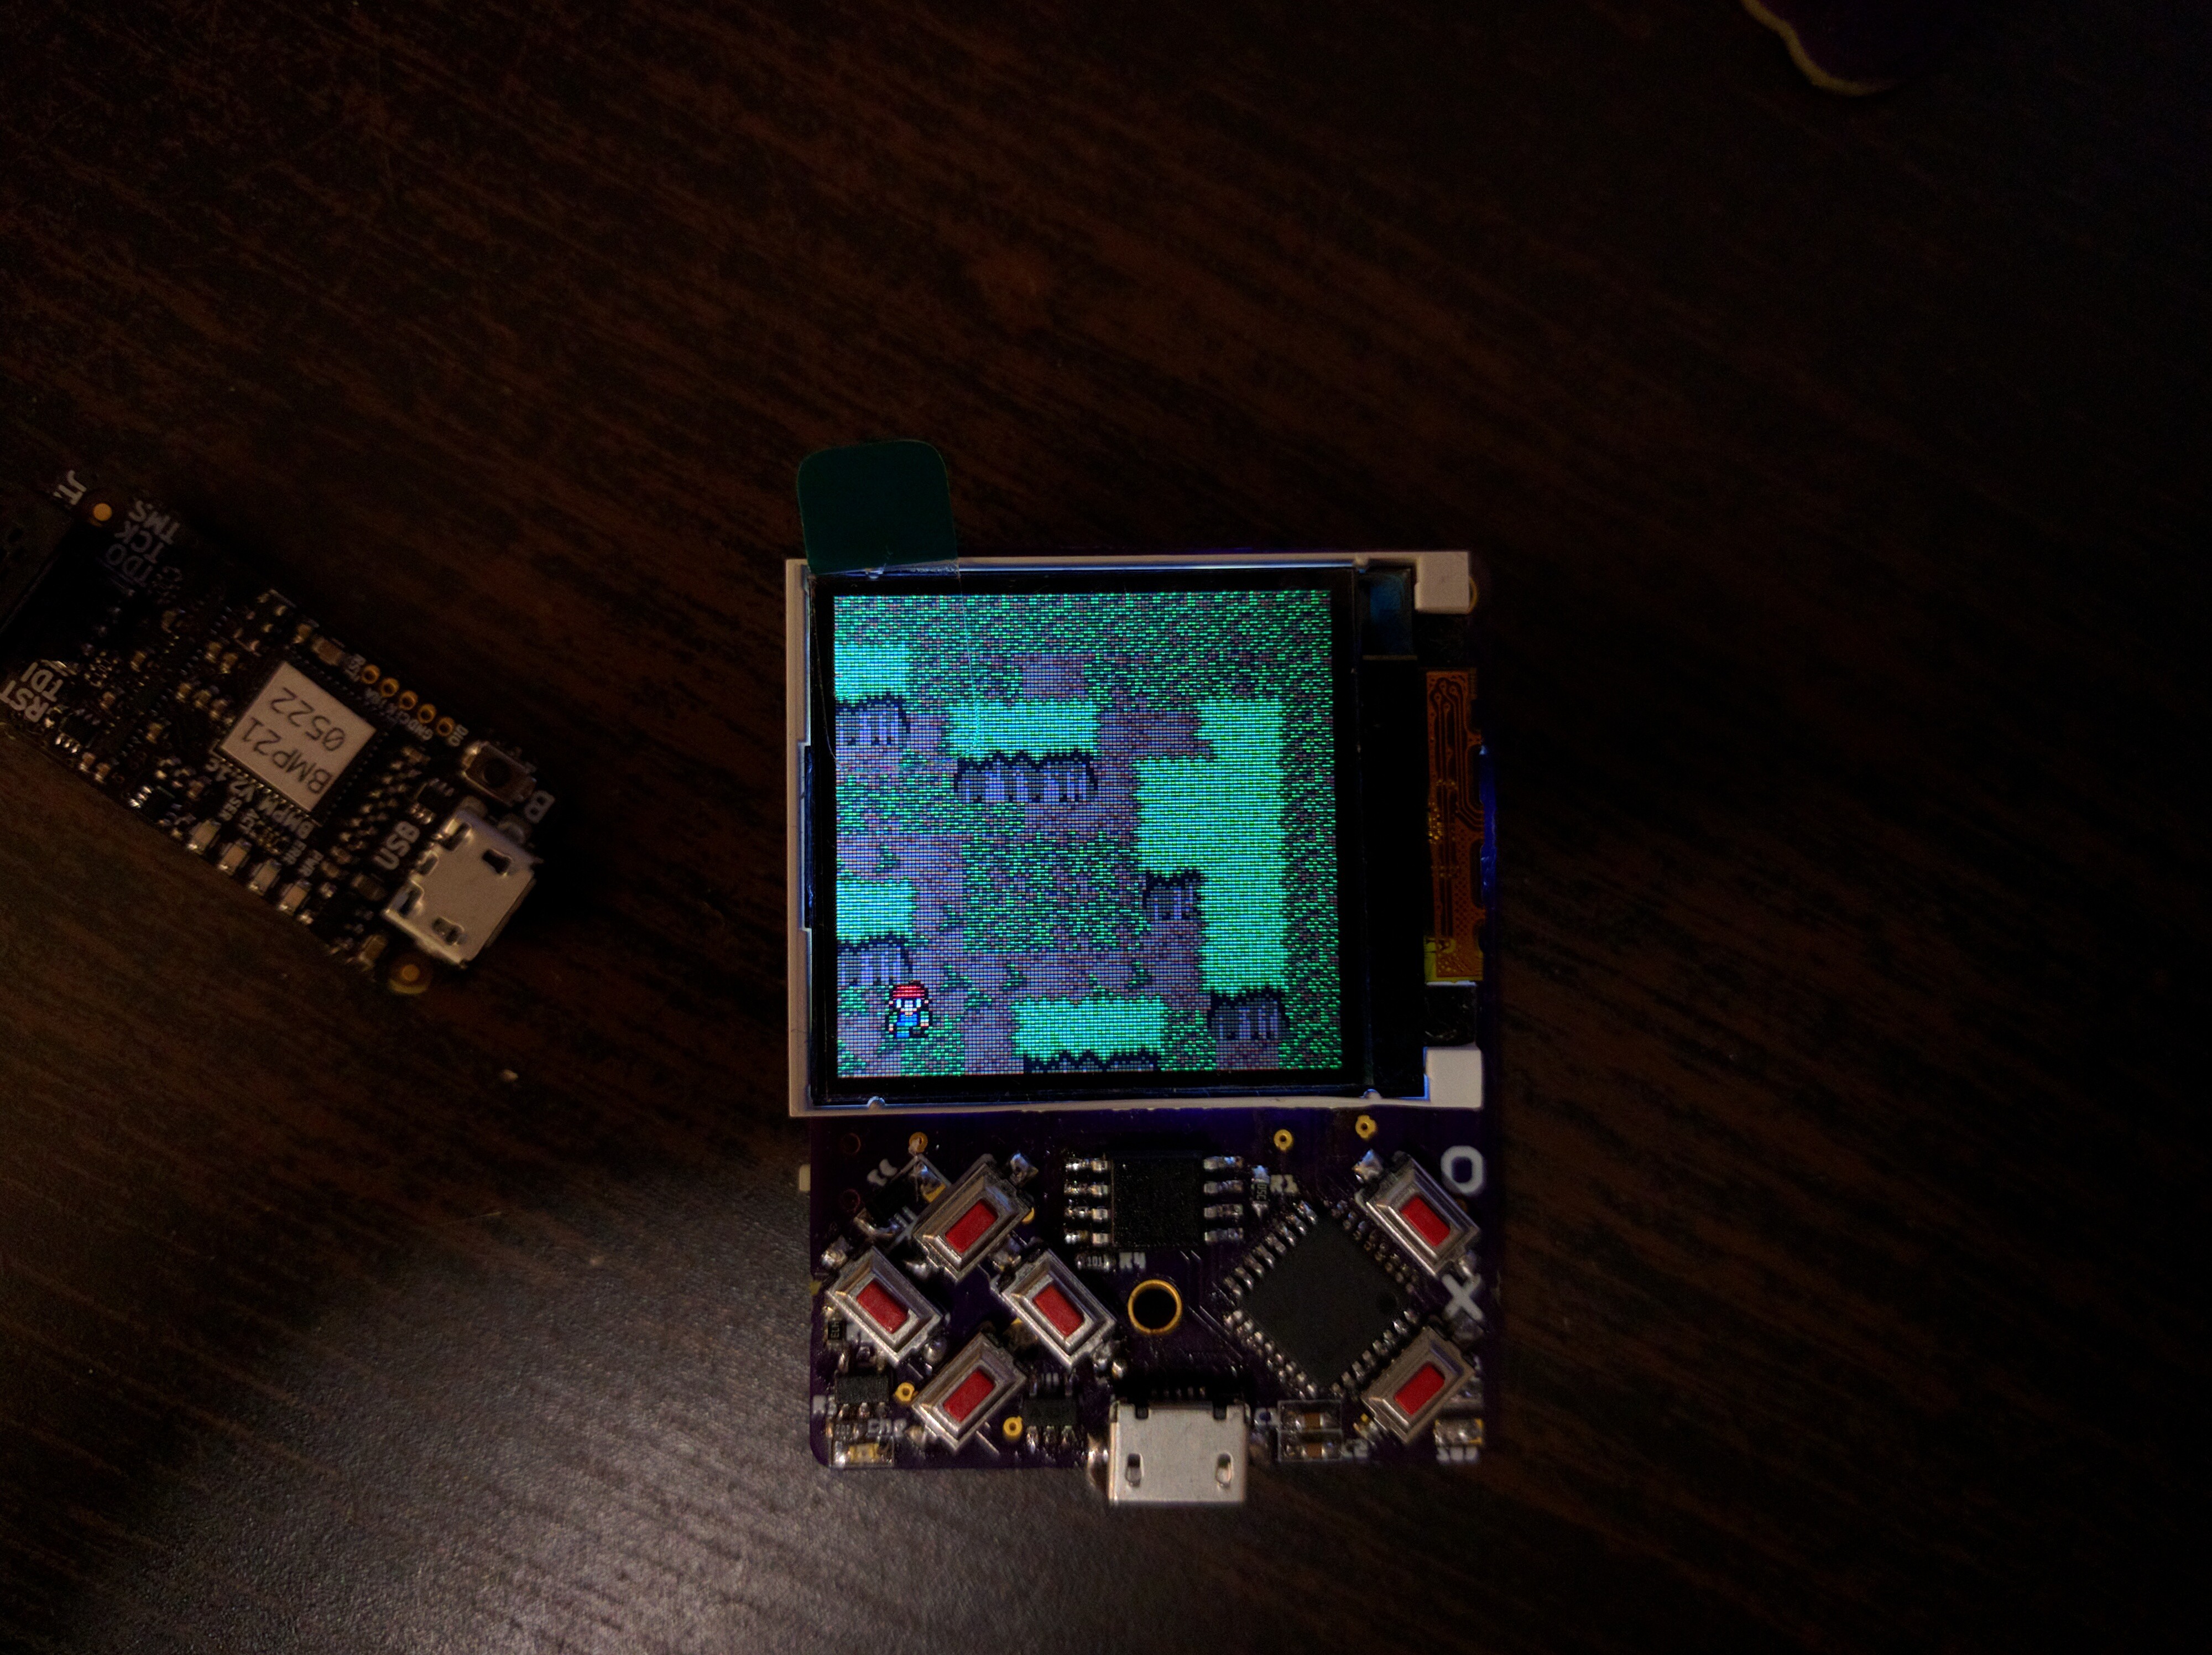
10/29/2017 at 14:30 • 1 commentI was expecting a considerable speedup from rewriting the whole rendering code as a C module and compiling it into the CircuitPython firmware, but a 50x improvement is much better than anticipated. I was afraid that I will have to limit myself to just a few sprites on the screen at once, and just one or two layers of tiles. But with this speed, there is no such problem. Of course, it will still slow down to around one frame per second if I fill the whole screen with animated sprites, but I think even ¼ of screen is already workable.
![]()
-
First Walking Sprite
10/29/2017 at 00:26 • 0 commentsI'm probably much more excited about this than I should be...
Traditionally, the colors are completely wrong in the video — they are much nicer in reality.
-
Inside a Tile Engine
10/28/2017 at 20:21 • 0 commentsSo how does all that work? It's simple, really, apart from all the book-keeping code for loading graphics and palettes from BMP files, accessing individual pixels in 4bpp data, and so on.
The heart of the whole thing is this method:
    def render(self, x0, y0, x1, y1, buffer):
        index = 0
        for y in range(y0, y1 + 1):
            for x in range(x0, x1 + 1):
                for layer in self.layers:
                    c = layer.pixel(x, y)
                    if c != 0x1ff8:
                        buffer[index] = c
                        break
                index += 1
It takes the coordinates of two corners of a rectangle and a buffer, and fills the buffer with pixel data to be sent to the display. It does that by iterating over all the pixels, and for each checking all the layers and sprites for non-transparent pixels. As soon as it finds one, it sets its color in the buffer, and goes to the next pixel. Simple.
Of course all the complexity is actually hidden in that pixel method of the layer/sprite, which needs to figure out how those coordinates map to the coordinates of the given layer, find the right square on it, get the graphic for that square, find which pixel in that graphic we want, convert it from 4-bit to 16-bit color using the correct palette, and return the color. That's where probably 80% of the time, or more, is being spent. Fortunately, that's all rather simple additions, bit shifts and table look-ups, so I hope that I can make it really, really fast in C.
On a side note, this is not the optimal way for doing it speed-wise. Using a blit function that would transfer whole blocks of memory would be much more efficient in terms of speed. But not in terms of memory, and I care for memory more in here than for the raw speed, which is limited by the speed of the SPI interface anyways.
![]()
-
Basic Tile Engine
10/28/2017 at 18:55 • 0 commentsThis took me less time than I anticipated — I started today at night, and in the evening I already have a basic tile and sprite engine with support for multiple layers and transparency, reading graphics from bmp files or from strings, and dirty rectangles.
![]()
There is only one tiny problem: it's all written in Python, and so it's really, really slow. Drawing the whole screen (one 16x16 square at a time) takes good 45 seconds. This is not so tragic when you realize that normally during the game you will update only 4 or 5 such squares every frame, and not 128, but still I need it a bit faster — 2 seconds per frame is not acceptable.
Fortunately, there is an easy way to make it faster: re-write it all in C (at least the one slow function that does the rendering), and compile into CircuitPython itself. That will require some more work, but should give me the speedup I need, especially since most of those operations are bit juggling, and C is really good at it.
Memory-wise, I can barely hold 2 banks of 16 tiles, each with its own palette, and 2 layers in memory. Of course that is easily solved by moving the graphics and the palettes into the flash, by freezing and compiling it into CircuitPython too. If I run out of memory there, I can always disable some modules I'm not using, like touchio or analogio.
-
The Magical Number 16
10/27/2017 at 11:36 • 0 commentsI'm trying to budget the memory of this thing, for graphics is known to take a lot of it. There is a number of tricks I plan to use to save memory in order to fit into the 32kB available, together with the CircuitPython runtime.
- Frozen modules. All the code libraries, and all the data that doesn't change (fonts, pre-defined palettes, pre-defined graphic, pre-defined sounds) are going to be byte-compiled and included in the firmware, to be executed directly from the chip's flash memory.
- Tiles. The basic unit of graphic in the game will be a 16x16 square with 16 colors, called a tile.
- Banks. Tiles will be stored in banks, 16 tiles in a bank. All tiles in a single bank share a palette.
- Palettes. The 16-color palettes will be switchable, so that you will be able to reuse a lot of graphics by simply changing the colors. One of the colors (pure magenta) will be always treated as transparent.
- Layers. A layer is a map of 16x16 tiles from a single bank with a single palette. It has x, y and z offsets, which control where on the screen it is being displayed and what it covers or is covered by it.
- Fonts. Fonts are similar to banks, except they use 8x8 images with 4 colors. They can only be displayed on a special text layer, which is on top of everything else and can't be scrolled.
- Sprites. Those are like 1x1 layers with just one tile on them. They have x, y and z position, an assigned bank and palette, and the index of the image from that bank to be displayed.
- Dirty rectangles. Those are the areas of the screen that need to be updated in a given frame. Changing a square in a layer or sprite adds the corresponding area of the screen to the dirty rectangles list. Moving a sprite adds both the old and the new position (merged into one rectangle if they overlap). Moving a layer forces redraw of the entire screen (but there will be a trick for scrolling).
That's the plan for now, anyways.
-
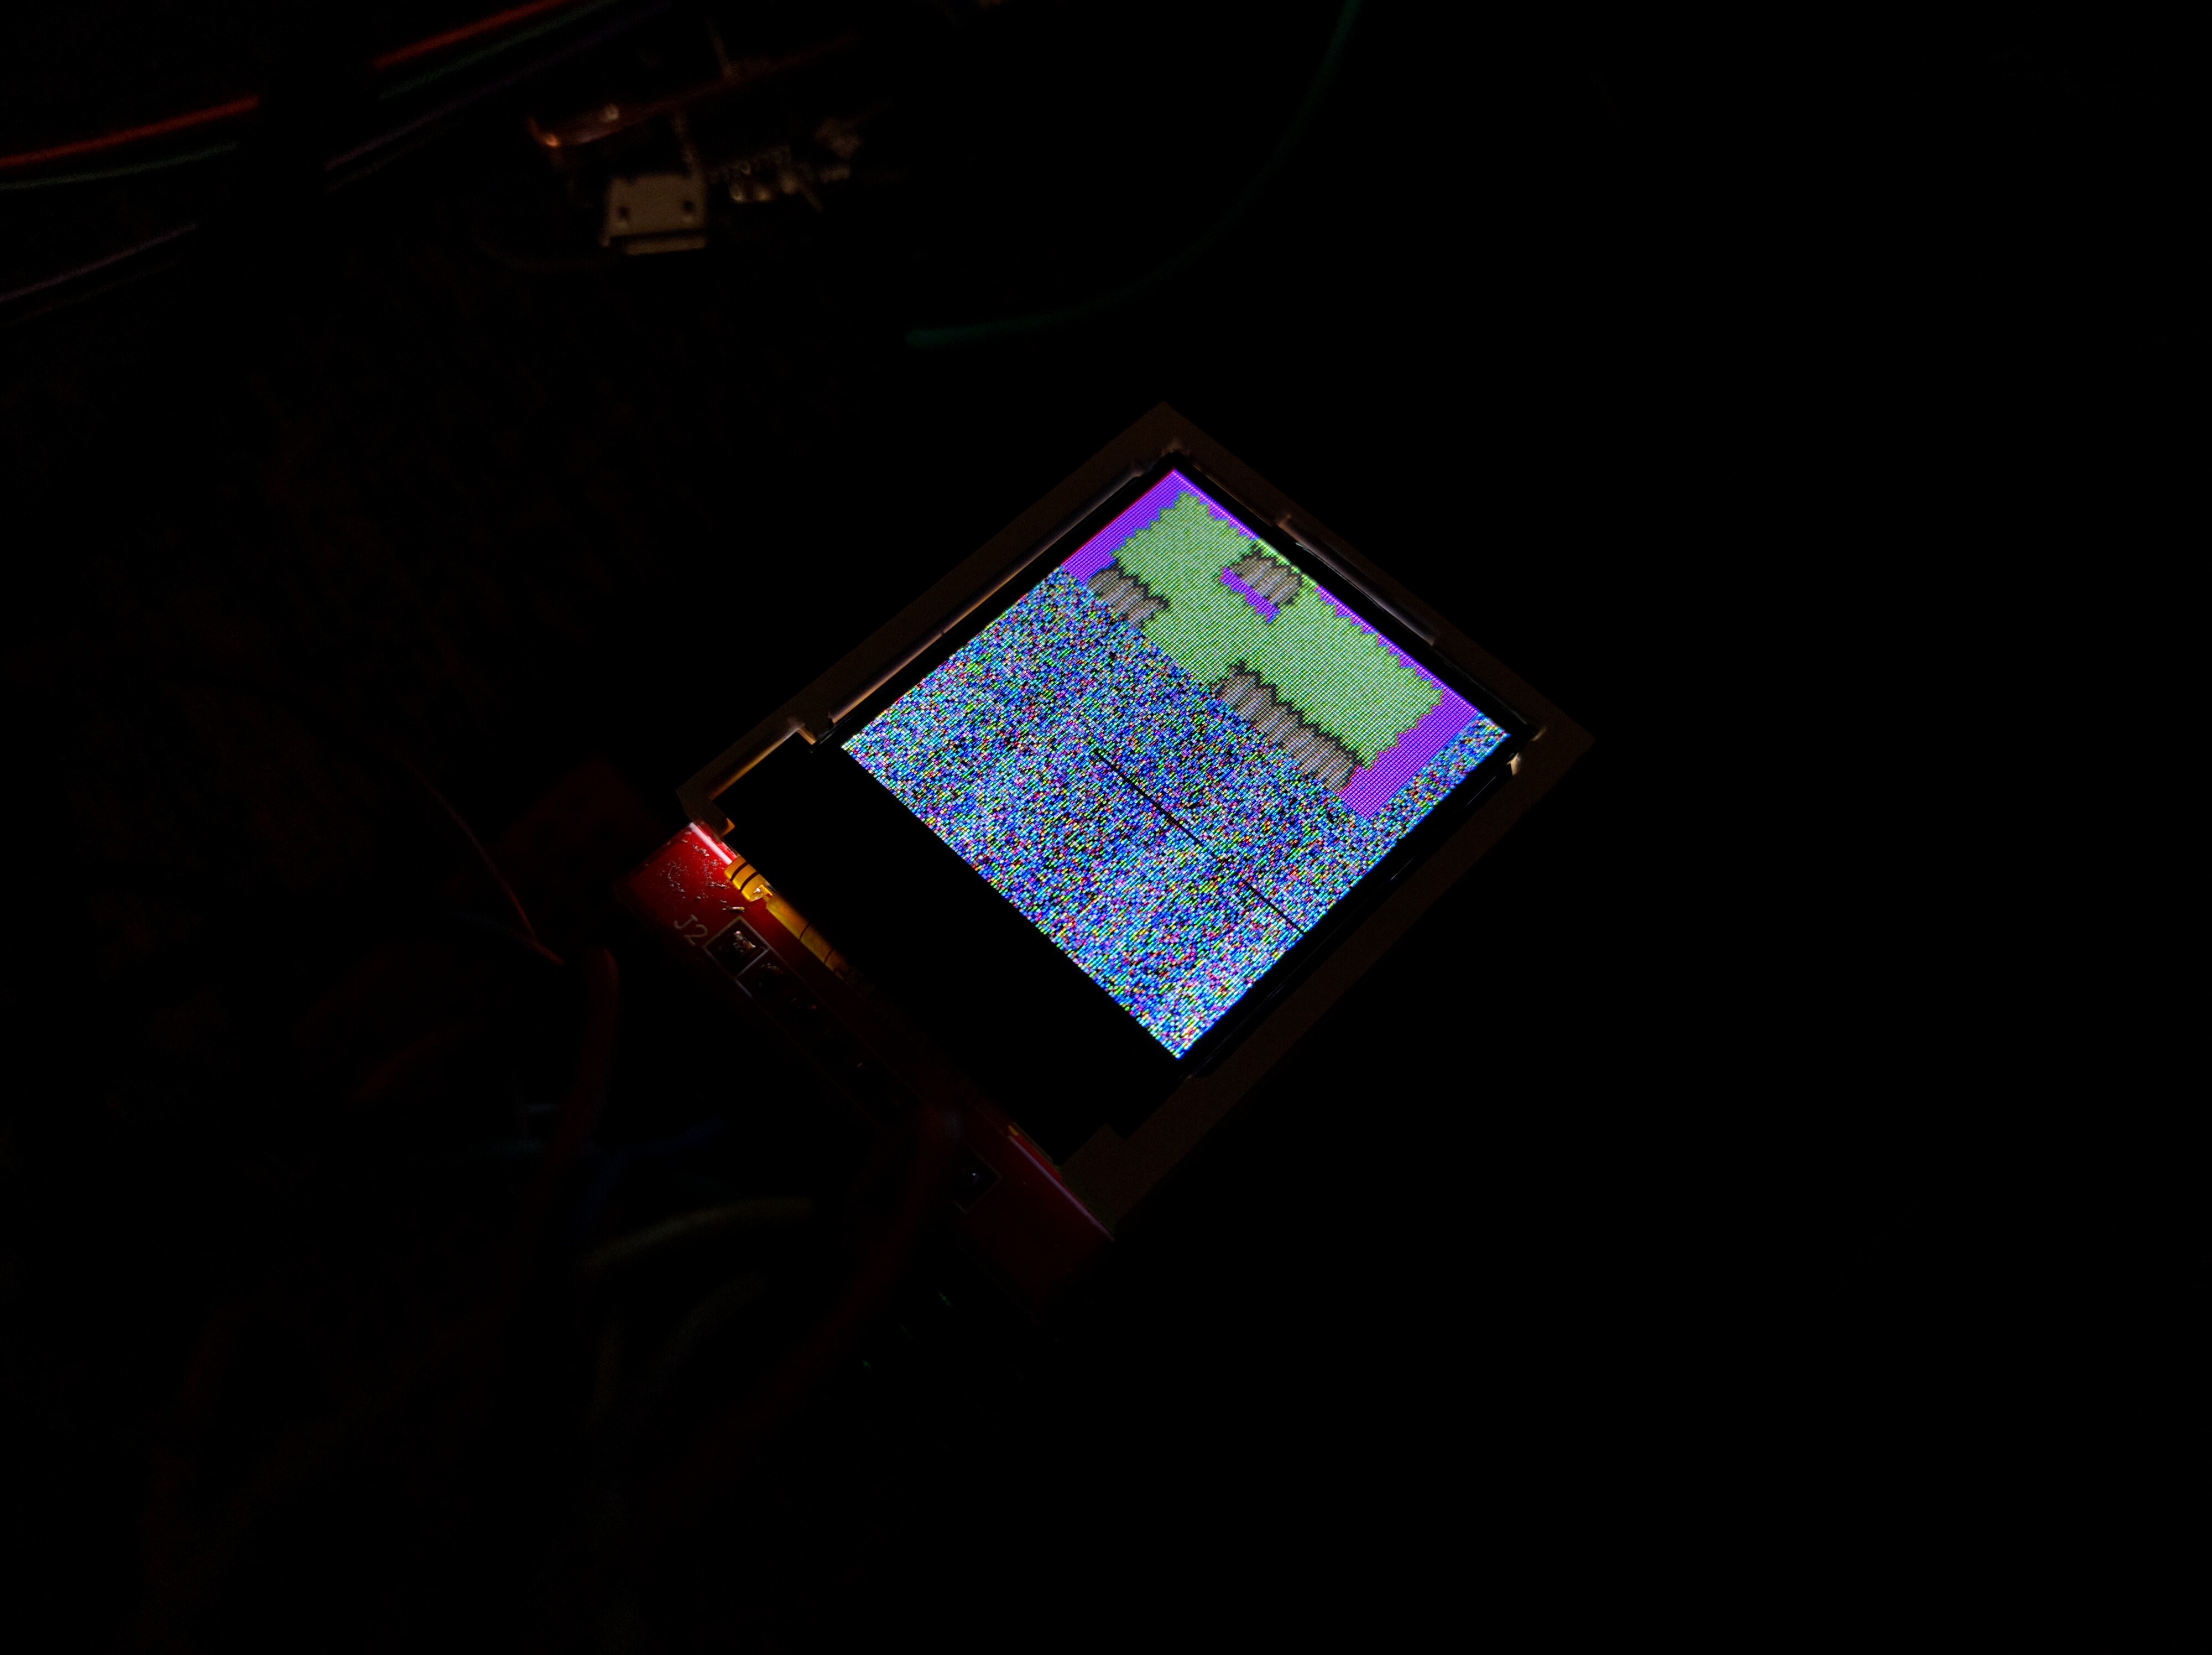
Reading BMP
10/26/2017 at 00:52 • 0 commentsThis thing has a real color display for real graphics — so you will need graphics in your games. I could create my own format, and some utility program to convert common image formats to it, but that's always an additional step — it would be so much nicer to be able to edit the images directly on the USB drive. So I looked around for a file format that would be easy to parse, uncompressed, capable of storing 16-color indexed images, and understood by common graphics formats. And what do you know, the stupidest raster file format, BMP!
So I took a tile sheet from one of my games, converted it to 16 colors and saved as BMP in GIMP. Then I poked around the file in Python until I had it displaying, with this code:
import busio

from adafruit_rgb_display import st7735
from adafruit_rgb_display.rgb import color565


rst = digitalio.DigitalInOut(board.D0)
dc = digitalio.DigitalInOut(board.D2)
cs = digitalio.DigitalInOut(board.D1)
spi = busio.SPI(clock=board.SCK, MOSI=board.MOSI)
d = st7735.ST7735R(spi, cs=cs, dc=dc, rst=rst)

with open('walls.bmp', 'rb') as f:
    f.seek(18)
    width = int.from_bytes(f.read(4), 'little')
    height = int.from_bytes(f.read(4), 'little')
    buffer = bytearray(width * 2)
    f.seek(46)
    colors = int.from_bytes(f.read(4), 'little')
    f.seek(54)
    p = f.read(colors * 4)
    for y in range(height):
        for x in range(width // 2):
            b = f.read(1)[0]
            c = (b & 0x0f) * 4
            z = color565(p[c + 2], p[c + 1], p[c])
            buffer[x * 4 + 3] = z & 0xff
            buffer[x * 4 + 2] = z >> 8
            c = (b >> 4) * 4
            z = color565(p[c + 2], p[c + 1], p[c])
            buffer[x * 4 + 1] = z & 0xff
            buffer[x * 4 + 0] = z >> 8
        d._block(0, height-y, width, y + 1, buffer)
I had to draw it one line at a time, instead of one large buffer, because of not enough memory. There is a lot more work required before this turns into a tiles and sprites engine, but the first step is done.
![]()
-
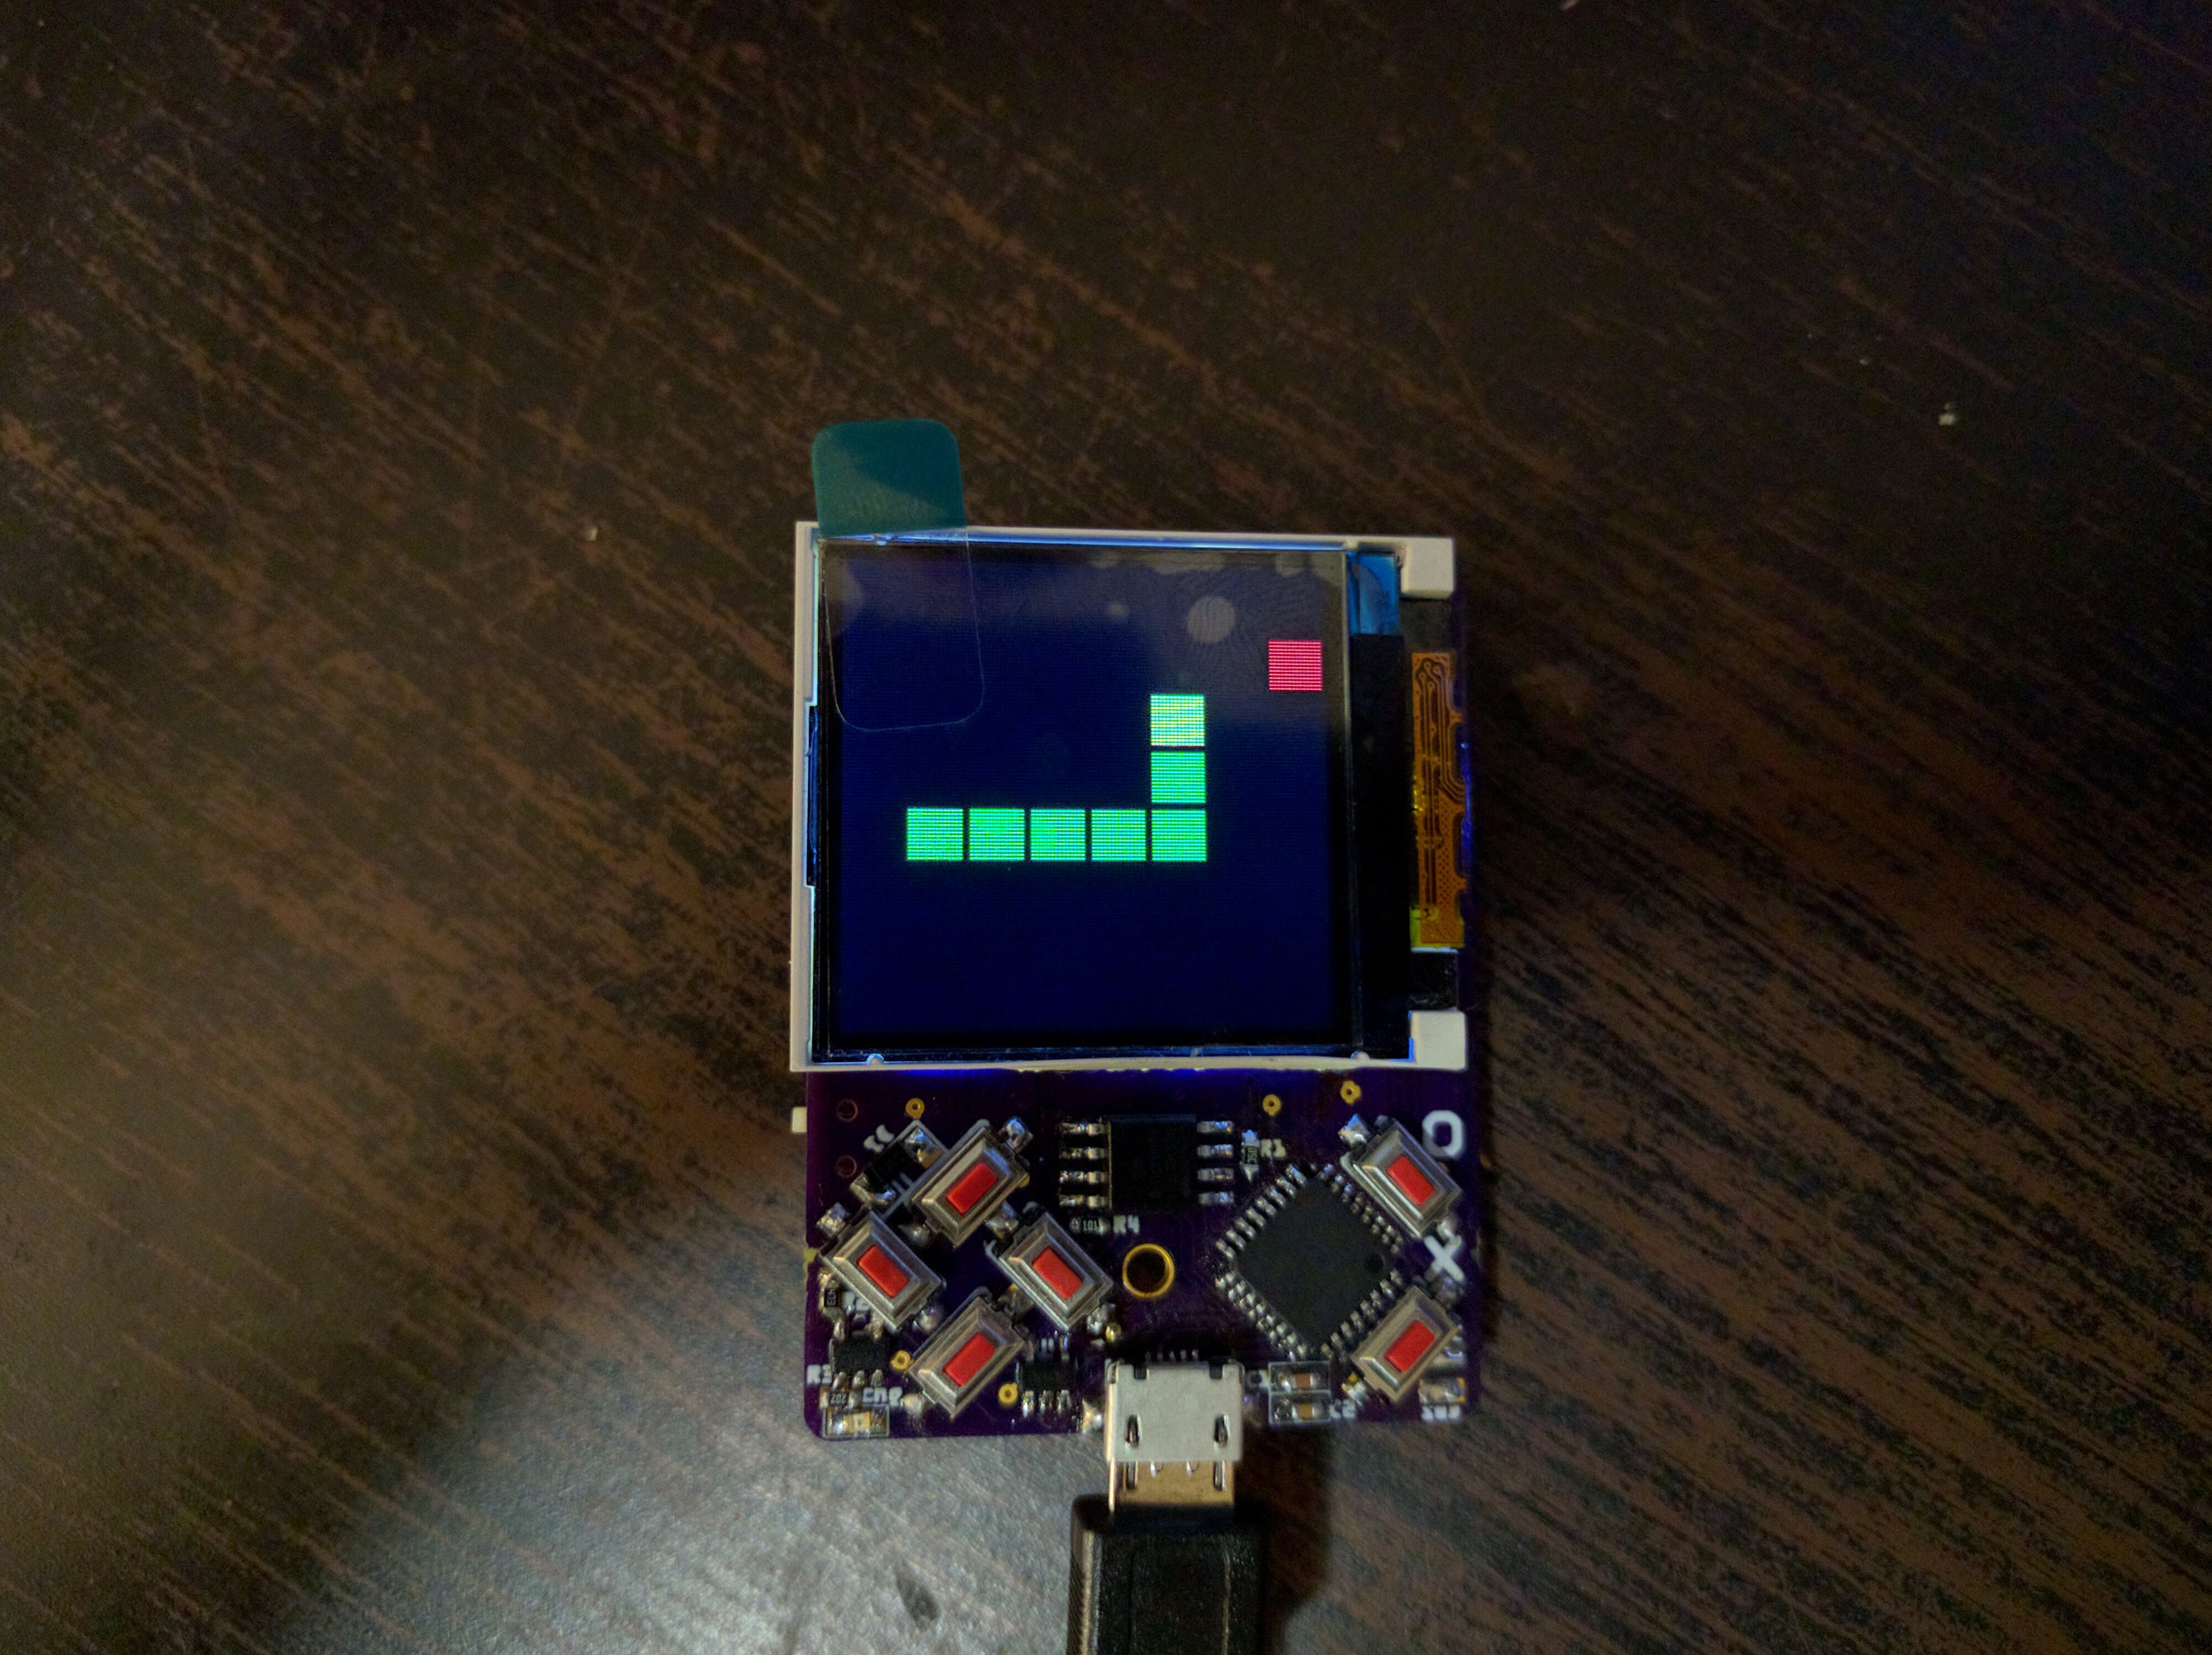
Emulating PewPew Lite
10/22/2017 at 19:39 • 1 commentI decided to make a quick experiment, before I go on writing the sprite library and writing proper games for this. I wrote a version of the "pew" library (needed for the games written for #PewPew FeatherWing) for this device, simulating the 8x8 display with rectangles.
![]()
At least the snake game works, didn't try the others yet. I'm redrawing the whole screen every frame, so the frame rate is not terrific, but it's playable.