charliex
-
Building badges
05/22/2015 at 02:01 • 0 commentsSo far this year we've done a lot better, the kits are all made, speaker and staff badges are all built, and i'm putting together a bunch of the LED badges. I'm using the TM-220A pick and place, and actually getting it to run.
Using DP-TM220A.ulp for eagle from Dangerous Prototypes. The first issue i ran into was that the rotations are different, after some poking around I realised we'd had this problem with our PickoBear PNP at NSL, that Eagle doesn't use an absolute rotation, the rotation the ULP sees is relative to the the rotation of the part in the library.
Hmm not good..
![]()
So i went through each of the parts manually and fixed the rotation myself. The firmware is a bit flaky and it crashes a lot on malformed files, i ended up using a Chinese formatted file to handle it.
After that i did a run in single step and the rotation was a bit off and needed manual touch off, and on a full run the rotation got even worse, so i changed the machines speed to 50% and it rotated perfectly, so probably either the vibration or the nozzle size is too small, i've pulled out the nozzle pack and will try a larger one.
Another thing we did, was to cnc out a chunk of aluminium put a couple of metal pegs in that matched the holes of the badge and put it on the bed of the PNP , the existing holder is not good at all. So now i can pop the board on, use the paste stencil, remove the stencil and run the pnp, take it off and put it on the hot plate. so far so good!.
![]()
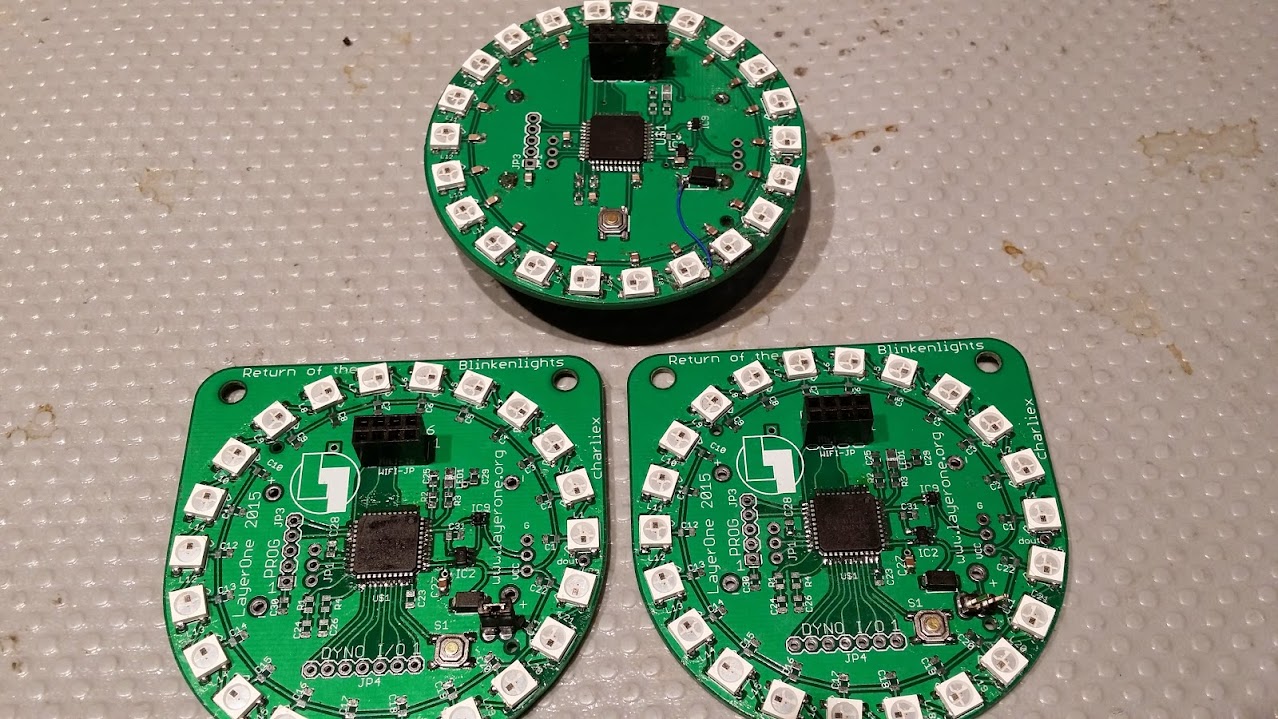
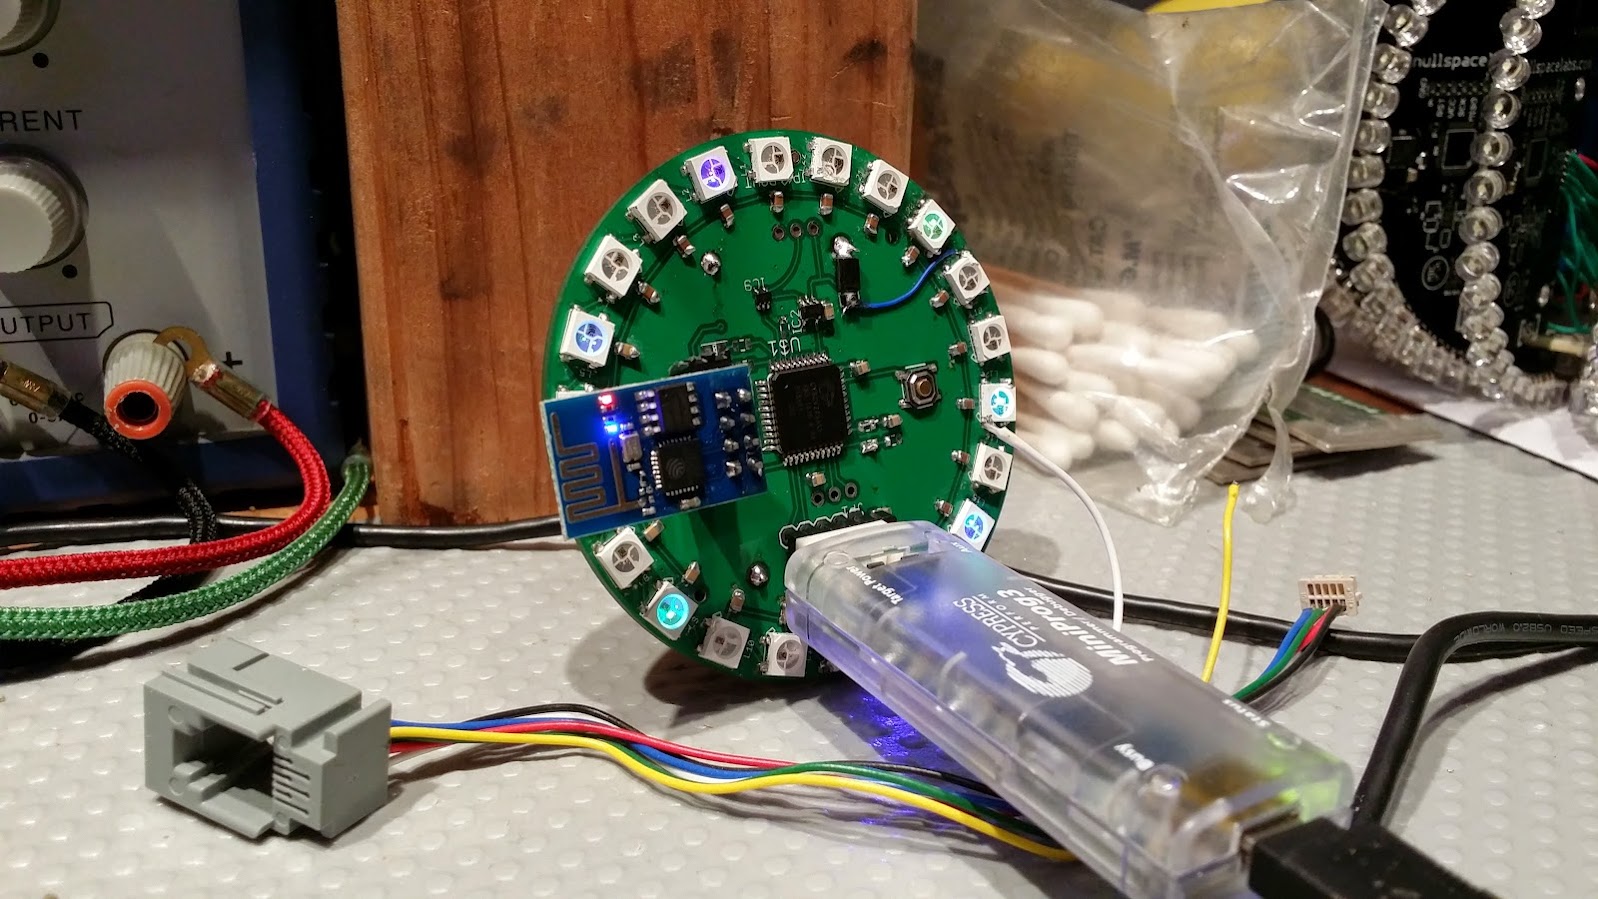
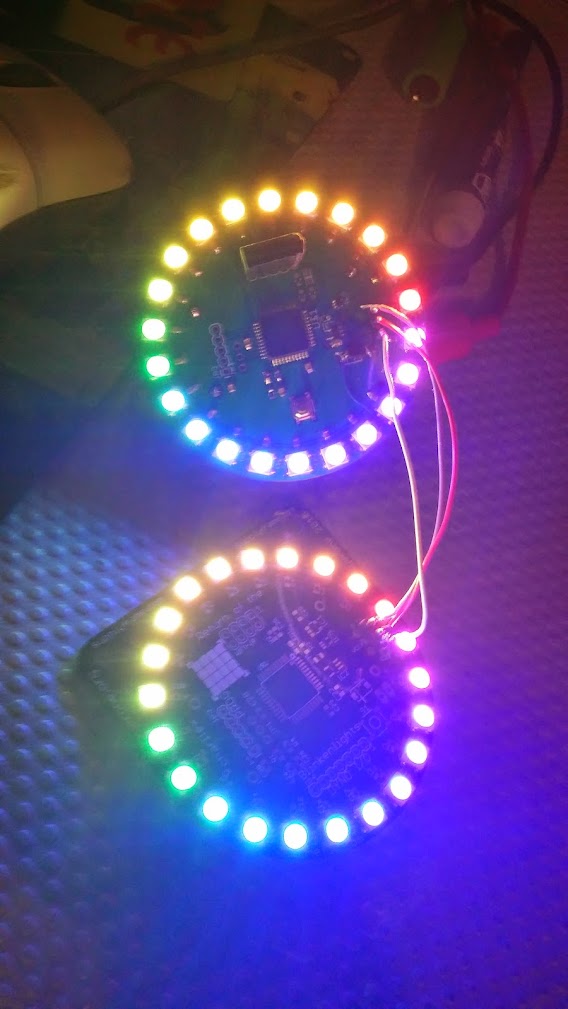
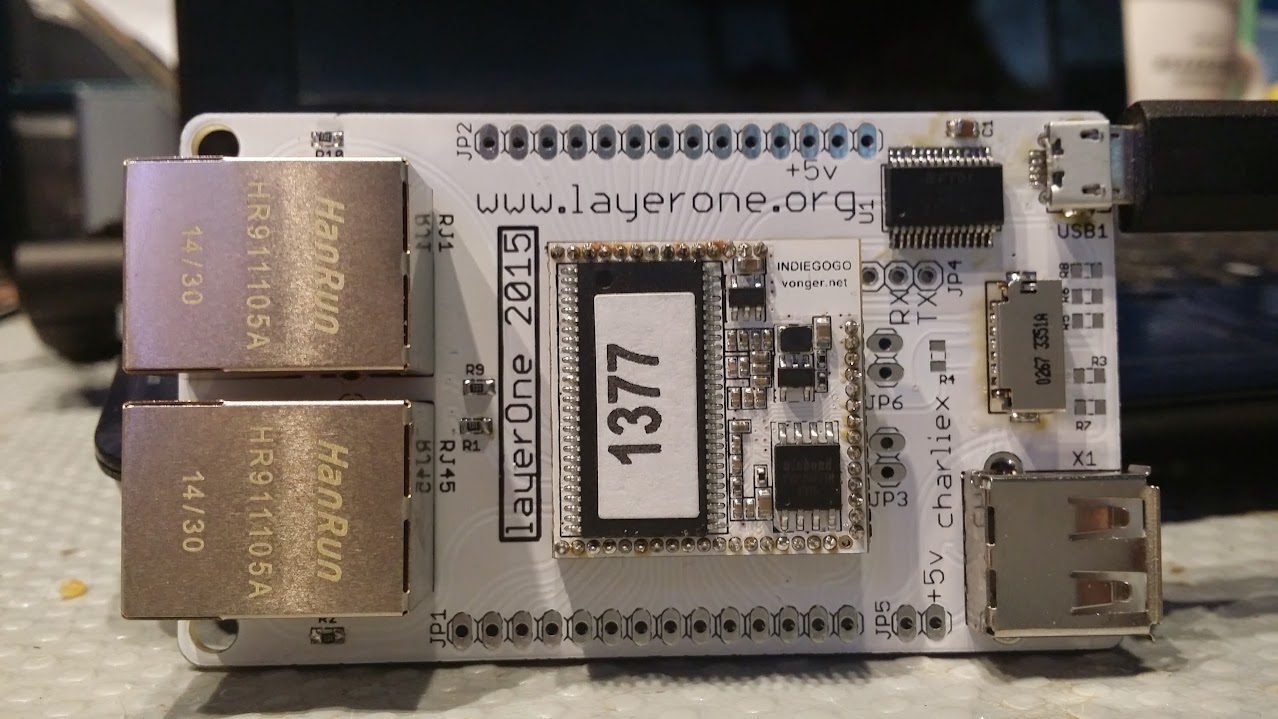
The badges are also chainable and they'll even run in parallel. Here its passing over VCC,GND and the logic output to drive the WS2812's.
![]()
![]()
![]()
![]()
![]()
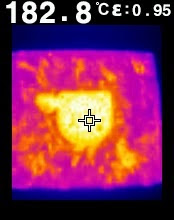
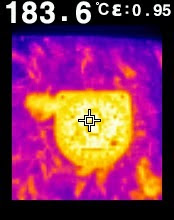
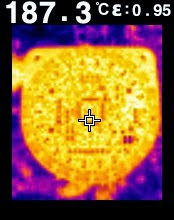
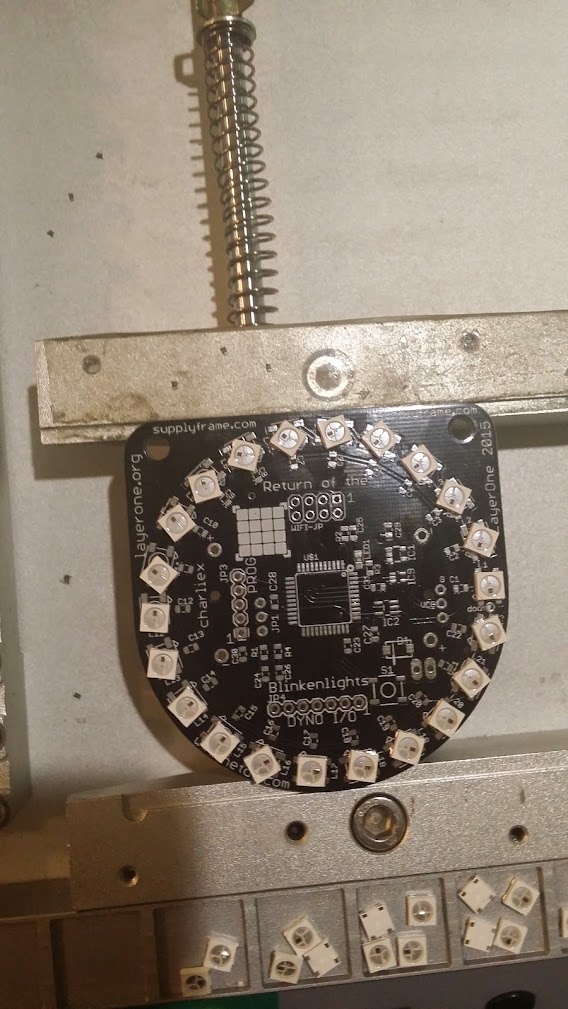
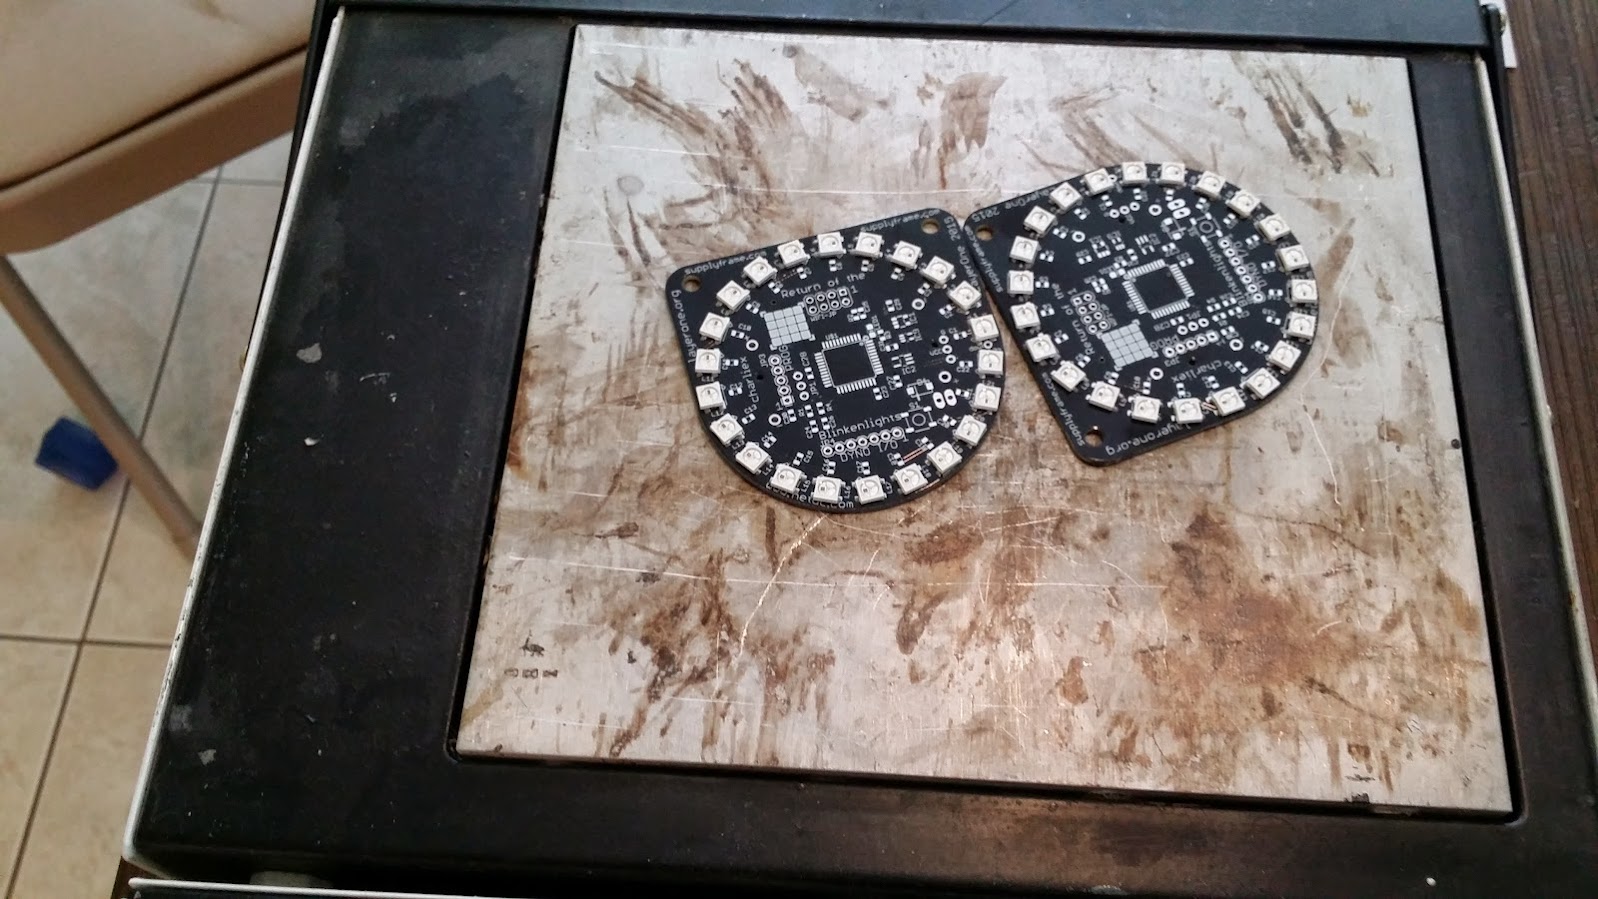
So close to the right number....
![]()
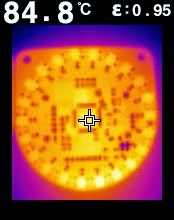
hotplating at 176 setting
![]()
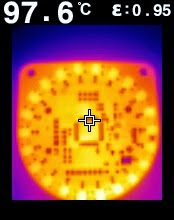
of course if you have one, there are always reasons to use it
![]()
![]() \
\![]()
![]()
![]()
![]()
![]()
Robots!
-
Using the $4 PSOC4 devboard as a programmer for PSOC4's
05/03/2015 at 18:42 • 0 commentsThis is just a link to a Cypress article showing how to use the cheap PSOC boards to implement a programmer to program other PSOC4's
http://www.cypress.com/?id=4&rID=98796
Don't upgrade the components when you load it into Cypress Creator, leave them as is.
Arrow have these boards in QTY 16 for $3.21
-
first badges sent off for manufacturing
04/21/2015 at 04:19 • 0 commentsAfter a few prototype runs, and a delay due to some artwork changes to the LED board, it's gone off for manufacturing, using itead instead of silver circuits for the first time, so hope it works out. this is always the most stressful part. I haven't opened up the LED reels either, since i don't want to bake them.
CAM files are updated to the new drill format in eagle 7.2
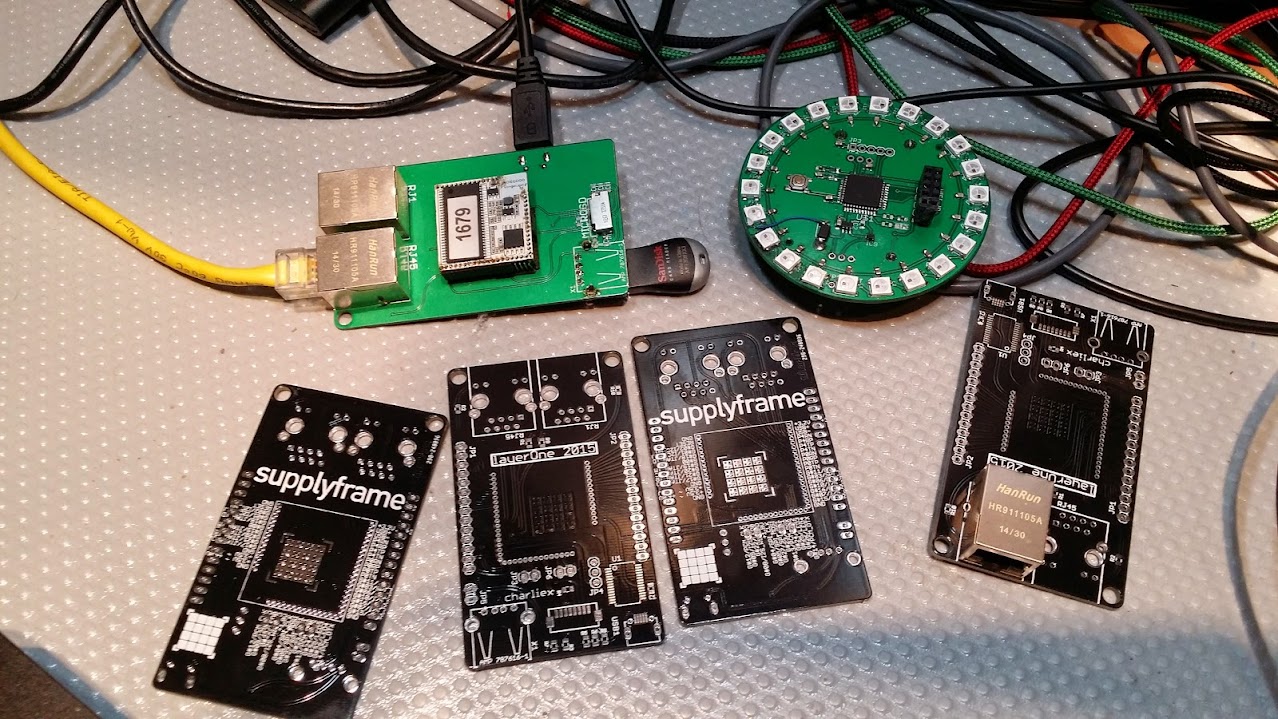
added the now infamous ft232rl to the board, the interesting thing is the badge has the right tool set to reset the usb vid/pid on a counterfeit chip, but here's hoping i get real ones.
i left off some of the copper around the antenna but i doubt it'll do much of anything, i'm just curious. most of the breakouts are done, sd holders are in, waiting on usb micros to arrive, also wired up the phy eth1 leds.
all that is left is to check, add artwork and teardrop it, well at least all that is left before sending to PCB house. i didn't break out a couple of the pins, due to space, but we'll see, i'm sure if i don't i will regret it.
tent the vias, teardrops, check power classes, watch for crazy overlapped traces, hole sizes, miter the board corners, check the silks etc. we have a check list we always forget to check!
-
fixed the drill settings in eagle 7.2
04/16/2015 at 06:26 • 0 commentswhen i cut out a board last month or so, the drills were crazeeeee , anyway figured it out and i
generated a new CAM file for ITead, this is only needed for Eagle 7.2
https://www.dropbox.com/s/8l54gfov1p0xfk3/ITEADstudio_CAM%20for%20Eagle7.2.cam?dl=0
basically change Excellon to Excellon_24, I haven't verified it yet since i'm just getting ready to send in the gerbers. But i emailed it to them as well.
-
setting up the vocore source code and changes etc.
04/13/2015 at 20:09 • 1 commentThis would be the goto page for the setup of the badge (hopefully)
clone out of git
refer to this for complete instructions http://wiki.openwrt.org/doc/howto/buildroot.exigence on setting up openwrt. on ubuntu 14.10 i needed gawk as well
sudo apt-get update
sudo apt-get install git-core build-essential libssl-dev ncurses-dev unzip subversion mercurial
ubuntu 14.x, the feed update will potentially warn you about a missing gnu awk
sudo apt-get install gawkgit clone git://git.openwrt.org/openwrtCloning into 'openwrt'...now head into the openwrt folder and setup the default config.
menuconfig setup
if you don't want luci, skip the luci parts. if luci fails, check for the awk version.
cd openwrt
./scripts/feeds update -a
./scripts/feeds install luci
./scripts/feeds install -a -p luci
make defconfig
make prereq
make menuconfig
i'm using things like fuse, usb support and luci, haven't really fleshed this out yet.
(Target System: Ralink RT288x/RT3xxx, Subtarget: RT3x5x/RT5350, Target Profile: VoCore)
kernel/usb support/kmod-usb-storage *
kernel/usb support/kmod-usb-storage-extras M
(fuse isn't needed, its for me)
block devices kmod-scsi-core *
filesystems kmod-fs-ext4 *
filesystems kmod-fuse M
input modules kmod-hid *
usb-support kmod-usb-hid *
libraries/filesystem/libext2fs *
libraries/filesystem/libfuse M
luci/collections/luci(new) *
luci/modules/luci-mod-admin-full *
utlities/filesystem/e2fsprogs M
utilities/disk/fdisk M (optional can opkg'd)
Read some of the things below about configuring the root fs, and wifi setup etc before building
building it, or make world
make -j 9-j N number of threads (approx number of cores, adjust for machine)
V=s verbose, for debugging make, if it errors out. usually a dirclean and rebuild fixes build errors ( after the first successful one)
now wait a really long time, go read http://www.hackaday.com for a bit or something...
If the build finishes the firmware will be in the bin/ramips folder the openwrt-ramips-rt305x-vocore-squashfs-sysupgrade.bin file
for me on a virgin ubuntu install it failed on the first make, and when i re-ran it with V=s to see why, it compiled ok...
writing firmware
mtp -r writeopenwrt-ramips-rt305x-vocore-squashfs-sysupgrade.bin
firmwarealternative way, which has been working for me for a few months and doesn't reset anything to stock except the password.
scp binary to ram/tmpfs cannot be flash!, sometimes the wifi drops before it is able to flush the stdout, so doesn't always show the end, should be less than 60 seconds. I use winscp with sftp mode on windows.
sysupgrade -v /tmp/openwrt-ramips-rt305x-vocore-squashfs-sysupgrade.binSaving config files... etc/config/dhcp etc/config/dropbear etc/config/firewall etc/config/luci etc/config/network etc/config/openvpn etc/config/system etc/config/ucitrack etc/config/uhttpd etc/config/wireless etc/dropbear/dropbear_dss_host_key etc/dropbear/dropbear_rsa_host_key etc/group etc/hosts etc/inittab etc/passwd etc/profile etc/rc.local etc/shadow etc/shells etc/sysctl.conf killall: watchdog: no process killed Sending TERM to remaining processes ... ubusd askfirst logd netifd odhcpd ntpd dnsmasq Sending KILL to remaining processes ... askfirst Switching to ramdisk... Performing system upgrade... Unlocking firmware ... Writing from to firmware ... Appending jffs2 data from /tmp/sysupgrade.tgz to firmware... Writing from to firmware ... Upgrade completed Rebooting system...
I've seen it not print out the last two lines, still seemed to work ok, the kernel just isn't flushing the print buffer.
first time password
change first password with telnet http://wiki.openwrt.org/doc/howto/firstlogin
usb setup http://wiki.openwrt.org/doc/howto/usb.storage
turn off firewall , security conference , remember?
(ssh to vocore)
/etc/init.d/firewall stopopkg update
new config for opkg if using a version before april 2015
src/gz base http://downloads.openwrt.org/snapshots/trunk/ramips/generic/packages/base
src/gz luci http://downloads.openwrt.org/snapshots/trunk/ramips/generic/packages/luci
src/gz management http://downloads.openwrt.org/snapshots/trunk/ramips/generic/packages/management
src/gz packages http://downloads.openwrt.org/snapshots/trunk/ramips/generic/packages/packages
src/gz routing http://downloads.openwrt.org/snapshots/trunk/ramips/generic/packages/routing
dest root /
dest ram /tmp
lists_dir ext /var/opkg-lists
option overlay_root /overlay
https://downloads.openwrt.org/snapshots/trunk/ramips//packages/packages/
Examples
opkg install fdisk
opkg install nmap (uses lipcap/libstdcpp )
opkg install wavemon kismet-clientNote: will switch WLAN to promiscuous and kick you off if in client mode
opkg install kismet-server
format usb/sd
mkfs.ext3 /dev/sd?
add dns in client mode
add nameserver 8.8.8.8 to resolve.conf
move root to a USB stick
install usb, don't mount, find if /sda etc
mkfs.ext4 dev/sda1
mount /dev/sda1 /mnt
mkdir /tmp/cproot
mount --bind / /tmp/cproot
tar -C /tmp/cproot -cvf - . | tar -C /mnt -xvf -
sync ; umount /mnt
umount /tmp/cproot
now edit /etc/config/fstab
config mount
option target /
option device /dev/sda1
option fstype ext4
option options rw,sync
option enabled 1
option enabled_fsck 0
now reboot and check
df -hFilesystem Size Used Available Use% Mounted on rootfs 3.6G 21.4M 3.4G 1% / /dev/root 3.0M 3.0M 0 100% /rom tmpfs 14.3M 64.0K 14.3M 0% /tmp /dev/sda1 3.6G 21.4M 3.4G 1% / tmpfs 512.0K 0 512.0K 0% /dev
wlan
to use both wlan and eth0 interfaces separately, split the bridge in luci and create a new interface using vlan eth0.1
edit to enable wifi by default
package/kernel/mac80211/files/lib/wifi/mac80211.sh
and comment out
option disabled 1
to
#option disabled 1
same place to change SSID from OpenWrt to VoCore etc as well, though note via sysupgrade it remembers the old settings, so the ones compiled into the firmware only get updated on a full reset.
add packages to base build
./scripts/feed install zsh
(example) zsh from packages website doesn't work, has to be built
add luci
./scripts/feeds update packages luci
./scripts/feeds install -a -p lucinotes
currently trying to add this to it, though i haven't done much
-
Second Badge Prototype, LayerOne is closing in fast
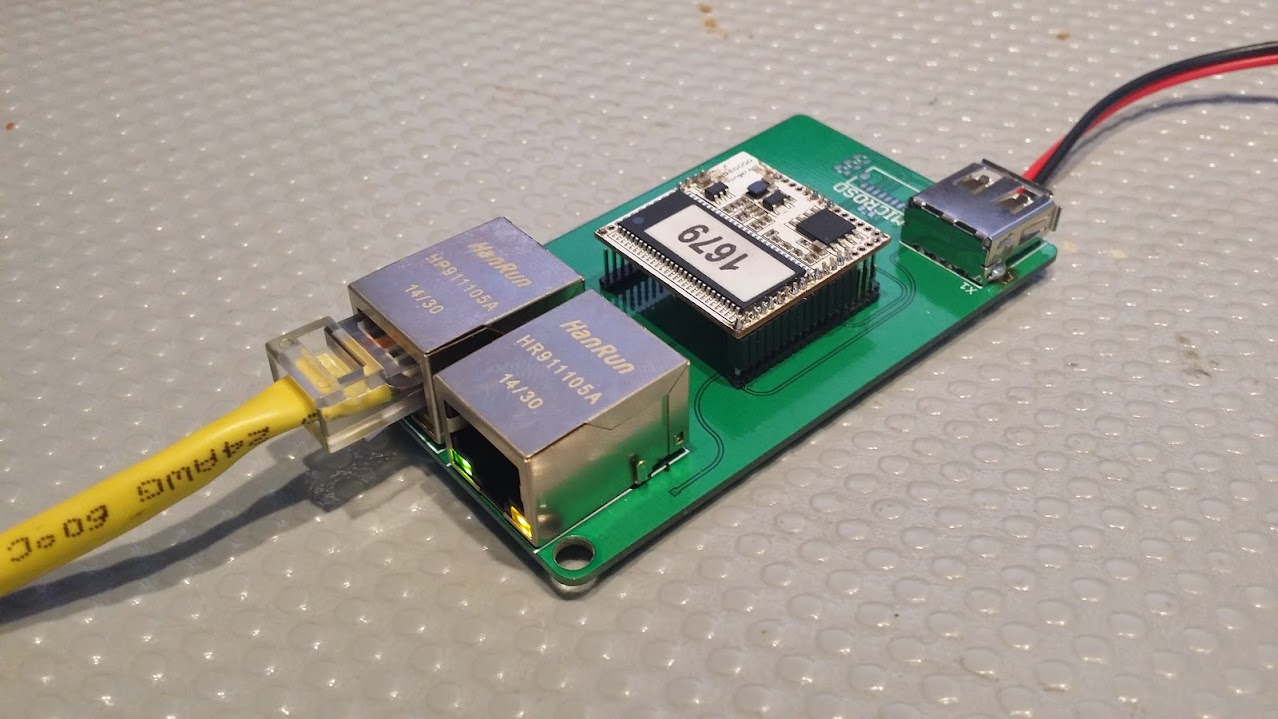
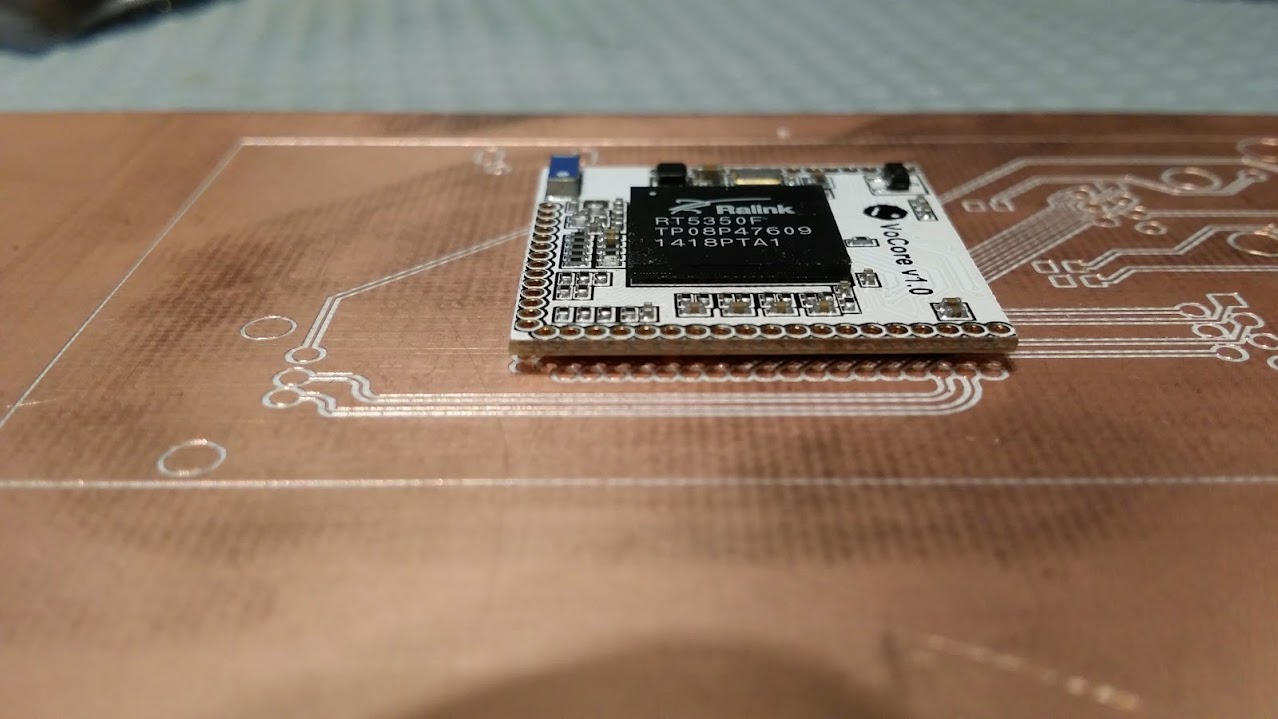
04/12/2015 at 17:09 • 0 commentsThe VoCore based badge PCB's arrived, and i built one yesterday.
![]()
worked except for the usb which was mirrored! i looked at the symbol in eagle and it was a box with USB written so edited that part with vcc/d-/d+/gnd so it'd be spotted (con-amp.lbr) booted up fine after that. If usb is backwards you'll see >3V on the d+/d- lines which at first we thought short or bad connector etc etc. Luckily its a thru hole part so we just installed it on the other side of the board and all good.
I cut down a 10mmx10mm8mm heatsink on the bandsaw and that seemed to work fine too.
Updated to the latest OpenWRT build and flashed it with sysupgrade.
sysupgrade -v /tmp/openwrt-ramips-rt305x-vocore-squashfs-sysupgrade.bin
luci didn't install for some reason i haven't looked into yet, even though i have it in the feed so
opkg update
opkg install luciafter ssh/telneting into the vocore.
So far so good. Should be an interesting build for people, and for us an easy build so we can actually go to the conference this year. Wifi + Two ethernet ports ( default same port)
The other badge we've decided to drop the M74VHC1GT125DF2G in favour of a different 3v>5v converter, kris built three boards and one worked, the other two the fault lay in that chip, it is tiny and its a challenge to hand solder. I will make the pads a tad bigger for handwork but kris is an expert in soldering and if she had issues, the attendees definitely will.
Haven't decided what to use instead yet, and i'll do it in parallel to the 125 since last minute board changes are never fun.
The PSOC4 is amazing, when i was programming the chips with the 3.3v programmer the leds all started working (even blue) which is crazy, they were about 2.85V!. The PSOC4 can go to down to about 1.5V before it gives up. for a 5.5V top limit, it's hard to beat.
Also we tested not having cap's per LED since its 22 extra caps to solder in, everything we've ever seen has that cap but it worked fine and checking with the scope the power and signal were just fine. the 5V to 3.3V VREG just needed a 450nF cap to smooth out the signal to the LEDs.
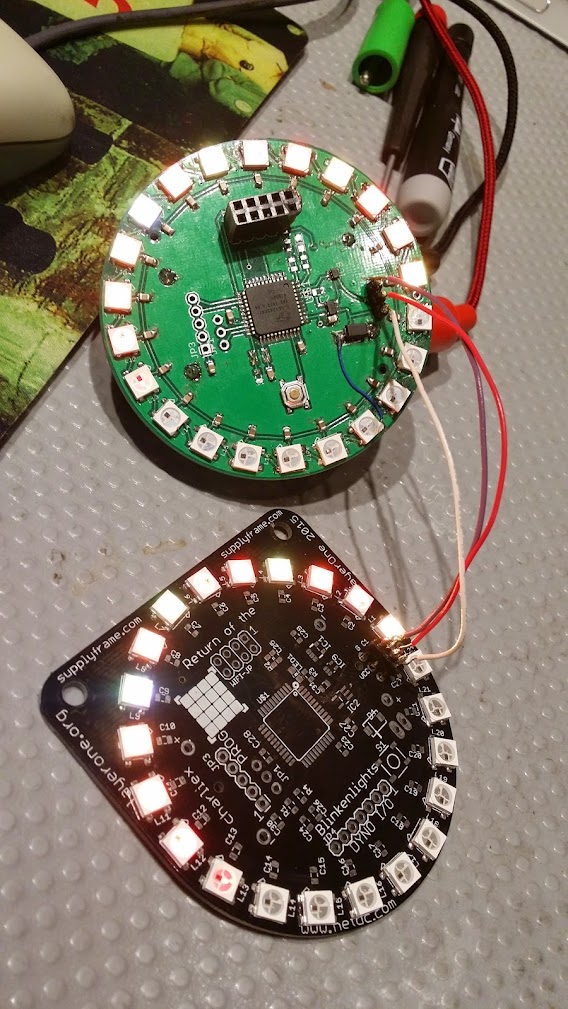
We also did a test of the daisy chaining of the boards, and that worked. We've built a number of LED boards with daisy chain capabilities but none of them we've actually tried it on.
Just need to add sponsor artwork (thanks HAD!) and get the boards in for final manufacturing
We're also doing a hebocon at L1 next month.
![]()
Ordered an additional 200 CR123A batteries, 300 battery holders, microsd card holders, mini usb connectors and heatsinks. Just need to track down another logic level converter that is fast enough, not too big, won't break the budge and is easier to solder.
I'm using the same jumper + two pins for the on/off switch again, and there is a diode to protect against improper battery insertion CR123A's are no joke.
The ESP8266 works, and they can talk to each other and the other badge, not sure where we'll go with that. I'm usually so busy getting the hardware ready i don't get time to code up awesome stuff for people to hack on. But I put all the basics in there, light patterns and code to talk to the wifi , the other is busybox+openwrt.
This badge has more processing power than last years , but only in some ways. Since the last had cpu+fpga+asic. Much much less parts this time ( since we're using a prebuilt cpu module )
The Ws2812b's have some interesting failures, usually an internal wire just comes loose and you can often put a little pressure in the front and it'll pop on but can only maybe be fixed by being super lucky and heating it, more likely it'll kill it so dump it. The other one is the data line gets shorted or something and it upsets the whole chain, so you get random colours on the other LEDs.
-
eagle stuff, derp stuff ,vocore
03/04/2015 at 02:57 • 0 commentsI've been recreating the vocore dock and vocore schematic since as in a lot of "open source" projects people often only give gerbers and pdf schematics, i realise why that is , but if your product is meant to interface to something else its nice to have the board available in a format you can actually use in a PCB layout tool. they're on my github and the NSL 032 svn. I Also mapped out the BGA part , since i couldnt find a bsdl for the rt5350f so did it the hard way.
anyway i started up the second badge, can only have two ethernets because the pins to the BGA aren't broken out, so that's a shame, also wondering why the phy ether0 leds aren't on the led's from the rt5350 pins.
did a test cutout on single sided and then after it was done, thought hmm i forgot to do the drills, then for some reason eagle/my pcb mills software is no longer importing the drills properly so i just said screw it and made sure they lined up, i'll put the board back when i figure out what happened in the eagle -> gerber -> mill software ... only takes a few minutes to cut outy a board , and i have these really nice single sided pcb blanks from all electronics.
![]()
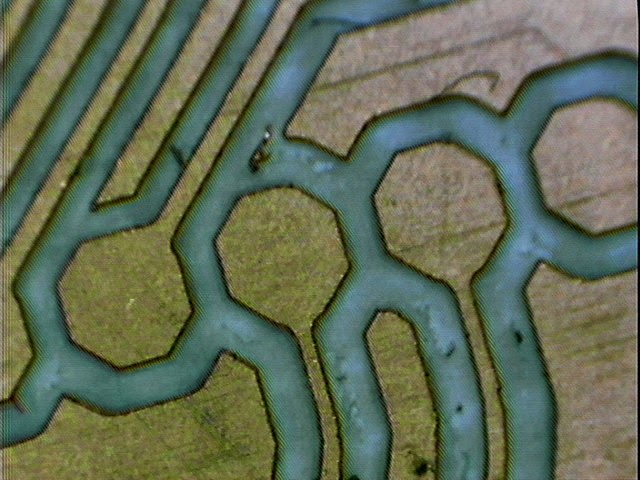
for entirely no reason, some lowres closeup pictures of the board. sans holes,, which would be entirely useful right now.
![]()
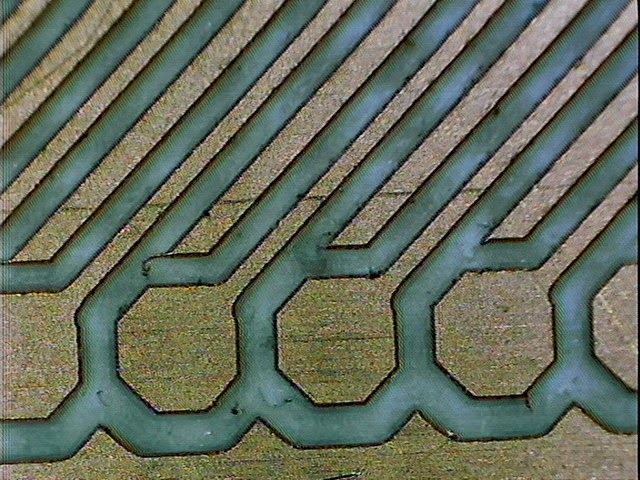
![]()
ok so once i figure out whats going wrong in the excellon i'll drill these out, and mount the board with the 1.27mm headers. (note to self add teardrops )
the plan is two ethernet ports, wifi , usb host, uart ( with pads for a dare i say it, ft232r ) and break out the other pins and we're cooking with gas,,
-
ESP8266 added and working
02/08/2015 at 01:38 • 0 commentschanged the pin since the original Xmas lights shared an SWD pin, turned on the WiFi chatter in the psoc code and streamed UDP traffic to the board. works great.!
The esp8266 as i noted before is the wrong orientation (derp), however you can attach it to the back instead.
![]()
so just one last step in figuring out the best way to handle the two 3V CR123As and we should be done for this version of it.
-
Eagle notes
02/07/2015 at 23:58 • 0 commentsI've been converting more of the PADS layout to eagle, and one of the things that happened was that the layers reversed, i wanted the top side on layer 1, Surprisingly easy to do i edited the XML and changed all layer="1" to layer="16" and layer="16" to layer="1" and that was it. there might be an easier way to do it, but probably not as fast.
exported all the parts to a LBR with exp-project-lbr.ulp and replaced the existing ones in the BRD, next step would be adding the schematic for those parts. if only people would release both files for the EDA package, and not as seems typical a PDF.
Of course one day CadSoft will add a flip view to the board, right ?
-
VoCore side
02/07/2015 at 20:09 • 0 commentsWe decided to go with the VoCore as the base. Olimex had promised a board by January to compare, but they just stopped responding to emails, and its February so time ran out, i've been using the VoCore for a few months now.
I converted the PAD boards to Eagle and put them in github.
 \
\