Things you need
- 2 Arduinos - In this case, I am using DFRduino Uno Rev3 and DFRobot Mega2560
- Jumper Wires
Software serial and UART between Arduinos
The serial port, professionally called Universal Asynchronous Receiver/Transmitter (UART) communication, is generally used to program and debug the Arduino via the USB port. There are multiple sensors and systems that use UART as the main communication method, and sometimes we need to discuss between two Arduinos to share information, workload, and so on.
However, most Arduinos only have one serial port, which is used by the USB connection. Serial communication can only happen between two devices. What can we do now? With a bit of luck, we'll have an Arduino Mega or similar that has up to four serial ports, but if we don't, there still is a solution. A special library has been written that simulates an UART port on other digital pins. There are a few drawbacks, but it generally works.
How to do it
Follow steps to connect two Arduinos using software serial:
Assuming we use pins 8 and pin 9 for RX and TX on both Arduinos, connect pin8 on one Arduino with pin 9 on the other one, and pin 9 on the first Arduino to pin 8 on the second one.
- Connect the GND of both Arduinos together.
- If we don't power up both Arduinos via USB, then we need to power up at least one and connect 5V on each together.

Code
The master Arduino will receive commands from the computer and write them over the soft serial. Take a look at the Controlling the Arduino over serial project now.
// Include the Software Serial library
#include <SoftwareSerial.h> // Define a Software Serial object and the used pins
SoftwareSerial softSerial(8, 9);  // RX, TX
void setup()  {
    Serial.begin(9600);   softSerial.begin(9600);
}

void loop()  {
    // Check for received characters from the computer
    if (Serial.available())  {
    // Write what is received to the soft serial
    softSerial.write(Serial.read());   }
}
And here is the slave code that interprets the characters sent from the master. If the character is 'a', it will start the built-in LED. If the character is 'x', it will stop it:
// Include the Software Serial library
#include <SoftwareSerial.h> // Define a Software Serial object and the used pins
SoftwareSerial softSerial(8, 9);
// LED Pin
int LED = 13;
void setup()  {
    softSerial.begin(9600);
    pinMode(LED, OUTPUT);
}
void loop()  { // Check if there is anything in the soft Serial Buffer
    if (softSerial.available())  {
    // Read one value from the soft serial buffer and store it in the variable com
    int com = softSerial.read();
    // Act according to the value received
    if (com == 'x')  {
    // Stop the LED
    digitalWrite(LED, LOW);
    }     else if (com == 'a')  {
          // Start the LED
          digitalWrite(LED, HIGH);
            }
       }
    }
How it works…
Software serial simulates a standard serial port on different digital pins on the Arduino. It is very handy in general; however, it is simulated, so it doesn't have dedicated hardware. This means it will take resources, particularly execution time and memory. Otherwise, it works just like a normal serial connection. All the functions present in the normal serial port are also present in software serial.
Code Breakdown
First, we will look in the master code, which takes characters received on the normal serial port and writes them to our simulated serial connection. In the beginning, we include the SoftwareSerial.h library:
<strong>#include <SoftwareSerial.h></strong>
Then, we need to declare a serial object. We do so using the following syntax:
<strong>SoftwareSerial softSerial(8, 9); </strong>//RX,TX
The serial connection will...
Read more »
 CanHobby.ca

 Mark VandeWettering
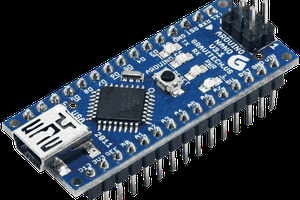
 ken.do
There is a problem in the I2C slave code which took us a while to understand. In the loop function, if statements you are checking for characters, when our x is an integer, please fix that!