 Johnny
-
1Step 1
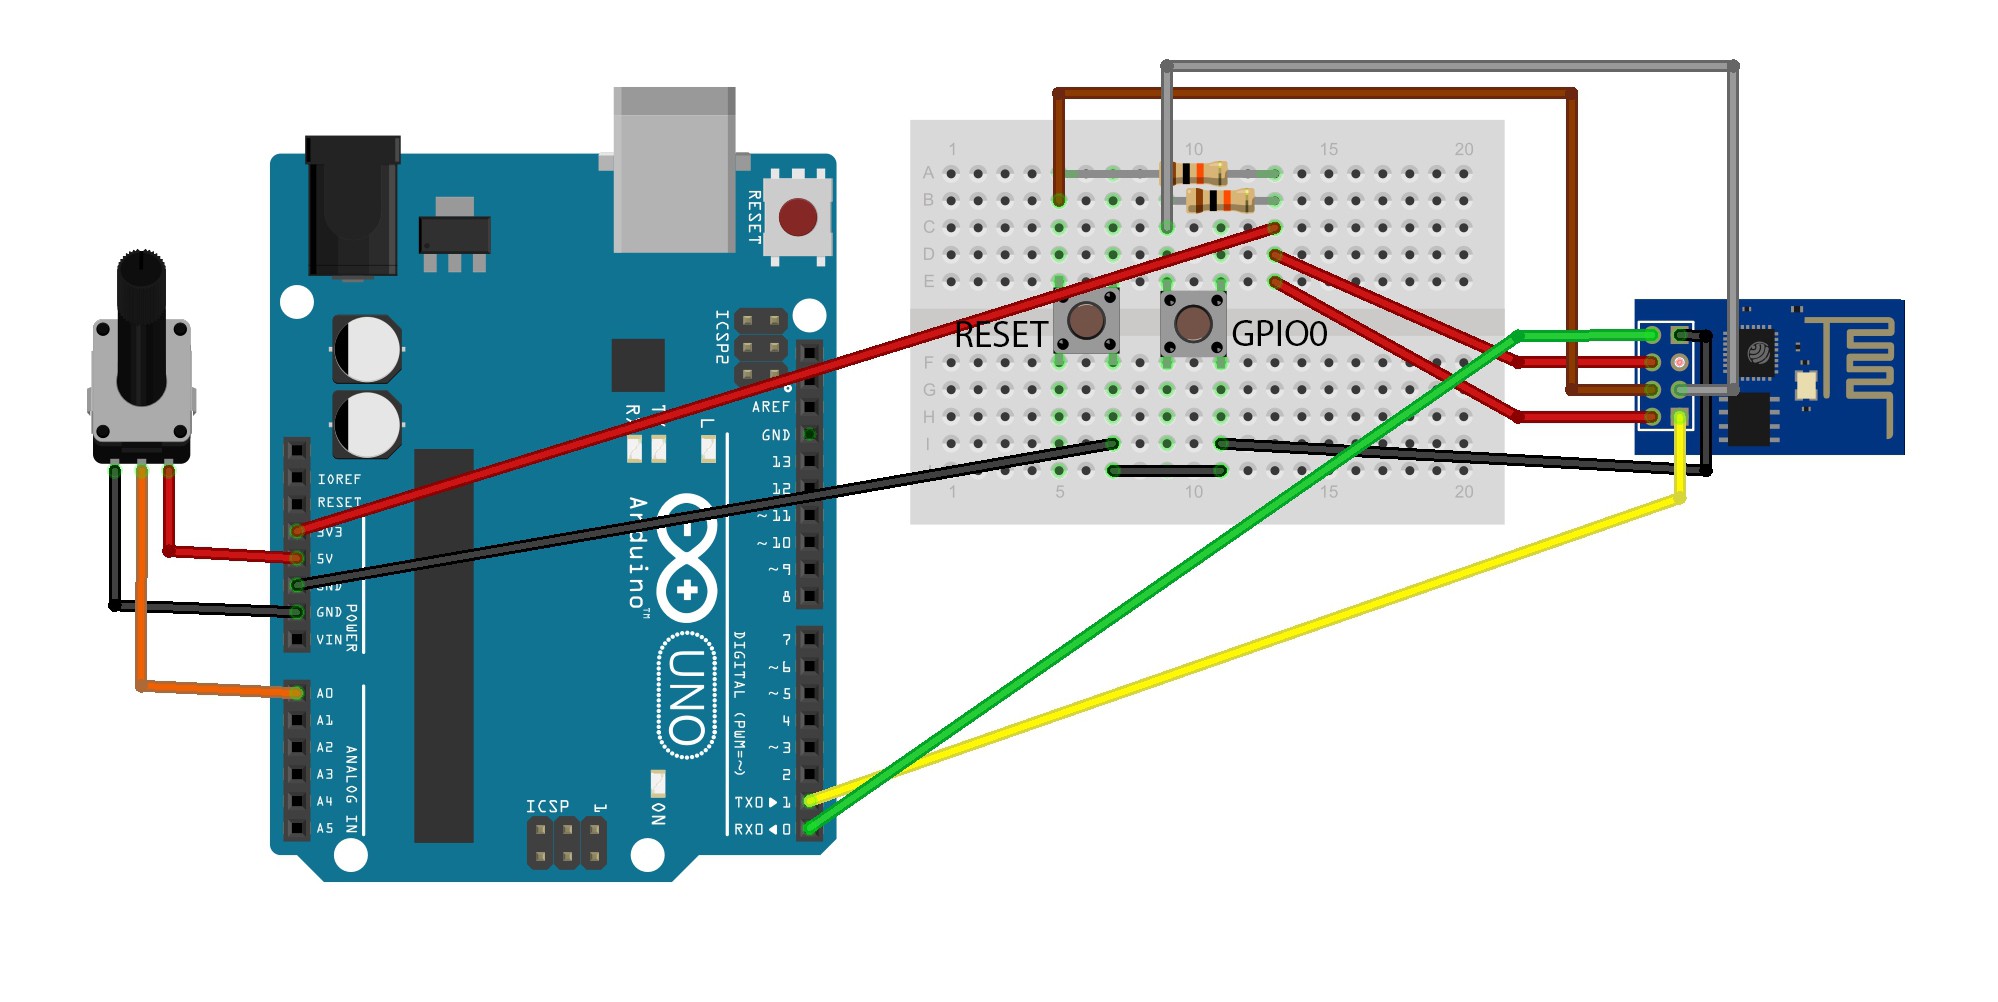
Connect your arduino Uno to the ESP8266 as followes:
![]()
-
2Step 2
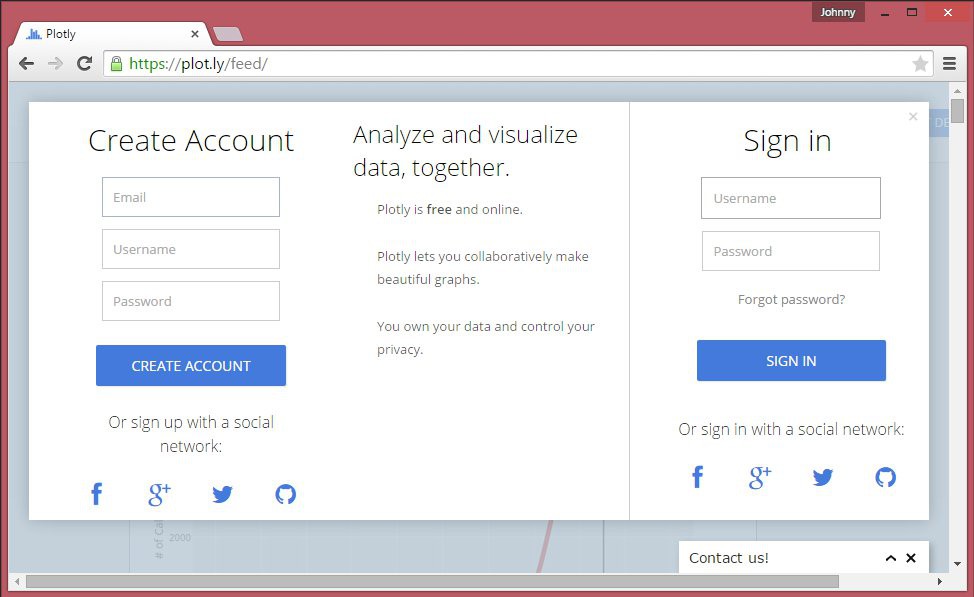
Visit the Plotly website and sign up. After that, go to your settings page, and generate a streaming token. Now write down your Username, API Key, and Token.
![]()
-
3Step 3
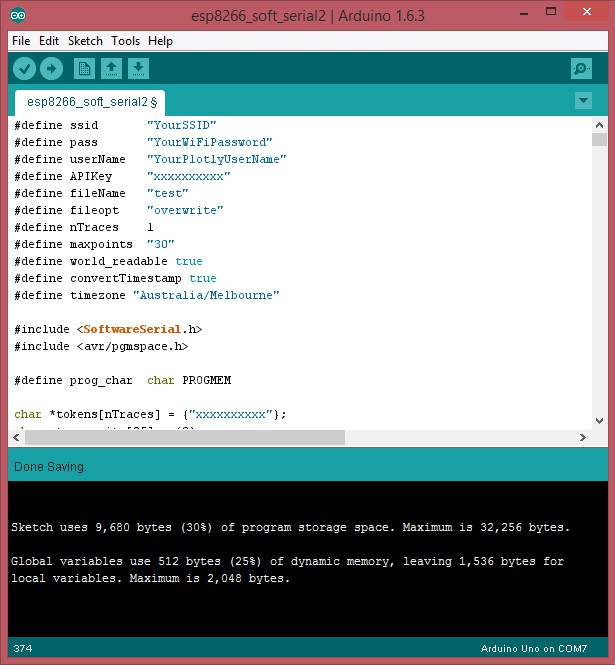
Open the Arduino IDE. Past in the code I have included in my project details section, add your own WiFi SSID and Password, plotly username, API key and token into the code and save.
![]()
-
4Step 4
Now in tools, select your board type as "Arduino Uno". Select the com port your Uno is on. and click the upload button (make sure the ESP8266 is disconnected to the arduino while uploading sketch).
-
5Step 5
Upload the 0018000902-AI03 firmware to the ESP8266, bin files can be found here. Use the ESP8266 Flasher or NodeMCU Flasher here. Make sure to put the ESP8266 into flash upload mode. This is usually done by holding GPIO0 low, when reseting the device (toggle RST pin LOW which is normally held at HIGH). Tutorials on doing this can be easily found online.
-
6Step 6
Once you have uploaded new sketches to the arduino, just make sure you reset both arduino and ESP8266 at the same time, this will ensure both are in sync. If power is disconnected and then applied to the uno (and the ESP8266 is powered from the Arduino UNO board), then this is not an issue.
plotly + Arduino + ESP8266
(Plotly has stopped support) A Wireless Real-time Data Logger/Grapher
Discussions
Become a Hackaday.io Member
Create an account to leave a comment. Already have an account? Log In.