 Daniel
While the first version of the enclosure did its job to demonstrate the feasibility of the project, there was clearly room for improvement.
Some requirements:
- The enclosure should be as water, weather and shock proof as possible
- The power source (USB power bank) should be housed together with the electronics
- No dangling wires; everything should look neat
- Quick access to the controller's USB port should be possible, as well as the charging port
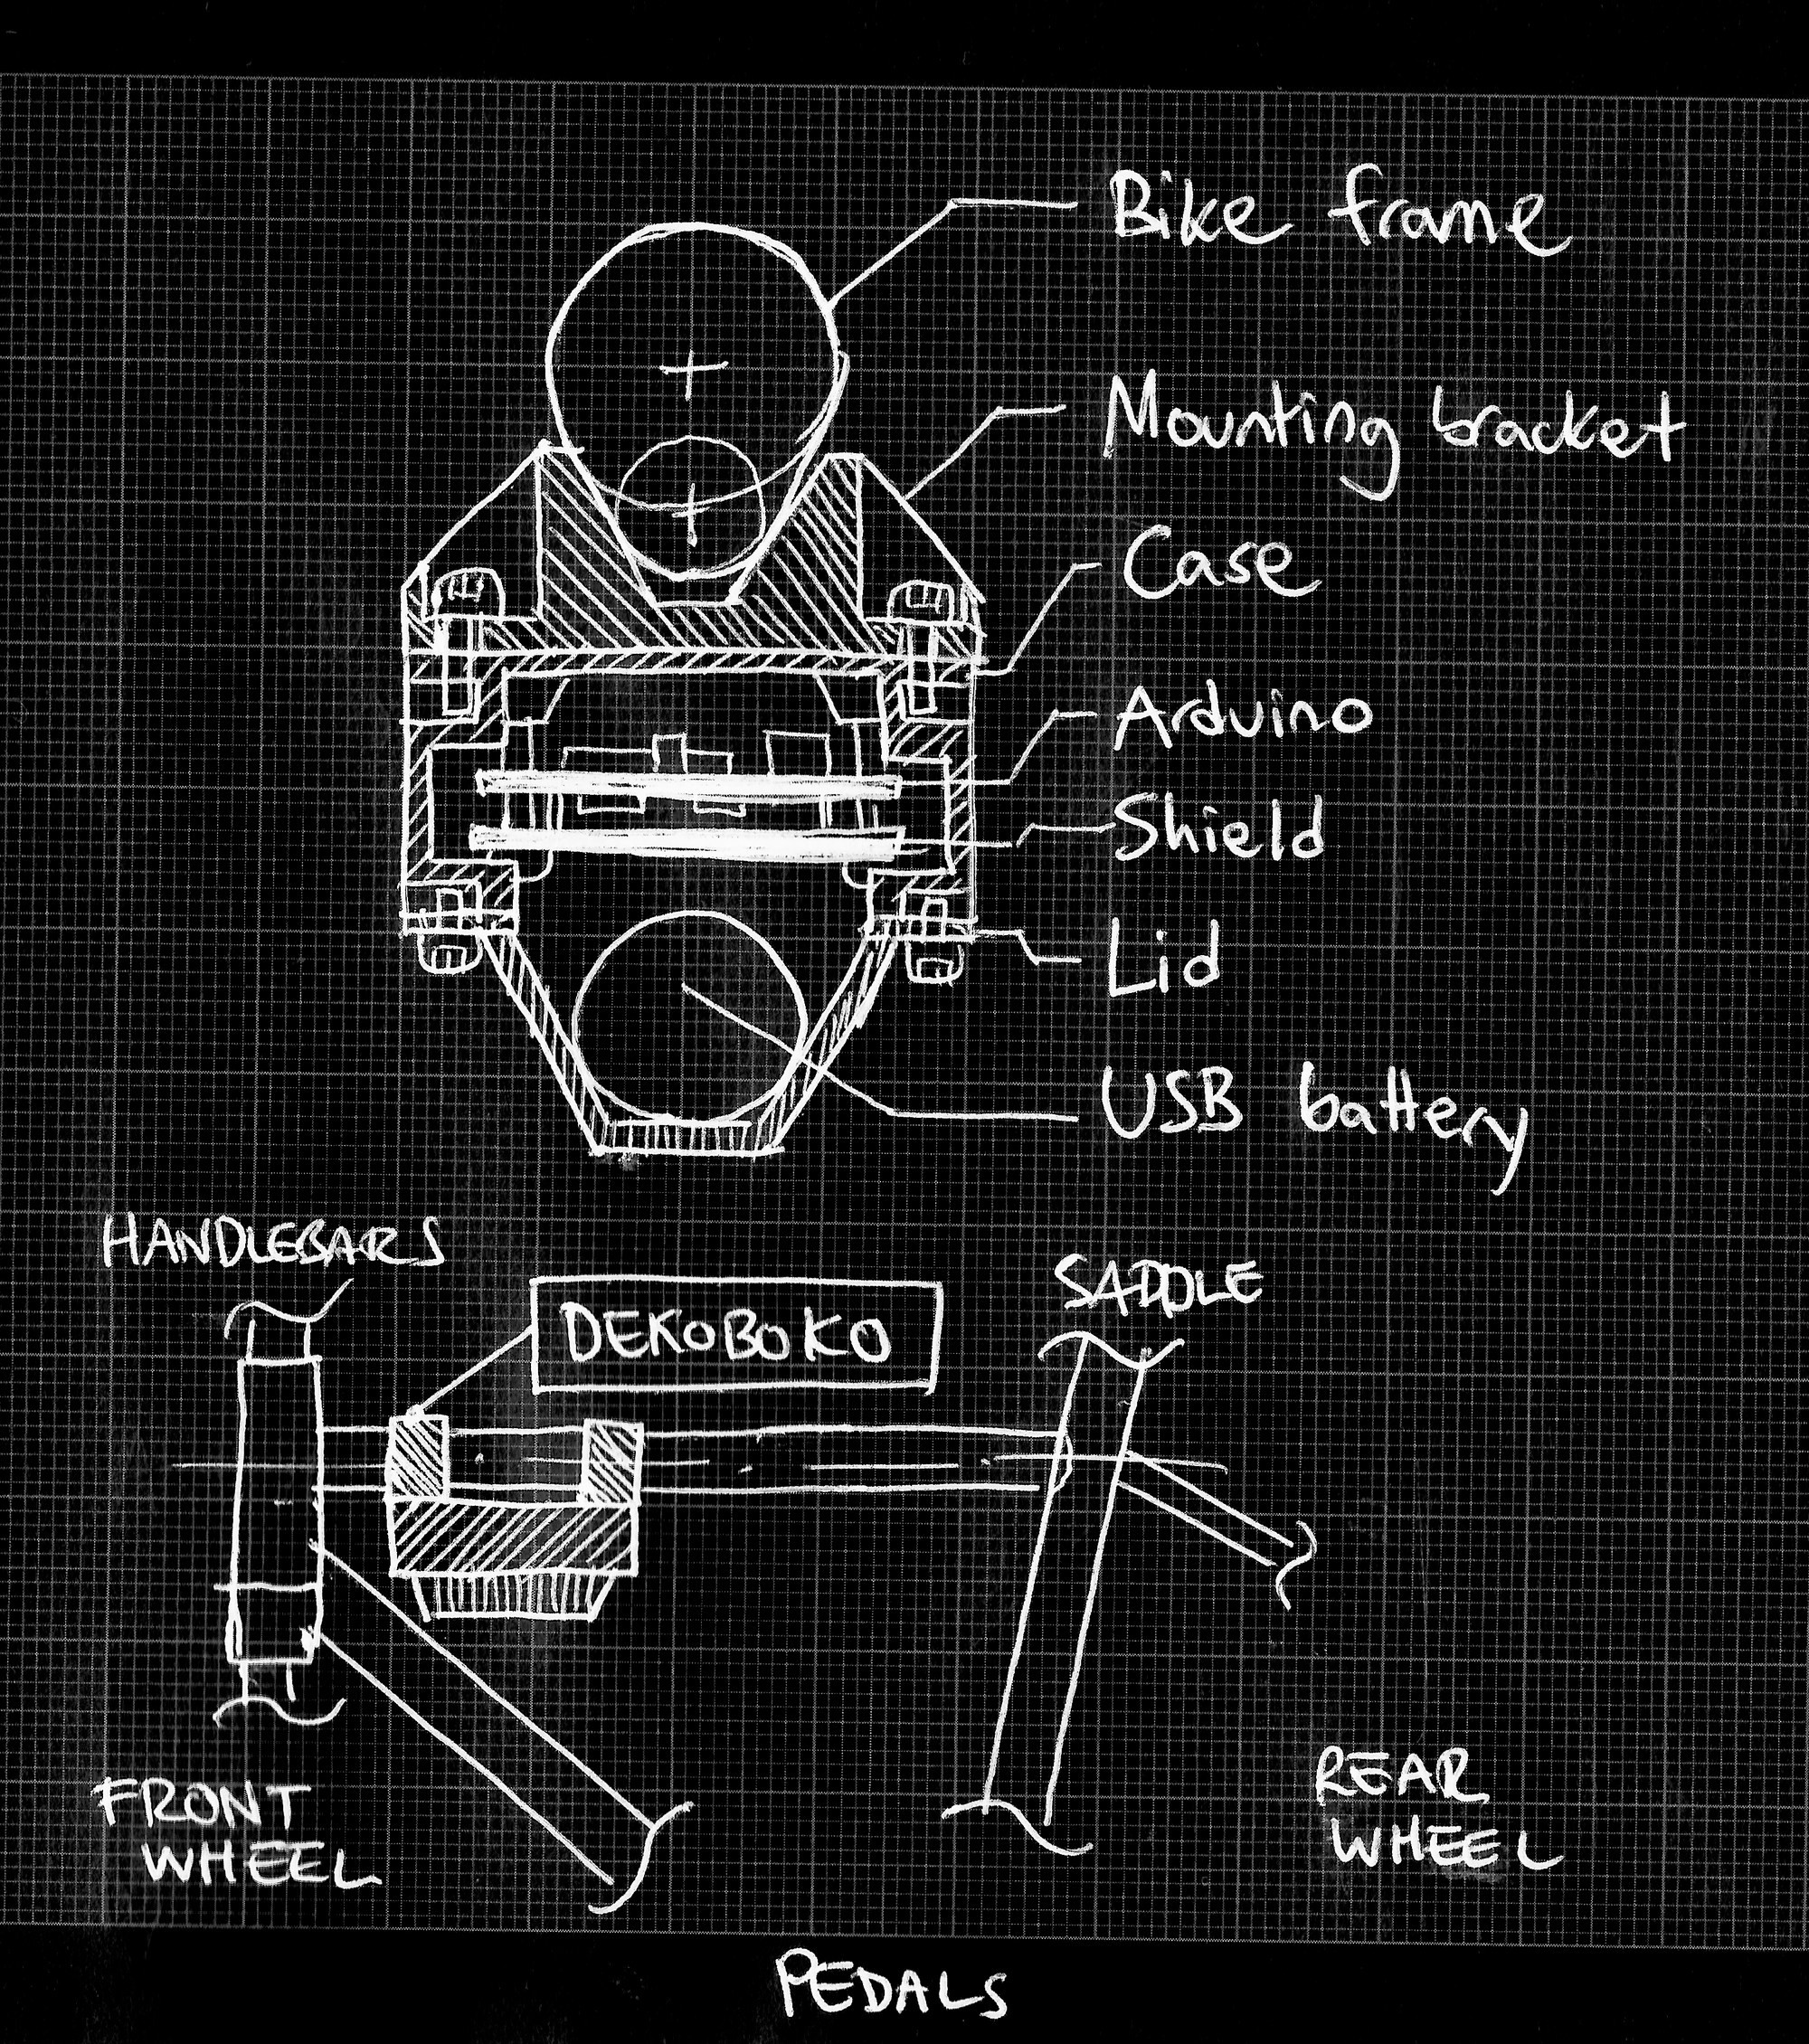
Initial sketch.
The mounting brackets are attached to the bike frame via zip-ties, which proved very reliable and robust during the hackathon. The case housing the electronics can be removed from the bike by releasing four screws, without having to remove the zip ties. Additionaly, a lid can be removed for quick servicing such as a firmware upgrade or for rechargint the USB battery pack.
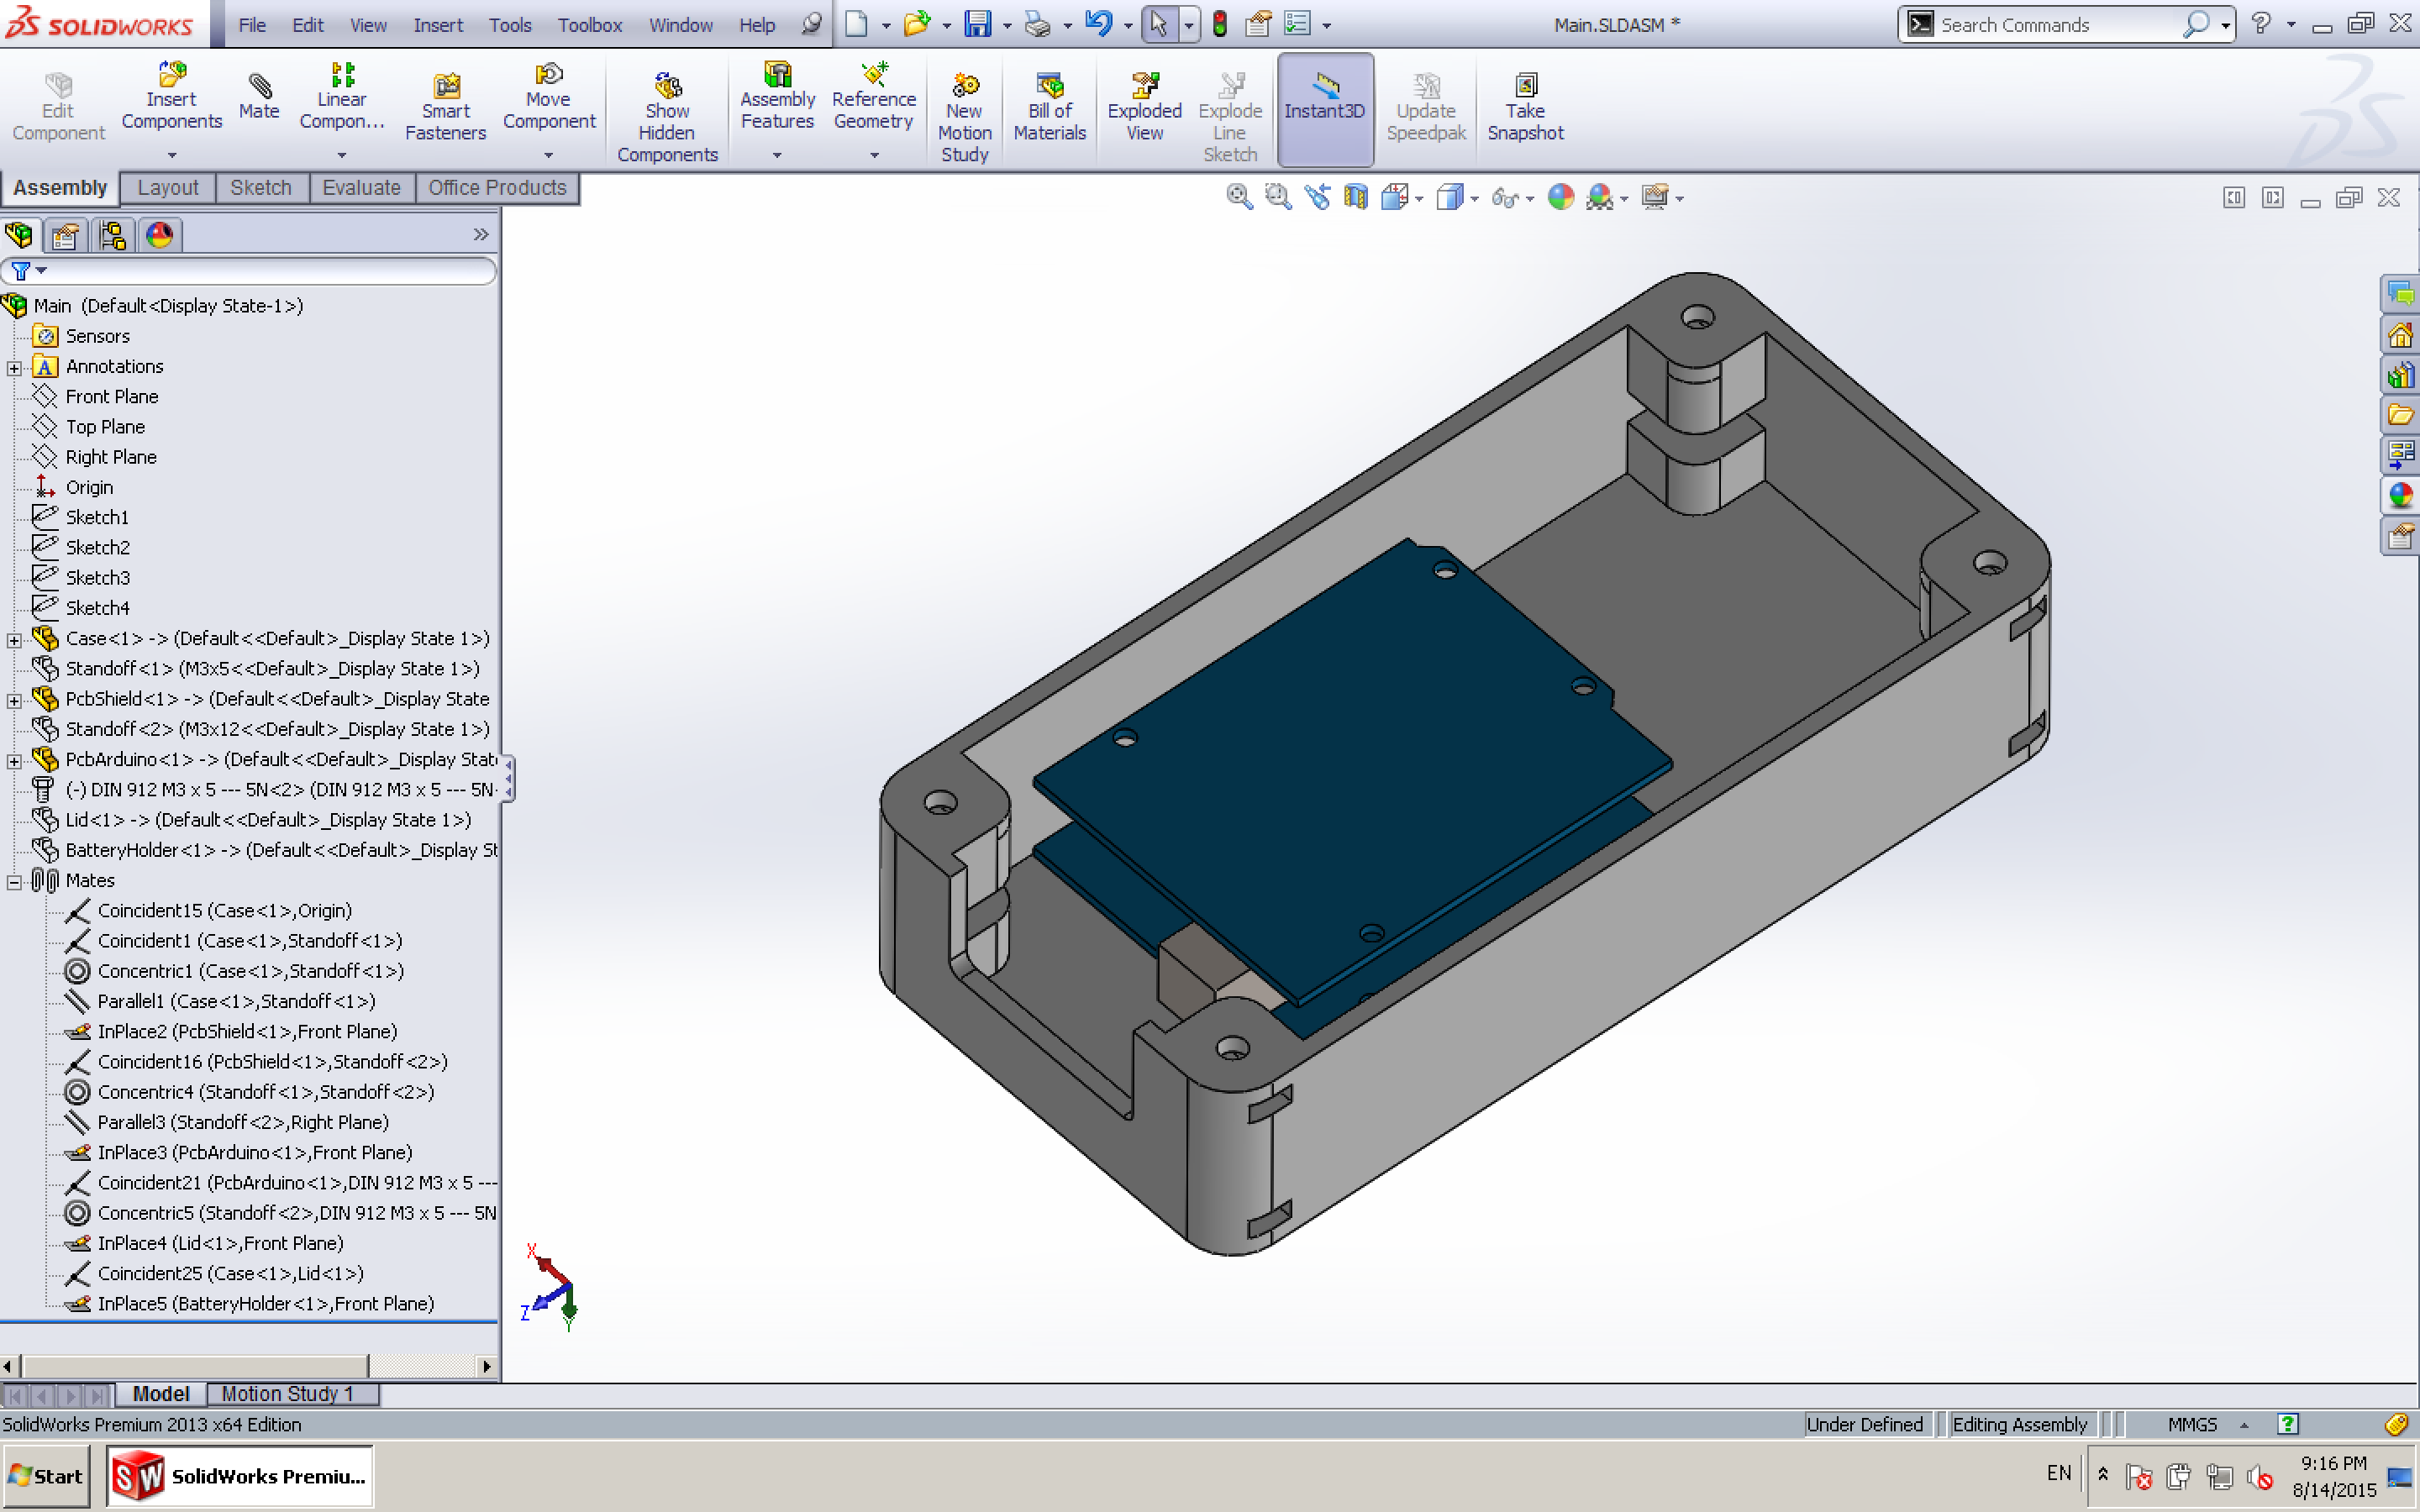
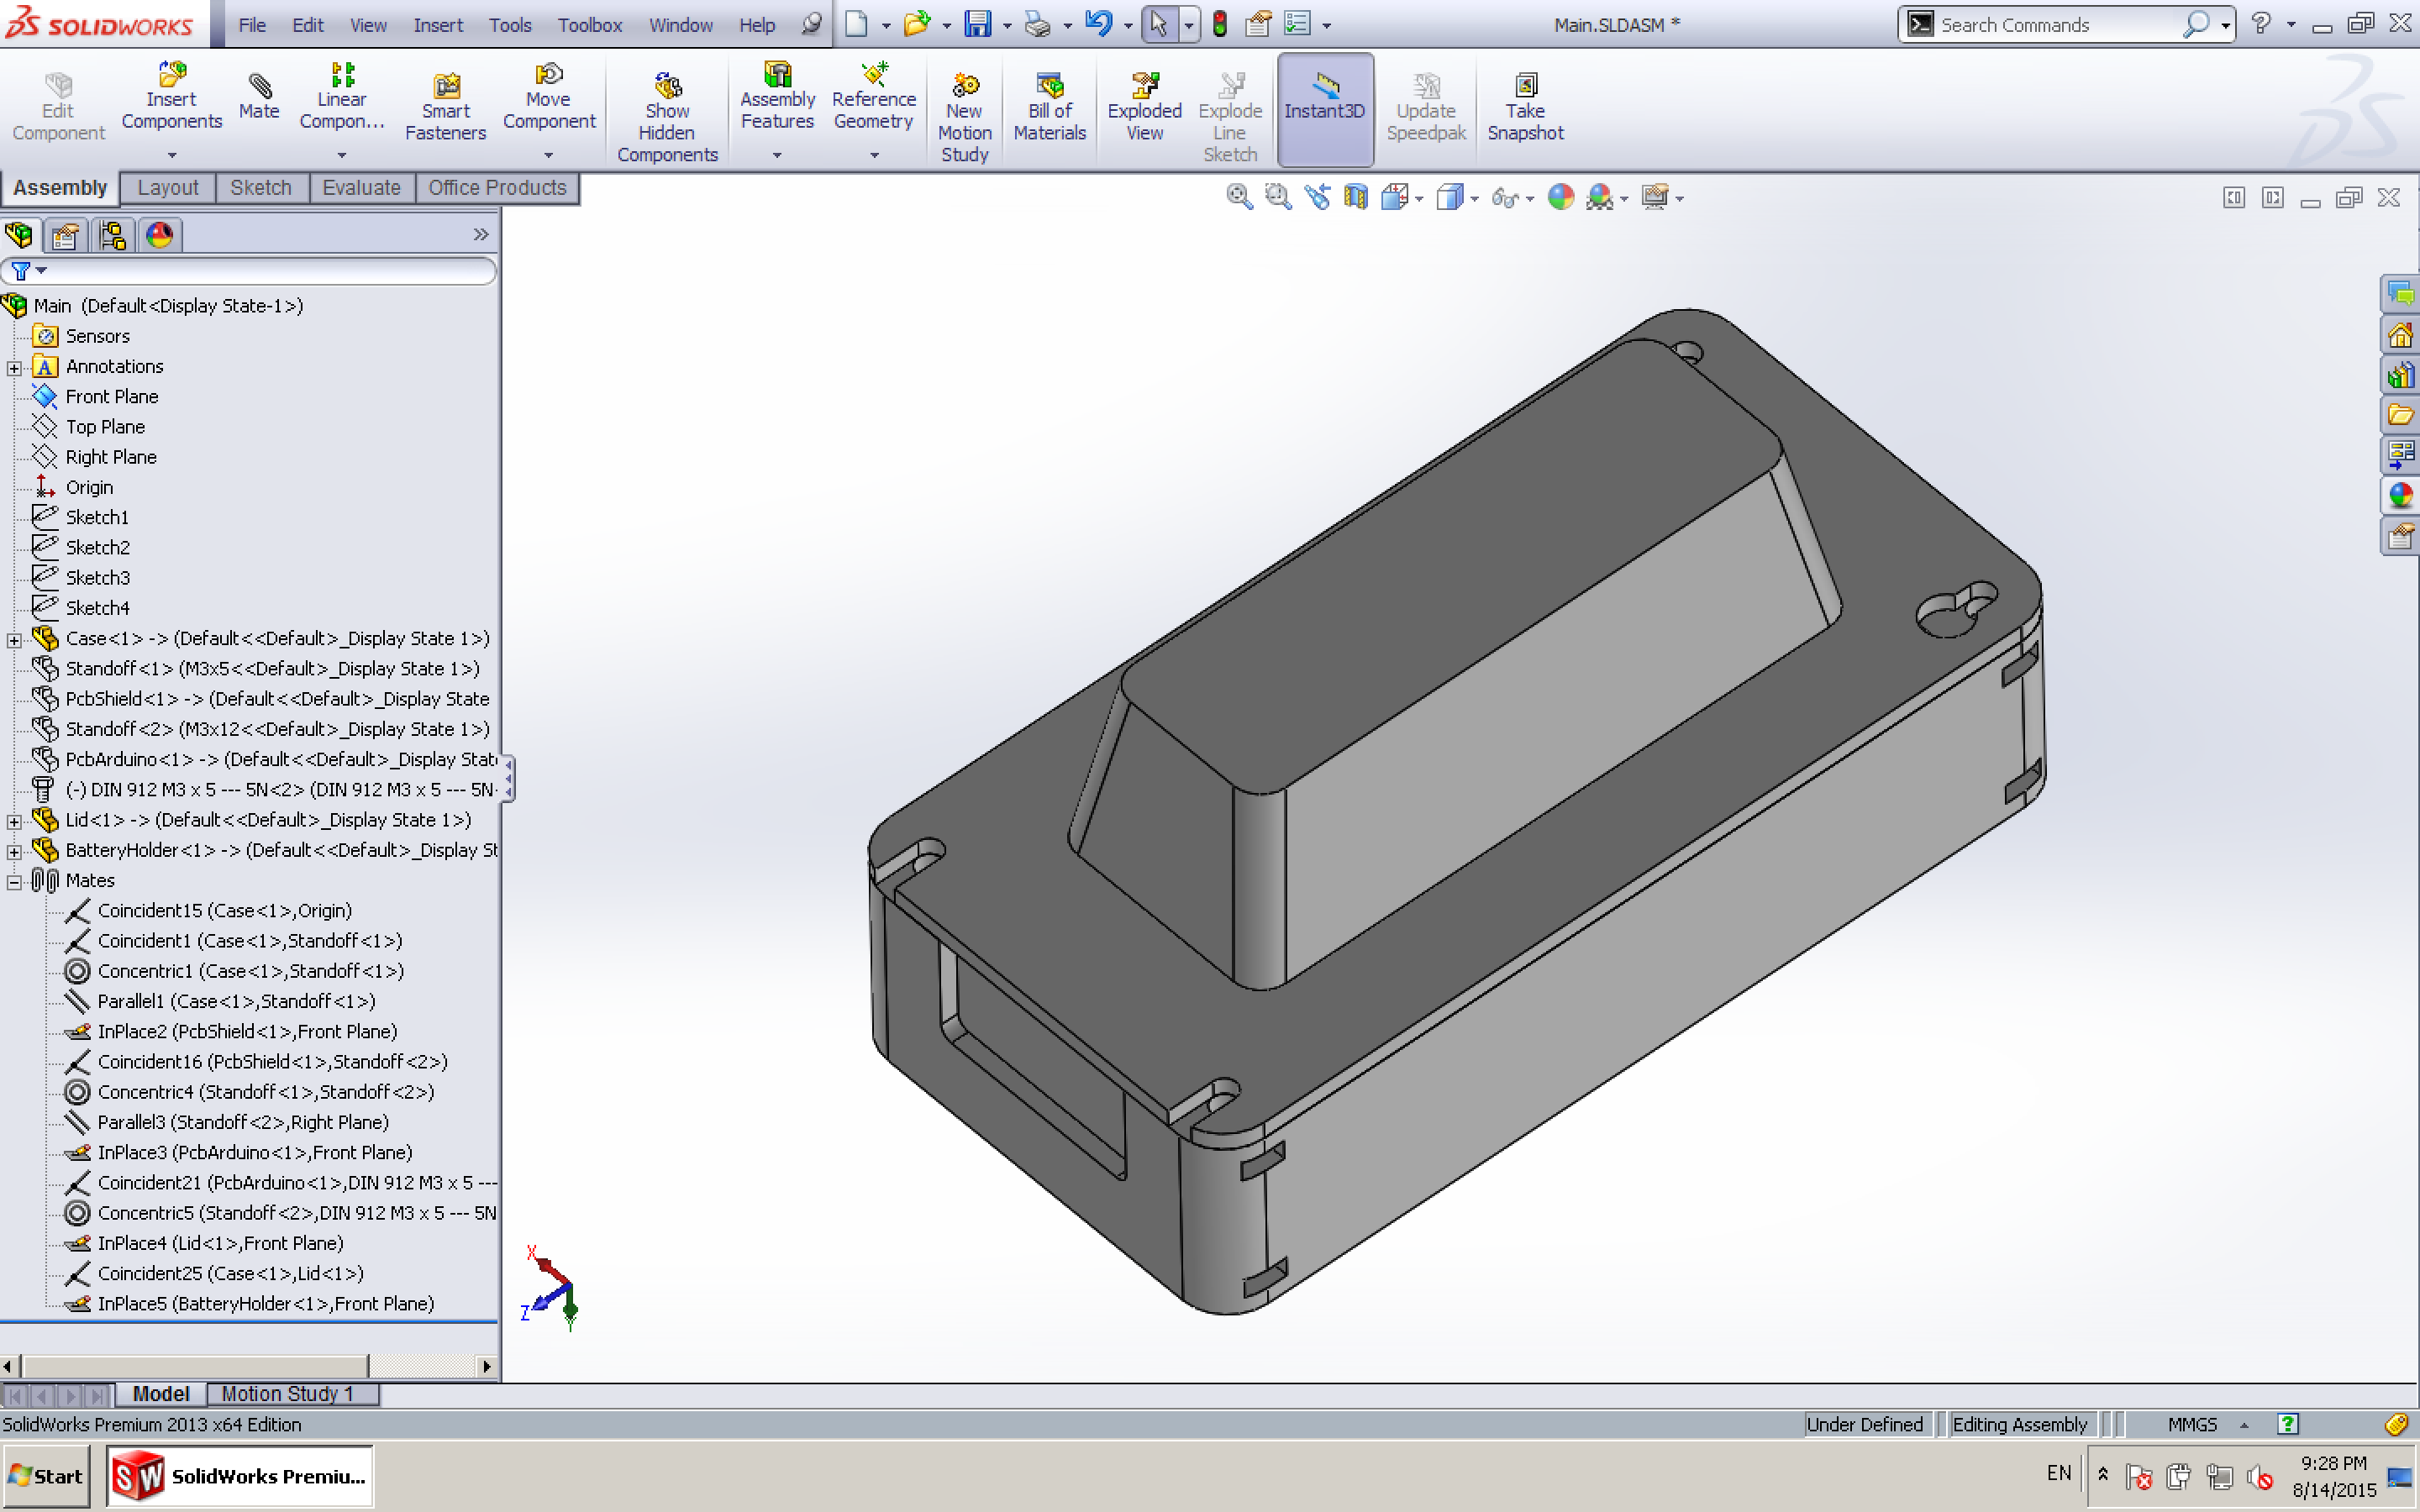
Here are some renderings of the new design, created to be 3D-printable, easy to assemble and adressing all the requirements mentioned above: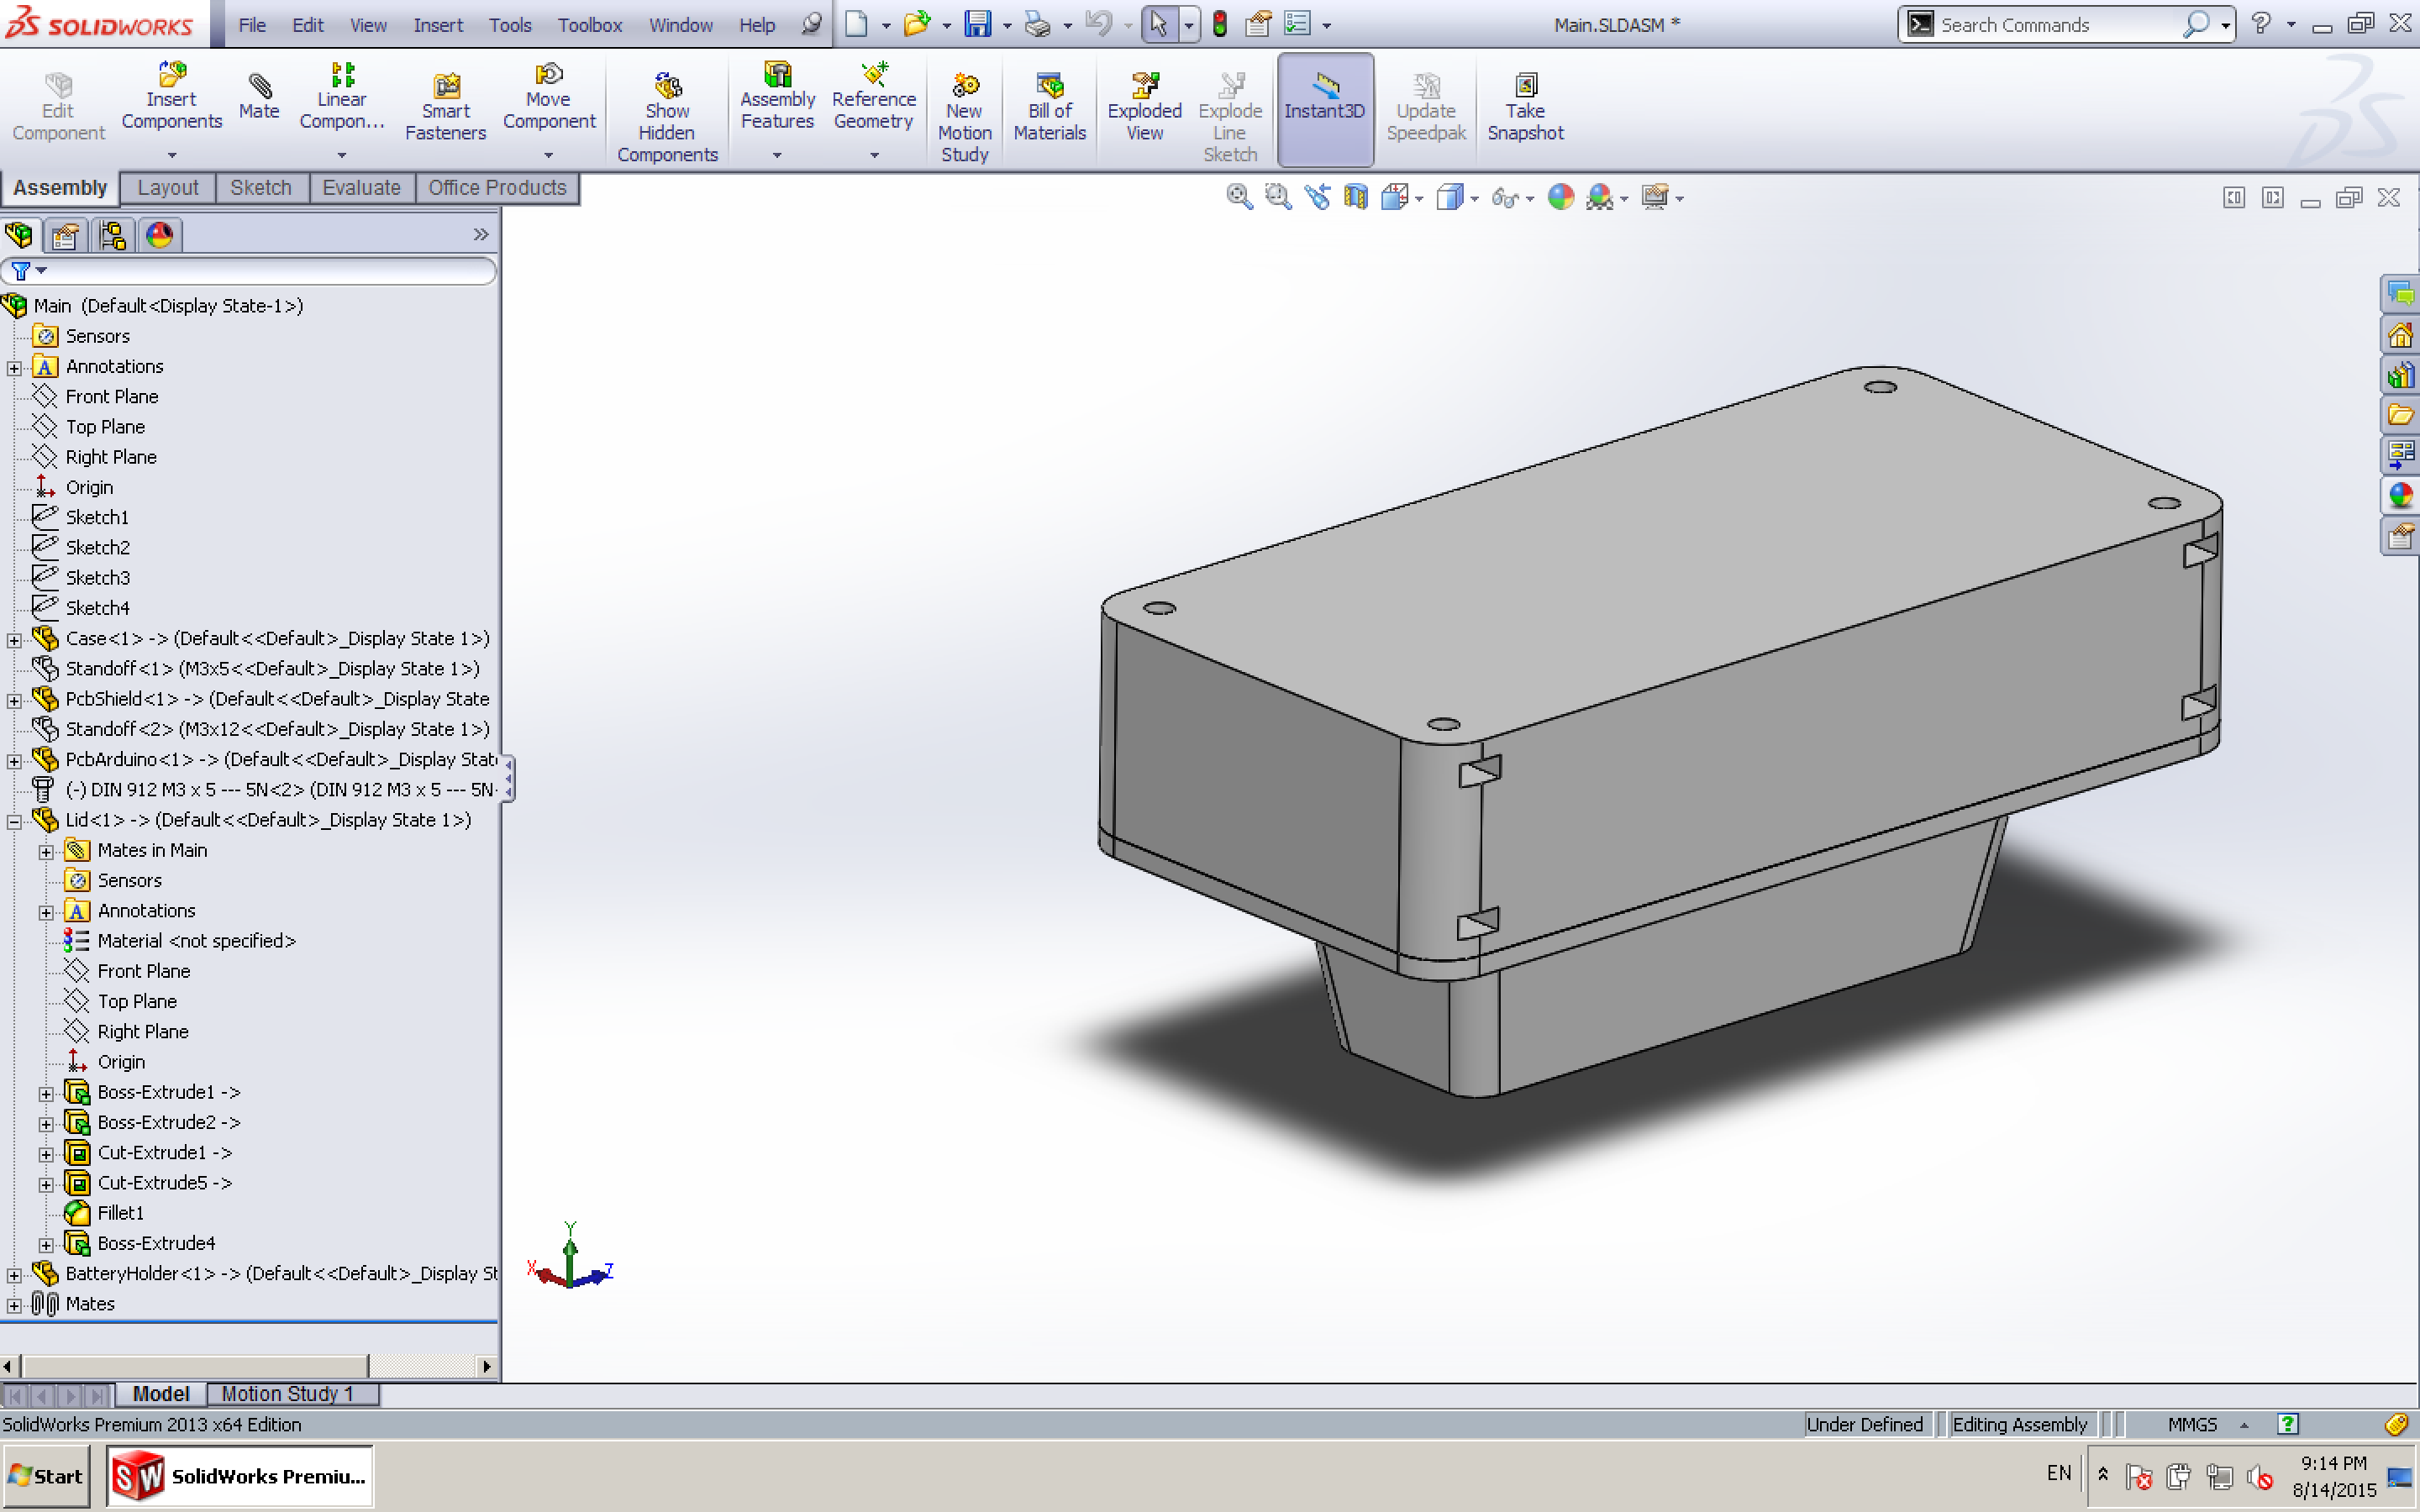
We will use Adafruit's Ultimate GPS Logger Shield, as it provides GPS, RTC and SD Card logging, as well as enough prototyping space to attach the accelerometer and WiFi modules (for uploading).
The blue PCBs are the Arduino and the Logging Shield. The case is longer than the PCBs to accomodate the USB battery pack that resides within the lower compartment, and the corresponding cabling.
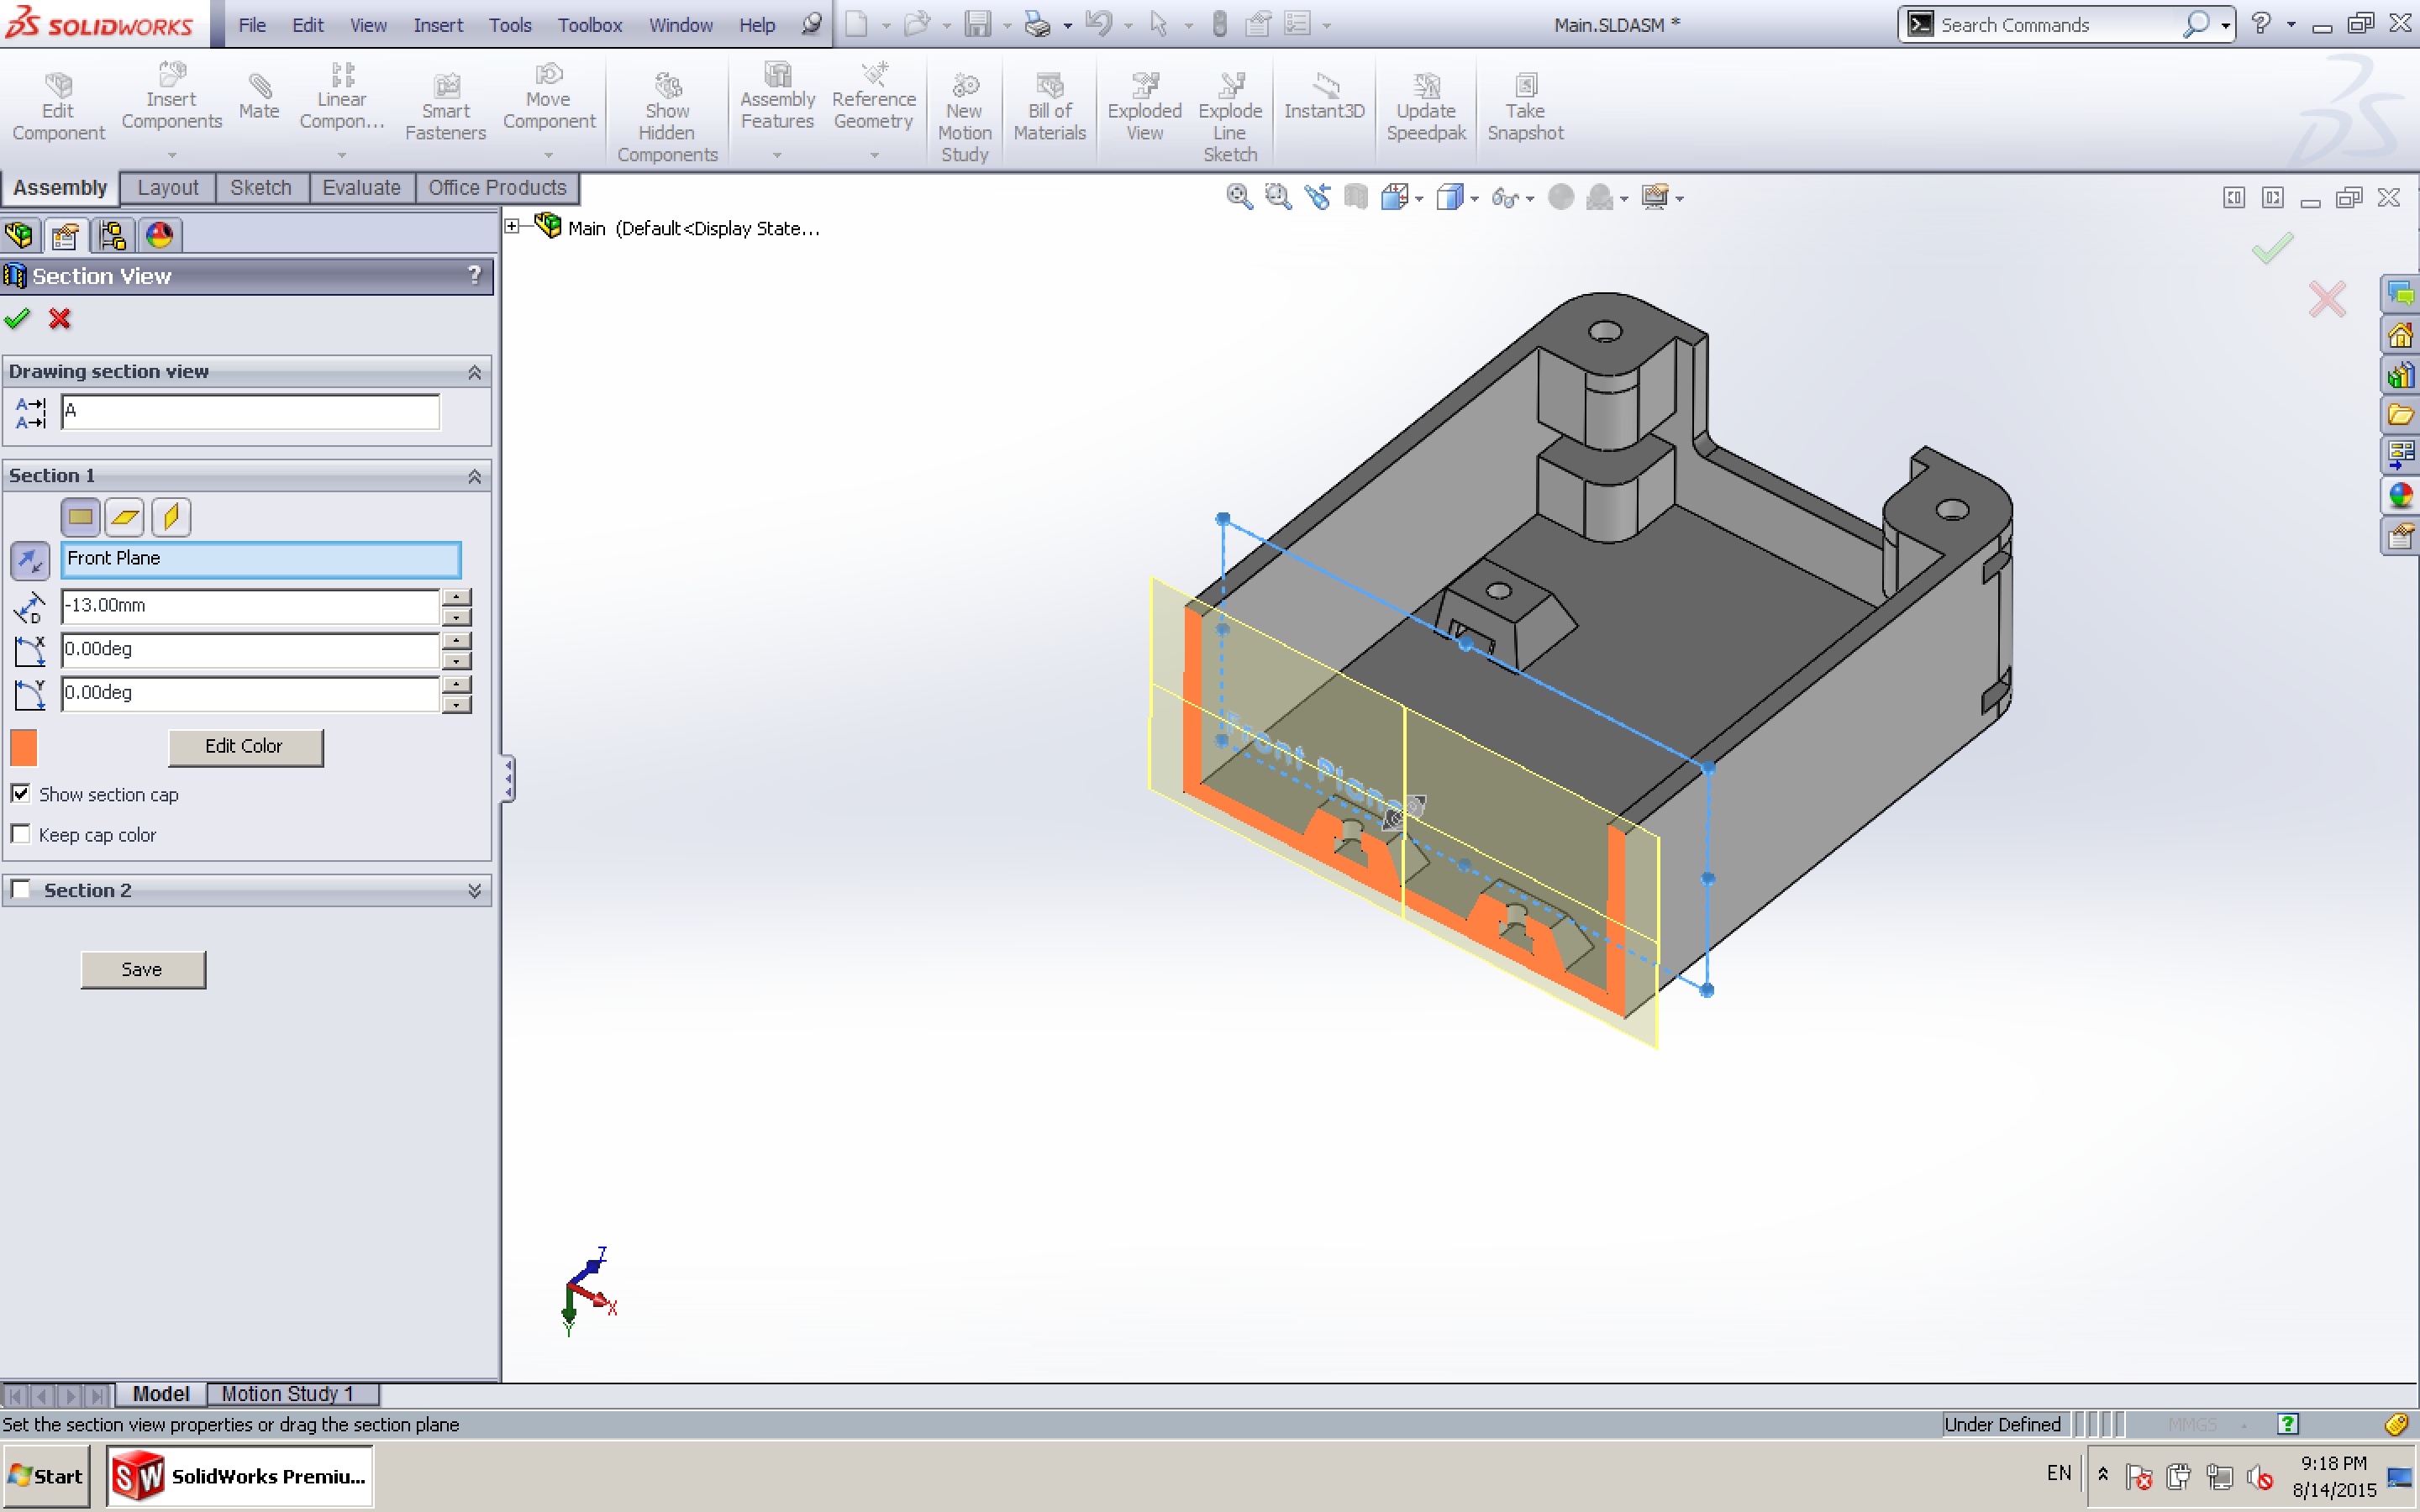
We keep the inside and outside of the box strictly separated, especially at the mounting holes. We took care to ensure there were absolutely no through holes on the top part of the enclosure, with could be exposed to rain while riding. None of the screw holes and nut inserts for the mounting mechanism provide a way for water to enter the enclosure.
You can see this in the following pictures. Notice the orange cross sections. The case is actually upside down in the pictures; the PCBs will 'hang' from the mounting pads visible in the center.
The bottom 'lid' will provide a lid to prevent water from leaking in from the bottom side. We will need to perform some rain tests to see whether this setup will stand up to the lovely German weather.

We use keyhole style mounting holes to easily detach the unit from the bike frame (thanks Hackaday for providing the video with the inspiration for this!). Removing the cover on the underside reveals the USB port (for firmware updating) and the USB battery pack (for recharging).
Discussions
Become a Hackaday.io Member
Create an account to leave a comment. Already have an account? Log In.