-
1Step 1
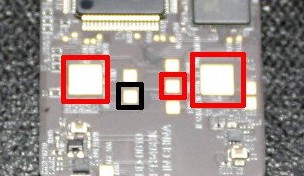
Attach a 3v3 power supply to any of the V+ (red) pads shown in the tare down image below.
-
2Step 2
Attach common ground between your Raspberry Pi and one of the GND (black) pads shown.
-
3Step 3
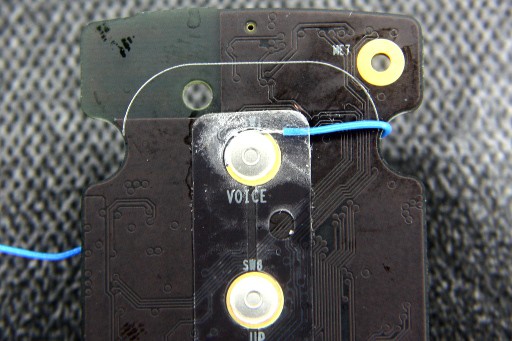
Solder a wire to the outer ring of the voice button contacts.
-
4Step 4
Solder the newly soldered wire in between a 1/2 voltage divider. Since Raspberry Pi uses 3v3 logic on it's GPIO pins and the controller expects about 1v8.
-
5Step 5
Now you just need to set the GPIO to HIGH when you want the voice button to be pressed down, LOW when it's suppose to be released (after you play back a voice command).
Amazon Echo Voice Command Automation
Yes! You can now have "Alexa" do what you want, when you want, by using a Raspberry Pi.
 gamaral


Discussions
Become a Hackaday.io Member
Create an account to leave a comment. Already have an account? Log In.
I'm getting ready to do this hack. Couple quick Q:
1) You mentioned you're using e-speak and bixycron (sp?). I got e-speak, but what's bixycron? I think I must have misheard you in your video.
2) This 3v3 will work, right? http://www.hobbyengineering.com/H5492.html I just want to make sure there is nothing special I need for the Echo remote.
Are you sure? yes | no
How was the audio connection made? Looks like you used a headset plugged into the auto jack of the PI and placed the ear piece over the remote mic?
Are you sure? yes | no
Yeah, simple earbud over the mic input. If you want to go hard-core, you could remove them mic IC and bitbang away. :)
Are you sure? yes | no
I have the "Slice of Raspberry Pi" up and running. I login as root. But all I get is this:
-sh: alexa: not found
So what am I missing?
Thanks
Are you sure? yes | no