Close
0%
0%

Scrap parts assemble to rescue stuff stuck in tree

Similar projects worth following
We make a lot of projects that fly. Multirotors, Rockets, Kites, Balloons, etc. and have had a lot of problems with our projects getting caught high up in trees. We assembled a tool from junk that we had on hand to get stuff down when a tree snagged it. The tool we made was so effective that we even used it to assist in placing a rope saw to prune giant white pine trees. We decided to document how to make and use this design so that others could benefit from our idea.

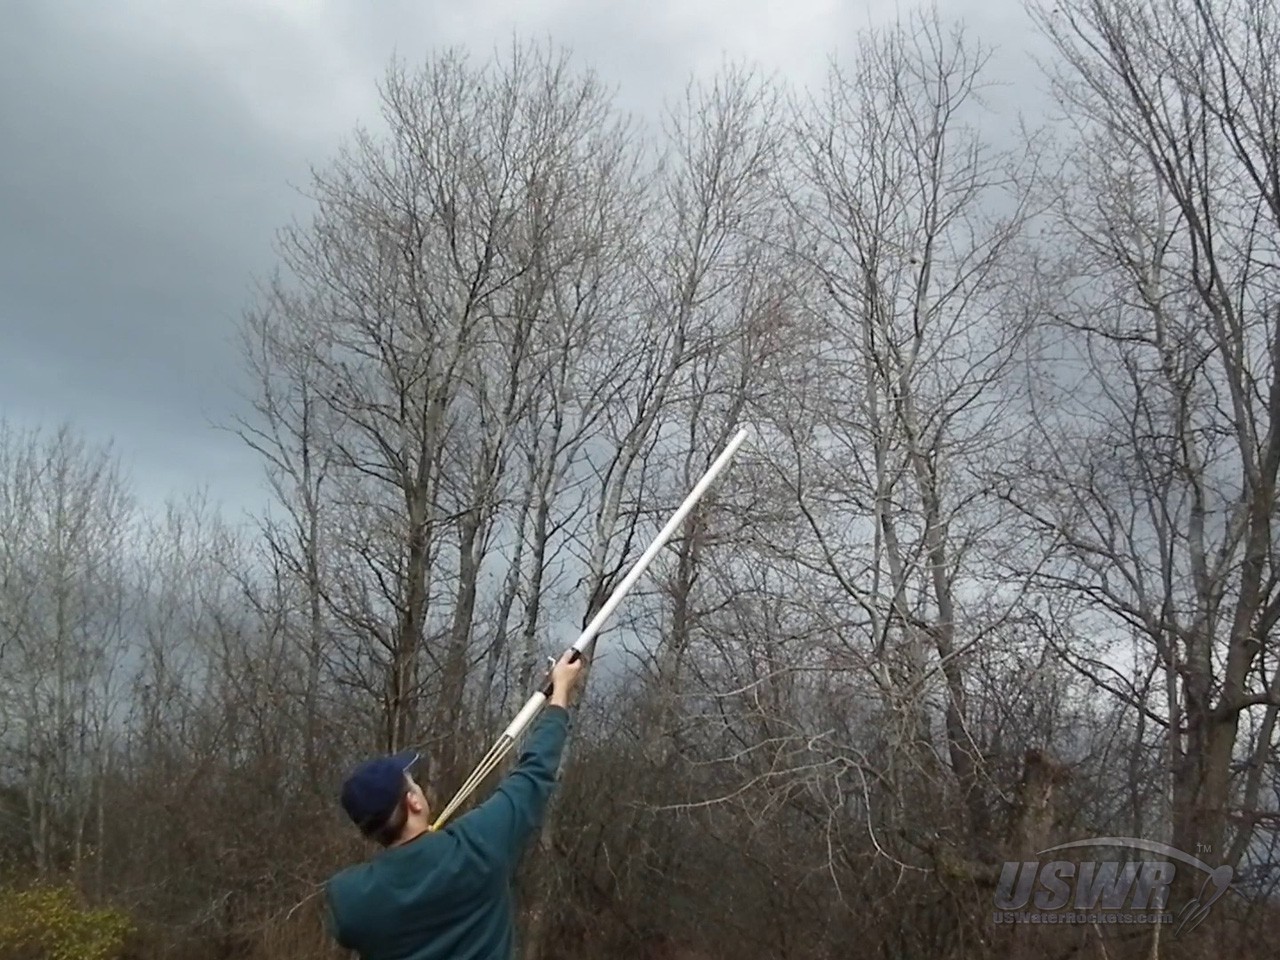
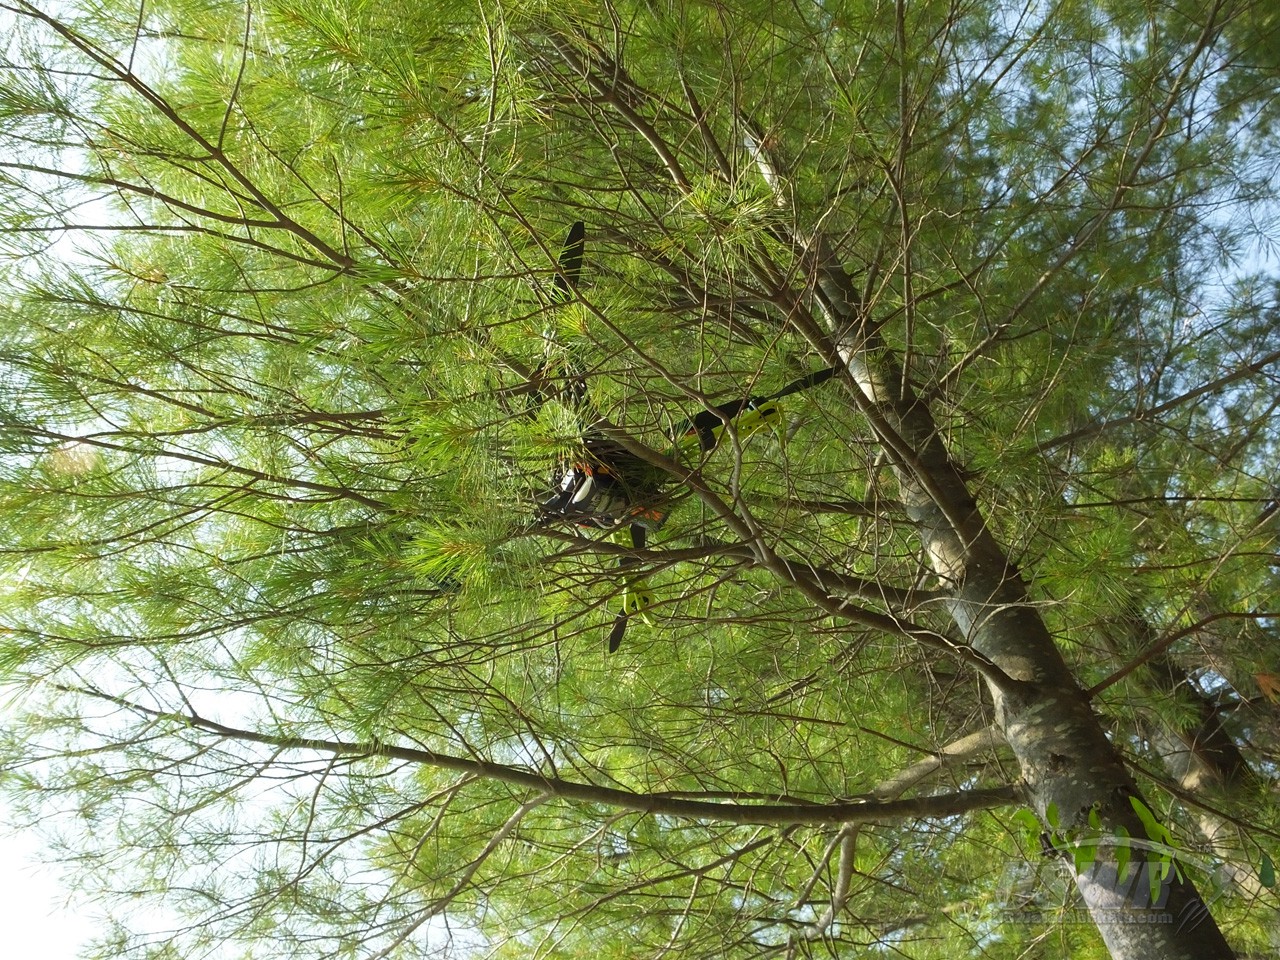
If you have hobbies which involve things that fly, then chances are that you've had something like this happen to you. Getting your projects down when they become stuck in trees is difficult and frustrating.

We've had this experience a number of times in the past, and we wanted to share our solution with you so that you may benefit from our design, no matter what project you need to rescue from a tree. We threw this thing together in a hurry from junk we had on hand and it worked so well we were stunned.

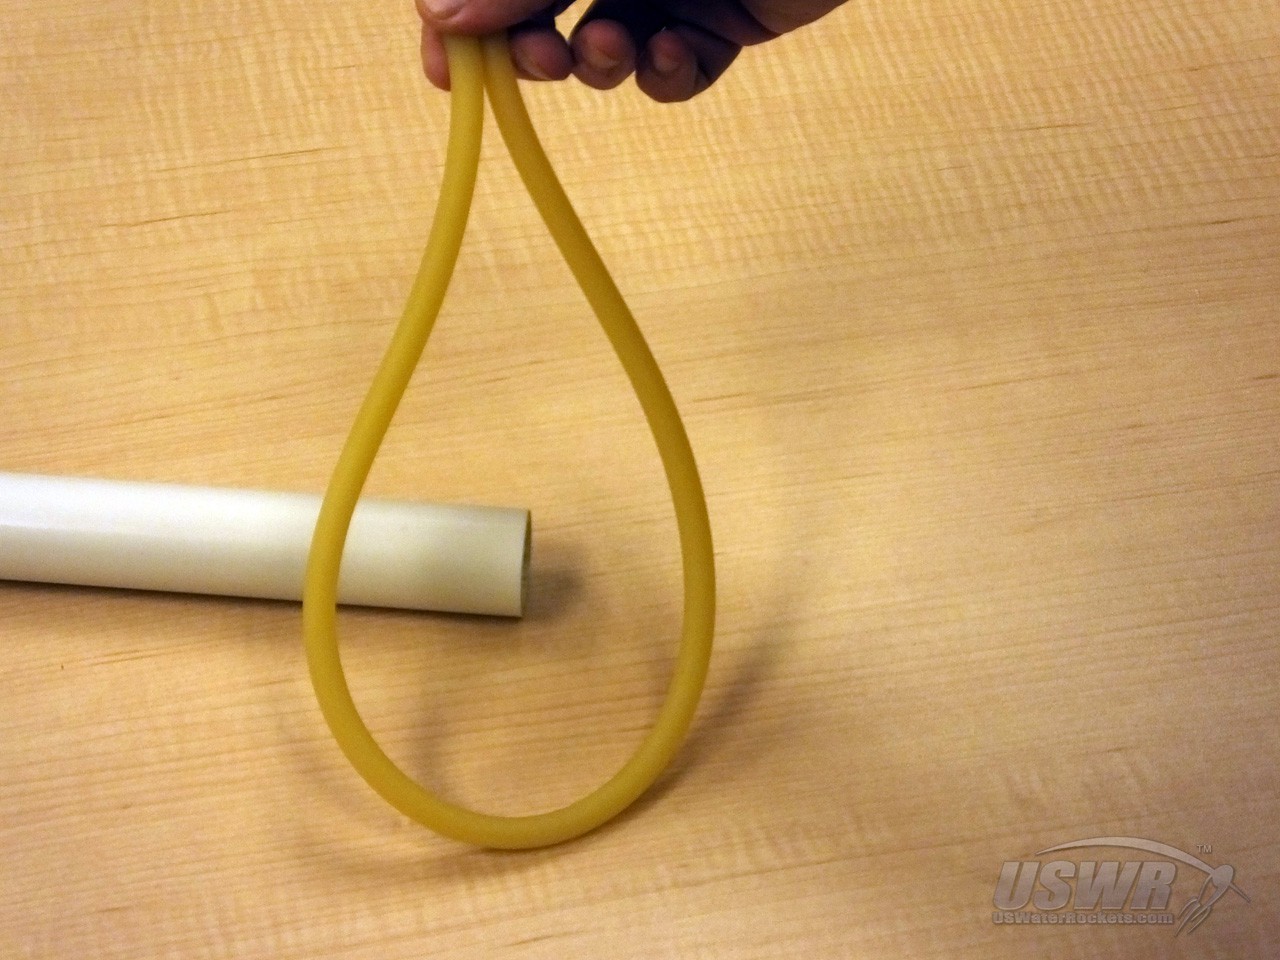
In this project we will show you how to build and how to use our Tree Recovery System.

  • 1 × Latex Surgical Tubing We got this at Home Depot to make a slingshot a long time ago and tossed the leftovers in a junk bin.
  • 1 × Electrical Tape Electrical tape is the smarter and sexier older sibling of Duct Tape.
  • 1 × Fishing Reel We have a bunch of old fishing poles in the closet and stole an old reel with line from one of the poles.
  • 1 × 1" Diameter Pipe about 3 feet long. We had some leftover PVC pipe. The size is probably not critical.
  • 1 × String We had some nylonf string we use to make rocket parachutes.

View all 7 components

  • Instructions for getting stuff out of a tree with this tool!

    U.S. Water Rockets07/31/2015 at 07:21 0 comments

    Here's a quick tutorial showing you how to use this tool to recover things when they get stuck in a tree!

    Take one of the projectiles and tape the line from the fishing reel to the tail end. The line should be taped firmly but should pull free in the event that the projectile gets stuck in the tree.

    The projectile is inserted tail first into the top of the launcher.

    Grasp the projectile as it comes out of the bottom of the launcher and pinch it with the latex tube.

    Pull back and stretch the latex tube, similar to the way you would arm a slingshot.

    Take aim down the barrel of the launcher and release the projectile.

    If you miss the shot, you can quickly reel the projectile back in and try again.

    Once you have placed your projectile in the desired location, you can let if drop to the ground and pull it off then tie a string to the fishing line.

    Then, you tie a rope on the other end of the string.

    When you reel in the fishing line, it pulls the string through the branches, then the string is used to pull the rope through the branches last.

    When you have the rope where you want it, you can then use it to pull your object or shake your object loose from the tree.

    With a little patience and persistance, you can recover just about anything.

    A word of caution: Never use this tool where the projectiles could land where you cannot see. You do not want to hit people or animals or cause property damage. NEVER use this around power lines, but you knew that already, right?

    A video of this entire project in tutorial form is available on our YouTube channel:

View project log

  • 1
    Step 1

    The first build step is to fasten the fishing reel to the pipe about a foot from the bottom. Use electrical tape strips to hold it in position and then give it a good tape wrap to make it a permanent joint.

  • 2
    Step 2

    Next, take about 2 feet of the surgical tubing, fold it in half to find the middle and temporarily tape the center over the end of the pipe just below the fishing reel.

  • 3
    Step 3

    Fold the ends of the latex tubing along the sides of the pipe and hold them in position with a strip of tape. Leave 2 to 3 inches of latex protruding past the tape.

View all 8 instructions

Enjoy this project?

Share

Discussions

Similar Projects

Does this project spark your interest?

Become a member to follow this project and never miss any updates