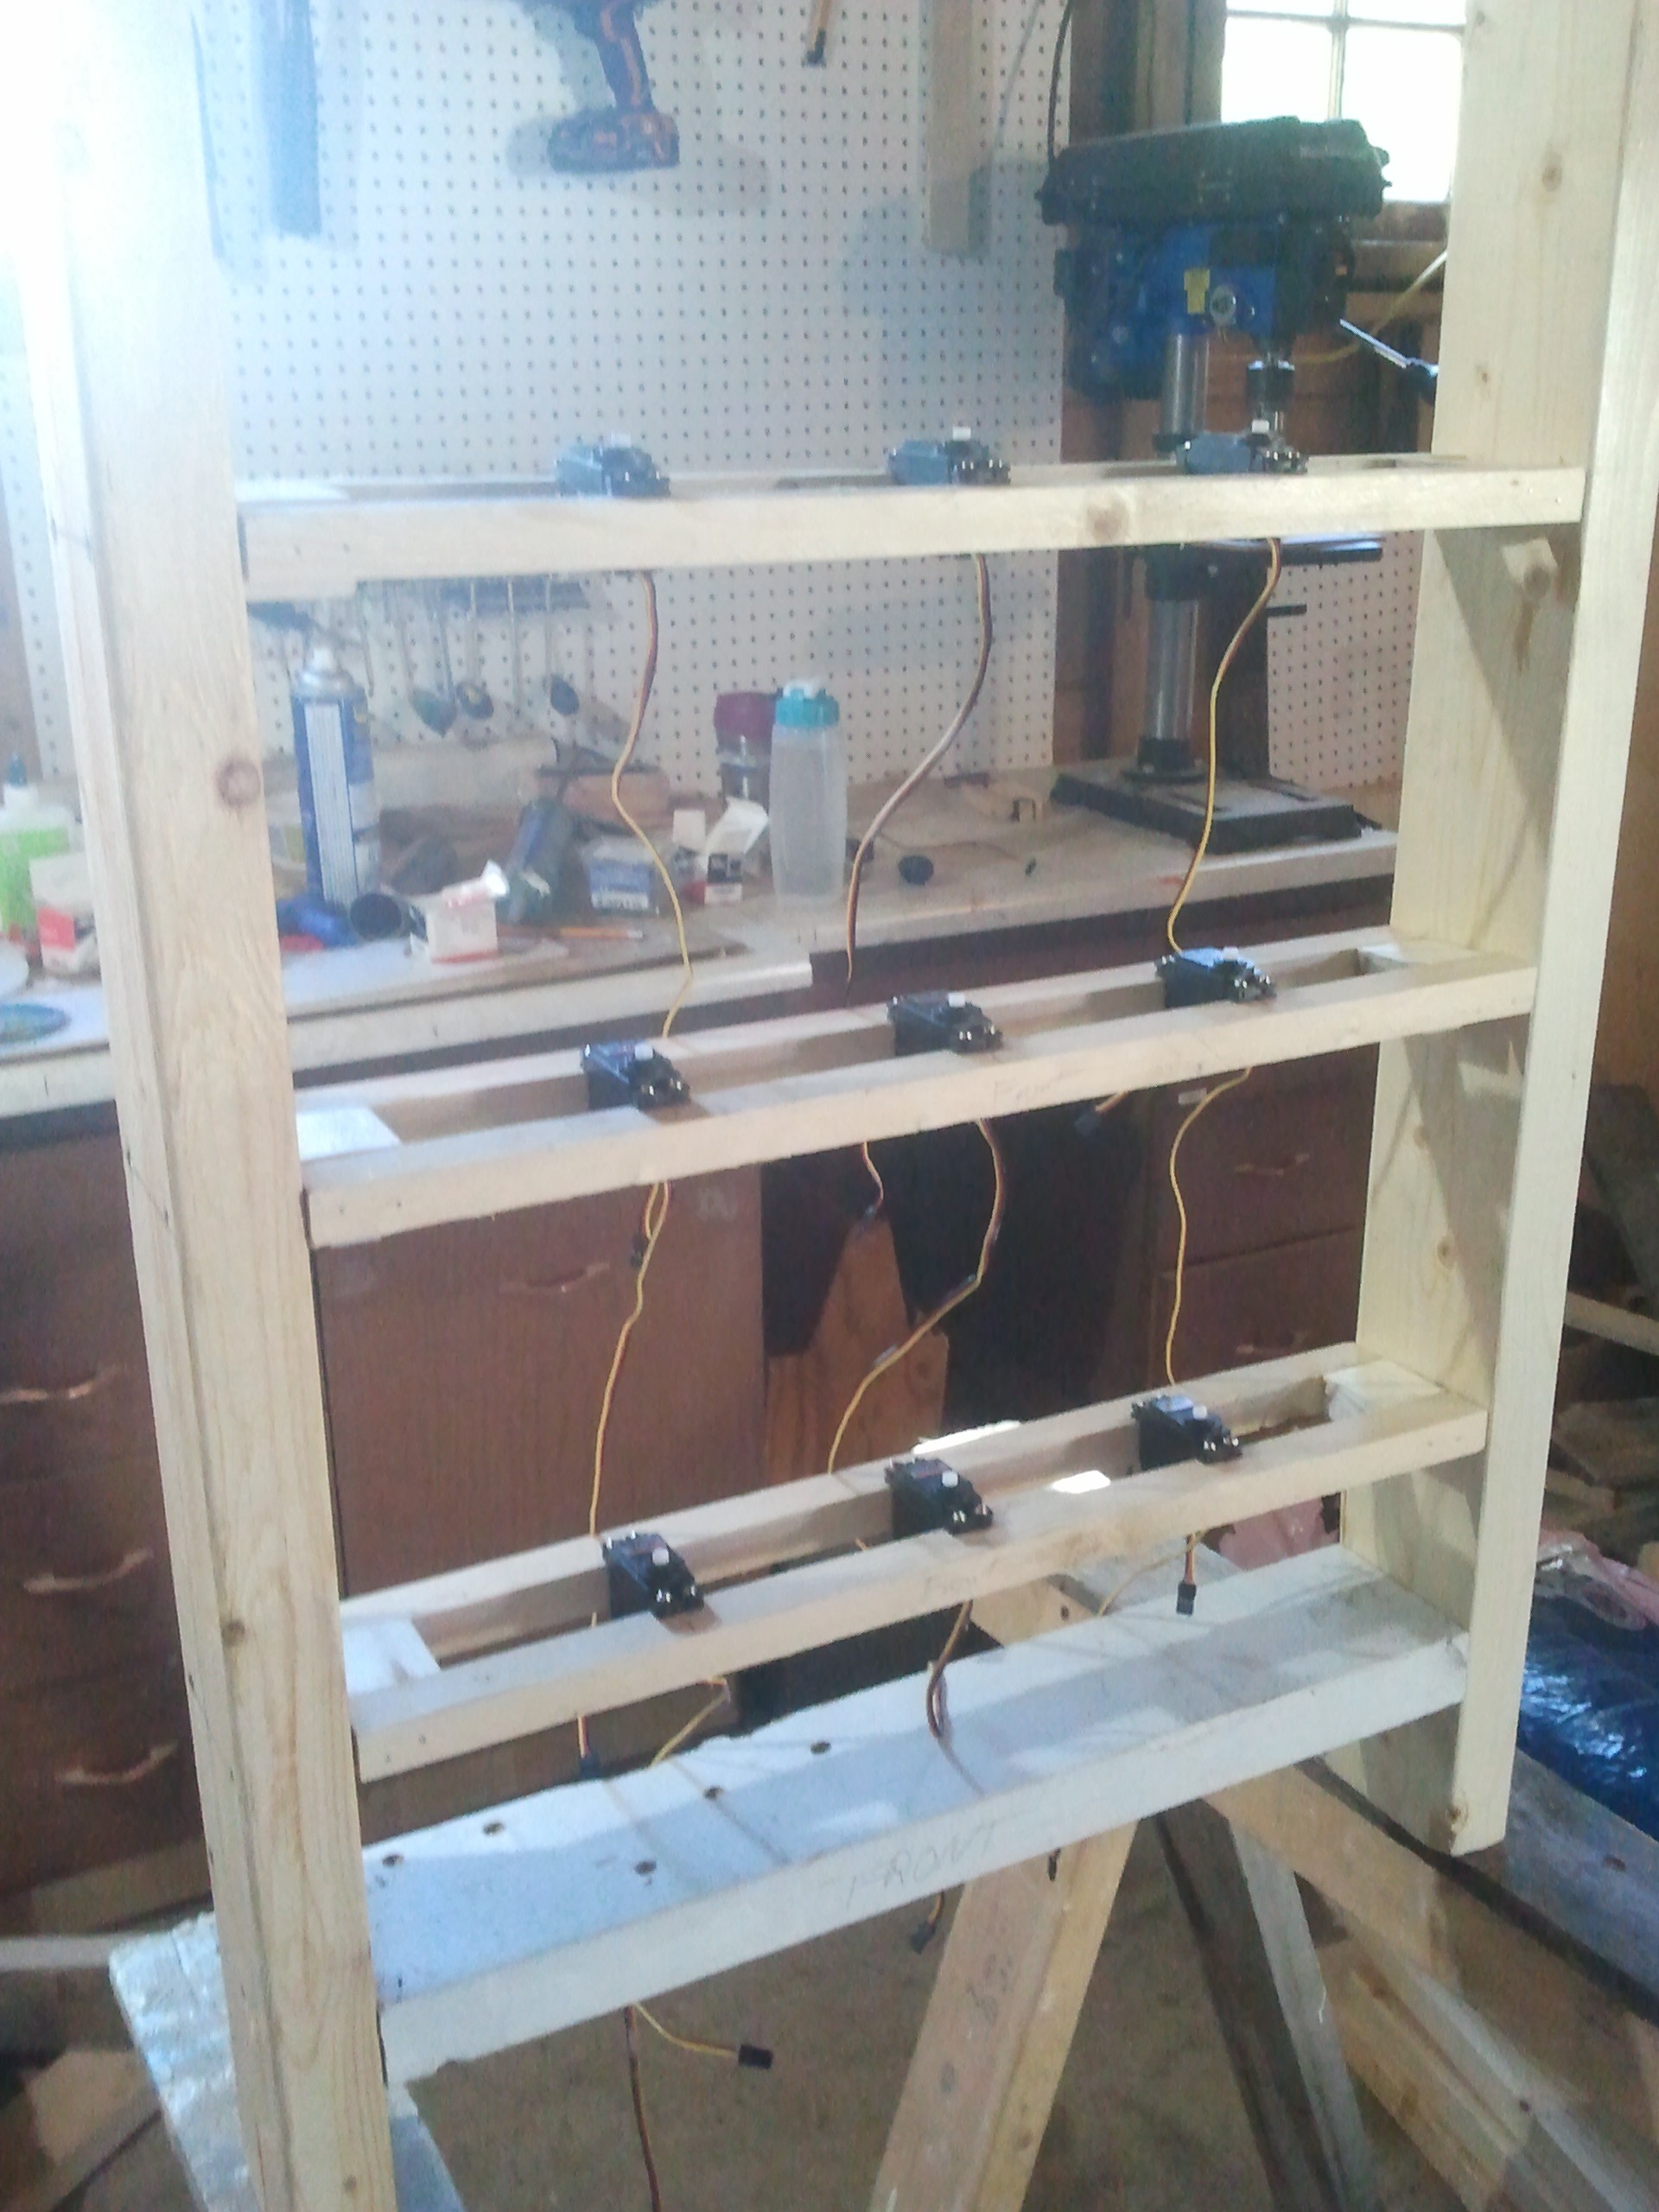
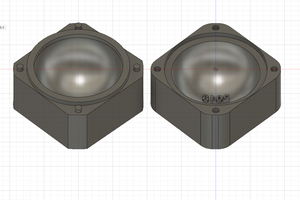
This was "quickly" made out of parts on hand for a kids event.
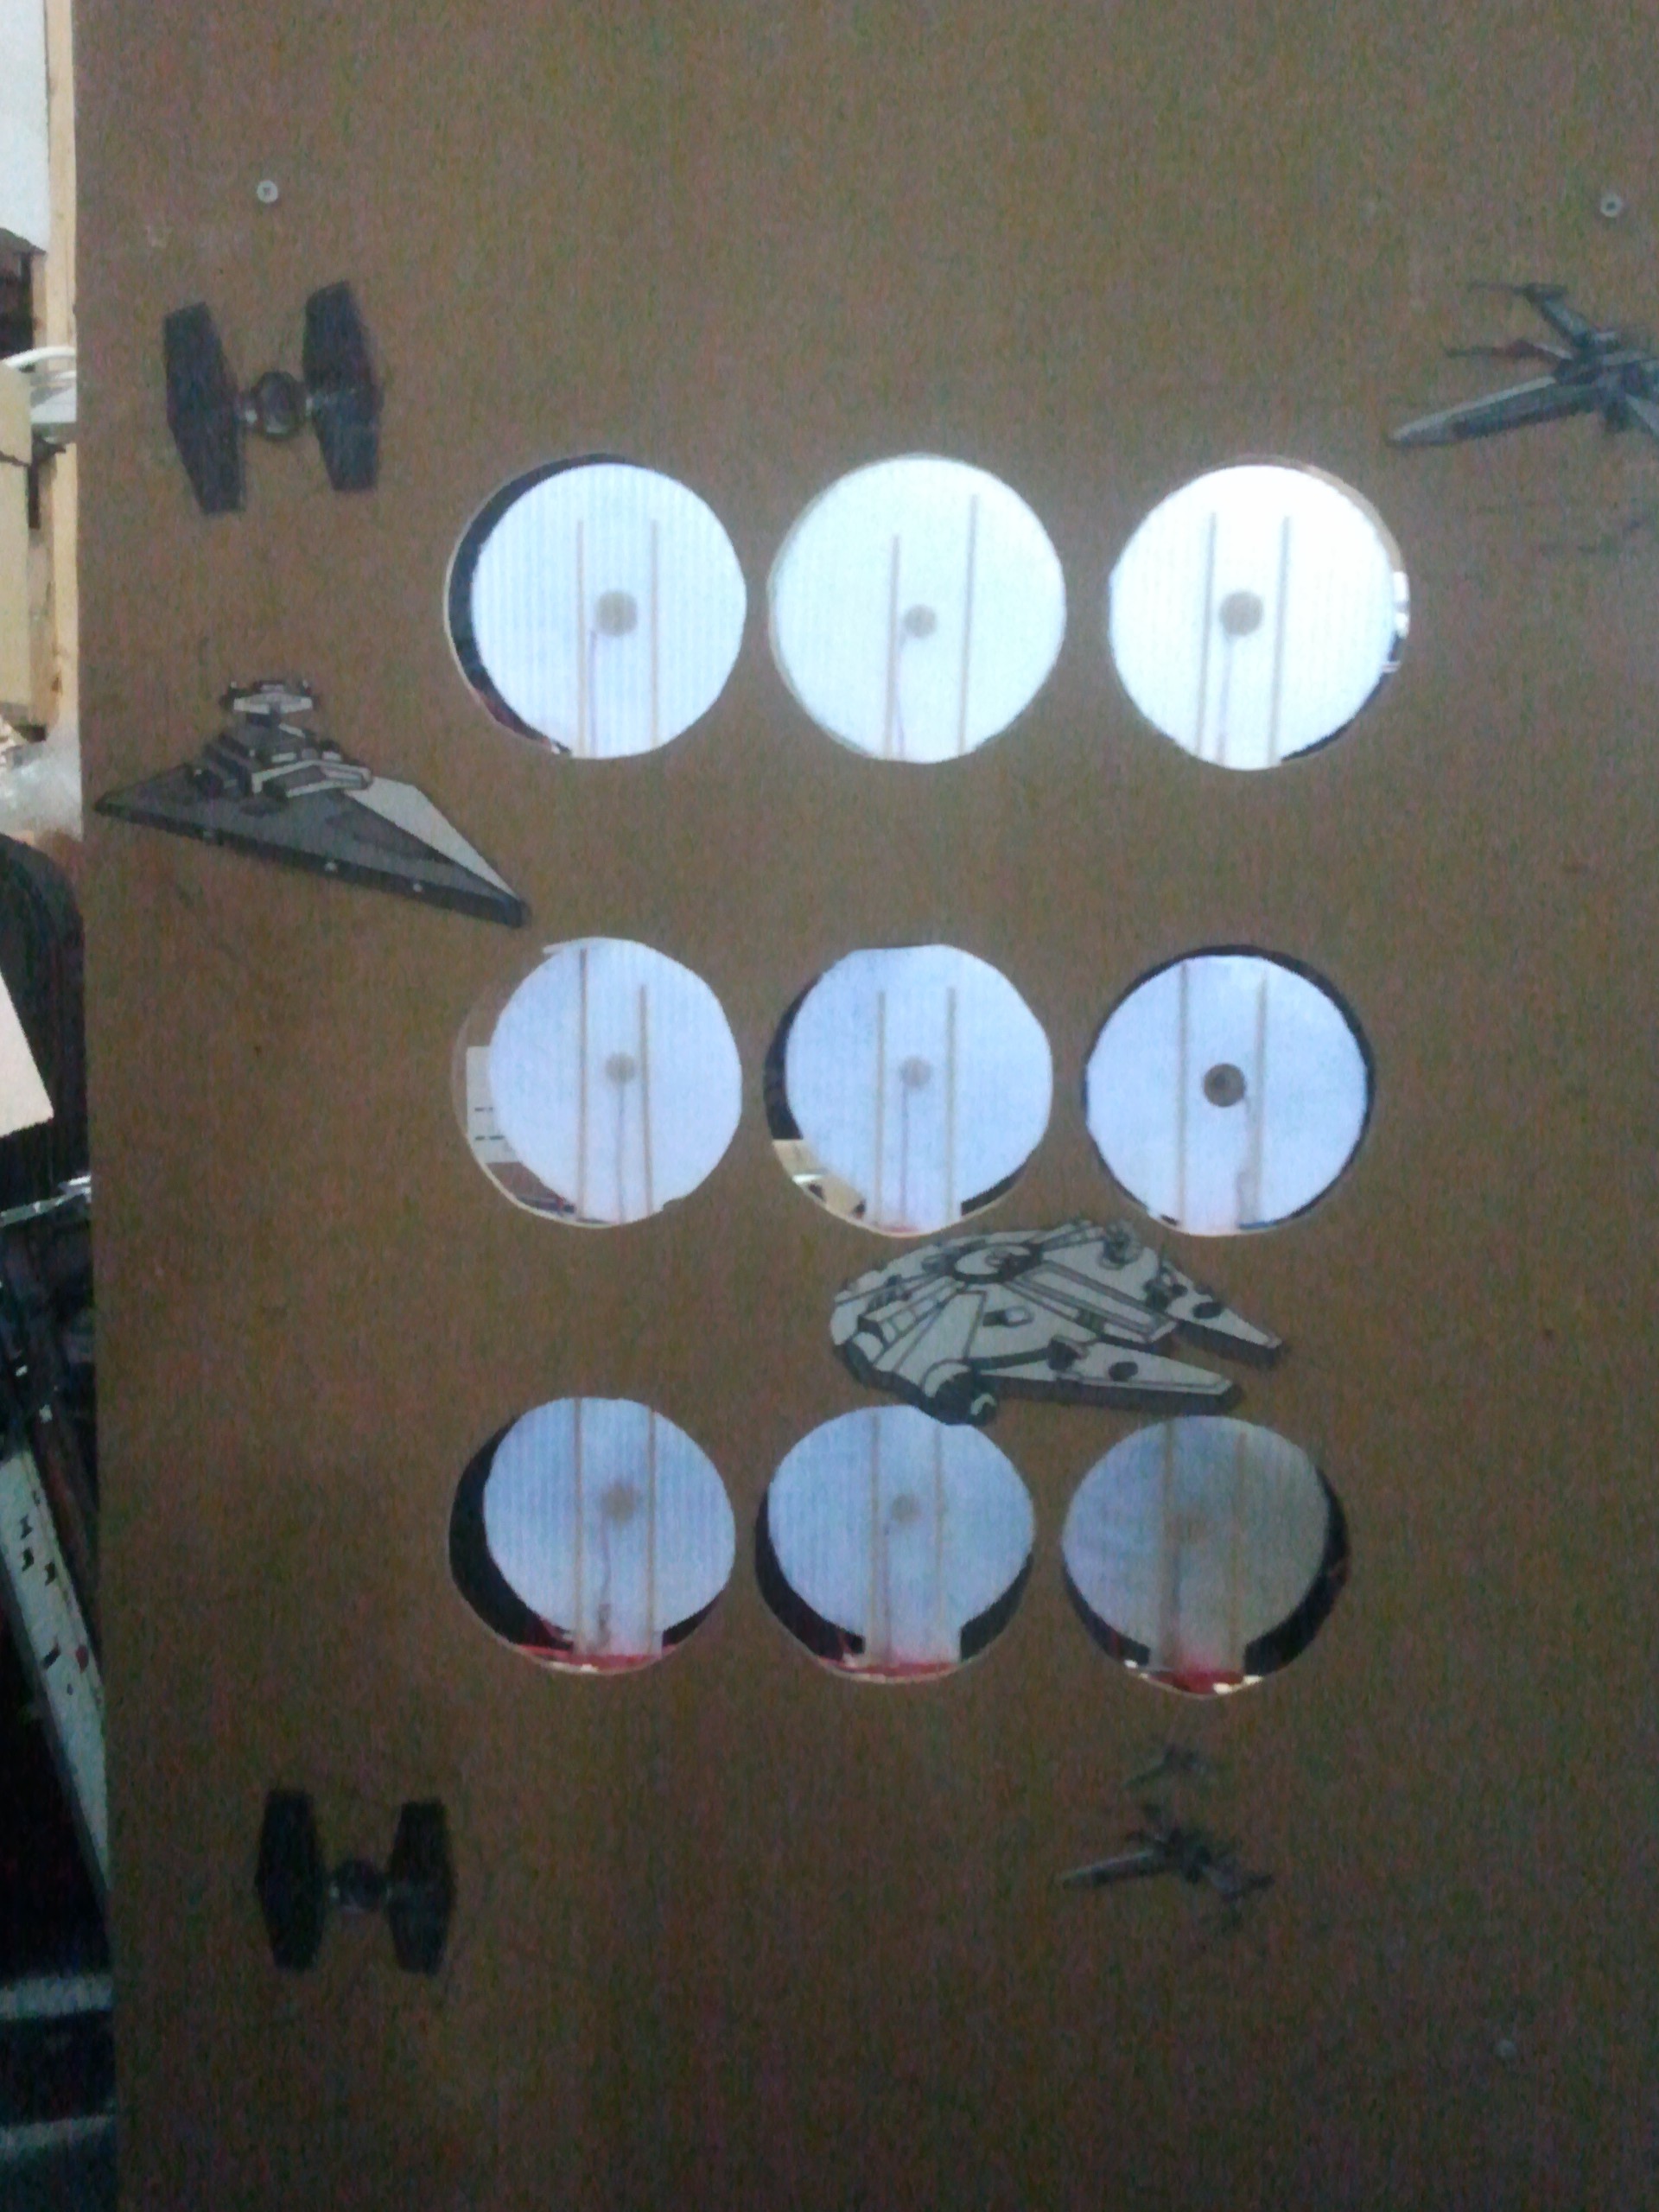
Once you press the button to start, you get 60 seconds. As your time counts down on the display, you try to shoot the targets. As you hit them they turn edge-on.
| Target | Value |
| Stormtroopers | 1 point |
| Good guys | -1 point |
| Bad guys | 5 points |
Which side of each target you get is determined randomly at the start of each game. If you manage to get them all knocked down before your time runs out, you get bonus points for any remaining time. I used single-shot guns, so it's really hard.
There's another mode where the targets show and hide randomly.


 fab4U
fab4U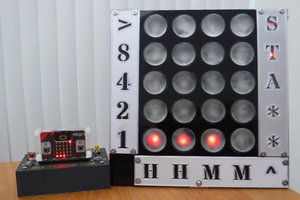
 TheThirdMan
I really like it that you followed this through to a completely finished look. The functionality was already great, but the inclusion of characters and their good/evil colors will make it addictive. Nice!