 zaphod
the design process for the hull was pretty simple. I started by doing a few sketches and picked one that looked like it would work. then I did some full scale drawings:
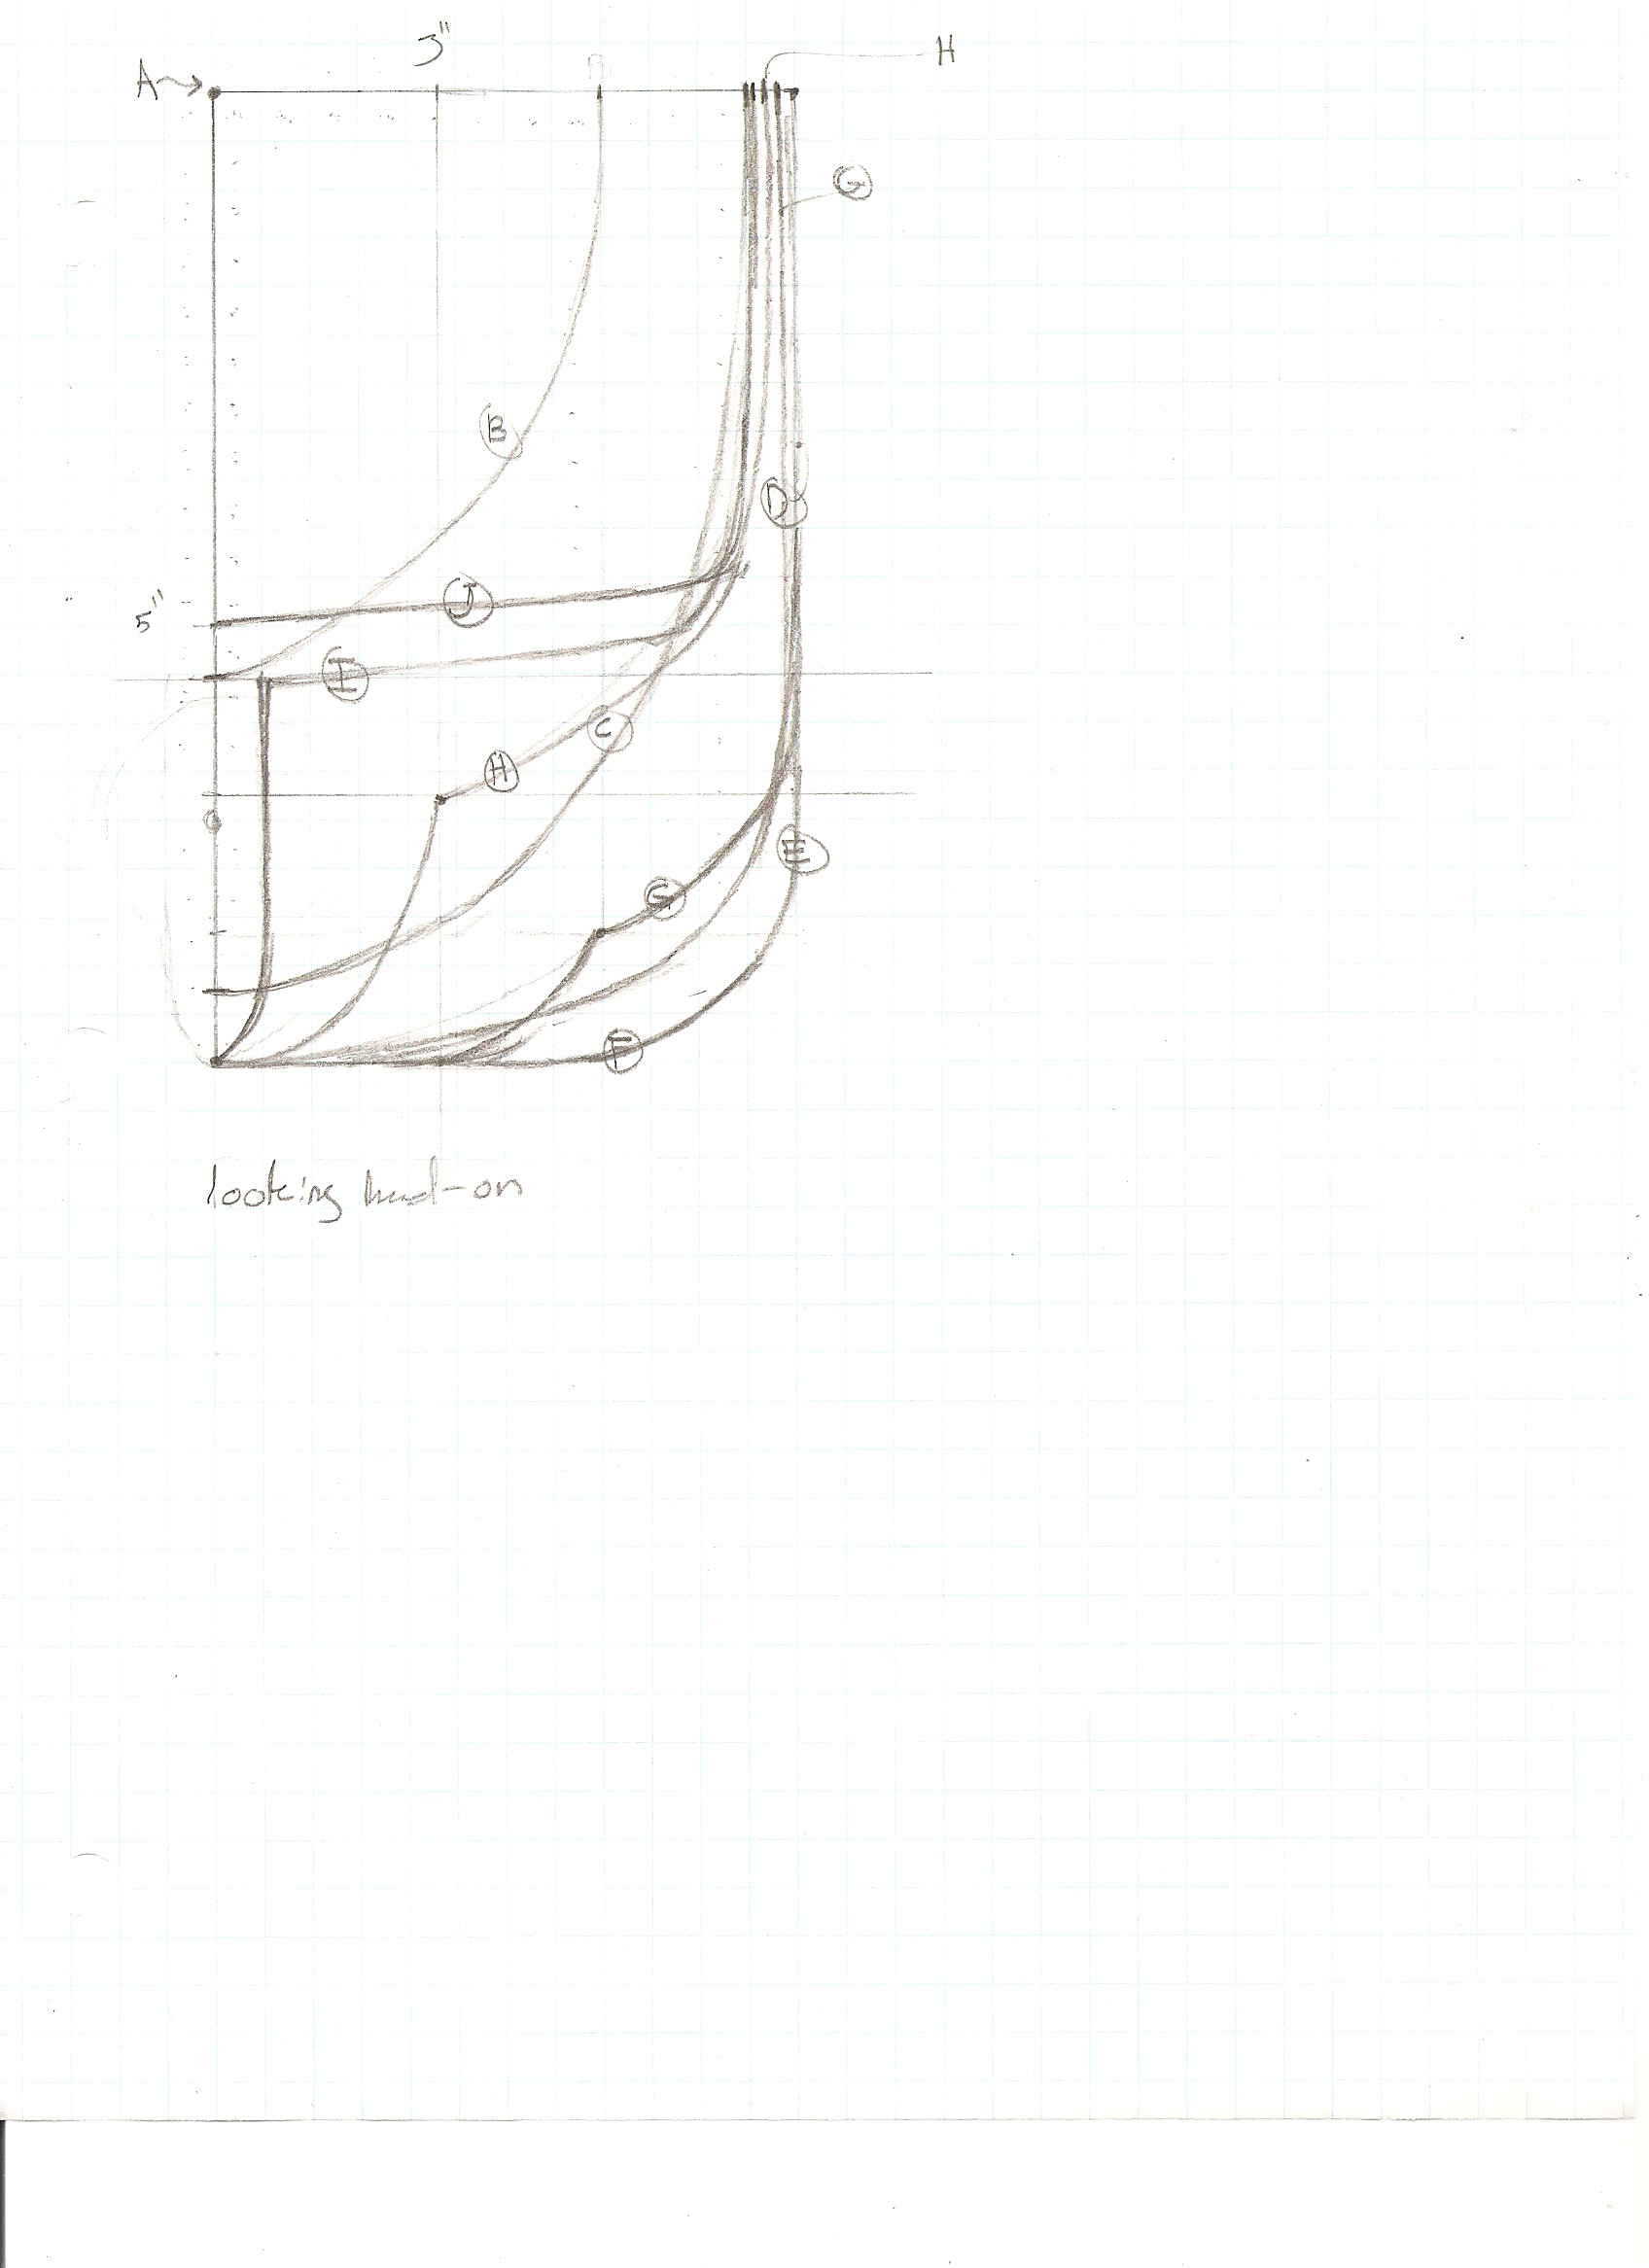
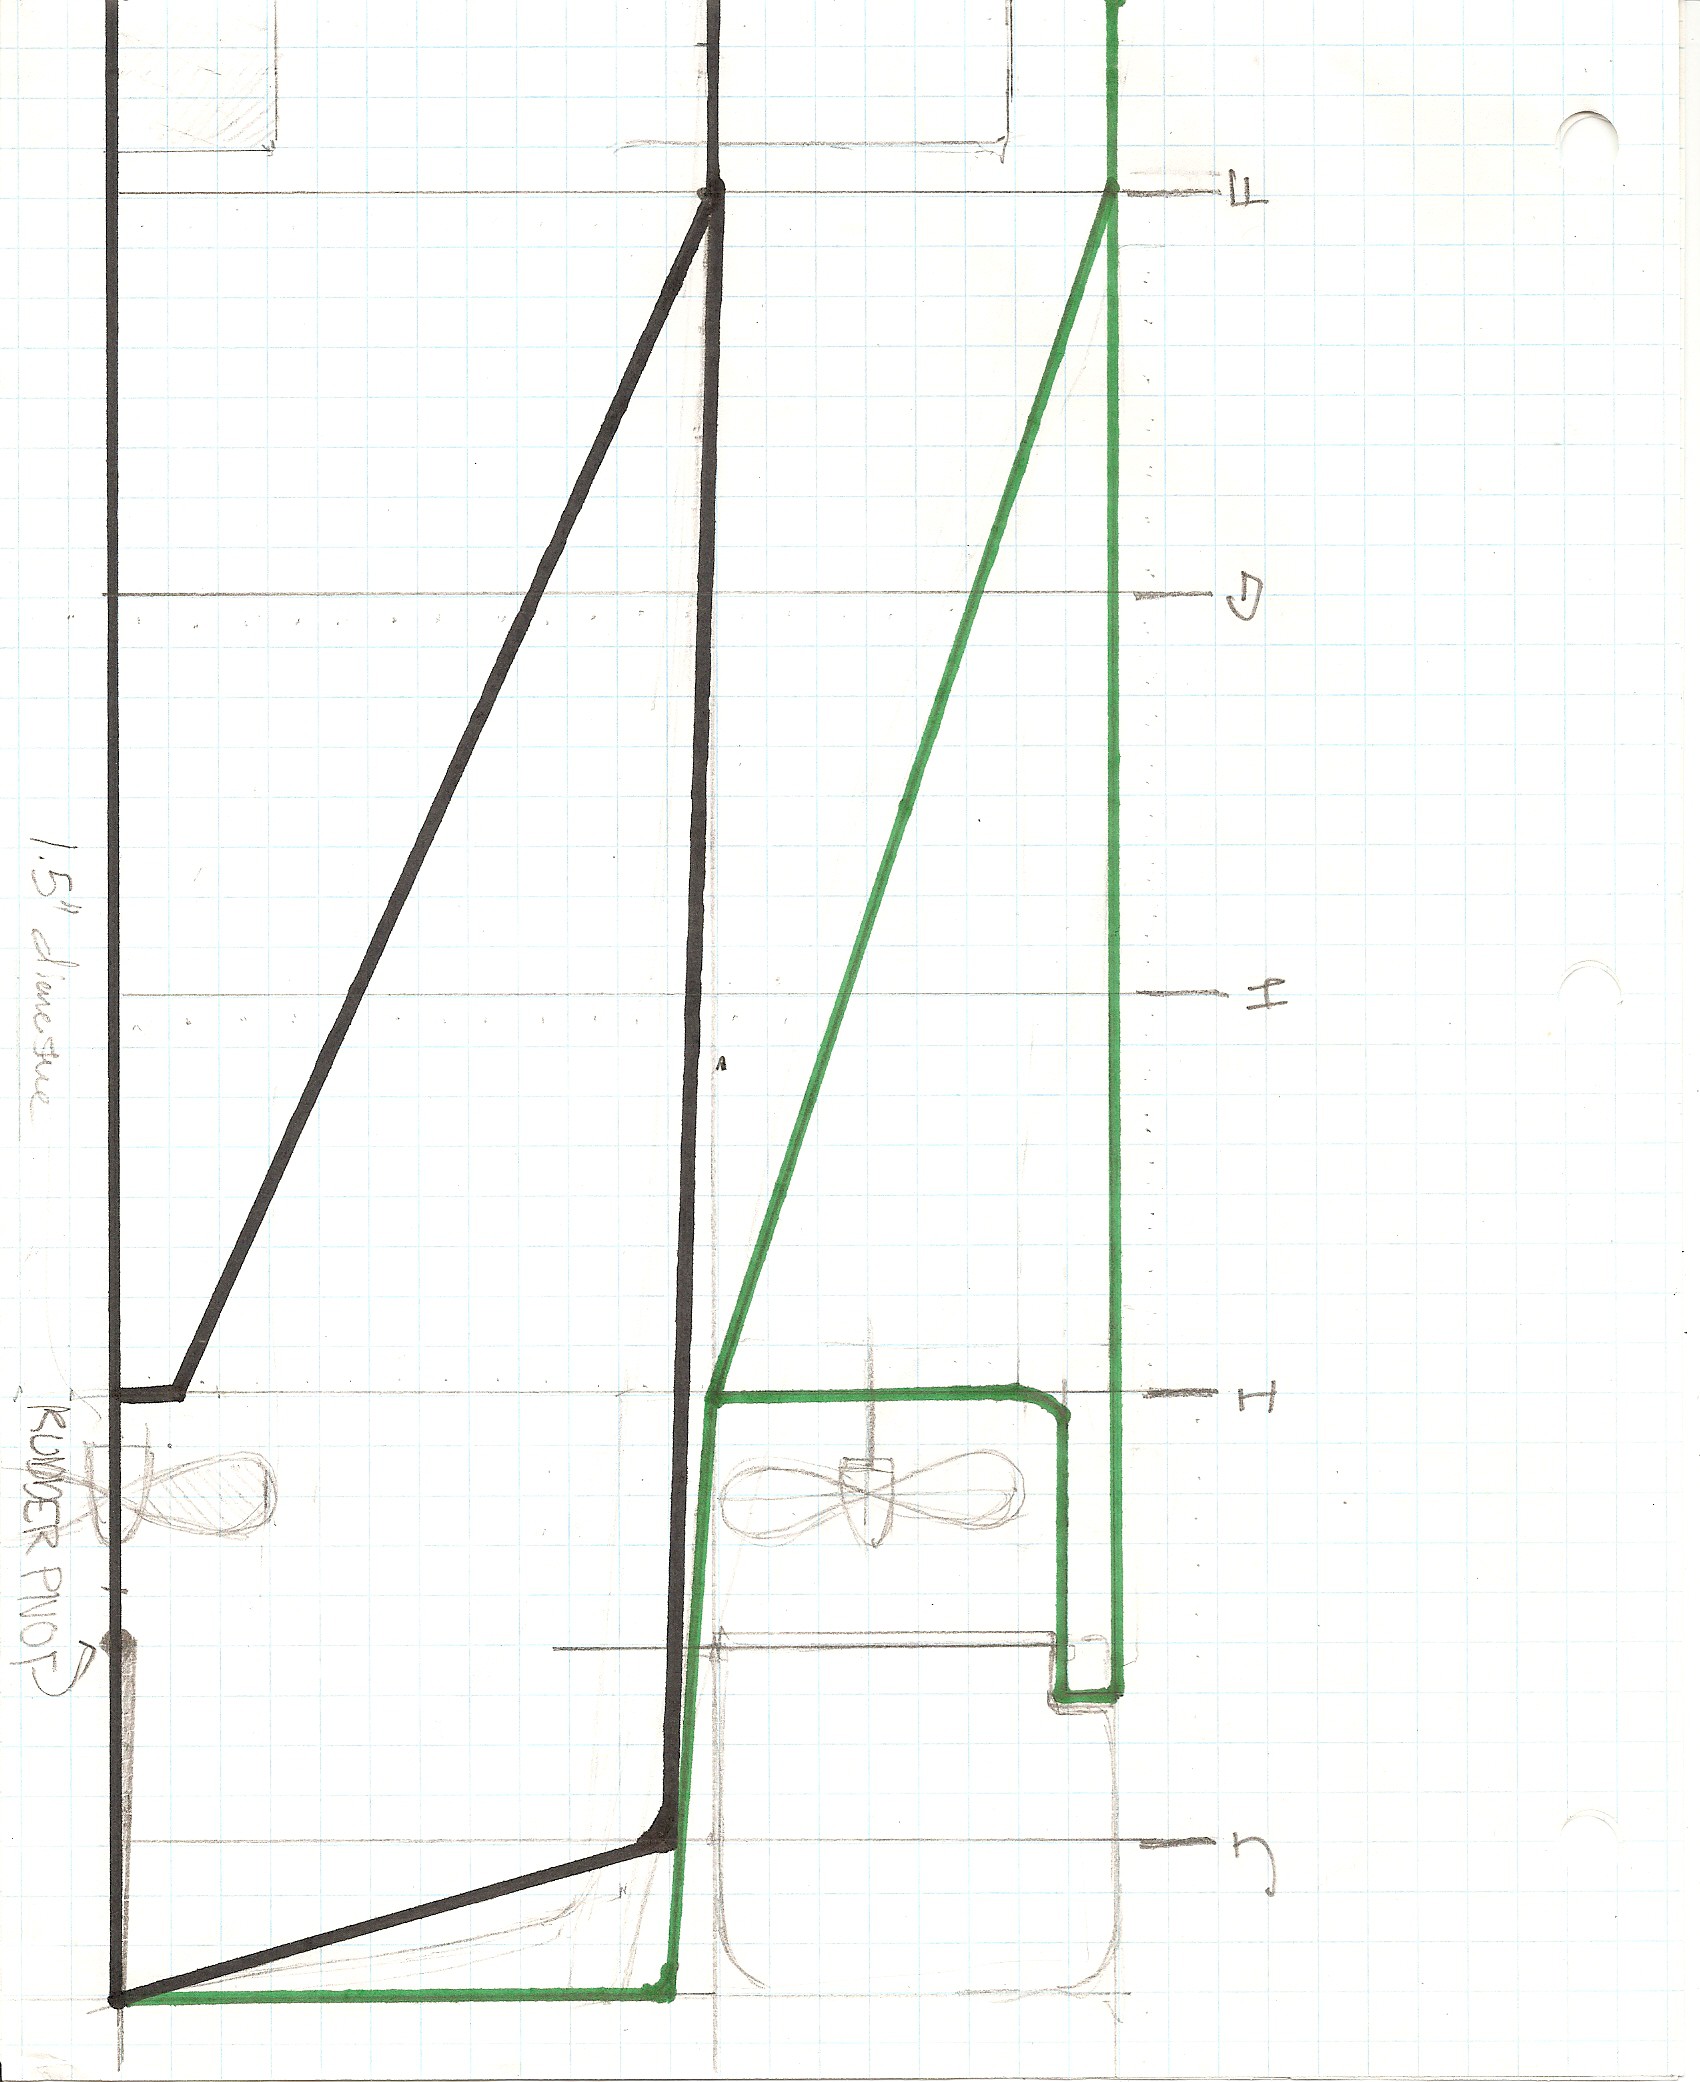
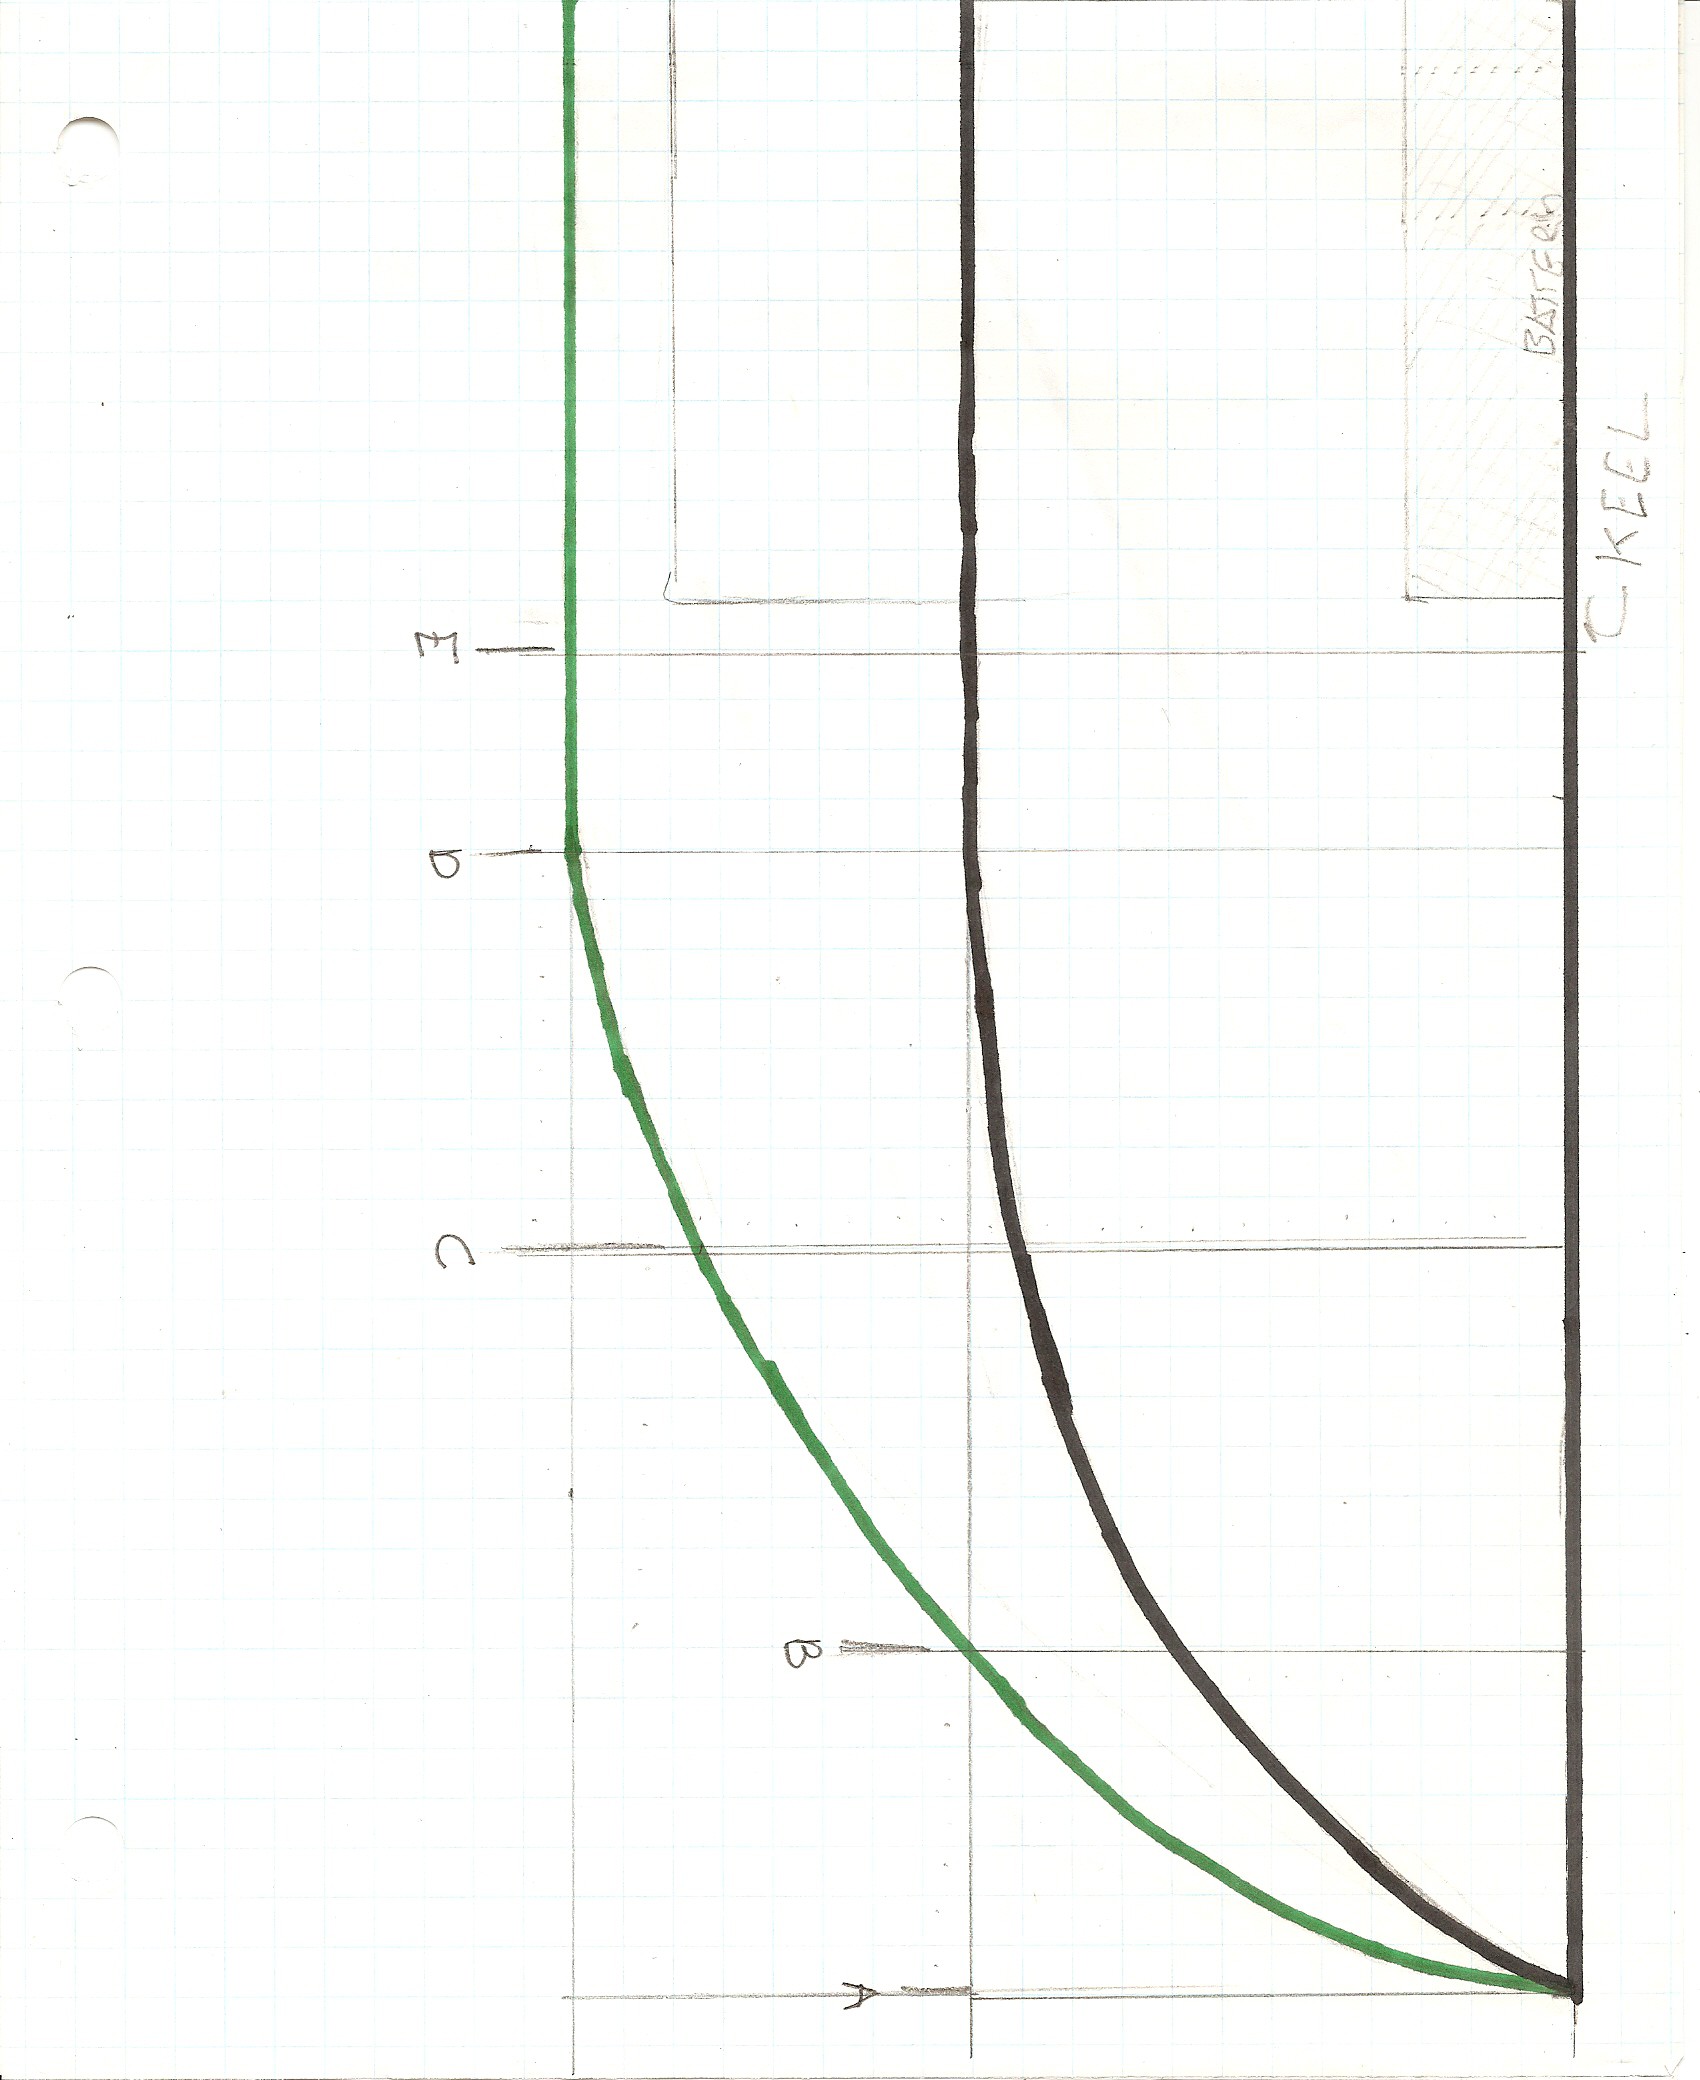
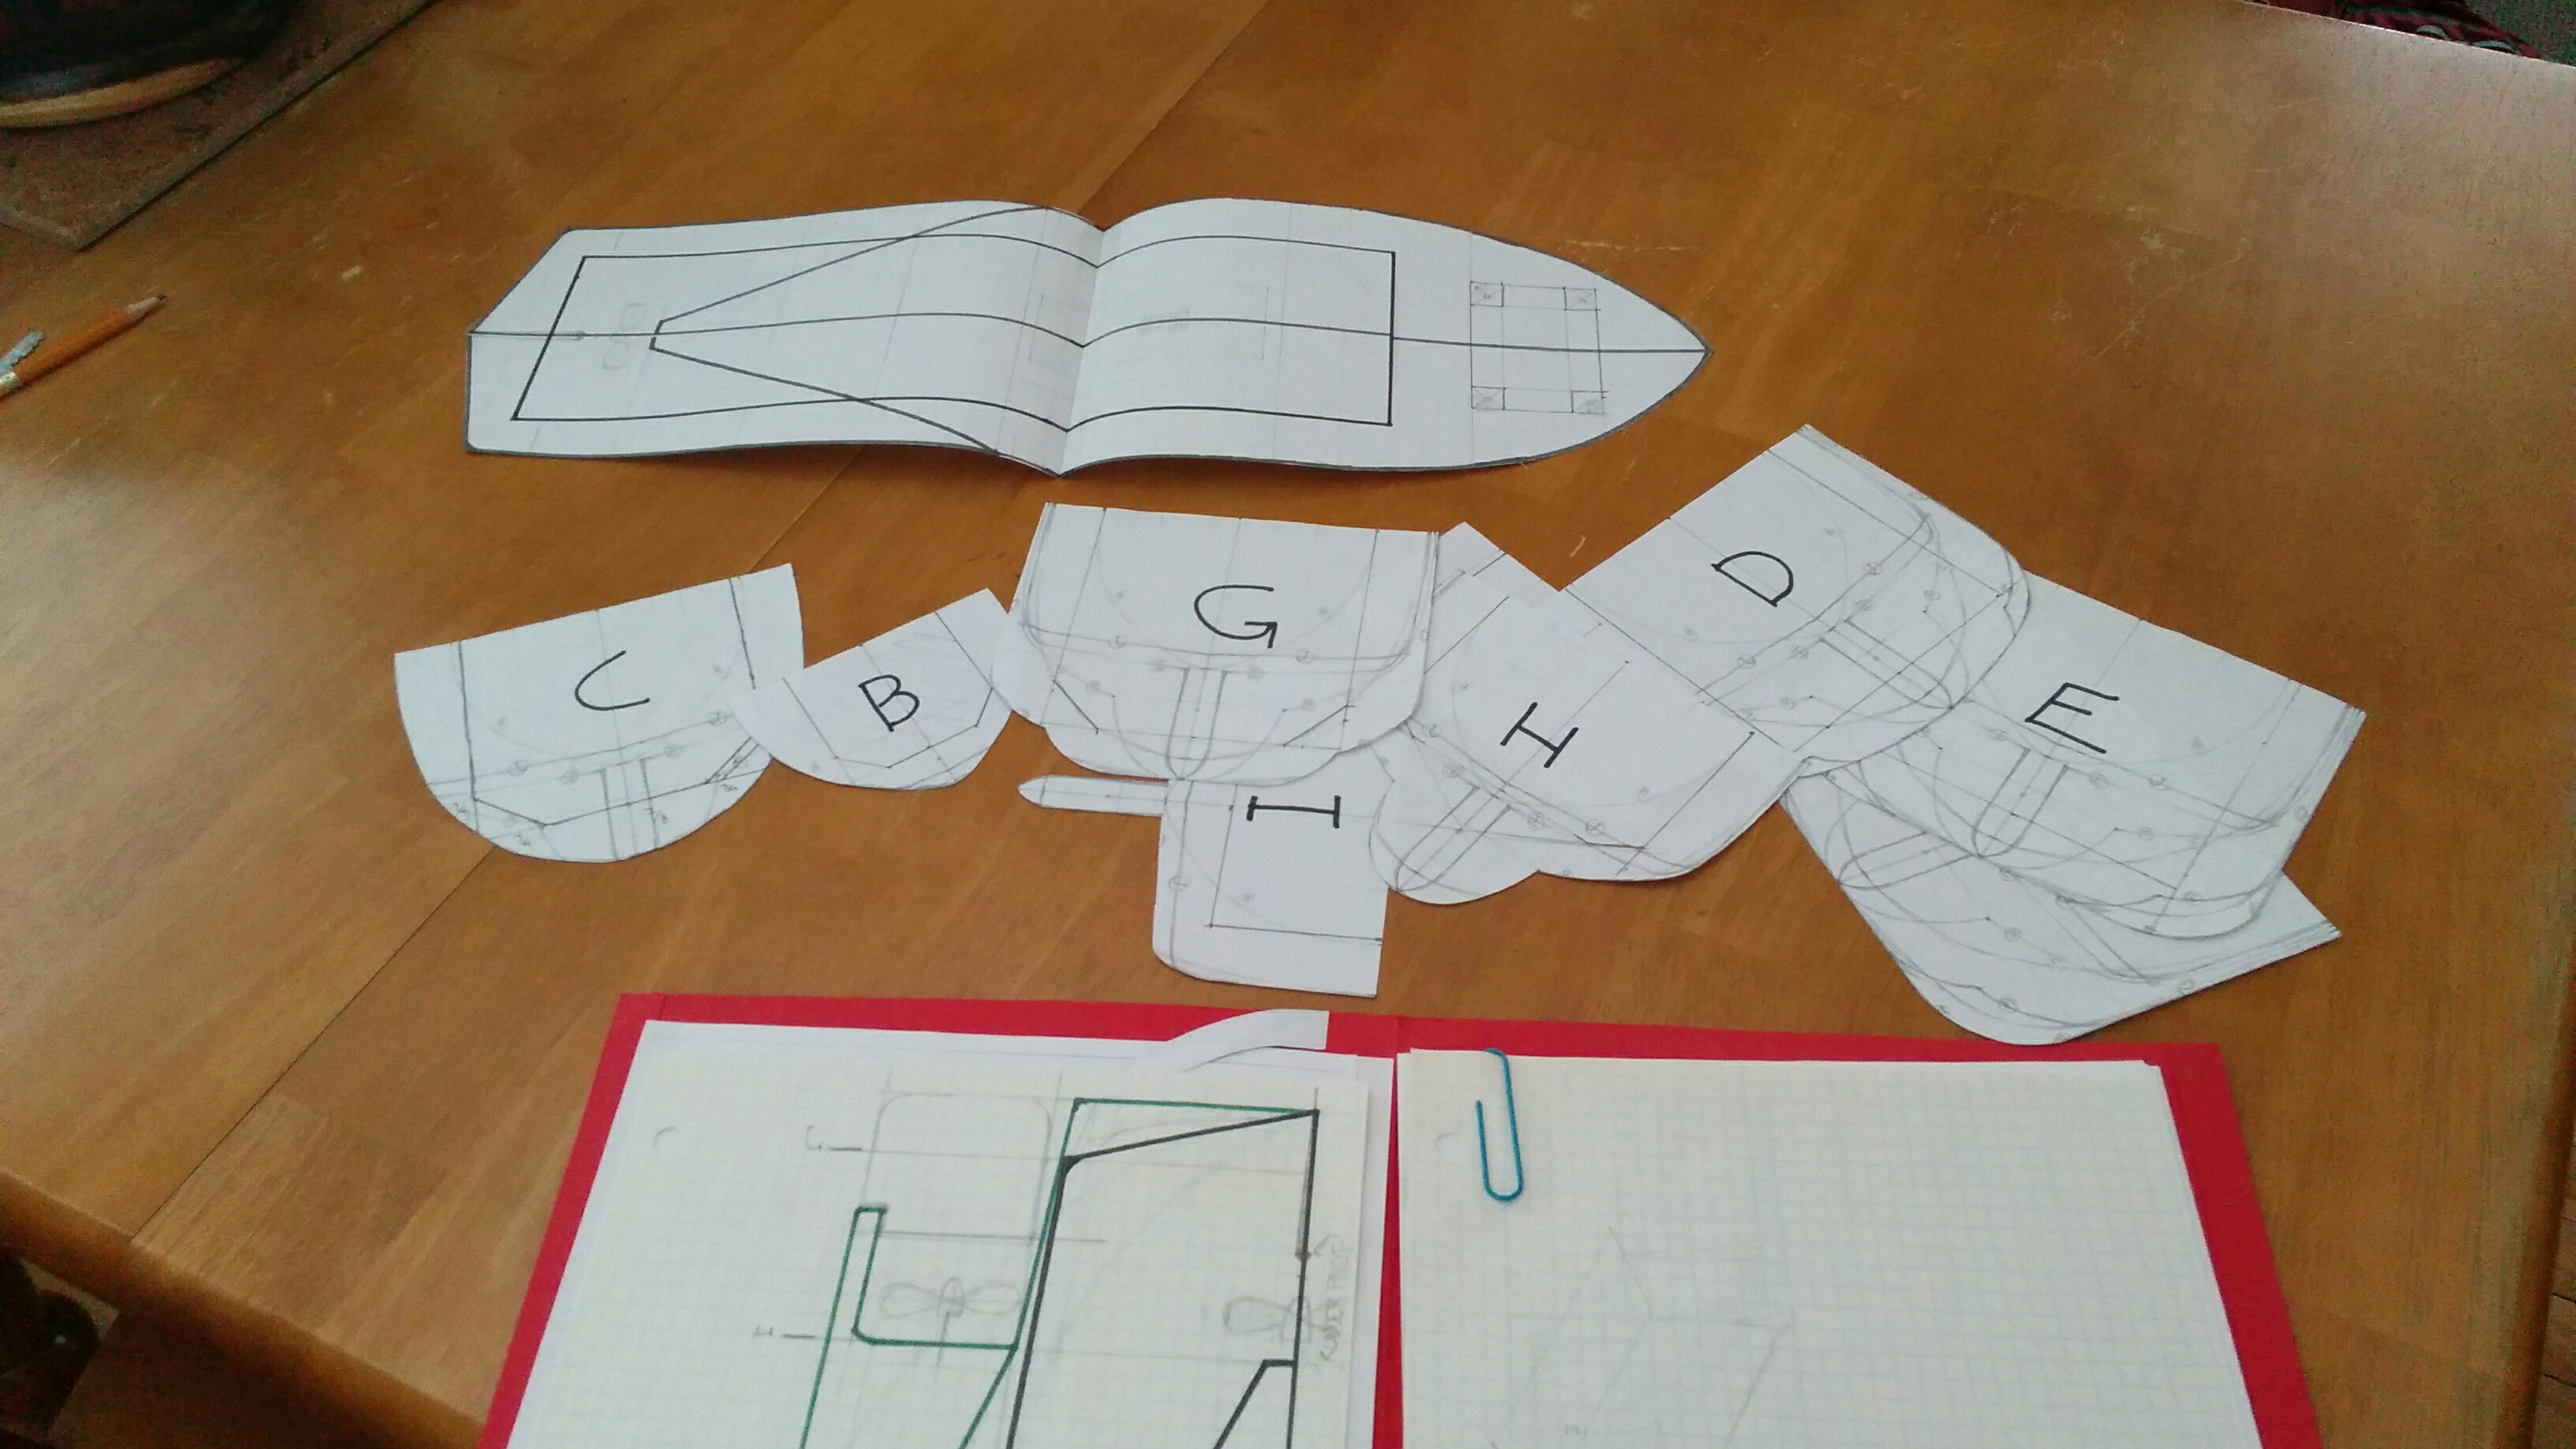
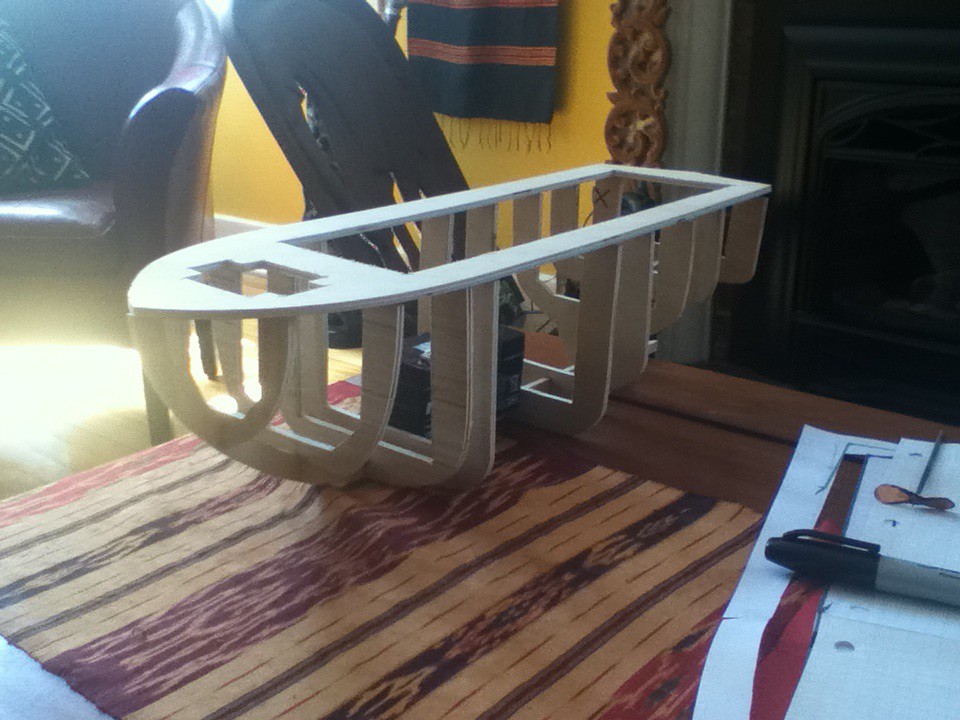
there are others, but you get the picture. if you want a full set feel free to contact me. I did the drawings on quarter inch graph paper (I know I should be using metric standards for everything, but its basically impossible to get stock materials in metric sizes) and then scanned them. the second two images are full scale top and side views, they also indicate were each rib is positioned. the green line indicates the bottom edge of the keel (as seen from the side), and the black line is the outer edge of the deck (as seen from the top down). the first image is a cross section that shows the ribs. the letters next to the rib correspond to its position along the keel. to ensure that my designs were symmetrical I copied an mirrored them in the computer. I did this for for the ribs and the deck. from these drawings I produced a series of paper templates for the ribs, keel, and deck:
I used the templates to cut out the appropriate pieces from quarter inch birch plywood. the pieces were then assembled with gorilla glue and some hot glue to hold it in position while the gorilla glue was drying (no actually glued in the below pic but you get the idea):
in the above picture you can see the battery in place between the E and F ribs. the next stage was planking. there are lots of ways to do this step, and if you're interested in building a model boat I'd suggest doing some reading first, that being said I pretty much picked the easiest/most awful way of doing it.
to plank the hull I glued strips of pine to the ribs. I used the hot glue and gorilla glue method, in addition to lots of clamping. I don't have any pictures of this processes so you'll have to use your imagination. some of the pieces went on easily as they were covering large flatish surfaces, but the curves were harder. to do the curves I cut lots of triangular pieces individually and then made a copy for the opposing side. the triangles were then glued in place and a 'low-poly' curve was constructed. If for what ever reason you want a full description of the planking process and the associated minutia leave a comment and I'll expand this section, but for now it'll suffice to say I glued lots of little pieces of wood together.
once the hull was planked and the curves were roughed out I started to file all of the edges down. this process slowly refined the curves on the boat, but it also opened new holes as the planks were ground away. these holes were filled with, glue, wood, and wood filler in a somewhat recursive process until I thought it looked right. here's a pic from that process:
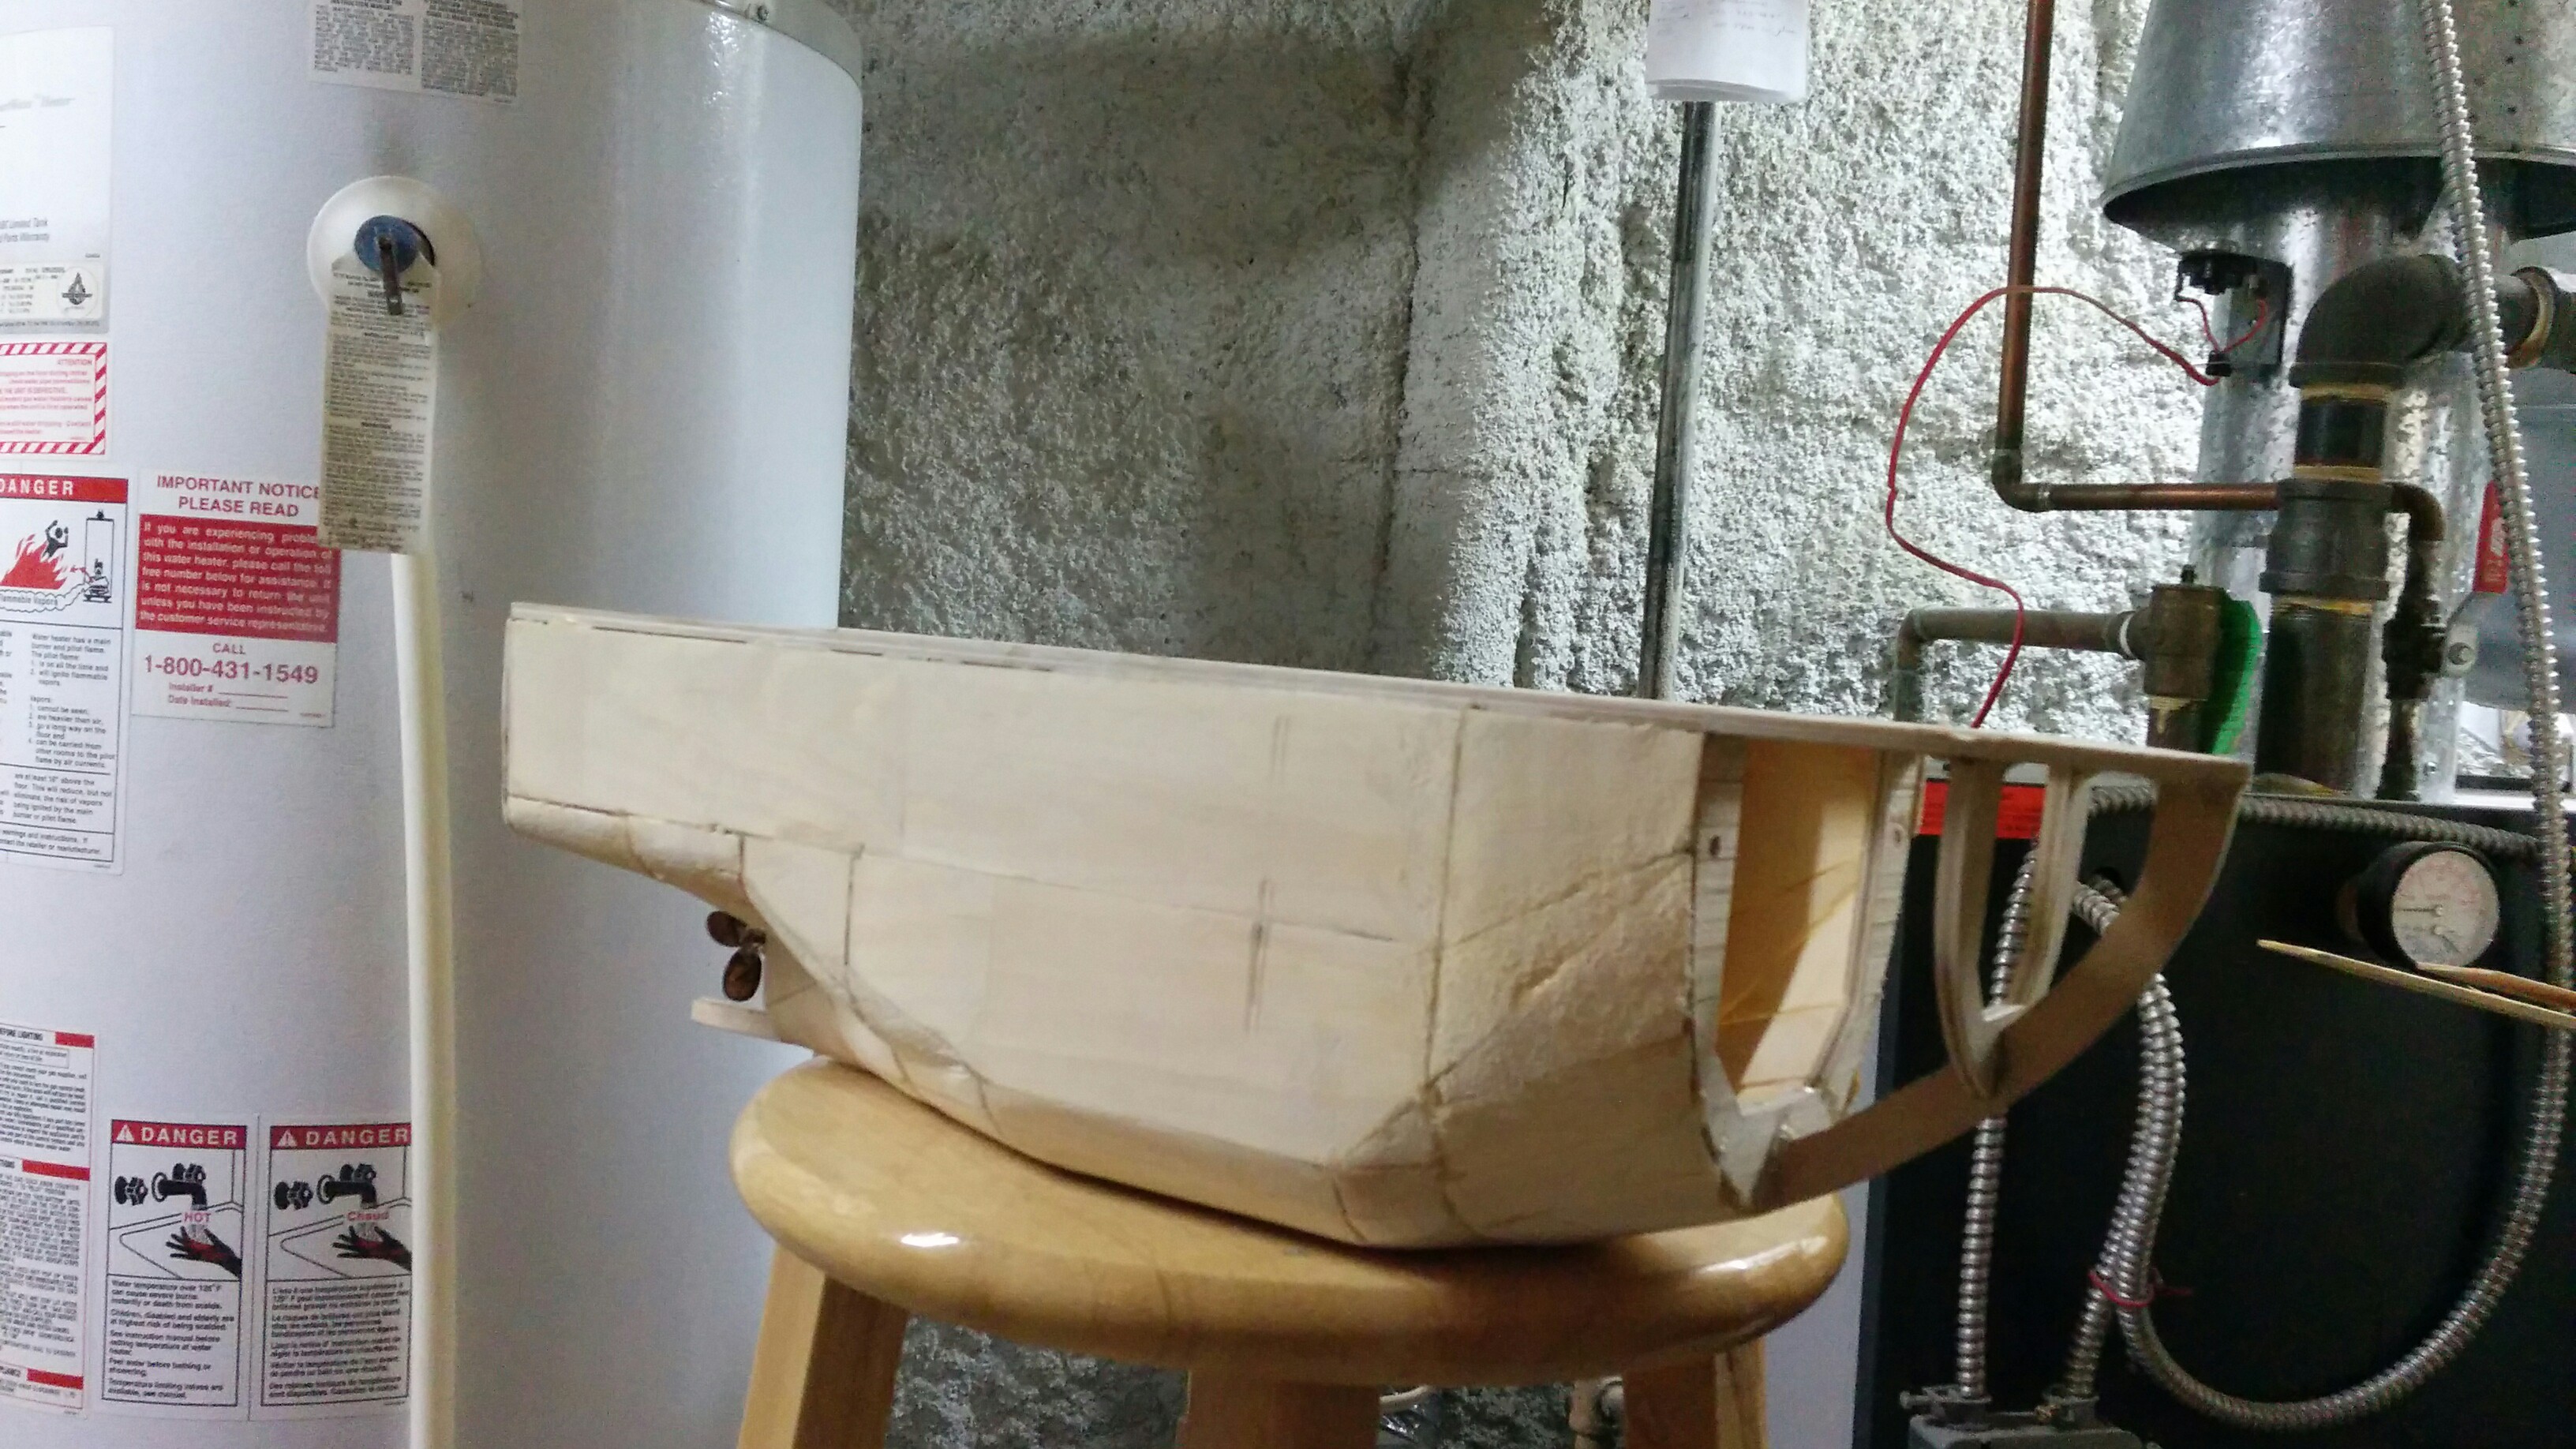
near the bow of the boat the curve got too steep to continue to build in the method I had been using so I filled the volume between the B rib and the A 'rib' with two solid chunks of ceder and went to town with a bench sander.
after the hull was roughed out I applied a few coats of wood filler and sanded a couple more times until the hull was reasonable smooth and uniform. next came paint:
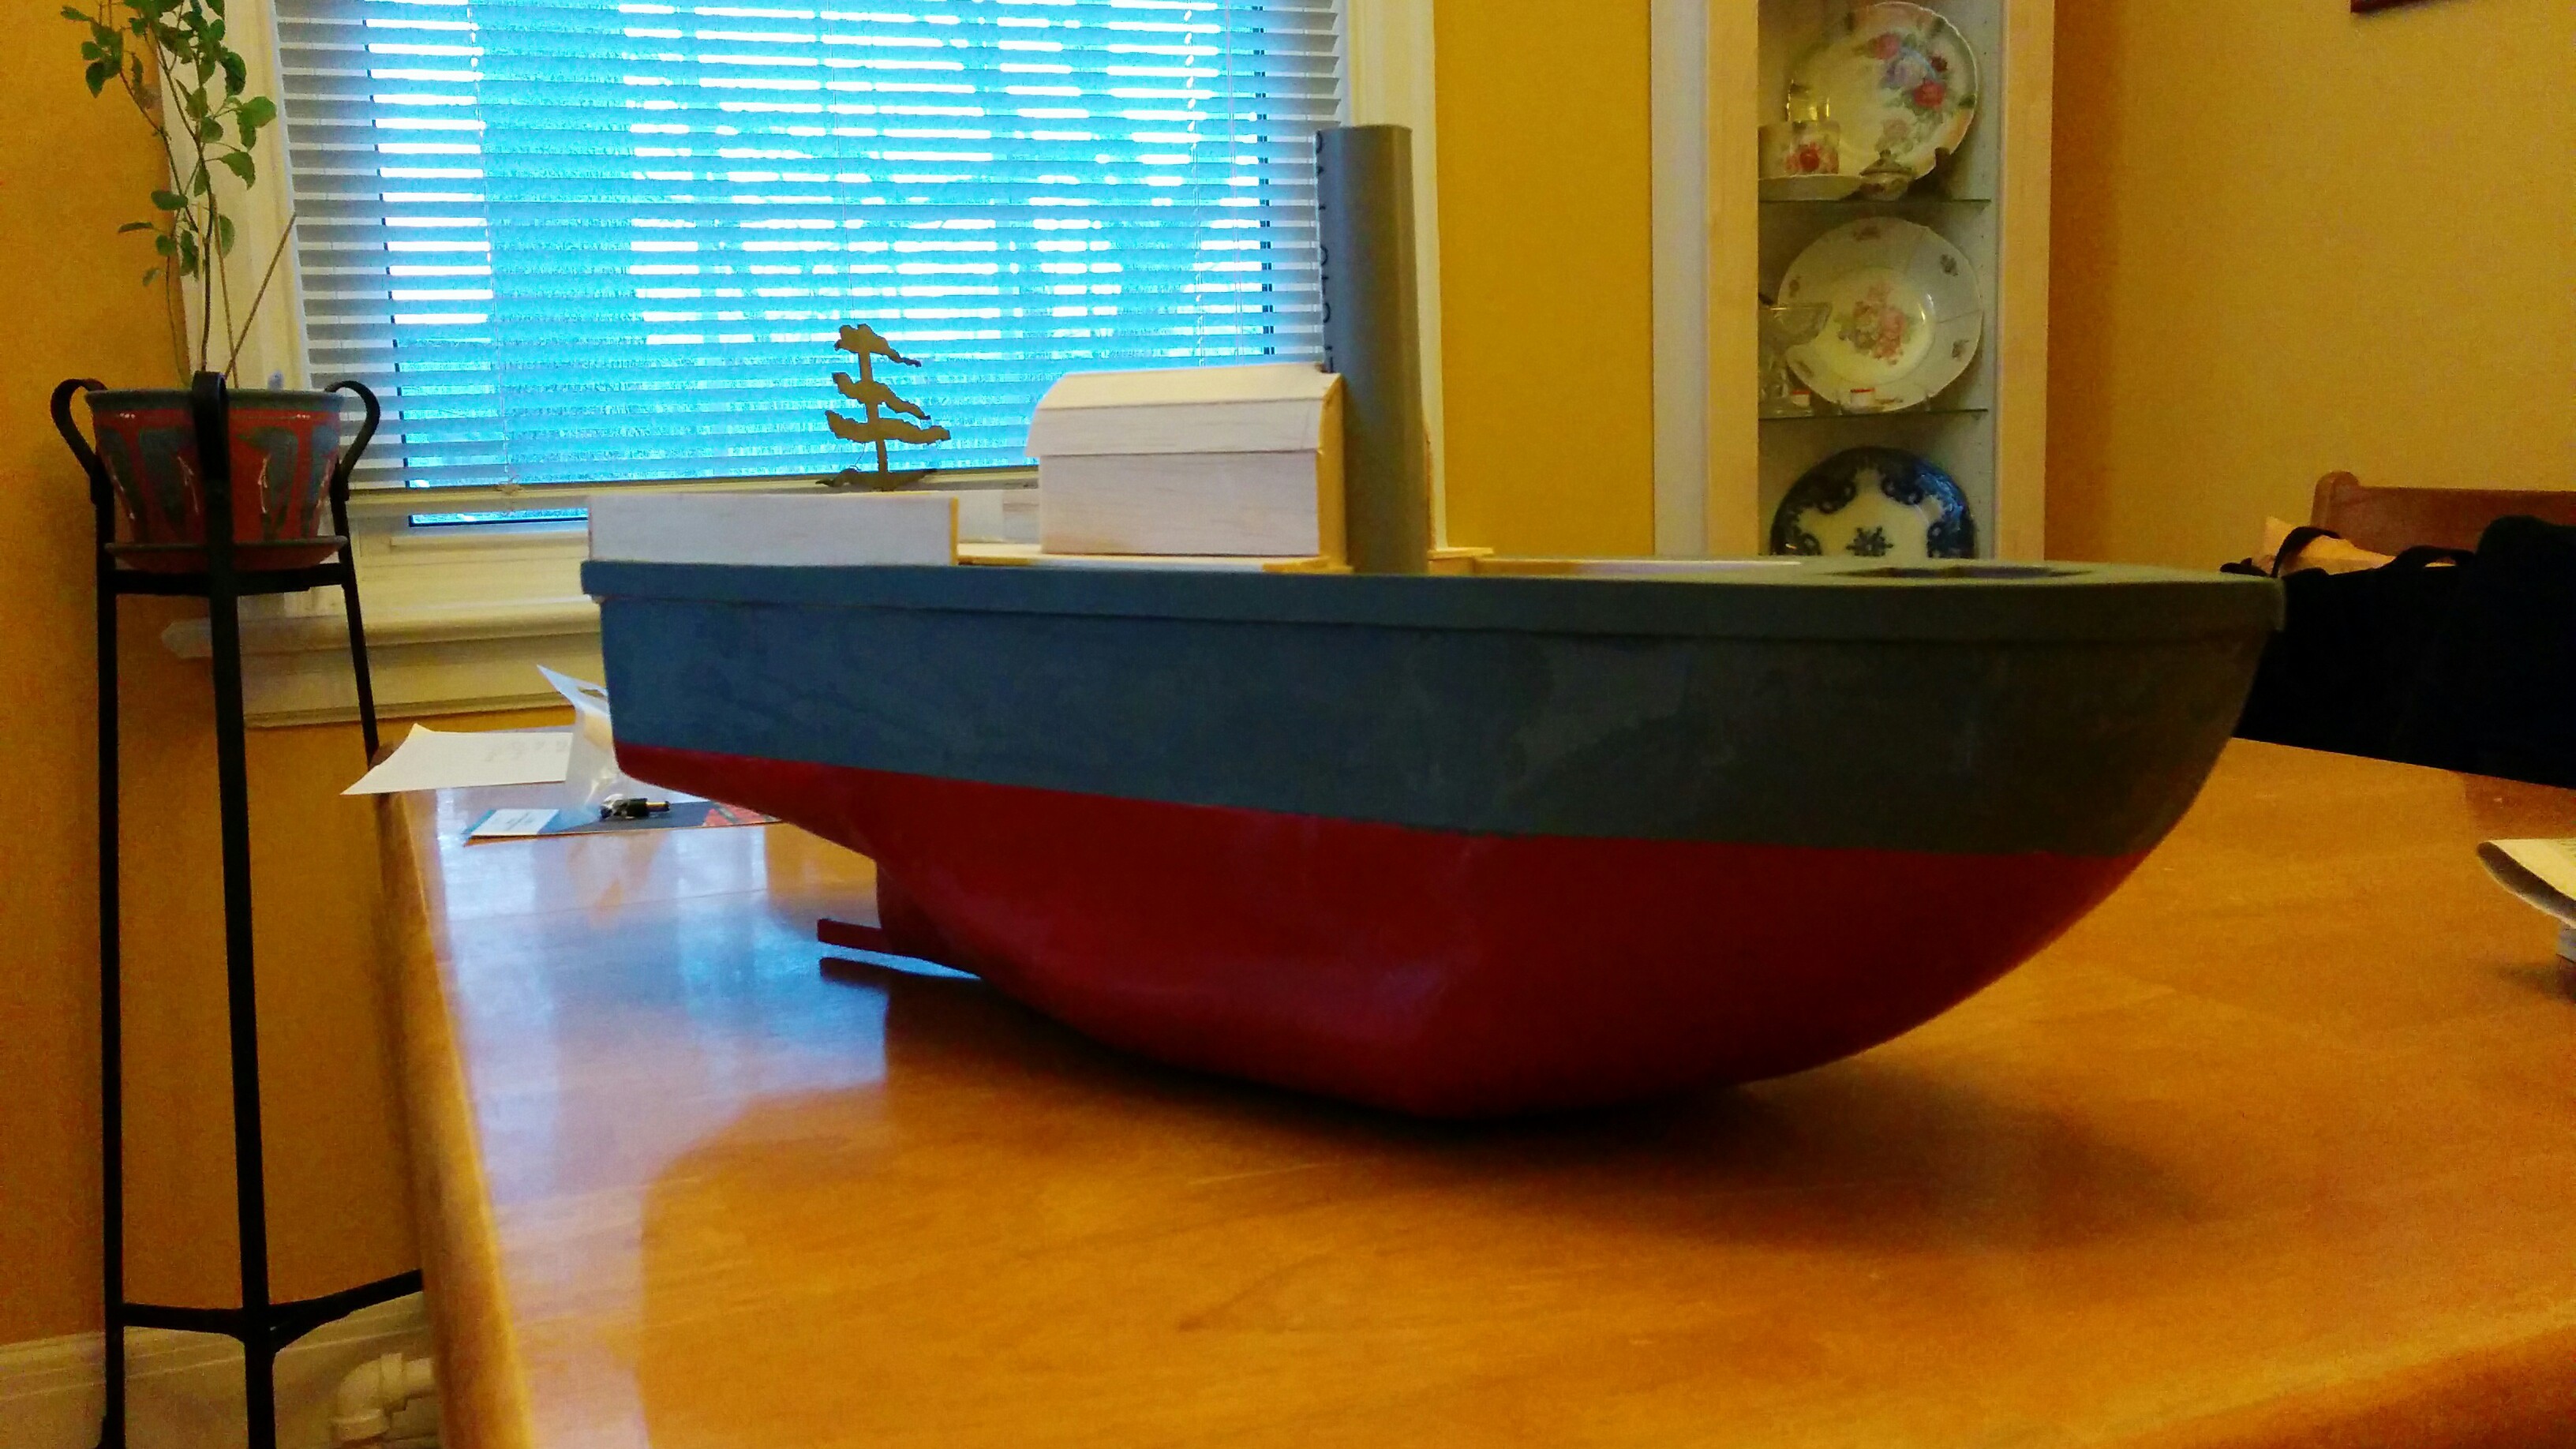
this pic shows the deck houses under construction, which I'll discuss later. you can see that I also added a railing and gunwale to the boat. After the boat was painted I varnished the outside. I used ~3 coats of spar varnish, but I think any varnish meant to seal out water would probably work. finally to seal the inside of the hull and provide some extra strength I dumped in a couple of cups of fiber glass resin (sans the fiber glass cloth) a sloshed it around until it had covered the interior of the hull. protip: if you're going to use resin on the inside do it before you varnish the hull, if the resin drips on the varnish it'll strip it off.
that's pretty much it for the hull. I made a bit of a mess with the skeg, but I'll discuss that somewhere else.
Discussions
Become a Hackaday.io Member
Create an account to leave a comment. Already have an account? Log In.