 Cricut.com/setup
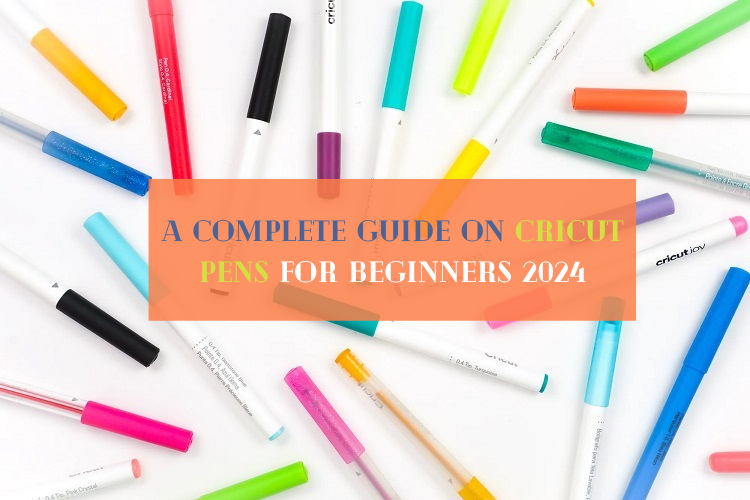
Are you looking for an accessory that can make your DIY craft come to life? If yes! Then Cricut pens are the ultimate answer. When I first bought my Cricut machine setup, I needed to learn more about its writing function. But as time passes by, I always find an excuse to use them to design new things. Yesterday, my parents celebrated their 25th wedding anniversary, and being a craft lover, I was responsible for creating all the decorations from the entrance to the main hall.
Ever since the party came to an end, everyone has been asking about how I made such fabulous projects on my own. Undoubtedly, all credit goes to my Cricut machine and pen. They helped me create projects such as banners, cards, doodles, and many more. In this blog, I explain everything about these Cricut supplies and projects.
What Are the Different Types of Cricut Pens?
Ever since its formation, the company has developed a variety of Cricut supplies that are beneficial for them while drawing or writing on the material. With an aim to expand the lifeline of this item, store this product with a cap in a downward position. One of the good news that I am going to share with you is that Cricut Maker, Explore, and Joy are compatible with all kinds of Cricut pens. These craft machine items are available in various models, allowing you to be more creative:
1. Opaque Gel Pens 1.0 mm
Beginning with opaque gel pens, they pop clearly on the darkest and light materials. With the help of this cutting machine product, it will be easy to include an embellishment on any card, paper craft, or decor. Also, these Cricut supplies are water-proof, non-toxic, acid-free, and permanent after getting dried up. Inside the pack, you will find five different colors, i.e. Pink, White, Orange, Blue & Yellow. Plus, these craft machine supplies are compatible with Cricut Maker & Explore machines.
2. Glitter Gel Pens 0.8 mm
Further referring to this specific Cricut supply, don’t leave the chance to add a special touch to your project with these glitter gel pens. Its eye-catching sparkle and silky gel will surely enhance each part of your project, making it look more attractive and praiseworthy. Also, these craft plotter items are water-based, acid-free, and non-toxic. The pack contains Blue, Red, Orange, Yellow, Green, Purple, Light Blue, Brown, and Black.
3. Pen Set, Metallic (5 ct.)
Equally important, this Cricut supply also includes a Metallic pen set with the Cricut pens in five different colors. These craft machine items are acid-free, non-toxic, and get permanent after getting dried up. Also, they are used for making invitations, banners, cards, gift tags and many more. Other than that, the set includes Gold, Silver, Copper, Blue, and Violet. Plus, this set is compatible with Cricut Maker, Explore & Venture cutting machines.
4. Infusible Ink Pens 0.4, Ultimate (30ct)
Last but not least, watch your design getting into vibrant, permanent, and pro-quality transfers on any Infusible Ink blank. Get a chance to draw and write on the material while making any project. This craft machine pen set is available in a variety of colors that give bright, beautiful, and seamless smooth transfers without any wrinkles. Finally, these items are acid-free, water-based, and aren’t safe for the skin.
Since you’ve learned about the types of cutting machine supplies, let’s begin by making you come across the process by which you can utilize this smart cutting machine accessory.
How to Use Cricut Pens for Making a Custom Project?
If you are a proud owner of a Cricut machine along with other tools and supplies, then this part is going to be beneficial for you. Here, you will get a chance to learn how to create a customized project with these supplies.
Step 1: Draw a Design on the Cricut App
Start the process by going to Cricut Design Space canvas and tick the Upload option. Next, tick the Upload Image and upload an image from your system gallery. After choosing an image, tick the Open and then Upload option. Following this, select your image from the Recently Uploads section.
After choosing the image, tick the Add to Canvas and change Operation from Basic Cut to Pen. Following this, select Ungroup, and you will be able to do your work separately on each layer. Now, click on the top layer and choose the color and pen or marker you want to use during the process. After adding all the colors to the design, select the whole design and tick the Attach option given at the bottom of the Layers panel.
Afterward, unlock your design dimensions and change the height and width appearing at the top of the screen. Also, tick the Make It option and change the material size from the drop-box.
Step 2: Apply the Material on Your Cricut Mat
With the completion of creating design on the Cricut app, open your card and hold it face upward with the crease running vertically and the front panel at the right. Following this, place the material on your cutting mat and go back to the mat preview mat. Now, move your design into the center and hit the Continue option.
Equally important, choose your Cricut material and then load compatible tools from the Cricut pens list. In addition, unlock your machine clamp and start your cutting machine by pressing the blinking Arrow button.
Step 3: Remove the Mat and Share Your Design
In the last step of making a customized card with this Cricut supply, roll out the card from the mat using the spatula tool. Apart from that, flip over the cutting mat and remove the card mat with your hands. Conclude the process of designing a DIY card by folding the existing crease with your fingers or with your Cricut scoring stylus. Finally, your first personalized greeting card is all done.
By paying special towards this smart cutting machine supply, you can now make plenty of customized projects with your Cricut machine. Besides, you can also sell or start your business by designing and selling various crafts made out of your craft machine.
Frequently Asked Questions
How to Load Pen Into Cricut Machine?
Go through the process and load your pen into your craft machine:
- First, unbox your Cricut machine and unlock Clamp A of your machine.
- Next, remove your pen cap and slide it downward into the clamp.
- When you hear a slight click, it will indicate that your Cricut item has been loaded into the machine.
Can I Use Non-Cricut Pens While Making Any DIY Projects?
Yes, you can use non-Cricut pens while creating any project without any type of issues. To do that, you need to open the Cricut app and select a similar pen or marker. On the other hand, you need to ensure that the cricut item you are using is compatible with your craft machine or not. Also, don’t force the pen to insert the pen into the clamp before starting the drawing process.
Can I Draw Directly on My Projects With Cricut Infusible Ink & Pens?
Nope, it’s impossible to draw the design directly on the compatible materials. For the perfect design, all the users must transfer the design made via an Infusible Ink pen with a heat transfer process. These Cricut pens are heat-resistant and can handle the pressure upto 400*F and get permanent on the compatible blank once they are dried up.
For more information visit: Cricut.com/setup autopress
Source: Cricut Pens
Discussions
Become a Hackaday.io Member
Create an account to leave a comment. Already have an account? Log In.