-
Cricut Joy Setup: A Step-by-Step Guide for Beginners
06/27/2024 at 07:31 • 0 comments![]()
Are you looking for an easy Cricut Joy setup tutorial? I’ve got you covered! Cricut Joy is a cutting tool that is great for beginners and anyone who wants to craft occasionally just for fun.
I also have it, and recently, I bought one of its new versions, the Cricut Joy Xtra, but I will only talk about the Cricut Joy machine. I understand some new users find it difficult to setup their Cricut machine. Therefore, I came up with this blog. Here, I will talk in a stepwise manner to make it easier for everyone to understand my points.
The Cricut setup includes various things, such as connecting Cricut to Bluetooth and downloading the Cricut app. However, I will only discuss the Cricut setup for Windows users. So, let’s get started now.
Minimum System Requirements for Cricut Joy Setup
Before you dive into the setup process of the Cricut machine, let’s understand whether your system meets the basic requirements for using Cricut Design Space software. In order to ensure the smooth functioning of the software, I advise you to check the system needs once and then proceed. Once you have checked it, you can move to the next steps, which I have answered: How do I setup my Cricut Joy?
Here is what you need to check on your Windows PC:
- Operating System - Windows 10 or later (64-bit)
- RAM - 4 GB
- Disk - 2 GB free
- CPU - Intel Dual Core or equivalent to AMD processor
- Display - Minimum 1024px x 768px screen resolution
- Connection Type: Bluetooth connection
Cricut Joy Setup Guide: 4 Quick and Easy Steps
Have you checked the above system requirements before proceeding with this step? If so, then GREAT!! Now, you are ready to setup your Cricut without any hassle. In it, we will connect the Cricut and download the software from scratch. If you have bought a new Cricut Joy and haven’t unboxed it yet, then don’t worry. You can join me on this journey. Let’s unbox it and finally set it up together.
Step 1: Unbox the Cricut Cutting Machine
In the first step of the Cricut Joy setup, you will need to unbox the machine.
Here’s the picture of my Cricut machine setup unboxing! Now, let me tell you what I got in the box of the Cricut machine. Let’s take a look below:
- Cricut Joy machine
- Fine Point Pen (0.4mm)
- StandardGrip Mat, 4.5″ x 6.5″
- Powder Adapter
- Welcome Card
- Blade + Housing
- Free trial membership to Cricut Access
- 50 ready-to-make projects online
- Materials for a practice cut
Step 2: Connect Cricut to Your Windows Computer
This second step is crucial in the Cricut Joy setup. In it, we are going to connect our Cricut to our PC using Bluetooth. Before that, make sure your Cricut machine is placed on a flat surface, and the distance should not be more than 10 - 15 between the PC and the machine.
Here’s what you need to do to connect your Cricut to your PC via Bluetooth:
- Navigate to the Start menu and then tap the gear-like icon in your settings.
- Then, you will need to choose Devices on the next screen.
- Now, check whether you have turned on your Bluetooth. If not, please turn it on. Once done, click on the Add Bluetooth or other device.
- On the next screen, you have to select the Bluetooth option.
- After that, wait for a while for your PC to check your Cricut machine.
- As you can see in the available list, you have to select your Cricut model.
Step 3: Download Cricut Design Space
Here’s how to download Cricut software on Windows 10:
- Launch the Internet browser on your desktop.
- Search design.cricut.com is on your browser search bar.
- On the displayed screen, click the I agree checkbox and then hit the Download button.
- Now, you have to hit the Download tab to start downloading the Cricut Design Space.
- Once you have downloaded the Cricut app, double-click on your file from the Downloads folder.
- Afterward, the installation will start.
Step 4: Complete Cricut Joy Setup Steps
- Launch your Cricut software on your PC.
- Then, you need to select Cricut New Product Setup.
- After that,...
-
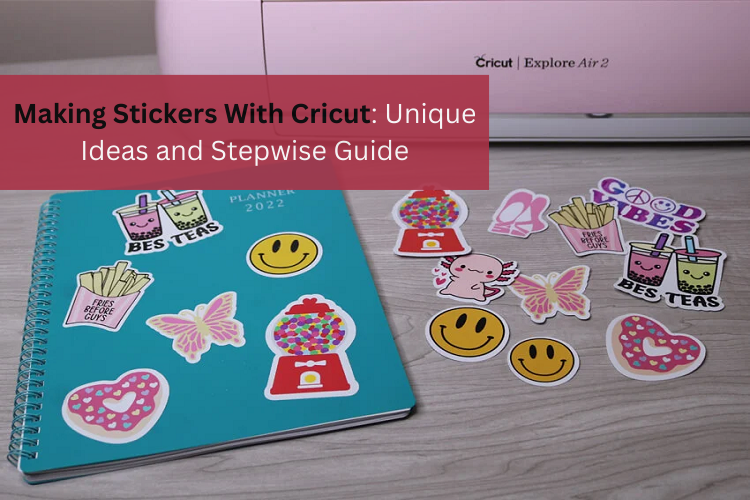
Making Stickers With Cricut: Unique Ideas and Stepwise Guide
02/07/2024 at 10:37 • 0 comments![]()
As the new year arrived, I started planning my resolutions. This led me to buy a planner in which I wanted to plan my days. While planning, I got an idea and decided to give it a creative touch. Since then, I have been looking for customized stickers to add to my planner (which really sounds like a really cool idea). Making stickers with Cricut is easy, as I’ve been crafting for several years. go to official website cricut.com/setup to register.
In this blog, I am going to show you how to make vinyl stickers with Cricut using a Print Then Cut feature. With this tutorial, I will basically cover the steps to guide you through the process. In addition, I will also explain the essential items required to make stickers.
So, visit this blog to learn the steps to create your own stickers using a printer and Cricut cutting machine.
What Will You Need for Making Stickers With Cricut?
The supplies I am going to discuss here are really important if you want to make professional-looking stickers like me. So, gather the following items first, then proceed to learn the steps to create Cricut stickers.
Here’s the list that includes essential items:
- Cricut Machine and Blades
- Cricut Variety Cutting Mats
- A4 Printable Vinyl Sheets
- Printable Clear Sticker Paper
- Printer
- Design Space app
- Printable Sticker Paper
So, you must have these items before learning the steps to create stickers.
How to Make Vinyl Stickers With Cricut Cutting Machine?
Here, I am going to create character-based stickers. Each and every sticker indicates a particular task. Such stickers make it easier for me to figure out which task I am going to perform next.
So, I will take you through the process of making stickers with Cricut that you can use for journals, diaries, and others.
Step 1: Create a Sticker Image
As I have already mentioned in the list of supplies, you will need a software called Cricut Design Space Download. Using this software, I will create sticker images. However, it’s your choice whether you want to create stickers from scratch or upload print and cut images.
Since I hurriedly needed the stickers, I uploaded images that could be easily printed and cut on my printer and Cricut, respectively. Ensure that print and cut require a print margin of 6.75 x 9.25 inches. Hence, I will suggest you create a template so that it becomes easy to work on.
Here’s how to create a template to get the most out of my material:
- First, go to Canvas on your Design Space and navigate to Shapes from the left toolbar.
- After that, choose the Square shape.
- Next, you need to resize it to 6.75 x 9.25 inches.
- Then, you should arrange the stickers onto the template.
- Once everything comes to its place, you will need to remove the square from the canvas.
- Now, you will need to select the images on the sheet and attach all of them together.
Now, we have arranged all the sticker images together to be in one place while being printed and cut.
Step 2: Manage Settings
My design is ready, and I can print and cut it now. Before that, I have to click on the green-colored Make It button. As you hit the Make It button, you will notice your designs inside the black-lined box. This black-lined box indicates that your printer will not print anything beyond this black border, so ensure your design fits perfectly inside the box.
For the rest, you must do the same steps as usual, such as clicking on the Print option. After that, you will be moved to the print screen.
As you can see in the picture above, I have enabled the Add Bleed option. This Add Bleed option creates a margin around the stickers. To access the printer’s settings, you should also enable the “Use System Dialogue.”
Step 3: Load Your Printer
Now, it is time to load my printer. I will add my printable material here.
Note: Before loading the material into the printer, you should know whether your printer requires a face-up or face-down paper feed.
Once done, you...
Read more » -
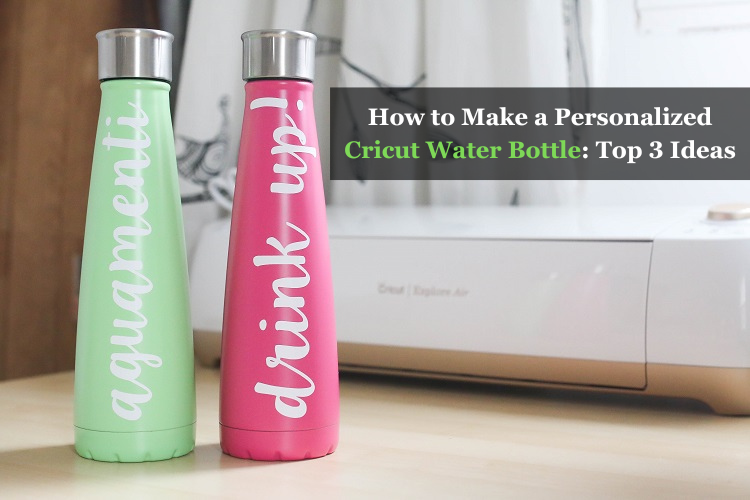
How to Make a Personalized Cricut Water Bottle: Top 3 Ideas
01/25/2024 at 10:23 • 0 comments![]()
The Cricut water bottle is more than just an accessory for hydration, as it's a great way to show off your creativity and personal style. If you are interested in learning how to make a water bottle with the Cricut machine, I have prepared this blog post just for you. In this blog, I will first share with you 3 unique water bottle projects that are very popular and expensive in the market, which I made myself with some supplies and a Cricut machine.
Next, I will show you step-by-step how you can make such bottles in only a short time. Once you learn it, you will be able to make many things like bottles, glasses, and cups. Now, I can't wait to start this guide.
3 Most Popular Cricut Water Bottle Ideas
The following are the trending water bottle ideas that you should try to show your creative side. Bottles are very easy to style and don't take much time. If you are a person who loves exploring new ideas, you are going to love these three ideas.
1. Berg Water Bottle
Whether you're a working professional or in college, you can make this project with your Cricut. This is a water bottle from a very popular brand, Berg, which you can prepare yourself at your home. I made this because I had to give it to my clients at the crafting office. To make this, buy a plain water bottle, cut out several permanent vinyl berg designs with a Cricut, and attach.
2. Cricut Water Bottle With Vinyl
My daughter wants to serve the country as a professional nurse, and I keep giving her small gifts to keep her motivated. She loves to personalize things, so I gifted her a personalized water bottle. To make this, I need a Cricut machine and vinyl. You can also make this by simply cutting your design on vinyl.
3. Sports Water Bottle
If you are also a sports lover, like to go to the gym and also do workouts. It is your responsibility to keep yourself hydrated, and for this, you need a water bottle that will excite you. This Cricut allows you to personalize a plain water bottle according to you.
To make this first, go to the Design Space, create a stencil design, choose the correct material setting, and cut it out.
How to Make a Water Bottle With Your Cricut Machine?
After sharing my top Cricut bottle ideas with you, I'll now walk you through the complete step-by-step process of how to make a custom Cricut water bottle.
Step 1: Collect All the Tools and Supplies
The first thing you have to do is gather all the essential materials you will require for your project.
- A Step by step instruction
- Cricut cutting machine
- Permanent adhesive vinyl
- Transfer tape
- Cutting mat
- Scraper tool
- Blank water bottles
- A computer with Design Space installed
- Downloaded SVG file
Step 2: Upload Your SVG File on the Design Space
First, we connected our Cricut machine to our computer and opened the Design Space.
- Now, click on the New Project on this software.
- After this, press the Upload icon on the left-hand corner of your screen.
- Then, browse and find the SVG file from your computer system.
- Next, import the file, write a name and tag for it, and select Upload.
- Here, I am making more than 3 Cricut water bottle designs, so I have selected multiple designs.
- Now, measure your bottle and resize your design accordingly using the edit tool.
Step 3: Choose the Appropriate Material Settings
The design we will make on the bottle must be curved; for this, click on the design and use the curve tool. Once everything is prepared according to plan, click on the Make It option.
Now, you will be on a new page, mirror the design here, and click on Continue.
Subsequently, set the material as permanent vinyl and maintain the default pressure setting.
Step 4: Cut the Design
Now leave your computer as it is, take your permanent vinyl, and lay it on the Cricut mat with the shiny side down. And after that use the roller to fit it correctly.
Moreover, press the Load button on the machine and load the mat. Then go back...
Read more »
My Pages

Projects I Like & Follow
 Lutetium
 Rui Santos
 Vinch
Vinch Kuldeep Singh Dhaka
 NASCO
NASCO Johnny
 atltvhead
 danjovic
 CNLohr
I use the Ada language on a STM32F4 to turn an old hard drive into a solenoid engine.
 Fabien-Chouteau
 1BarConnection
 Wenting Zhang
 Rahul Khanna
 Savo
Savo