-
How to Connect Cricut to MacBook: A Complete Guide
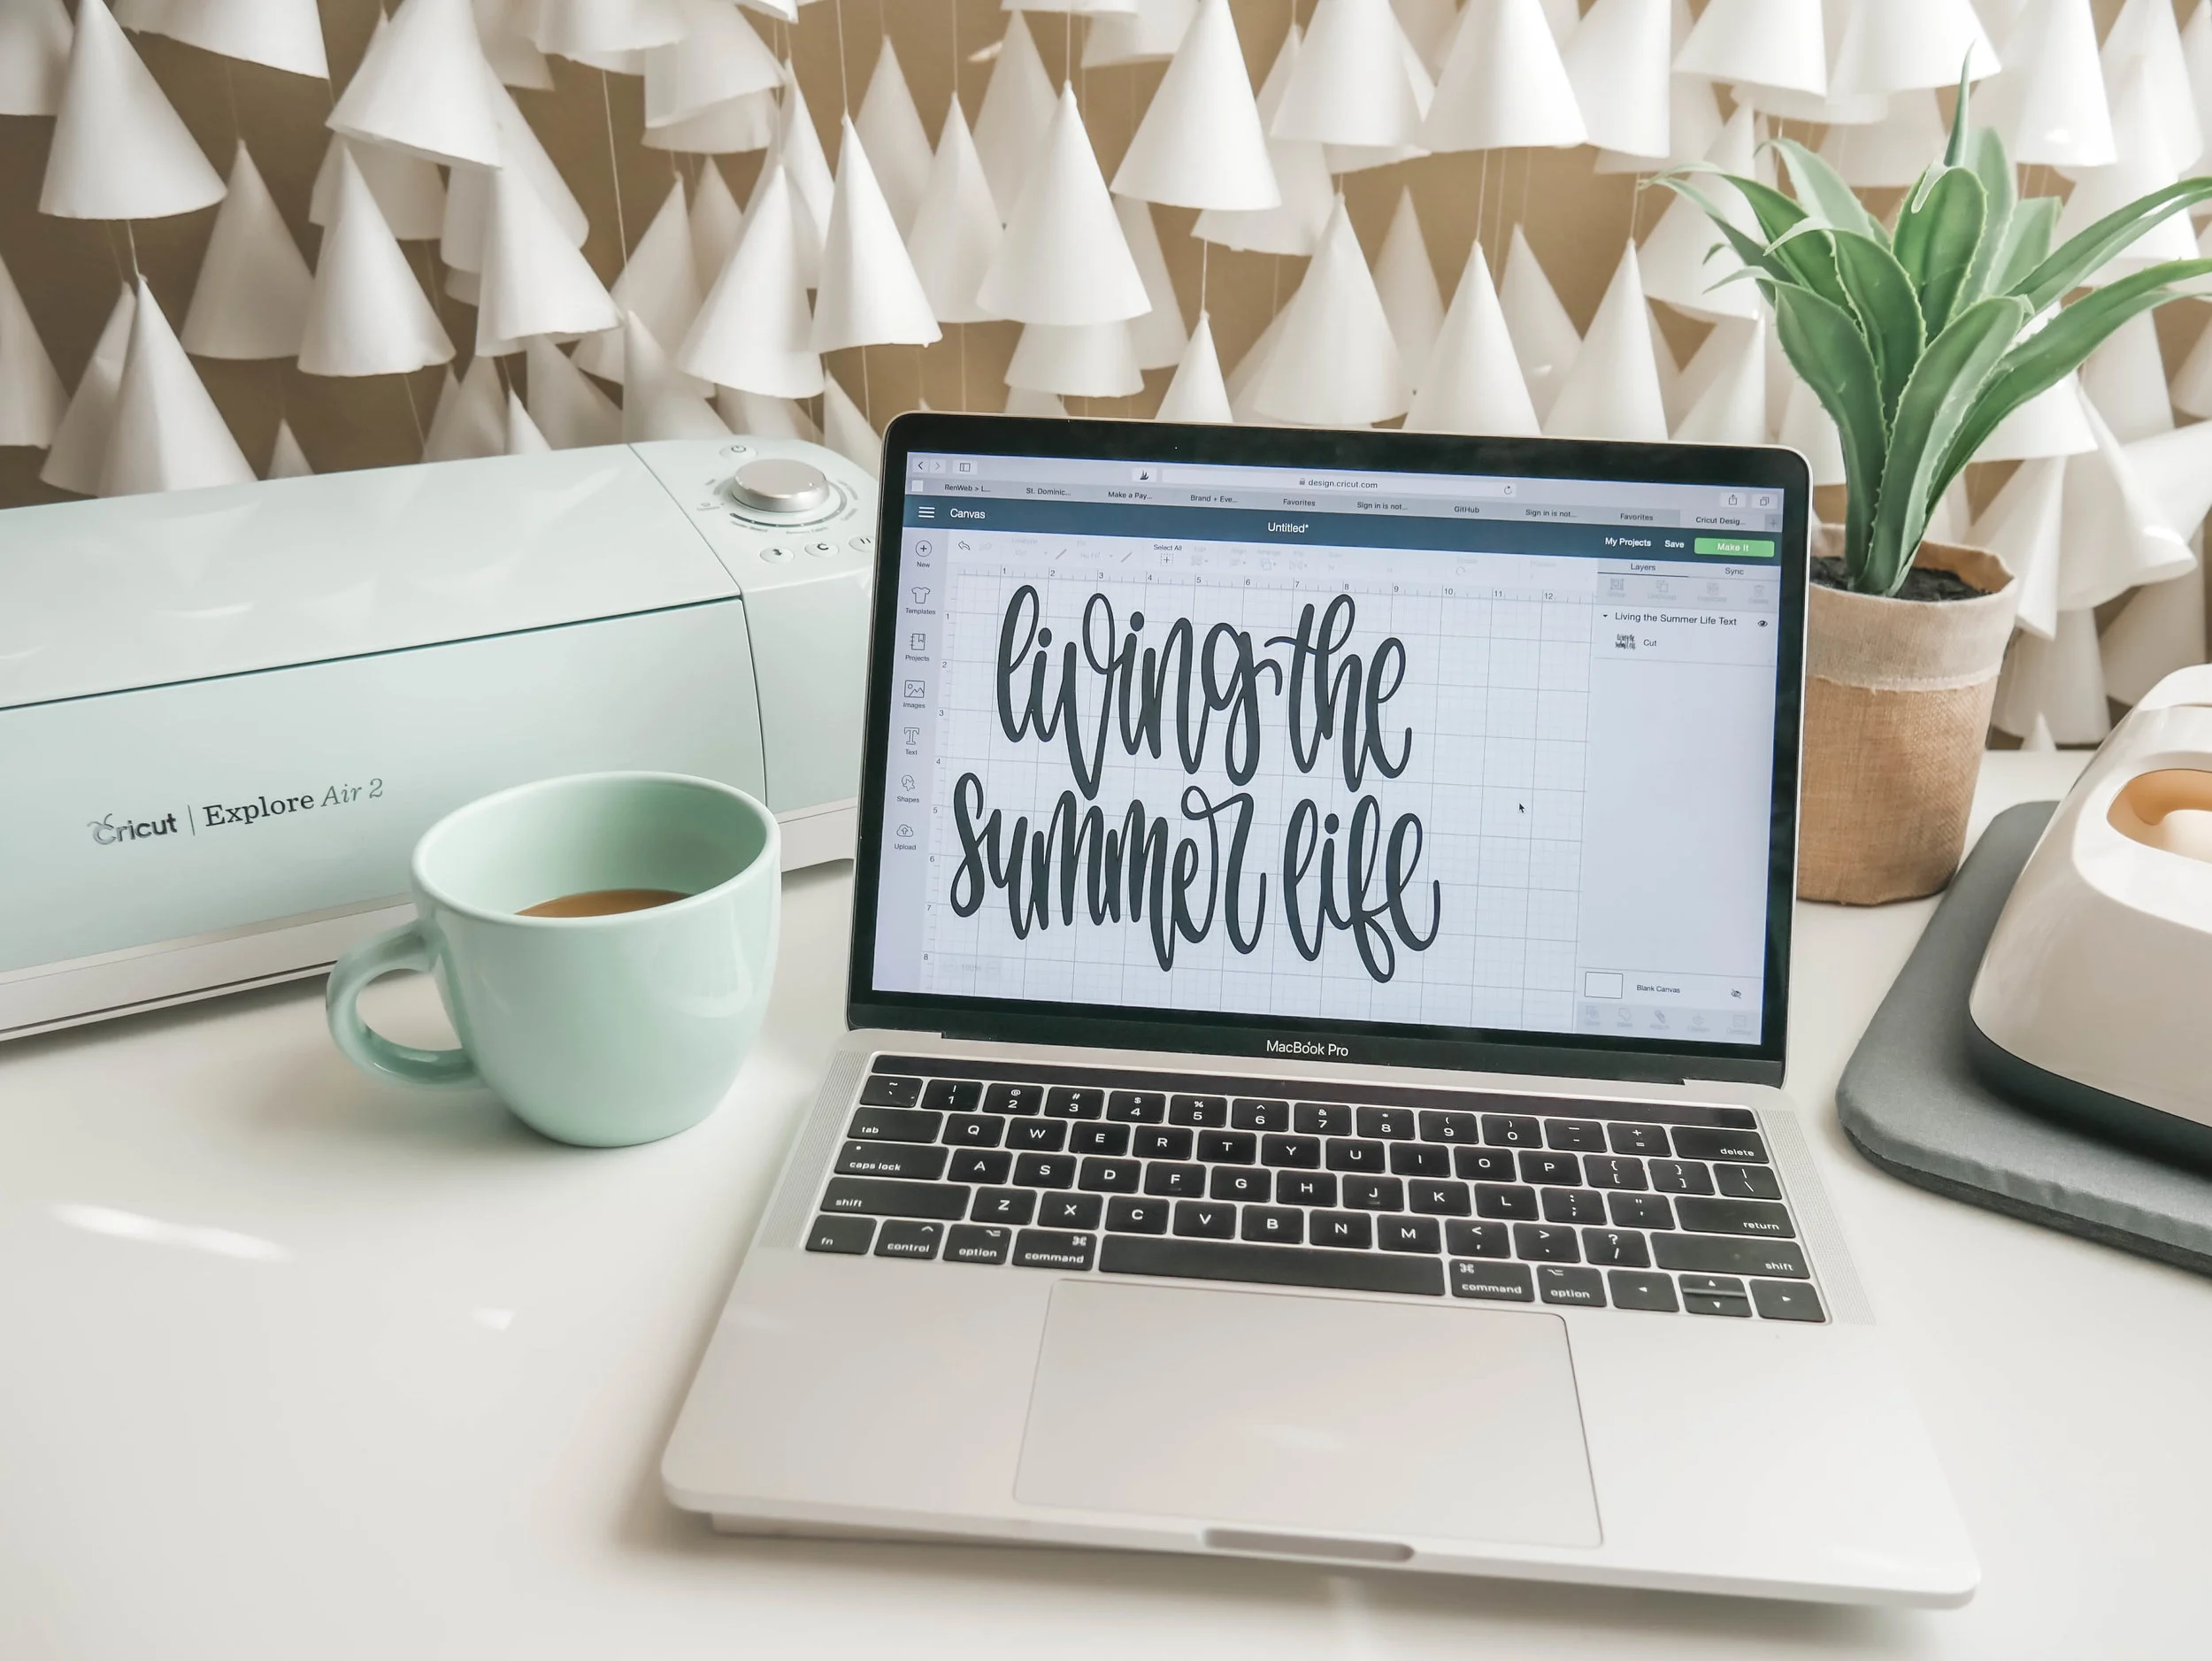
04/20/2024 at 10:47 • 0 commentsDo you want to connect your Cricut machine to your MacBook? If yes, then this blog will help you understand the connection between Cricut and Macbook. It’s not only about you; almost everyone who is starting with a Cricut machine finds the setup procedure difficult. Therefore, be with me and learn how to connect Cricut to MacBook here.
Before that, you need to understand that Cricut Design Space is an intuitive Cricut software that you need to set up on your device to connect your Cricut product. To get this software, you need to download and install it on your device. Then, you will be ready to set up your Cricut machine for a MacBook.
What Do You Need to Get Started?
To get started with the Cricut connection to MacBook, you need to keep a few things in mind. Look at the steps below to learn the necessary requirements.
- Your macOS version should be the latest, macOS 11 or later.
- Your device should have USB or Bluetooth connectivity.
- Ensure that your PC has a RAM of 4GB and 2GB free disk space.
- Also, ensure that your screen display is at least 1024 x 768.
- You should have an internet connection.
Now, you are ready to start the Cricut setup on your MacBook. Let’s check the steps.
How to Connect Cricut to MacBook?
As you know, Cricut machines are compatible with Windows and Mac computers; you can set it up easily on any of your devices. Here, you’ll learn how to connect it to a Mac device. Look at the steps below.
Step 1: Connect Cricut to a MacBook via Bluetooth
Your first step should be to connect your Cricut to a MacBook using a suitable method. I’m choosing the Bluetooth connection method, which is the best wireless connection.
- Initially, turn on your Cricut machine and connect it to the power outlet.
- Then, hit the power button to make it ready for pairing.
- After that, ensure that your Cricut and MacBook are 10-15 feet apart from each other.
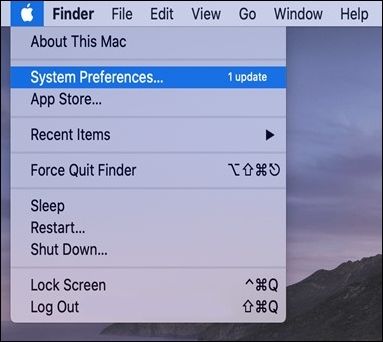
- Now, head to the Apple menu and select the System Preferences option.
![System Preferences]()
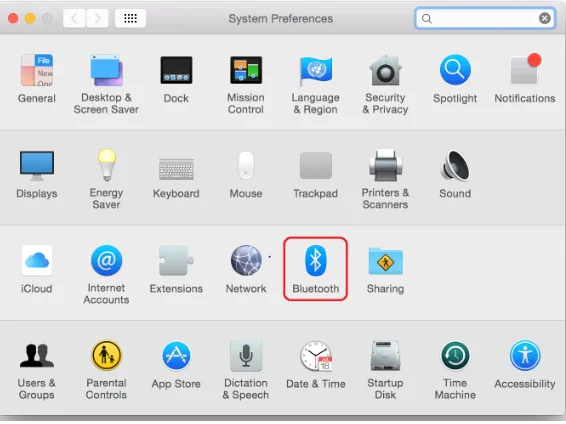
- In the following step, search for the Bluetooth option on that page.
![How to setup my Cricut Maker]()
- When you see the Bluetooth option, turn it on.
- Next, pick your Cricut model from the list of available options.
- Enter “0000” if the screen asks you to enter a PIN.
- In the last step, select the Pair option to start the pairing process.
Finally, your pairing process will be finished. You have learned one step towards how to connect Cricut to MacBook.
Step 2: Download Cricut Design Space
In the second step of connecting Cricut to a MacBook, you need to download and install the Cricut Design app on your device. Look at the steps given below to install the Cricut software.
- To start, navigate to Cricut’s official website on an internet browser.
- Then, search for the Cricut Design Space and hit the Download button when you see it.
![Downloading Cricut Design Space App]()
- Also, agree to the terms and conditions and the privacy policy before going ahead.
- After that, let the download process start, and you may notice slight changes on the screen.
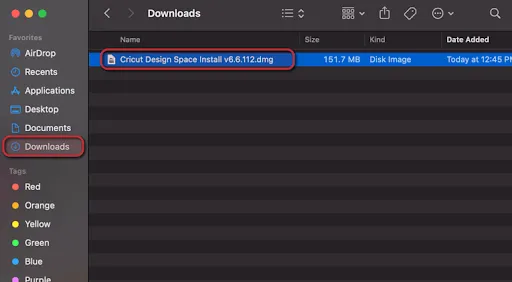
- Let the software download, and once the download is over, search the folder in the Downloads folder.
![Download & Install Cricut Design Space App on Windows & Mac]()
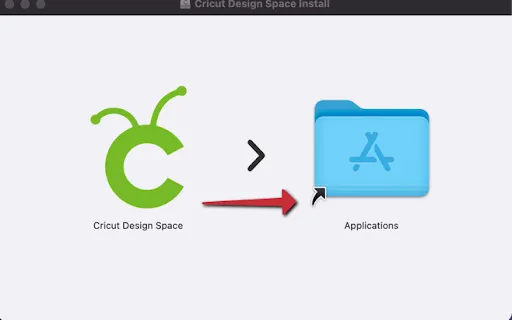
- To start the installation, drag your .dmg file to your Applications folder.
![Download & Install Cricut Design Spaxe]()
- By doing this, you will add your Cricut Design app under the Applications folder with an icon.
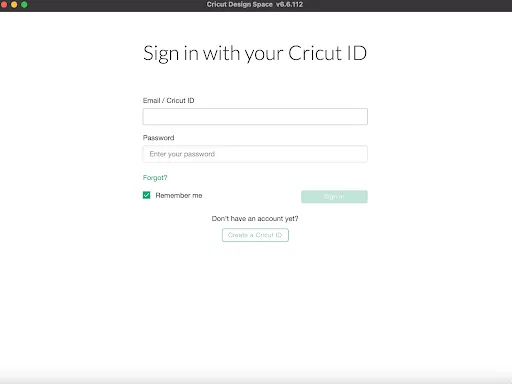
- Now, open your app and sign in to your Cricut account.
![Sign in to Cricut App]()
- Next, if you are a first-time user, create a new Cricut ID.
Finally, you have learned how to install Cricut Design Space and how to connect Cricut to MacBook. Now, you can start project-making with your amazing Cricut machine.
FAQs
How Do I Setup Cricut Machine on My Phone?
To set up a Cricut product on a phone, follow these steps.
- Initially, head to the Play Store/App Store on your...
-
How to Connect Cricut to MacBook: A Step-by-Step Guide
04/06/2024 at 11:05 • 0 commentsGetting started with a brand-new Cricut machine can be overwhelming, especially for beginners. So, I’m here to help you with its connection. Take a deep breath, and let me teach you how to connect Cricut to MacBook. It’s going to be interesting, and after reading this blog, you won’t need anyone’s help to set up a connection between your devices.
As a MacBook user, you may often find yourself in trouble due to different connection and setup methods, but not anymore! In this guide, I will explain the steps, particularly for MacBook users, to help them out with a Cricut connection. Here we go!
What Is a Cricut Design Space?
It’s the key to a Cricut machine’s setup. If you’re an existing user, you might know about it. But, if you don’t, I’ll tell you here. Basically, it is a design software by Cricut. This software has many features that allow you to design anything. For instance, you can use different fonts, designs, templates, etc, to design your project.
To get started with the Cricut Design app, you’ll need to download and install it. I’ll share with you the procedure to get this versatile software on your Mac system. Well, you can get this software on any device, but as this guide emphasizes the Mac system, you can only learn about Mac. After installing this design software, you can connect Cricut to MacBook.
How to Download Cricut Design Space on MacBook?
You know how important it is to download and install the Cricut software on your MacBook system. Check the steps below to learn how to install it on your Mac.
- Navigate to design.cricut.com on an internet browser.
- Now, accept the Cricut Terms and Conditions and Privacy Policy to proceed.
- Then, hit the Download option to get the app.
- After that, select a location to save your Cricut software file.
- Next, let the download process start and end.
- Once the download is complete, head to the Downloads location.
- In the next step, you’ll get an icon for Cricut Design Space.
- Then, drag that icon to the Applications folder to start the installation.
- Next, your Cricut Design Space will be added under the Applications folder.
- Thereafter, move to that folder and launch your application.
- To open the app, you may need to select an option, select the Open option.
- Now, sign in or log in to your Cricut ID and password.
- Finally, you can enjoy your Cricut software and create projects.
That’s it for installing the Cricut account on your MacBook. If you’re a new user, create a new Cricut account and then sign in to your Cricut account.
Connect Cricut to MacBook: 2 Different Methods
Here, all your questions will be answered. I’ll tell you all the steps involved in connecting a Cricut machine to a MacBook.
Method 1: With a USB Cable
If you want a wired connection, you can choose a USB connection. As this connection method is conventional, you can use it to connect your devices when your device doesn’t support a Bluetooth connection. Let’s see the steps below to learn how to connect Cricut to computer with USB.
- In the first step, connect your USB cable to your Mac’s USB port.
- Now, connect another end to the Cricut machine.
- After that, power on both devices by connecting them with a power supply.
- Next, when your devices are ON, you’ll see the lights blinking.
- Finally, you’ll see that your devices are connected to a USB.
That’s it to connect Cricut to MacBook via USB connection. If you don’t want to use a USB connection, go for a wireless connection like Bluetooth.
Method 2: Via a Bluetooth Connection
If you want to go for a wireless connection, you can select the Bluetooth option. Let’s see the steps here to learn how to connect Cricut to MacBook via Bluetooth.
- To start, power on your Cricut machine and then turn on your Mac system.
- Once your Mac is ON...
-
Cricut Explore Air 2 Wireless Setup on a Computer and Mobile
03/21/2024 at 11:13 • 0 commentsHey, are you looking for a guide to setting up your Cricut machine? However, Cricut already has plenty of models in its lineup. So, which Cricut machine am I talking about?Well, this is going to be all about the Cricut Explore Air 2 wireless setup. The setup will be done wirelessly using Bluetooth. Since a Bluetooth connection might be a little tricky for beginners, I will show you how to connect your Cricut Explore Air 2 to Windows or Mac wirelessly via Bluetooth.
I have done it for many Cricut machines, such as Cricut Maker, Explore, and Joy. But today, I am setting up my friend’s machine. She wanted to enter the world of crafting, so she had to do it herself, but for some reason, she could not do so. I took this chance to explain to you all the steps of setting up the machine. Let’s start!
How to Connect Cricut Explore Air 2 via Bluetooth to Computer?
Let’s establish the connection here! Connection is very important for our Cricut Explore Air 2 wireless setup. The wireless connection will be a breeze with the following steps:
Windows
- You should first place the Cricut machine within 10 to 15 feet of your computer.
- Then, you will need to move to the Start menu > Settings (Gear icon).
- After that, you need to go to the Devices option.
- Now, turn on Bluetooth and hit Add Bluetooth or other device.
- Next, select Bluetooth and wait until it shows your Cricut model.
- Also, select the machine from the available list.
- Here, your machine will be paired.
- You can also start setting up your machine.
Mac
- The first step is the same as for the Windows computer.
- Navigate to your Apple menu and select System Preferences.
- Now, you have to find the Bluetooth option.
- Verify whether the Bluetooth is turned on.
- Then, let your Mac find your Cricut machine.
- Select the machine model found by your Mac and begin pairing.
- Finally, you have paired your machine successfully.
iOS
- Again, the first step is the same as that for Mac or Windows.
- Now, go to the Settings and turn on the Bluetooth.
- Now, choose your Cricut model from the list.
- Now, you have paired your Cricut Explore machine with your iOS device (iPhone or iPad).
Android
- Once you have placed your machine at a recommended distance, you need to go to Settings.
- Now, you have to turn your Bluetooth on.
- Then, select your machine model from the available list.
- Here, it is paired now.
Cricut Explore Air 2 Wireless Setup on a Computer
Below, I will share the methods for wirelessly setting up your Cricut machine. The following steps will be helpful for both Mac and Windows users.
- To setup your machine, you have to visit cricut.com/setup on any browser that you use.
- Then, proceed to the next page and click on the check box to download the Cricut Design app.
- However, everything will be shown on the screen; you just have to follow the prompts to set it up.
- Next, you will be required to register your machine using sign-in with your Cricut ID.
- Afterward, choose the machine on the upcoming screen.
- Now, you have to plug your machine into your computer using your power cord.
- You can skip to the next step since you have already connected via Bluetooth.
- Also, your Design Space will be updated; wait and let it update.
- Once it is updated, you have to register your machine by entering the details. You should also try the free Cricut Access Membership trial.
- Finally, you have to follow the prompts to perform a test cut or complete your first project.
Cricut Explore Air 2 Wireless Setup on a Mobile
Many users want to use their mobile phones to operate or setup the Cricut machine. Don’t worry; I’ve got you covered below! Below, I have explained how to setup Cricut Explore Air 2 for mobile devices, suitable for both iOS and Android...
Read more -
How to Use Design Space for Cricut: Beginner’s Guide
02/29/2024 at 11:35 • 0 commentsMy daughter loves reading, and I appreciate her hobby as it helps her collect information. To honor her hobby, I will give her a customized bookmark that I made. It will be a symbol of love and appreciation for taking her hobby so seriously and still valuing it. I have created numerous DIY crafts for a long time, and this blog will teach you all how to use Design Space for Cricut.
Cricut Design Space is an easy-to-use and easy-to-learn design software that allows crafters to give their ideas the proper form. The Cricut app provides tons of images, text fonts, and ready-to-use projects for free. Besides, this software is compatible with all the Cricut cutting machines & Heat Presses.
If you have recently downloaded the Cricut app and want to make your first project, check out the information in the section below.
Step 1: Create a Bookmark Design on the Cricut App
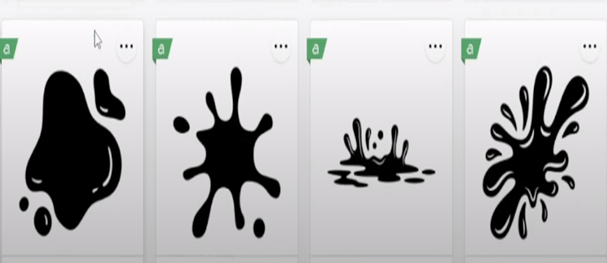
Let’s start the process of how to use Design Space for Cricut by making a customized bookmark by going to the Shapes tool and choosing a square. After selecting the shape, change its dimensions, and it will get into a proper bookmark shape. Next, press the Images and type Splash inside the search section, and a gallery of those designs will appear. Select any design from the library and tick the Add to Canvas option.
![Cricut Design Space download]()
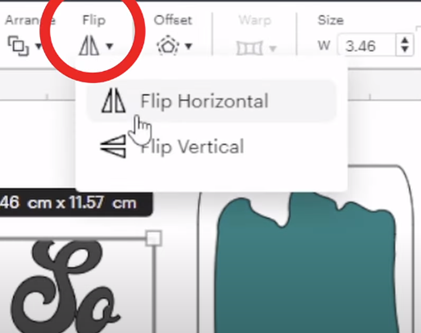
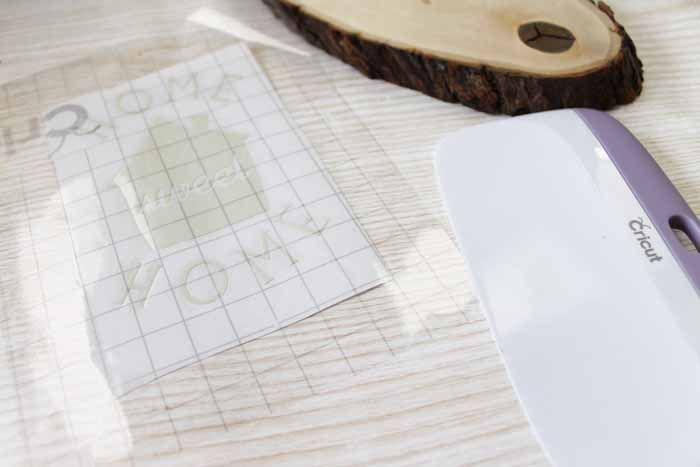
Now, resize the design and place it on the bookmark design. After that, press the Text option and write the text inside the box. Then, change the text size, color, font, and style and set it inside the bookmark. To cover the gap between the letters and words, select Weld and place them closer to each other. After covering up the spaces, go to the Flip tool and tick the Flip Horizontal option.
![Cricut Design Space]()
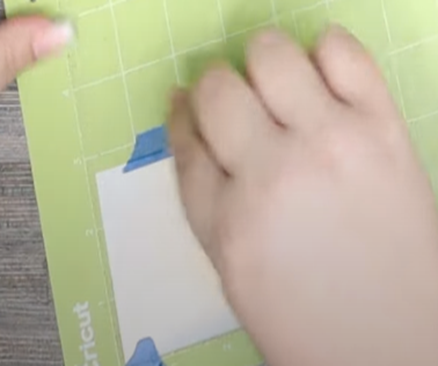
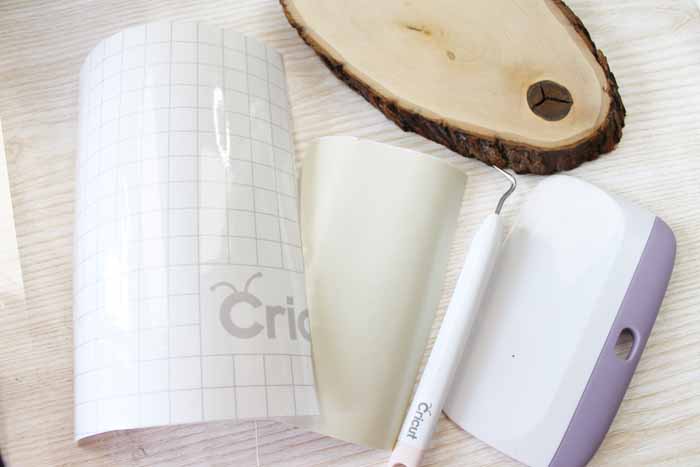
Step 2: Stick the Material on Your Cricut Cutting Mat
In this step of how to use Design Space for Cricut, remove the plastic cover from the vinyl and place the material on the cutting mat. Cover all the sides of the material with painter’s tape so that the material doesn’t slip from its place.
![Cricut Design Space]()
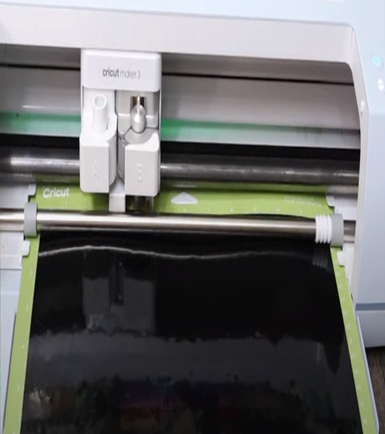
Afterward, move your Cricut Brayer tool upward and downward to settle the material in its place. Now, turn on your crafting machine and load your Cricut cutting mat into the cut-die machine. When the cutting process is complete, stick HTV on the same mat and turn on the Cricut machine again.
![makeing designs]()
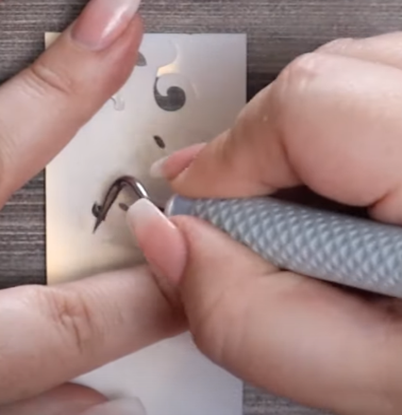
After cutting the material, take your weeding tool and remove extra vinyl from the Cricut mat. Following this, slowly weed out the HTV from the design using the weeding tool and keep the final design at the other end of the table.
![Cricut Design Space app]()
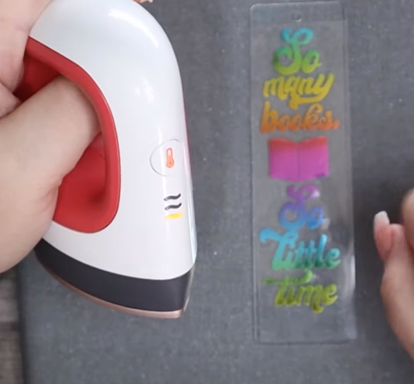
Step 3: Preheat Your Cricut EasyPress Mini Tool
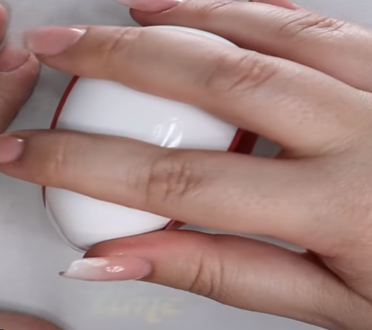
In learning how to use Design Space for Cricut, remove the sheet from the acrylic blank and clean it with baby wipes. After doing that, place your bookmark design on the blank. Now, preheat your EasyPress Mini at the lowest temperature settings.
![]()
After that, cover the entire bookmark with a Teflon sheet and slowly cover the craft by putting a little pressure on it. If you come across that the design needs to be adequately shifted on the blank, then wait for a few seconds and use EasyPress Mini again for perfect heat transfer.
![Cricut Design Space]()
Step 4: Show Your Final Bookmark
After transferring the design, follow these steps to complete the project:
- Let it cool down for a few minutes, and then slowly remove the sheet from the blank.
- Remove the material from your vinyl and place it on the backside of your bookmark.
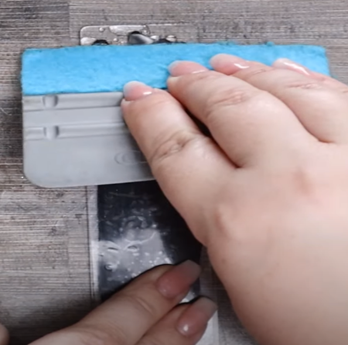
- Take a scraper tool and properly stick the vinyl on the blank without any of the bubbles remaining on the blank.
![How to Use Design Space on Cricut]()
Finally, you can share your DIY craft after collecting and learning how to use Design Space for Cricut crafts.
![How to Use Design Space for Cricut]()
Following the same steps, you can make other personalized acrylic projects from the Cricut app. However, you must take the correct steps while making any do-it-yourself project...
Read more -
How to Use Transfer Tape With Cricut: A Beginner’s Guide
02/22/2024 at 13:10 • 0 commentsI’m glad you are here to learn how to use transfer tape with Cricut. Using transfer tape for your regular Cricut projects is very simple. I will cover a real project that I made using transfer tape. This accessory is as important as any other Cricut supply. However, if you haven’t used transfer tape before, I’ll ensure that you understand everything about it.
![]()
When I first started, I was a newbie, too. But, gradually, I came to understand all the important accessories and tools of Cricut. One thing that most crafters face is that they often get confused about which transfer tape to use. If you are one of them, don’t worry – I will explain it to you too.
What Is a Transfer Tape?
Before learning how to use transfer tape with Cricut, you need to understand what it is. A transfer tape is a strong grip tape to transfer iron-on vinyl onto the material. It holds the vinyl and then smoothly transfers it to the desired material. Generally, there are two types- Regular and Strong Grip transfer tape.
The regular transfer tape is great for general projects, whereas the strong grip tape will be useful for glitter vinyl, where you need extra effort to pull off the tape. So, if you are using a strong iron-on vinyl, you should use a strong grip transfer tape.
Where Do I Get Transfer Tape From?
Well, I use Cricut’s brand for all my craft needs. Cricut’s things suit my projects, and it has become my all-time favorite stuff to use now. But it’s all about someone’s choices. So, if you find some other brand good, go for it. Try different types of brands until you find your perfect one. I have been using Cricut’s transfer tape from the start, so I have never gone to other brands.
How to Use Transfer Tape With Cricut?
To get started with the transfer tape, you need to make a cut with your adhesive vinyl with your Cricut machine. I often use my Cricut Explore Air 2; you can use other Cricut machines, too. As you are a Cricut user, you know how to cut vinyl with your Cricut machine.
Once you cut your vinyl, weed out the excess of vinyl from the final design. So, when you get the design you need, it’s time to apply the transfer tape using my easy steps.
Step 1: Cut the Transfer Tape
In the first step, you need to cut a large piece of transfer tape compared to your design. You can use a transfer tape multiple times before disposing of it. There is one benefit to using transfer tape.
![]()
Step 2: Peel off the Backing Paper
After that, you need to peel off the backing paper. You can apply the transfer tape back to the backing paper to use in the future. Let’s move to the next steps to learn how to use transfer tape with Cricut.
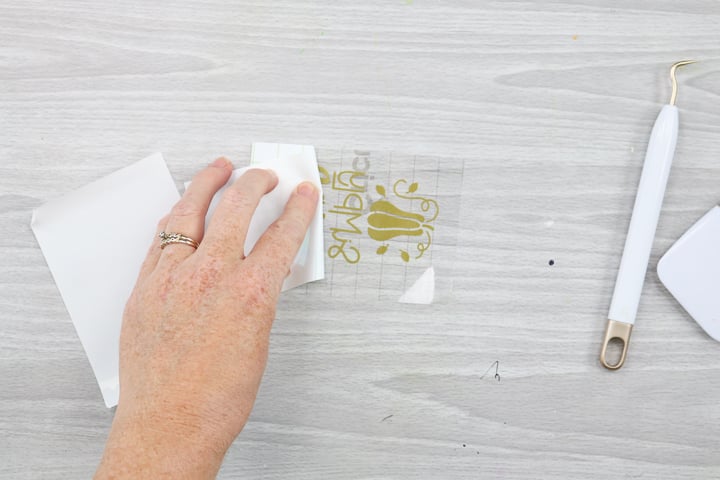
Step 3: Apply the Transfer Paper to Your Design
In the final step, you need to transfer the design and smooth it down using a scraper so no wrinkles or bubbles are left. If you don’t have a scraper, you can use your credit card or a gift card, too.
![]()
Step 4: Peel off the Backing Paper
Now, turn your piece and peel off the backing paper once again. Next, the tape will only be left with the design. You can press the transfer tape once again to take a neat and clean design. When your design is ready on the transfer tape, you can apply it to your material. Now, let’s proceed to the next step to complete the process of how to use transfer tape with Cricut Maker.
![]()
Step 5: Apply the Transfer Tape to Your Material
Then, you need to peel off the transfer tape once you place it on the material. Ensure that the vinyl sticks well to the surface of your project. If it does not stick well, remove it and burn it well once again. And then reapply on the material.
![]()
Conclusion
Finally, you have learned how to use transfer tape with Cricut. I am sure you will find this process easy peasy. A transfer tape is really necessary to apply adhesive vinyl correctly. So, if you are a regular Cricut user, a transfer tape is a must have for you. So, wait no more to get a suitable transfer...
Read more -
Which Is the Best Cricut Machine You Should Buy In 2024?
02/20/2024 at 13:31 • 0 commentsIf you are a crafter, you may always wonder which machine is the best and which is not. I can totally relate to you. When I started out as a crafter, I was greatly influenced by the internet, people, and friends. But there was one blog that really helped me make the right choice for me. So, if you are on the same page as I was, I am in your rescue. When you are looking for the Best Cricut machine, you should not think twice about it as these machines are amazing.
Through this guide, I will be telling you about the top 3 Cricut models that have been game-changers for most crafters and that can become a milestone for you, too. I am gonna talk about Cricut Maker, Cricut Explore, and Cricut Joy. All of these machines are old models, but they are very suitable for newbies. Let’s understand what these tools are.
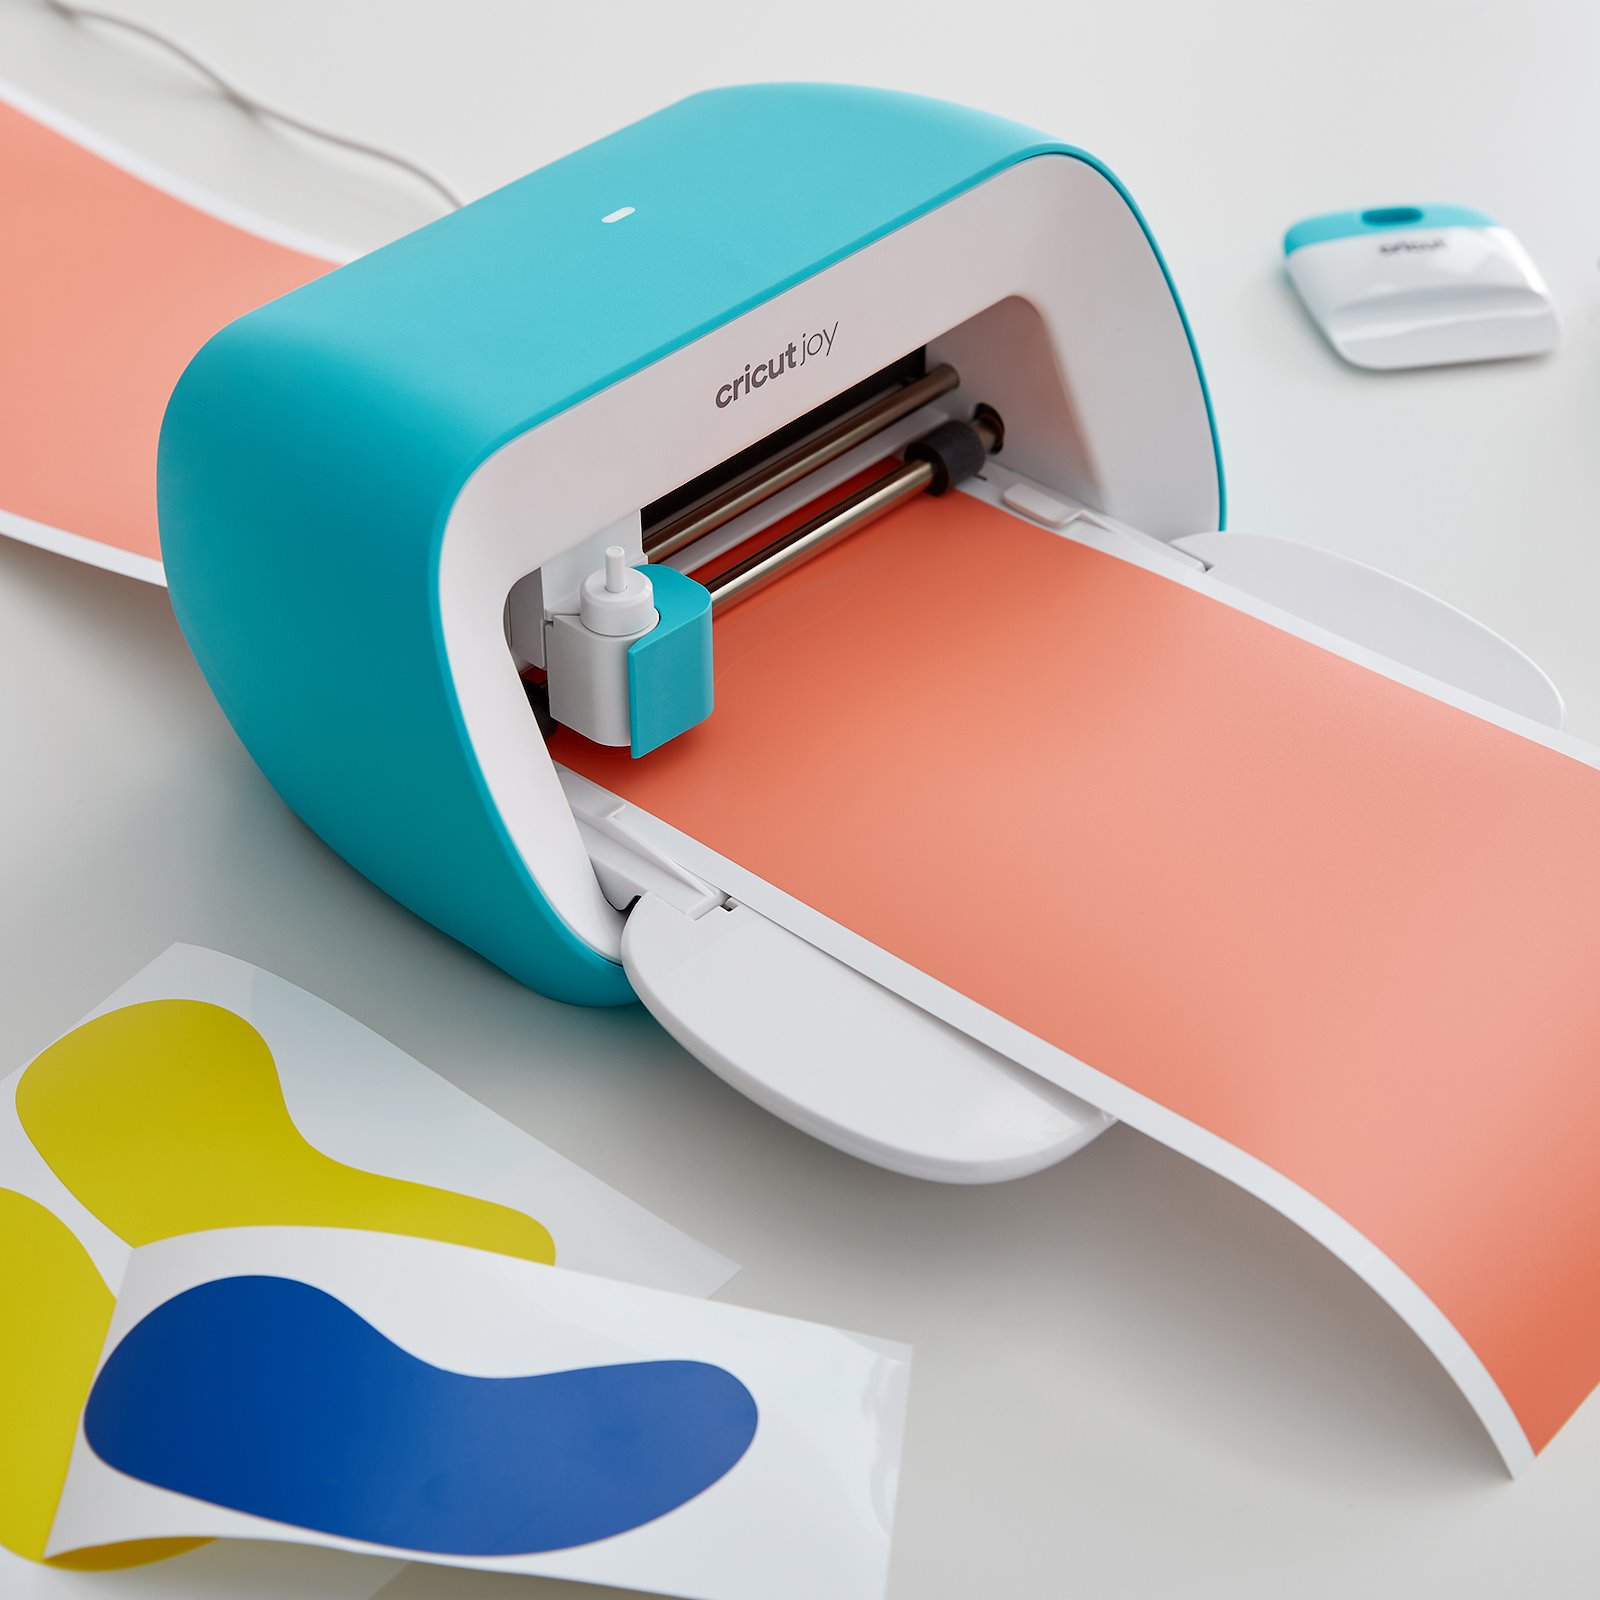
1. Cricut Joy
This is really a fun machine that makes your crafts perfect and provides precise cuts and draws excellently. Also, it can use the Cricut Design Space software, a personalized software for all the Cricut machines. You can use many interesting designs from the Design Space Library and use them in your projects.
![]()
This excellent machine is compact and portable and measures 5” x 5” x 8”. Plus, it uses a wide range of Cricut materials to cut, including Smart Materials. Also, it’s the only machine that uses a card mat for making multiple cards simultaneously.
However, you can’t make bigger projects on a Cricut Joy and cut hard materials such as wood, fabric, chipboard, etc. Also, you can’t use the Print then Cut feature on it. So, overall, this machine would be a perfect fit for crafters who want instant crafts. So, if you are a teacher, mother, or student, Cricut Joy can be the best Cricut machine for you.
2. Cricut Explore Air 2
This is another machine on my list. However, this machine is big and can be used for complex projects. With a colorful lineup and elegant design, it attracts a large number of people. It is capable of cutting more than 100 materials easily with its sharp blades and impressive build-up. It needs a cutting mat of at least 12” x 12” to cut different materials.
Explore Air 2 can cut lots of materials, but it can’t cut thicker and harder materials like wood, leather, and fabric. In addition, it doesn’t allow matless cutting and can’t use Cricut Smart Materials. So, whoever has a minimal project requirement can use this machine.
![]()
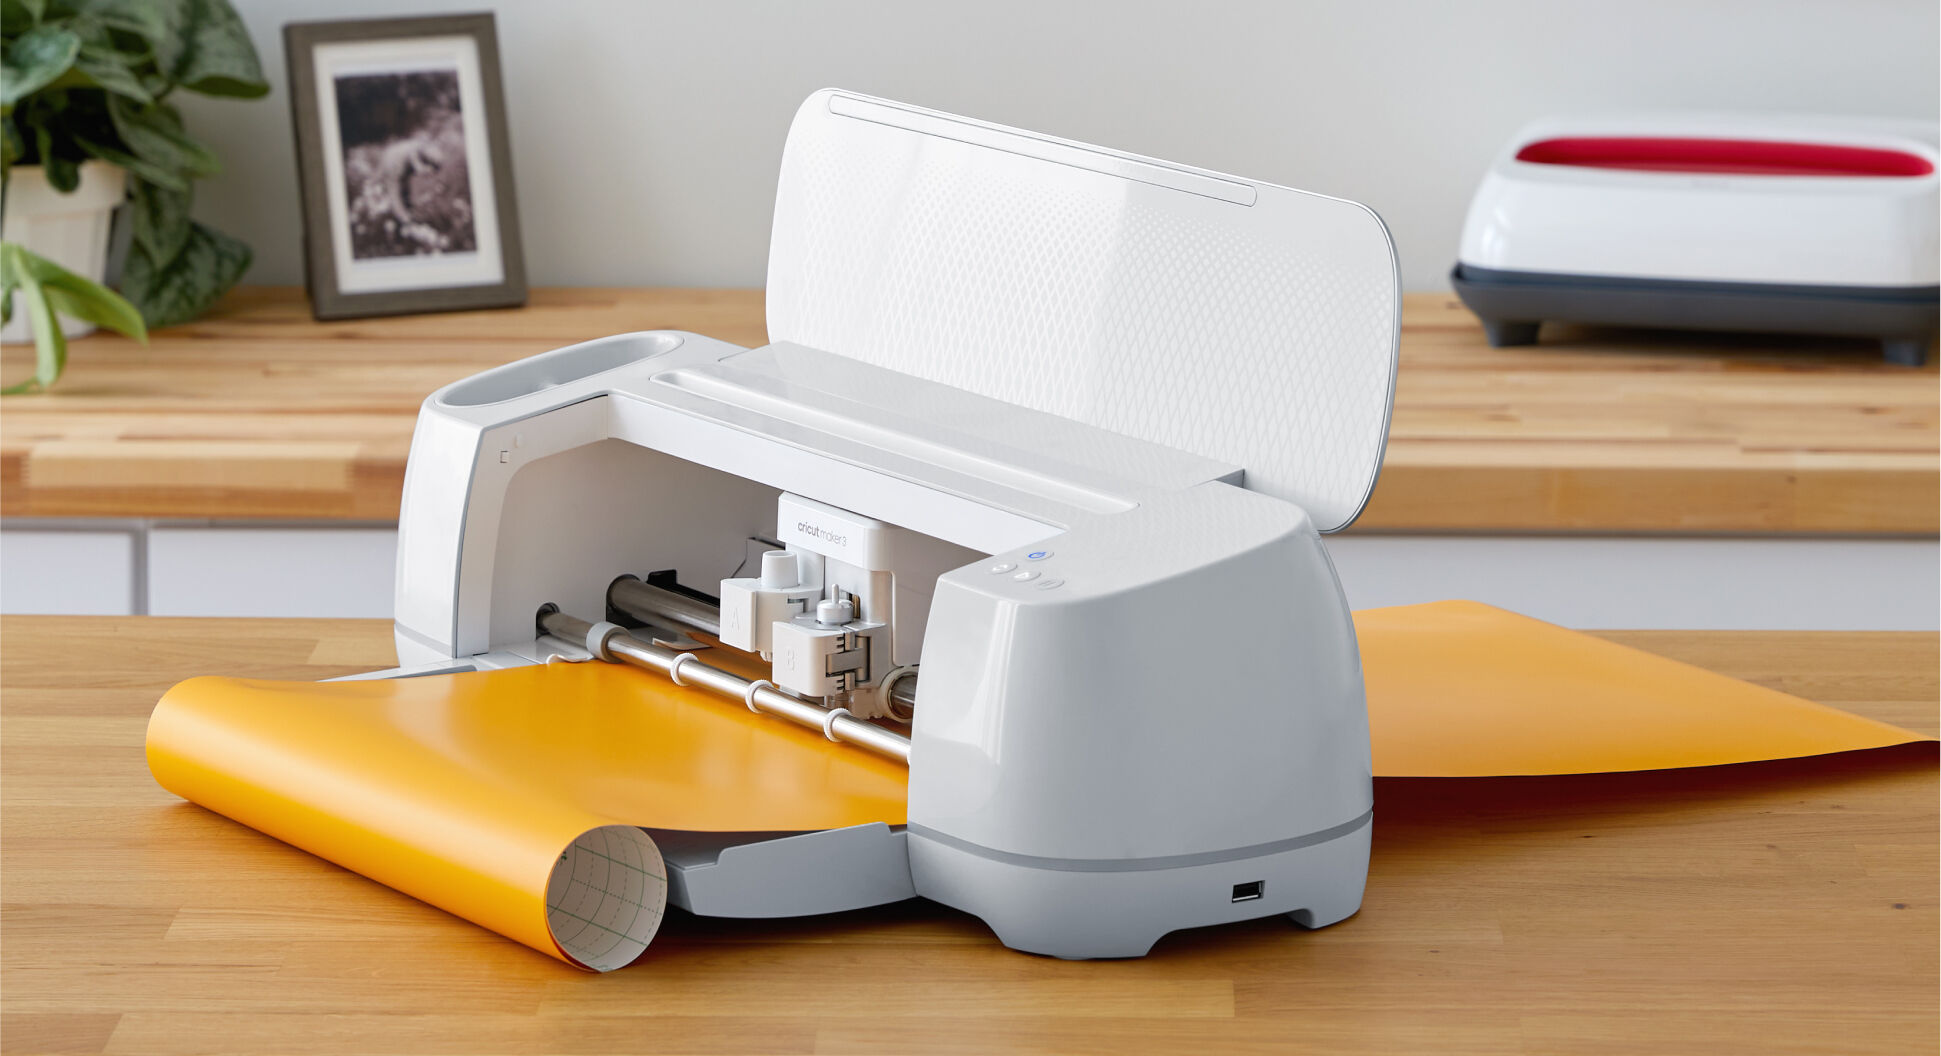
3. Cricut Maker
Here comes the strongest Cricut machine that has various impressive features and can cut a wide range of materials. But why is it the best Cricut machine? All thanks to its powerful tools like blades and housing. Well, the tools of the Cricut Maker are interchangeable with that of the Cricut Explore. Hence, you can use them on both of these machines to perform engraving, debossing, engraving, and many more things.
![]()
Plus, the machine is known for its advanced cutting features and compatibility with a wide number of materials, from delicate to complex, such as fabric, wood, and even leather.
Hence, it’s clear that this machine is already ahead of the competition in every aspect and can deliver work faster and better than any other Cricut machine.
However, this machine doesn’t facilitate matless cutting. Apart from this, there is no point where this machine doesn’t persuade the users. Overall, this machine would be a perfect fit for serious crafters who are driven to create something unique.
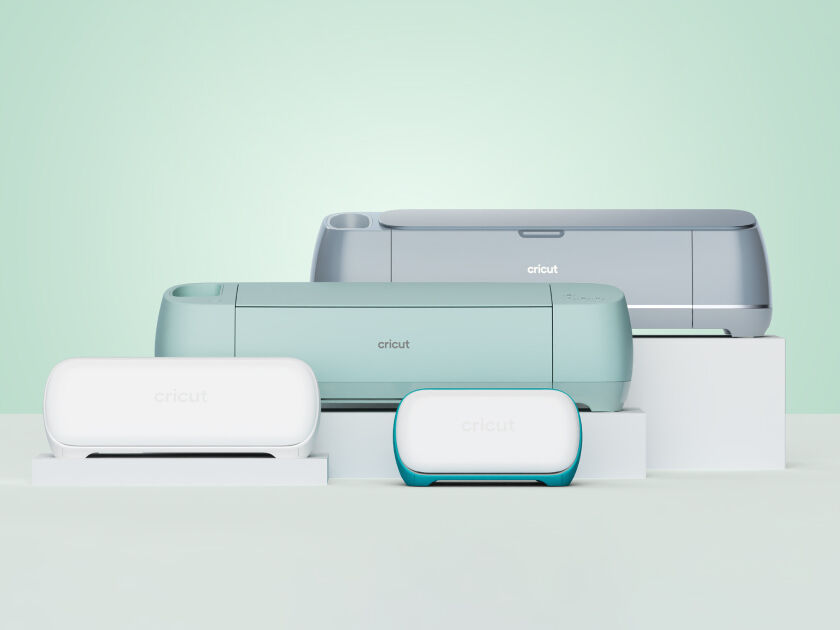
Which Cricut Machine Should You Consider?
Since all the Cricut machines are pretty good, you need to decide what your expectations are as a crafter. So, when you are searching for the best Cricut machine for crafts, you must understand what type of projects you are gonna make. So, if you are a seasonal crafter and rarely need a cutting machine, you can get a Cricut Joy that will match your needs and offer you flexibility.
![]()
But,...
Read more -
How to Cancel Cricut Subscription: A Complete Guide
02/09/2024 at 12:28 • 0 commentsWondering how to cancel Cricut subscription? Cricut is an excellent DIY cutting machine that is leading in the market, and all passionate crafters rely on this tool due to its remarkable results. I am also a Cricut admirer and have been using this machine for the past few years. And you know what I love most about this machine? I like its capability to cut through a large number of materials, from delicate to hard.
Cricut Access is a Cricut membership that you take to access additional features of the Cricut machine. This membership is important for all crafters who are looking for a long-term career in crafting. The Cricut membership offers various powerful tools, such as design templates, fonts, images, and much more, to help you get creative and make something exciting.
But, if you don’t want to use that anymore, you have the option to cancel your membership. And you can do it by following me through this guide. So, let’s get started with the process of canceling the Cricut membership.
What Is a Cricut Access Subscription?
Cricut Access is a subscription, either monthly or annual. Cricut members are given this membership to offer them a large collection of images, fonts, shapes, and designs in the Design Space Library. Also, Cricut Access membership offers extra savings from Cricut’s website.
Under the Cricut Access plan, you get three main paid plans- Monthly Standard plan, yearly Standard plan, and Premium plan. These are the things included in the Cricut Access:
- Over 250,000+ images
- Many projects
- Over 700 projects
- Discount on licensed images of up to 10>#/li###
- Exclusive features of Design Space
How to Cancel Cricut Subscription on Browser?
If you use Cricut Access on a desktop computer, you have the option to cancel the plan and use your Cricut machine as usual. So, here I am giving some easy steps to cancel a Cricut plan. You can go through it.
- First of all, open the web browser of your choice and move to Cricut Access.
- Then, hit the Sign In option at the top bar of the website.
![]()
- Now, you can fill in your correct login information and then Sign In to your Cricut Access account.
![]()
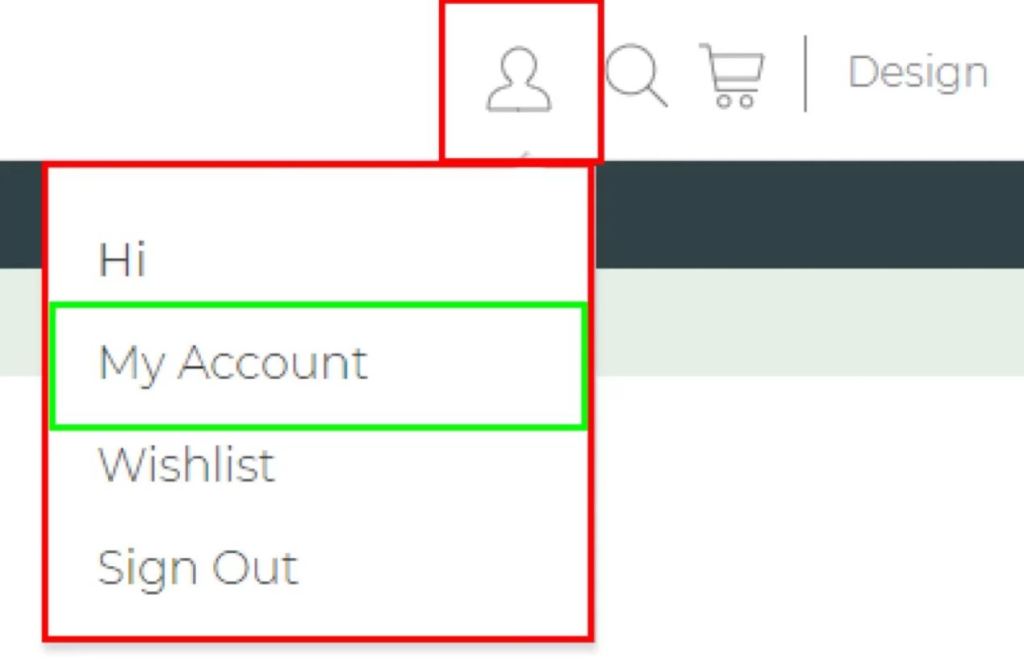
- When you successfully log into your Cricut Access account, hit the Profile option and select the My Account option from the list.
![]()
- On the My Account page, hit the Subscriptions section in the Payment Settings.
![]()
- Under the Subscriptions section, a message will appear as “click here to manage your..”
- Then, hit the “here” option, and you will be redirected to the Subscriptions page.
![]()
- On that page, you can click on the Cancel button in green.
![]()
- You can also check the status of Cricut Access.
So, these are the final steps on how to cancel subscription to Cricut Access on a desktop.
How to Cancel Cricut Subscription on Android?
After the desktop, let’s learn the procedure to cancel a Cricut Access plan on an Android device. Installing the Cricut Access is very easy from the Google Play Store. If you own a subscription and want to cancel it for some reason, here are the easiest steps for me.
- First of all, open the Google Play Store app, click on the Profile option, and select the Payments and Subscription from the options.
- Then, click on the Subscription option once again.
- Now, locate the Cricut Access app from the list.
- After that, click on the app icon and click on the Cancel Subscription option.
- Next, select your reason for canceling the plan (optional).
These are the simplified steps to cancel a Cricut Access plan on an Android device.
How to Cancel Cricut Subscription on iOS?
If you are an iOS user and use devices like iPhones and iPads, you will need to use different steps to cancel your plan on those devices. So, here are the steps you need to follow on iOS.
- First of all, launch the Settings App on your iOS device.
- Then, click on the Apple ID.
- Now, click on the Subscription option in the Payment and Shipping option.
- After...
-
A Guide to Cricut Design Space Download on Computer/Smartphone
01/17/2024 at 12:56 • 0 commentsDo you want to learn the Cricut Design Space download process on your PC or smartphone? If your answer is yes, then you have come to the right place. Here, I will provide you with an in-depth guide to downloading and installing the Cricut app. I have been using the Cricut machine and app for a long time now.
As a result, I decided to help other aspiring Cricut crafters start their journey. If you are also a beginner like I was, then this blog will be beneficial for you. Here, you will get the complete guide to download the Cricut Design app on Windows, iOS, Android, and Mac devices.
Cricut Design Space Download on Your Computer
The Cricut software is necessary for crafters who want to use a cutting machine of the same brand. These are the steps you need to follow to download the Cricut Design app on your Windows/Mac computer.
For Windows
- For the first step, browse the Cricut support website on your Windows PC.
- Access the Cricut Design Space software page and click on the Download option.
![]()
- You might agree to the Cricut Terms of Use and Privacy Policy checkbox to start the download.
- When the download is complete double click on the file in the browser.
![]()
- Or you can head to the Downloads folder to access the file.
![]()
- Follow the further instructions to start the installation.
- Once the software download is complete then sign in with your Cricut account.
![]()
- Finally, you can use your Cricut software or set up the Cricut cutting machine.
For Mac
- Access the Cricut official website and go to the Design Space for Mac window.
- Agree with the Terms and Conditions and click on Download.
- Now, a prompt will ask you to specify the folder to save the software after download.
![]()
- Once the Cricut app download is complete, open the .dmg file from the browser or the specified folder.
![]()
- When a new window shows up on the screen, drag the Cricut icon to the Applications folder; it will start the installation process.
![]()
- After that, double-click on ‘cricut design space’ in the Applications folder to launch the software.
- On the Mac notice, click on the Yes option to open the software.
- After opening the software, enter your Cricut account credentials to sign in.
![]()
- Lastly, use the software to create stunning DIY crafting projects.
Cricut Design Space Download on a Smartphone
You can easily download the Cricut Design app on your iOS/Android smartphone, as the process is so easy. Here is how you do it.
- Begin with launching the Play Store or App Store application on your respective smartphone.
- In the search section, type ‘Cricut Design Space’ to get relevant results.
- Next, tap on the Cricut (green C) icon from the result.
- Then, click on the Download or Get option to start the download.
![]()
- Once the app download is complete, the app will launch itself.
- Choose the option to set up your Cricut machine or create a design for a project.
![]()
Conclusion
In this blog, I have shared all the crucial information a crafter needs to download and install the Cricut Design app. Anyone can easily download the app on a computer or smartphone. Plus, the software is compatible with various operating systems, such as Windows, Mac, Android, and iOS, but has some additional system requirements. So, it is best to learn the app system requirements before you start the Cricut Design Space download. For any additional help, you can contact Cricut customer support or visit the official website.
Frequently Asked Questions
What Are the System Requirements to Download Cricut Design Space?
These are the basic system requirements a device should have to download the Cricut app.
- Your Windows device should have Windows® 10 or later operating system.
- For Mac devices, macOS 11 or later is necessary.
- The iPhone and iPad must be running on the iOS 15 or later version.
- Android 10.0 or higher OS version is required for the app download.
- The device must have an uninterrupted and fast network...
-
DIY Crafts With the Cricut Design Space App
12/08/2023 at 17:55 • 0 commentsGreetings to all my lovely crafters; welcome back to another Cricut Design Space app series. I have been in the crafting world for the last eight months and have managed to make my reputation among other experts. It took me a long time to become an expert at accessing the Cricut machine, so if you are wondering where to find quick and relevant info about the Cricut app, then this blog is going to be the perfect place for you.
![Cricut Design Space app]()
Design Space is Cricut’s private software that works with all Cricut cutting machines. Plus, it is a free program that gives me access to thousands of images, fonts, and ready-to-use projects absolutely free. If the Cricut software is mesmerizing you, calm down because I am going to guide you from the smallest to the most important details about Design Space.
What Are the Key Features of the Cricut Design Space App?
After getting the Cricut app overview, I will share with you some of the primary features that will clear all your doubts about the application. Have a look at the following pointers below:
- This free-to-use app works with all PCs as well as mobile devices. However, it’s essential to ensure that they fulfill all the system requirements needed to support the software to run on the devices.
- Apart from that, it is compatible with all cutting machines along with the heat presses. On the other hand, one can choose any image, font, shape, or project from the library.
- The Cricut Design Space app automatically controls how much pressure to use depending on the material that I am going to cut from the cutting machine. On the other hand, I can get the app from the official website as well as from the Play Store or App Store.
- Equally important, one more feature of the software is that it also offers a subscription known as Cricut Access. It is an ever-growing library with 2,00,000+ images, 700+ fonts, and 1000+ ready-to-make projects.
Following this, let’s make progress and collect content about the software installation download and installation into PCs.
How to Download Cricut Software on Desktop?
As I said in the opening lines of the blog, I can get the software for free on any of my devices. Now, in this part of the blog, I will teach you how to get the Cricut Design Space app on your Windows and Mac operating systems. Ensure that you go through each step very carefully without skipping any of them.
Windows
- First, I will switch on my Windows computer and go to the web browser.
- Next, go to the Cricut official page and tap the Download box.
- After the download process comes to an end, go to your web browser or Downloads folder and double-click the file.
- Now, a window will open asking you to trust the app; choose trust the application option.
- Following this, a setup window with the installation progress will appear in front of you.
- After the app gets installed, I will get to see its icon on my Windows home screen.
- Now, I will click it and create or sign in to the account using my Cricut ID and password.
- Finally, I can now create my design on its canvas using its tools and other functions.
Mac
Apart from the Windows software, I will now make you learn about how to get the Cricut Design Space app on your Mac system. To complete the download process, you need to have a look at the steps below:
- I am going to start the download process by opening the Safari browser and going to design.cricut.com.
- After reaching the page, tap the Download button and hold on till the download process is on the way.
- Next, I will go to the Downloads folder and double-click the .dmg file.
- Now, drag the Cricut icon to the Applications folder to start the installation process.
- Following this, I will double-click the Cricut Design Space and launch the application.
- Now, a ...