An ATTINY based TIS-100 Clone
To make the experience fit your profile, pick a username and tell us what interests you.
We found and based on your interests.
TIS_BASIC_JMP_SIMPLIFIED.inoThis is a simplified version of previous files.ino - 4.14 kB - 06/08/2016 at 20:38 |
|
I have been working on other projects, but I do have the design and most of the code ready for a BEN in Python.
However, there are some questions left about how to connect the Pis - the simplest, but least authentic way being to use the MCN (Master Control Node) as the communication point between all nodes.
I've also been toying with Docker, but I think this would make serial comm. complicated.
https://dzone.com/articles/docker-swarm-node-set-up-with-docker-112-rc-on-ras
Link to article.
From the very beginning I've wanted to implement this project with processors and parts that "felt authentic" - that's part of the challenge of a problem like the TIS-100.
I found a way of translating TIS-100 assembly programs into a byte-code that was efficient and took the fewest number of cycles to execute. I have experimented with single method C code so that nothing gets put on the stack. Through all of it, I thought that the ATTINY would be a sufficient chip.
The ATTINY has enough program space to hold the small program. The ATTINY has enough RAM to run our program. The ATTINY has enough IO (just enough) to support the communication protocol I came up with. However, it does not have enough raw speed.
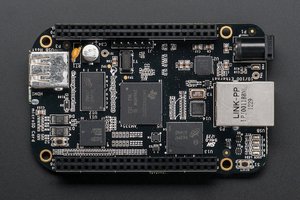
The Raspberry Pi Zero is overkill. It's at least 10x faster than what we need, it runs a full OS, it has video out for every single node, it has more than enough IO, it has its own disk for each node. It's overkill, but it's overkill in a pleasant way. There are some freedoms to be gained from switching platforms to the Pi Zero.
My current intention is to still keep 'real' connections between each of the boards by building out a back-plane that MUX's the comms between the Pi Zeros. However, I will probably use the 12 nodes as Serial Gadgets hooked to a master node Pi Zero that will handle visualization, keyboard, and syncing.
However, there are some really dirt-cheap LCD monitors that are about 3 inches that I could hook to each one of the Zeros -- which would emulate the baffling visualization we see in the game.
I updated the emulator file for Arduino. I simplified some of the logic, which makes the program file slightly bigger, but makes the program itself drastically shorter.
However, there's a problem. The compiled Arduino code is really inefficient for our simple operations.
Even if we weren't using 16 bit Ints we'd still have some problems with speed.
If every single one of our emulated operations took 10 clock ticks we'd still have an operational speed of 1.6 Mhz. Currently every single operation is taking upwards of 100 clock ticks.
In AVR architecture some operations like moving a value from one register to another takes 2 clock ticks, but 100 seems excessive for the simple code we have.
The solution for a faster emulator will likely be AVR targeted C. Although I do write in assembly, I'd rather do this sort of work in C, so I think it will be a good compromise between speed and power.
I have shared working Arduino code for a single node - it just does an HCF and loops back.
However, you can now write and compile your own code.
It's manual right now because I haven't written a program that will allow you to transfer code to the emulator (I'm sorry, but I'll get to it soon).
1. Write code for a single TIS-100 node.
2. Compile the code using the compiler.
3. Copy from the 2nd position to the end for the code marked with % - this is your program code. Insert commas (,) between the arguments and put them in your program array in the Arduino code.
4. Copy from the 2nd position to the end for code marked with a $ - these are your constants - put them in the constants array.
5. Copy from the 2nd position to the end for code marked with a : - these are your labels - put them in the label array.
6. Compile the Arduino code.
7. Enjoy.
I'm about to write a TIS-100 adding program, so I'll probably upload that as well.
I have added a multi-pass Assembler script, limited to assembling a single node at a time.
To use, you will need to open the script and edit the paths for the files to fit your own environment. The first file is the one you wish to compile, the second and third are output files for the build process. The third file outputs the program in Hex, then labels after the ':' and constants after the '$'.
This output can then be uploaded to the microcontroller running the Basic Execution Node emulator.
Example Input:
THAT:
MOV LEFT RIGHT
MOV DOWN LEFT
ADD UP
ADD 255
JMP THAT
Example Output:
0xd
0x21
0x93
0x97
0xcc
: 0x0
$ 0xff
You can see how these HEX values map to our opcodes.
13: MOV(LEFT,RIGHT)
33: MOV(DOWN,LEFT)
etc. etc.
If you don't read HEX you can either take my word, learn hex, or use a handy-dandy hex converter (which is what I do for bigger numbers): http://www.binaryhexconverter.com/hex-to-decimal-converter
I'll be uploading the Arduino code to run a single node in serial interactive mode in the next day or two.
Each node must be able to load code on the fly. I have created 3 execution modes in the core.
1. Run mode. In this mode the node will continually load the next instruction after receiving the 'begin cycle' signal.
2. Debug mode. In this mode the node will report its status to MCN after completing work.
3. Program mode. In this mode the node will wait for MCN to transmit a new program.
The program transmission is structured so the node knows exactly how much to load.
1. The number of program bytes is sent.
2. The number of constants is sent.
3. The number of labels is sent.
Then the data for each of these is transmitted and stored in the correct arrays.
This represents a complete OPCODE list with 14 Constants (int values) available and 10 Labels (byte values) available for creating subroutines. Constants were favored over Labels, but this is up for evaluation. NOP and HCF were both added to the official OPS-List. There is space for 2 more OPS...
0: SWP()
1: SAV()
2: NEG()
3: HCF()
4: NOP()
5: MOV(ACC,LEFT)
6: MOV(ACC,RIGHT)
7: MOV(ACC,UP)
8: MOV(ACC,DOWN)
9: MOV(ACC,ANY)
10: MOV(ACC,LAST)
11: MOV(LEFT,ACC)
12: MOV(LEFT,LEFT)
13: MOV(LEFT,RIGHT)
14: MOV(LEFT,UP)
15: MOV(LEFT,DOWN)
16: MOV(LEFT,ANY)
17: MOV(LEFT,LAST)
18: MOV(RIGHT,ACC)
19: MOV(RIGHT,LEFT)
20: MOV(RIGHT,RIGHT)
21: MOV(RIGHT,UP)
22: MOV(RIGHT,DOWN)
23: MOV(RIGHT,ANY)
24: MOV(RIGHT,LAST)
25: MOV(UP,ACC)
26: MOV(UP,LEFT)
27: MOV(UP,RIGHT)
28: MOV(UP,UP)
29: MOV(UP,DOWN)
30: MOV(UP,ANY)
31: MOV(UP,LAST)
32: MOV(DOWN,ACC)
33: MOV(DOWN,LEFT)
34: MOV(DOWN,RIGHT)
35: MOV(DOWN,UP)
36: MOV(DOWN,DOWN)
37: MOV(DOWN,ANY)
38: MOV(DOWN,LAST)
39: MOV(ANY,ACC)
40: MOV(ANY,LEFT)
41: MOV(ANY,RIGHT)
42: MOV(ANY,UP)
43: MOV(ANY,DOWN)
44: MOV(ANY,ANY)
45: MOV(ANY,LAST)
46: MOV(LAST,ACC)
47: MOV(LAST,LEFT)
48: MOV(LAST,RIGHT)
49: MOV(LAST,UP)
50: MOV(LAST,DOWN)
51: MOV(LAST,ANY)
52: MOV(LAST,LAST)
53: MOV(CONST1,ACC)
54: MOV(CONST1,LEFT)
55: MOV(CONST1,RIGHT)
56: MOV(CONST1,UP)
57: MOV(CONST1,DOWN)
58: MOV(CONST1,ANY)
59: MOV(CONST1,LAST)
60: MOV(CONST2,ACC)
61: MOV(CONST2,LEFT)
62: MOV(CONST2,RIGHT)
63: MOV(CONST2,UP)
64: MOV(CONST2,DOWN)
65: MOV(CONST2,ANY)
66: MOV(CONST2,LAST)
67: MOV(CONST4,ACC)
68: MOV(CONST4,LEFT)
69: MOV(CONST4,RIGHT)
70: MOV(CONST4,UP)
71: MOV(CONST4,DOWN)
72: MOV(CONST4,ANY)
73: MOV(CONST4,LAST)
74: MOV(CONST5,ACC)
75: MOV(CONST5,LEFT)
76: MOV(CONST5,RIGHT)
77: MOV(CONST5,UP)
78: MOV(CONST5,DOWN)
79: MOV(CONST5,ANY)
80: MOV(CONST5,LAST)
81: MOV(CONST6,ACC)
82: MOV(CONST6,LEFT)
83: MOV(CONST6,RIGHT)
84: MOV(CONST6,UP)
85: MOV(CONST6,DOWN)
86: MOV(CONST6,ANY)
87: MOV(CONST6,LAST)
88: MOV(CONST7,ACC)
89: MOV(CONST7,LEFT)
90: MOV(CONST7,RIGHT)
91: MOV(CONST7,UP)
92: MOV(CONST7,DOWN)
93: MOV(CONST7,ANY)
94: MOV(CONST7,LAST)
95: MOV(CONST8,ACC)
96: MOV(CONST8,LEFT)
97: MOV(CONST8,RIGHT)
98: MOV(CONST8,UP)
99: MOV(CONST8,DOWN)
100: MOV(CONST8,ANY)
101: MOV(CONST8,LAST)
102: MOV(CONST9,ACC)
103: MOV(CONST9,LEFT)
104: MOV(CONST9,RIGHT)
105: MOV(CONST9,UP)
106: MOV(CONST9,DOWN)
107: MOV(CONST9,ANY)
108: MOV(CONST9,LAST)
109: MOV(CONST10,ACC)
110: MOV(CONST10,LEFT)
111: MOV(CONST10,RIGHT)
112: MOV(CONST10,UP)
113: MOV(CONST10,DOWN)
114: MOV(CONST10,ANY)
115: MOV(CONST10,LAST)
116: MOV(CONST11,ACC)
117: MOV(CONST11,LEFT)
118: MOV(CONST11,RIGHT)
119: MOV(CONST11,UP)
120: MOV(CONST11,DOWN)
121: MOV(CONST11,ANY)
122: MOV(CONST11,LAST)
123: MOV(CONST12,ACC)
124: MOV(CONST12,LEFT)
125: MOV(CONST12,RIGHT)
126: MOV(CONST12,UP)
127: MOV(CONST12,DOWN)
128: MOV(CONST12,ANY)
129: MOV(CONST12,LAST)
130: MOV(CONST13,ACC)
131: MOV(CONST13,LEFT)
132: MOV(CONST13,RIGHT)
133: MOV(CONST13,UP)
134: MOV(CONST13,DOWN)
135: MOV(CONST13,ANY)
136: MOV(CONST13,LAST)
137: MOV(CONST14,ACC)
138: MOV(CONST14,LEFT)
139: MOV(CONST14,RIGHT)
140: MOV(CONST14,UP)
141: MOV(CONST14,DOWN)
142: MOV(CONST14,ANY)
143: MOV(CONST14,LAST)
144: ADD(ACC)
145: ADD(LEFT)
146: ADD(RIGHT)
147: ADD(UP)
148: ADD(DOWN)
149: ADD(ANY)
150: ADD(LAST)
151: ADD(CONST1)
152: ADD(CONST2)
153: ADD(CONST4)
154: ADD(CONST5)
155: ADD(CONST6)
156: ADD(CONST7)
157: ADD(CONST8)
158: ADD(CONST9)
159: ADD(CONST10)
160: ADD(CONST11)
161: ADD(CONST12)
162: ADD(CONST13)
163: ADD(CONST14)
164: SUB(ACC)
165: SUB(LEFT)
166: SUB(RIGHT)
167: SUB(UP)
168: SUB(DOWN)
169: SUB(ANY)
170: SUB(LAST)
171: SUB(CONST1)
172: SUB(CONST2)
173: SUB(CONST4)
174: SUB(CONST5)
175: SUB(CONST6)
176: SUB(CONST7)
177: SUB(CONST8)
178: SUB(CONST9)
179: SUB(CONST10)
180: SUB(CONST11)
181: SUB(CONST12)
182: SUB(CONST13)
183: SUB(CONST14)
184: JRO(ACC)
185: JRO(LEFT)
186: JRO(RIGHT)
187: JRO(UP)
188: JRO(DOWN)
189: JRO(ANY)
190: JRO(LAST)
191: JRO(CONST1)
192: JRO(CONST2)
193: JRO(CONST4)
194: JRO(CONST5)
195: JRO(CONST6)
196: JRO(CONST7)
197: JRO(CONST8)
198: JRO(CONST9)
199: JRO(CONST10)
200: JRO(CONST11)
201: JRO(CONST12)
202: JRO(CONST13)
203: JRO(CONST14)
204: JMP(LBL1)
205: JMP(LBL2)
206: JMP(LBL3)
207: JMP(LBL4)
208:...
Mixing data and op-codes seemed like an unpleasant consequence of the way I had earlier proposed writing op-codes. Besides that, parsing the op-code would take some bit-masking at a minimum, which although fast, still takes a cycle. We're trying to minimize cycles as much as possible and come as close to an effective operation speed of 5MHZ as we can.
When I woke up this morning a new plan was in my mind. Instead of having pointers to the constants held in another array as a second 8-bit instruction that we'd have to keep track of in the Program Counter, why not build a table of 256 commands that already included the combinations of <SRC> and <DST> built in? That way, we could evaluate where to send data extremely quickly. This blows up the number of directly addressed commands, but I think we can fit a few Constants and a few Labels in there and maintain this scheme.
The biggest bloat is going to be in the number of instructions needed for MOV <SRC> <DEST>. We have 5 available sources and each of those has 4 available destinations (we will ignore the fool who wants to move ACC to ACC). Then, we will need an additional code for every single Destination for every single CONST we allow to be assigned. If we allow 16 CONST definitions, our OP-CODE count for MOV jumps to 36. Honestly, 16 is probably more CONST than are needed per node, but I don't want to limit the user very much if we can avoid it.
This scheme allows a 1-to-1 parity between the number of OP-CODES we have in compiled code and the number our users type into the screen. This allows JMP commands to work on a 1-to-1 basis without inspecting the array. Binary table coming soon.
In the last project update, I introduced the concept of dealing with constants through the use of an array with a pointer.
So, in our program array, we might have something like this:
[(MOV|VAL)(VAL|001)]
The 8 bits are split into the move command and a marker for VAL, then the second is marked with VAL and a position in the VAL array. Although all of this is clever, it ends up wasting bits.
It will be more efficient to have [(MOV|VAL) (11001101)(10101010) - This means that when we are moving a value, we will have to increment the Program Counter by 3 - which is a little bit of book-keeping, which is what we were trying to avoid, but it's more bit efficient.
However, it may prove problematic in the future when we're trying to calculate JMP commands. As we continue to evaluate how we're implementing the rest of the language, we will resolve this problem.
The assembly definition for the TIS-100 has several instructions that contain too much information for a single 8-bit instruction. There are two solutions that seem plausible to me: extend the instruction set so that combinations of Source/Destinations are encoded, or split the single problematic assembly instruction into 2 8-bit instructions. The second solution is more elegant, because the MOV command, which takes two arguments, also USUALLY takes two ticks (unless we're moving to ACC).
MOV <SRC>, <DEST> will be translated into byte-code as three discrete instructions for the Emu:
MOVTOACC <SRC> --------- OPCODE: 0000 | SRC
MOVTOTEMP <SRC> ------- OPCODE: 0001 | SRC
MOVFROMTEMP <DEST> - OPCODE: 0010 | DEST
The second instruction that is problematic for maintaining an 8 bit instruction width is any instruction that can use VAL or a LABEL instead of a register. Since both VAL and LABEL are <INT> types in the system, it would introduce a variable-width instruction set to have them embedded with the instruction. So, instead of embedding VAL or LABEL, we will instead replace the embedded val with a pointer to an array where they are stored. Since we have 4 bits -- we will be limited to 16 aliases for both LABEL and VAL per core, per program.
int[16] Label - contains the JMP values.
int[16] Val - contains the INT values defined in the program.
Using these two tricks, we can preserve an 8-bit instruction width which will make program execution smoother than a variable-width instruction set. It will also allow us to compute space better at compile time. (Apologies to Michael Covington, I still think this is a legitimate use of the word compile.)
Create an account to leave a comment. Already have an account? Log In.
Become a member to follow this project and never miss any updates

 jlbrian7
 agp.cooper
