Close
0%
0%

Sniff the Wireless Data of a Sports Wrist Watch

Reverse engineer the wireless protocol between a chest belt heart rate monitor and it's wrist watch that displays the beats per minute

Similar projects worth following
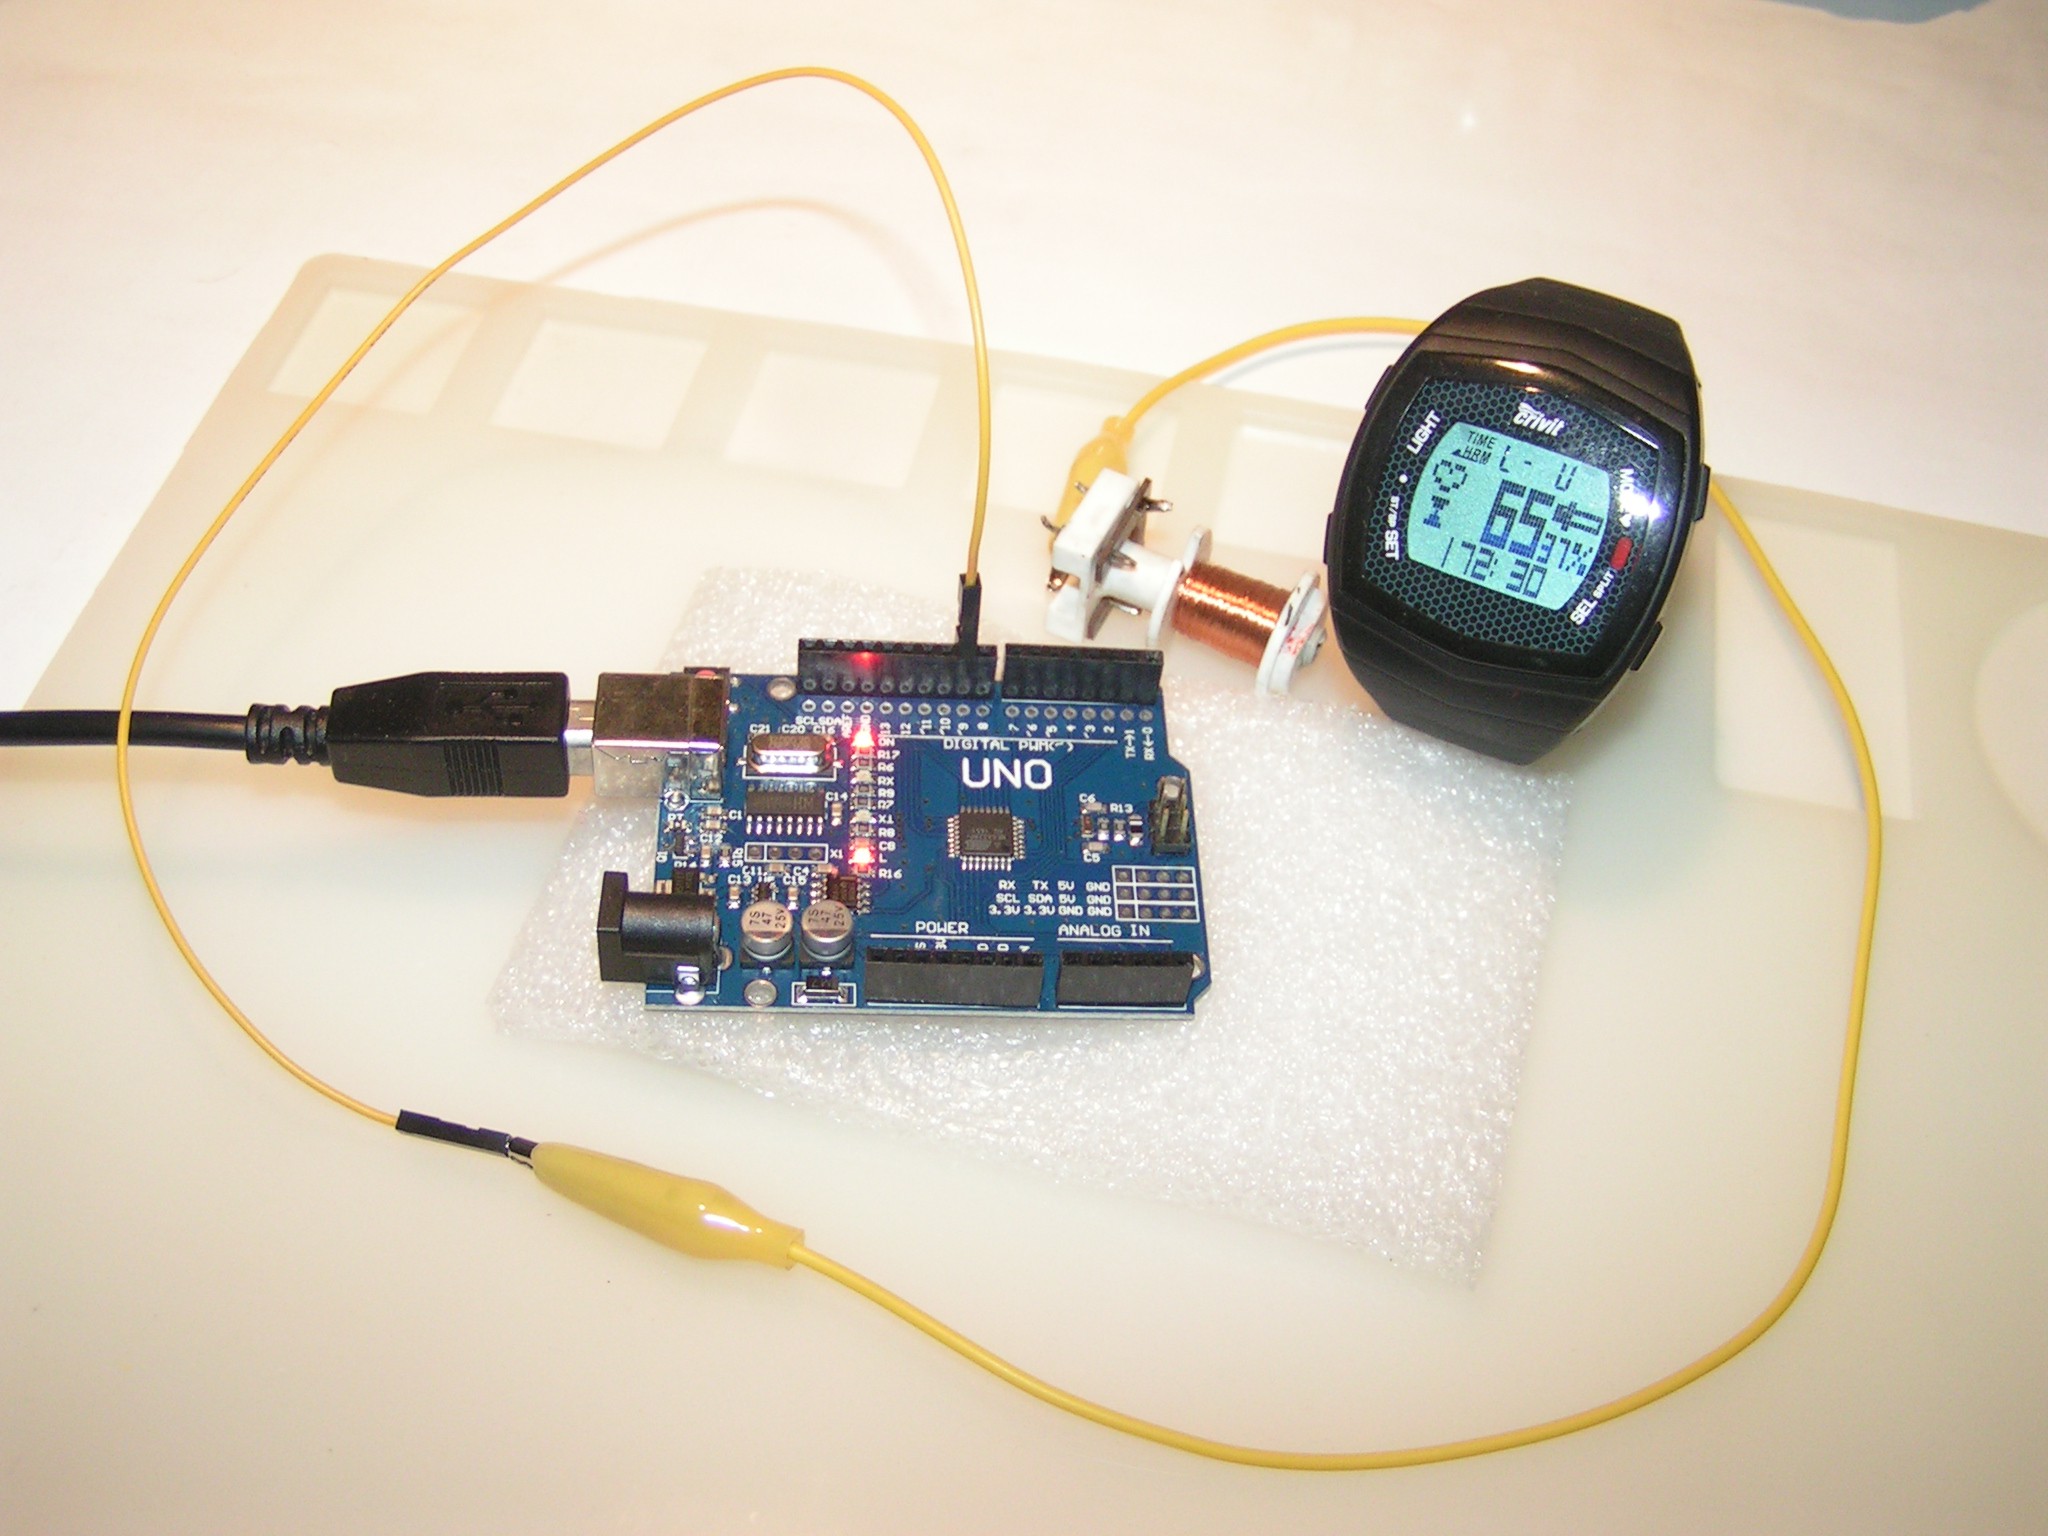
The “Crivit Sports” wrist watch HRM (Heart Rate Monitor) is wrist watch that can also display the heart rate BPM (Beats Per Minute).

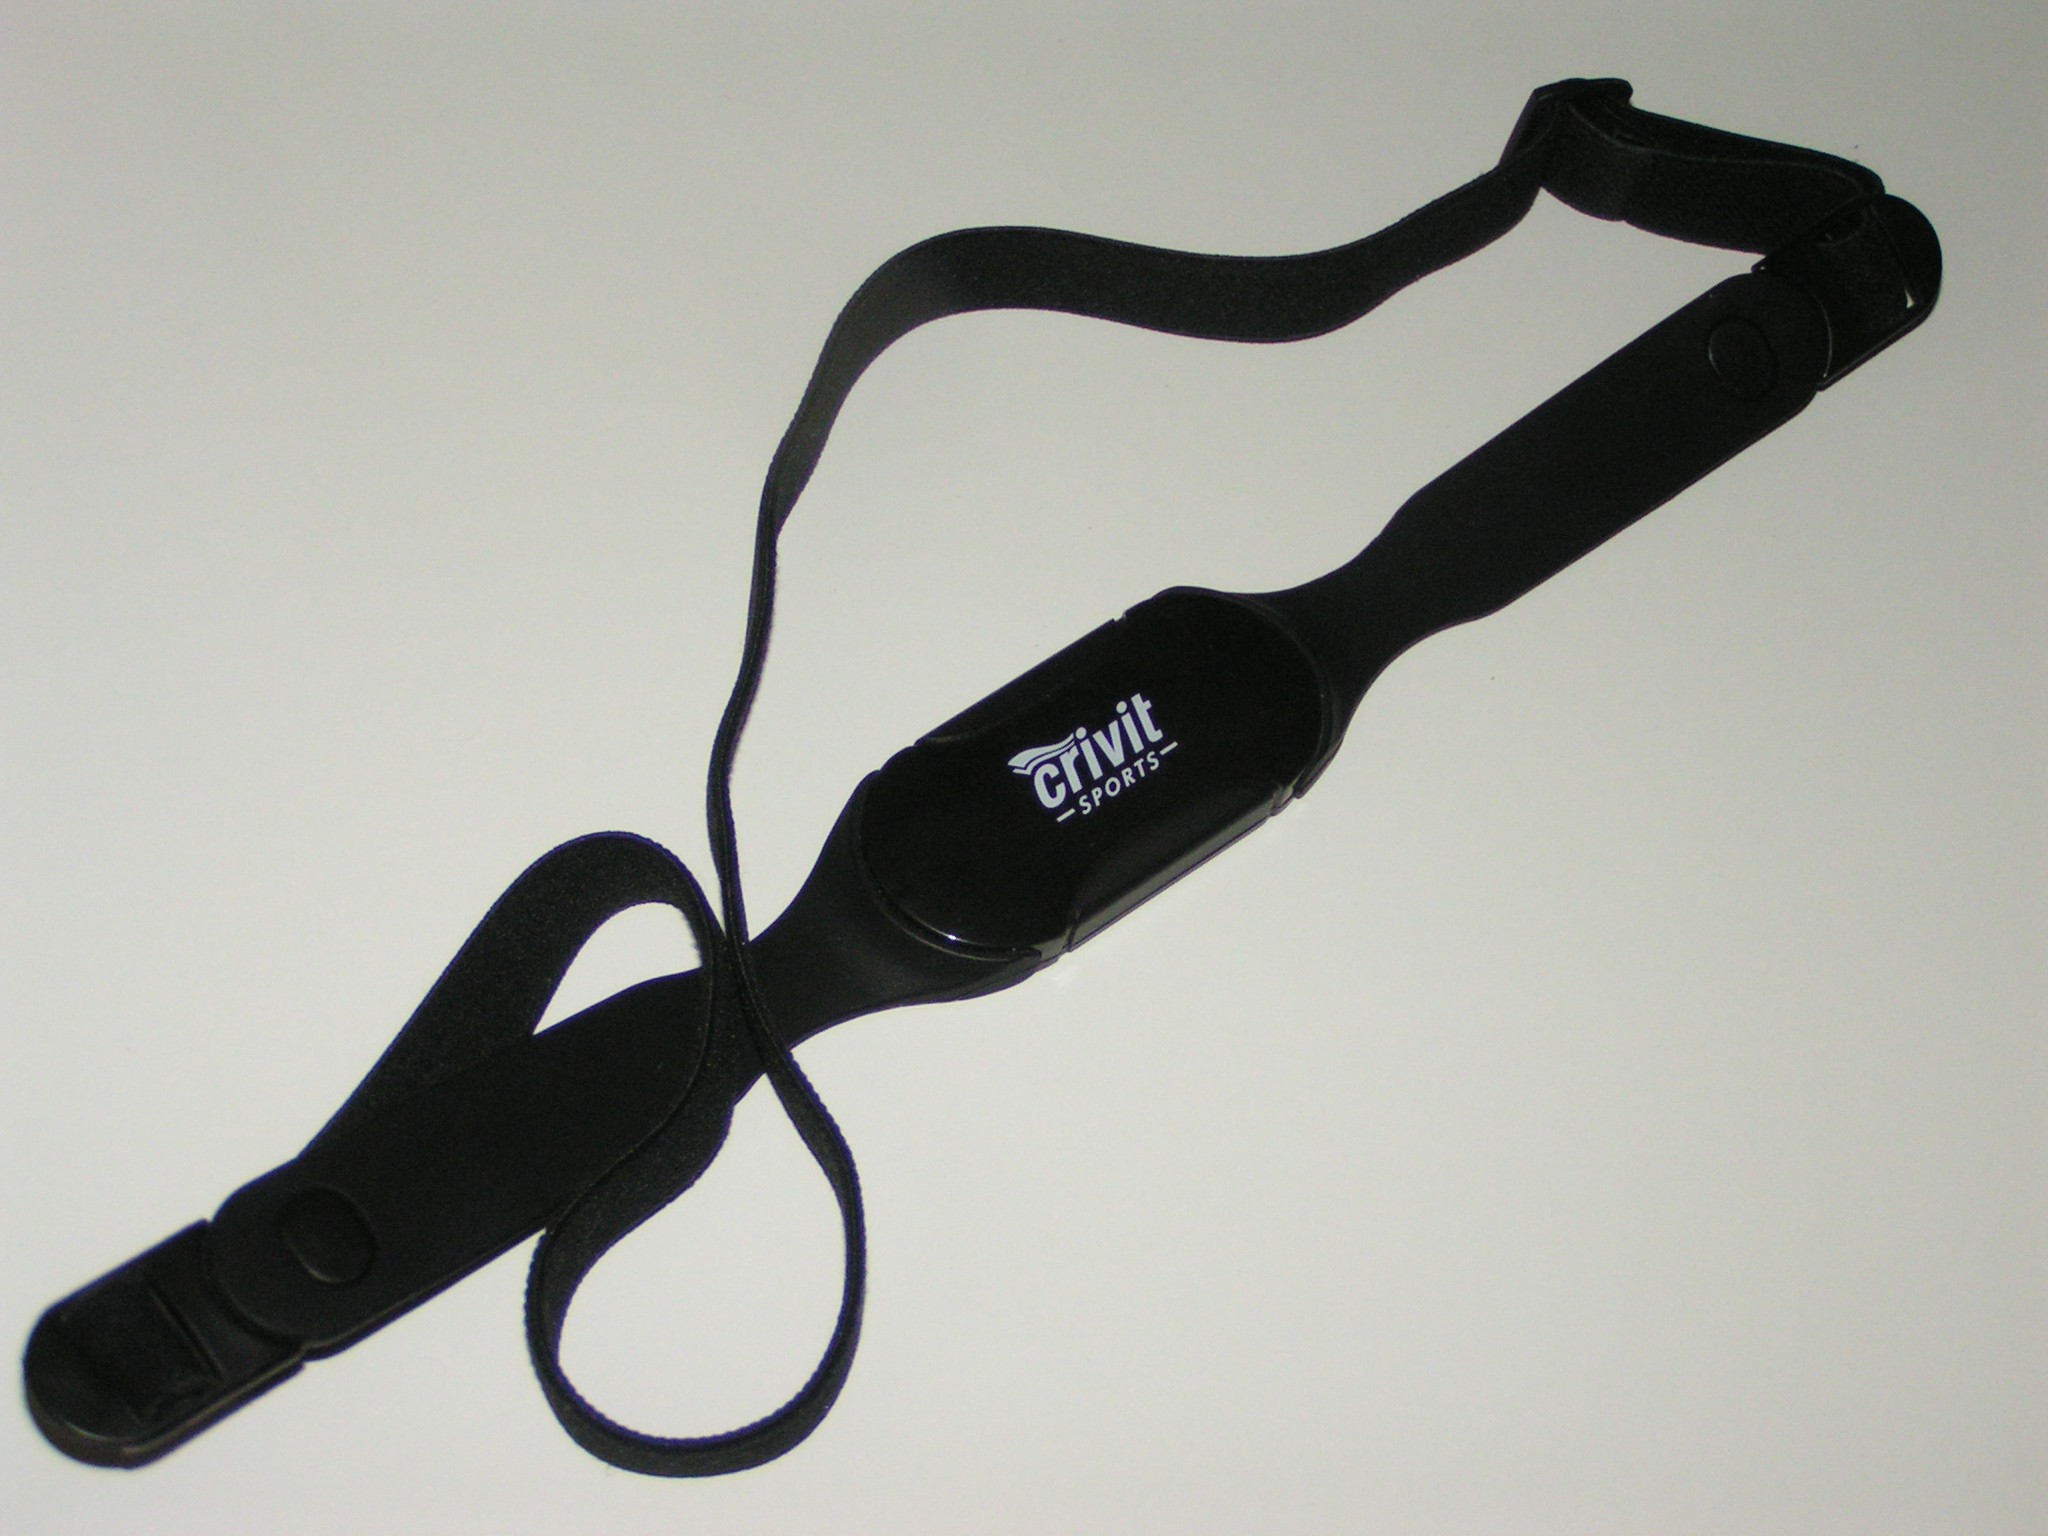
The heart beats are detected by a chest strap included with the watch. The chest strap measures the heart beats and communicate with the wrist watch display by radio.

Unfortunately, it does not have any other kind of connectivity, it can not log data, and it can not make charts.

I wanted to log the heart activity, and that is how I started to sniff at the radio communication between the chest strap detector and the wrist watch display.

The “Crivit Sports” wrist watch HRM (Heart Rate Monitor)
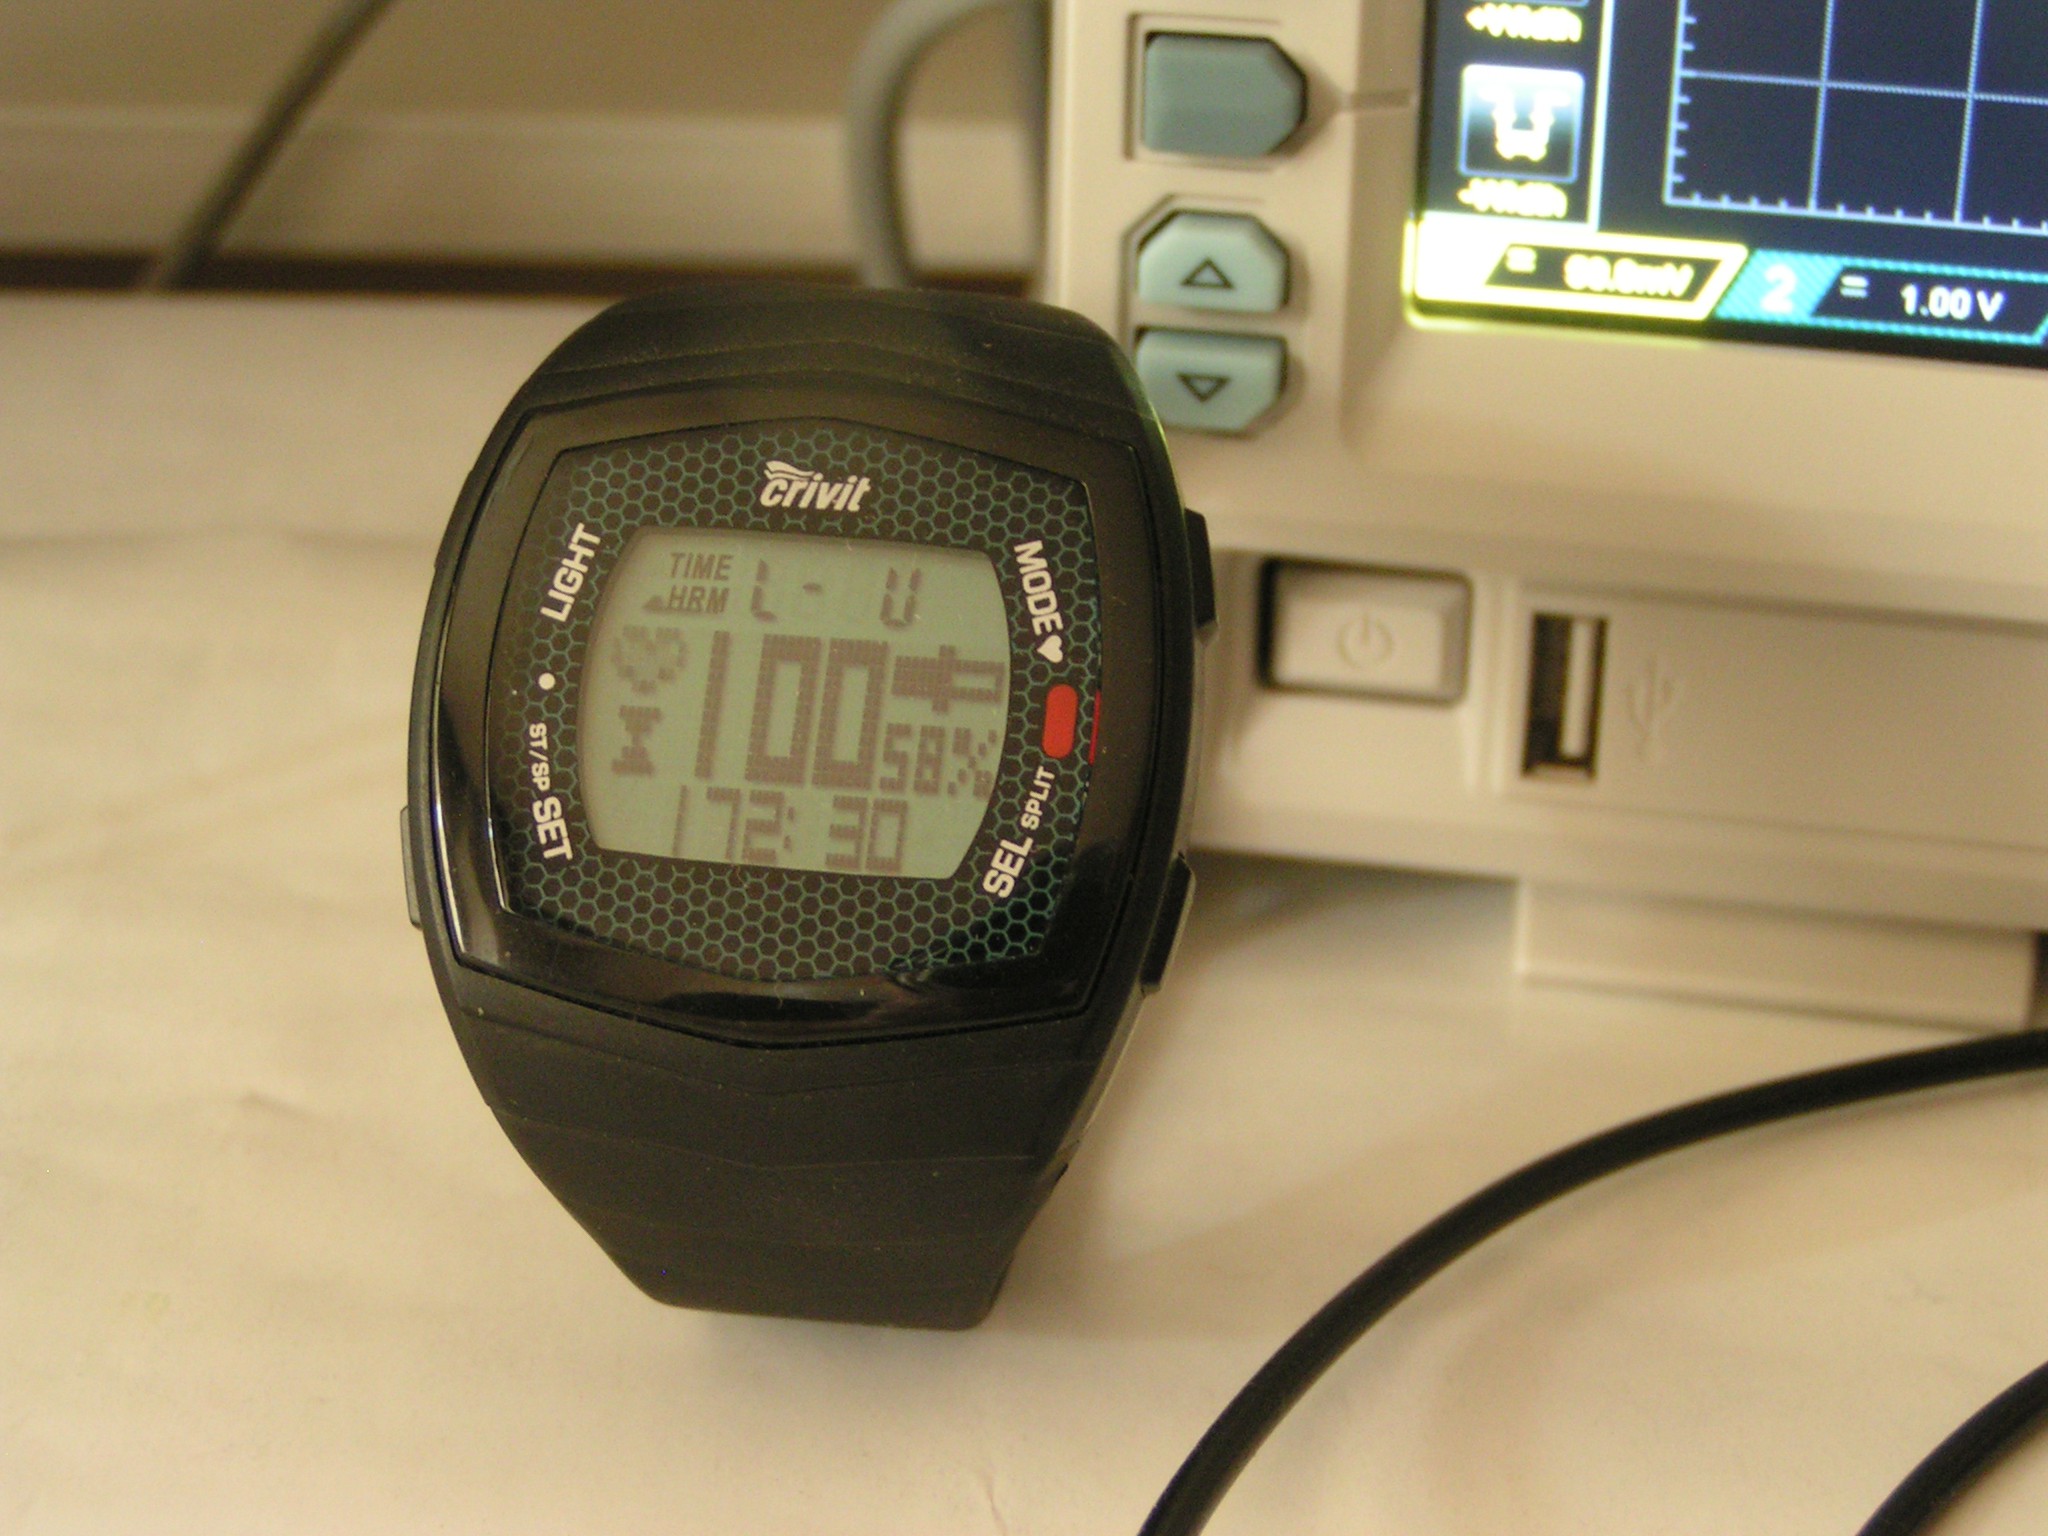

This is a wrist watch that can also display the heart rate BPM (Beats Per Minute).

.

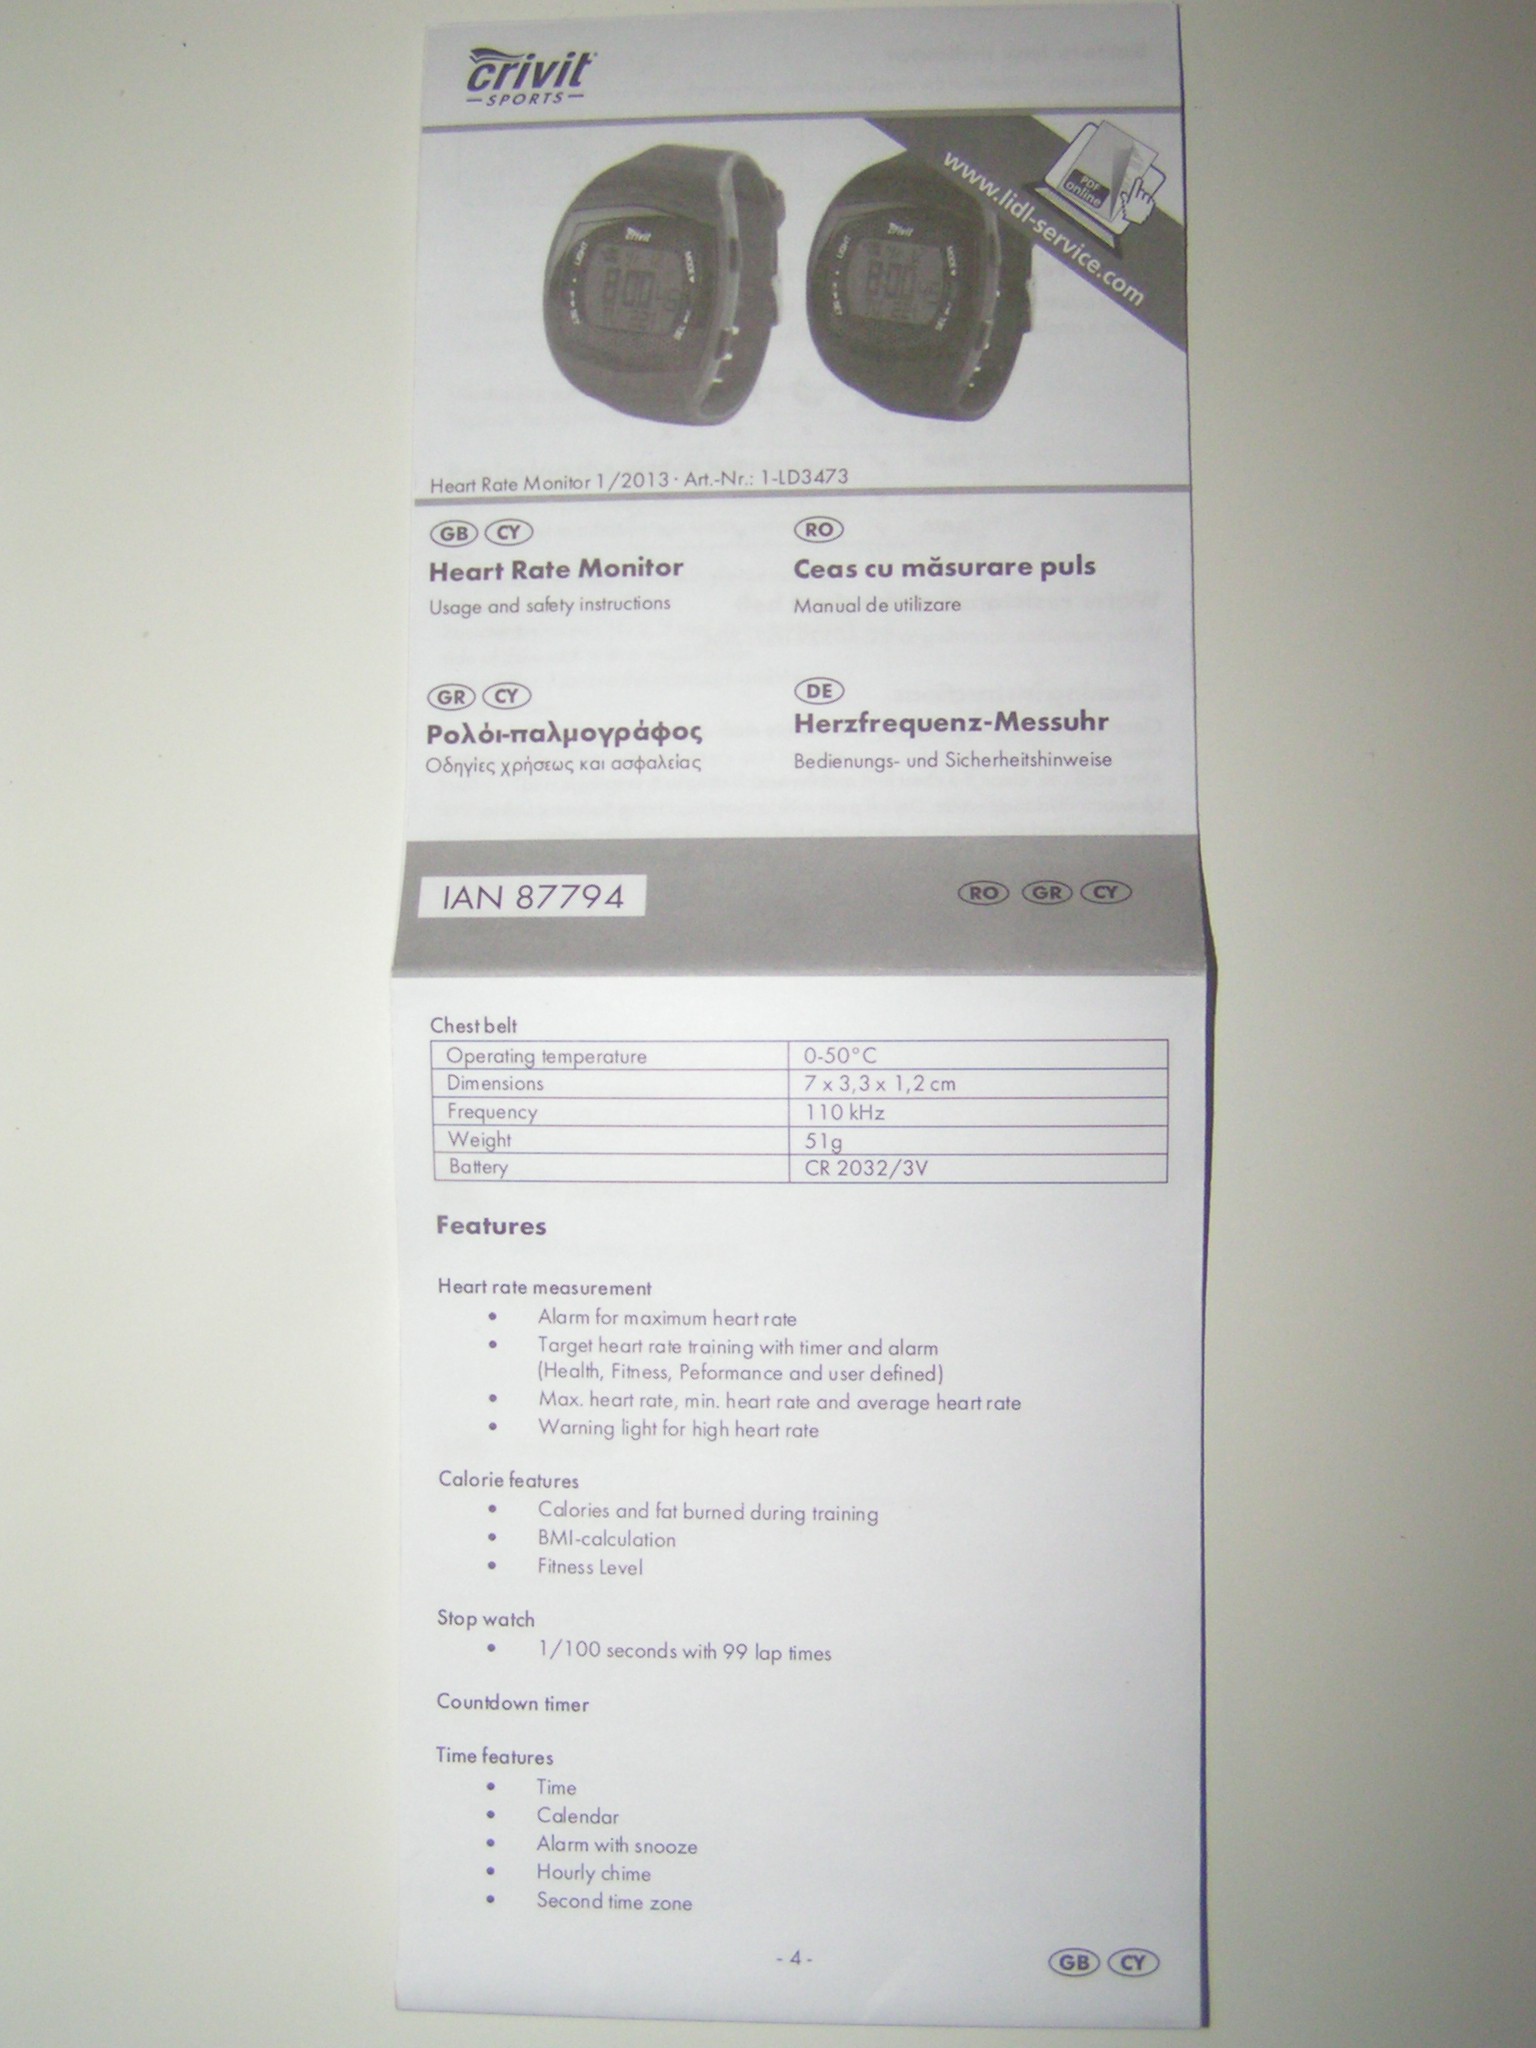
The complete specs and the user manual can be found at http://www.lidl-service.com/cps/rde/xchg/SID-648946E8-5F850FDD/lsp/hs.xsl/product.html?id=47039228

.

The heart beats are detected by a chest strap included with the watch.

The chest strap have two conductive rubber pads that senses the electrical signals produced by the heart beats. No contact gel is required for the rubber pads.

The link between the chest strap and the wrist watch is wireless, by an RF (Radio Frequency) signal.

.

.

Missing features


Being a very cheap item, it does not have any kind of connectivity, it can not log data, and it can not make charts. It would have been way more interesting to be able to see a ECG (ElectroCardioGram) or a BPM chart for the whole day. Could it be possible?

I couldn't find any online technical documentation about this 'Crivit Sports' model.

.

.

Reverse engineering the RF signal
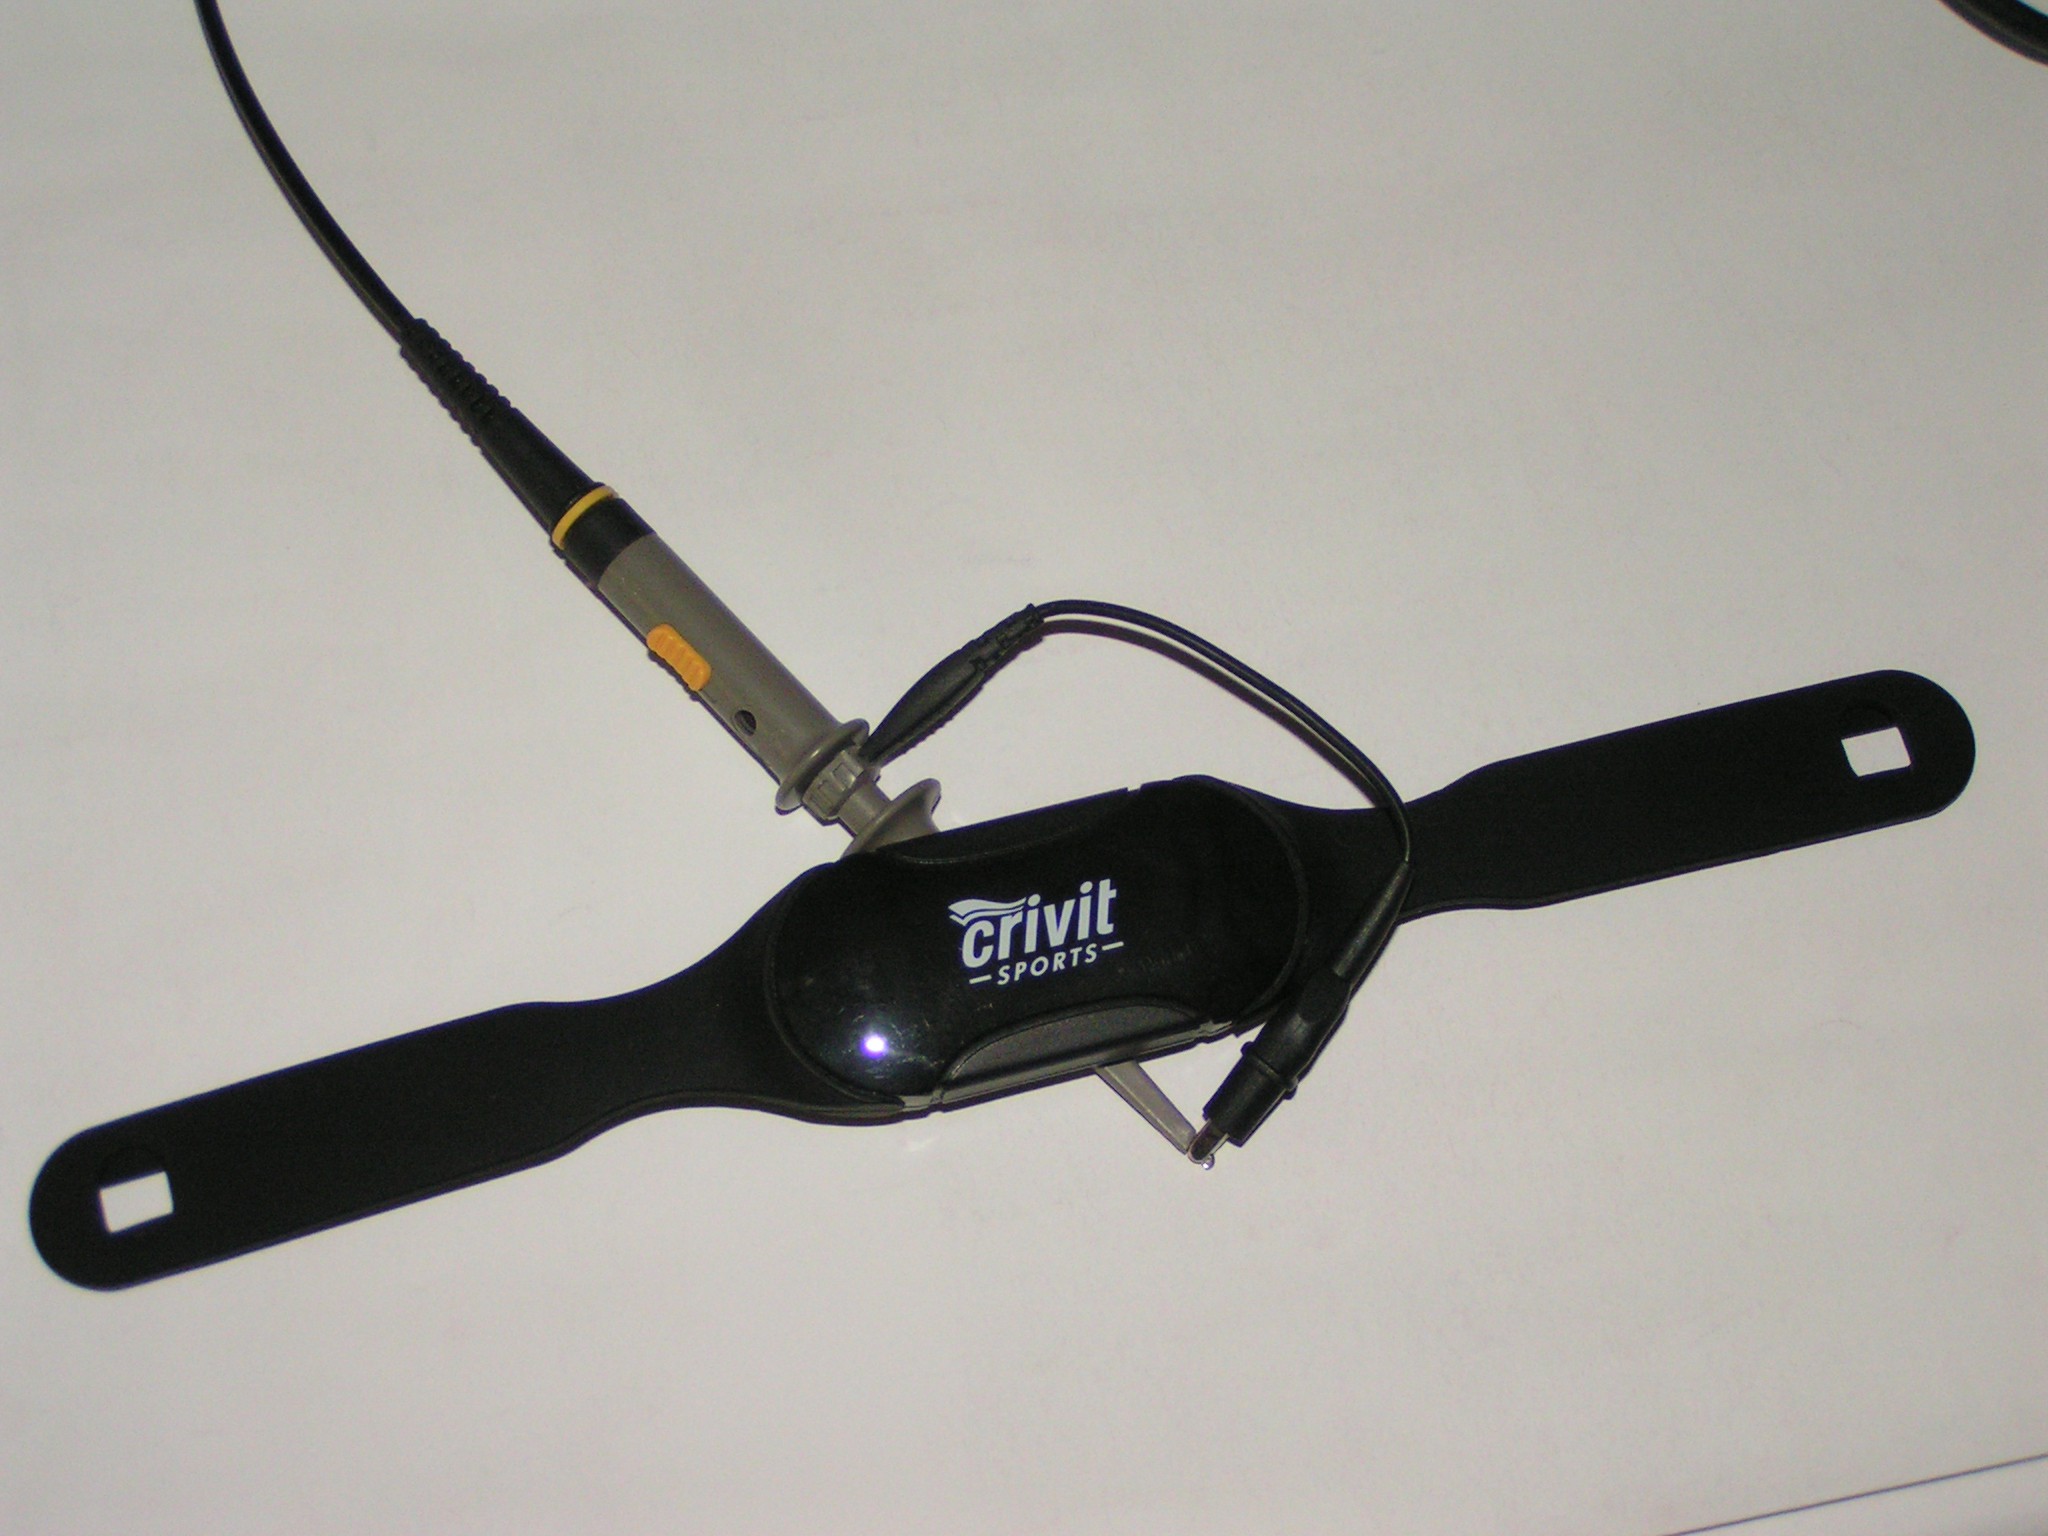

To receive the RF, a one loop coil was wrapped around the chest strap,

by simply clipping the oscilloscope GND (GrouND) wire alligator to the

tip of the probe, and around the chest strap transmitter.

.
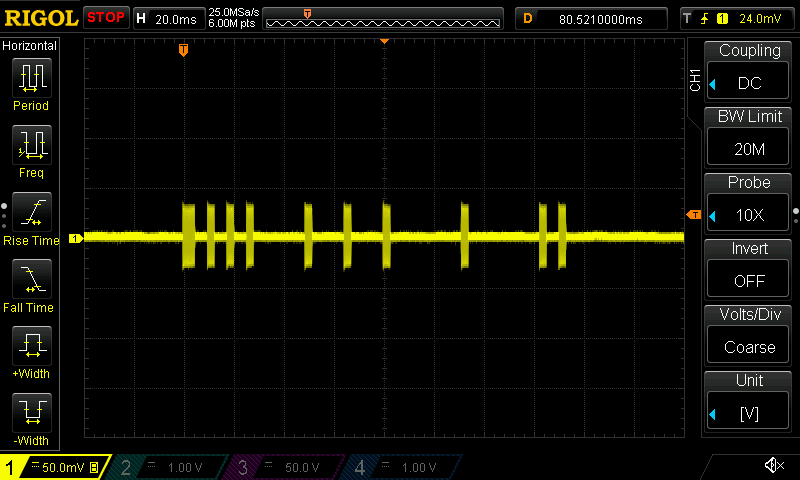
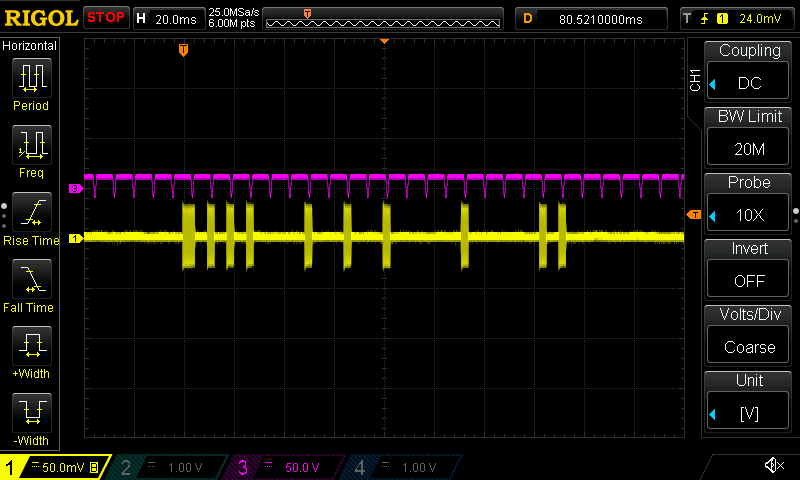
This is the signal received from the chest belt HRM for a constant

heart rate of 100 BPM. The RF carrier is at 110 kHz, 100% AM (Amplitude

Modulated) by a digital signal.

By looking at the received signal for various heart rates, it turns out that the BPM rate is computed by the chest wrap by averaging the last few heart beats, then the resulting number is used to modulate the RF signal like this:

  • chest strap monitor’s RF carrier is at 110 kHz, 100% AM modulated
  • a bit of 1 is made by a 3 ms ON (100% RF) followed by a 4.8 ms OFF (0% RF)
  • a bit of 0 is made by a 7.8 ms OFF (0% RF)

The BPM data is constantly sent about 0.5 to 2 times per second. The delay between two data packets is unrelated with the heart beat. The structure of a packet is:

  • one start sync bit with 5ms ON (100% RF) and 4.8ms OFF (0% RF)
  • next 6 bits encode the chest strap ID (IDentification). The ID changes randomly each time the battery is disconnected. The observed IDs were all bigger then 48 (first two bits 11)
  • the remaining 13 bits encodes the BPM.

This stream of data is received and decoded by the wrist watch, which then display one number, the BPM. Observed BPM displayed range was between 30 and 233. The watch displays the BPM no matter what ID the chest belt randomly picked.

I tried to look at the carrier waveform corresponding to a couple of different BPM numbers, by doing push-ups in order to accelerate the heart beat. My intention was to understand the correspondence between the last 13 bits sent by the chest strap and the BPM number displayed by the wrist watch.

Counting bits after making push-ups is not easy. I couldn’t figure out the encoding scheme.

.
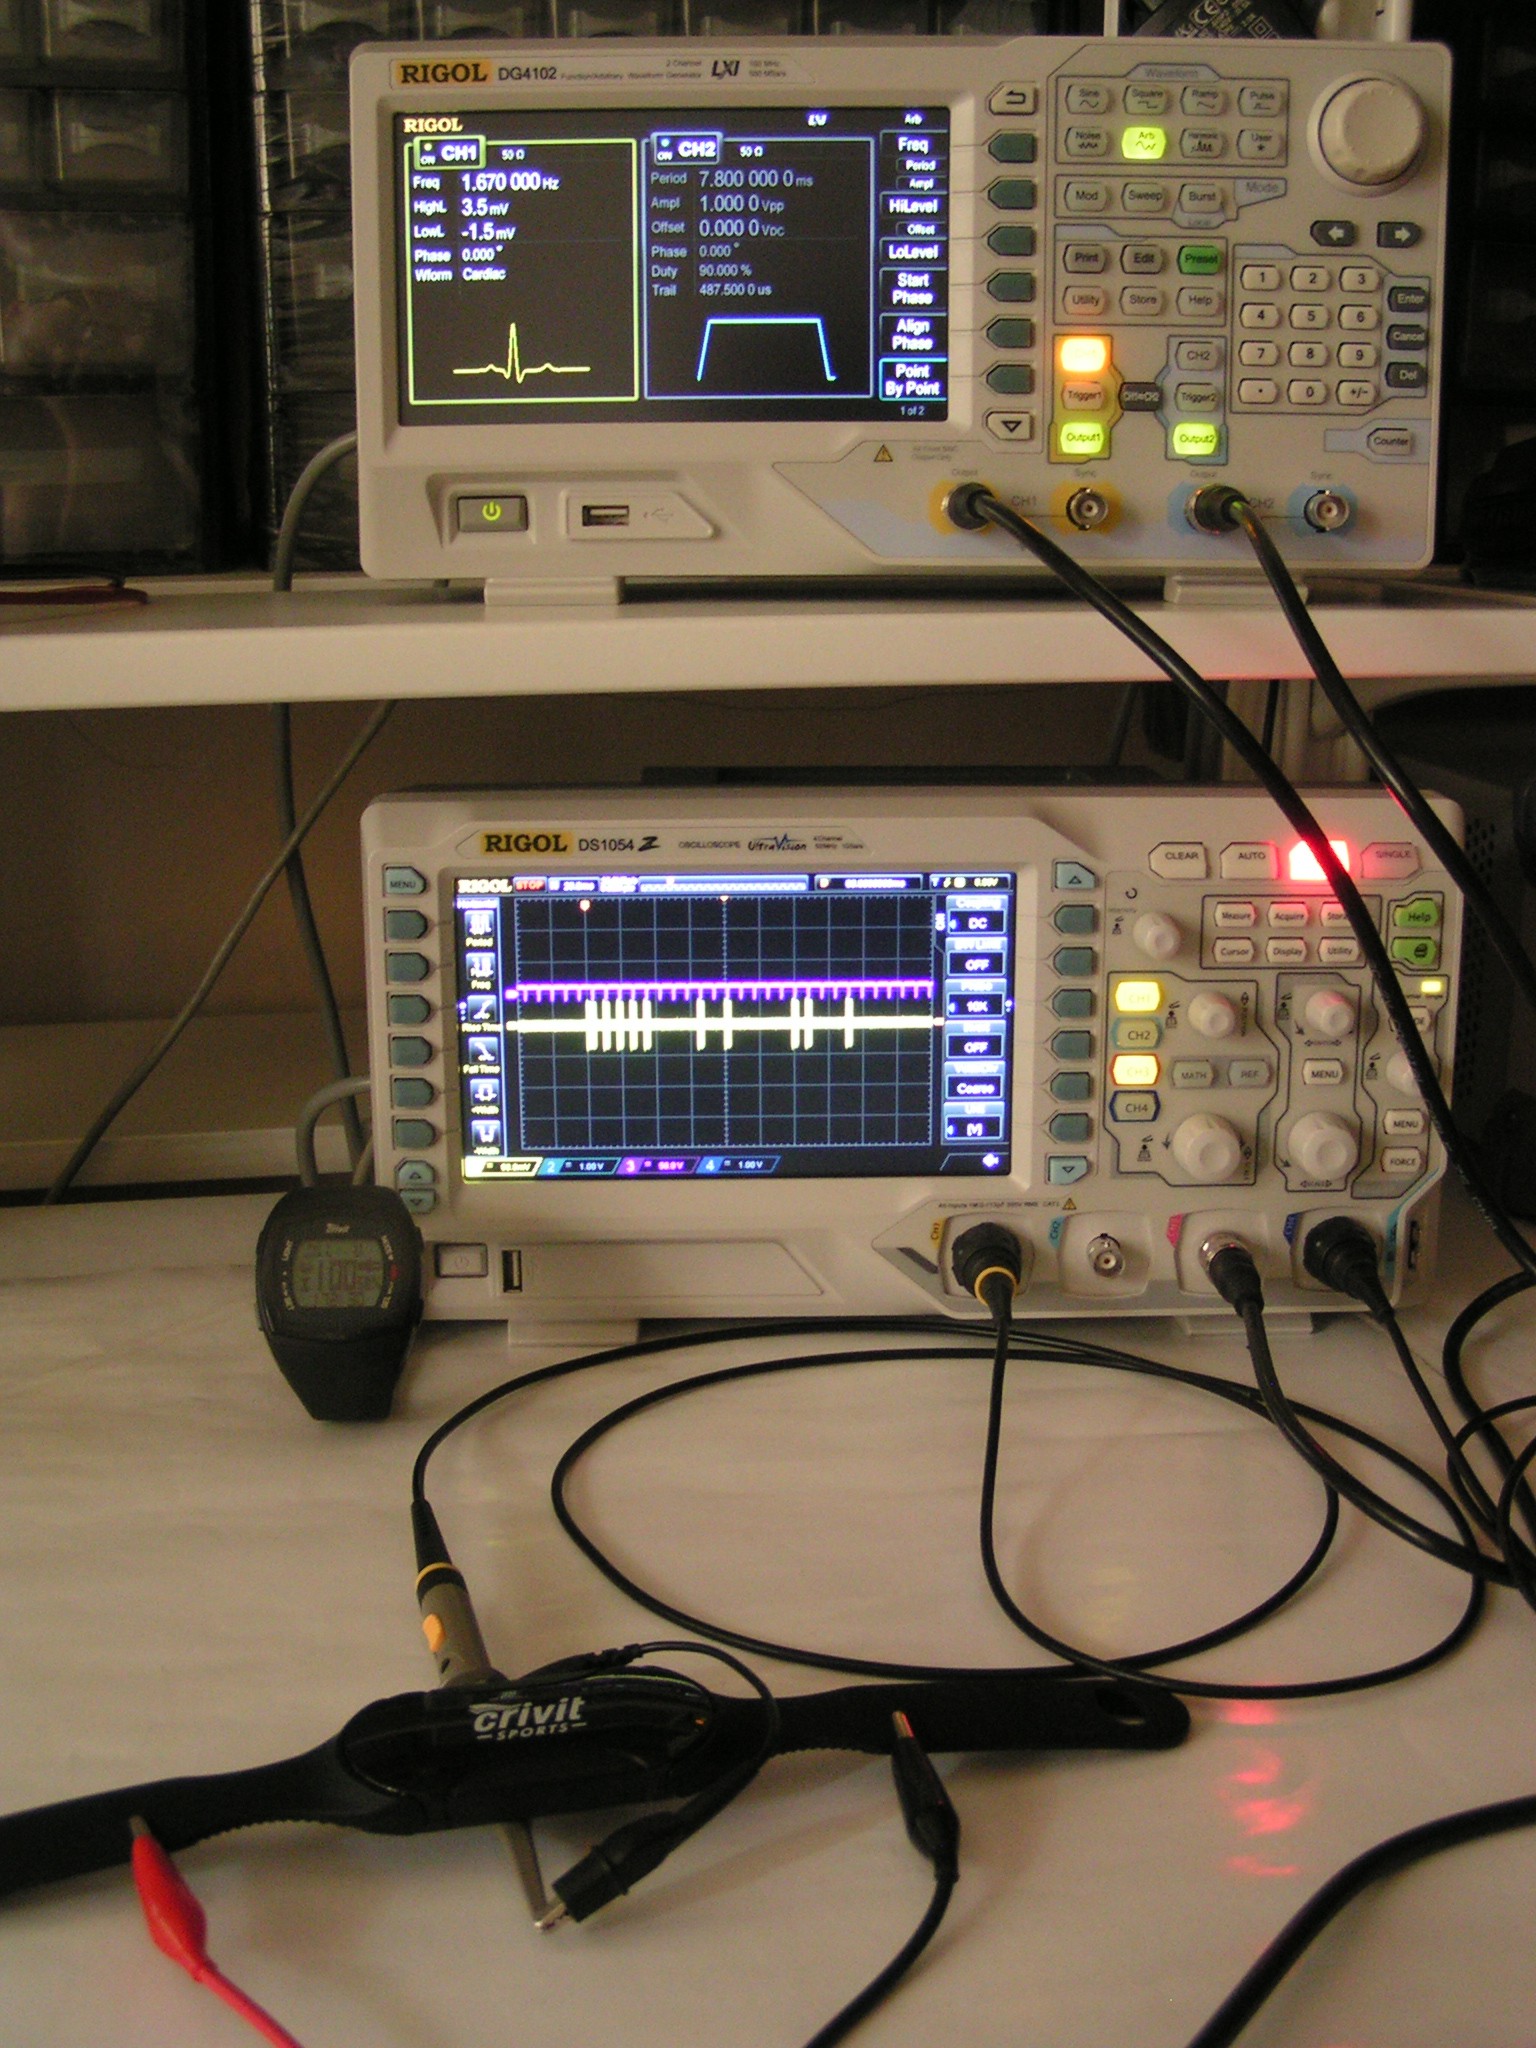
Another more rigorous testing way was necessary. Instead of using real heart signals, a signal generator (RIGOL DG4102) was used to simulate the electrical signals coming from the heart. By contrast with a real heart, the generator can produce any BPM number with high accuracy. The output from the signal generator was connected to the two conductive rubber pads of the chest strap. An one wire loop antenna was wrapped around the chest belt, and the received RF signal was displayed on the oscilloscope (RIGOL DS1054Z).

.

Also, another signal was generated by the second channel of the generator, and was added as a grid (the magenta signal), to ease the task of counting consecutive bits of zero. Each magenta spike is now pointing to a zero or a one bit. The yellow signal in this capture is:

S 111001 0101000100011

Where ‘S’ is the Sync bit, ‘111001’ is the chest strap ID and ‘0101000100011’ is the BPM. For this particular signal, the wrist watch will display one hundred BPM.

.

By varying the period of the fake heart beat generated signal, all possible heart rates were browsed.

The following table...

Read more »

Heart rate watch LIDL.ods

Testing Notes and Tables for the encoding scheme

spreadsheet - 235.36 kB - 05/10/2017 at 07:15

Download

  • - Computer, scan all the wireless codes!

    RoGeorge03/29/2017 at 03:47 0 comments

    - Computer, scan all the wireless codes!
    - Scanning..., scanning complete.

    - Computer, read the scanning summary.
    - Tested: 8192 codes. Decoded as valid: 213 codes. Decoded range: from 30 to 239.

    - Computer, why are there more valid codes than the range allows?
    - There are 3 duplicated codes.

    - Computer, list duplicates.
    - Listing...

    Wireless code:        Should display:     Displays as:
    ======================================================
    1111000000101100110   28                  92
    1111000100101100110   92                  92
    1111000000101101010   29                  93
    1111000100101101010   93                  93
    1111000000101111100   31                  95
    1111000100101111100   95                  95
    

    Well, it was not exactly like that, but I love the idea: Let a machine do the work for you.


    OK, but how it actually was?

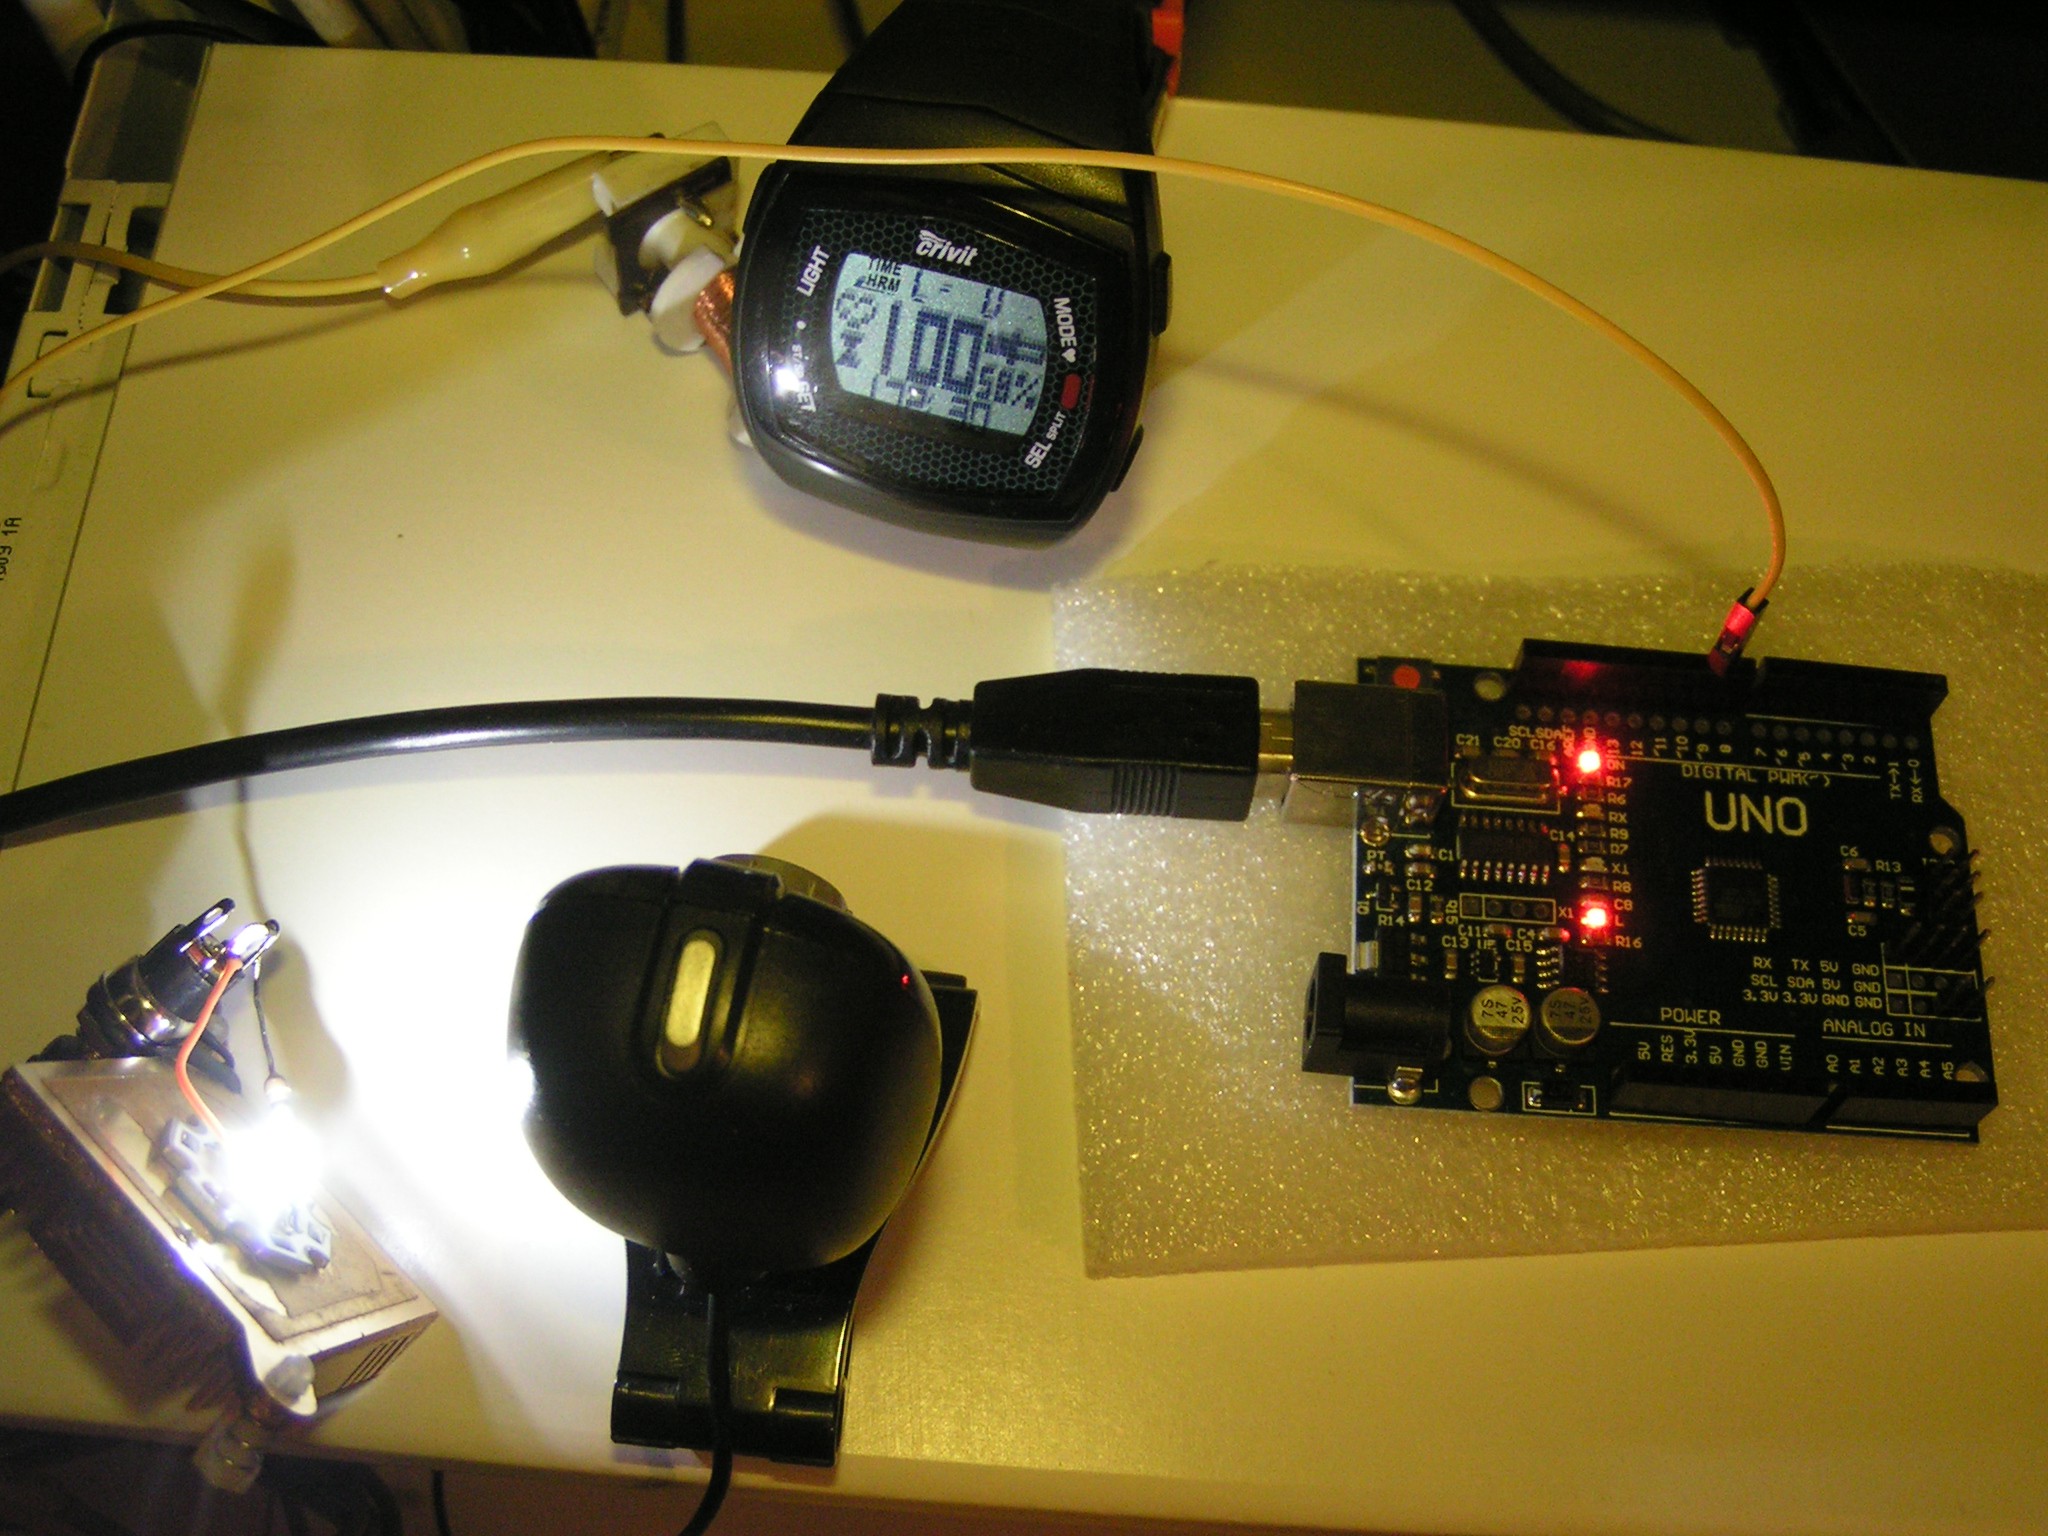
    From where we left last time, we already had a computer controlled radio Tx. To test all the possible 8192 codes, we can write a script to Tx all the codes one by one, while looking at the number displayed on the wrist watch.

    For a solid radio connection, it would be nice to send first a known working code and confirm the displayed number is as expected, then send a known invalid code and confirm the display shows invalid.

    Then, send the code we want to test and read the display.

    Now, save the results. Job done.


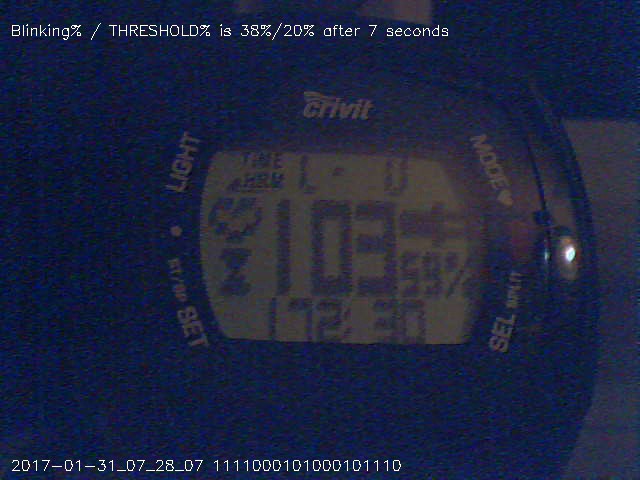
    For a computer, the most difficult part is to read the display of the wrist watch, so a compromise was made: No optical recognition of the displayed number, recognize just if the heart symbol is blinking on the display.

    If blinking, then we have a valid code, so take a snapshot from the WebCam and save it on the disk. We will look later at all the taken pictures. If not blinking, then the code is invalid, go to the next one.


    Data flow setup:

    Python script that parses all the 8192 codes ->
    Arduino radio transmitter ->
    110KHz radio waves ->
    Wrist watch radio receiver/decoder ->
    Wrist watch displayed number ->
    WebCam streaming the wrist watch display ->
    OpenCV video stream preprocessing/filtering ->
    OpenCV blinking recognition ->

    Snapshot save and text logging of the results.


    Hardware setup:


    OpenCV and computer vision:

    Never did this before, so I went head first. After watching a few OpenCV YouTube tutorials from the sentdex channel - thank you sentdex - it was the time to write some OpenCV based code:

    https://github.com/RoGeorge/OpenCV_Controlled_TX_Emulator

    # Usage:
    #   - plug the USB camera and the Arduino UNO programmed with 'Crivit_ChestBelt_TX_Emulator.ino'
    #   - set the 'COM_PORT' number taken by the Arduino UNO
    #   - if it's missing, create folder 'captures' near 'OpenCV_Controlled_TX_Emulator.py'
    #   - 3 windows will open, 1'st is a color live image, 2'nd a black and white, 3'rd with your selection
    #   - put the Crivit HRM wrist-watch in front of the USB camera and set it to HRM monitor mode
    #   - in the first 2 windows, adjust the sliders for the camera sensitivity and the black and white threshold
    #   - in the 2'nd window, select (by mouse dragging) a blinking area from the blinking heart displayed by the watch
    #   - tip: a single point selection (a click instead of a drag) works very good
    #   - the selected area will be seen live in the 3'rd window
    #   - all the bitstreams written in 'captures/input_bitstreams.txt' will be sent one by one to the radio Tx
    #   - the script will look in the 3'rd window if the heart symbol displayed by the wrist-watch is blinking
    #   - if blinking, a jpg snapshot will be saved in 'captures'
    #   - results will be displayed on the command line, then added to the log file 'captures/working_bitstreams.csv'
    #   - NOTE: Do not close the live windows. To exit teh script, press the 'ESC' key.
    # Installation:
    #   pip install numpy
    #   pip install pyserial
    #
    # to install OpenCV (32-bit) download and unpack, then go to folder
    #   'opencv\build\python\2.7\x86\'
    #   and copy the file 'cv2.pyd' into folder 'C:\Python27\Lib\site-packages'
    #
    # To check the OpenCV installation, open Python and type
    #   >>> import cv2
    #   >>> print cv2.__version__
    #   3.2.0
    #
    

    This is a print screen taken while adjusting the light and the B&W filter threshold: ...

    Read more »

  • Testing the encoding scheme hypothesis

    RoGeorge02/16/2017 at 01:22 0 comments

    A computer controlled radio Tx


    First, thank you all for the effort put in reverse engineering the encoding scheme, great job!

    Now, it's time to test some more the hypothesis.

    To do this, it would be helpful to be able to transmit any code, valid or invalid, and see how the receiver will react. The Crivit chest belt can't do that, so we need to build our own radio transmitter. With a carrier frequency of only 110 KHz, it should be easy to digitally synthesize the entire modulated carrier.

    A few lines of code later, it proves out that a simple wire connected to a digital output is good enough as a Tx antenna, and an Arduino UNO is fast enough to generate the carrier, modulate it, and in the same time talk to a computer over the serial port:

    This will allow us to put on air any combination of 0's and 1's that we might want to test.

    .

    .

    New findings


    • for an invalid code, the wristwatch will keep displaying the last valid number received, but the heart symbol will stop blinking, just like in the case of no signal
    • there is no handshake protocol, so the watch will display any valid code received, even if the chest belt ID is changed. All the following codes were displayed as one hundred:
      S 111100 0101000100011
      S 111010 0101000100011
      S 111001 0101000100011
      S 110011 0101000100011
    • the total number of bits can vary, i.e. the following codes are both displayed as a valid one hundred:
       S 110011 0101000100011
      S 1100100 0101000100011
    • so far, the encoding scheme found by @killy.mxi can predict valid codes even for numbers that were out of reach for the original chest belt transmitter. The following codes predicted for numbers between 234..239 were displayed as valid:
      1110010010010
      1110010011100
      1110011001100
      1110011010100
      1110011100100
      1110011111000
      Still, for predicted codes corresponding to numbers greater than 239, the blinking heart stops. This might be because the receiver was designed to act like that, but this it's not yet for sure.

    Manually typing each code to be tested proves to be useful, but also very time consuming and prone to errors. Since our radio Tx is now able to transmit any codes coming from the serial port, it will allow us to do automated testing. This will be the next step.


View all 2 project logs

Enjoy this project?

Share

Discussions

killy.mxi wrote 05/09/2017 at 16:31 point

> Wireless code: Should display: Displays as:
> =====================================================
> ...
> 111100 0000101111100 31 95
> 111100 0100101111100 95 95

You made a small mistake, it seems. Actual value for 31 should be 0010101111100.

Coding scheme used here ensures there are no more than three zeros in a row.

Why it decodes that invalid code as 95, though, I have no idea. It can be considered as undefined behaviour in their decoding. "Garbage in - garbage out" should be sufficient explanation in that case. Bad thing they didn't detect and ignore invalid inputs, despite the possibility.

  Are you sure? yes | no

killy.mxi wrote 05/09/2017 at 16:40 point

Ah, I got it. So, you've tested every possible input, and compared their output with yours, without checking for validity.

And found few invalid codes that slipped through their decoder implementation as the result.

(That, in turn, should not affect the functionality of the product, as these codes won't be transmitted in a first place.)

  Are you sure? yes | no

RoGeorge wrote 05/10/2017 at 06:47 point

I think there are valid codes with more then 3 zeroes in a row, e.g. for 128...143

Indeed, the watch is working just fine. The main reason to explore in an automated way for a wider range of codes then necessary was, in fact, my desire to learn about computer vision and OpenCV.

Even after exploring more codes, I am still intrigued by how the signals are encoded. IMO it must be some algorithm simple enough to implement it into hardware, without a processor.

The receiver side might have a processor (so the watch is able to run whatever software is needed to decode), but my guess is that the chest belt transmitter doesn't have a processor, so it must be simple enough for a hardware only implementation.

  Are you sure? yes | no

killy.mxi wrote 05/10/2017 at 08:58 point

My bad. There will be no more than 3 zeros in case of optimal implementation.

Still, "Should display" statement isn't quite right here. Test setup is quite nice though.

As for hardware: microcontrollers are dirt cheap nowadays. And handling the pulse sensor still requires some logic. I bet there is some generic RF-enabled one-time programmable microcontroller inside. With firmware flashed at factory. 

If you can't disassemble it to check that by yourself, look for FCC id code on the device - you will be able to find its insides at fccid.io

  Are you sure? yes | no

Lucio Di Jasio wrote 04/08/2017 at 21:54 point

This is the shortest/simplest decoder (radio signal in, bpm out) that I got so far. Still written in python, but it would translate almost directly to C or assembly ...

lut4 = (38,42,50,60, 6,10,18,28, 6,10,18,28,12,20,36,56)

lut8 = (19,21,25,30,35,37,41,46, 3, 5, 9,14,38,42,50,60)


def heart_rate( code):
    pqstu = (code >> 5) & 0xf8      # top five bit 
    vw = (code >> 4) & 0x0C         # middle two
    six = code & 0x3F               # bottom six    
    DE = pqstu & 0xC0               # top two bit
    FG = pqstu & 0x38               # middle three
    if DE != 0xC0: FG <<= 1         # get st or tu
    FG &= 0x30                      # reduce to two
    if DE != 0xC0 and FG != 0x30:
        w = (vw << 1) & 0x08        # only the bottom bit
        return DE + FG + w + lut8[w:].index(six)
    return DE + FG + vw + lut4[vw:].index(six)

Loved the puzzle ... 

  Are you sure? yes | no

RoGeorge wrote 05/10/2017 at 06:52 point

I must look into that, very interesting, thanks!

  Are you sure? yes | no

RoGeorge wrote 05/10/2017 at 07:11 point

Did you tried this decoder with the exception codes, like the ones from this table?
https://hackaday.io/project/13142-sniff-the-wireless-data-of-a-sports-wrist-watch/log/55886-computer-scan-all-the-wireless-codes

Here is a spreadsheet with notes as cell comments. Google Sheets cell comments are always collapsed, so the comments are hard to spot. I will attach here the original Open Office file, where all the comments can be seen at once.
https://docs.google.com/spreadsheets/d/1bD1QExAo3wHoBNc9jYppoeNdXunUgC1jm-AAx7J85hA/edit?usp=sharing

  Are you sure? yes | no

Asterek wrote 01/14/2017 at 01:22 point
Hi,

Just tried to find a pattern in the data and here is a piece of C code which translates the data to plain numbers:


========================================================================
#include <stdio.h>
#include <stdint.h>

// 13 bit data captured from pulse sensor encoded as integers
uint16_t pulse_array[] = {
1394, 1404, 1555, 1557, 1561, 1566, 1571, 1573, 1577, 1582, 1603, 1605, 1609, 1614,
1638, 1642, 1650, 1660, 1830, 1834, 1842, 1852, 1862, 1866, 1874, 1884, 1926, 1930,
1938, 1948, 1996, 2004, 2020, 2040, 2195, 2197, 2201, 2206, 2211, 2213, 2217, 2222,
2243, 2245, 2249, 2254, 2278, 2282, 2290, 2300, 2323, 2325, 2329, 2334, 2339, 2341,
2345, 2350, 2371, 2373, 2377, 2382, 2406, 2410, 2418, 2428, 2579, 2581, 2585, 2590,
2595, 2597, 2601, 2606, 2627, 2629, 2633, 2638, 2662, 2666, 2674, 2684, 2854, 2858,
2866, 2876, 2886, 2890, 2898, 2908, 2950, 2954, 2962, 2972, 3020, 3028, 3044, 3064,
4243, 4245, 4249, 4254, 4259, 4261, 4265, 4270, 4291, 4293, 4297, 4302, 4326, 4330,
4338, 4348, 4371, 4373, 4377, 4382, 4387, 4389, 4393, 4398, 4419, 4421, 4425, 4430,
4454, 4458, 4466, 4476, 4627, 4629, 4633, 4638, 4643, 4645, 4649, 4654, 4675, 4677,
4681, 4686, 4710, 4714, 4722, 4732, 4902, 4906, 4914, 4924, 4934, 4938, 4946, 4956,
4998, 5002, 5010, 5020, 5068, 5076, 5092, 5112, 6438, 6442, 6450, 6460, 6470, 6474,
6482, 6492, 6534, 6538, 6546, 6556, 6604, 6612, 6628, 6648, 6694, 6698, 6706, 6716,
6726, 6730, 6738, 6748, 6790, 6794, 6802, 6812, 6860, 6868, 6884, 6904, 7206, 7210,
7218, 7228, 7238, 7242, 7250, 7260, 7302, 7306, 7314, 7324, 7372, 7380, 7396
};

int main(void) {
    uint8_t i, qty = sizeof(pulse_array) / sizeof(pulse_array[0]);
    
    // get next value to decode
    for (i = 0; i < qty; i++) {
        uint16_t w=0, v=0;
        uint8_t a=0, a1=0, b=0, b1 = 0, gh=0, f=0, result=0, mod = 0;
        int8_t sign = 1;

        w = pulse_array[i];
        a1 = w>>10; a = a1>>1;
        b = (w & 0x0300)>>8;
        b1 = (w & 0x0200)>>9;
        v = w & 0x0FF;
        
        if (a != 3) {
            if (b == 3)    {
                v >>= 1;
            }
            gh = (a << 2) + b;
        } else {
            v >>= 1;
            gh = (a1 << 1) + b1;
        }
        
        v &= 0x07F;

        if ((v >= 19) && (v <= 25)) {
            sign = -1;
        }
        
        if ((v == 19) || (v == 46) || (v == 78)) {
            mod = 2;
        } else if ((v == 21) || (v == 25) || (v == 37) || (v == 41) || (v == 69) || (v == 73)) {
            mod = 1;
        }

        result = (gh << 4) + (v >> 3) + (sign * mod);
        
        // print decoded number of bps
        printf("%d = %d\n",w,result);
    }
}

  Are you sure? yes | no

RoGeorge wrote 01/25/2017 at 13:38 point

That's great, thanks!

At the first look, I can not tell if your algorithm is similar with the one found by @killy.mxi, but I'll give it a try very soon. So far I made an emulator for the radio transmitter, in order to test new combination of bits that are not in the published encoding table.

  Are you sure? yes | no

Lucio Di Jasio wrote 04/08/2017 at 14:54 point

Here is a simple test version in python3. In assembly (any micro) this would turn into just a dozen of lines of code:

#! /usr/bin/env python3
#
# Heart rate monitor decoder
#
#
from sys import argv


lut4 = (38,42,50,60, 6,10,18,28, 6,10,18,28,12,20,36,56)

lut8 = (19,21,25,30,35,37,41,46, 3, 5, 9,14,38,42,50,60)

def heart_rate( code):
    b = []
    for x in range(7):
        b.append(1 if (code & 4096) else 0)
        code = code << 1
    b.append((code>>7) & 0x3F)
    p,q,s,t,u,v,w,lut = b
    # print(p,q,s,t,u,v,w,lut)

    # find D and E
    D = p; E = q
    DE = D*2+E

    # find F and G
    if DE == 3:
        F = s; G = t
    else:
        F = t; G = u
    FG = F*2+G

    # print ('DEFG=',D, E, F, G)

    # find J and K
    if DE <3:

        if FG < 3:
            J = w
            # print('J=',J)
            JKLM = J*8 + lut8[J*8:].index(lut)
        else: # FG == 3:
            J = v; K = w; JK = 2*J + K
            # print('JK=',JK)
            JKLM = J*8 + K*4 + lut4[JK*4:].index(lut)
    else: # DE == 3
        J = v; K = w; JK = 2*J + K
        # print('JK=',JK)
        JKLM = J*8 + K*4 + lut4[JK*4:].index(lut)

    print('BPM = ', DE*64+FG*16+JKLM)


if __name__ == '__main__':
    if len(argv) < 2 :
        print('Usage: heart_rate.py code OR test.txt')
        exit()

    try:
        heart_rate(int(argv[1]))
    except:         
        with open(argv[1],'r') as f:
            for line in f.readlines():
                heart_rate(int(line))

  Are you sure? yes | no

killy.mxi wrote 12/11/2016 at 14:10 point

Thanks axodus for the initial seed for thoughts.

Encoded sequence has variable lenght. There are some stuffed bits for better signal recovery. No more than 4 "0"s in a row (doesn't look like a good achievement to me, actually).

Output sequence:


* in1
* in2
* (in1 nor in2) stuffed if (in1 nand in2)
* in3
* in4
* (in3 nor in4) stuffed if (in3 nand in4)
* in5
* in6
* (in5 nor in6) stuffed if (in5 nand in6)
* in7
* in8
* (in7 xnor in8)
* (in7 nand in8)


Speaking simple, stuffing rule works like this:
* if pair of bits is 00, stuff 1;
* if 01 or 10, then stuff 0;
* if 11, don't stuff anything here.


The reason behind the last two output bits is puzzling: why doing checksum just over two last input bits?


Me figuring out the encoding:
https://docs.google.com/spreadsheets/d/18AYRKe2EpUOVvEsKSWlFoXfy9EXSNNe7LVkw8dtX75Y/pubhtml
(Initially there was conditional formatting to distinguish ones from zeroes. Now only the pairs are highlighted.)
It seems that there's small mistake in data. Values for 231 and 232 should be swapped if I'm correct.

  Are you sure? yes | no

RoGeorge wrote 12/13/2016 at 23:21 point

Wow, these are very interesting findings, thank you very much!

I just tried to check again for the codes 231 and 232, but the chest strap didn't work any more.
:o(

I will try to fix it tomorrow, and let you know the result.

  Are you sure? yes | no

RoGeorge wrote 12/14/2016 at 00:33 point

The chest strap is working again, and you are correct: Values for 231 and 232 should be swapped, good catch.

I will update the project with your findings.

Thanks again for cracking the encoding scheme, very well done!

  Are you sure? yes | no

K.C. Lee wrote 08/16/2016 at 04:50 point

While it won't answer how it was encoded, you can use brute force to decode the values from the 13 bits by using a table lookup.

  Are you sure? yes | no

RoGeorge wrote 08/16/2016 at 08:49 point

Indeed, the table already extracted (the one at the end of the details section https://hackaday.io/post/43802) can be used to lookup for the decoded values, but I am still curious if this 13b/8b is a well known scheme, or a particular one used only for this product.

I tried to open the transmitter case in order to see the encoding chip, and find it's datasheet, but the case seems to be glued. I am not yet ready to open it by force because it will not be waterproof any more after this. One more reason not to open it is that there might be a dedicated chip with no part number and no available datasheet.

  Are you sure? yes | no

axodus wrote 08/15/2016 at 23:01 point

hey RoGeorge , thanks for the excellent write up.

 I tried to reverse engineer the encoding scheme you described in your first post with
no definite results, but thought I'd share my conclusions so far if anyone else want to give it a try.  

the i/o bits are indexed from left to right starting with 1.

looking at the correlation between the output bits  and the input bpm bits: http://imgur.com/M1Uet2e

and comparing the bits visually i got the following clues: http://imgur.com/1lEhH3f

=> bits 1,2 (left most) of the output are identical to bits 1,2 of the input.

=> bit 3  ? (correlate to input bits 3,4...)

=> bit 4 almost identical to input bit 3 apart from some values where the bits get negated.

=> bit 5 almost identical to input bit 4 apart from some (other) negated values.

=> bit 6 ? (correlate to input's bits 5...)

=> bit 7 almost identical to input bit 5, more values get negated.

etc...

not an answer yet, but a general direction i hope :)

  Are you sure? yes | no

RoGeorge wrote 08/16/2016 at 03:07 point

Thank you very much for looking into this.
:o)

I never thought of a graphical representation, very good idea!

Looking at the charts, I cannot see any obvious pattern. I am starting to believe that the designer maybe just used a lookup table for encoding 8b/13b in order to achieve DC-balance or clock recovery, something similar with this 8b/10b scheme: https://en.wikipedia.org/wiki/8b/10b_encoding

  Are you sure? yes | no

Similar Projects

Does this project spark your interest?

Become a member to follow this project and never miss any updates