 rkrishnasanka
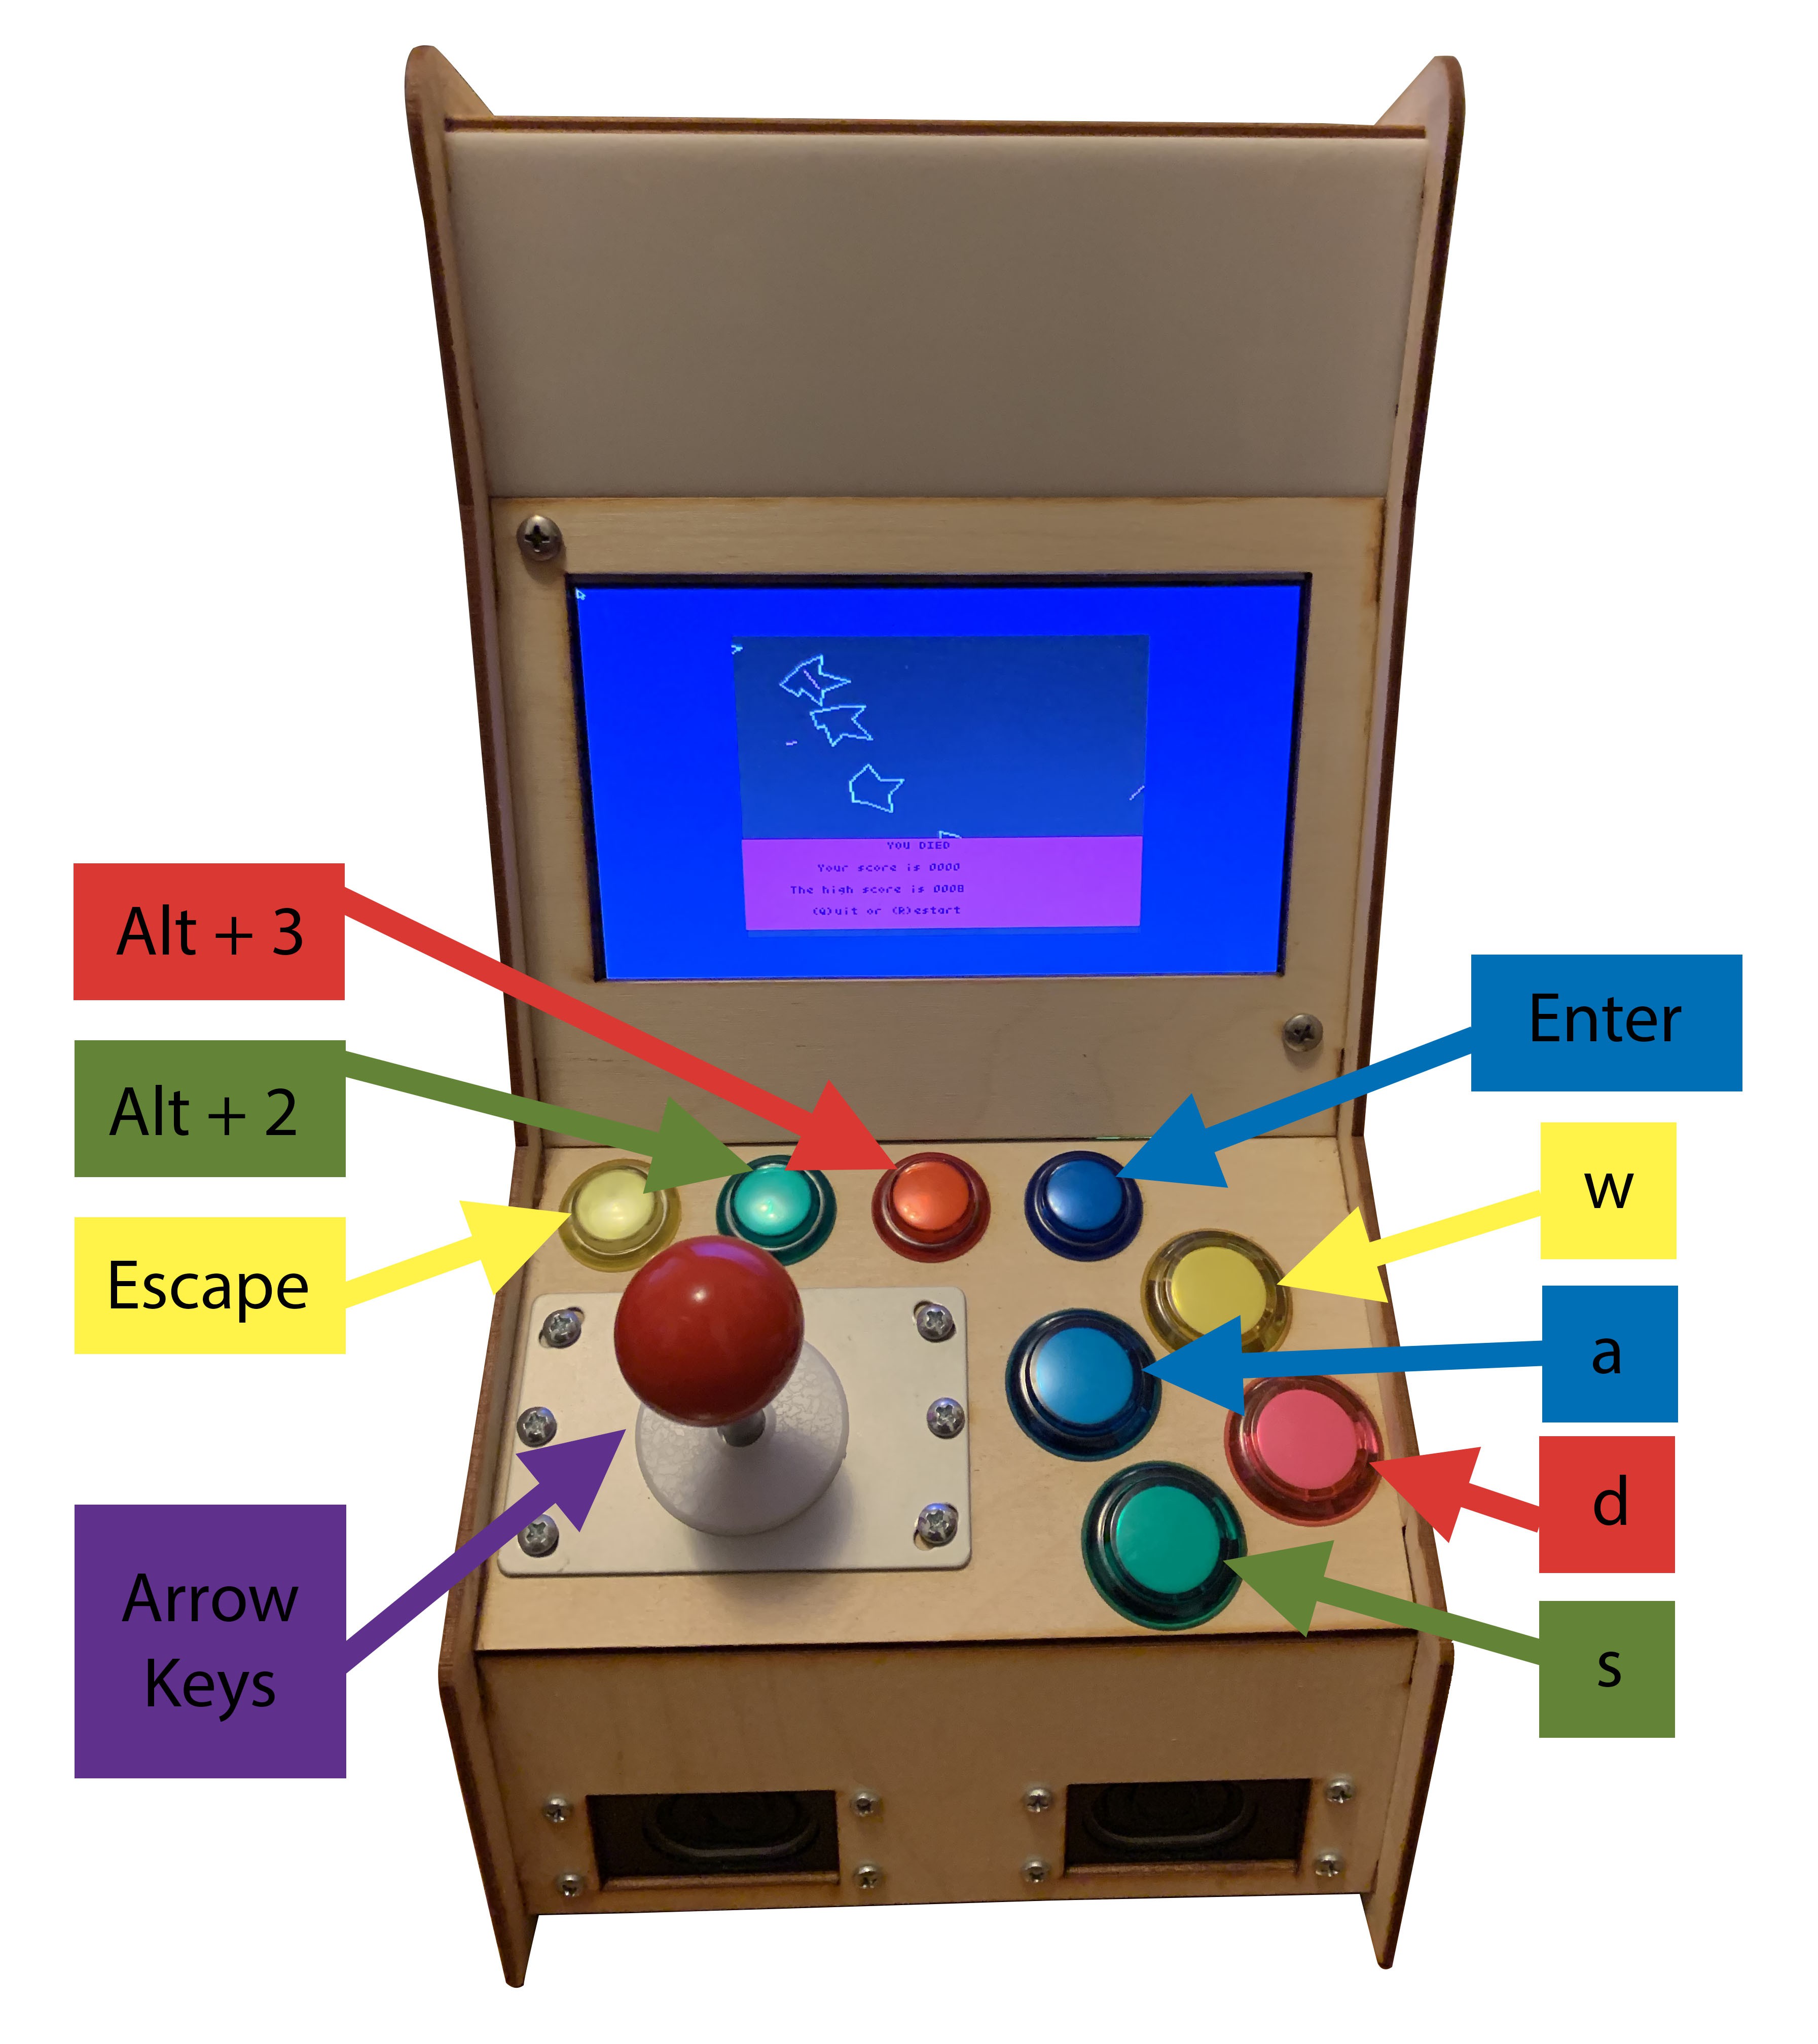
Keyboard Map
| Action | Arduino | Keyboard |
|---|---|---|
| Joystick North | 2 | Up Arrow |
| Joystick East | 5 | Right Arrow |
| Joystick South | 3 | Down Arrow |
| Joystick West | 4 | Left Arrow |
| Meta-Button-1 | 15 | Esc |
| Meta-Button-2 | 14 | Alt + 1 |
| Meta-Button-3 | 16 | Alt +3 |
| Meta-Button-4 | 10 | Enter |
| ARCADE-BUTTON-UP | 6 |
w |
| ARCADE-BUTTON-LEFT | 7 |
a |
| ARCADE-BUTTON-RIGHT | 8 |
d |
| ARCADE-BUTTON-DOWN | 9 | s |


 Ari
Ari
 j0z0r pwn4tr0n
 T. B. Trzepacz
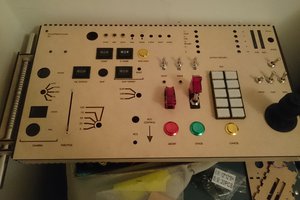
 Matthew Peverill
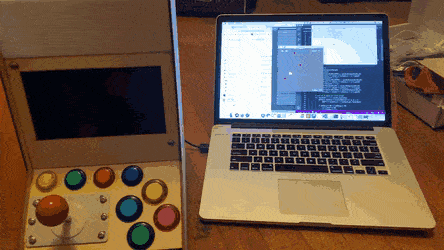
Nice project! Some people in our hacker space build a similar arcade based on MAME. We also laser cut the housing:
https://hackaday.io/project/10649/gallery#5f9f4a7b30f63360f826531cb7848b27
It's very similar in construction to yours.