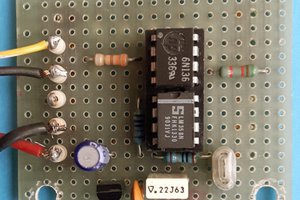
• Final integration done, analog filtered sound!

    Slavko Glamocanin10/19/2018 at 10:26 0 comments

    This is the current integration state:
    - physically connected on a plywood slate, the same material the case will be made of
    - power is all wired up, with a new 12v to 5v BEC powering the raspberry, arduino and its usb connected devices (1,5A sustained).
    - I had to up the voltage to the arduino to 5v to supply enough voltage to the analog modules. As the raspberryPi is a 3v3 device, i unhooked the TX pin of the arduino, as i'm not receiving data from the arduino anyway and it contains the 5v voltage that would hurt the Pi.
    3v3 is enough for the arduino to receive the data from the raspberry.

    I also had to up the serial speed to 115200 to have a fast enough response from getting the midi command, to transmiting it to the arduino and getting the voltage changed.

    It works but stops working after a while. Serial is such a mysterious pain in the butt, I'm going to have to research it a bit more:)

    The soundcard just plays a loop but it's the actual npSynth software running it.

  • 12v power supply to rule them all!

    Slavko Glamocanin10/12/2018 at 09:08 0 comments

    In this project i have a 5V needing RaspberryPi and 12v analog modules, so i decided for a fat 12v power supply to rule them all.

    But the 7805 voltage regulator i had lying around turned out to run at 100 degrees C, far too high and I didn't have a heatsink nearby.

    So i found the Recom switching regulator, and sourced it. But I remembered that while building my drone I also ordered some micro BECs and what do you know, they fit perfectly!

    The Recom is also pin compatible but it costs around 9eur, compared to this quite cheap 2e5 component or should i call it a module.

    The 1 amp should suffice in powering the RaspberryPi, but I will check what happens if you run a couple of usb powered midi devices on it, too.

  • Software and platform

    Slavko Glamocanin10/08/2018 at 07:57 0 comments

    In this episode i discuss the platform and software used in the npSynth.

    The hardware platform is the RaspberryPi but the software is made in a way that supports most platforms that the linux kernel can work on.

    For full control of the system I am using my npStarter custom init system, which allows for greater control and flexibility in running only the things i really need and allowing a read-only system partition to protect from corruption because of sudden power loss.

    So this init system runs the most important app, the npSynth C++ app.For audio I am using jack and i intend to support any soundcard linux does, focusing on the CM6206 codec based soundcards and the huuuge behringer 1820, whose 2 of 10 outputs i want to redirect to the analog modules so i can have a AUX bus with filters and send any sound through them. BTW the CM6206 codec card I have sounds horrid even compared to my notebook phones out, beware:) It is fully 7.1, though.

    Here is an overview of the platform so you can get a feel for how it comes together.

  • Connectivity and power, npSynth building progress report

    Slavko Glamocanin10/07/2018 at 21:30 0 comments

    Further integration for my npSynth, the raspberrypi is now talking to the arduino which sends out PWM signals smoothed (or smothered;) to DC to the analog modules.

    I also found out that the 7805 regulator i use to convert the 12v input to 5v to power the PI is VERY inefficient (supposedly 50% of the power goes to heat!) and gets very hot for even the 500mA needed. I already found a more efficient switching regulator which i will use.

    As a shameless plug i had one of our data loggers equipped with a KType probe so i could monitor the regulator temperature. It was probably below the 125 the 7805 is rated for but far too high to be used. The switching one is supposedly a lot better.

    I needed the 12V so i can have only one power adapter as the analog filter boards take 12V as input.

    Next time I'll go over the software parts a bit, how they work together on the raspberrypi.

    Still thinking about how to integrate it physically, though:)

    And even more important, will there even be a touchscreen, or will it all be controlled via websocket on your phone/ipad/40" tv:) ?

    Find out on the next episode.

  • PWM - Controlling the Analog modules

    Slavko Glamocanin10/06/2018 at 22:14 0 comments

    The brains of the project is the immensely powerful RaspberryPi, but for interfacing I like to use the Arduino Pro mini, a very flexible MicroController with many I/O lines which i connect to the Raspberry via the serial interface. For this you have to disable the default configuration of using the raspberry pi serial port as a login option.

    I will control the analog modules (a filter module from the great Shruti synth by Mutable instruments) with the arduino's Pulse Width Modulation lines.

    But the first time i tried it, the auditory results were horrible! The PWM frequency was obviously too low and fell into the auditory frequency spectrum (since the shruti also uses an ATMEL chip i hoped the smoothing was done on the filter board... nope:). 

    So to convert the jagged square wave the PWM generates I used a simple RC filter to only leave a nice DC voltage.

    The RC filter is a combination of a resistor and a capacitor, which cuts of higher frequencies. You can use an online calculator to find the R and C values you need.

    To use the smallest capacitors possible I also increased the PWM frequency to its highest value. The arduino pro mini has 6 PWM outputs, two per timer. Although changing the frequency of the first timer disrupts delay() and millis() functions i used it nonetheless because i have no need for timing in this program.

    Here is a nice cheat sheet describing the modes of the PWM outputs and how to set the timer divisors to get the highest frequencies.

  • Device redesign. UX first!

    Slavko Glamocanin09/18/2018 at 12:37 0 comments

    Starting on the redesign of the instrument. The integration with the huge soundcard was not viable and there would be (audio) cables connecting them anyway, so I decided to just integrate the filters and the raspberry together.

    I also added a touchscreen and i'm still deciding what buttons, sliders and knobs to use. 

    Will focus on the main functionality first, audio routing, spatialisation and analogue filter control, using external midi controllers for key/knob input.

    The analog modules could maybe be stacked and the input/output connectors would line up nicely as left/right input/output. But it would become quite fat:)
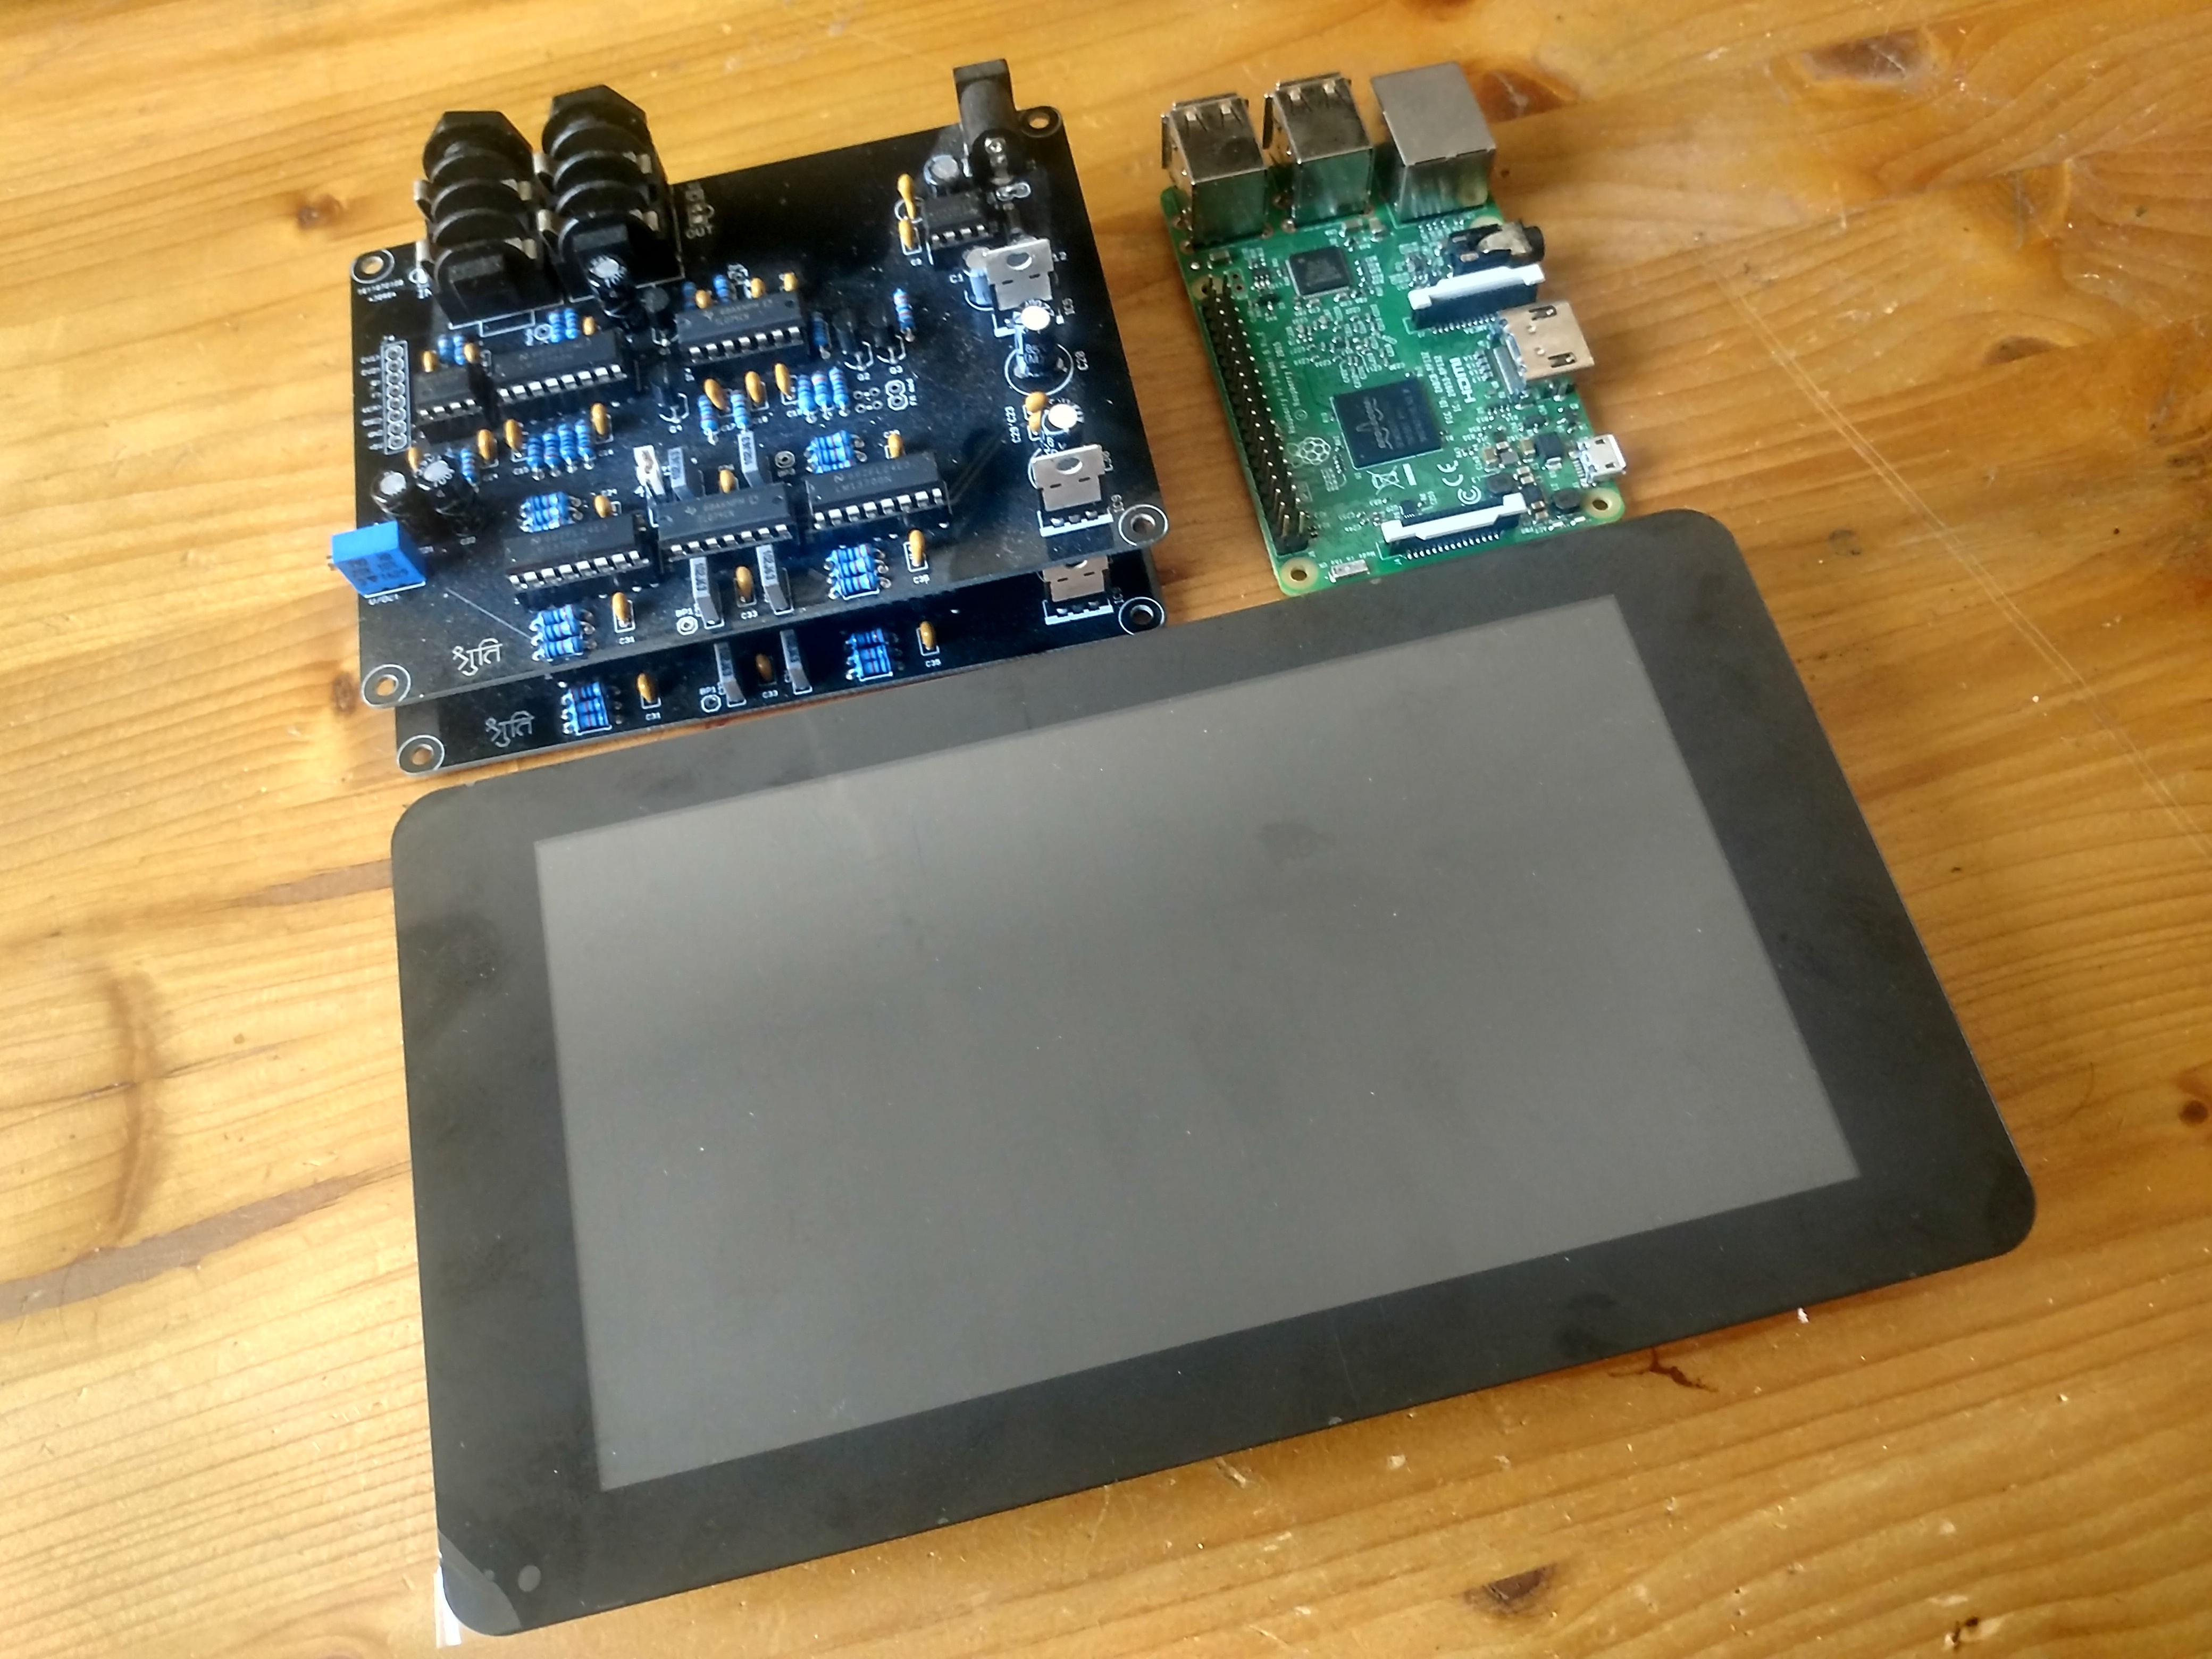
    Here are some of the examples of hookuppable controllers. Yes even a joystick:>

    Now let's get coding:)  I will use JACK as the sound driver, the wonderful linux stack will take care of the drivers for all connected soundcards and my own C++ based synth/router/mixer.