Close
0%
0%

Wood fired clay oven – build log

Follow me building an wood fired pizza and bread oven. I use mostly stuff I got for free, with some exceptions. No Arduino added, promise!

janJan
Similar projects worth following
I love good bread, and good pizza, too. Though I live in Germany, good bread isn't easy to get in some areas. Too many bakers just rip open bags of baking mixture, add water and yeast and call the product good bread. It's the same with pizza. Pizza needs 1) a very wet dough 2) extreme heat and a basic dough which had time to ferment and get infused by flavors! Most pizza places around here are either Turkish or Aramean. Tasty, but a totally different style of pizza!

Baking in a wood fired oven is the most basic form of baking. The oven is boss, it'll tell you when it's time to bake.

So, let's build one.

What is this all about?

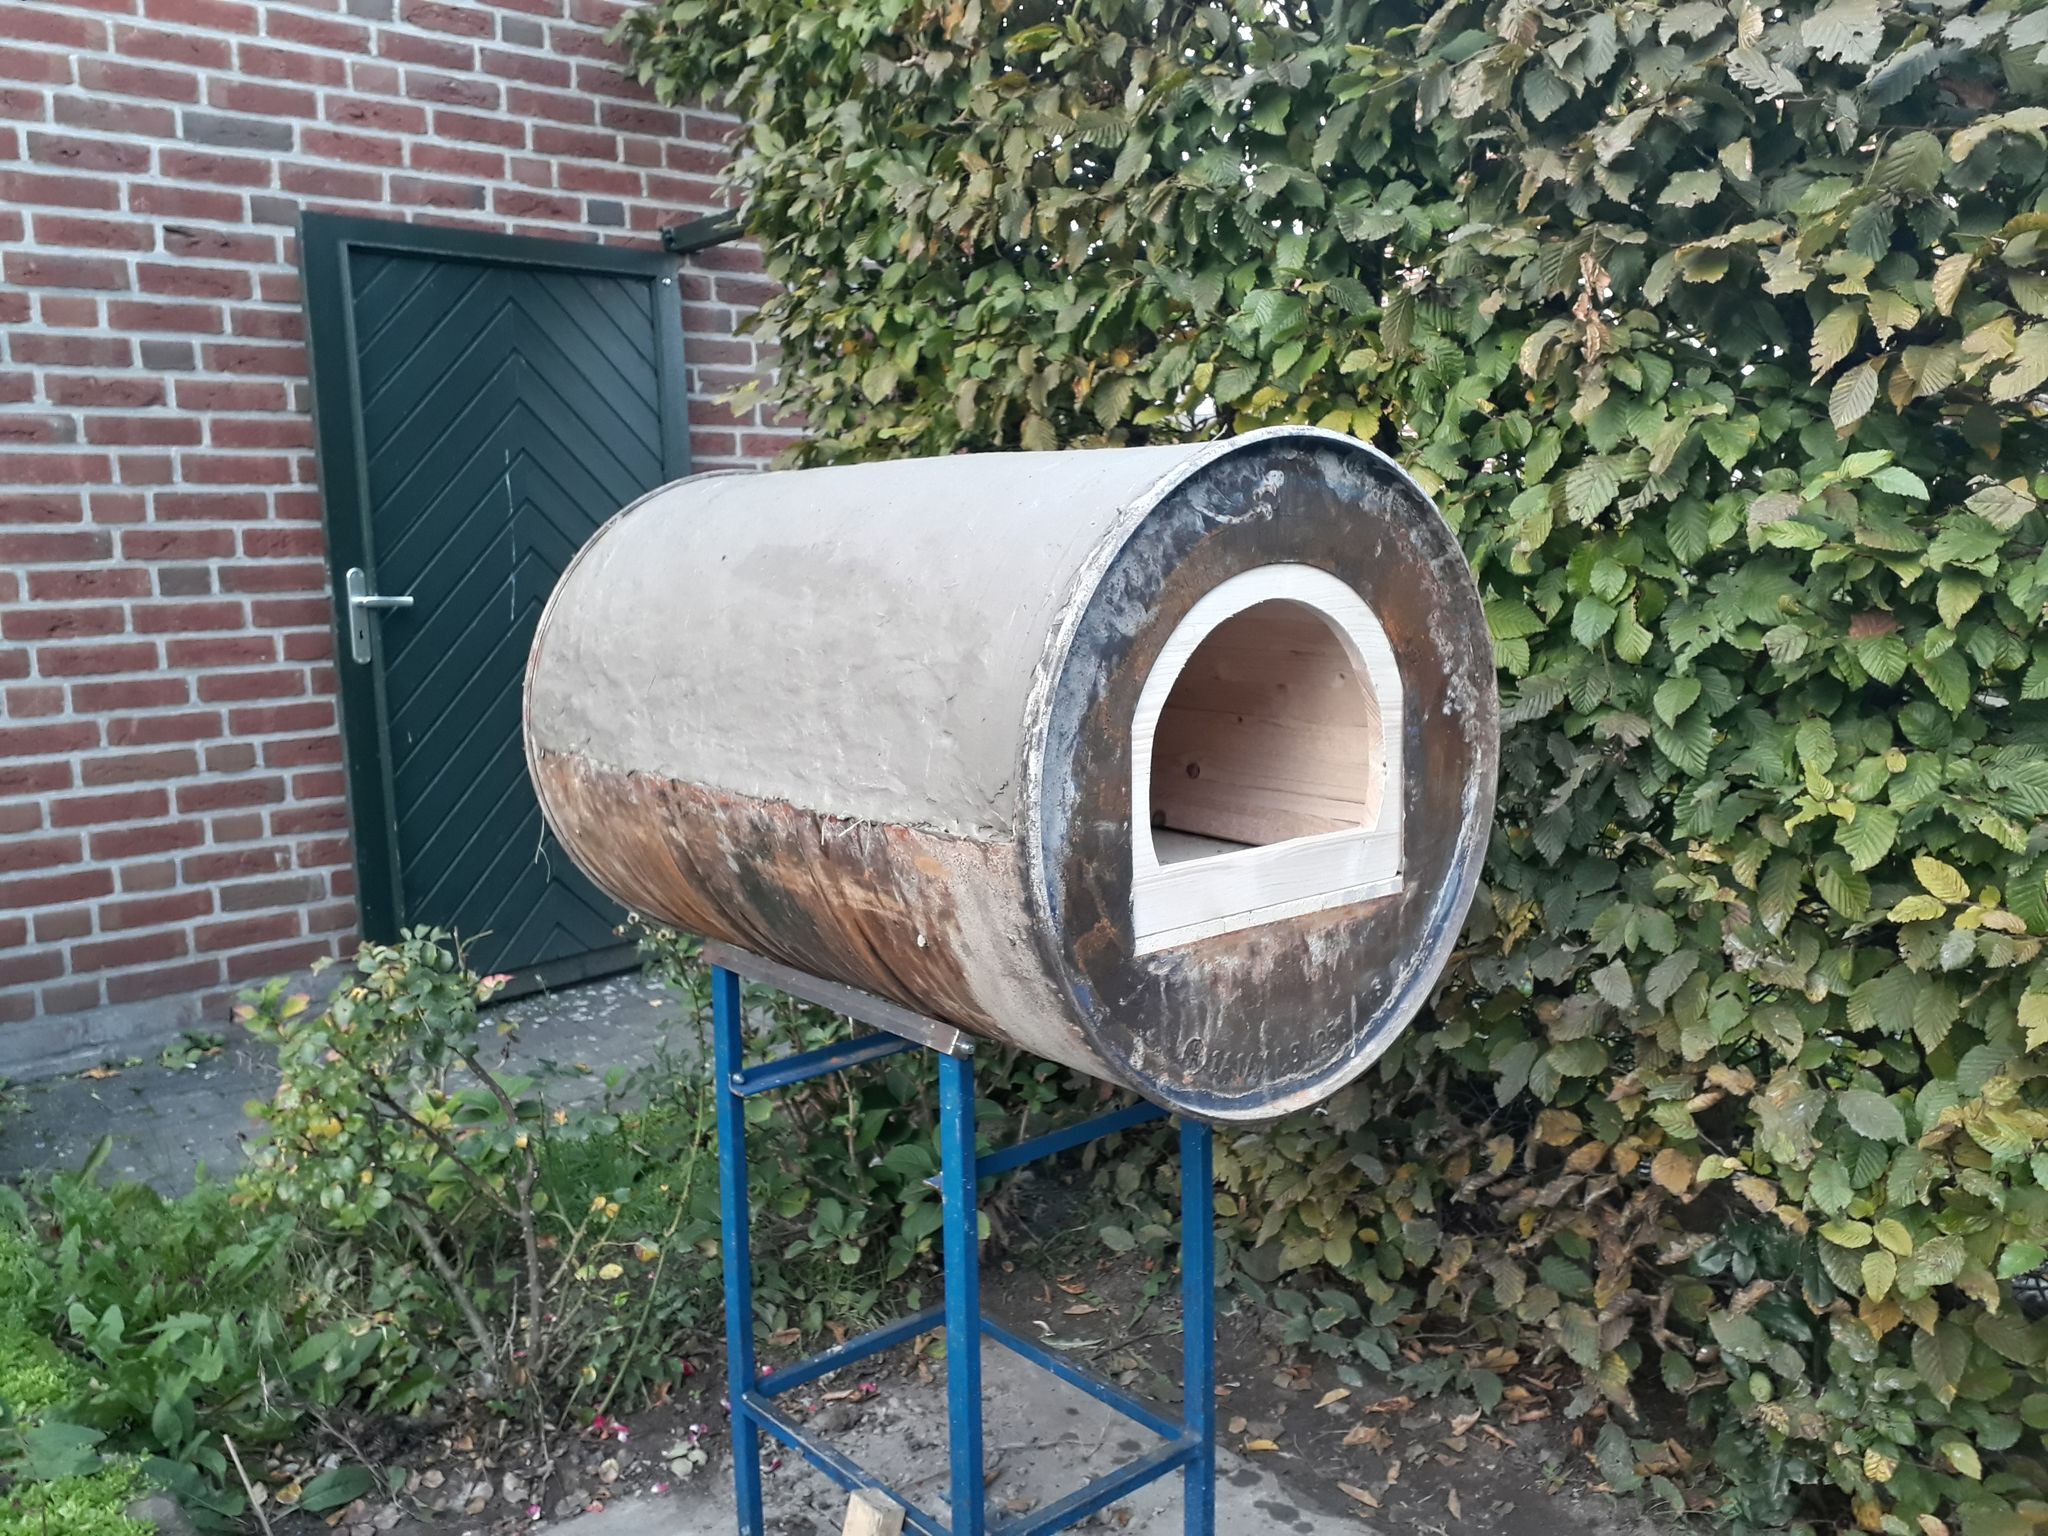
Put simple, it's about creating a fully functional wood fired clay/loam oven from scratch. Capacity is one Pizza at a time only due to limited space, but the oven can bake 4 breads at a time.

These were my restrictions:

  1. limited space in my garden: 1.5 x 1.5m
  2. using natural resources for everything directly in contact with the baked goods
  3. using clay/loam which is easily available in my region for the "heat storage"
  4. upcycling other stuff to finish the build

Some restrictions were easier to overcome than others. You'll see what I mean when reading through all the build logs.

Have fun reading!

Literature and Resources

I read the German (unfortunately shortened) translation of Kiko Denzers "Build Your Own Earth Oven" to get started. It was of much help, especially regarding getting the right ratio clay/sand/straw.

The internet is full of build instructions, too!

  • 11 – mounting the stove pipe ✓

    Jan11/04/2018 at 18:35 0 comments

    Update November 16th, 2018

    Adding pictures to the bottom of the old log doesn't work (like usual, picture-handling is a big fk'n mess here at hackaday.io). So here's the update:

    I found a fitting piece of 1.5mm thick aluminium, drilled a hole and cut a 75mm diameter hole with my jigsaw.

    The rosette is mounted with twelve cup rivets.

    Stick-out of the stove pipe is around 60mm.

    Mounted to the oven with cup-rivets. It's sturdy as hell. You can see the longer stove pipe just shoved down onto the stick-out pipe. Fits like a glove, happy with it!

    Read more »

  • 10 – insulation

    Jan11/04/2018 at 17:59 0 comments

    As the last log showed, the 60 to 70mm thick clay doesn't preserve the heat very well. It needed insulation badly.

    I wanted at least 50mm or so of insulation. A small format metal sheet (2000x1000mm) wouldn't be long enough then. So I chose the next format of 2500x1250mm. This gives the opportunity to use 80mm of insulation: yay!

    I got my metal sheet (2mm thick) and used a roller at the company to roll it into a cylinder of 740mm diameter with 30mm overlap:

    cylinder of 740mm diameter, overlapping 30mm and bolted together
    Next step was to do the cutouts for the four posts:


    I wanted to use rock wool instead of glass wool and soon regretted that decision.

    Rock wool is everything but easy to bend, so we had to cut lots of strips which were a mess to get around the oven! Wire was used to hold it in place.

    Above picture shows the second layer. Overlap was not as planned but should work nonetheless.

    The metal cylinder was easily bent open by about 400mm and put over the insulation. Two straps were needed to get the already drilled and tapped holes aligned and bolted together again.

    Insulation worked great. You can now still touch the outside when the oven is a max temperature (around 500°C, 932°F).

    To close the back, I chose not to buy another sheet but to use the strips left over:

    They were cut to length, roughened and glued together with 10mm overlap. After the glue cured, cup rivets were used to keep it from coming apart ever again :)

    Those create a water and airtight connection.

    This is how it looks now. Best thing is I made use of the whole metal sheet this way. Almost zero waste. Nice!

    Still to be done: closing the front of the oven. I need to cut a ring for that but have no sheet metal left. We'll see how to solve that.

  • 09 – first pizza (Nov. 2017)

    Jan11/04/2018 at 11:05 0 comments

    Baking in an wood fired clay oven is not like in your kitchens oven. Its really a lot of work and the learning curve is quite steep too.

    As every oven is unique in its properties, one needs to go through a lot of trial and error to find the right "values" for:

    • type, size and amount of wood
    • duration of heating till the ovens mass is saturated
    • time the oven needs to "even out" the temperature
    • ...

    So I just couldn't take any more waiting. The oven was not insulated yet but I needed to bake my first pizza/bread in it. So, let's fire it up:

    So, after heating it up for around 2.5 hours, I thought the right temperature was reached.

    Pizza dough was prepared the day before, so we got everything ready and tossed the first pizza into the oven:

    Hmpf :(

    The heat just wasn't right. Without insulation the oven was just not able to hold the heat of around 350°C (660°F) long enough.

    Pizza was okay, but I wanted a crisp bottom, charred in some spots and a crisply crust. Not this time...

    But the insulation should help with that, right? You'll see soon!

  • 08 – first repairs

    Jan11/04/2018 at 09:09 0 comments

    Clay/loam is a natural stuff. This means it does not behave exactly like you would expect it from standardized mixtures like store-bought fire clay.

    So, after the first big fire in the oven, many cracks and separations formed and needed to be repaired. I prepared a good amount of very rich repair clay with lots of straw/hay/sand in it:

    big cracks in the back of the oven
    big cracks on the outside
    smearing clay into some inner cracks
    front metal separated a lot from the clay. fixed
    fixed cracks in the back

    After these fixes the oven was left to dry/cure for a few days. It hasn't cracked much more after those fixes.

  • 07 – design of the front

    Jan11/04/2018 at 08:51 0 comments

    Until log 6 the oven had no real front. No door, no hinges, just an opening made from flimsy metal (drums are made from around 0.8 to 1mm thick sheet metal).

    I measured everything again and came up with the following dimensions of the front face:

    So, I sat down and did some CAD'ing and ordered the parts in 8mm thick standard mild steel (S355JR, 1.0045).

    I have no pictures of the single parts but here it is mounted to the front:

    The frame is bolted to the drum with screws (which got a fair amount of copper paste before tightening them):

    The handle to open and close the door is still a bit on the botchy side of things, but it works:


    This is by the way one of the exceptions to building the oven from the cheapest/scrap parts. I wanted the front to look and feel professional, so I bought it plasma-cut and sandblasted. It was around 25€ I think.
    But I used the inner cutout as the hatch (open in the above picture), which is not ideal because it has 3mm space all around, thus not closing exactly and wasting some heat...

  • 06 – forced drying

    Jan10/30/2018 at 15:57 0 comments

    Edit 17.12.2018 – found a few additional pics. Added here:

    This abomination of an "editor" just isn't capable of letting me add pics in between already existing pics without deleting the pic above and/or under. This bug annoys the hell out of me, reported it numerous times, nothing's happening. Anyway, here are some additional pics:

    hole drilled out
    it's about to get serious at this stage!
    intense heat, HOPING the dome won't collapse...
    no support left, dome still going strong, phew!

    Original log:

    October 2017 was quite the warm month. Perfect for building without sweating too much. But at the time the dome was done, it wasn't as sunny anymore. I decided to force-dry the thing:

    I put a tray of burning BBQ coal in and just let it heat up a bit.

    It's still quite wet, no cracks yet.
    A 80mm diameter hole is needed for the chimney.
    the heat from the burning coal is enough: it's steaming!
    cracks from the froced drying. that's why we put a lot of straw into the mix...
    these cracks need to be filled later
    cut-out added on top to keep rain outside but let the water from the clay evaporate
    force-drying is done. Now it's time to burn that form out! I made a protector from the cutout to prevent burning down the hedge and/or the house

    Finale! Let it burn burn burn!!! It was a really strong fire. Huge flames shooting out of the oven. Really hoped no-one calls the fire dept. Luckily everything went ok :)

  • 05 – building the dome (learning from one's mistakes)

    Jan10/29/2018 at 19:20 0 comments

    To get the dome exactly like planned I constructed the two identical faces in CAD and printed them on 4 A4 pieces of paper, glued them onto some 18mm thick spruce planks and cut them out with a jigsaw:

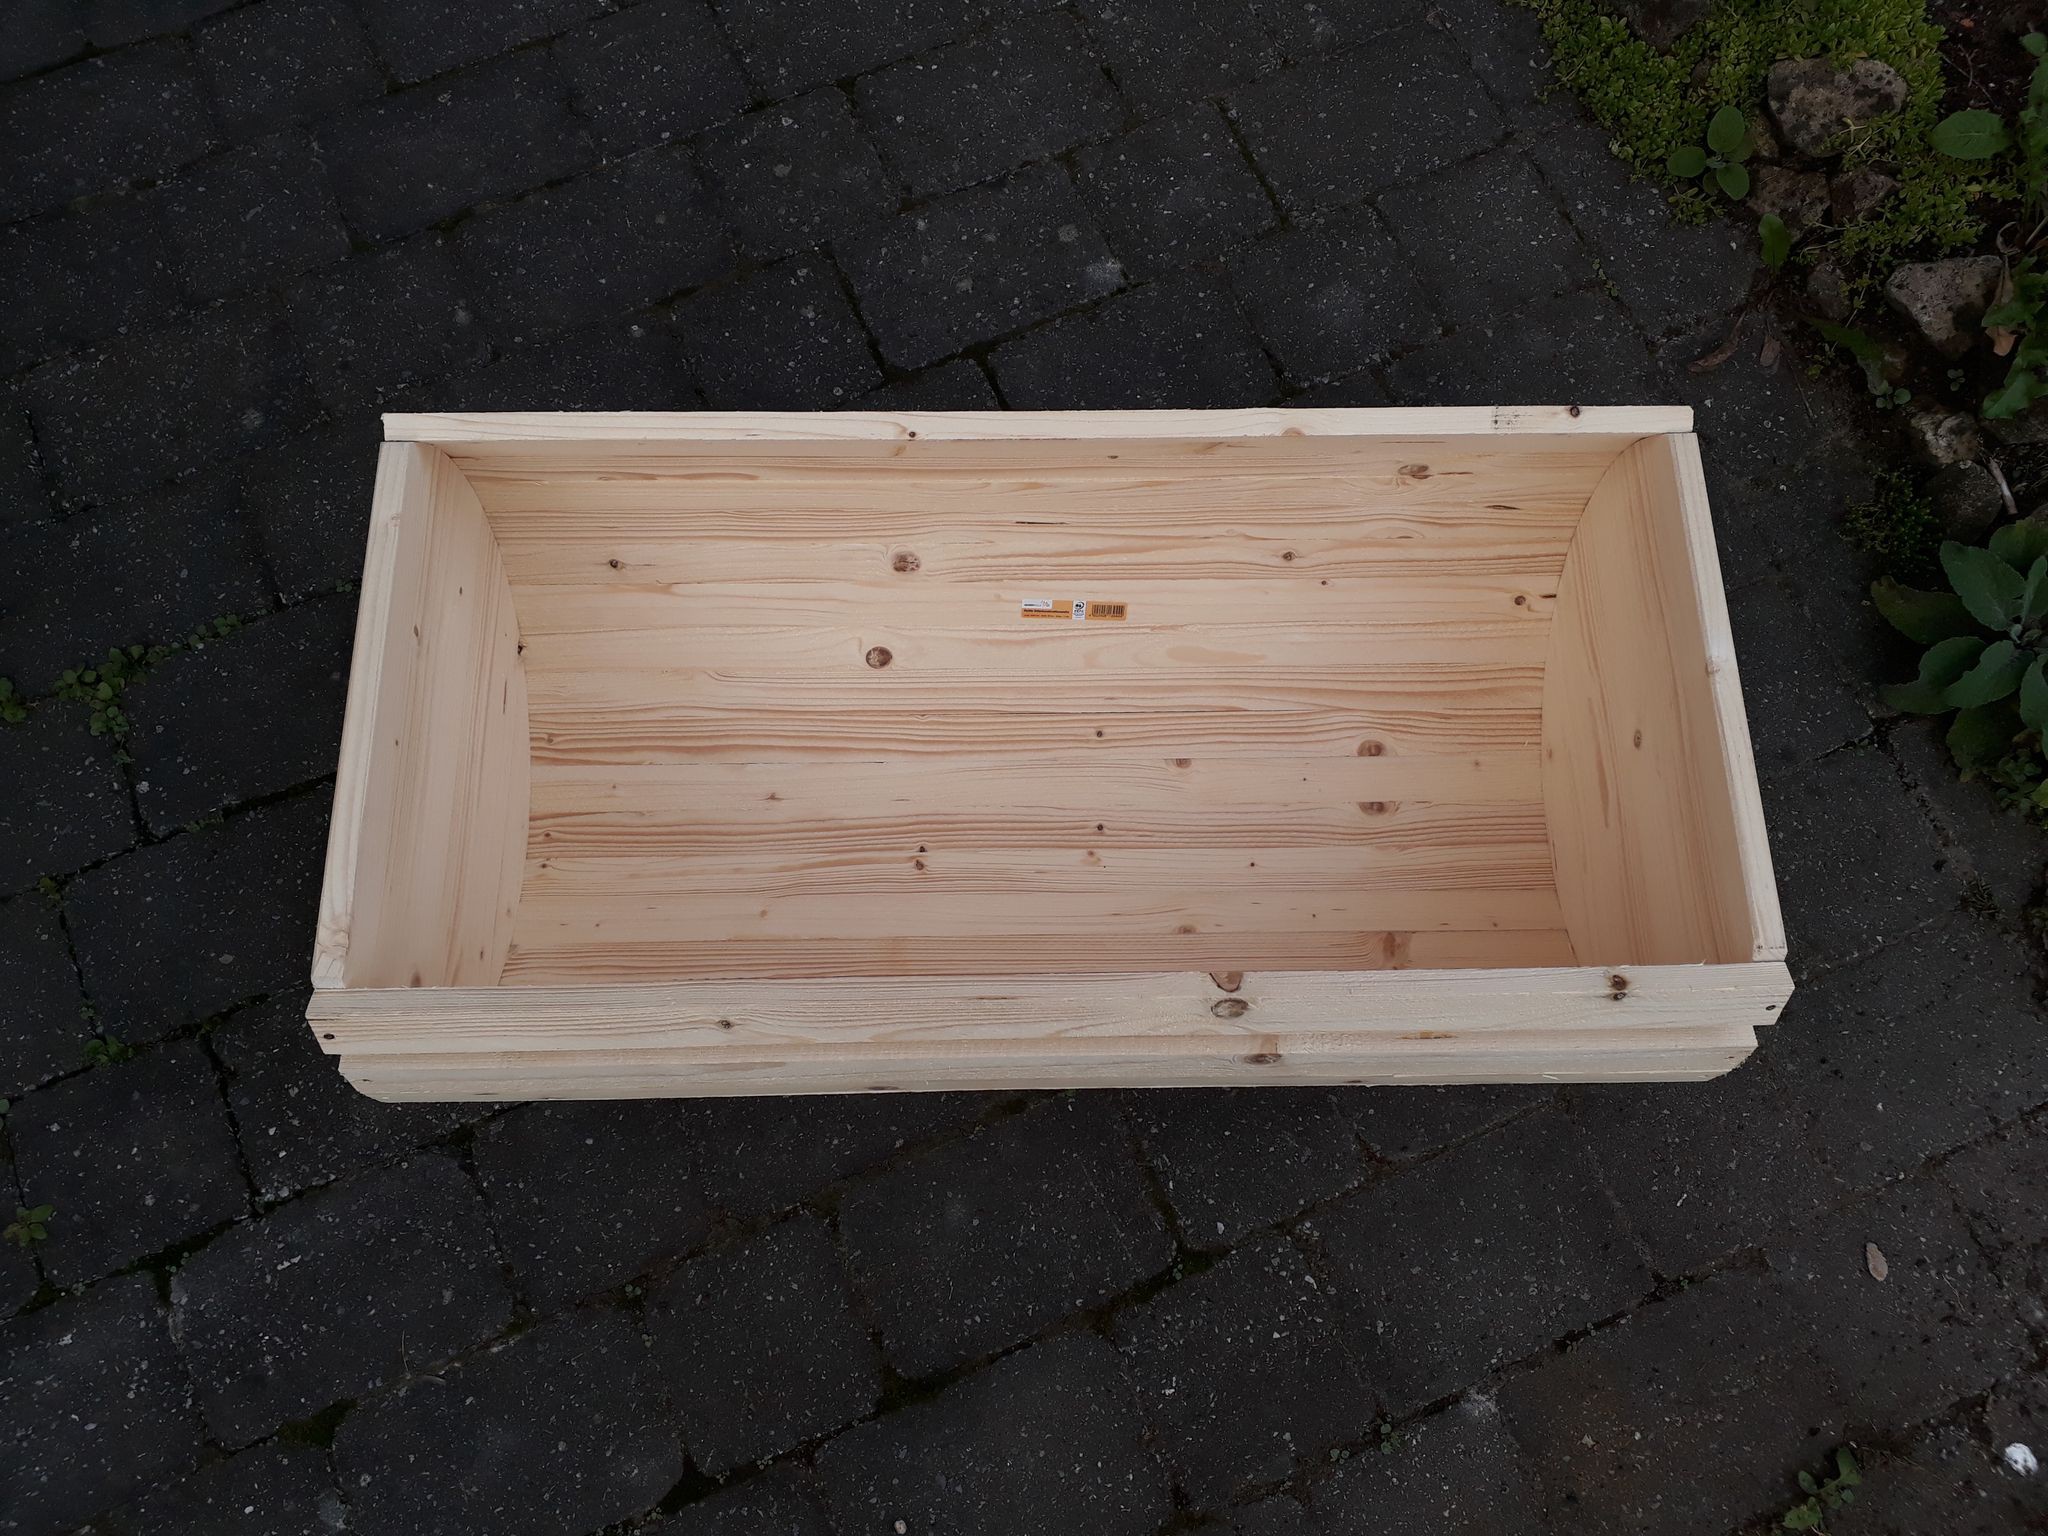
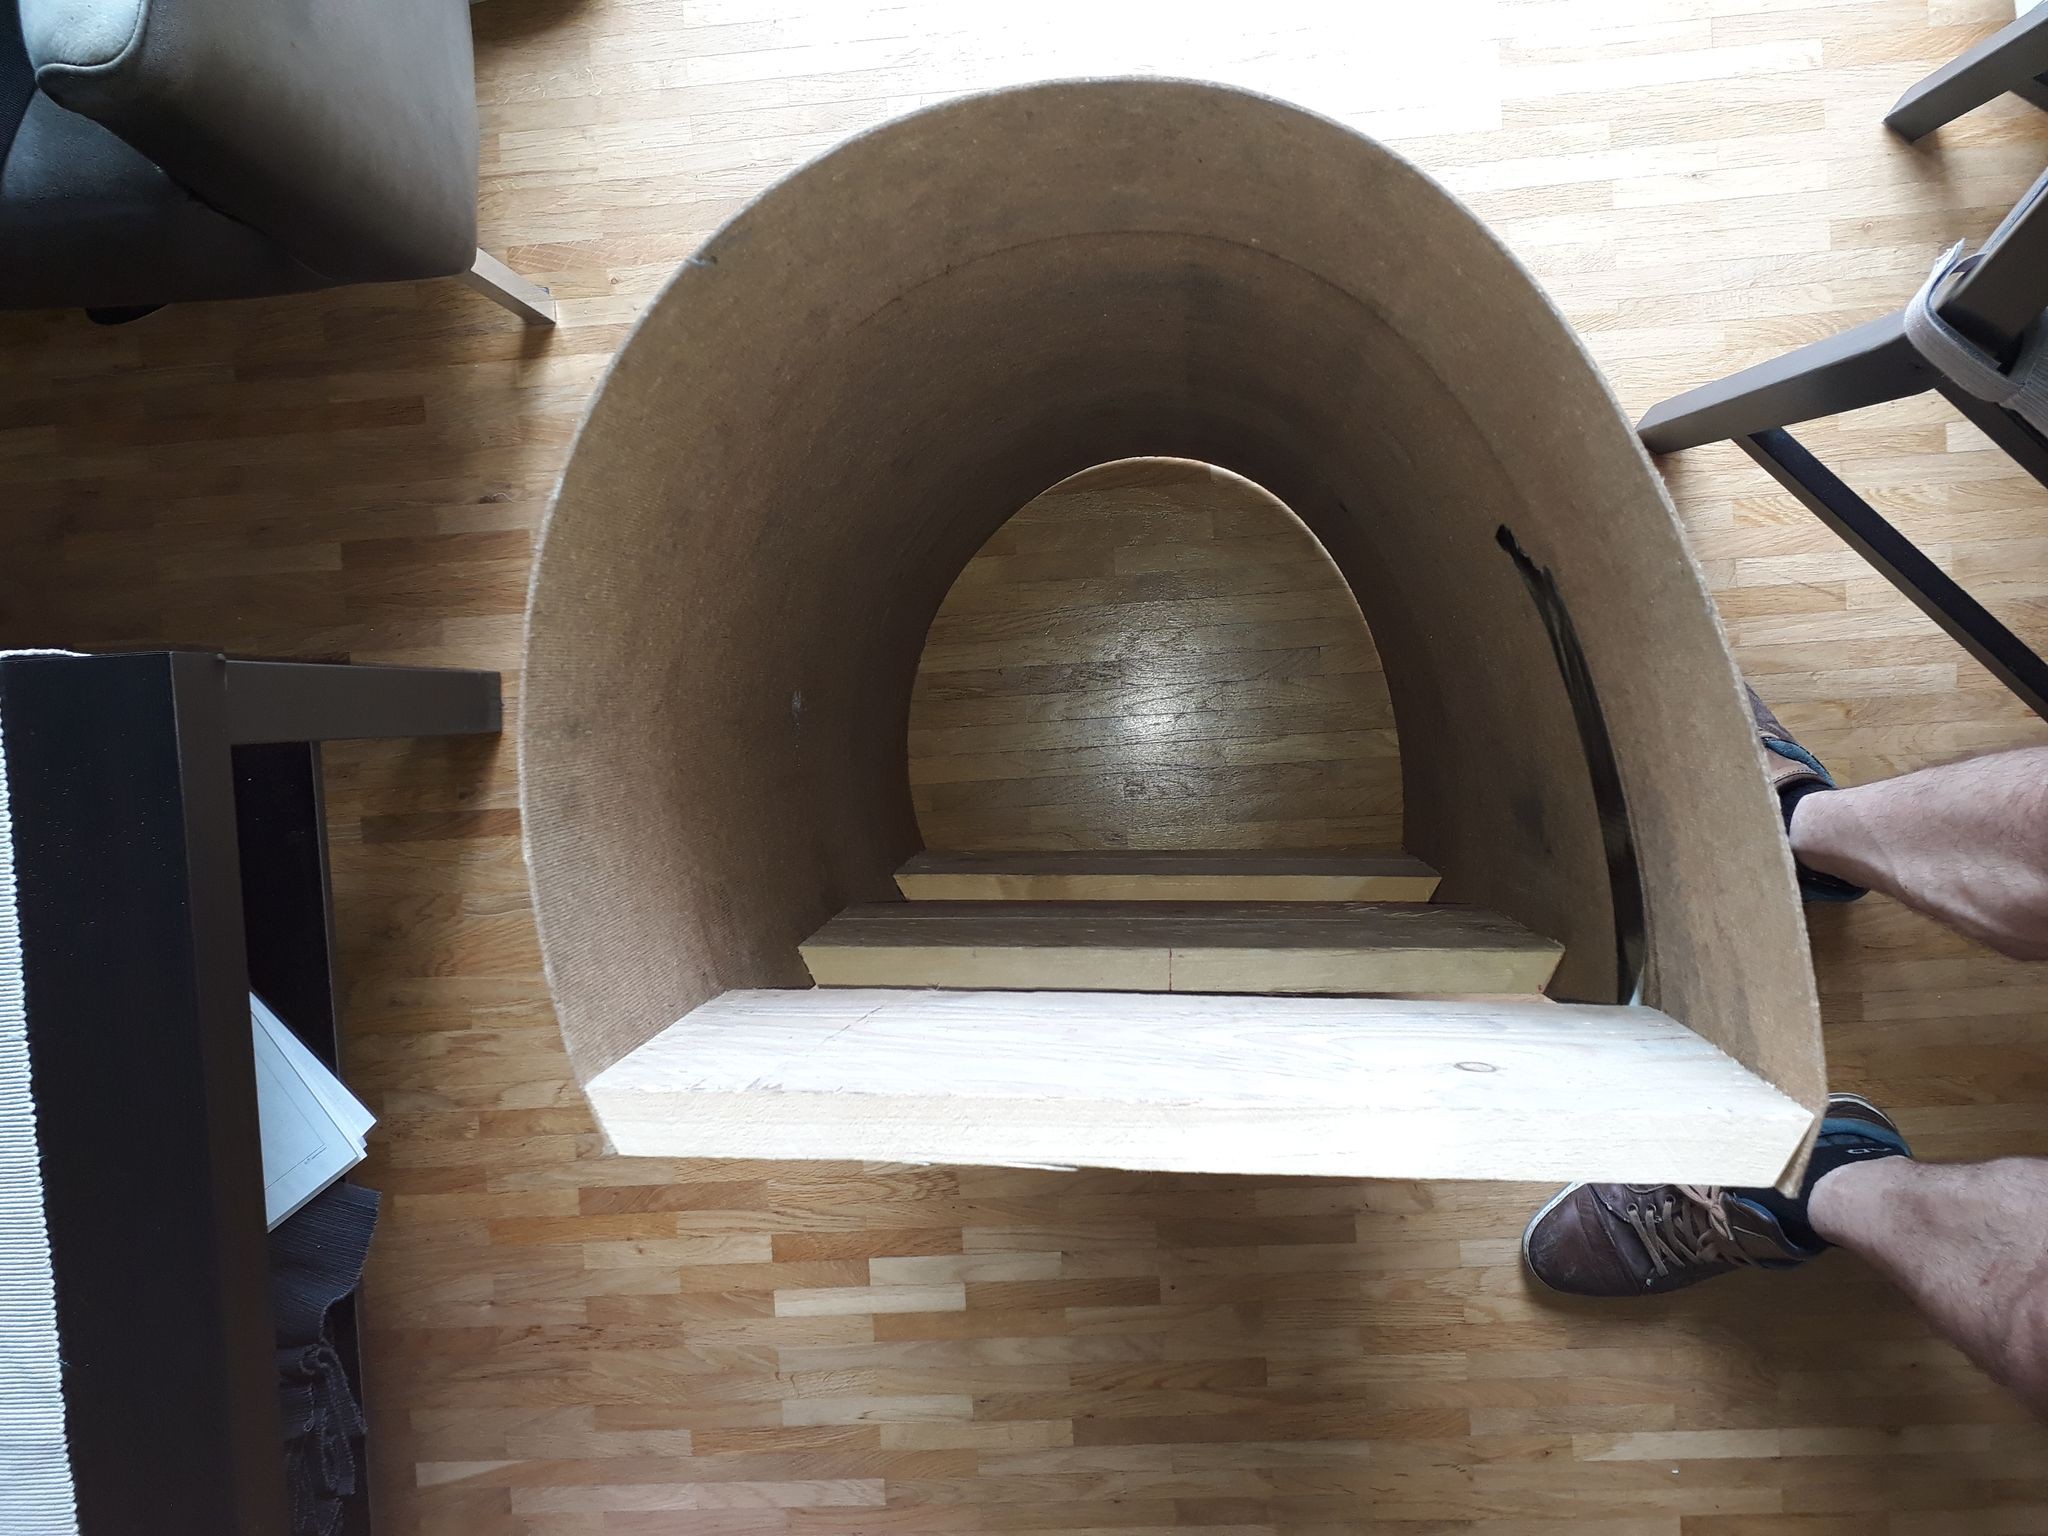
    I then screwed wooden slats to both faces to create some kind of trough:

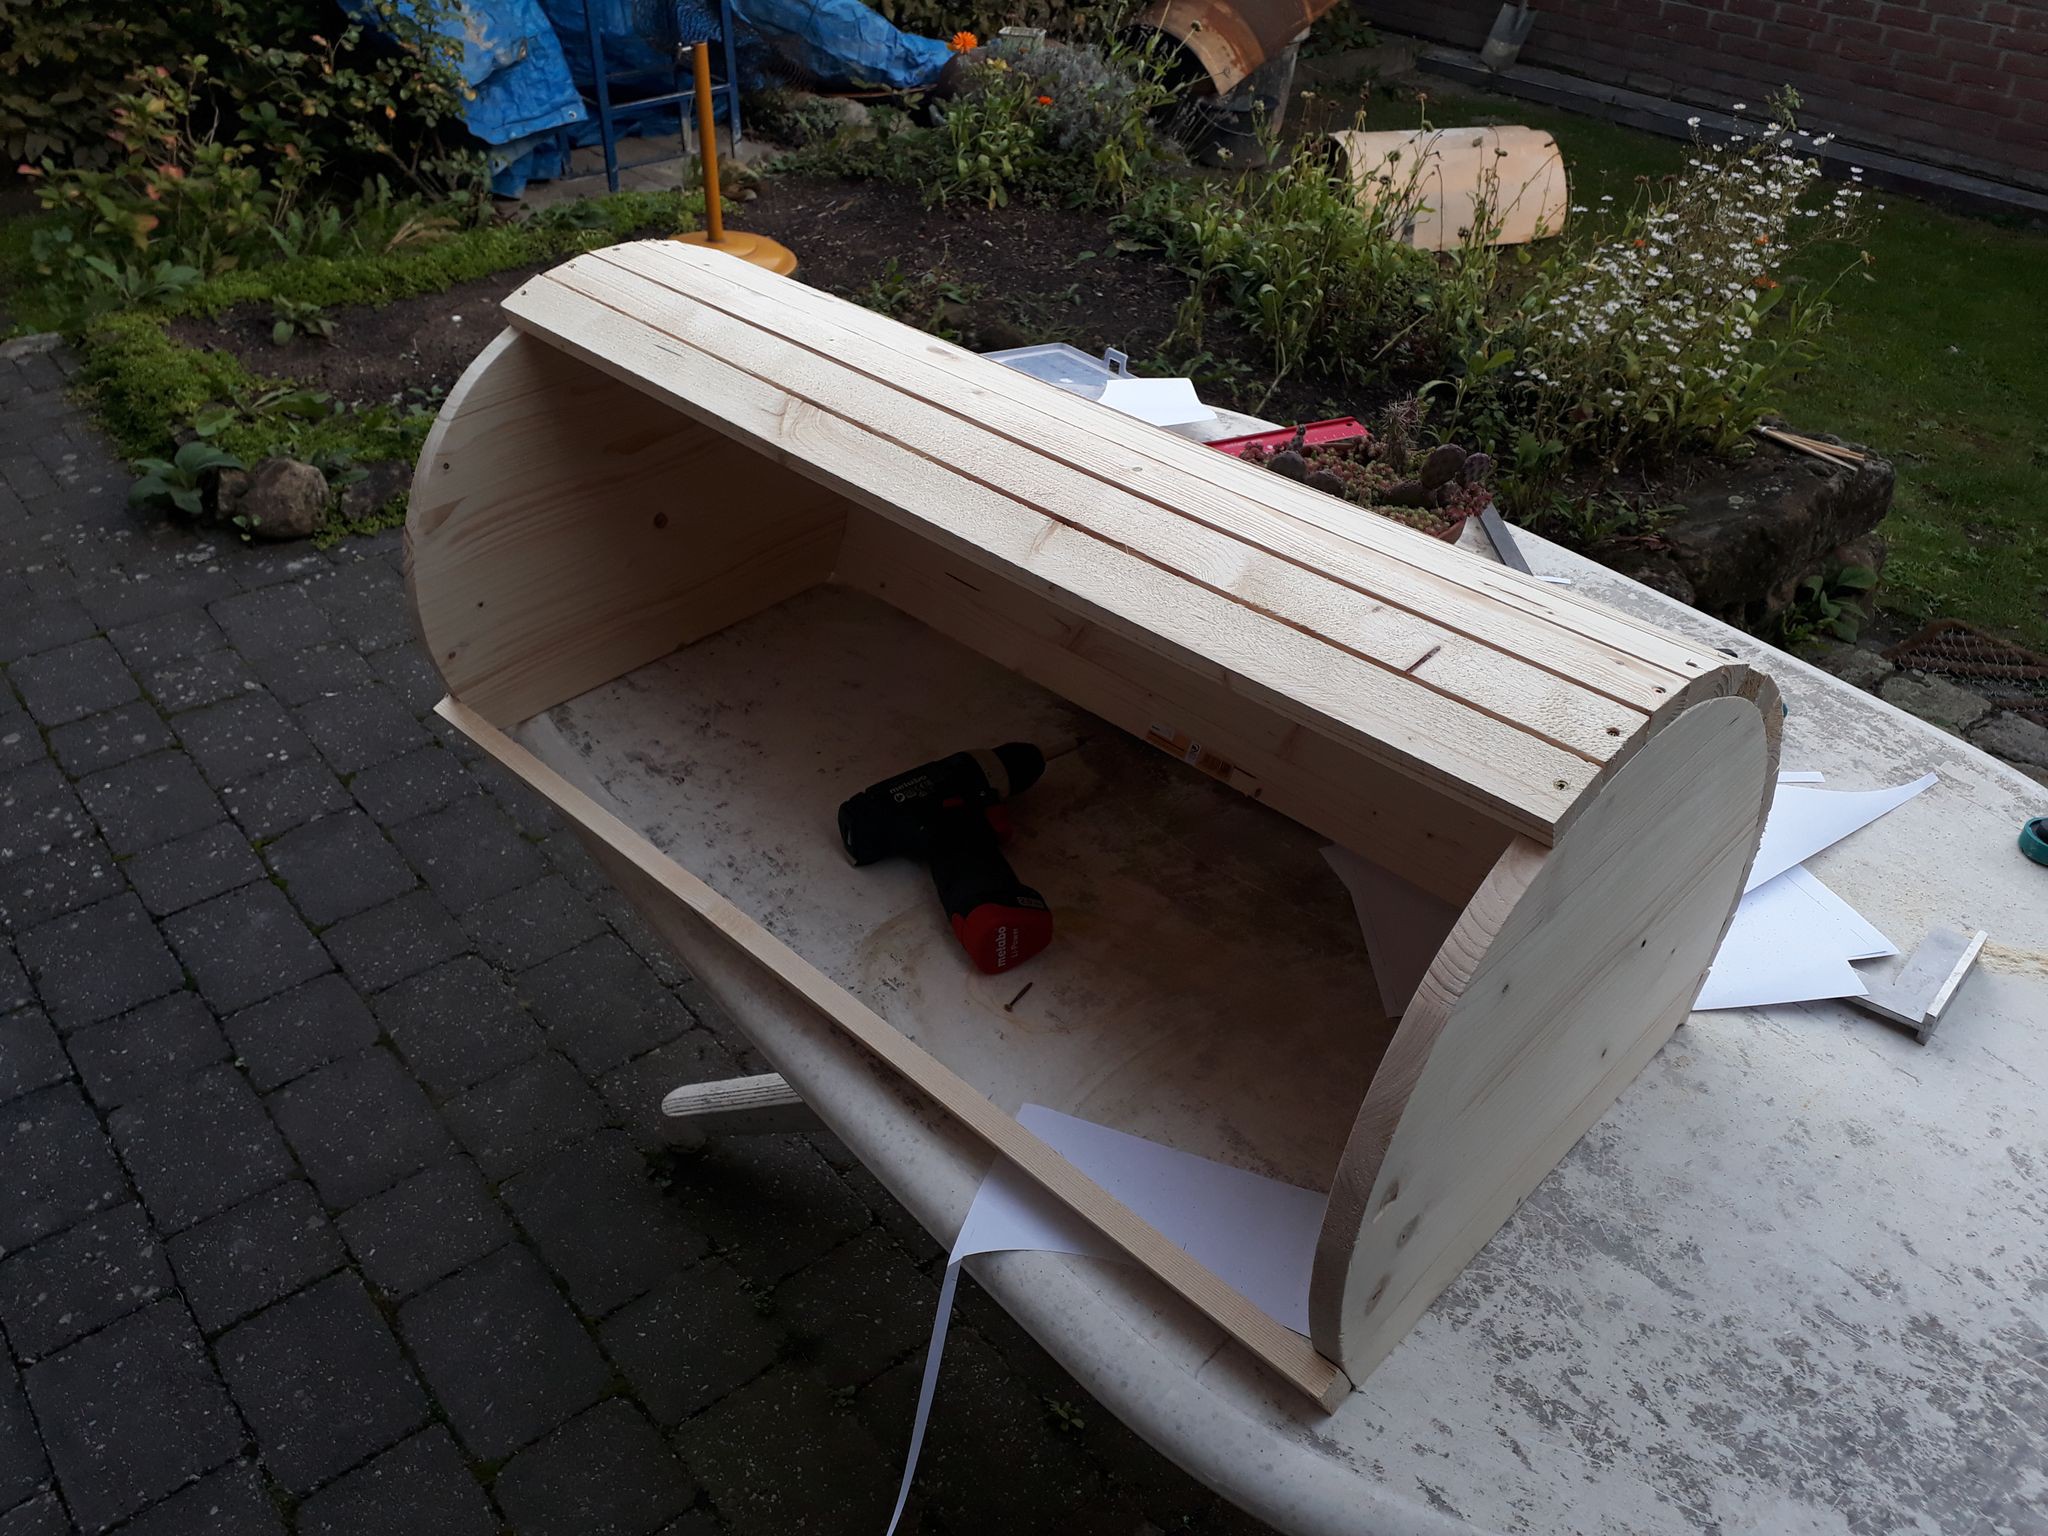
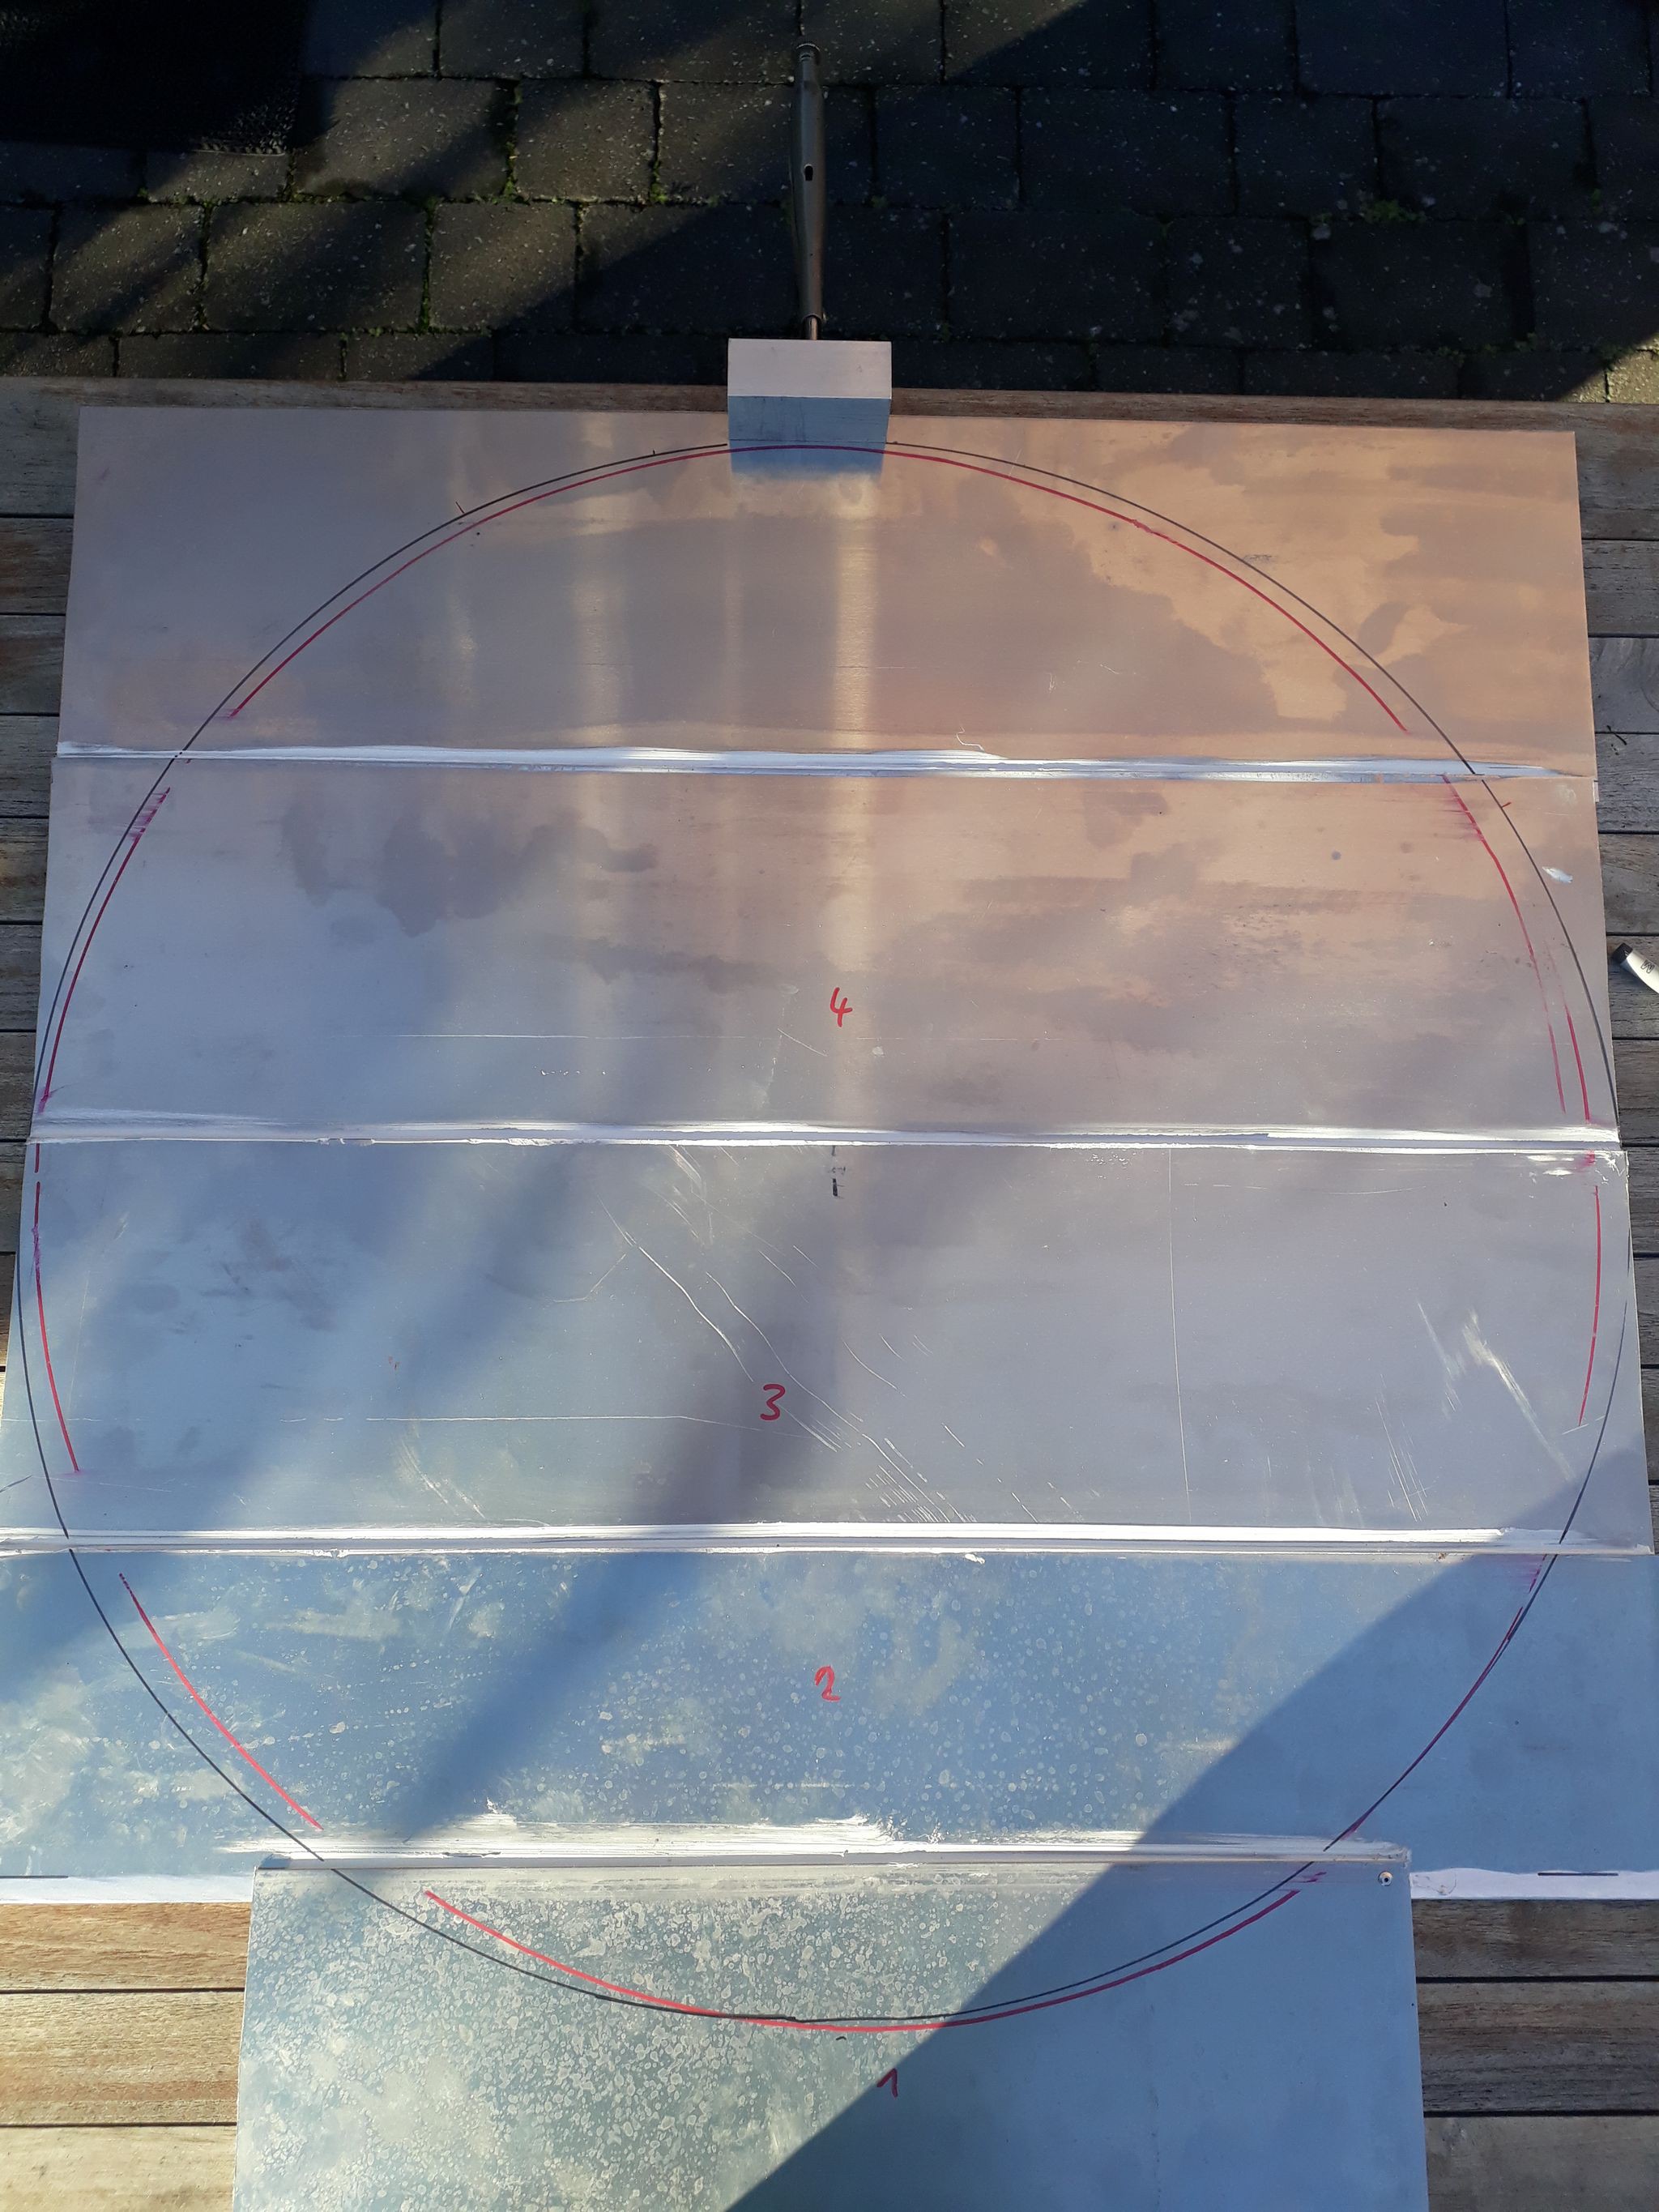
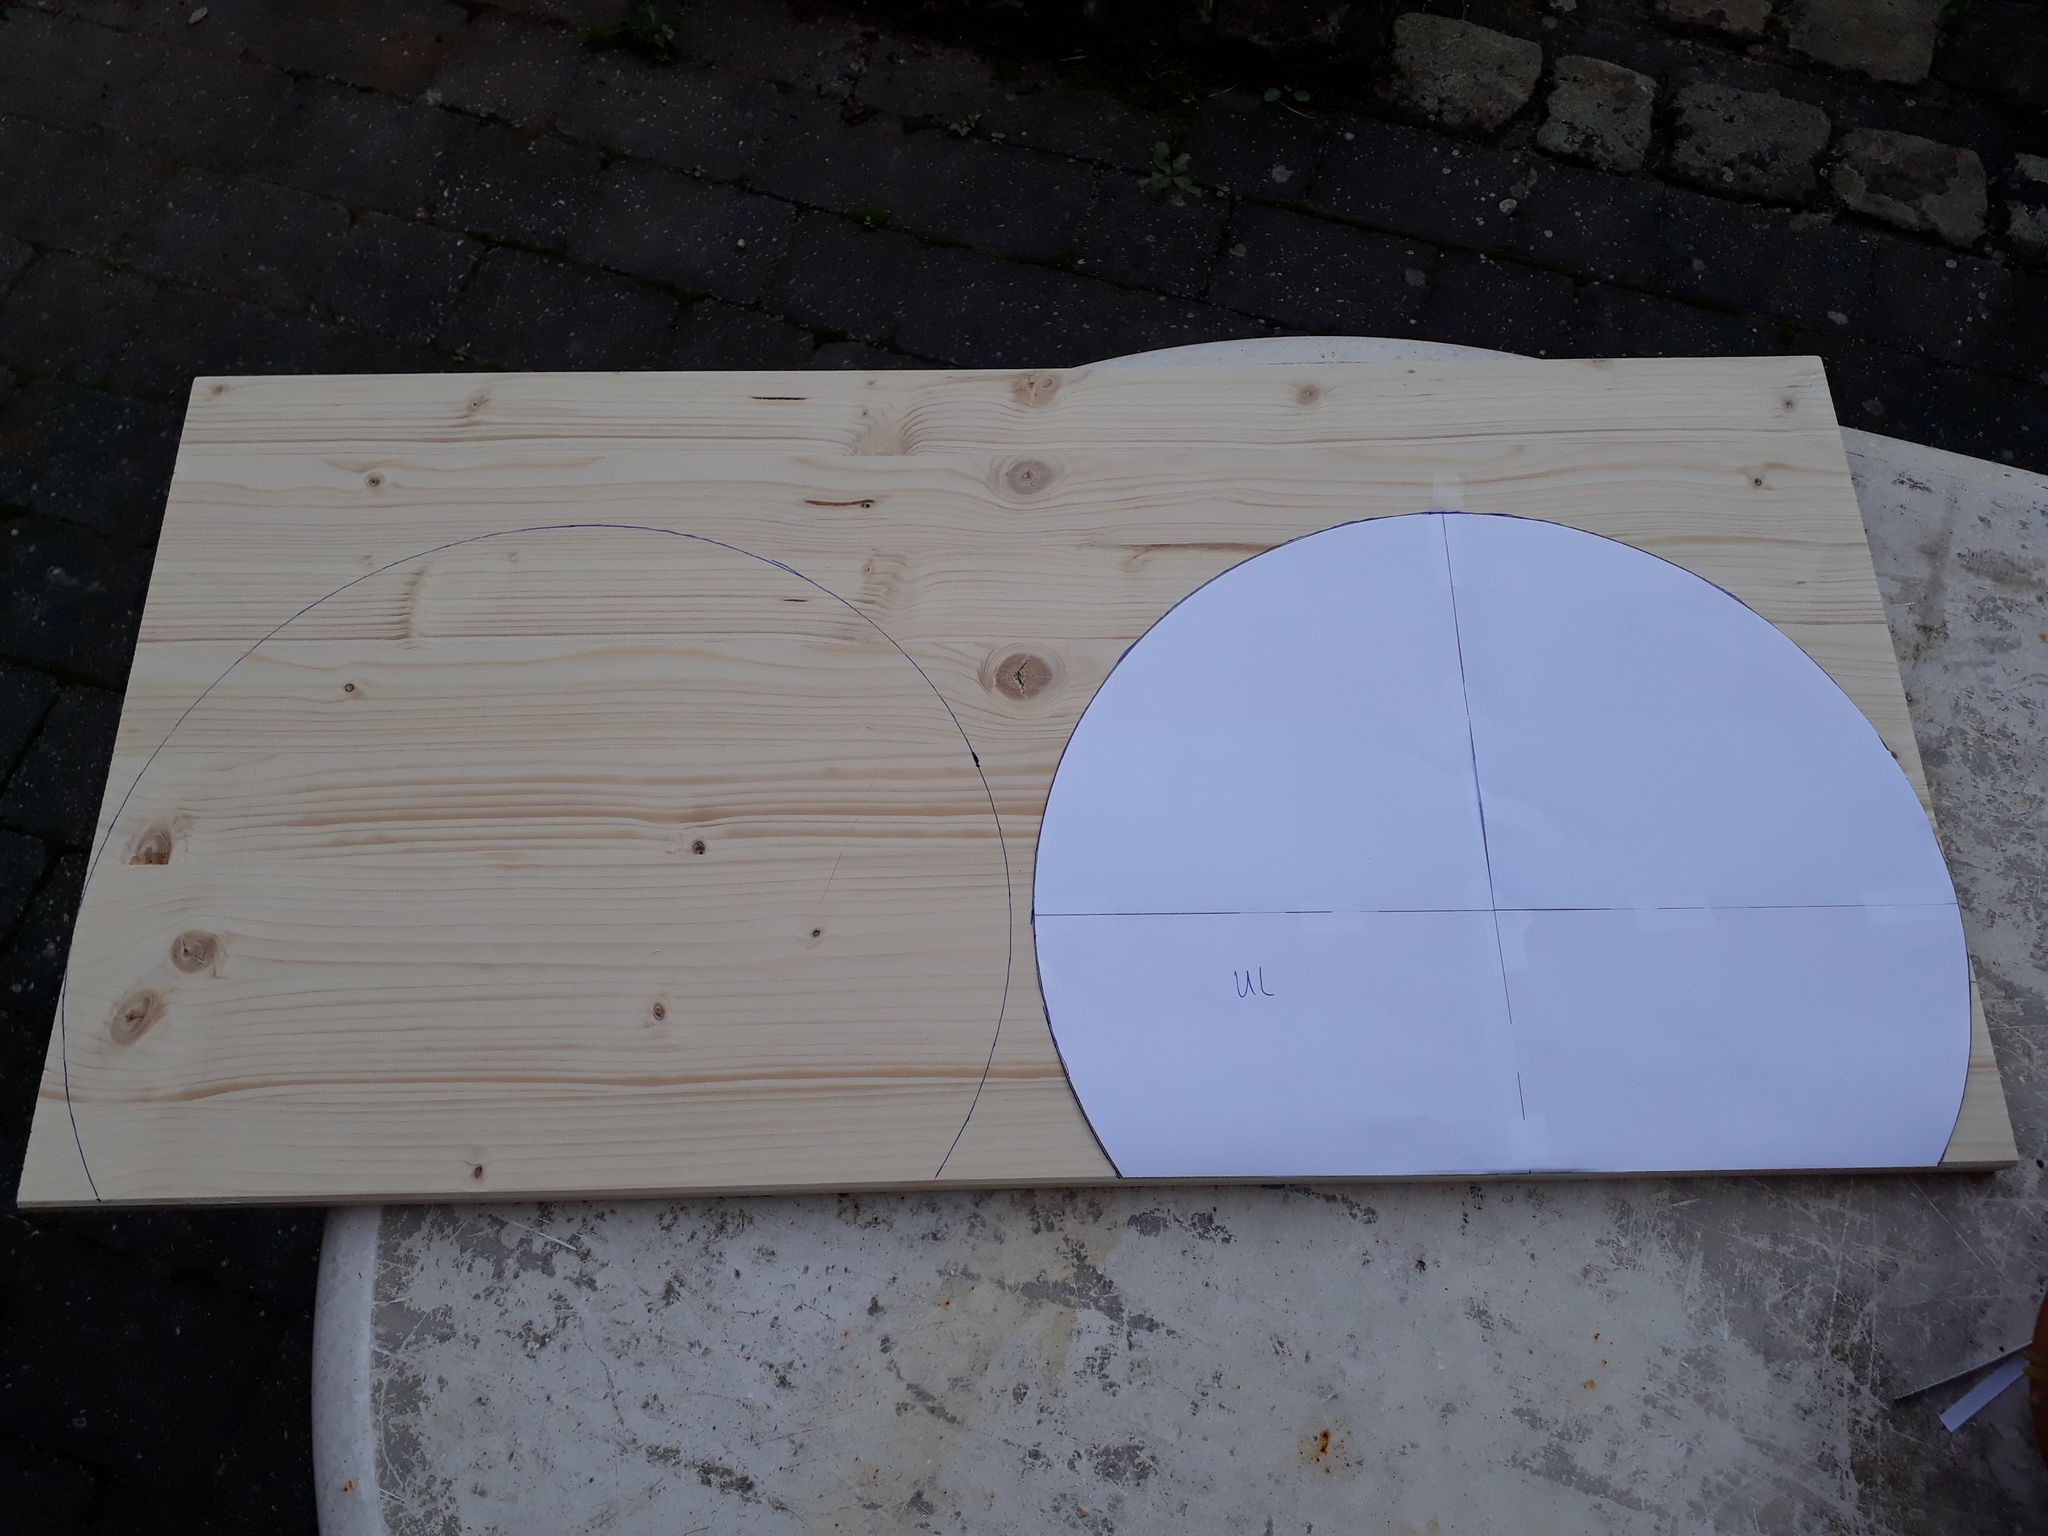
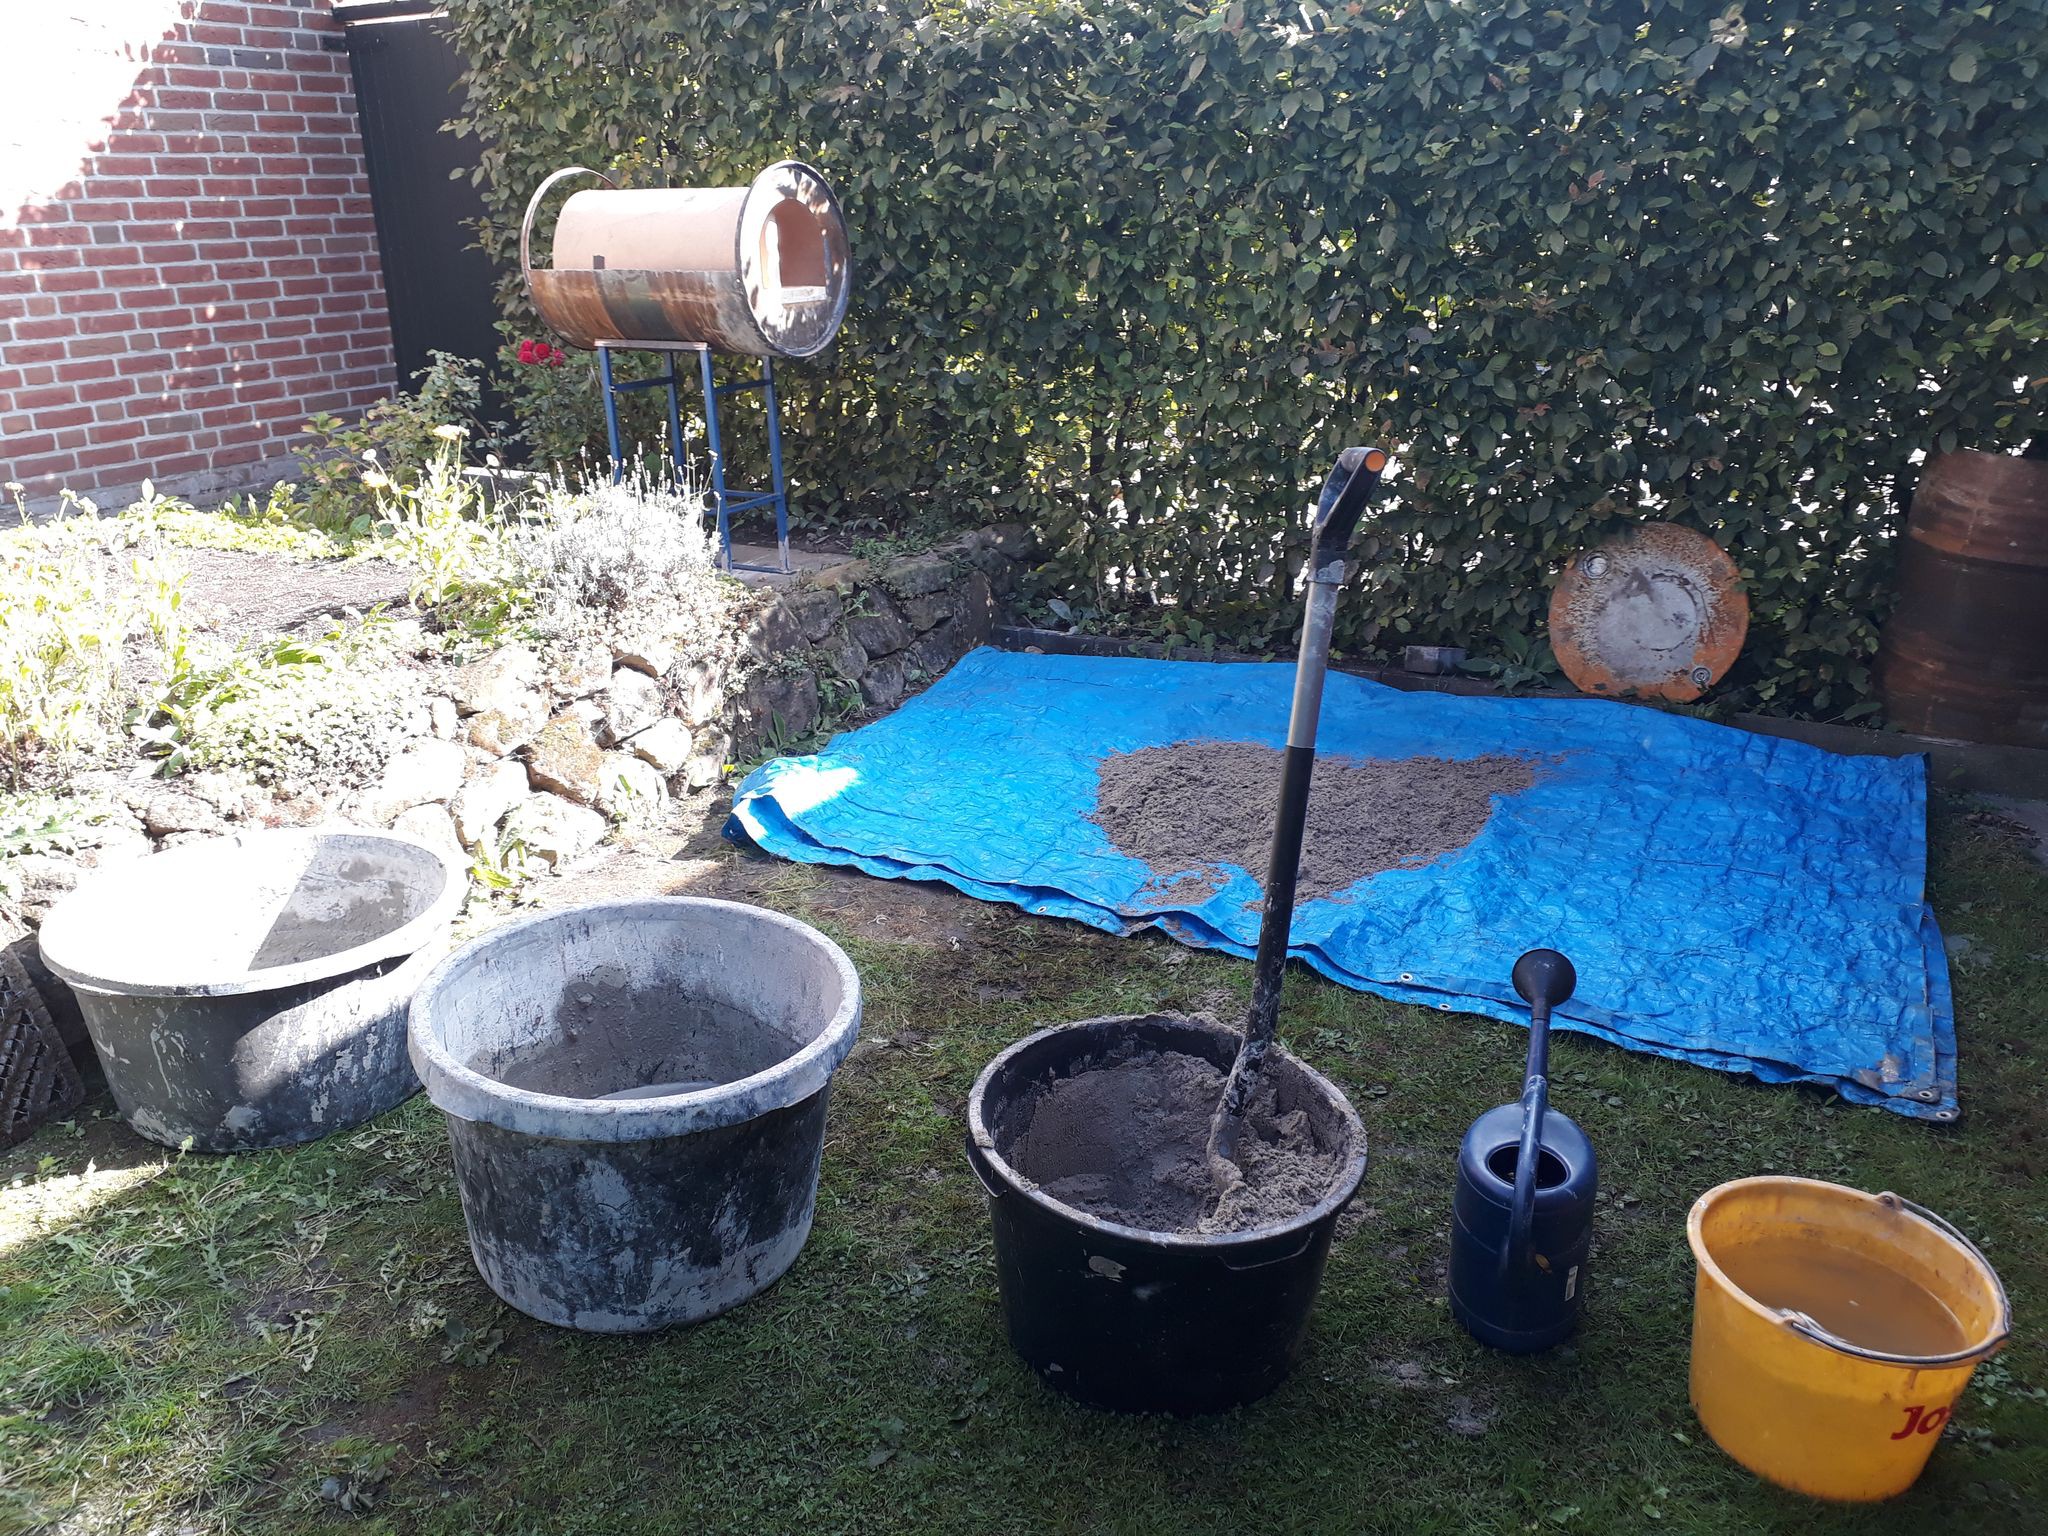
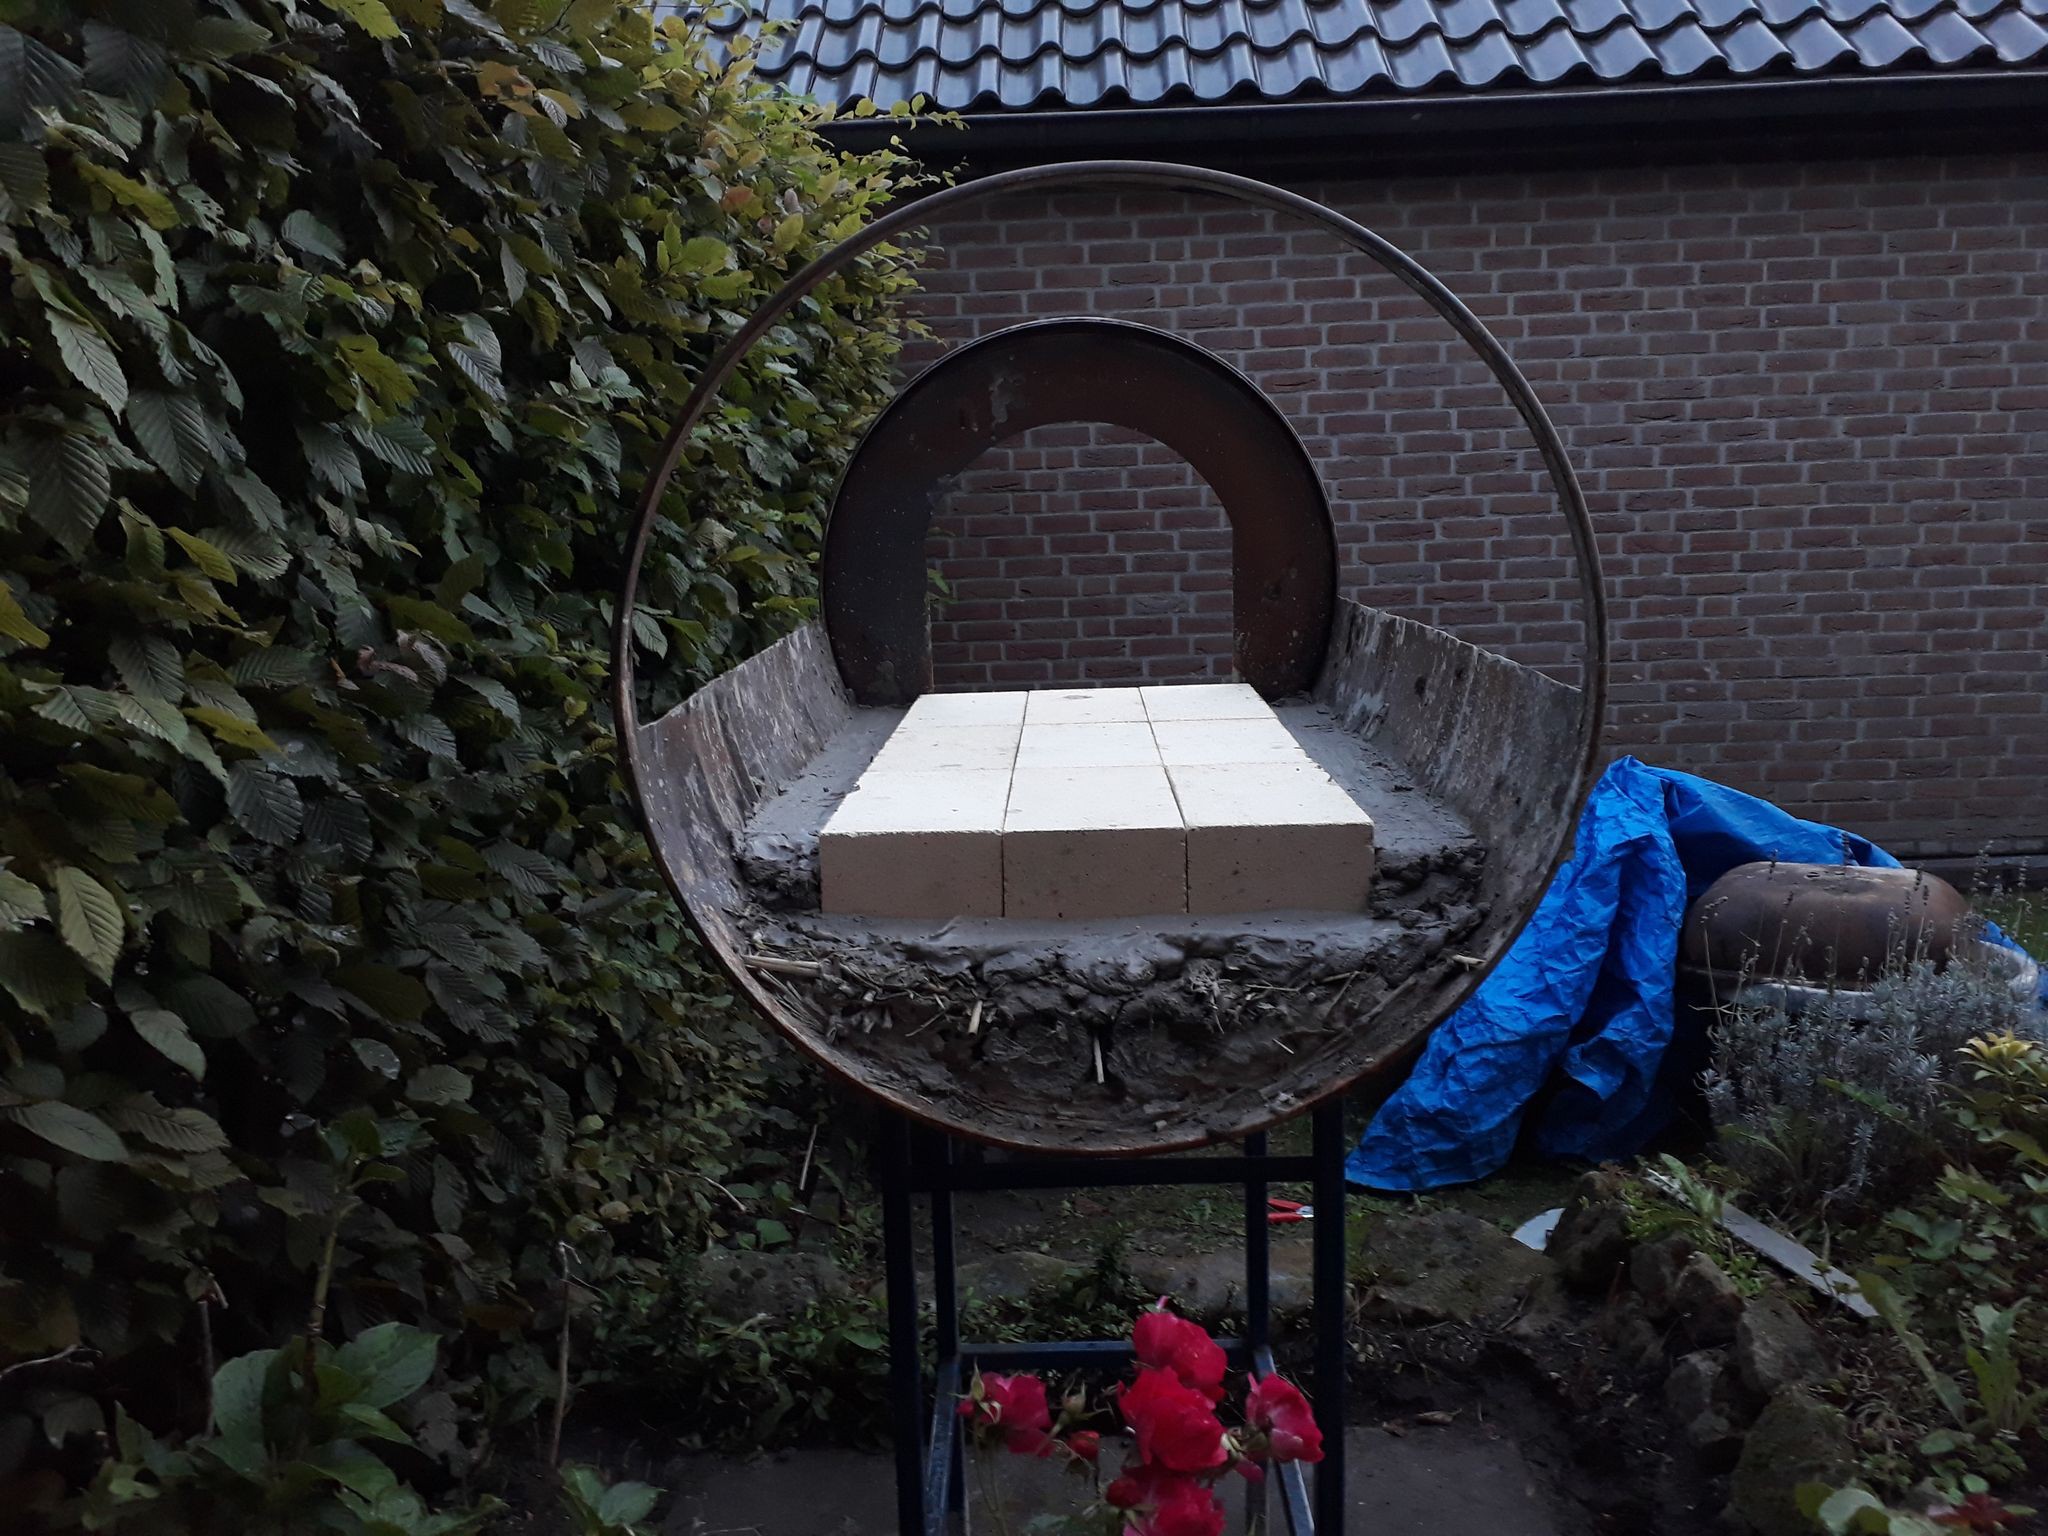
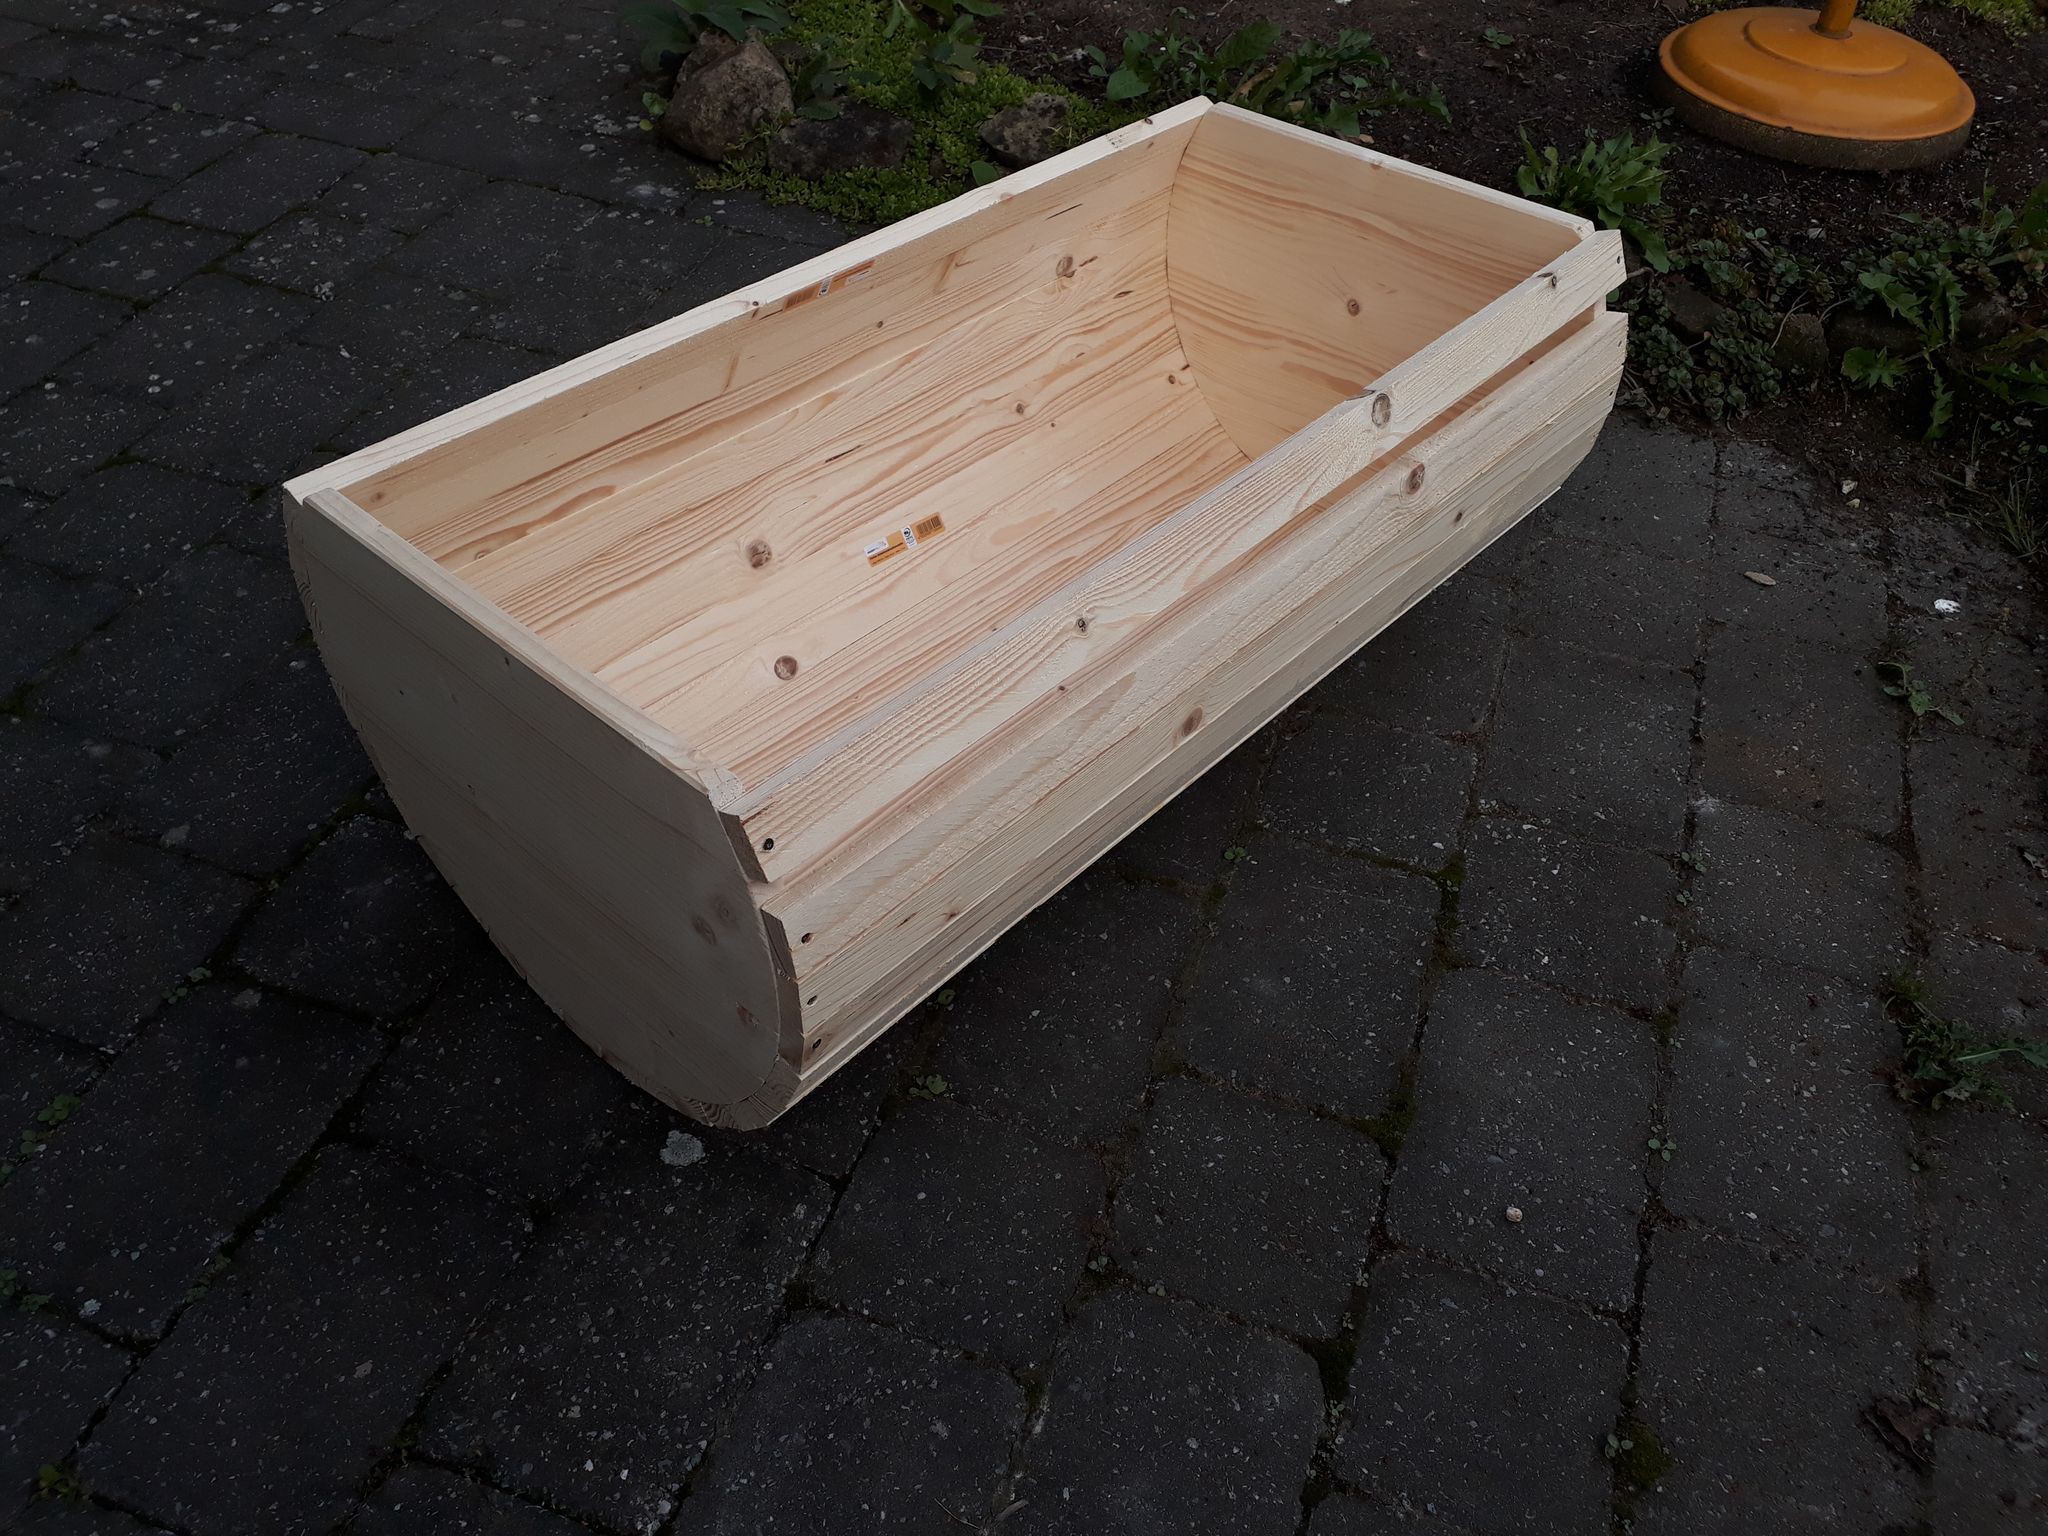
    This mould fits perfectly this time. You can see the shitty one in the lower right corner. It got destroyed later and used as fire wood :)

    There's only one good method to in-cooperate all the ingredients thoroughly: stomping it like there's no tomorrow:

    This time the ratio was much better. We used chicken wire to give it some additional strength:
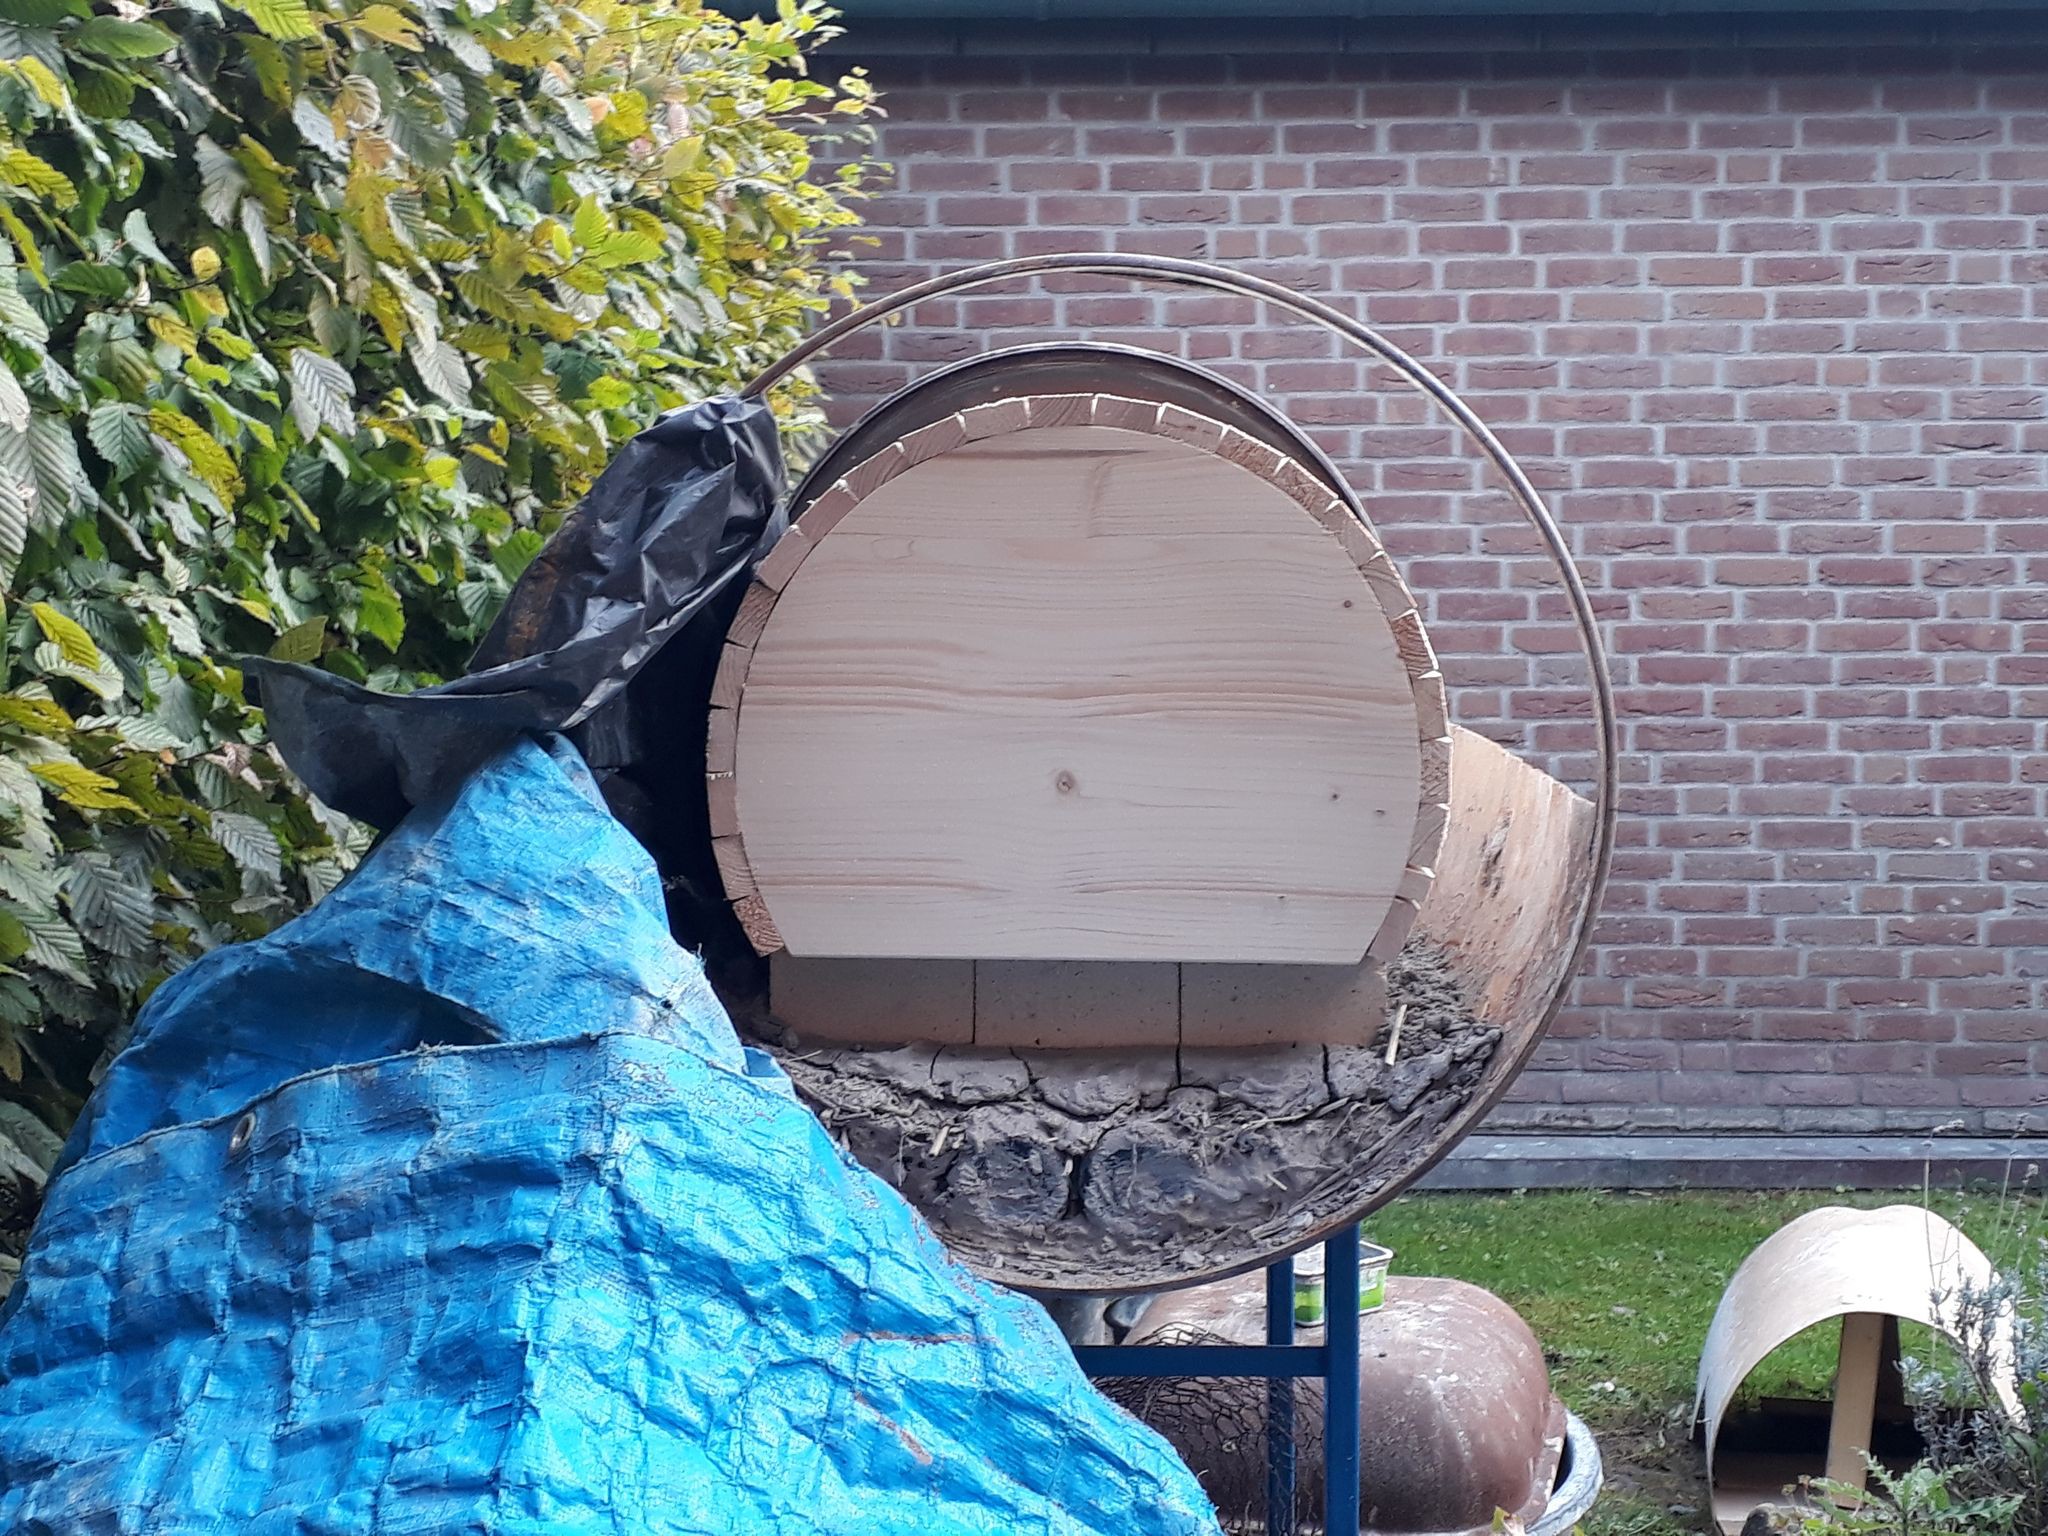
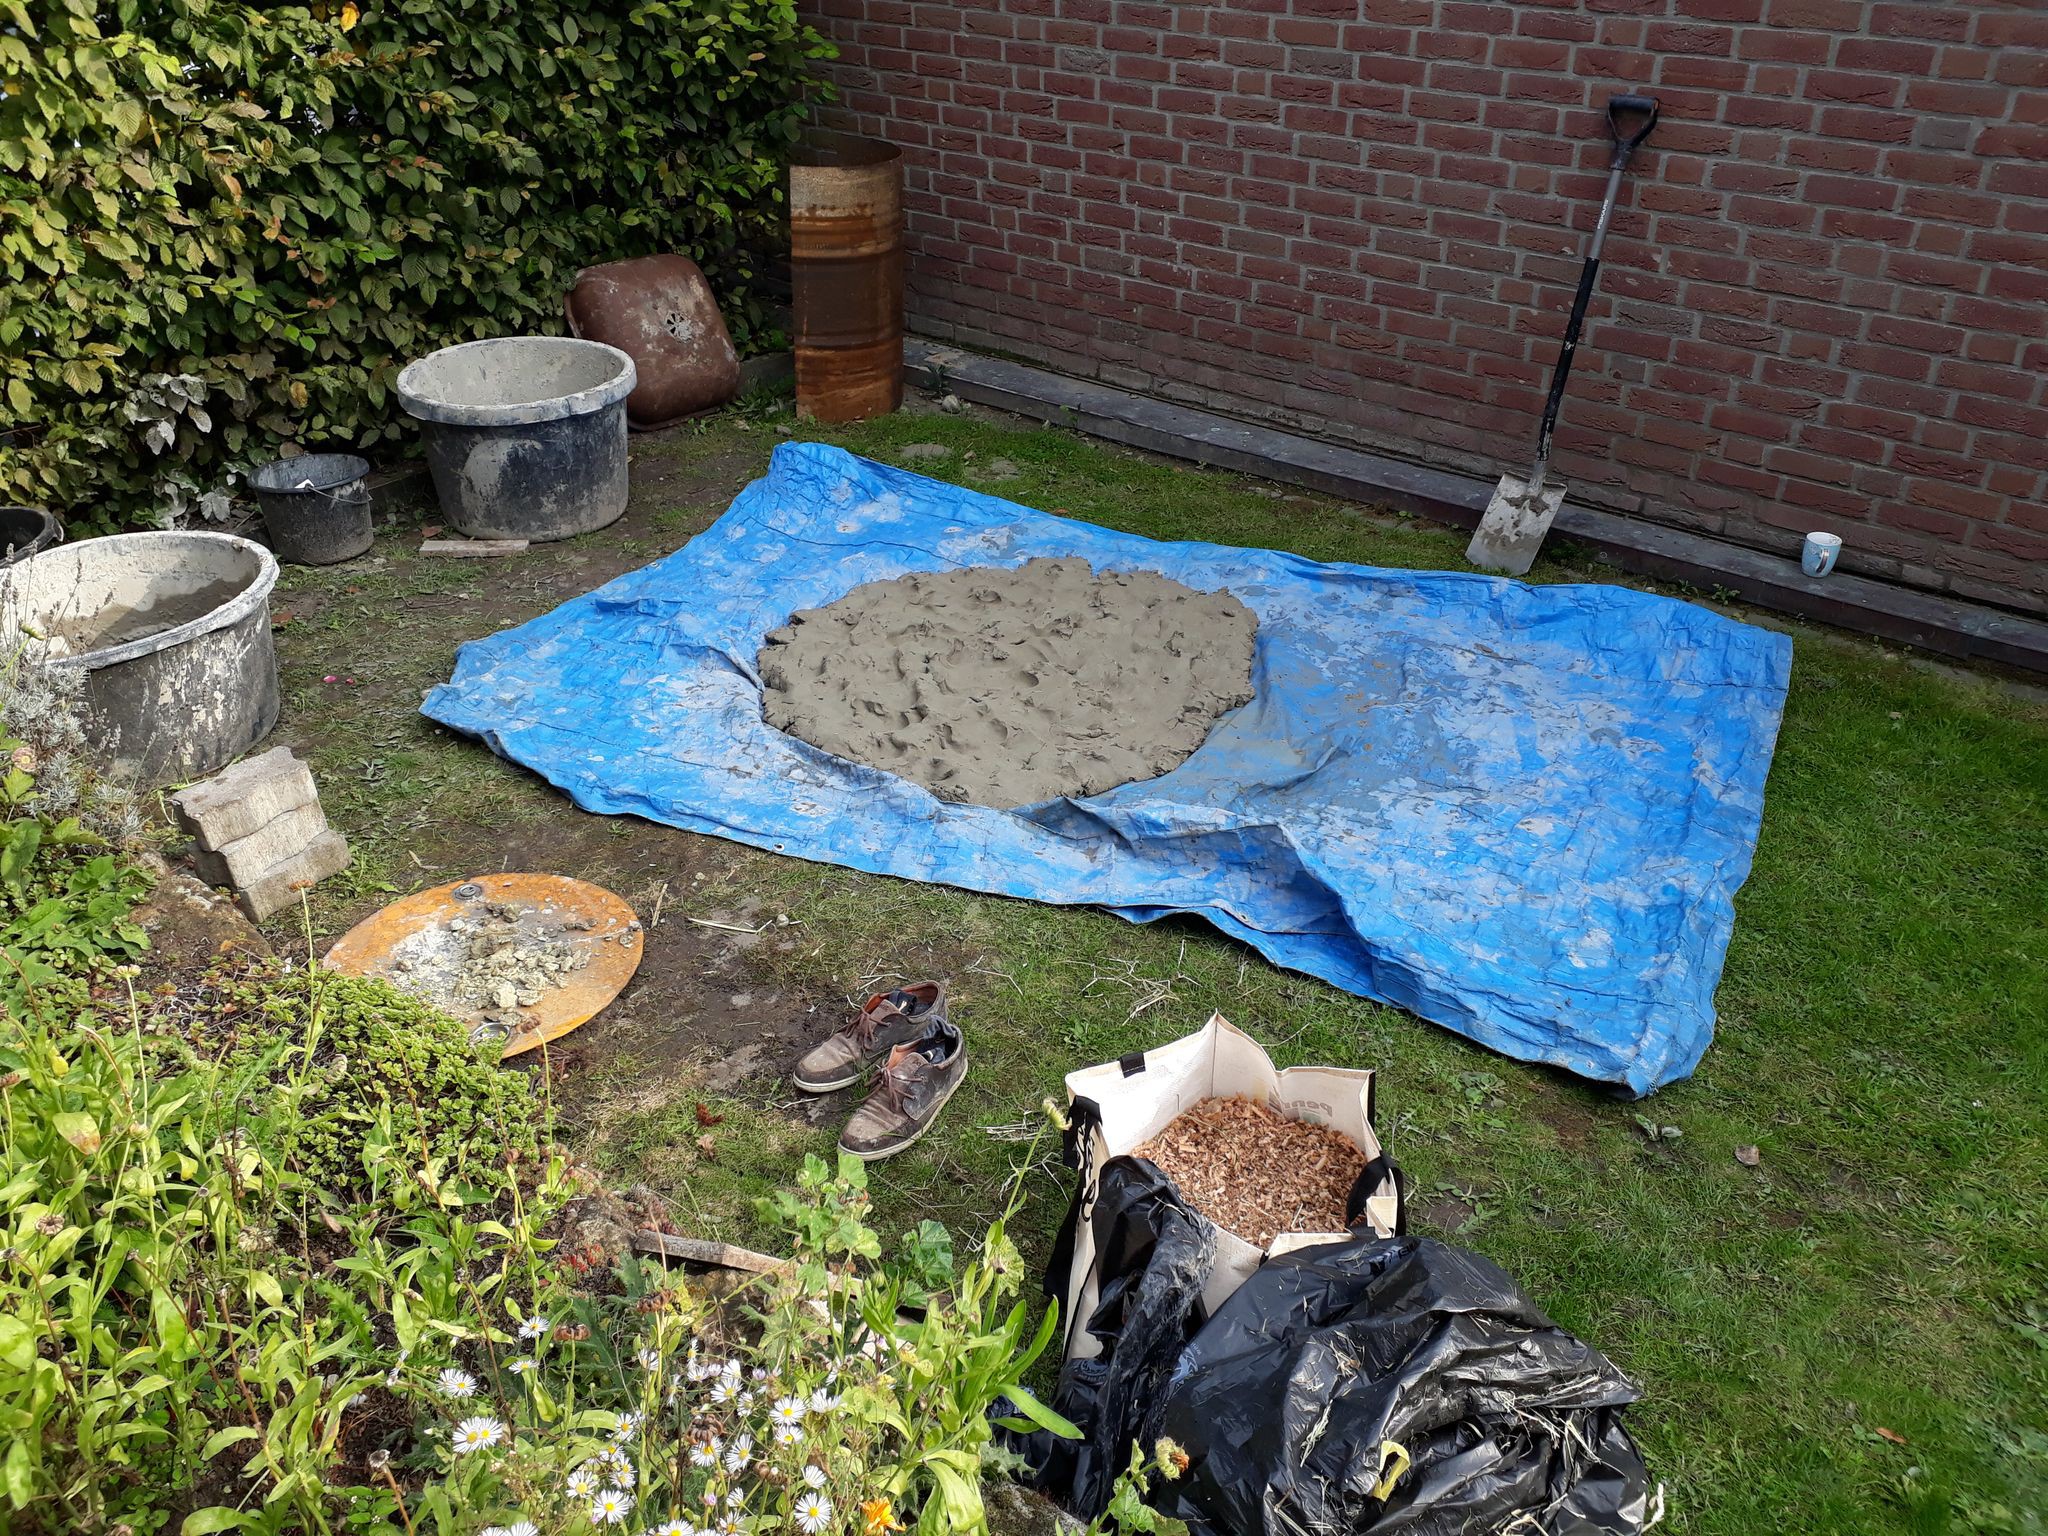
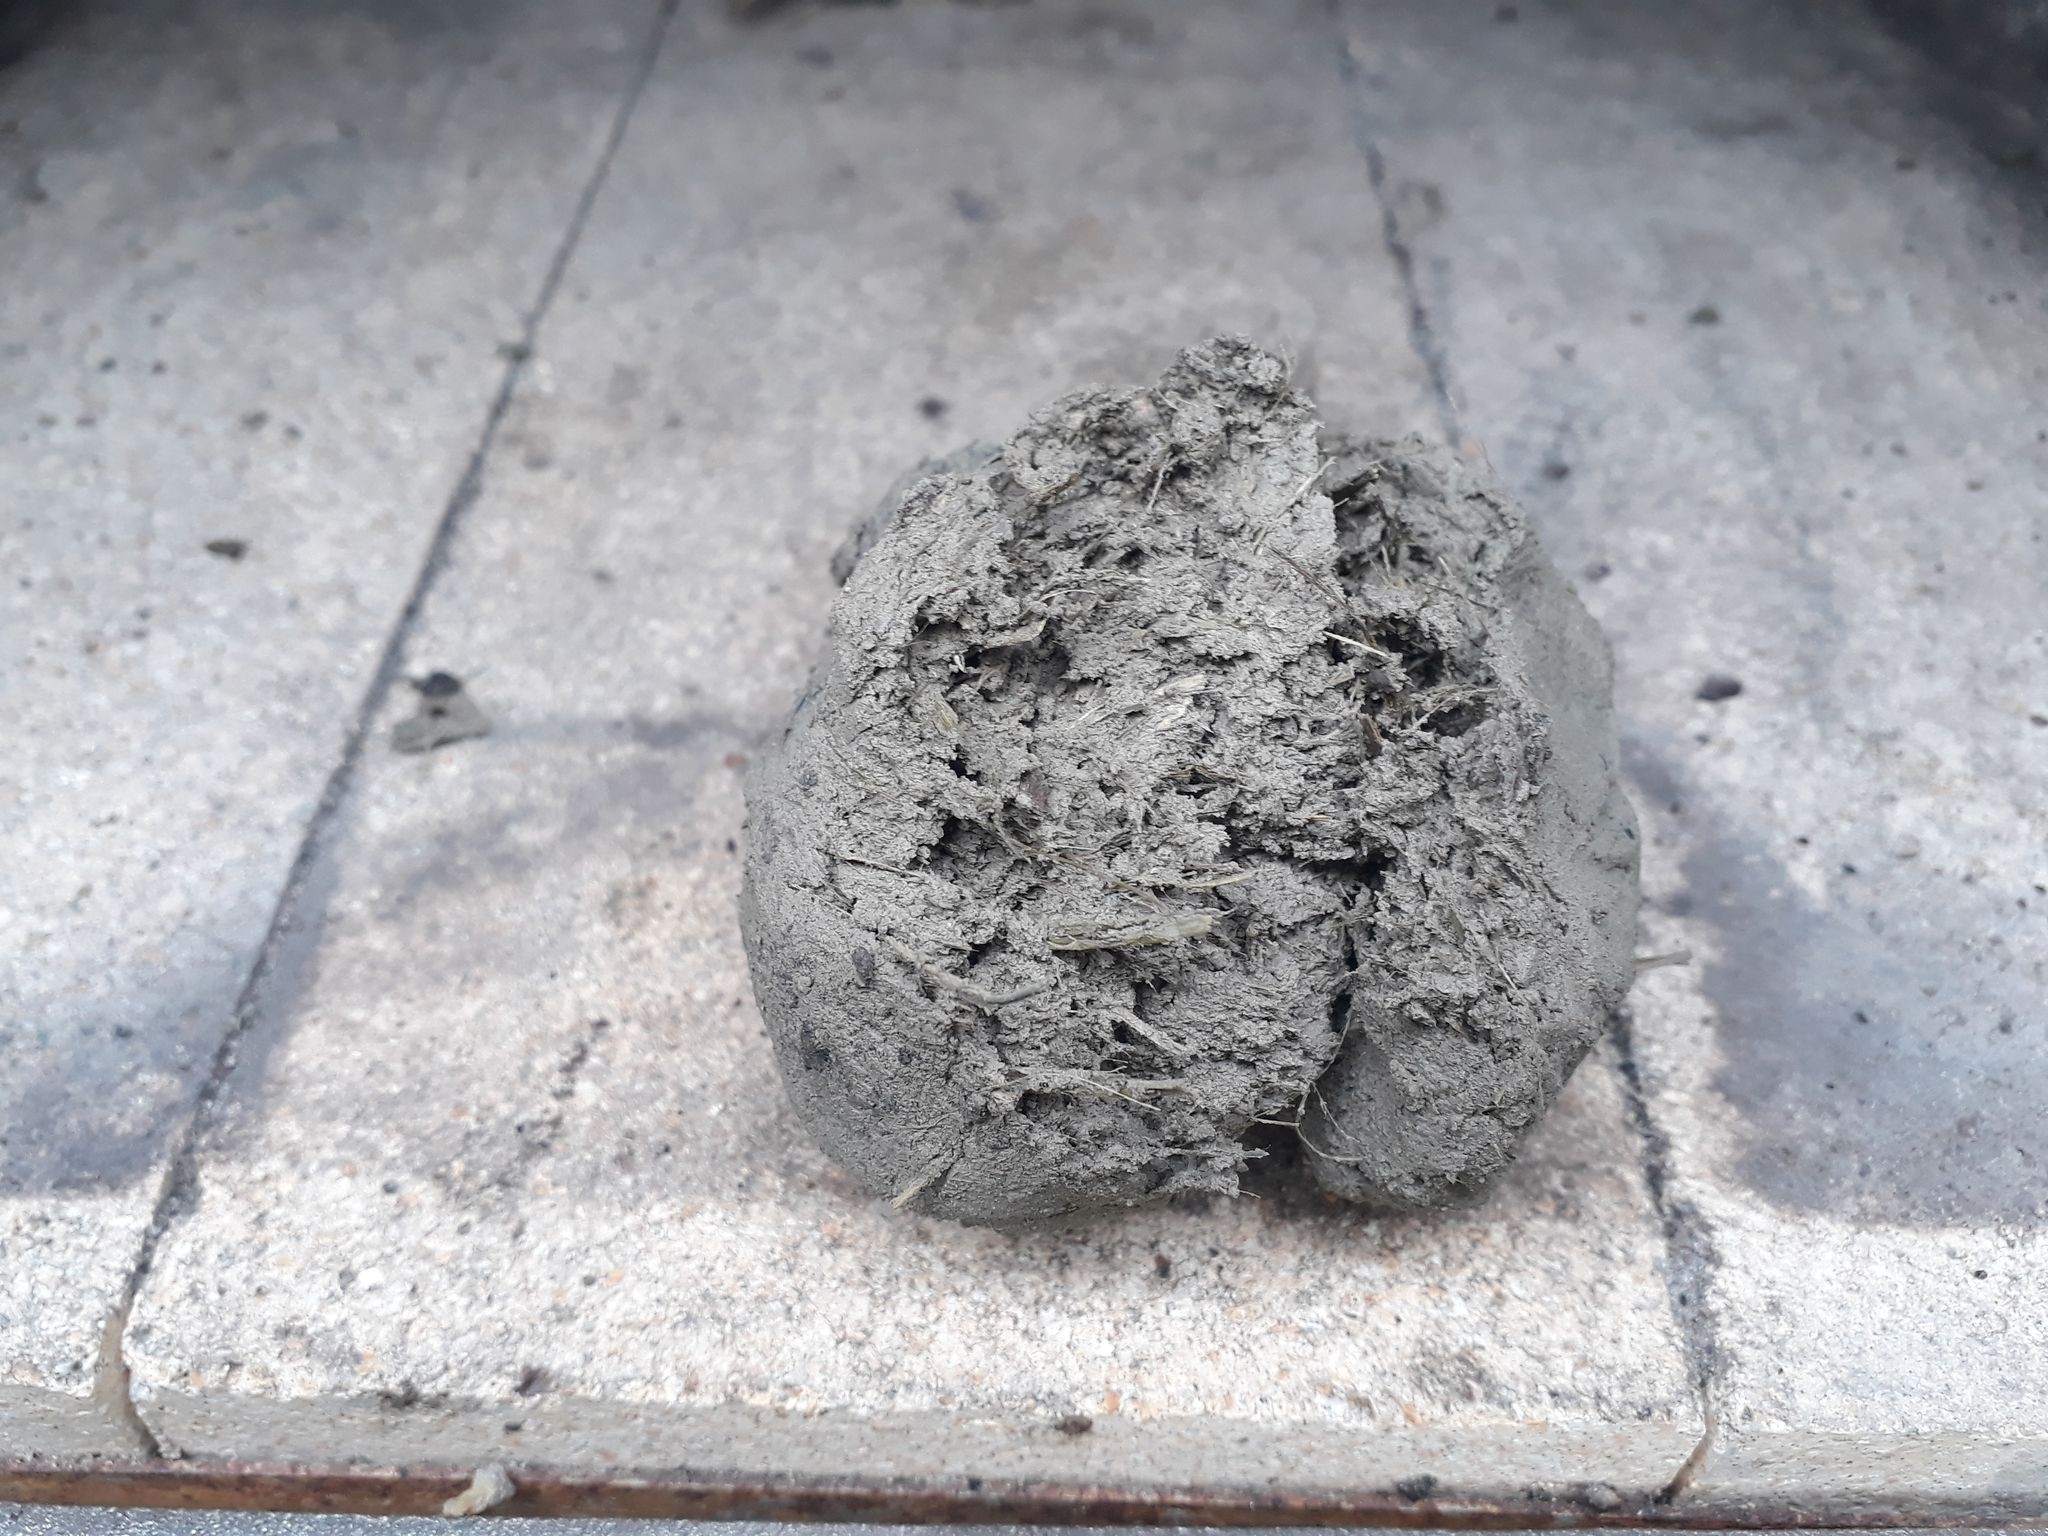
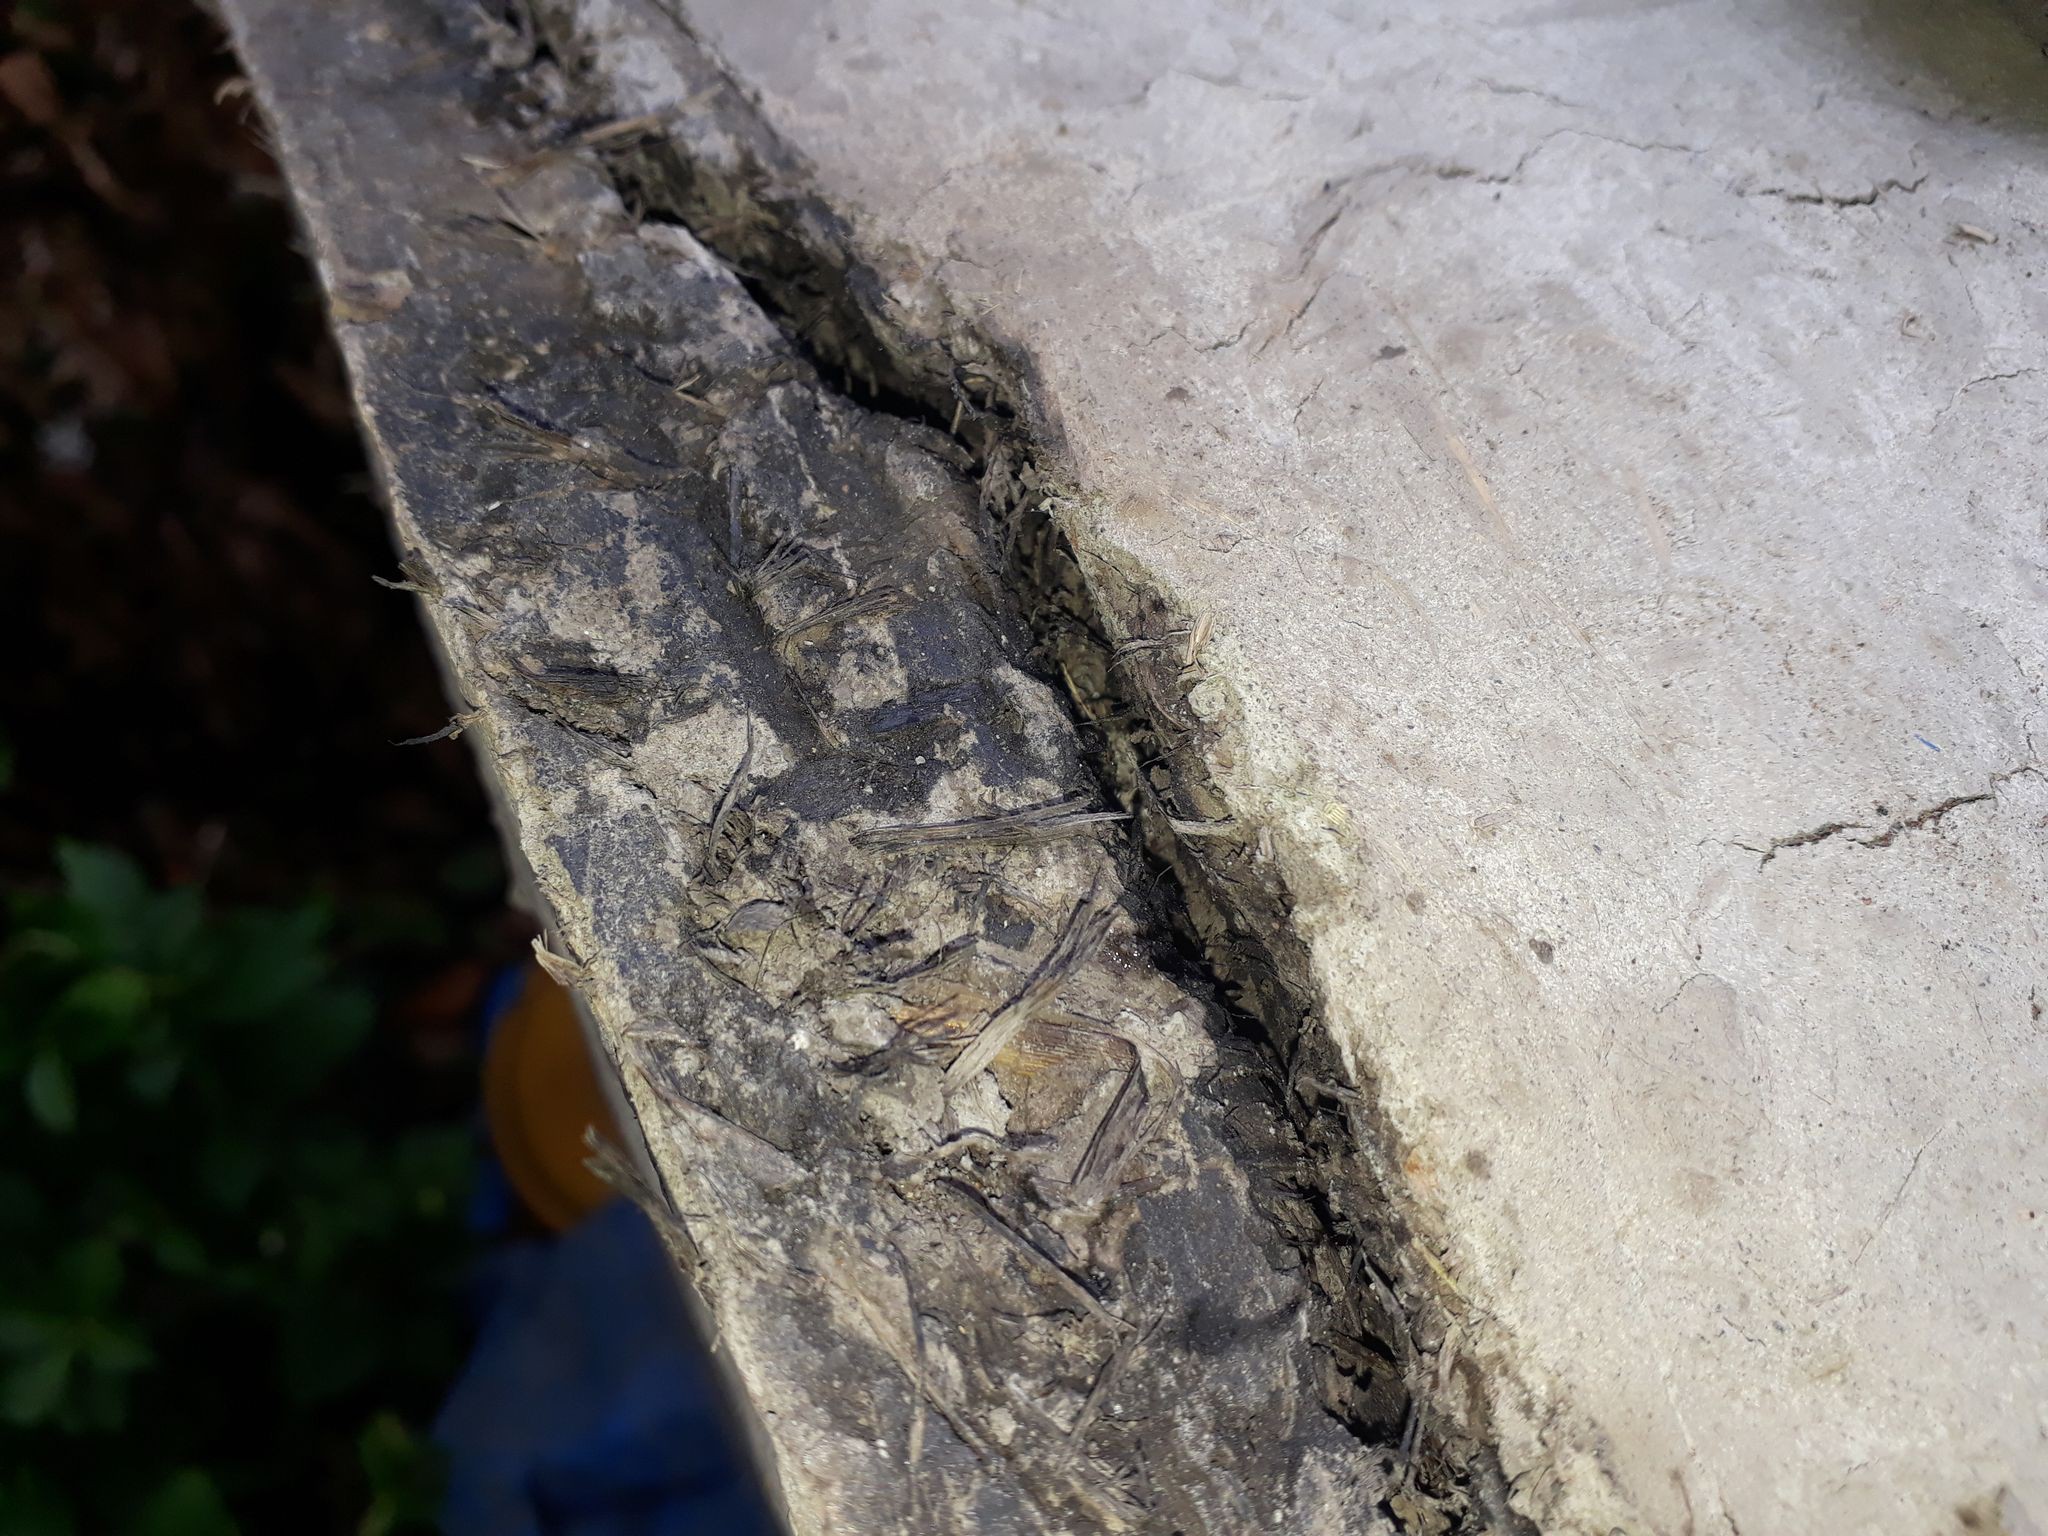
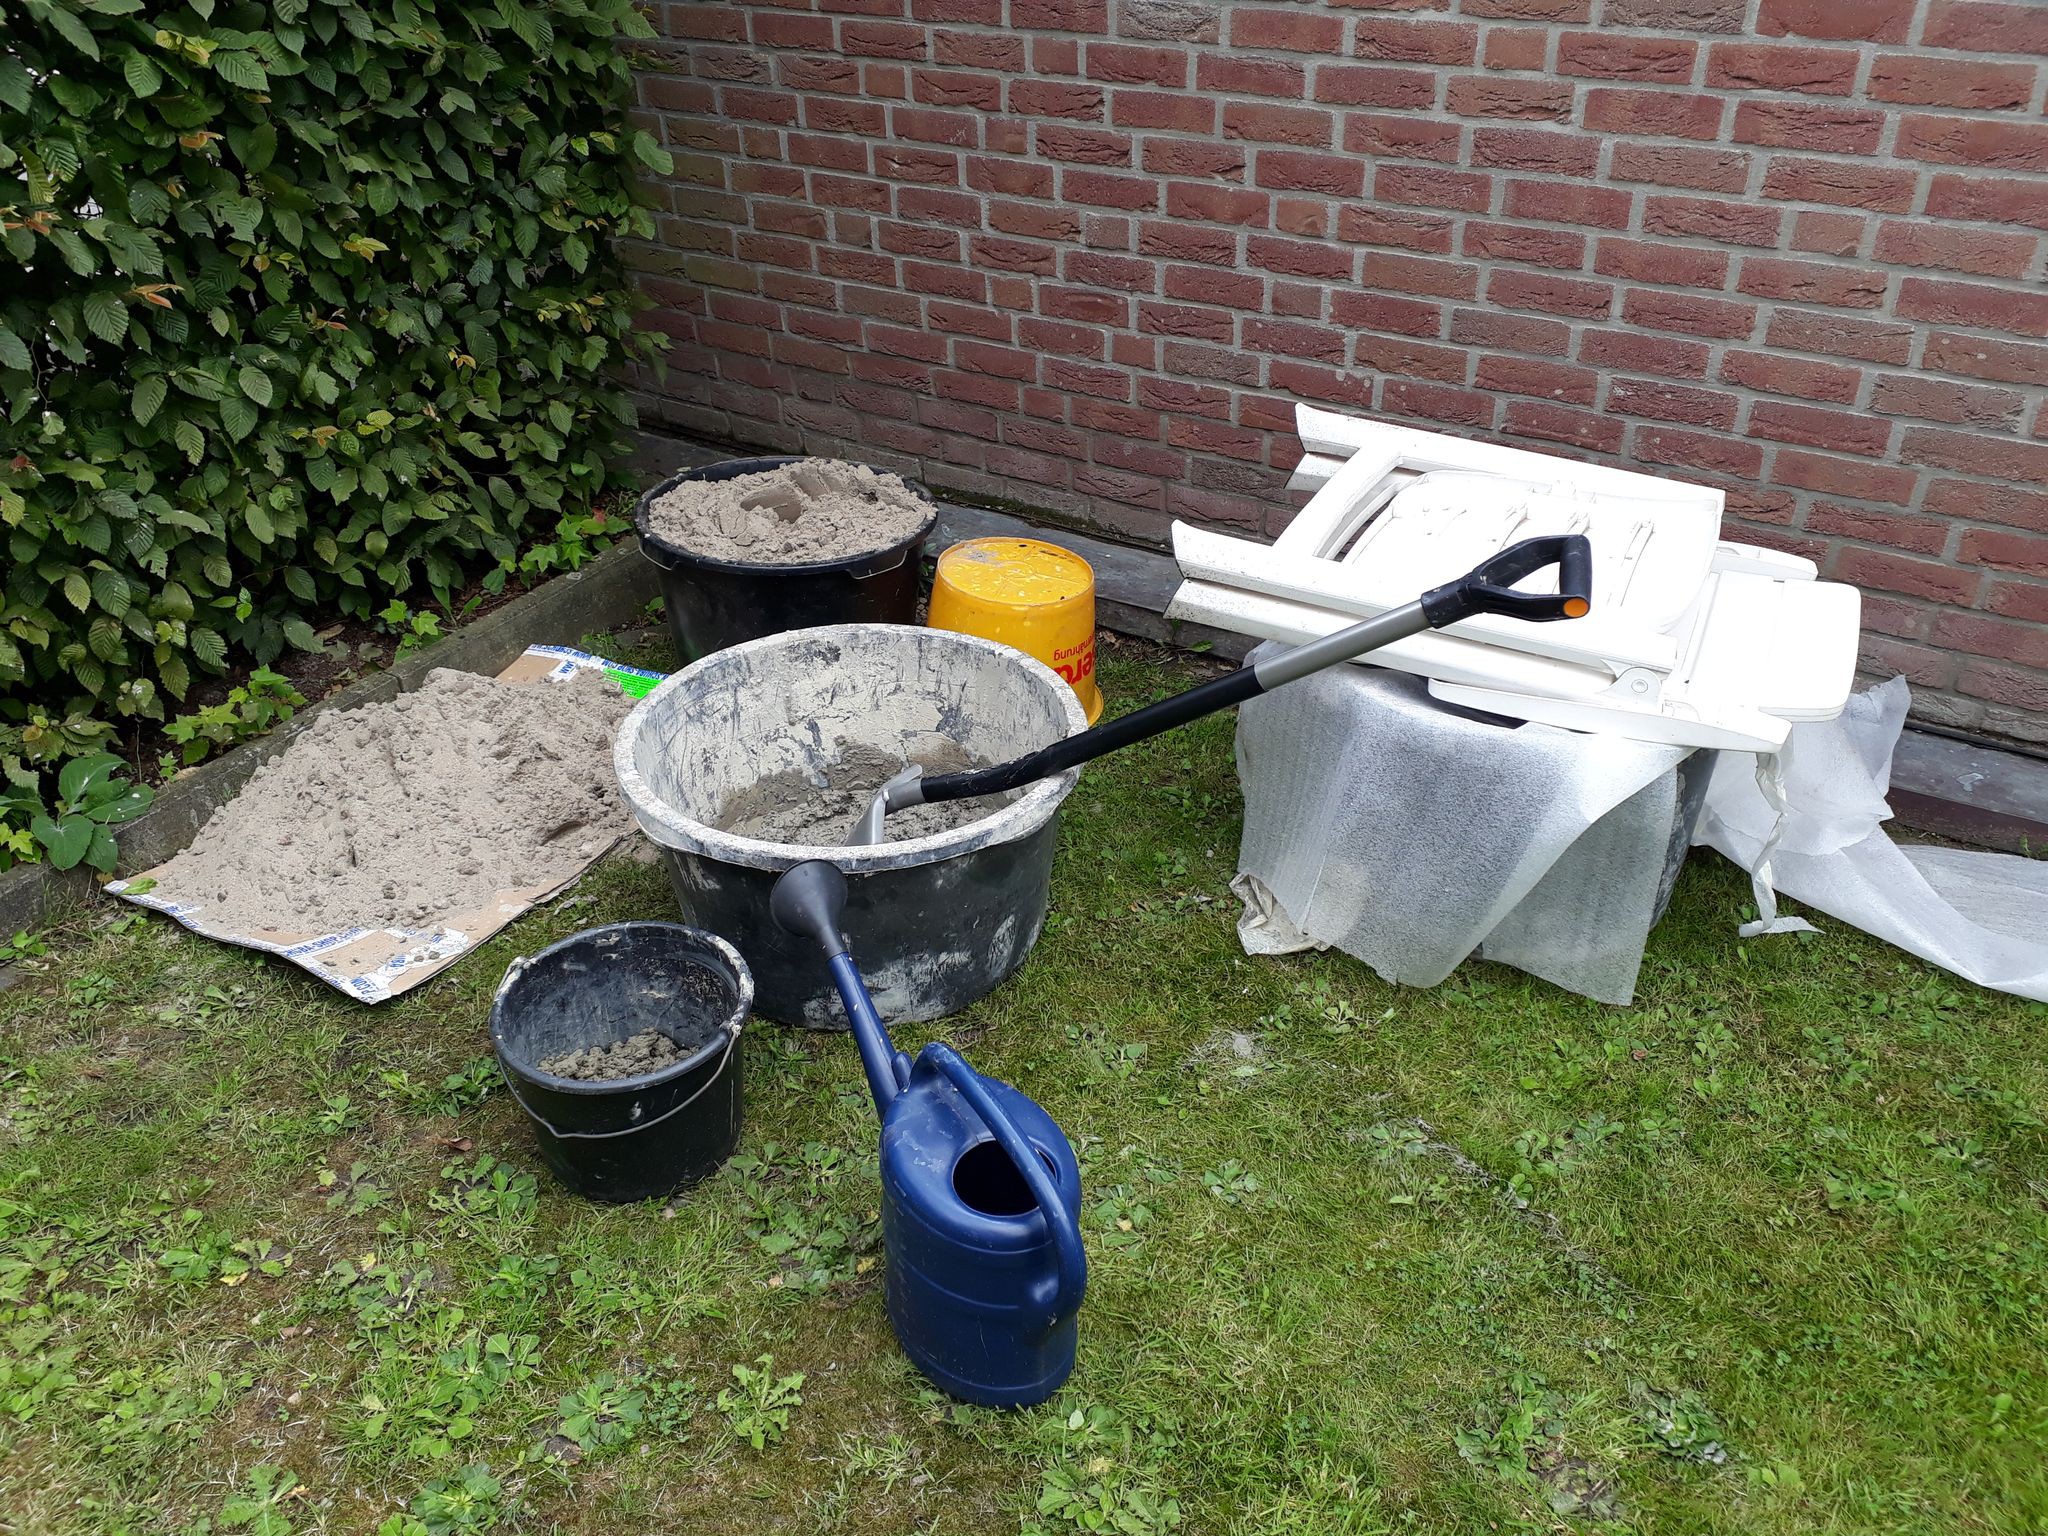
    The mix was still quite rich but worked perfectly:

    This is the result of a few hours stomping on mud like crazy and slapping it against the soon-to-be oven to create a nice dome:

    Here you can see how the drum sits on the frame. The two (not painted) bars can rotate by a few degree.

    That's it for part five of this series. Stay tuned for the fiery part six. What do you think is the best way to remove the wooden form? :)

  • 04 – building the dome (and failing miserably)

    Jan10/29/2018 at 17:04 0 comments

    So, this is where we encountered the first real set-back. But let's see what I planned to do:

    This wobbly thing is what I thought would suffice to create the clay/loam dome.

    We prepared everything and put the mould in place:

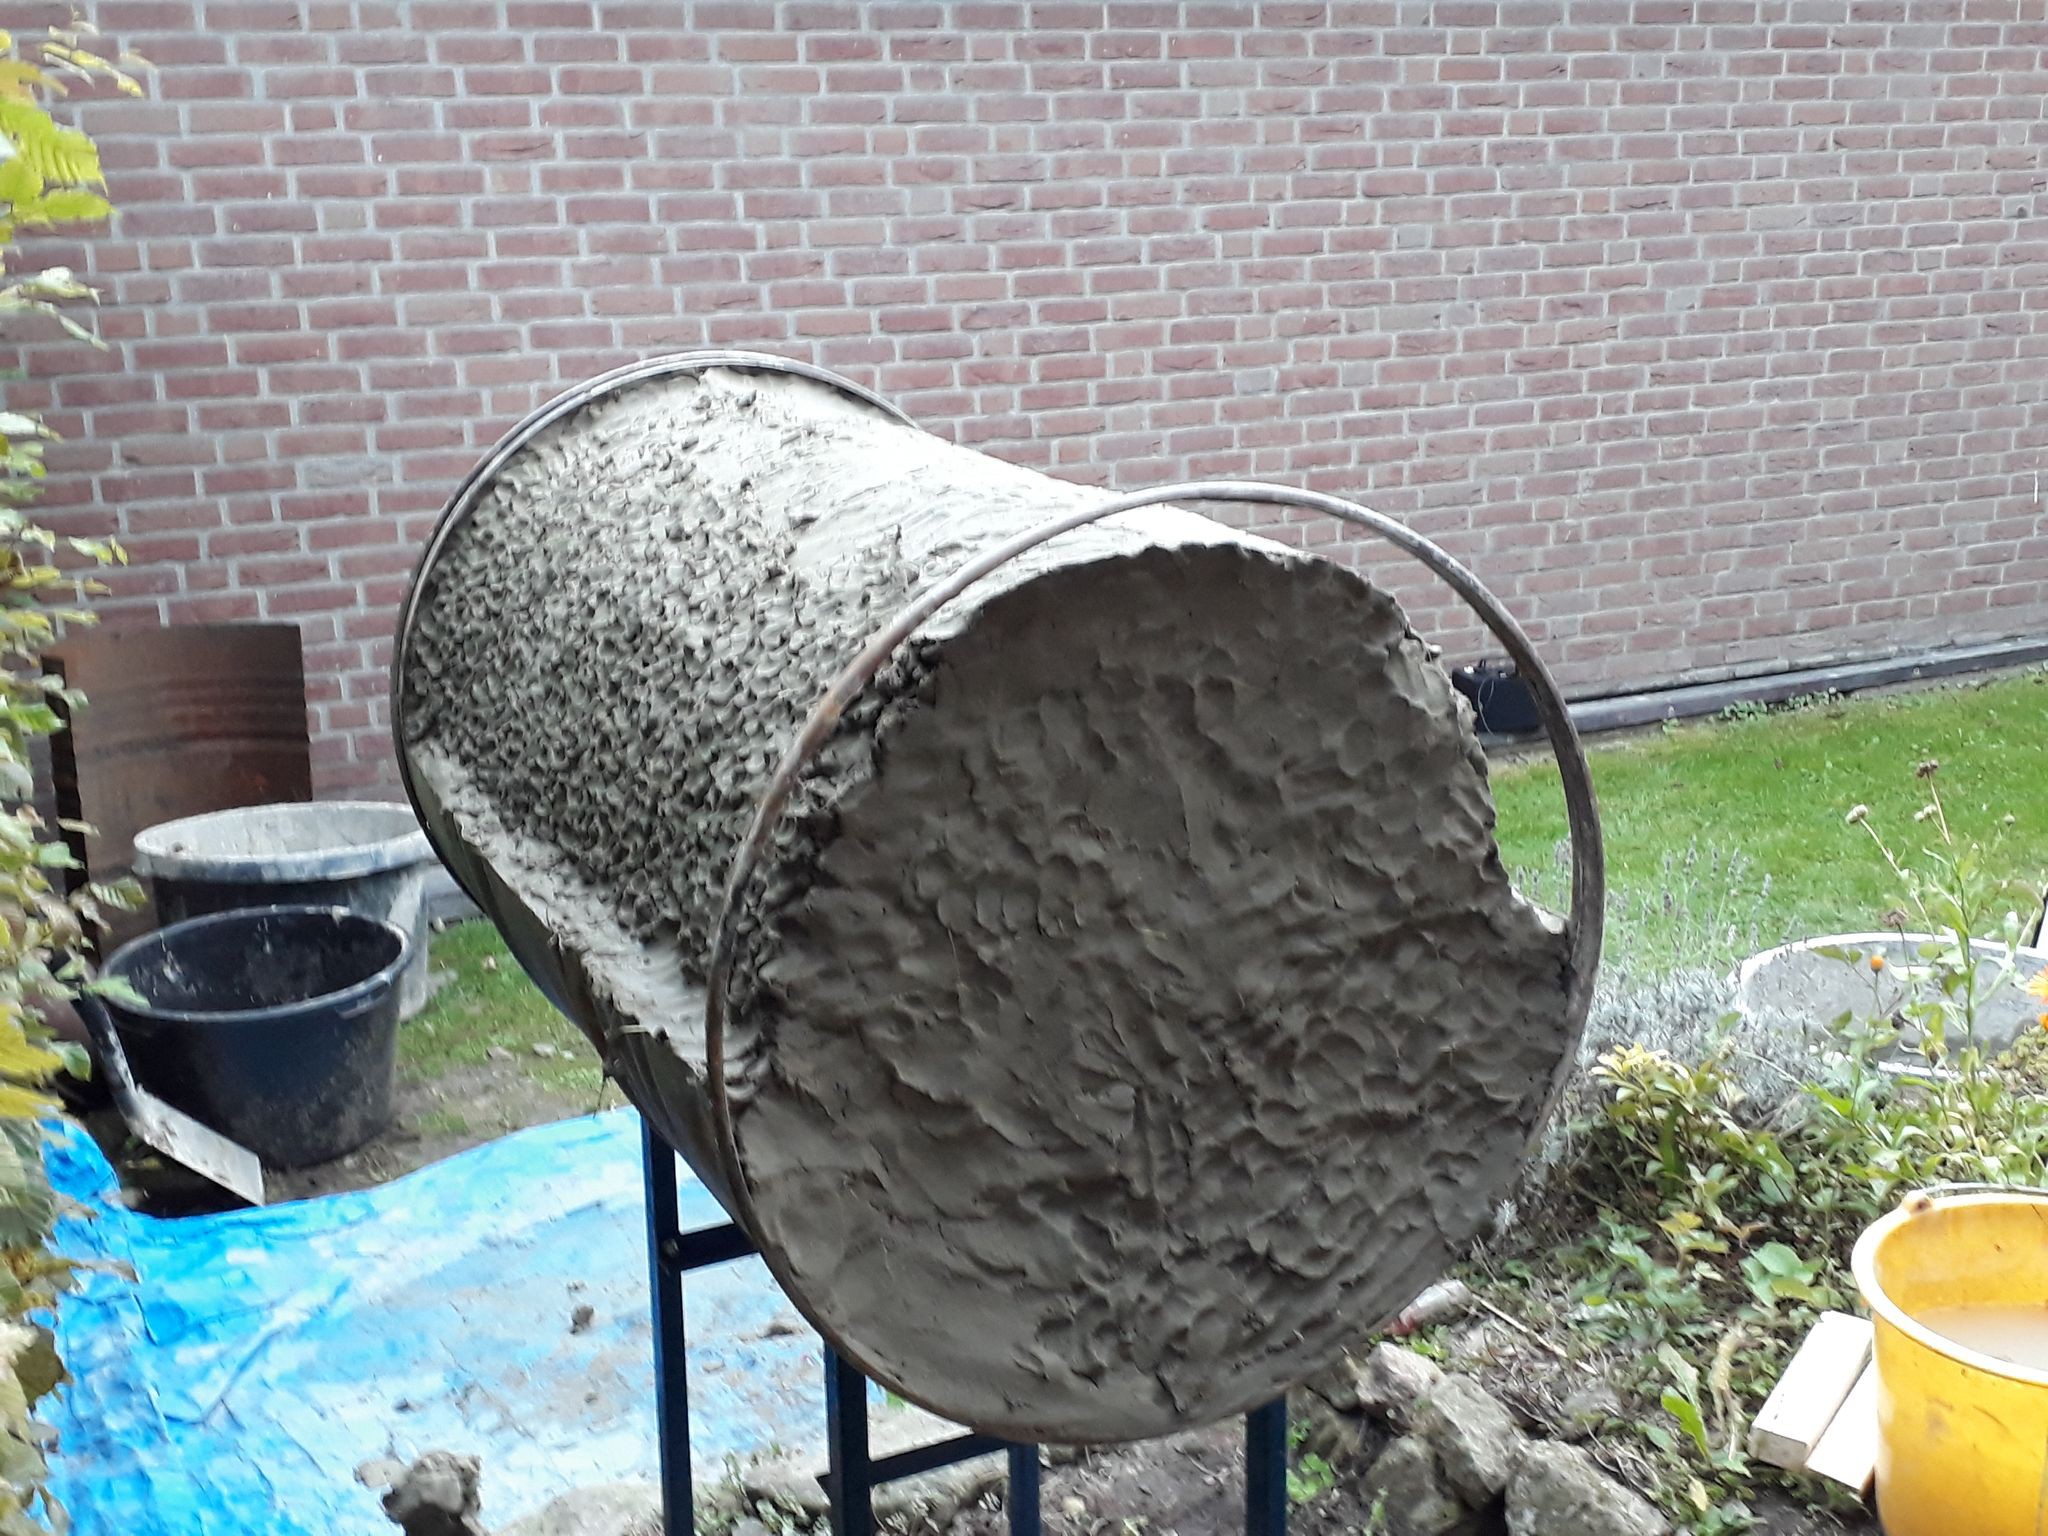
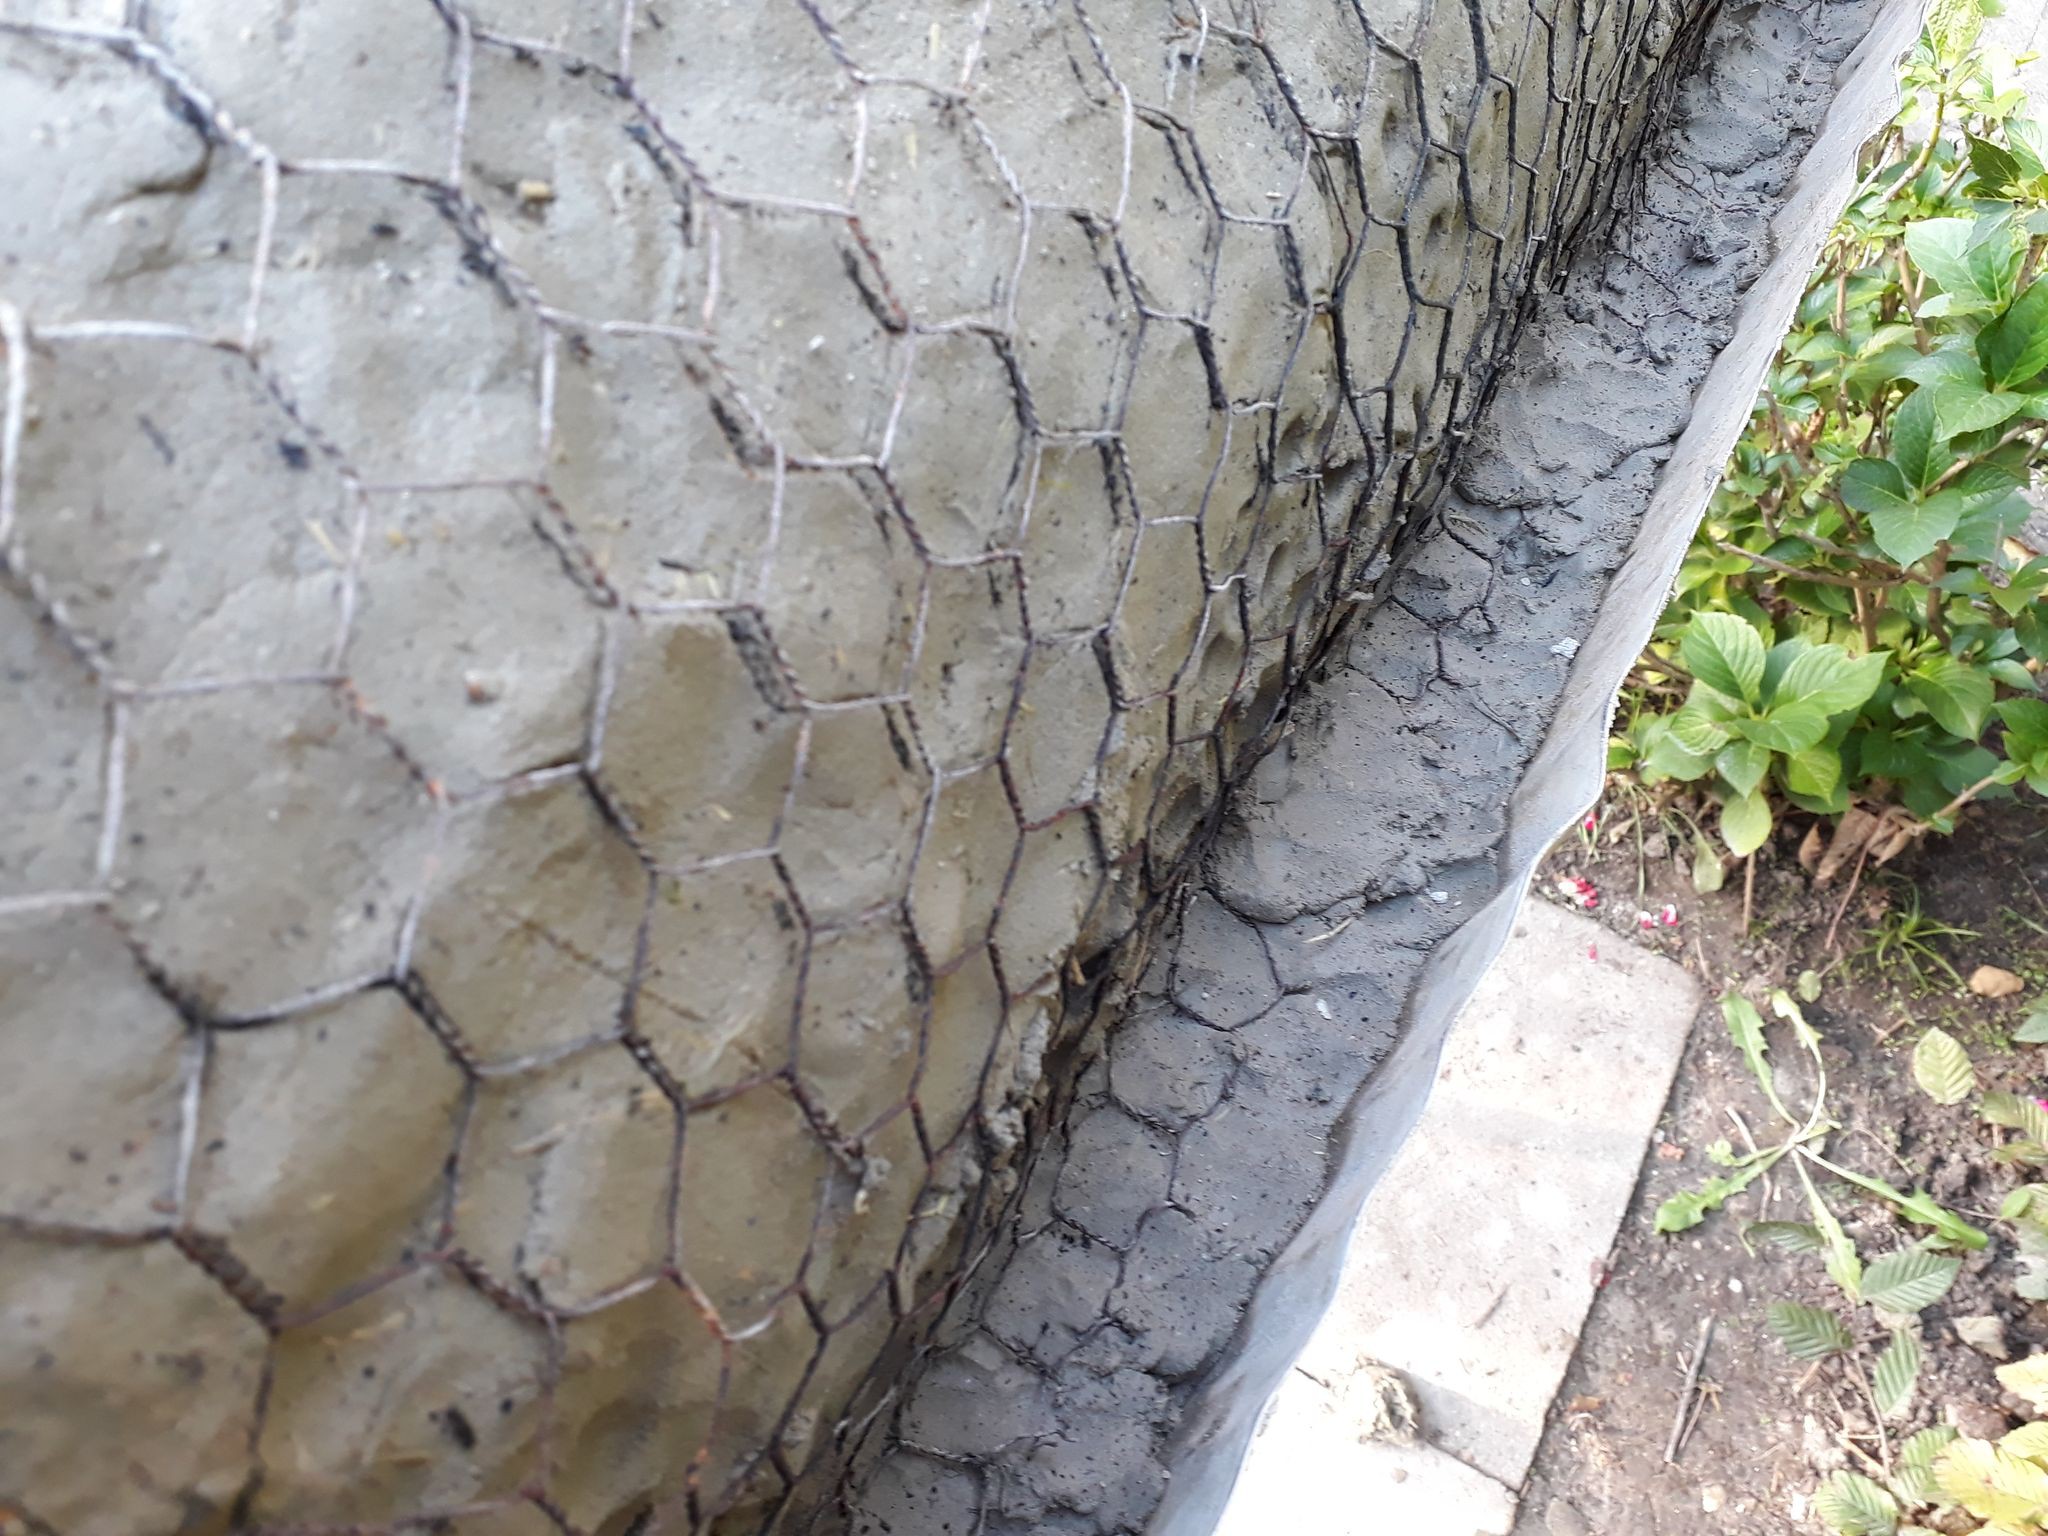
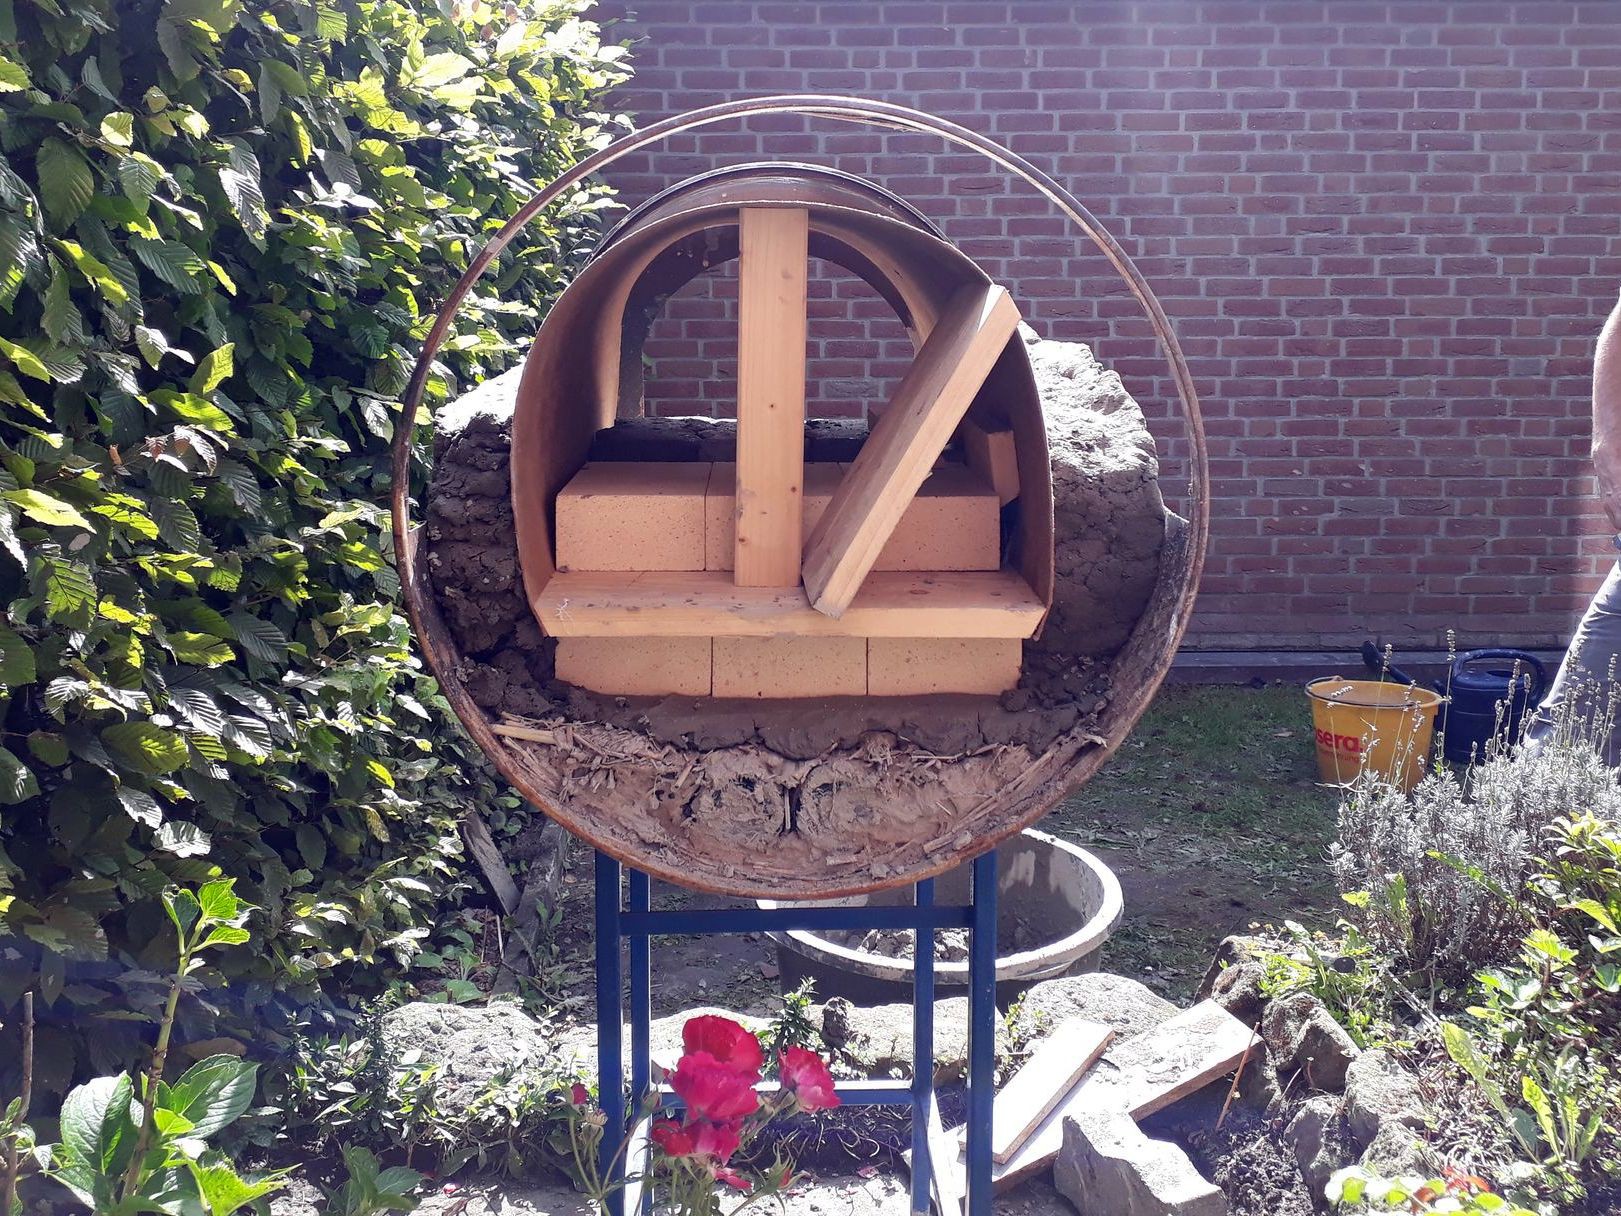
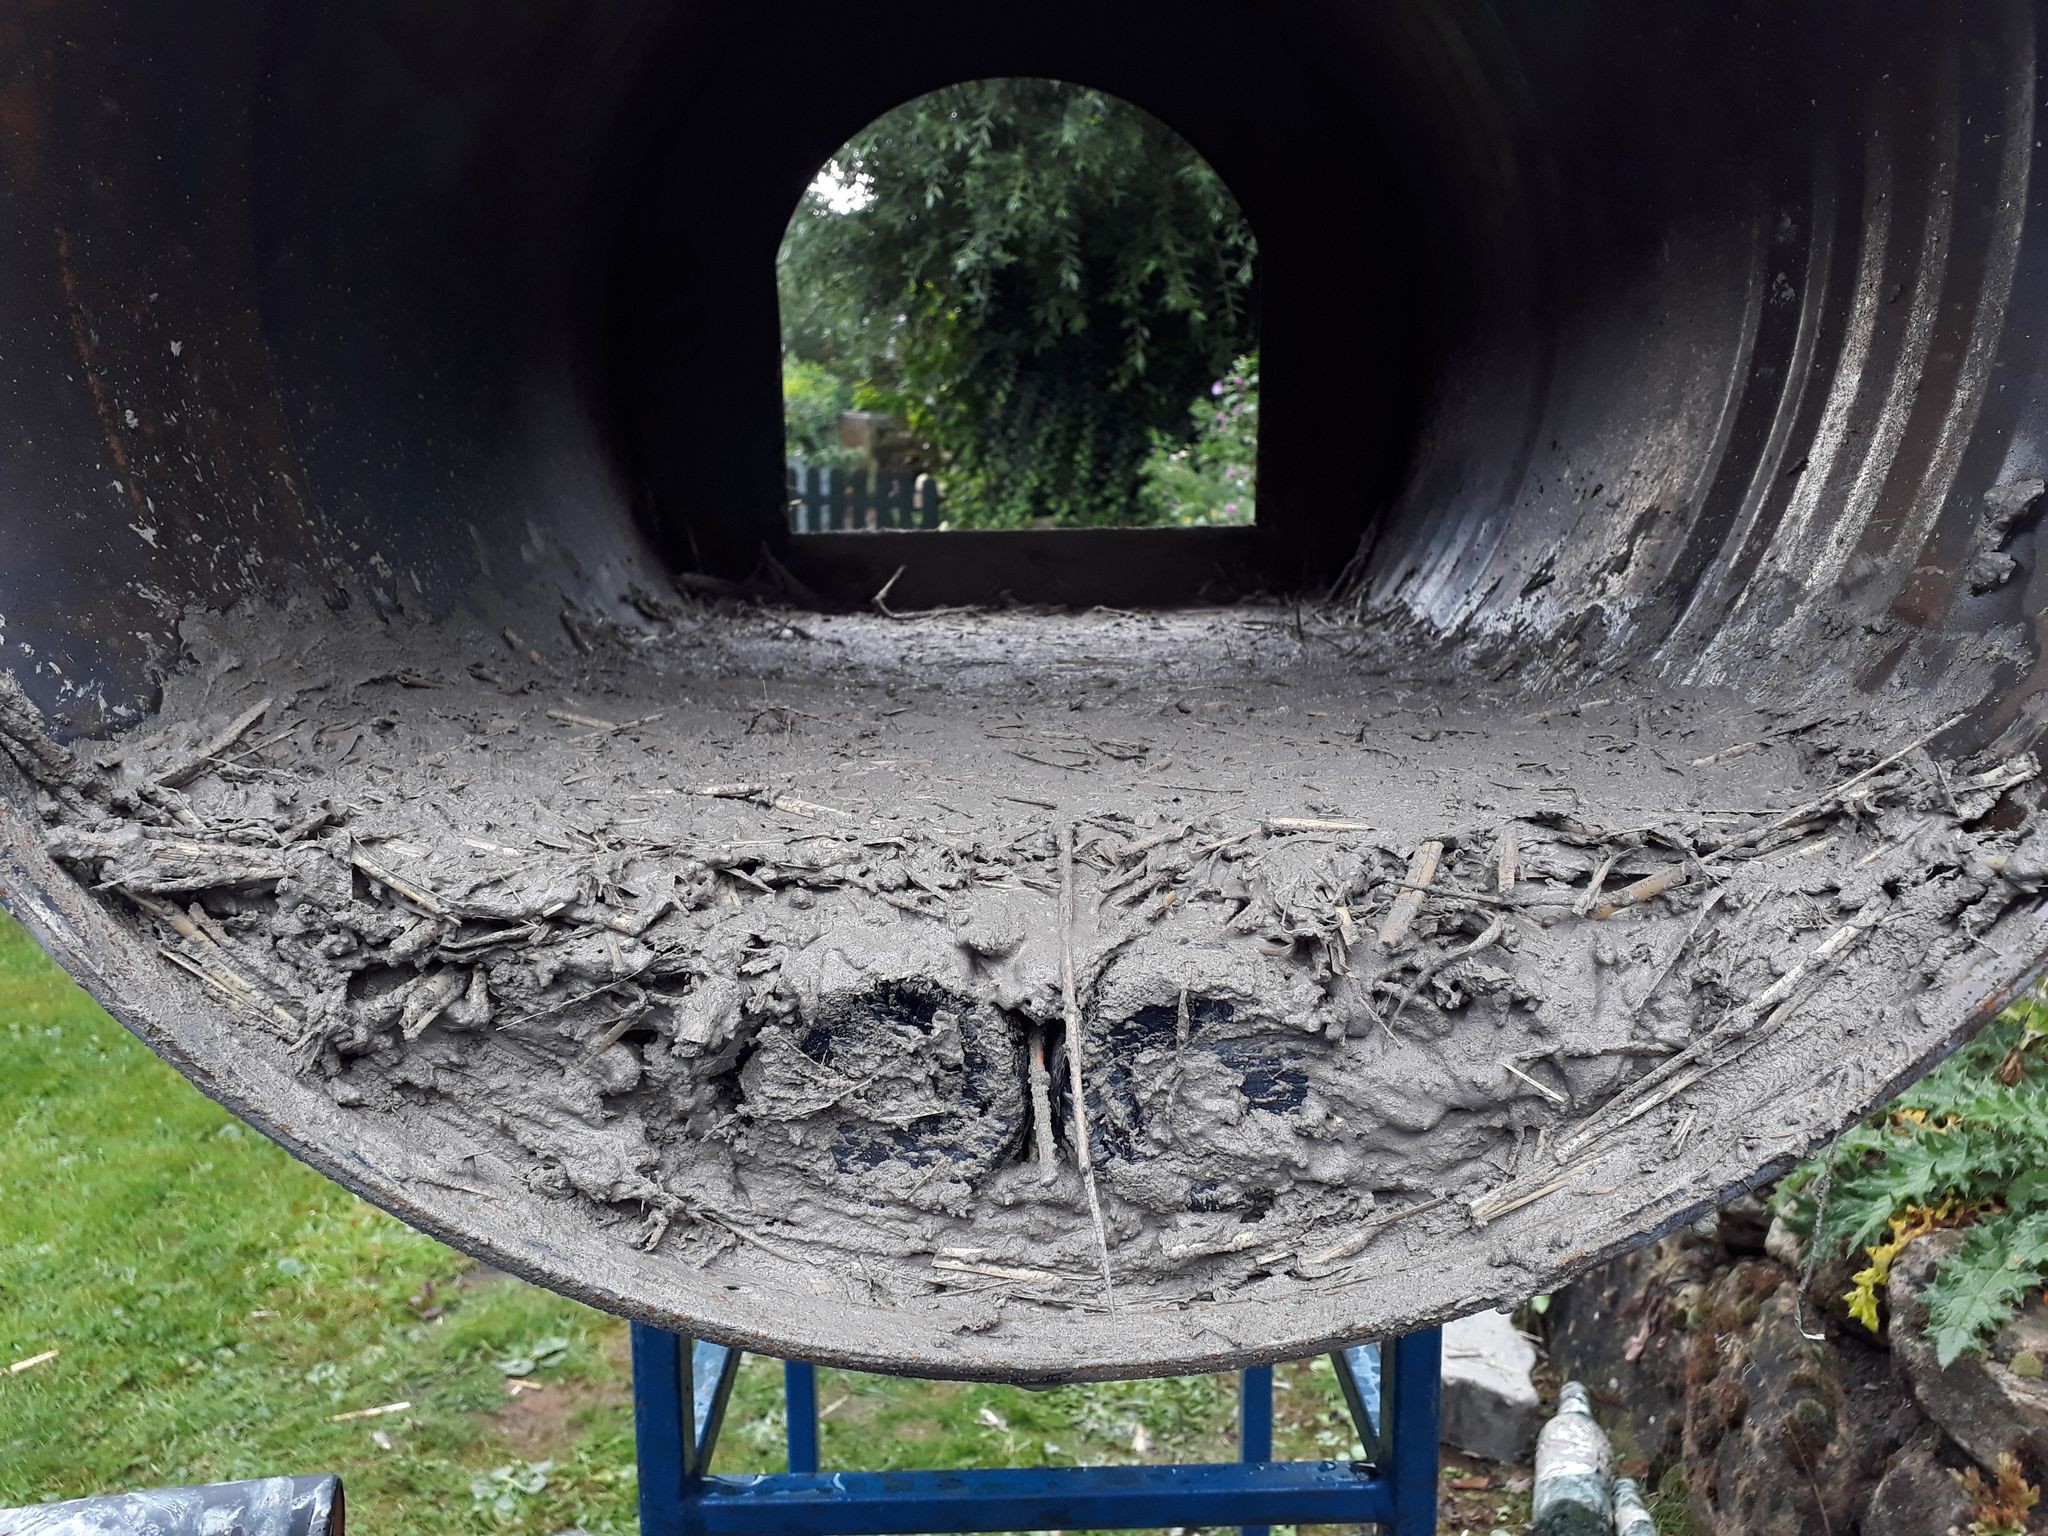
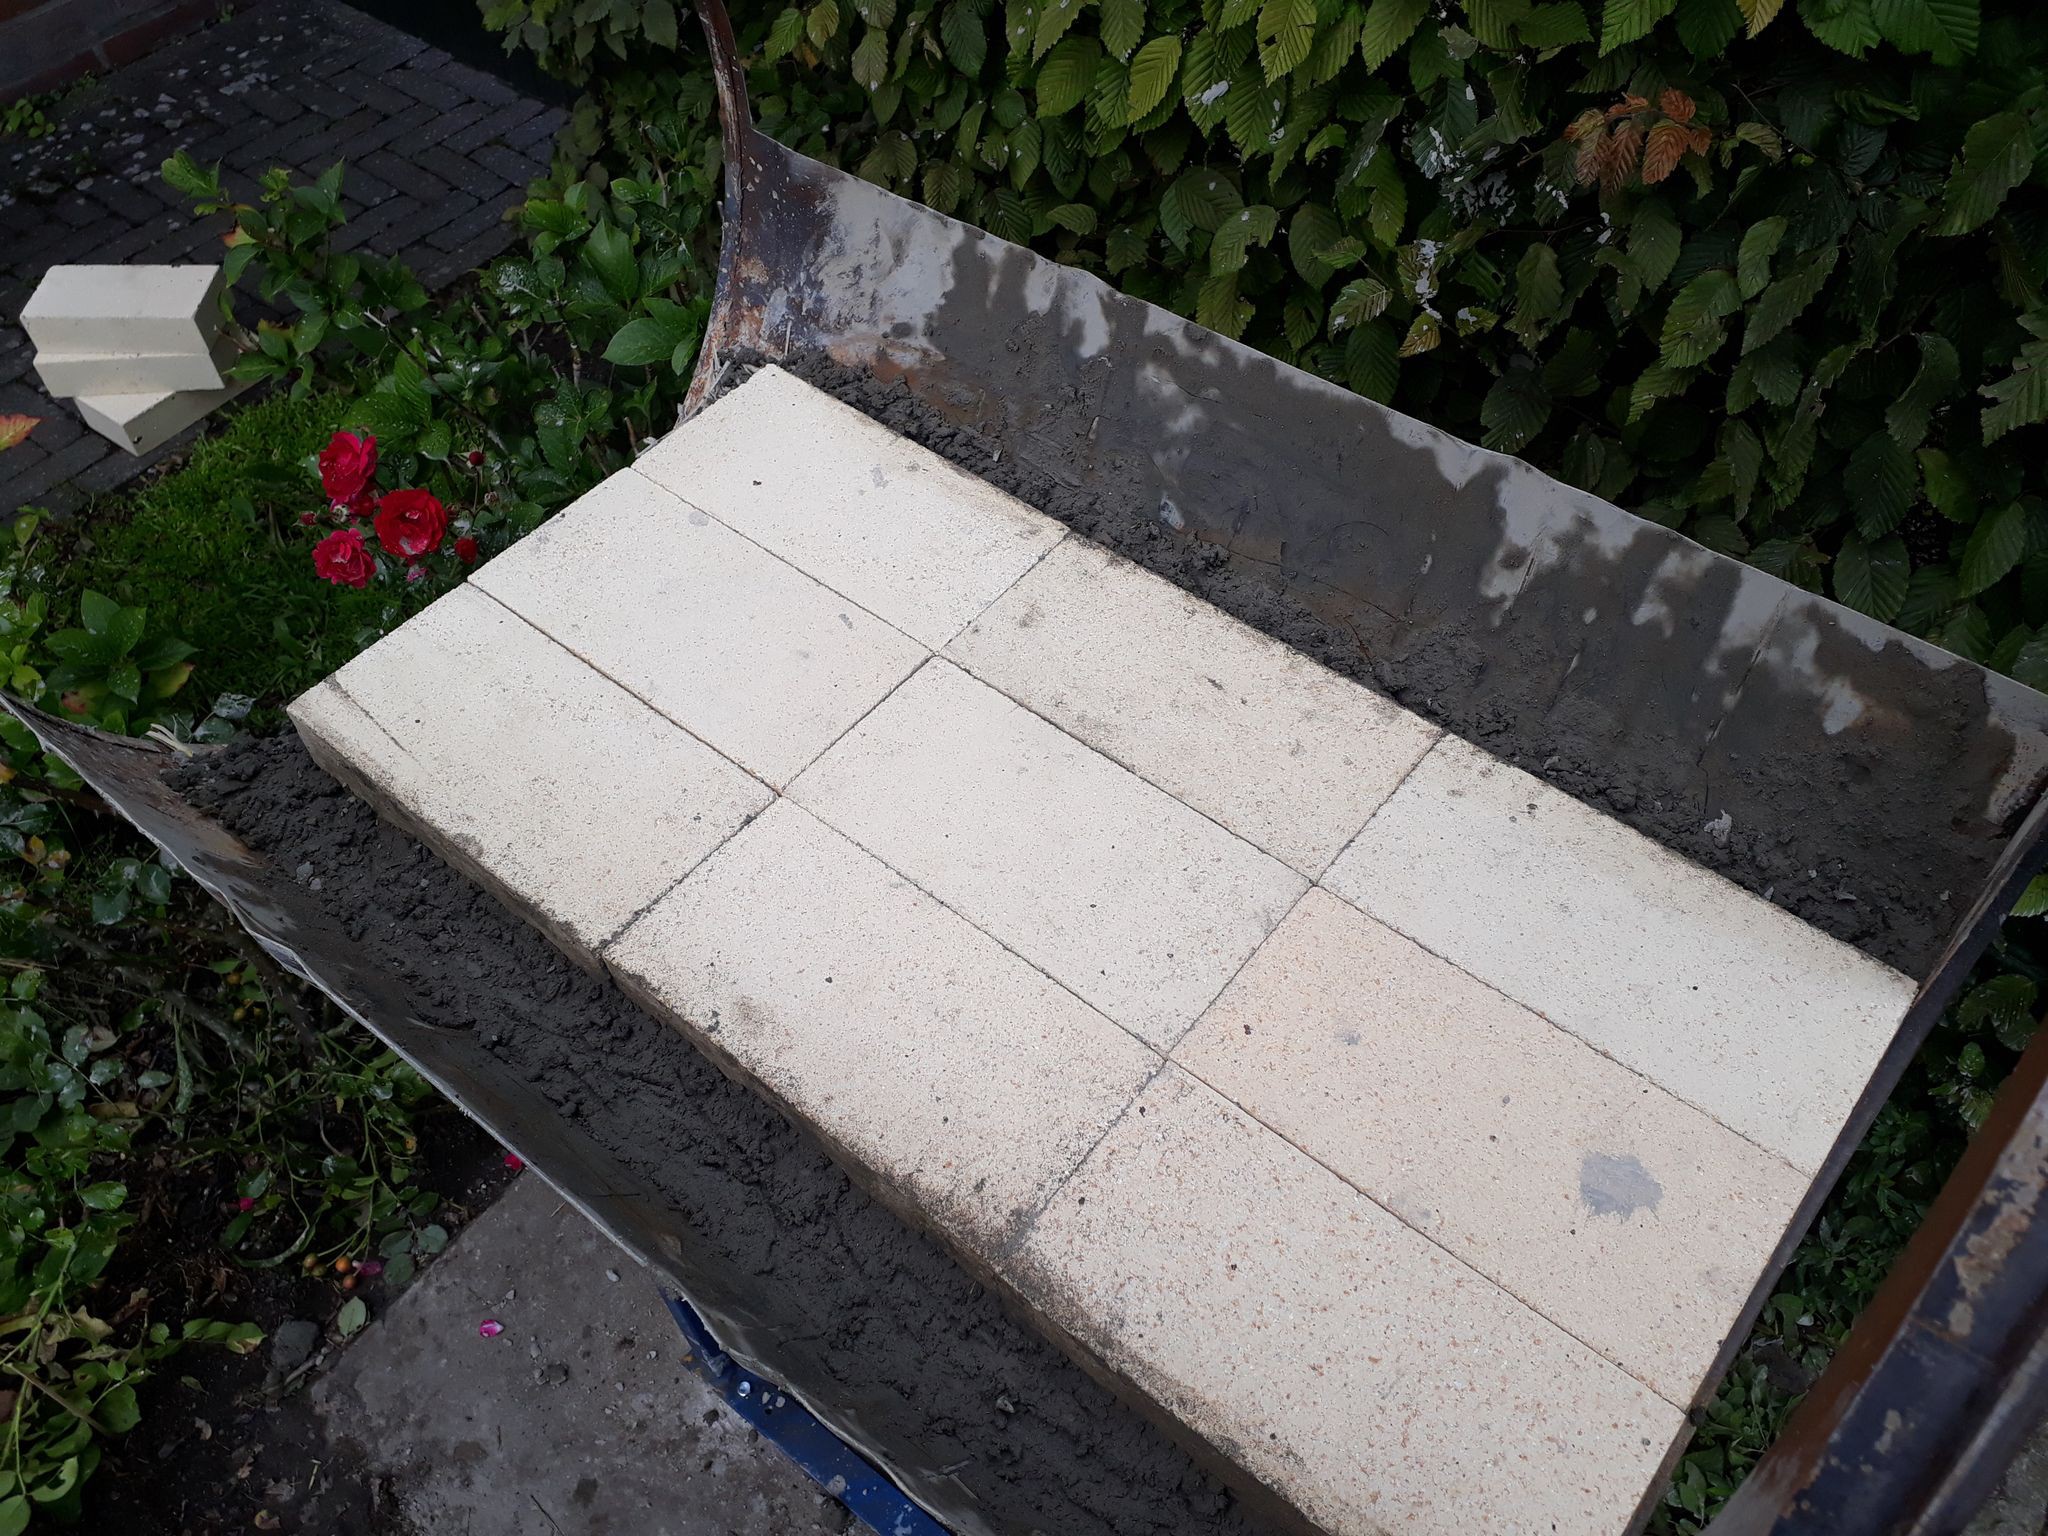
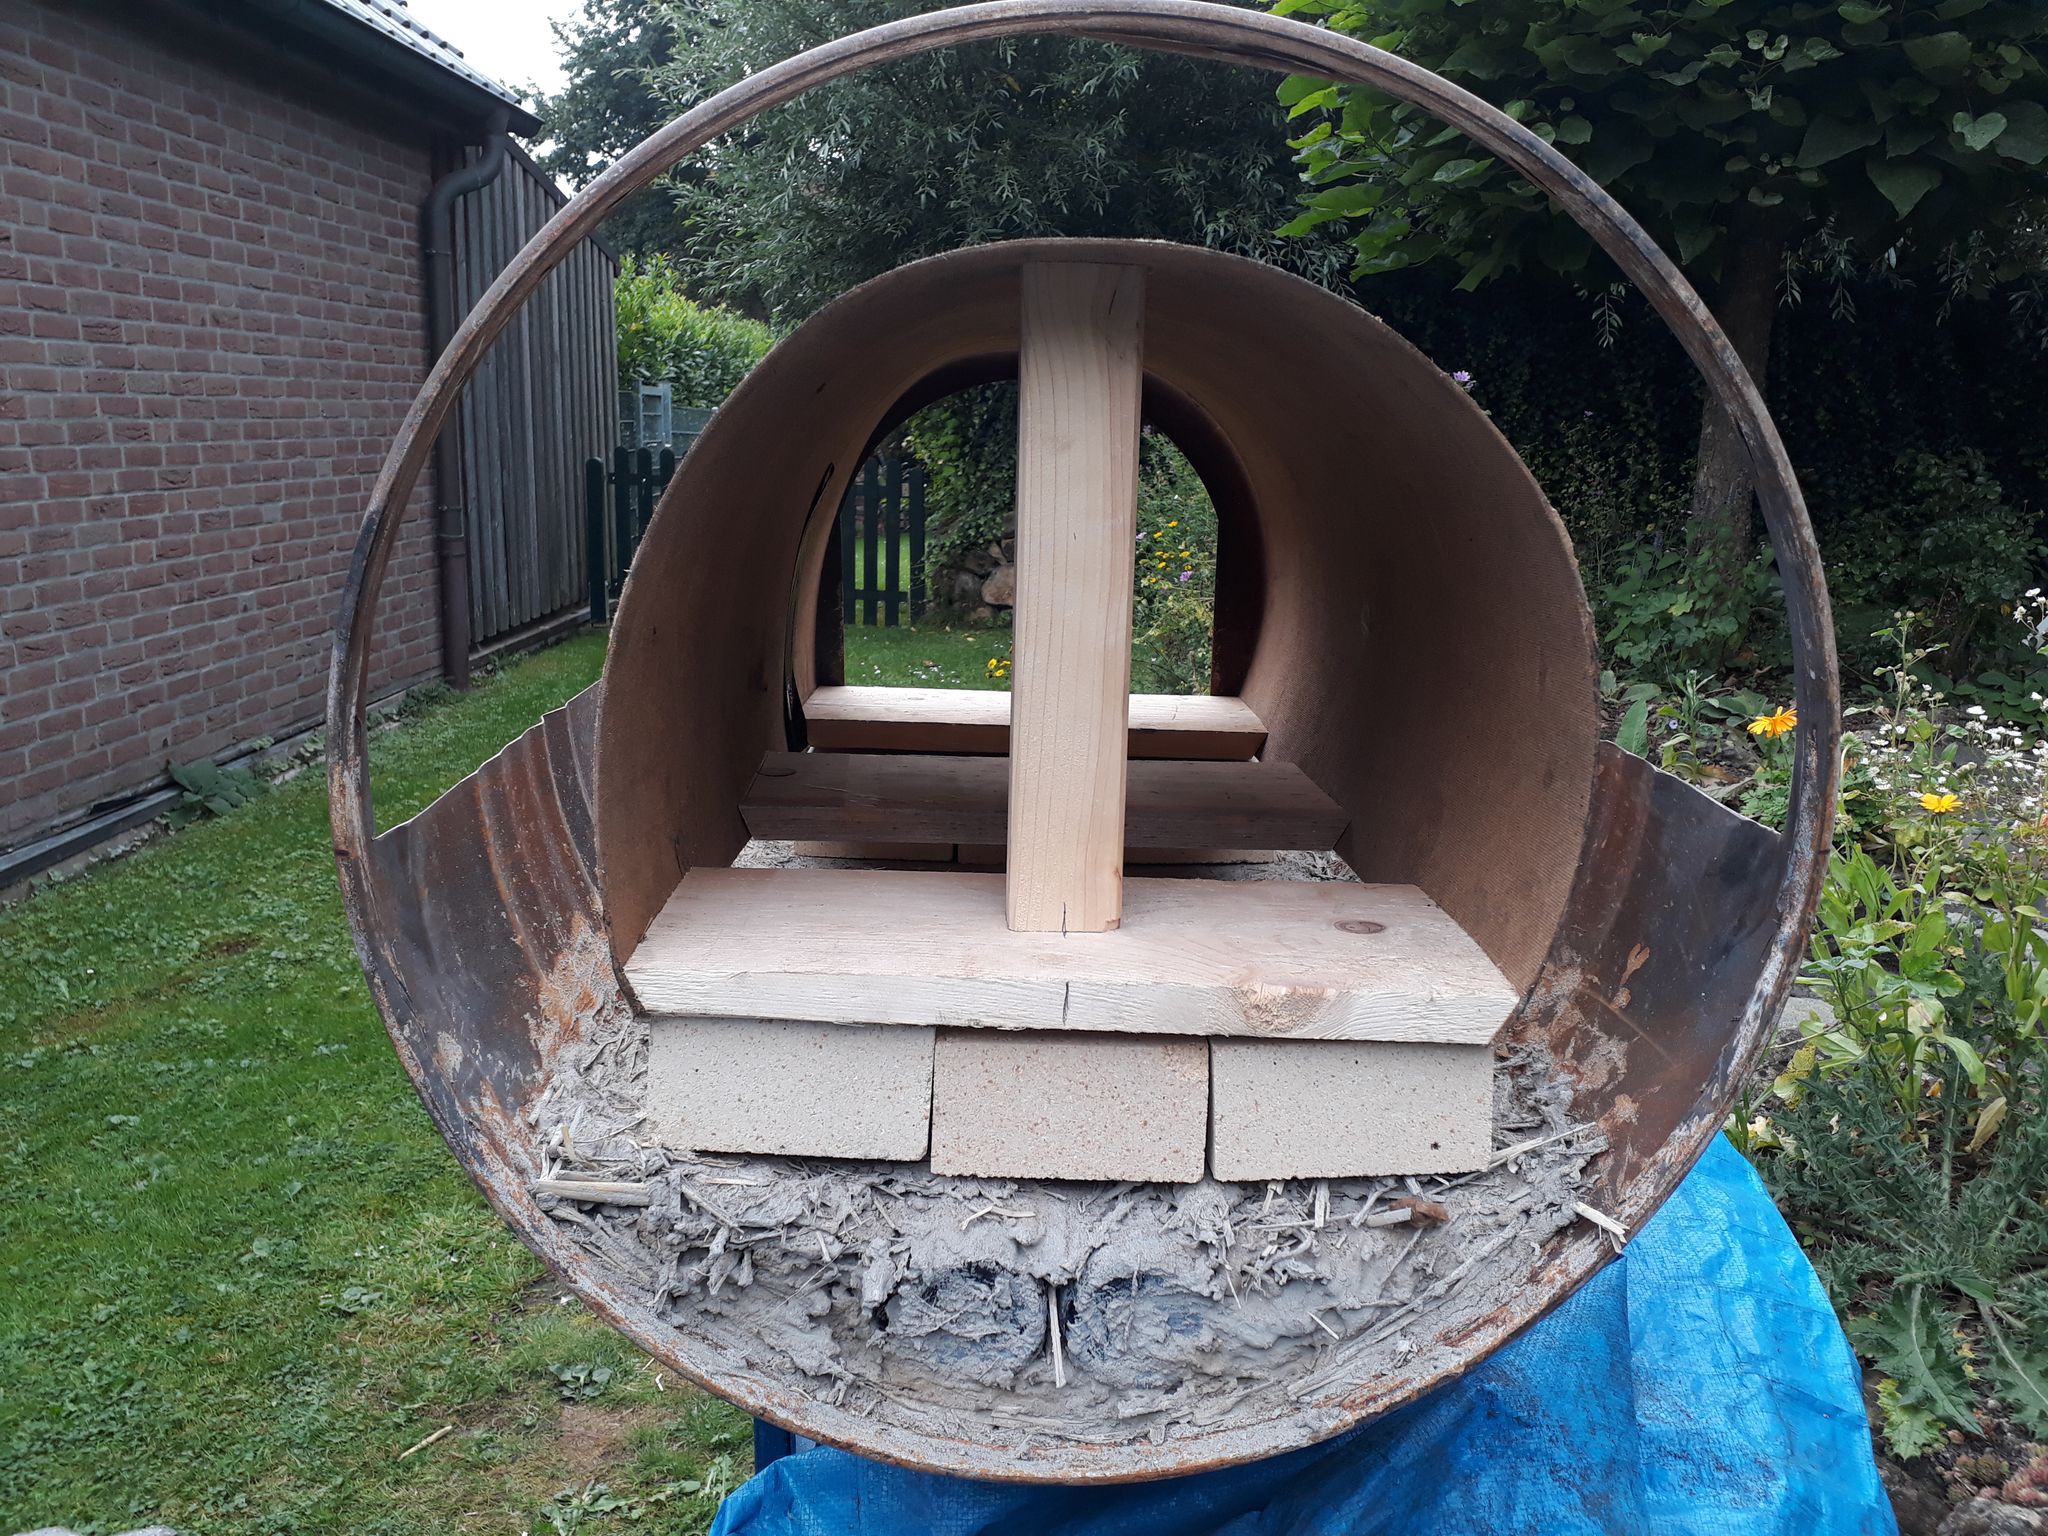
    The chamotte bricks are not yet pit in place in the above picture. It was just to test the fit. So, we made a huge batch of mud/sand/straw and began building the dome:
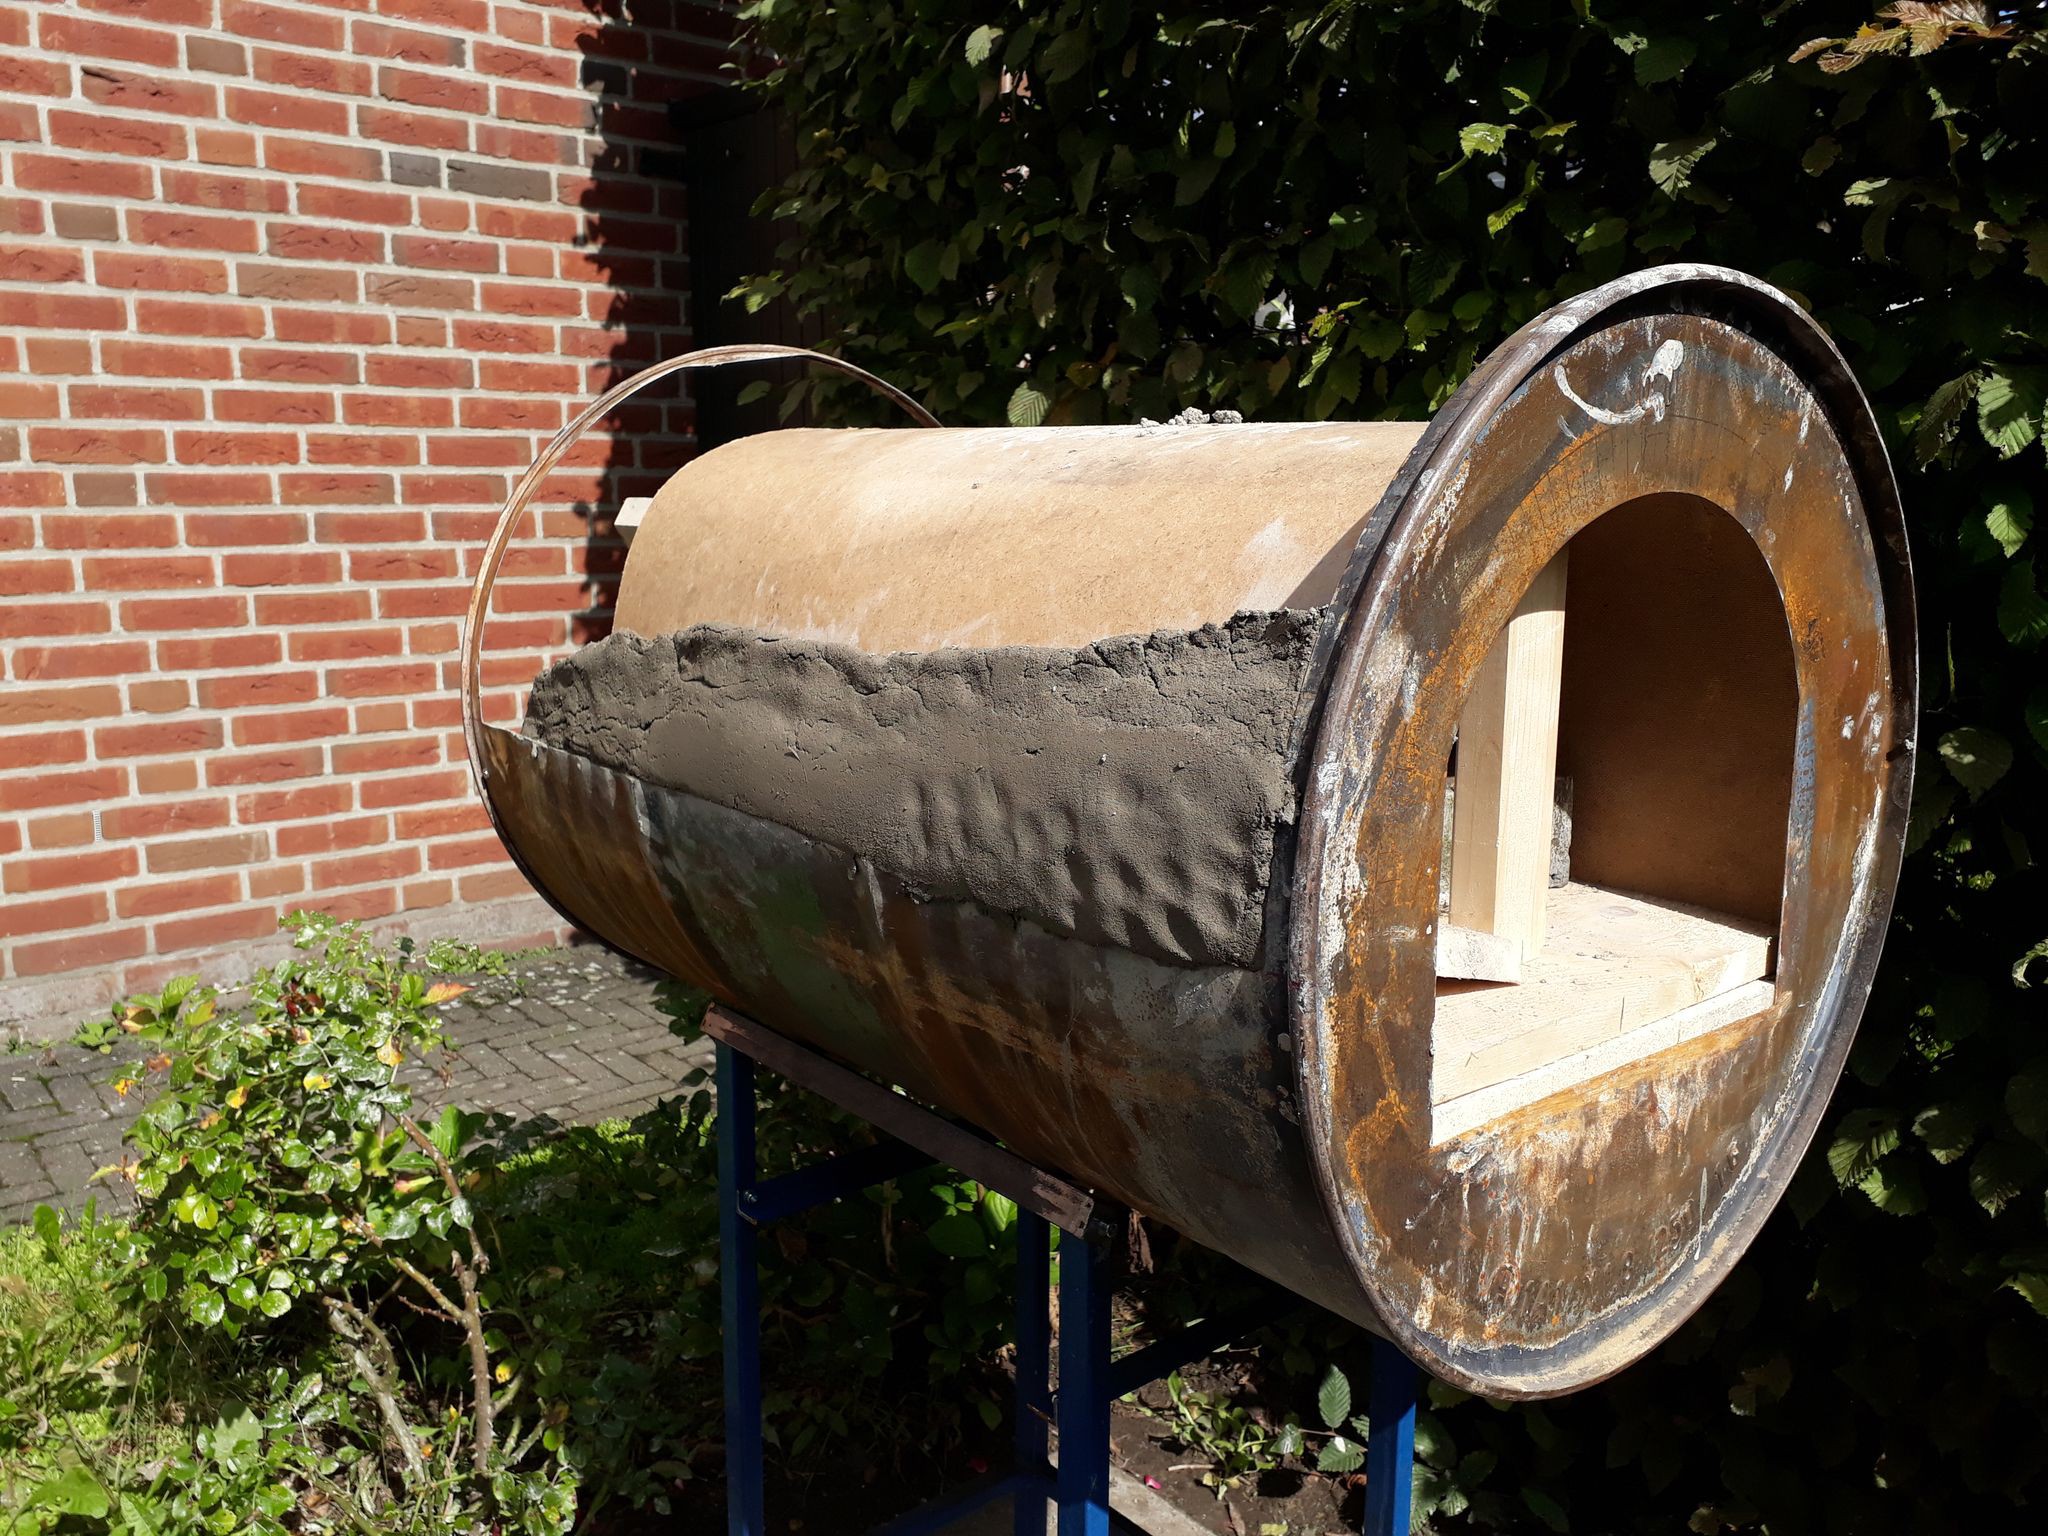
    What happened was the following:

    The mould gave way because it was much too soft and wobbly. We added pieces of wood to no avail...

    Second mistake was the clay. It was much too rich and gave way under its own weight. We gave up after an hour or so because there was no improvement to our situation.

    I had to rethink the mould...

  • 03 – foundations...

    Jan10/29/2018 at 16:53 0 comments

    So this log is a real quickie.

    I got 4 washed concrete panels which have exactly 1x1m when laid down as a square.

    I had to level the ground before that and used a rubber mallet to get everything level afterwards.

    One problem is rain. A heavy rain shower later it looked like this:

    I'll have to put a drainage to avoid this.

    This is the frame I found in the metal dumpster. I modified it a bit to fit my needs. Picture above doesn't show the final version anyway. You'll see how I modified it in the next posts!

  • 02 – laying the chamotte footprint

    Jan10/28/2018 at 07:55 0 comments

    After preparing the drum, the next step was to prepare the "floor" of the drum, so I can lay the chamotte (fire clay) bricks.

    The preparation for everything looked like this:

    We needed to mix (local) clay, sand, wheat straw to get the properties we wanted: sticky, not shrinking too much and a bit insulating.

    beer bottles as insulation

    We put a few bottles into the drum first, which serve as a good insulation. After all we want to conserve the heat in the drum!

    After that we let it dry for a few days and then put in the fire clay bricks:

    At this point I decided to cut the drum even more because we couldn't manage to create the dome without having access from all sides.

    This is the final form of the drum and baking surface. Only the front and the bottom half of the drum are left.

View all 11 project logs

Enjoy this project?

Share

Discussions

recordinformative wrote 05/07/2023 at 14:26 point

It is very great  to make wood fired clay oven and I want to  connect it with my webpage.so I usually recommend Burning Wood

  Are you sure? yes | no

matthewkleinmann wrote 11/07/2018 at 16:36 point

Hey, a fellow pyro!  Actually I can get chemicals in small quantities in the US pretty easily but they watch what you buy and if you try and buy the wrong things, even over different orders they won't sell to you.  I have used willow charcoal for fireworks before, never straw.

On the oven, with the vermiculite is mass heat. essentially.  The heat can not escape so it stays hot in the inner drum.  Truthfully if I do it, I will probably just use bricks.  They are expensive but I find them used and go and fetch them.  Never heard of a food grade brick but the old ones I get are pretty much just sand and red clay.

  Are you sure? yes | no

matthewkleinmann wrote 11/07/2018 at 04:28 point

I have wanted to build a wood fired oven for a long time.  One of these years.  I have more room so I may go with bricks, though now you have me thinking with the drum.  If you can seal it off well from the elements, gardening vermiculite is a really good insulator with great high temperature properties and it is inexpensive.  I am thinking of something like a drum inside of a drum with that in between.  I wonder if a 55 gallon drum would fit inside a 275 gallon household oil tank.  The 55 gallon drums are getting harder to find these days but every time the city pushes out another block and people in the suburbs can get natural gas you see them getting rid of the old 275 gallon oil tanks.  I would make a good bonfire and bake the hell out of both the 55 gallon drum and the oil tank before using them.  God only knows what kind of toxic juice comes in the 55's.

BTW, if you like to cook outside, you should try making your own charcoal sometime.  I do that in one of the 55 gallon drums that has a C closure on the lid and I built a stand to hold it about 4 feet off the ground.  I fill it up with small pieces of hardwood and put it in the center of a big bonfire.  When it gets baking good, you can see flames from the wood gases billowing out the bunghole.  It is not an efficient process, but the charcoal is to die for.  The coolest part is the wood in the drum shrinks by about 1/3 in the baking process.  Give it a shot sometime if you like to cook outdoors.

  Are you sure? yes | no

Jan wrote 11/07/2018 at 08:15 point

Hi Mathew, thanks a lot for your input!
55 drums are more easily available here, that's what I used. You are right, you need to make a good hot fire in the drums, especially to burn off the outer paint.
I did not use bricks for two reasons: they're hella expensive in food grade quality and the thing gets even heavier then!

Your Idea does not include mass for heat storage right? You want to put a steel drum inside a big oil tanbk and insulate the space in between with vermiculite? Then the only mass what stores heat would be the thin steel drum...

@ making charcoal: I did this for a longer periodin my youth. We made charcoal for our pyrotechnics (willow and straw). Always amazing to see the reaction going. It was going self-powering at some point. At the end we turned the drum upside down to seal off air and prevent the charcoal from burning... But you know, times have changed, making fireworks (and getting all the chemicals) is hard nowadays, everything is on some list now...

  Are you sure? yes | no

Similar Projects

Does this project spark your interest?

Become a member to follow this project and never miss any updates