Close
0%
0%

I want a Laser Cutter!

My Home Laser Cutter Journey

Similar projects worth following
I got tired of having to schedule laser cutter time and going to my makerspace. I wanted my own laser cutter at home! These are my notes while studying, ordering, and then using my own laser cutter!

Beginners' Resources

Software (first two are a must have)

Shopping Links (search for 'co2 laser')

Reviews and Tips from Owners

  • Getting Control over a 50 Watt CO2 Laser Cutter from China by Erich Styger
  • Test cutting different hard woods by Just Josh rfpom
  • Control K40 using Raspberry Pi by NovaSpirit tech
  • Don Kleinschnitz Jr.  
  • Settings (just for ballpark, varies greatly from machine to machine)
    • The basic variables you control in operation are the power of the laser, and the movement speed of the head. You control the head speed through software, but the laser power with the control panel dial. You will use faster speeds and lower power for thin materials, and slower speeds and higher power for thicker materials. - Reddit K40 Wiki
    • Daniel Flanagan: 10 - 15 mA at 10 - 20 mm/s for cutting (never above 15, as suggested), but for engraving I feel like 4 - 10 mA at 100 - 200 mm/s was working for me.
    • Tony Hudson: Id say not fast enough 3mm about 12 as speed
    • Nigel Davies: I can cut 3mm in one pass at 10mms 10mA
    • Carlos Alberto: I cut 3 mm at 13 mah 11 mm/sec
    • Jan Erik Laiti I cut at 8mm/s and 10 mA
  • How to shorten the inside duct by Karl Laun
  • Keep water temp between 17-20C to prevent blowing out your tube - Starla Fox
  • K40 Whisperer > Raster settings > Scanline - start at 0.004 to start - you may have to up the power slightly but it will take half the time - John Bowley

Other Tips

Inspiration

  • "Impossible" Woven Laser Cut Celtic Knot

    Hari Wiguna01/28/2019 at 02:32 0 comments

    It's not perfect, but I'm happy with how this turned out.

    Material is EVA Foam from Michael's hobby store.  3mA power @ 6mm/sec.

    No photo description available.Practice run on cereal box cardboard.
    Yes, I cheated, it's laser cut in 13 pieces.  All the glued joints are hidden underneath the overlaps.

  • Self-Improvement

    Hari Wiguna01/19/2019 at 03:46 0 comments

    You know how 3D printers print stuff to improve itself?  I've just done that with my laser cutter :-)
    Nothing fancy, just a bracket to hold the smoke assist fan at an angle.

    https://www.thingiverse.com/thing:3370541

    FYI: Smoke assist fans are placed towards the front of the laser cutter to create an air flow towards the back of the laser cutter so smoke would get sucked up by the Exhaust Vent instead of lingering in the cutting area.

    image.pngimage.png

  • Vector Engraving

    Hari Wiguna12/25/2018 at 18:30 0 comments

    import svgwrite
    import math
    
    dwg = svgwrite.Drawing('test.svg', profile='tiny',width='100px',height='100px')
    
    a = 0
    n = 15
    x0=50
    y0=x0
    r=x0
    for i in range(0, n-1):
        a = 3.14*2 * i / n
        x = x0 + math.sin(a)*r
        y = y0 + math.cos(a)*r
        b=0
        for j in range(i+1, n):
            b = 3.14*2 * j / n
            x2 = x0 + math.sin(b)*r
            y2 = y0 + math.cos(b)*r
            print(i,j)
            dwg.add(dwg.line((x, y), (x2, y2), stroke=svgwrite.rgb(0, 0, 255, '%')))
    
    dwg.save()
    

  • $12000 Epilog vs. $400 K40 Laser Cutter

    Hari Wiguna12/25/2018 at 02:57 0 comments

    I decided to get Expanded Metal Sheet from HomeDepot while I wait for the honeycomb bed.

    Box on left is cut by a $12,000 Epilog Mini, one on the right is by my $370 K40. I ran the engrave at 300mm/sec @ 5mA, vector cut at 5mm/sec @5mA (one pass).
    The Epilog is definitely better, but I'm hopeful that with time I will be able to get closer to the Epilog's result with the K40.

  • Poorman's adjustable laser bed

    Hari Wiguna12/24/2018 at 17:39 0 comments

  • Trimming the exhaust vent

    Hari Wiguna12/24/2018 at 17:25 0 comments

    The exhaust vent inside the K40 juts in quite far and actually obscures the laser path when Y is zero.

    Unfortunately taking out this vent to trim it on the bandsaw require removal of the gantry that is in the 

    way, in turn this would require re-aligning mirrors.  I decided to do it differently.

           Success!

    Ooops...

    Incidentally, later I discovered that I did not trim enough to clear a 3D printed air assist nozzle and had to trim for the second time.  So, if you decide to do this, be more generous in trimming. :-)

  • K40 Exhaust Fan Hack

    Hari Wiguna12/24/2018 at 17:02 0 comments

    Sorry, I don't remember where I learned this from, but someone noticed that there is quite a gap between the fan and the cage on the stock exhaust fan.  Adding a nut decreases that gap and hopefully improves efficiency of the fan.


    Had to trim the top of the fan to screw the plastic cap in.
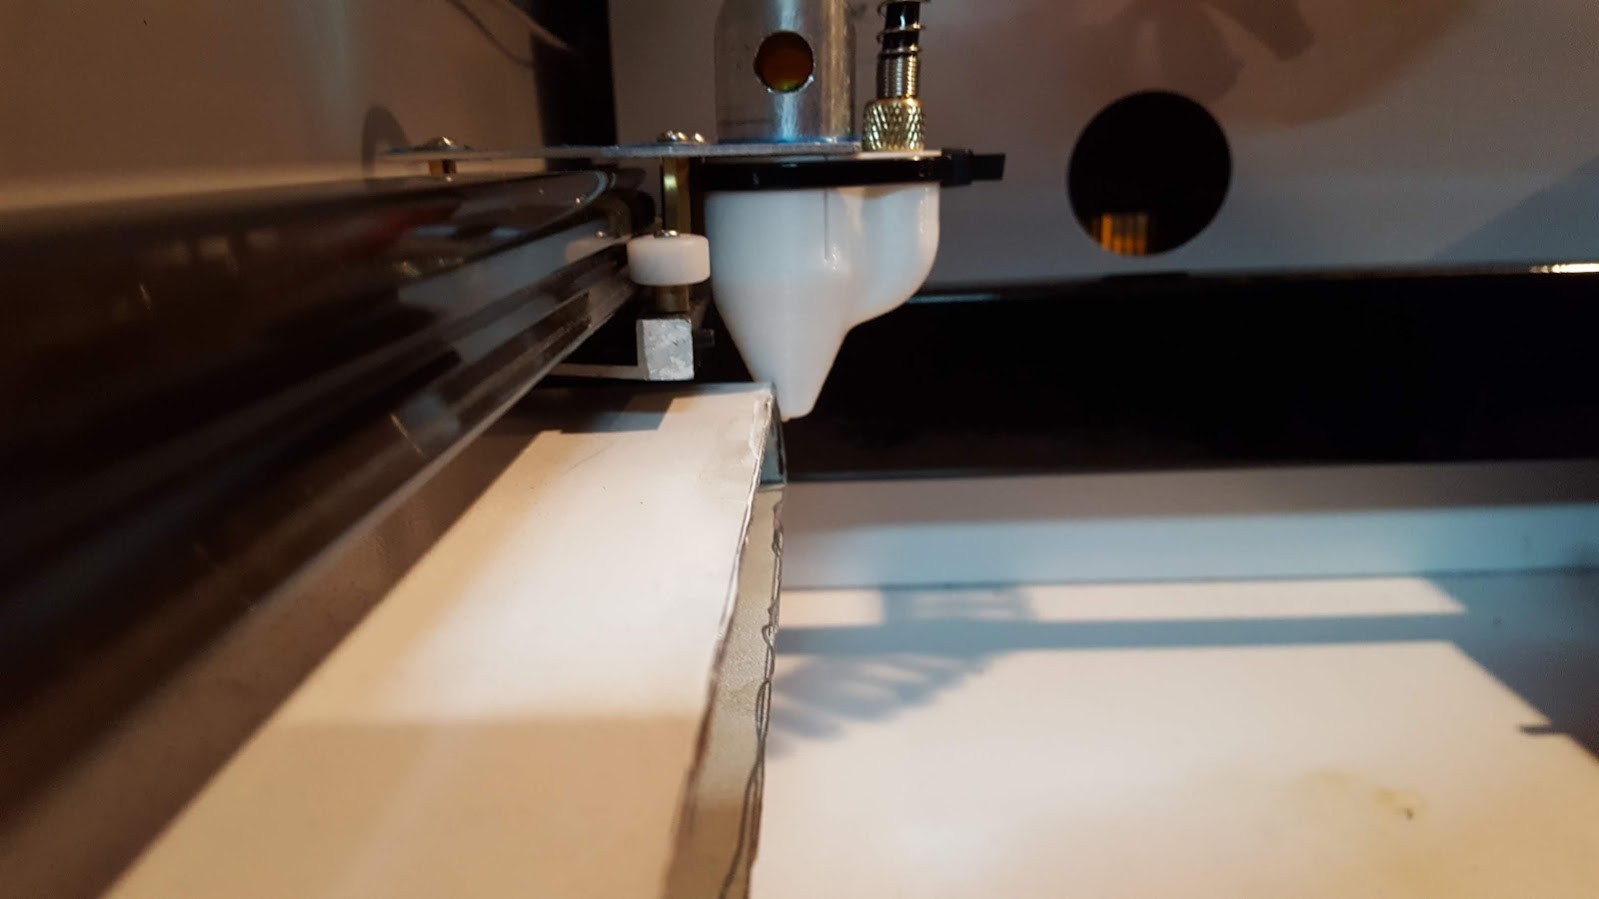
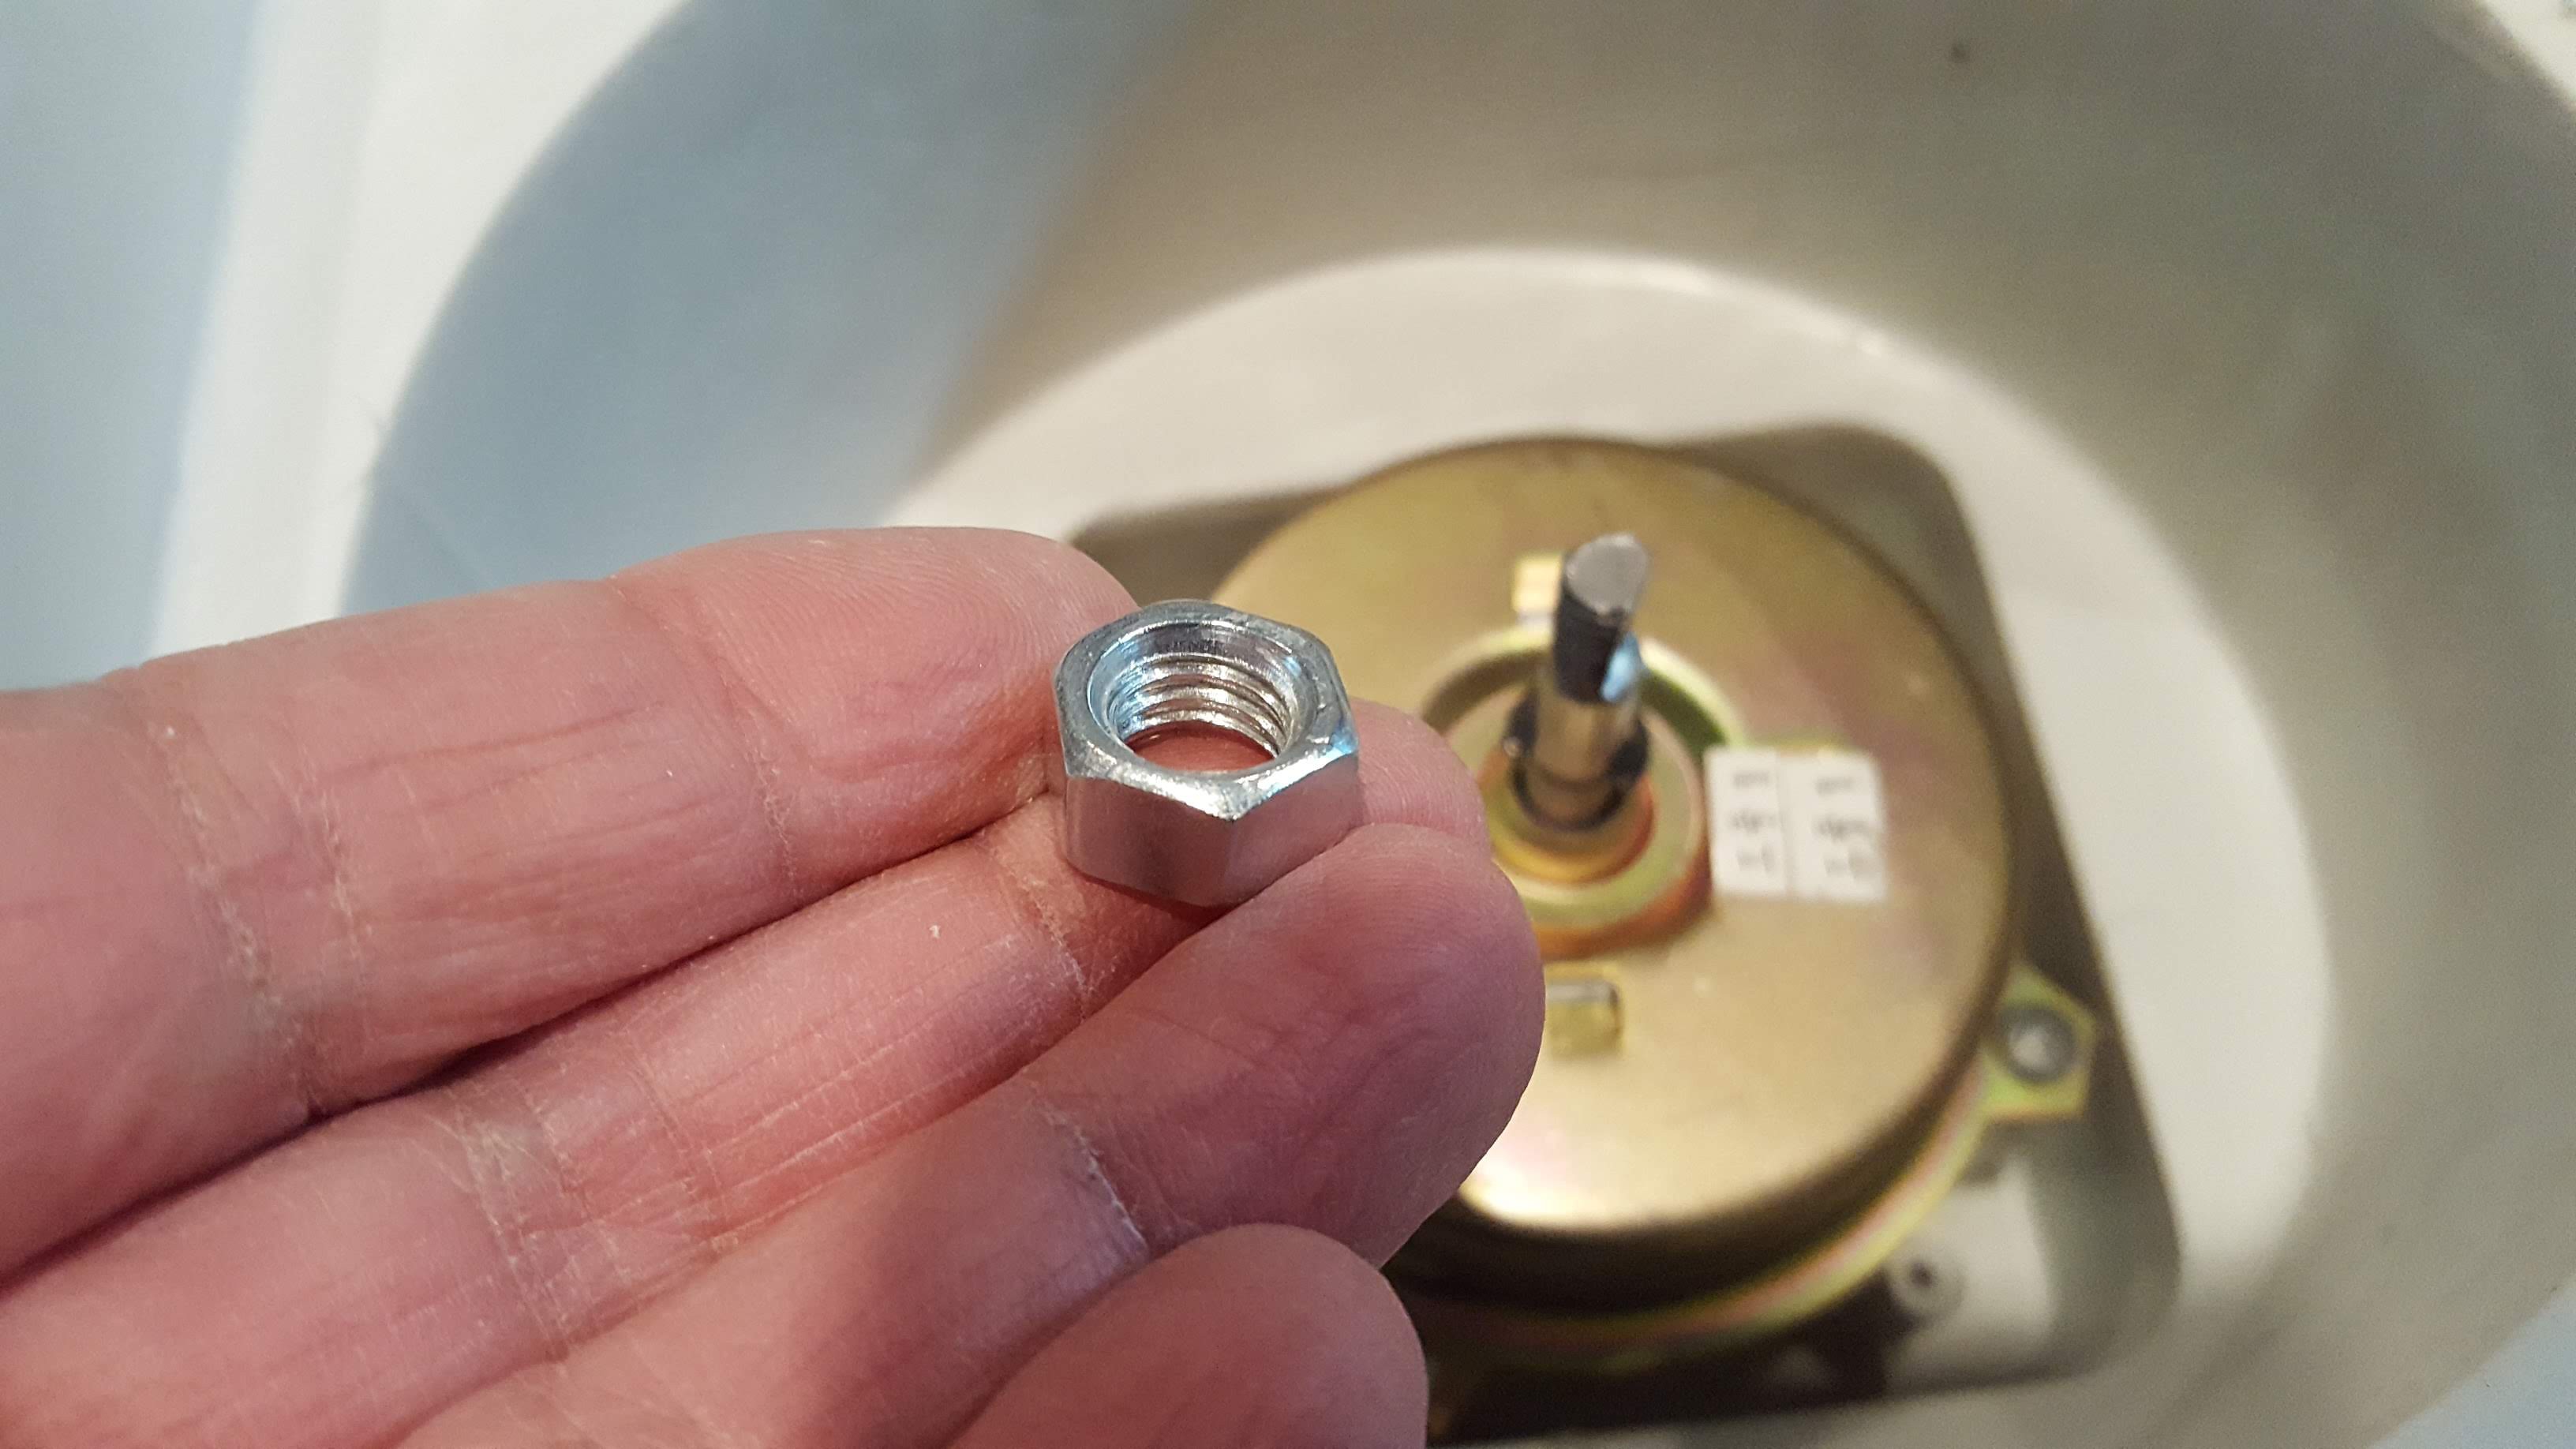
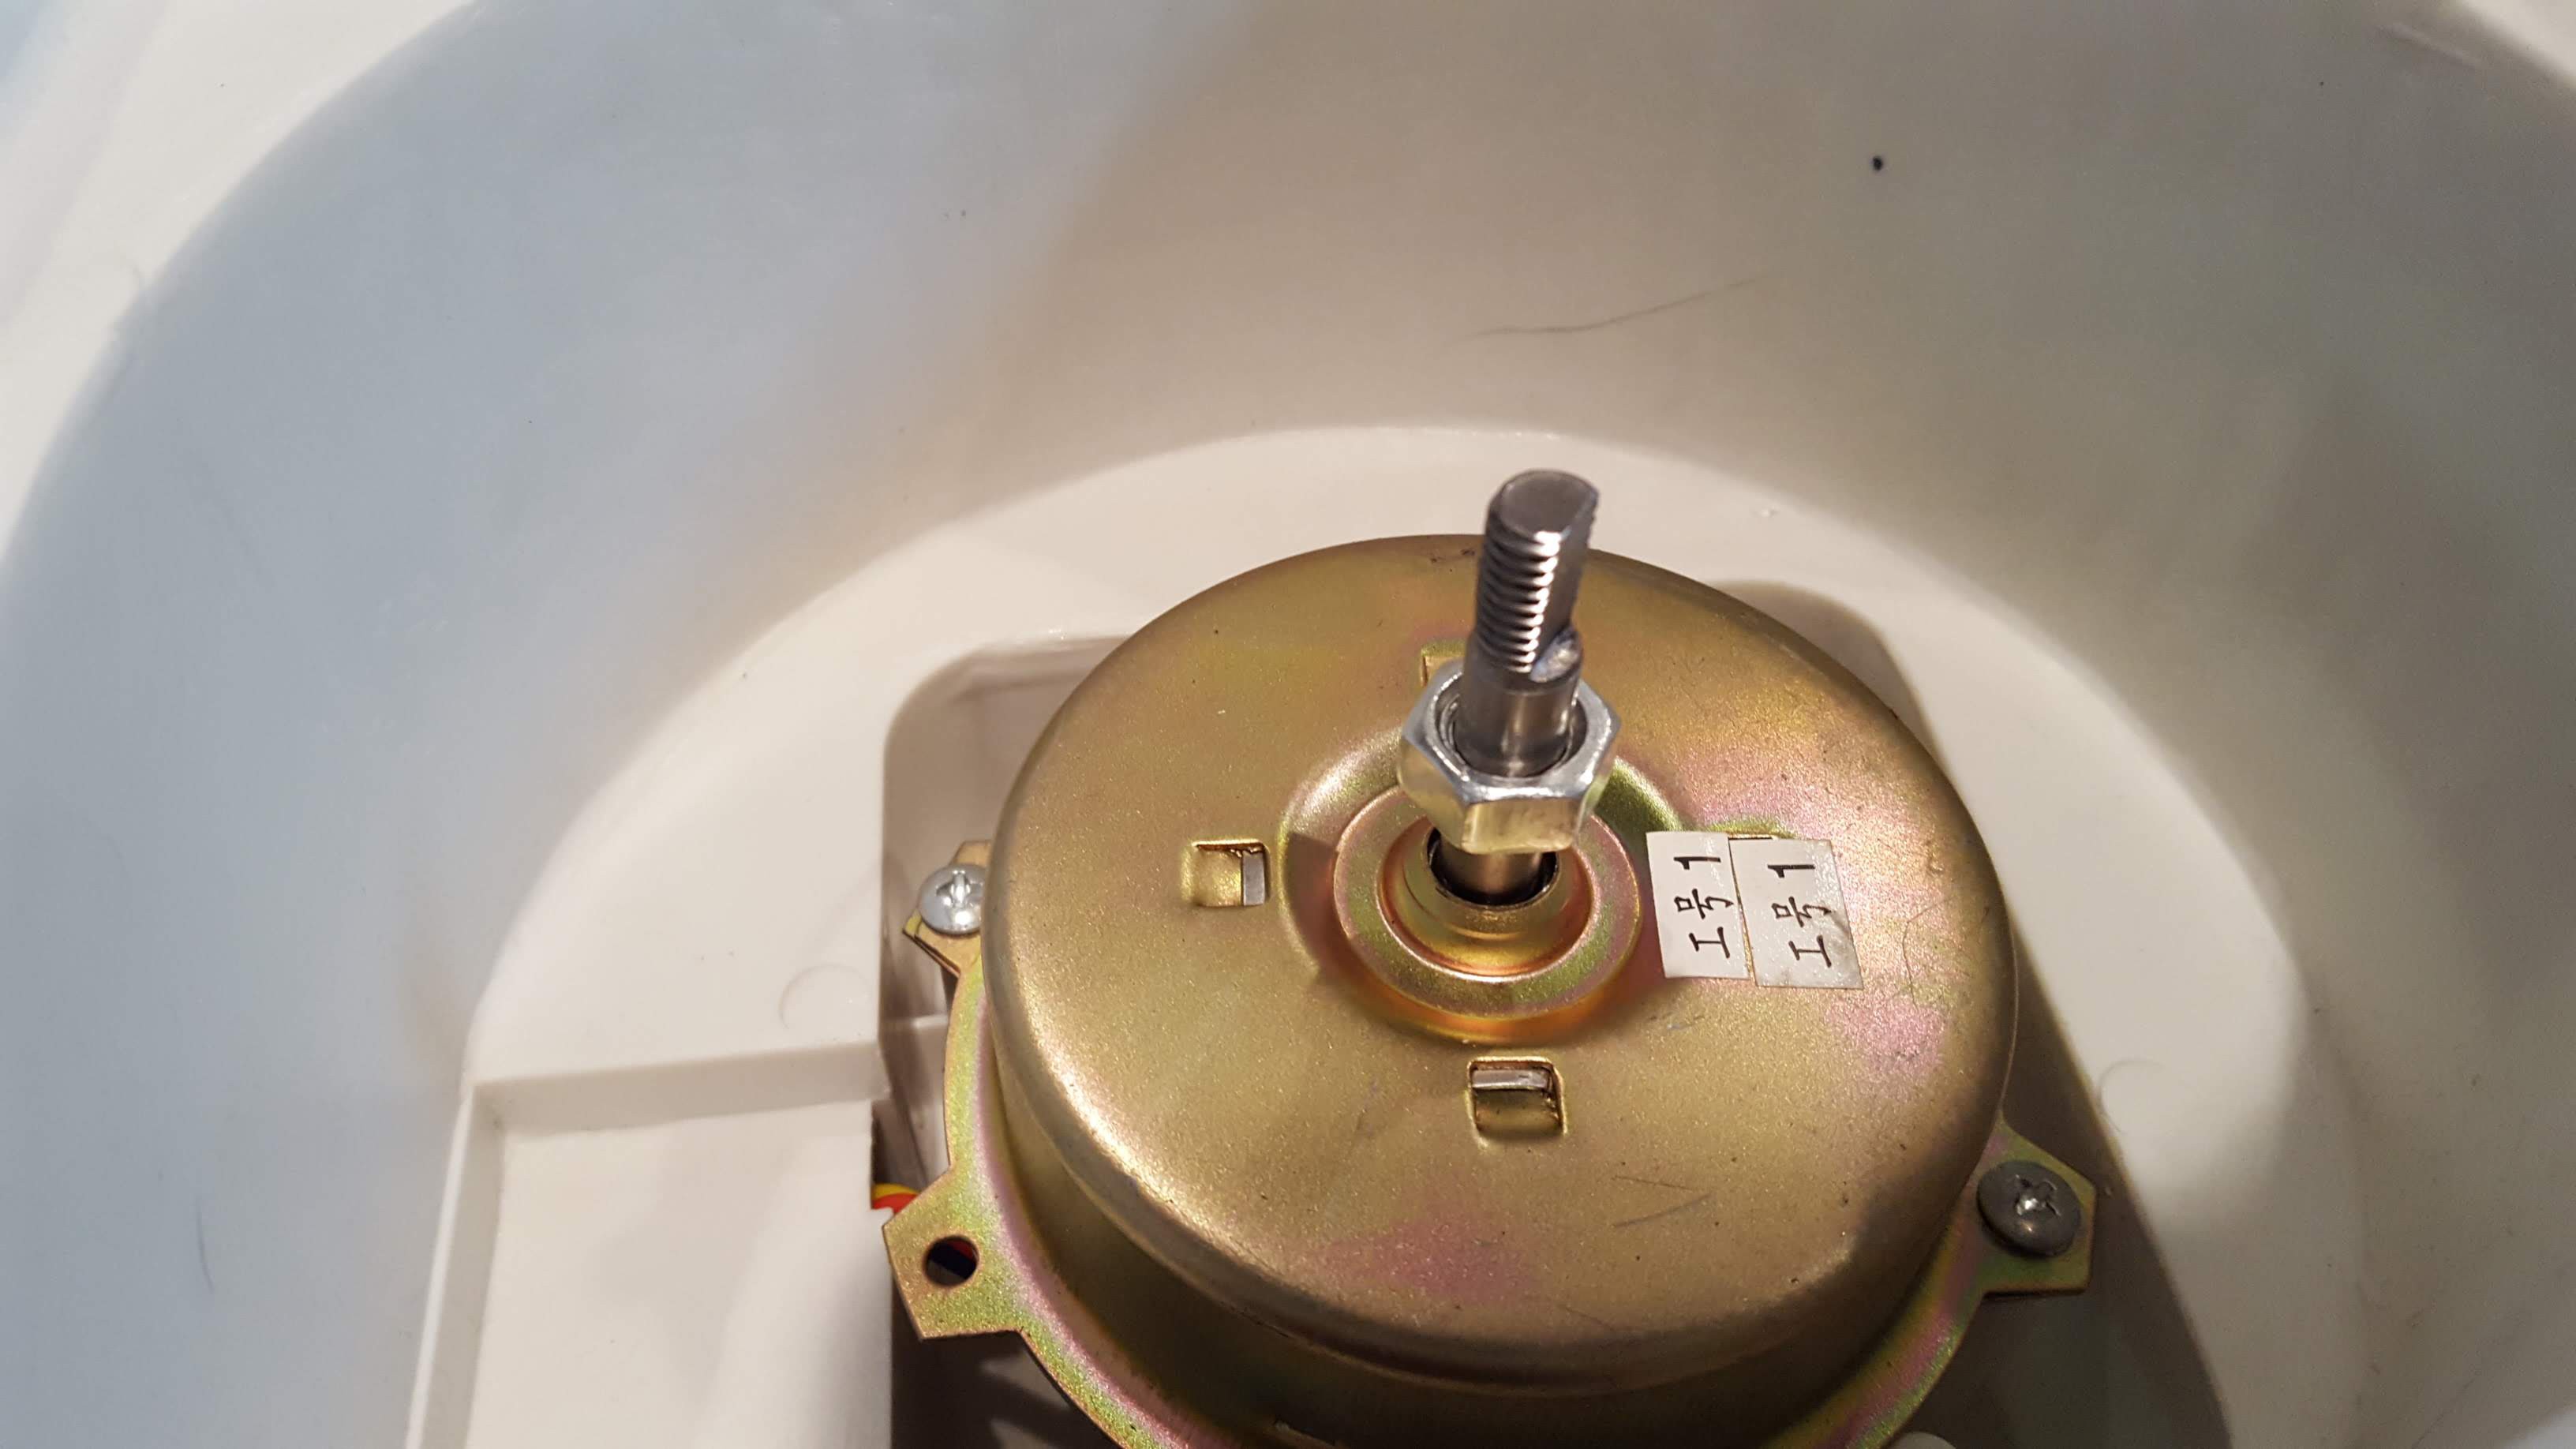
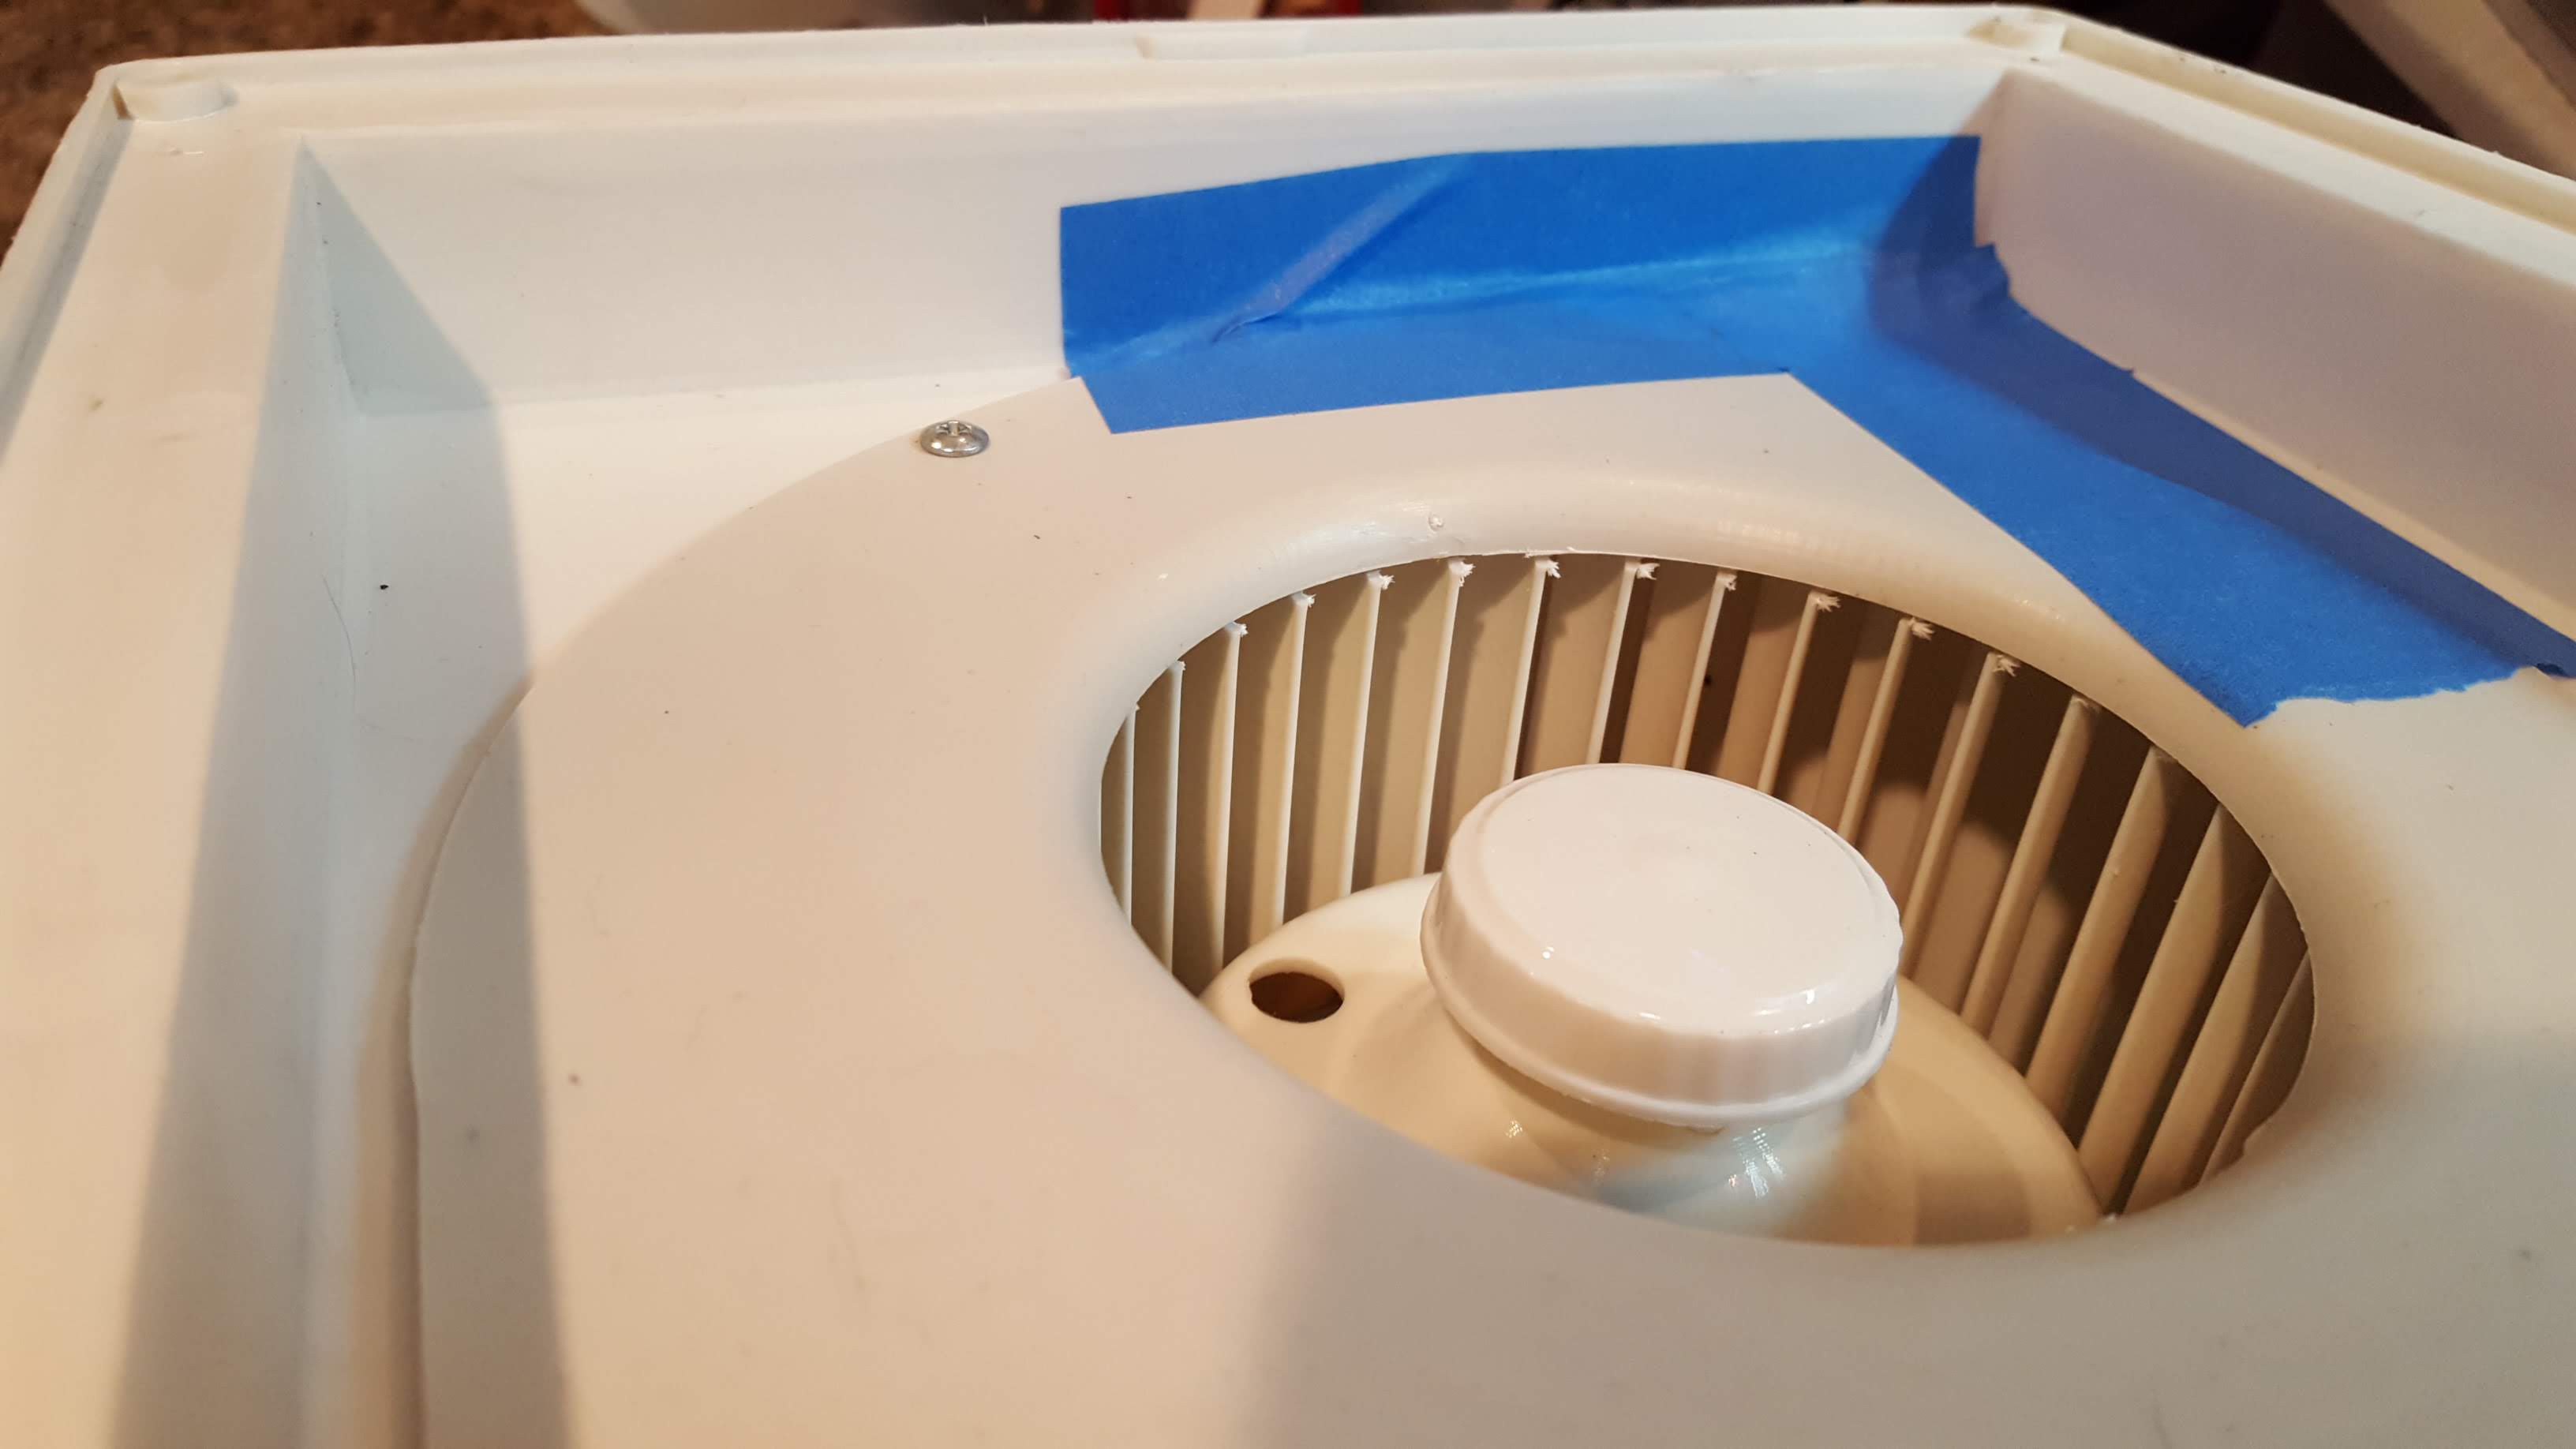
Nut was just a bit too tall.  I had to shim the cover with two cardboard pieces so the fan would clear the cover.
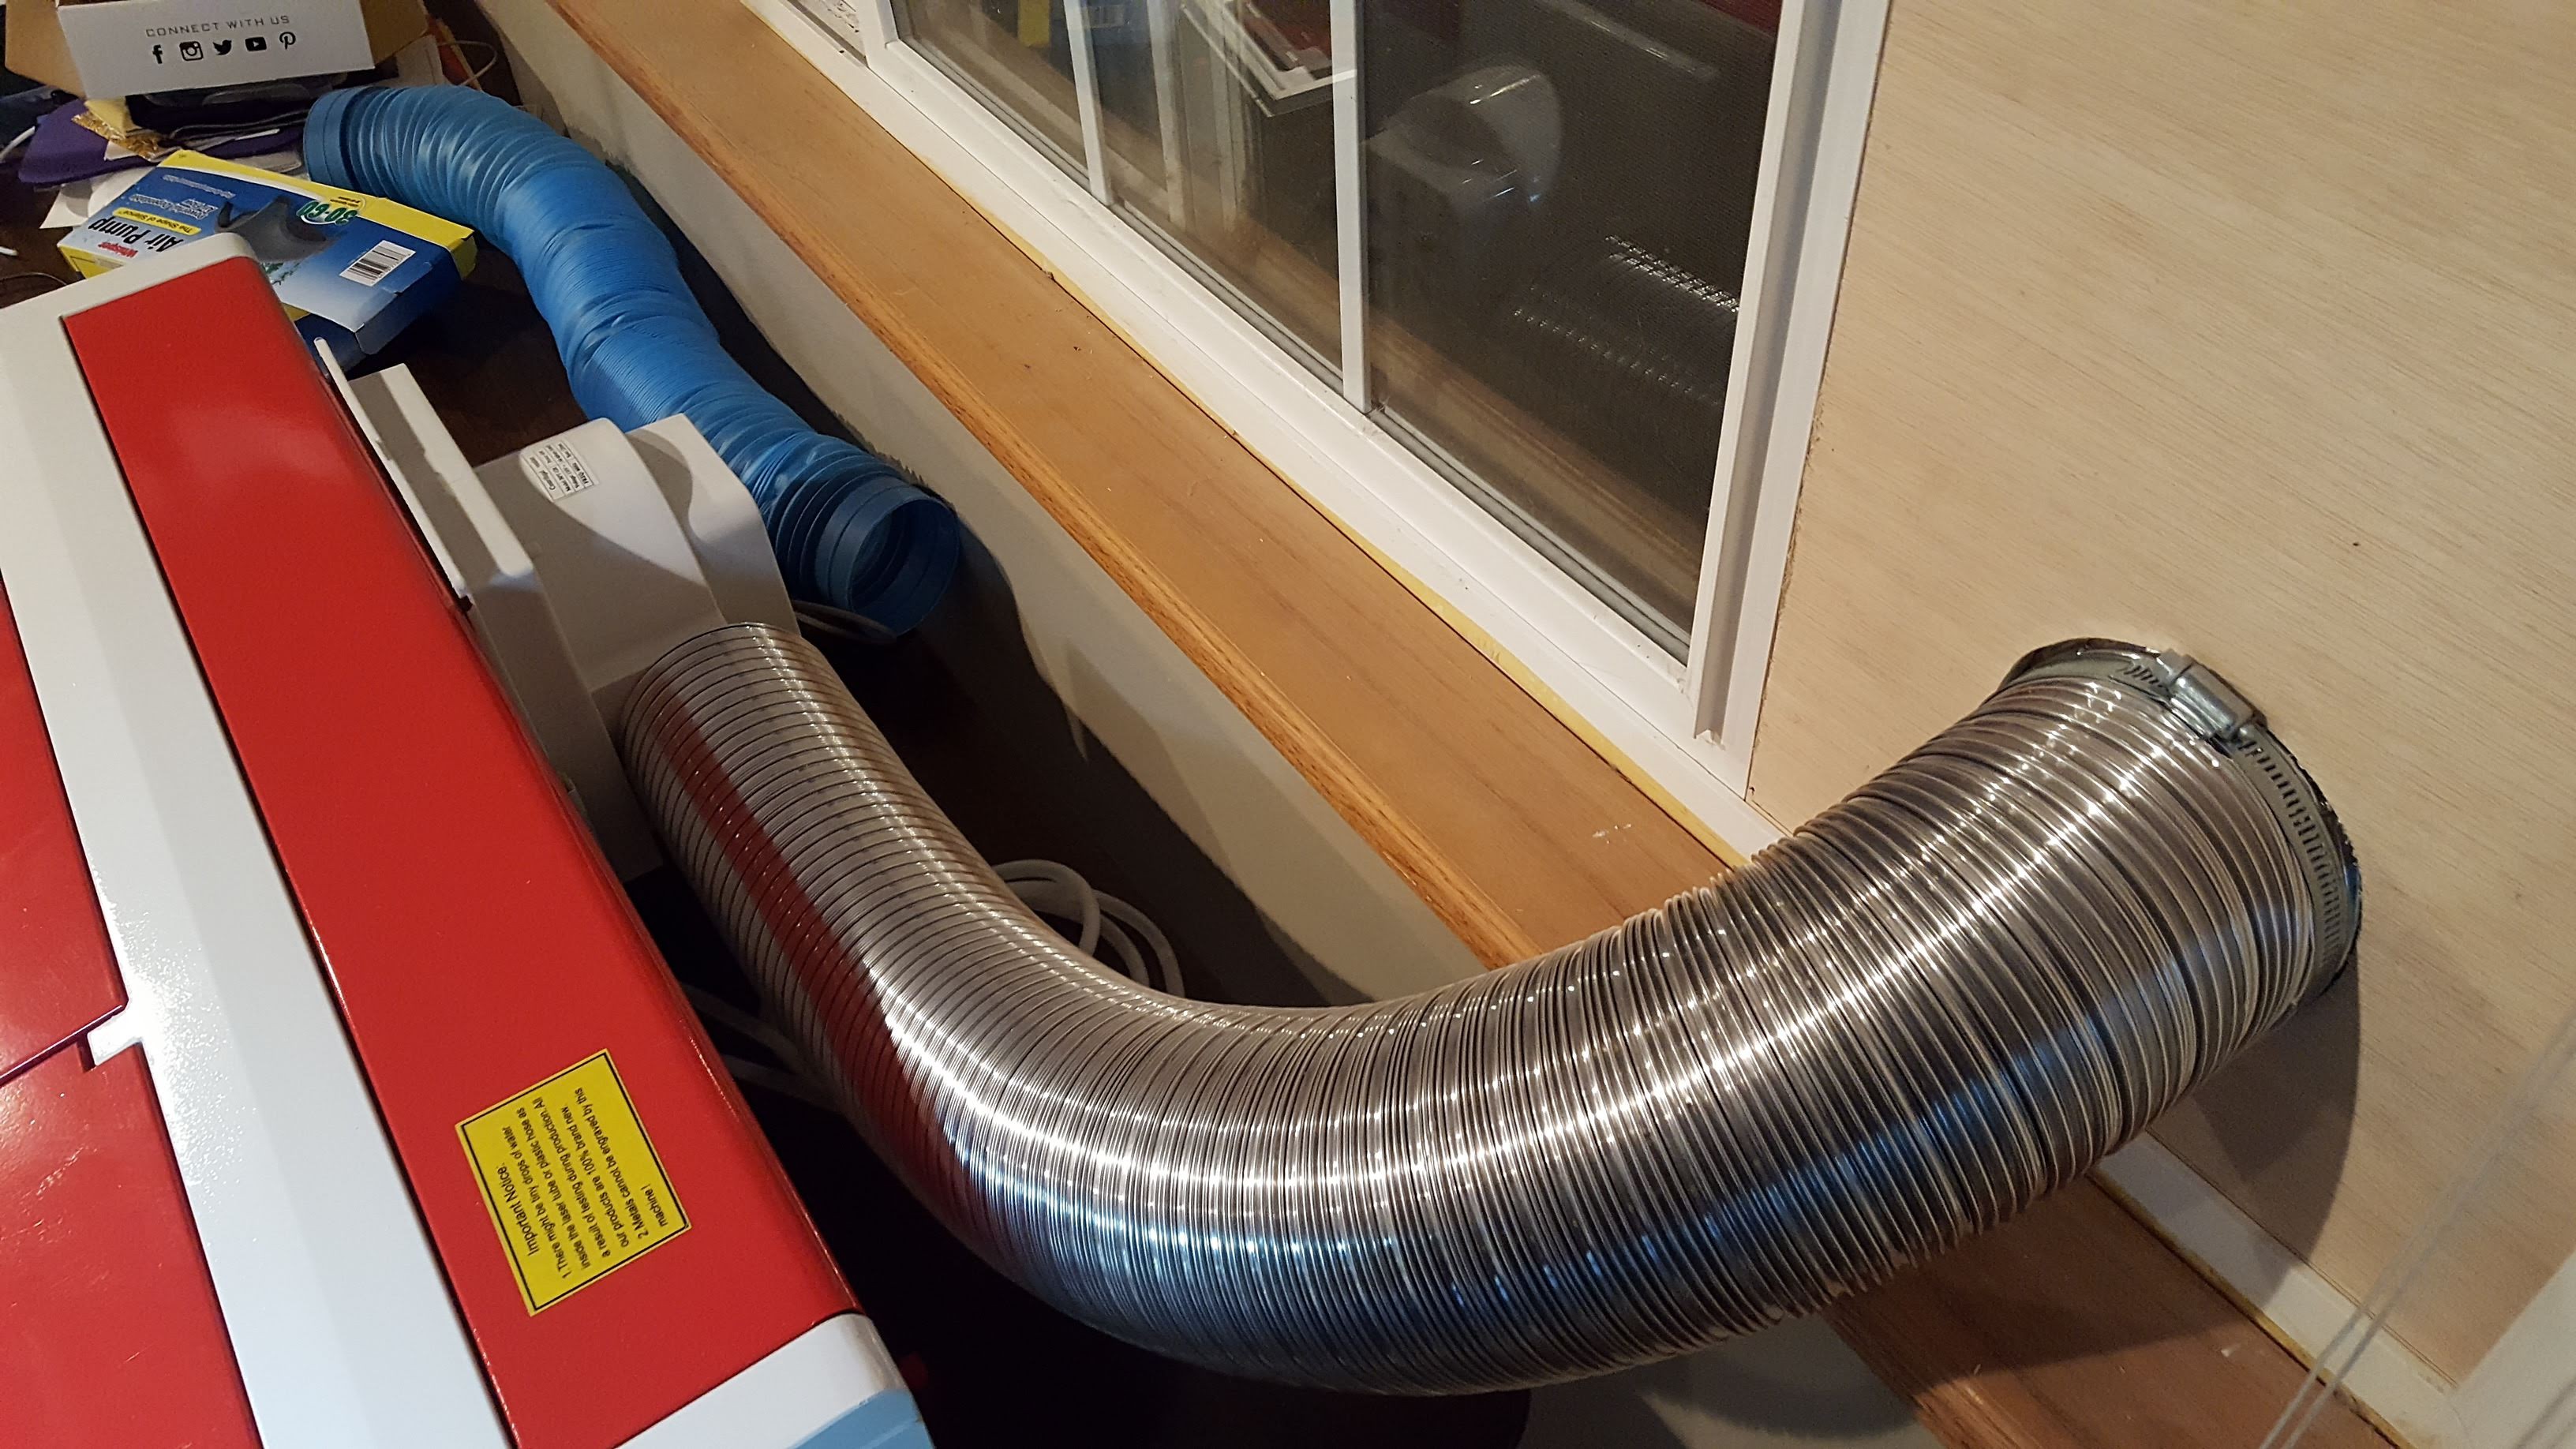
  • First Cut and Engraving

    Hari Wiguna12/24/2018 at 16:49 0 comments

  • Non-destructive window vent

    Hari Wiguna12/24/2018 at 16:42 0 comments

    Before I start punching holes on the wall, I want to make sure that this laser hobby is not a passing fad for me, so I came up with this temporary vent solution.  I cut foam core pieces to perfectly seal any gaps below the wood and also between the two sliding window panes.


  • Suggested Mods

    Hari Wiguna12/01/2018 at 02:36 0 comments

    • [x] Shortened exhaust duct (gives you a lot more room)
    • [x] Install 100-150CFM fan near the outdoors to suck instead of push the air through the pipe.
    • Added a coolant temp gauge
    • Added some additional outlets and fittings to the back (12V and air assist)
    • Found a hose adapter on Amazon the fit the duct slot perfectly
    • Added a stylish cabinet handle (Menards) to lift the cover
    • [x] Added an air assist nozzle
    • Upgrad mirror to the head assembly
    • [x] Removed the stock bed
    • Installed an adjustable height one (Thingiverse)
    • [x] Added an air pump for the smoke assist and a 110v ventilation fan for smoke removal
    • Added some 5v and 12v power supplies inside the electronics section to power various accessories
    • Added some additional LED lights for better visibility
    • [/] Made a cable chain (Thingiverse) to support the air assist hose and a support for the cable chain
    • Made a “laser” spot pointer that shows exactly where the beam will hit

View all 12 project logs

  • 1
    Examine and Install

    Laser is here! Now what?!

    • [x] Make sure all the promised parts are included.
    • [x] Visible external damage? enclosure, buttons and knobs (mine just spins freely - replaced with knob with set screw), outlets secure, broken window, etc
    • [x] Unscrew the rear lid and check to make sure laser tube is not cracked.
    • [x] Unscrew front right panel, check wiring for loose connections, especially grounding.  Case should be electrically connected to actual earth ground on the three prong receptacle so if any high voltage accidentally touch the case, it would go to ground instead of electrocuting you!
    • [x] Unscrew the acrylic window, remove the protective paper, re-mount acrylic window.
    • [x] Optional - remove spring loaded clamping bed
    • [x] Mount the rear smoke fan, exhaust it to the outdoors. We will plug this onto the laser soon, but for testing just plug the fan to wall outlet.
    • [x] Setup the water cooling bucket, cooling tubes, submerge the pump in 10 liter (2.8 Gallons) of distilled water and one tablespoon bleach to prevent algae. We will plug this to the laser soon, but to test, plug it to wall outlet. There should not be any air bubbles in the tubes.
    • [x] Plug fan and pump to the rear of laser, so both would turn on whenever the machine is on. 
    • [ ] Clean the mirrors?
    • [x] Have water sprayer nearby.
    • [x] Have fire extinguisher nearby.
  • 2
    Install Software

    Most people do not like the included software. Download and install these two FREE software instead:

    • K40 Whisperer - Alterative software to control the laser cutter (FREE)
    • InkScape- Alternative software to draw/edit your designs (FREE)
  • 3
    First power up
    • Before plugging it in, set the power switch to OFF
    • Make sure the laser toggle button is off (raised rather than depressed)
    • Plug it in, set the power switch to ON.  Fan and pump should run.
    • Run the water for at least a minute until there are no bubbles in the tube or laser.  If necessary, prop the right side of the laser to remove bubbles. Others have suggested a few drops of dish soap to break surface tension.
    • Follow HP Persson's excellent mirror alignment instruction. I was lucky that my laser arrived fairly well aligned!

View all 5 instructions

Enjoy this project?

Share

Discussions

RandyKC wrote 01/13/2020 at 09:54 point

This is an incredible resource you’ve created. I’ve got my laser in a box ready to unpack when I found your project. 

Thank.you.very.much!

I read Don’s blog on coolant. I was going to add car antifreeze as the coolant. Sounds like capacitive coupling is a problem. I live in a cooler region where the temperatures get below freezing during the winter. Are you in a similar region and, if so, how do you handle that?

  Are you sure? yes | no

RandyKC wrote 01/14/2020 at 06:26 point

lots of broken Facebook links (reason I don’t like Facebook) in the inspiration section:

Inspiration

Free SVG Image Gallery-OK
Topographical World Map by Prime8-OK
canvas. Spray pink paint, let it dry. Then spray red paint. Let it dry. Then spray black paint. Engrave. by Adam O'Brien - Facebook link broken
Tips on etching edge-lit acrylic by Dominique Borer - Facebook link broken
Layzor - Kit to completely upgrade the K40 by ManMadeMayhem -OK
Custom engraved work gloves by Eduardo Cervantes  - Facebook link broken
Boxed Set of Christmas Ornaments by Alin Draghiceoiu - Facebook link broken
Lasercut toys by Ashley M. Kirchner  - Facebook link broken
HolgaMods - making a living using K40 and 3D-printing by Randy Smith - OK
Awesome Edge-lit Artworks by David Da Costa & Be Steve  - Facebook link broken
3D lasercut mandala by TheGorgonaut -OK
Jigsaw Puzzle Maker by  Draratech - OK

  Are you sure? yes | no

not jason wrote 01/17/2019 at 16:22 point

this has home tatoo almost written all over it

  Are you sure? yes | no

sunny wrote 12/06/2018 at 00:58 point

Although I also want K40, But i don't know what to do with it. It's like I bought a 3D printer and now it's seldom used.

  Are you sure? yes | no

Hari Wiguna wrote 12/06/2018 at 13:51 point

A laser cutter is a tool, just like a soldering iron is a tool. Neither comes with inspiration.  I believe inspiration comes from other inspiration.  It's a good thing you're reading Hackaday.  There are many great projects here that hopefully will inspire you to make something similar or better (using a laser cutter or your 3D printer).

  Are you sure? yes | no

davedarko wrote 12/05/2018 at 13:00 point

Thank you for sharing all this, Hari! I'm sure many people go through this process and find this project very useful :)

  Are you sure? yes | no

Hari Wiguna wrote 12/05/2018 at 14:27 point

Hi Dave!
I did it mostly to organize what I learn reading facebook groups, watching YouTube, etc.  The information is out there, but not easy to find.
Do you have a laser cutter?

  Are you sure? yes | no

davedarko wrote 12/05/2018 at 16:09 point

I'm still debating on getting one of the 40W Laser cutters :)

  Are you sure? yes | no

Jan wrote 12/05/2018 at 16:44 point

@davedarko
"I'm still debating on getting one of the 40W Laser cutters :)"
You know the German phrase "Haben ist besser als brauchen", right? :D

  Are you sure? yes | no

davedarko wrote 12/05/2018 at 17:05 point

hehe, that's valid for a lot of things in my lab

  Are you sure? yes | no

KJoh wrote 11/27/2018 at 00:43 point

>> schedule laser cutter time

I hear ya, bro.  You must go to the same makerspace as me.

  Are you sure? yes | no

Hari Wiguna wrote 11/27/2018 at 02:38 point

Ha! Yeah, I'm sure I would be disappointed at the performance of whatever I could afford at home, but being able to use it whenever I want would be so liberating.

  Are you sure? yes | no

Similar Projects

Does this project spark your interest?

Become a member to follow this project and never miss any updates