Close
0%
0%

3D printed rodent stereotaxic device

A 3D printed stereotax

Public Chat
Similar projects worth following
Stereotaxic devices are used to immobilize animals during surgery. Typically they are made of machined metal and are high-precision devices. We wanted to explore whether it would be possible to make one with 3D printing. The advantages of a 3D printed stereotax are a much lower cost, as well as increased flexibility for adding new functionality. For instance, we built a "downdraft" table right into this device for scavenging anesthetic gasses. Aside from the 3D parts, this costs ~$8 to build, with almost all of that cost being the fancy thumb screws :)

Update March 2019: the thumbscrews are no longer the most expensive part. In the photos I've added an aluminum breadboard base which runs ~$90. I added this base to give the stereotax some weight and stability. It's not critical that you use a fancy breadboard though, any base will work.

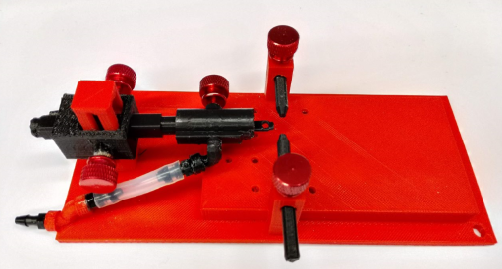
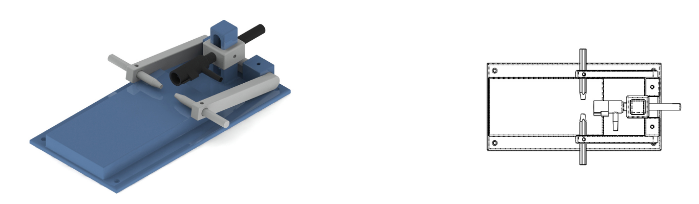
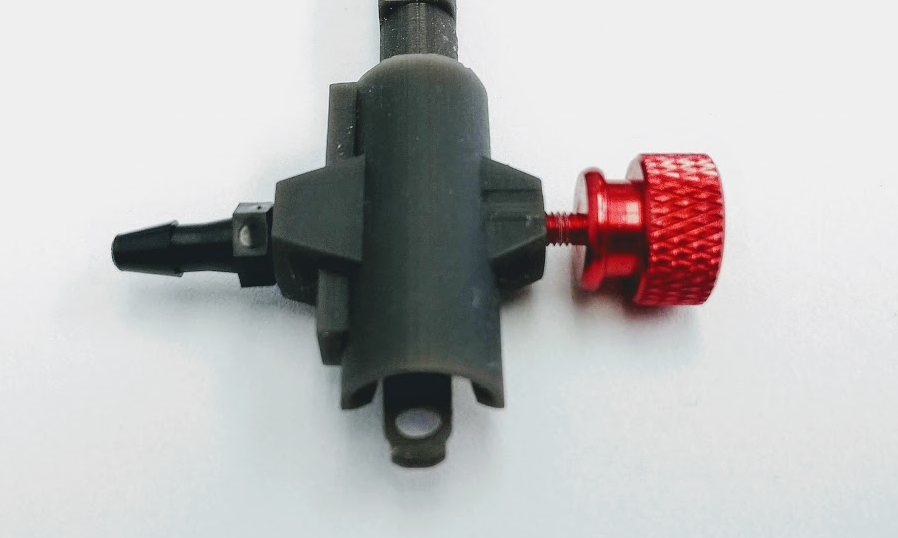
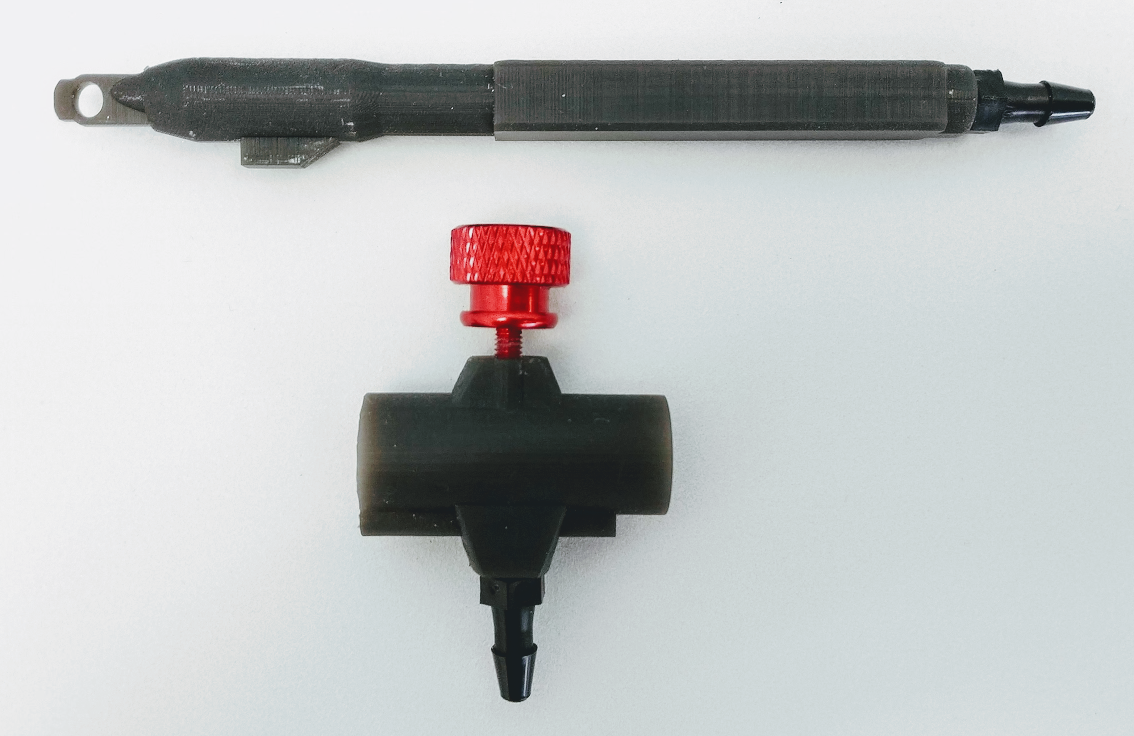
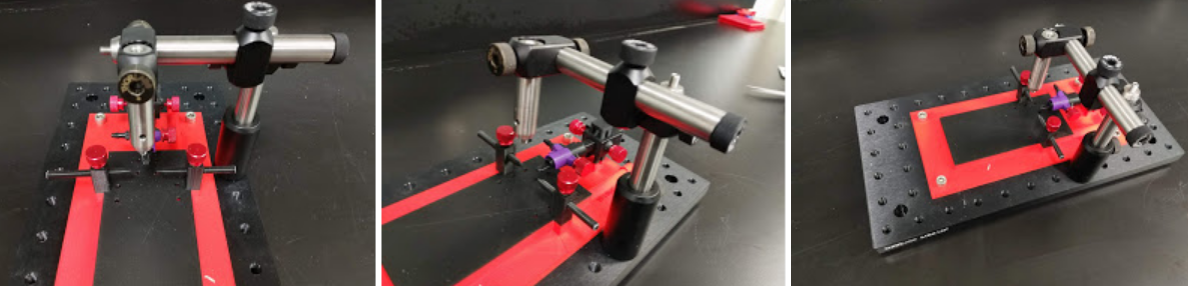
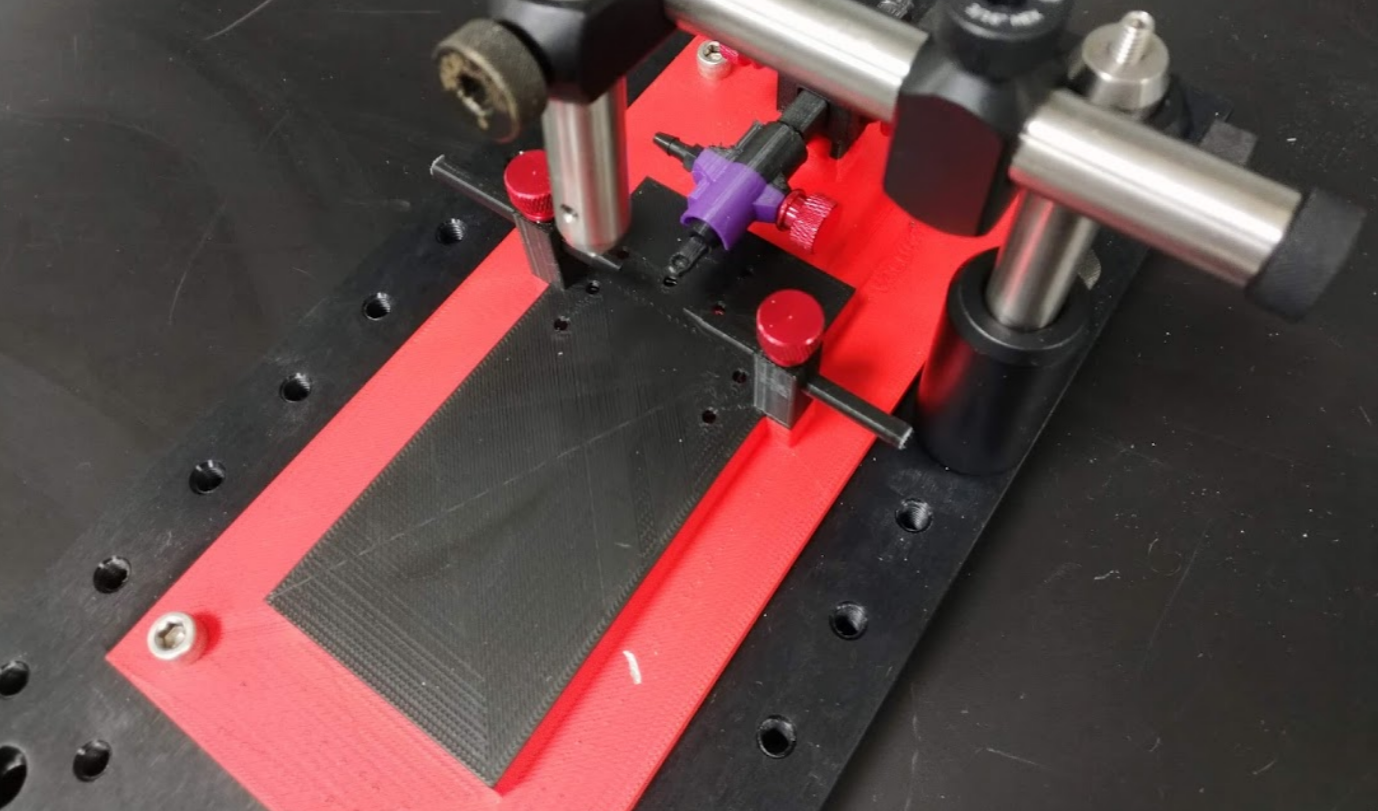
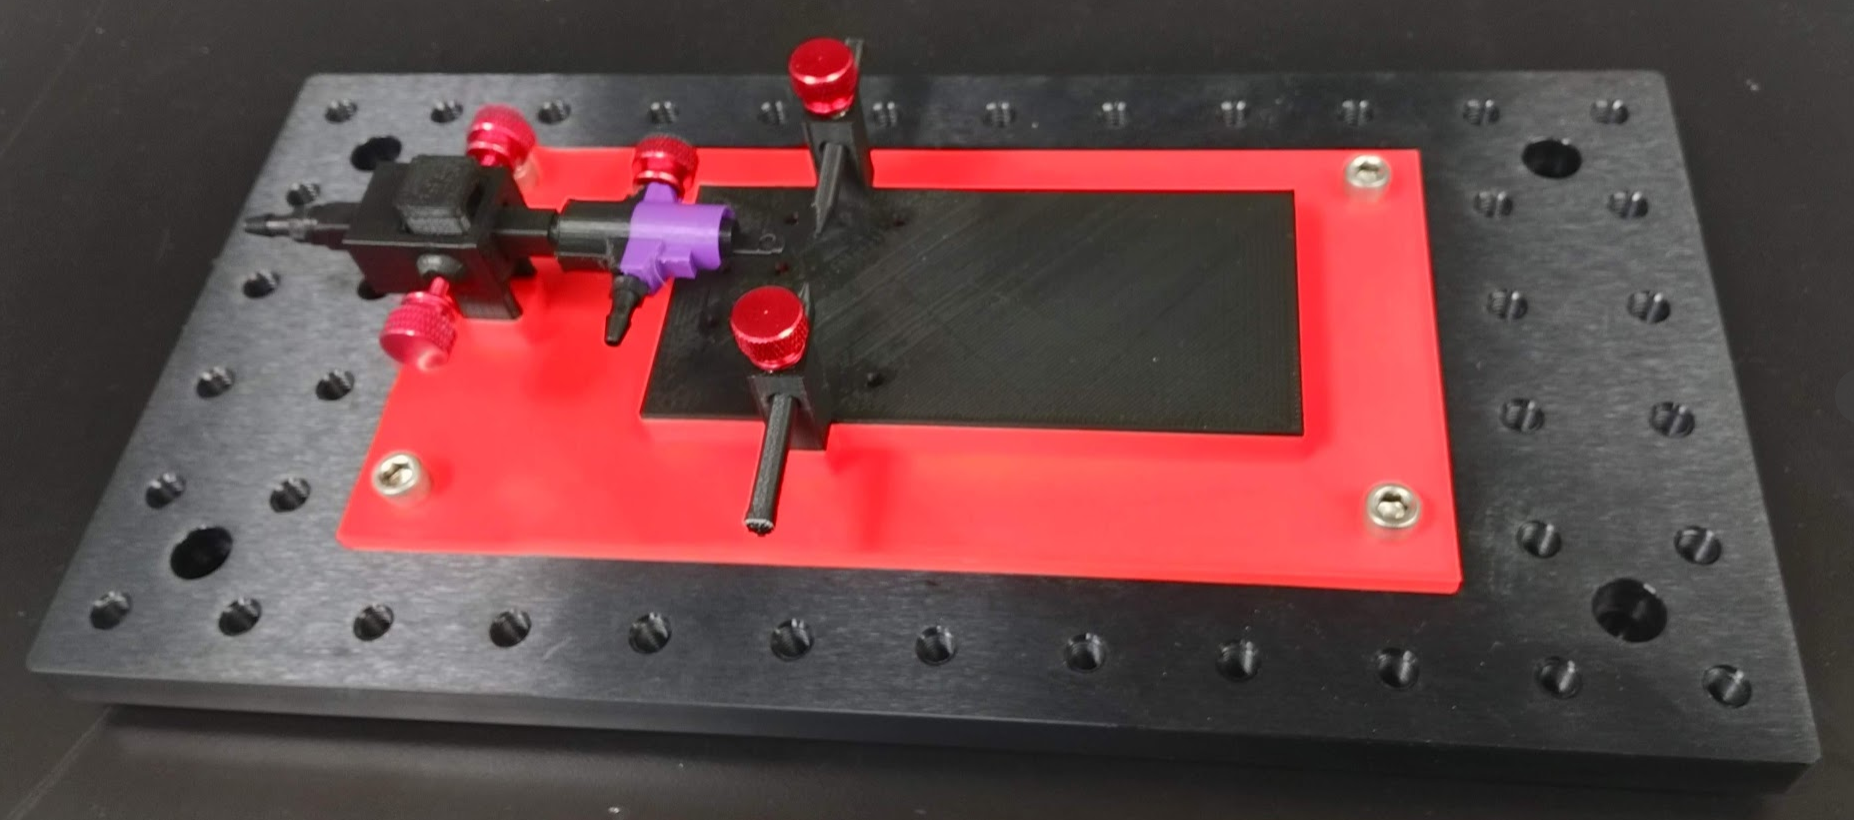
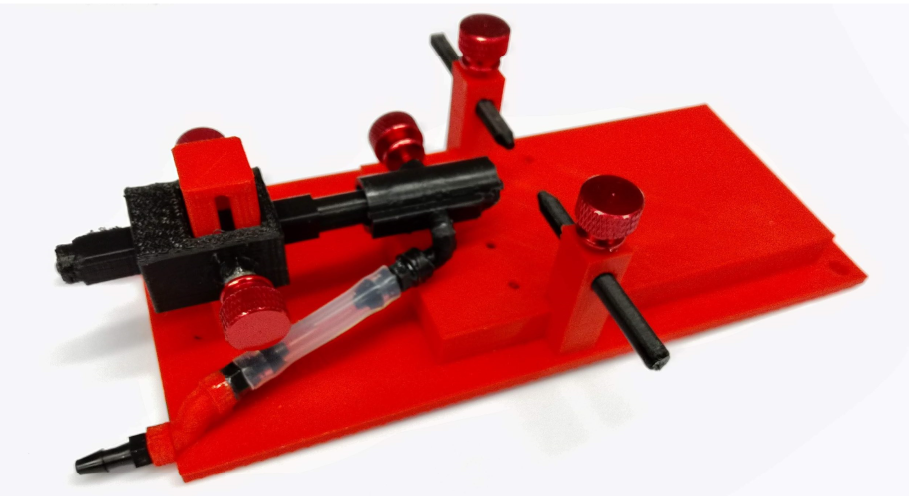
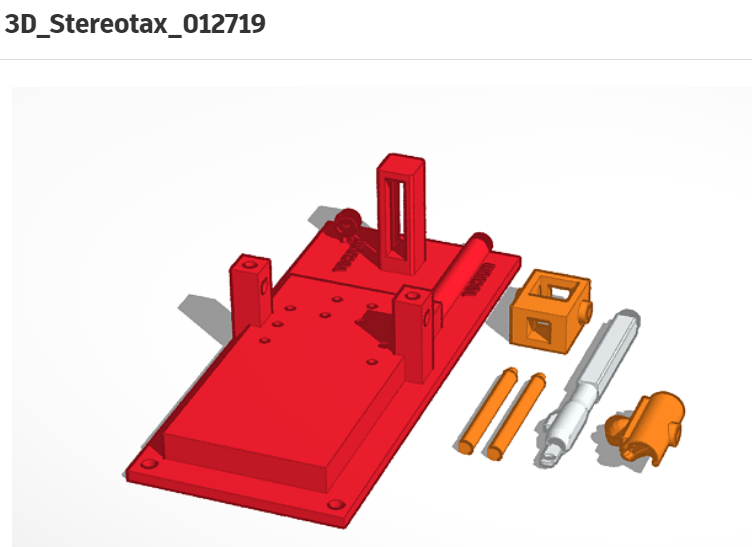
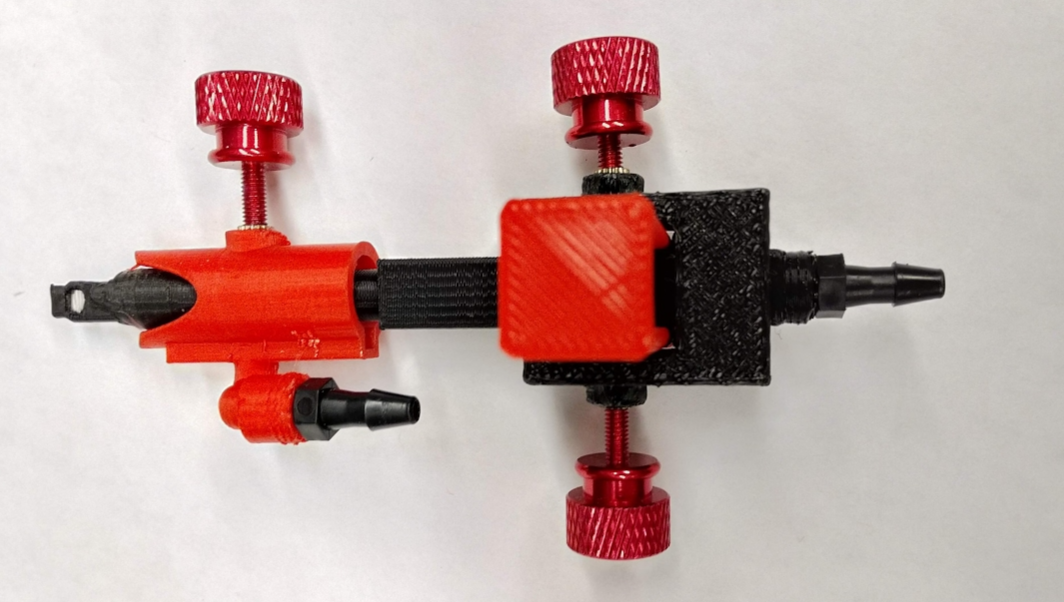
This 3D printed stereotaxic device was designed to be simple, modifiable, and low profile.  It includes a gas anesthesia mask which has a vacuum line attached to the mask, as well as a mini down-draft table below the animal to scavenge excess gas.  

Disclaimer: your printer might not print air-tight parts, so if you use this with anesthetic gasses make sure to monitor for leaks - if you can smell the anesthetic gas it means there's a leak and you should stop using it!  Coating the parts with acrylic or epoxy may reduce leaks. 

This project is released under the terms of the Creative Commons - Attribution - ShareAlike 3.0 license:

human readable: https://creativecommons.org/licenses/by-sa/3.0/
legal wording: https://creativecommons.org/licenses/by-sa/3.0/legalcode

This project was based on an earlier design by John E Martin that was generously shared with me by the author.

3d-printed-rodent-stereotaxic-deviceV2.zip

V2 offers: Stability improvements Replacement of plastic threading with nuts Elimination of need for tubing connectors by printing the t-barb parts Allowing for breadboard fixation (imperial and metric) Allowing for holding various sizes of tubing Removement of the secondary air removal (eases printing) A recess for physical monitoring (ex: temperature sensor) More information: https://optogeneticsandneuralengineeringcore.gitlab.io/ONECoreSite/projects/AnestesiaSurgerySystem/

x-zip-compressed - 7.69 MB - 11/11/2019 at 16:30

Download

3D_stereotax_022319.zip

Updated design (Feb 2019)

x-zip-compressed - 293.37 kB - 02/23/2019 at 19:03

Download

3D_Stereotax.zip

STLs for 3D designs (January 2019)

x-zip-compressed - 459.26 kB - 01/20/2019 at 17:39

Download

View all 6 components

  • Stereotaxic clamps and accessories!

    Lex Kravitz10/10/2019 at 17:07 0 comments

    I've designed a few stereotaxic clamps for holding a drill or other equipment.  Editable 3D files are available here!


    These will require a few metal parts to put together.   The M2.5 thumbscrews and brass inserts, and 8mm steel rods (~$3 each on Amazon).

    Assembled drill clamp:

    Stereotaxic clamp


    8mm to 6mm rod clamp:

  • 3D resin parts

    Lex Kravitz04/02/2019 at 18:25 0 comments

    We've recently gotten a sweet resin printer (the EnvisionONE from EnvisionTec) and it's producing amazing parts.  I printed the gas mask and bite bar and they are coming out much nicer in resin.  The threaded holes took the 1/8" threading perfectly with zero post-processing.  There are multiple online services that print parts in resin if you'd like to try without purchasing a printer.


    Lastly, if you've read this far and want some resin parts to try please drop me a line and I'll print some and mail them to you :)

  • Manipulator

    Lex Kravitz02/28/2019 at 05:22 0 comments

    I've started thinking about manipulators for this stereotax.  There's a good review on open-source approaches for manipulators here:

    https://www.researchgate.net/publication/327737857_Approaches_to_Open_Source_3-D_Printable_Probe_Positioners_and_Micromanipulators_for_Probe_Stations

    I doubt I'll design my own, but it might be possible to bolt one of the open-source designs in that paper onto the side of this stereotax.  The aluminum base-plate is easy to mount things on.  Here are some photos of the 3D stereotax with some ThorLabs optical posts mounted to the base plate:

  • Updated design!

    Lex Kravitz02/23/2019 at 19:09 0 comments

    Based on testing information from Niko Massaly (it works!), I made a few modifications: the anesthesia vaccuum line now comes out of the side of the mask, the platform is a bit larger, and the ear bars are a bit pointier.  The base mounting holes are now positioned to mount onto an optical breadboard with 1/4"-20 Taps like this one, to give it a more stable base:

    https://www.thorlabs.com/thorproduct.cfm?partnumber=MB612F

  • Real world test!

    Lex Kravitz02/14/2019 at 15:34 0 comments

    A colleague of mine at Wash U, Niko Massaly, hooked the device up to an anesthesia machine today and we were happy to find out it worked great!  He had some suggestions for improving the mask design but the device worked well in this first test.

  • First print

    Lex Kravitz01/20/2019 at 17:47 0 comments

    Still needs testing but it looks good!

View all 6 project logs

  • 1
    Print out the six 3D parts.

    Note: you'll need to print two of the ear bars.  

    STL files are in the files area and can be used for printing.  If you need to edit the design it was made in TinkerCAD, and edit-able files are available here.

  • 2
    Glue the brass inserts into the clamp, mask, and base

    These inserts can be glued in place with 5-minute epoxy.  Make sure they dry straight!

  • 3
    Screw threaded hose barbs into the mask and clamp.

View all 4 instructions

Enjoy this project?

Share

Discussions

nglembotski wrote 10/11/2022 at 13:30 point

Is this for rat or mouse?

  Are you sure? yes | no

Michael wrote 01/07/2022 at 19:42 point

So is there an updated version of this? Possibly a v2 Hackaday project?

  Are you sure? yes | no

Lex Kravitz wrote 01/10/2022 at 20:41 point

Hey Michael!  Not on Hackaday but Andrew Scallon remixed it and made several improvements here: https://optogeneticsandneuralengineeringcore.gitlab.io/ONECoreSite/projects/AnestesiaSurgerySystem/

  Are you sure? yes | no

droscaradolfomartinez wrote 07/15/2019 at 05:01 point

I wish to make  a stereotaxic frame to insert electrodes Could you help me? Thank you

  Are you sure? yes | no

Lex Kravitz wrote 10/13/2019 at 16:01 point

I'm sorry I don't have the bandwidth to customize the design for you, however the 3D design software that I used to design this is free (TinkerCAD) and the editable design files are online so you can edit them.  Please post back if you make a cool modification!

  Are you sure? yes | no

andrew.scallon wrote 06/11/2019 at 19:47 point

Whoopsy daisy. I accidentally designed this for imperial units (6-32 screws). What a dope! I redesigned, all the files in the link below are now for M3 screws and nuts, as should be. And I was nervous about a printer being able to span the vaccum chamber in the origional design, but I tried it and it printed well, so I made that one part again.

Also, I think someone requested a linear stage design somewhere here. I have a design done for 1 to 3 axis, 1 inch movement, well controlled with a 4-40 screw system (there I go with imperial units again), very rigid and smooth; not with linear bearings, but rather sliding bearings (cheaper too). Each axis (over) constrained with 2 basic 5 mm rods, 4 bearings. Keep an eye on my site in the next week or two for a post.

  Are you sure? yes | no

Lex Kravitz wrote 10/13/2019 at 16:03 point

Thanks for doing the redesign, it looks great!   If you want to post your files here as well please let me know I can add you to the project.  No worries if not too :) 

Do you have a link to your linear stage BTW?

  Are you sure? yes | no

andrew.scallon wrote 10/16/2019 at 14:14 point

Hello, yes, please add me and I will post the files here: several updates with mainly an eye to add rigidity. I may not yet be ready to post them to my site, as I am scrambling to finish another project to add a ~$20 arduino controlled heating pad.

I will try to post the linear stage files soon as well....

And Neuropixel stereotaxic holders....

So much to do, so little time. Will anyone be at SfN? I think I saw a post for open neuro social. Let's meet up!!!

  Are you sure? yes | no

Lex Kravitz wrote 10/16/2019 at 16:35 point

Sweet I added you to the project !  Looking forward to seeing your other updates.  

And yes I'll be at SFN, the Open Source Social is Monday night, 6:45 Room N135 I'll be there the whole time, looking forward to meeting up!!!

  Are you sure? yes | no

andrew.scallon wrote 06/10/2019 at 18:04 point

Hello, Thanks for the project! I have remixed this project for my needs. I will share on my site (bit.ly/onecore; I will acknowledge original work) after I actually print and test this, but wanted to give a couple of suggestions here. I would recommend not using ABS for the FDM prints, it is toxic (even to humans just printing it). PLA or nGen are great. If you need help with air tightness with the FDM prints, you can paint over any surface with WoodGlue (Titebond 3 is FDA approved for indirect food contact). It fills voids wonderfully. You can test for air tightness by plugging the system, and (using clean tubing) blow into the system when it is submerged under water. Changes to the 3D parts can be found https://gitlab.com/OptogeneticsandNeuralEngineeringCore/Stereotax3DONECore. These include allowing for mounting to metric breadboards, breaking the vacuum into two parts for ease of printing (glue together with wood glue), replacing all screws with basic M3 nuts (McMaster: 90592A085) and screws (91292A114) because it is easy to assemble and cheap ($6 total for 100), and lots of random minor changes. And you can FDM print out caps for the screws for ease of use. 

  Are you sure? yes | no

gabriella.h.berman wrote 03/20/2019 at 00:17 point

Could someone point me in the direction of the proper brass hex nuts? The ones included in the instructions are one sided only so they don't work if you want to use the red screws to tighten the various components. 

  Are you sure? yes | no

Lex Kravitz wrote 10/13/2019 at 16:12 point

Hi and sorry for the delay and the bad link :(  I think the company may have updated the product I linked to.  Anyway I've fixed the link, the correct part is: https://www.amazon.com/gp/product/B01IYWTCWW/

If it changes again, you can search Amazon for the product called:

Uxcell a16041800ux0824 M3 x 3 mm Female Thread Brass Knurled Threaded Insert Embedment Nuts 100PCS (Pack of 100)

They cost $5.99 for 100 of them, they're really great for using with those M3 knurled thumb screws!

  Are you sure? yes | no

Sourish Mukhopadhyay wrote 02/28/2019 at 19:17 point

Just curious, what age pups are these parts optimized for? I'm trying to get something that could work with ~day 15-20 pups. Any ideas? I am very new to this 3D printing and DIYO science tools, but so excited!

Any input will be useful, thanks!

  Are you sure? yes | no

Lex Kravitz wrote 10/13/2019 at 16:06 point

Sorry for the delay, these are for adult mice, ~25grams work well not sure if it would work for day 15-20 pups, please post back if you tried it!

  Are you sure? yes | no

Ted Yapo wrote 01/20/2019 at 19:57 point

Those rats have been listening to music without paying their fair share...

TIL what stereotaxic surgery is. Thanks!

  Are you sure? yes | no

Sophi Kravitz wrote 01/20/2019 at 19:29 point

My printer does ABS too, does yours? 

I never tested a print for airtight, but I think a high tech way to test could be soapy water... bubbles have a way of sneaking into tiny holes (guessing). I feel like you could do the same with smoke. Maybe light something on fire inside and wait to see if smoke comes out? Hmm.... but then you'd burn the plastic which is kinda a problem :P.  

yeah, I'd just wait for the resin printer lol

  Are you sure? yes | no

Lex Kravitz wrote 01/22/2019 at 16:38 point

Cool ideas!  This is an open system which delivers gas to the mouse through a mask.  So the mask has a large output port for gas delivery, which is a potential source of leaks.  The question becomes whether the excess gas from the output is being scavenged safely enough.  The low-tech way of determining this is that the gas has an odor, so if you can smell the gas the scavenging system is not working well enough.  I like your idea (and Dan's below) for testing whether there are additional leaks through the 3D printed material itself, it would be cool to verify this even with the resin printer!

  Are you sure? yes | no

Lex Kravitz wrote 01/20/2019 at 18:30 point

My printer is PLA, so it's likely not airtight.  One way to test if it's airtight is if the gas has an odor and the odor is detectable it means it's leaking.  I don't know any more high-tech ways to detect leaks though...

I just ordered a resin printer though which will be air-tight so I'm planning to re-print these parts with that!

  Are you sure? yes | no

Dan Maloney wrote 01/22/2019 at 16:14 point

Could you pressurize it with an equivalent inert gas and use a pressure gauge to monitor any loss of pressure?

  Are you sure? yes | no

Lex Kravitz wrote 01/22/2019 at 16:32 point

That's a good idea!  We could plug the output port (or print a version with the output port filled in), pressurize it and check... I'll look into doing this, it sounds like a fun weekend project, exploding 3D printed parts with pressurized gas :)

  Are you sure? yes | no

Sophi Kravitz wrote 01/20/2019 at 18:24 point

Lex!!! This looks excellent. Does your printer do airtight? What's a good way to test?

  Are you sure? yes | no

Similar Projects

Does this project spark your interest?

Become a member to follow this project and never miss any updates