 Brian McEvoy
-
1Safety warning
If people refer to you as, "The first ingredient in a recipe for disaster," do us all a favor and try to revitalize the Beanie Babies trend instead of reading any farther.
Anything that generates electrical arcs should be considered dangerous. Generating an electrical current in someone's body can cause muscles to "speak out of turn" in ways that are bad for bowels, brain matter, and hearts and stuff. If you zap someone who isn't prepared, they could lose their balance or worse. That said, these cheap stun guns are rubbish for self-defense. The zappy-sparky show is a deterrent, but that's just bluffing since these have less stopping power than a well-placed banana peel. They sting, and that's about it.After this point, I am going to assume you're safe, foolish, masochistic, or a combination. Hey, I'm not the electric knife police, sort it out yourself.
-
2Bill of Materials
I list specific parts throughout the instructions because that is how I built a working model, but substitutions are fine, so long as you understand why I picked the parts I show.
- 1" Pipe - This should have an inner diameter (ID) of 1" or 25mm
- 18650 battery - Probably wise to keep a few spares
- 18650 battery holder - Get the kind with a red and black wire
- 18650 battery charger
- Stun gun* - Choose one model from below
- Vipertek VTS-T01
- Vipertek VTS-T03
- Cold Steel Rubber Recon Tanto Training Knife 92R13RT
- 1" furniture leg protectors - Plugs for the back of the handle
- (6 qty) 1/2" #6-32 countersunk machine screws
- (2 qty) 1" #6 standoffs - 1" long with #6-32 internal threads
- Aluminum tape
- Normally open (N.O.) momentary pushbutton - hole mount
- (3 qty) Solder sleeves - Clear shrink tube with a ring of solder, 24awg
- Handle wrapping tape - Optional
- Switch-pipe adapter - 3D printed
* Buying a raw high-voltage converter from an AliEx/eBay seller could land you with a device capable of damaging flesh. We chose to salvage one from an inexpensive stun gun.
-
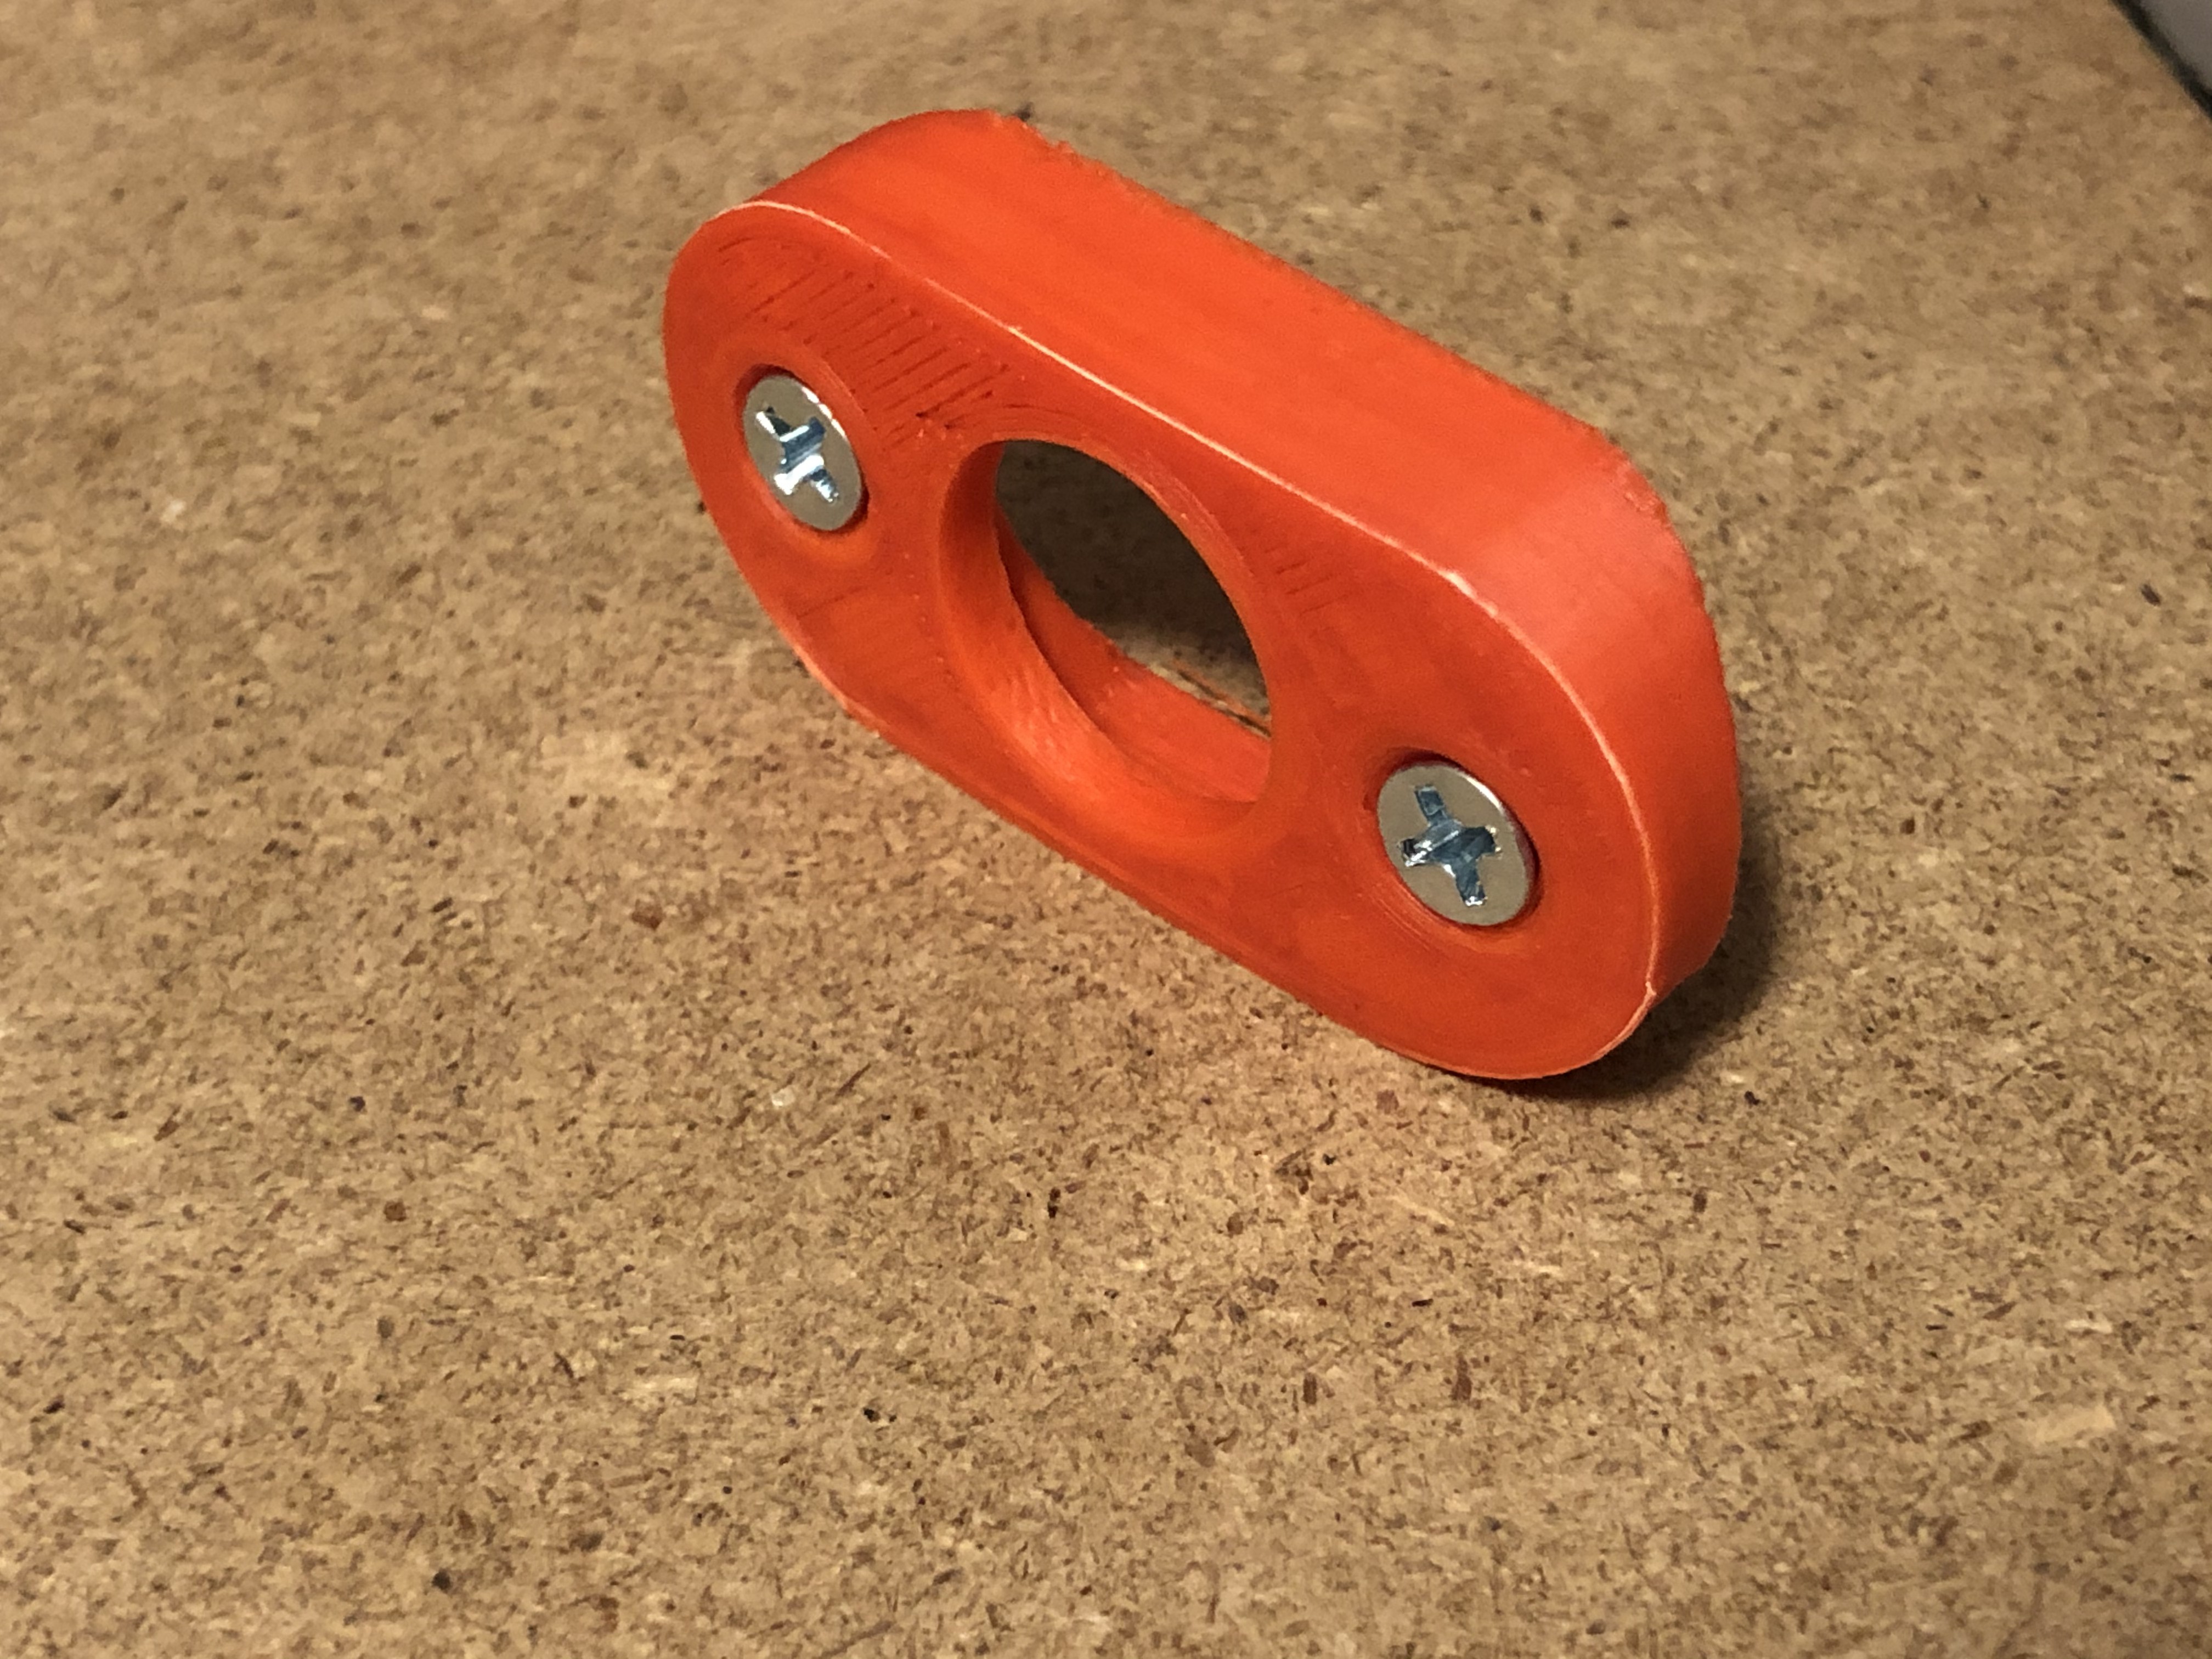
3Switch-pipe adapter
We will start with the most exotic component in the entire build because it requires a 3D printer. If you picked a pushbutton with an exceptionally long threaded shaft, you might be able to skip this and mount your switch directly onto a chunk of pipe, otherwise, read on.
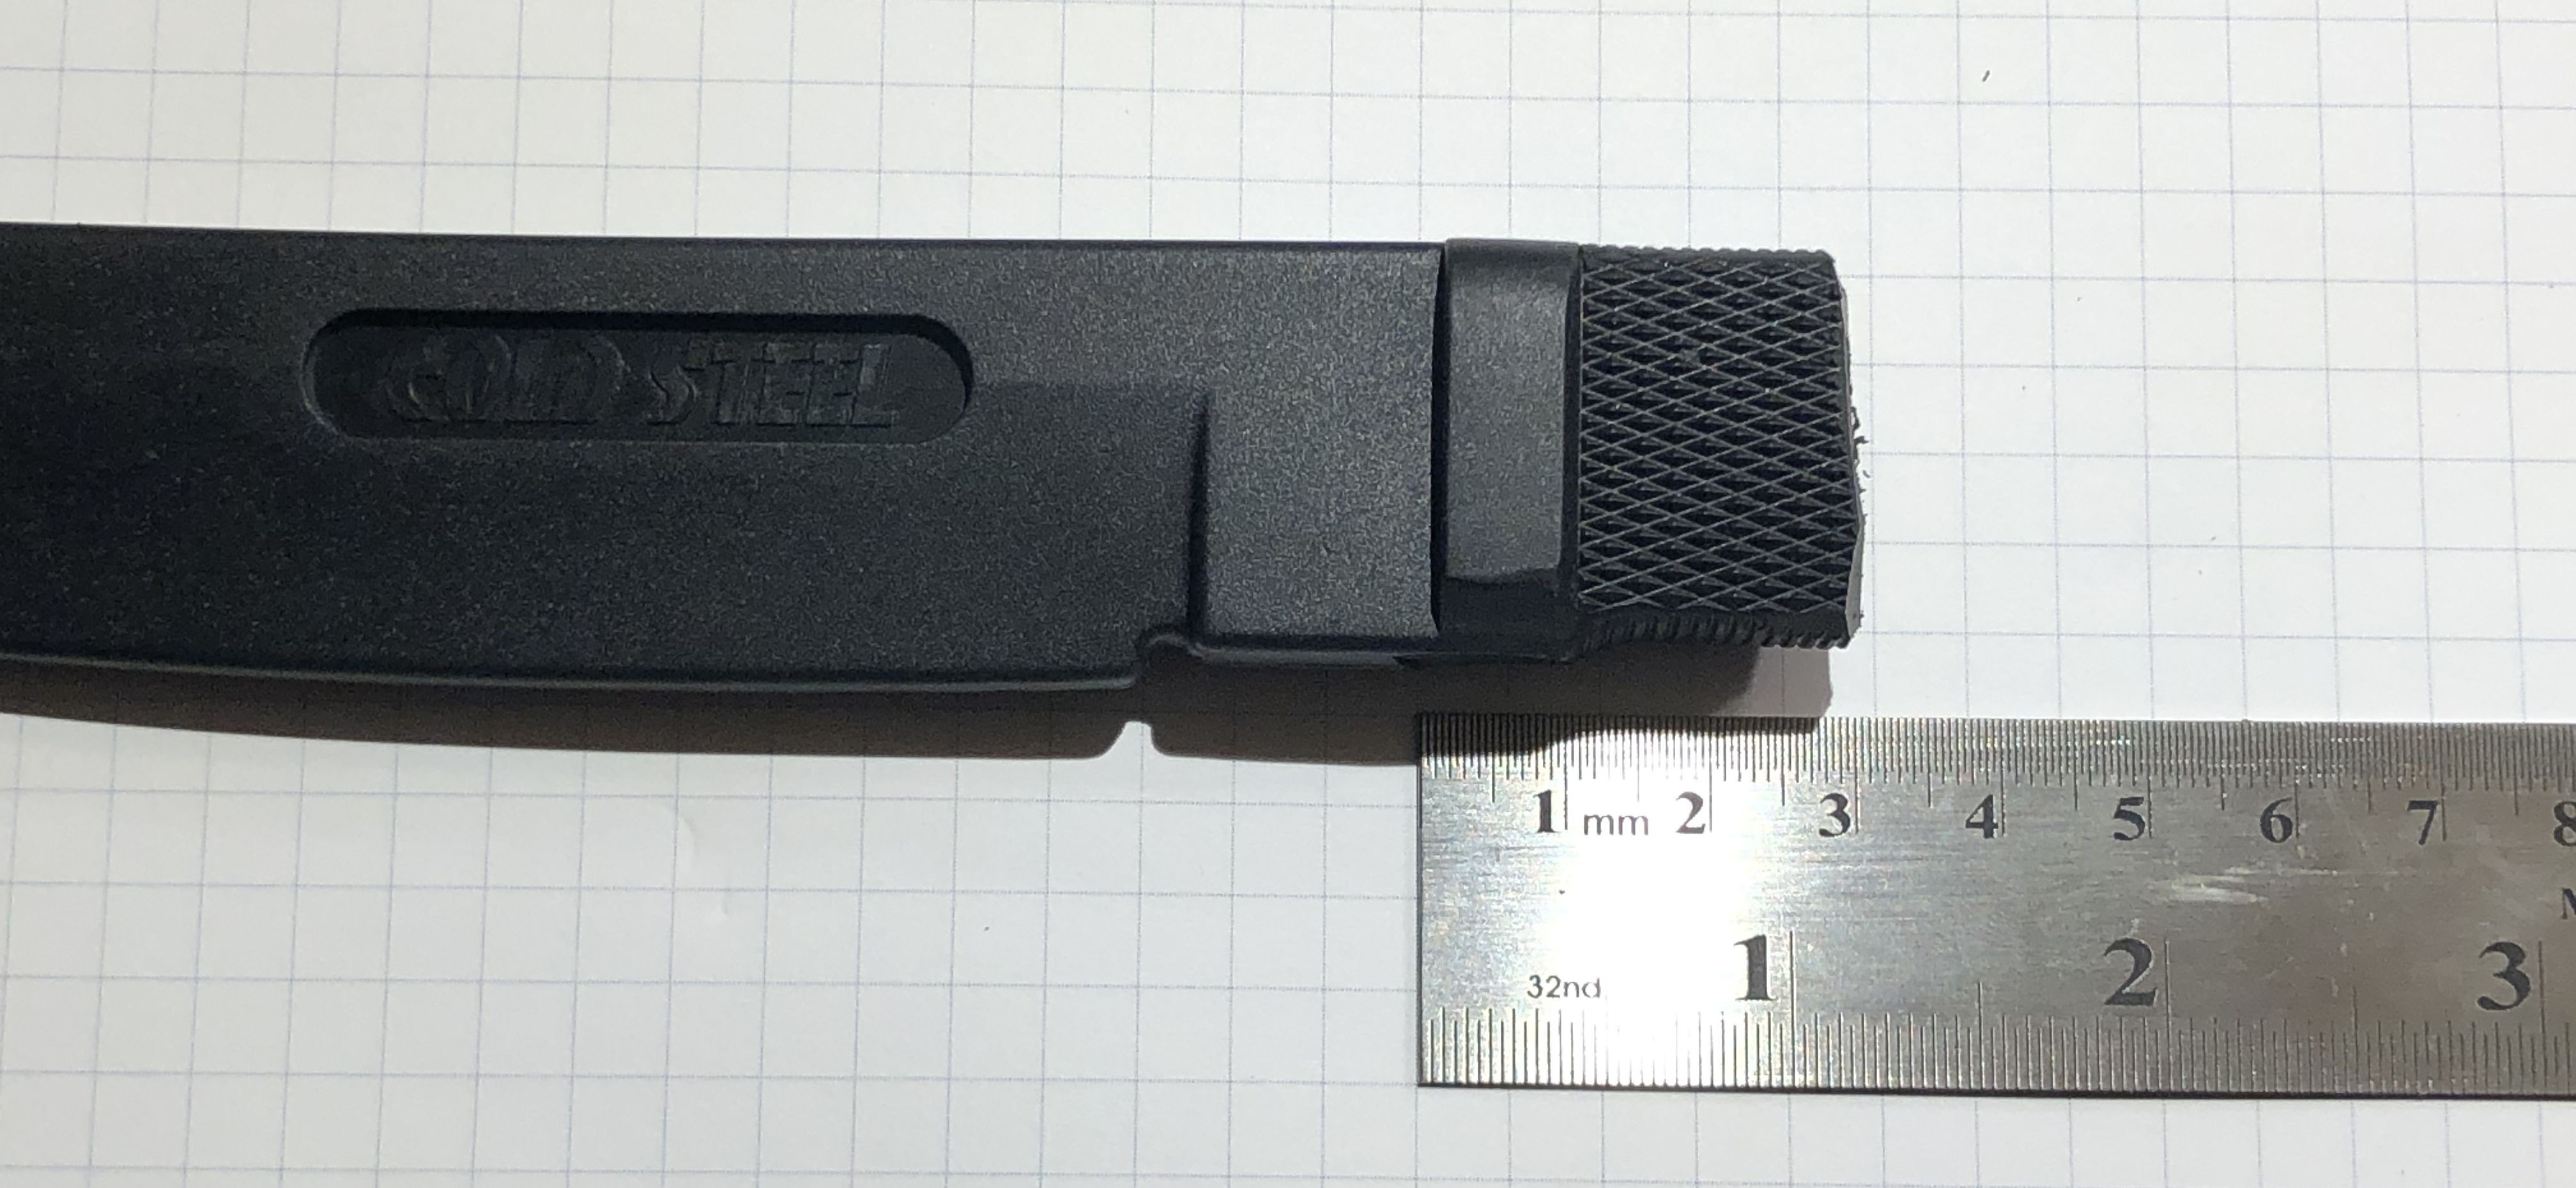
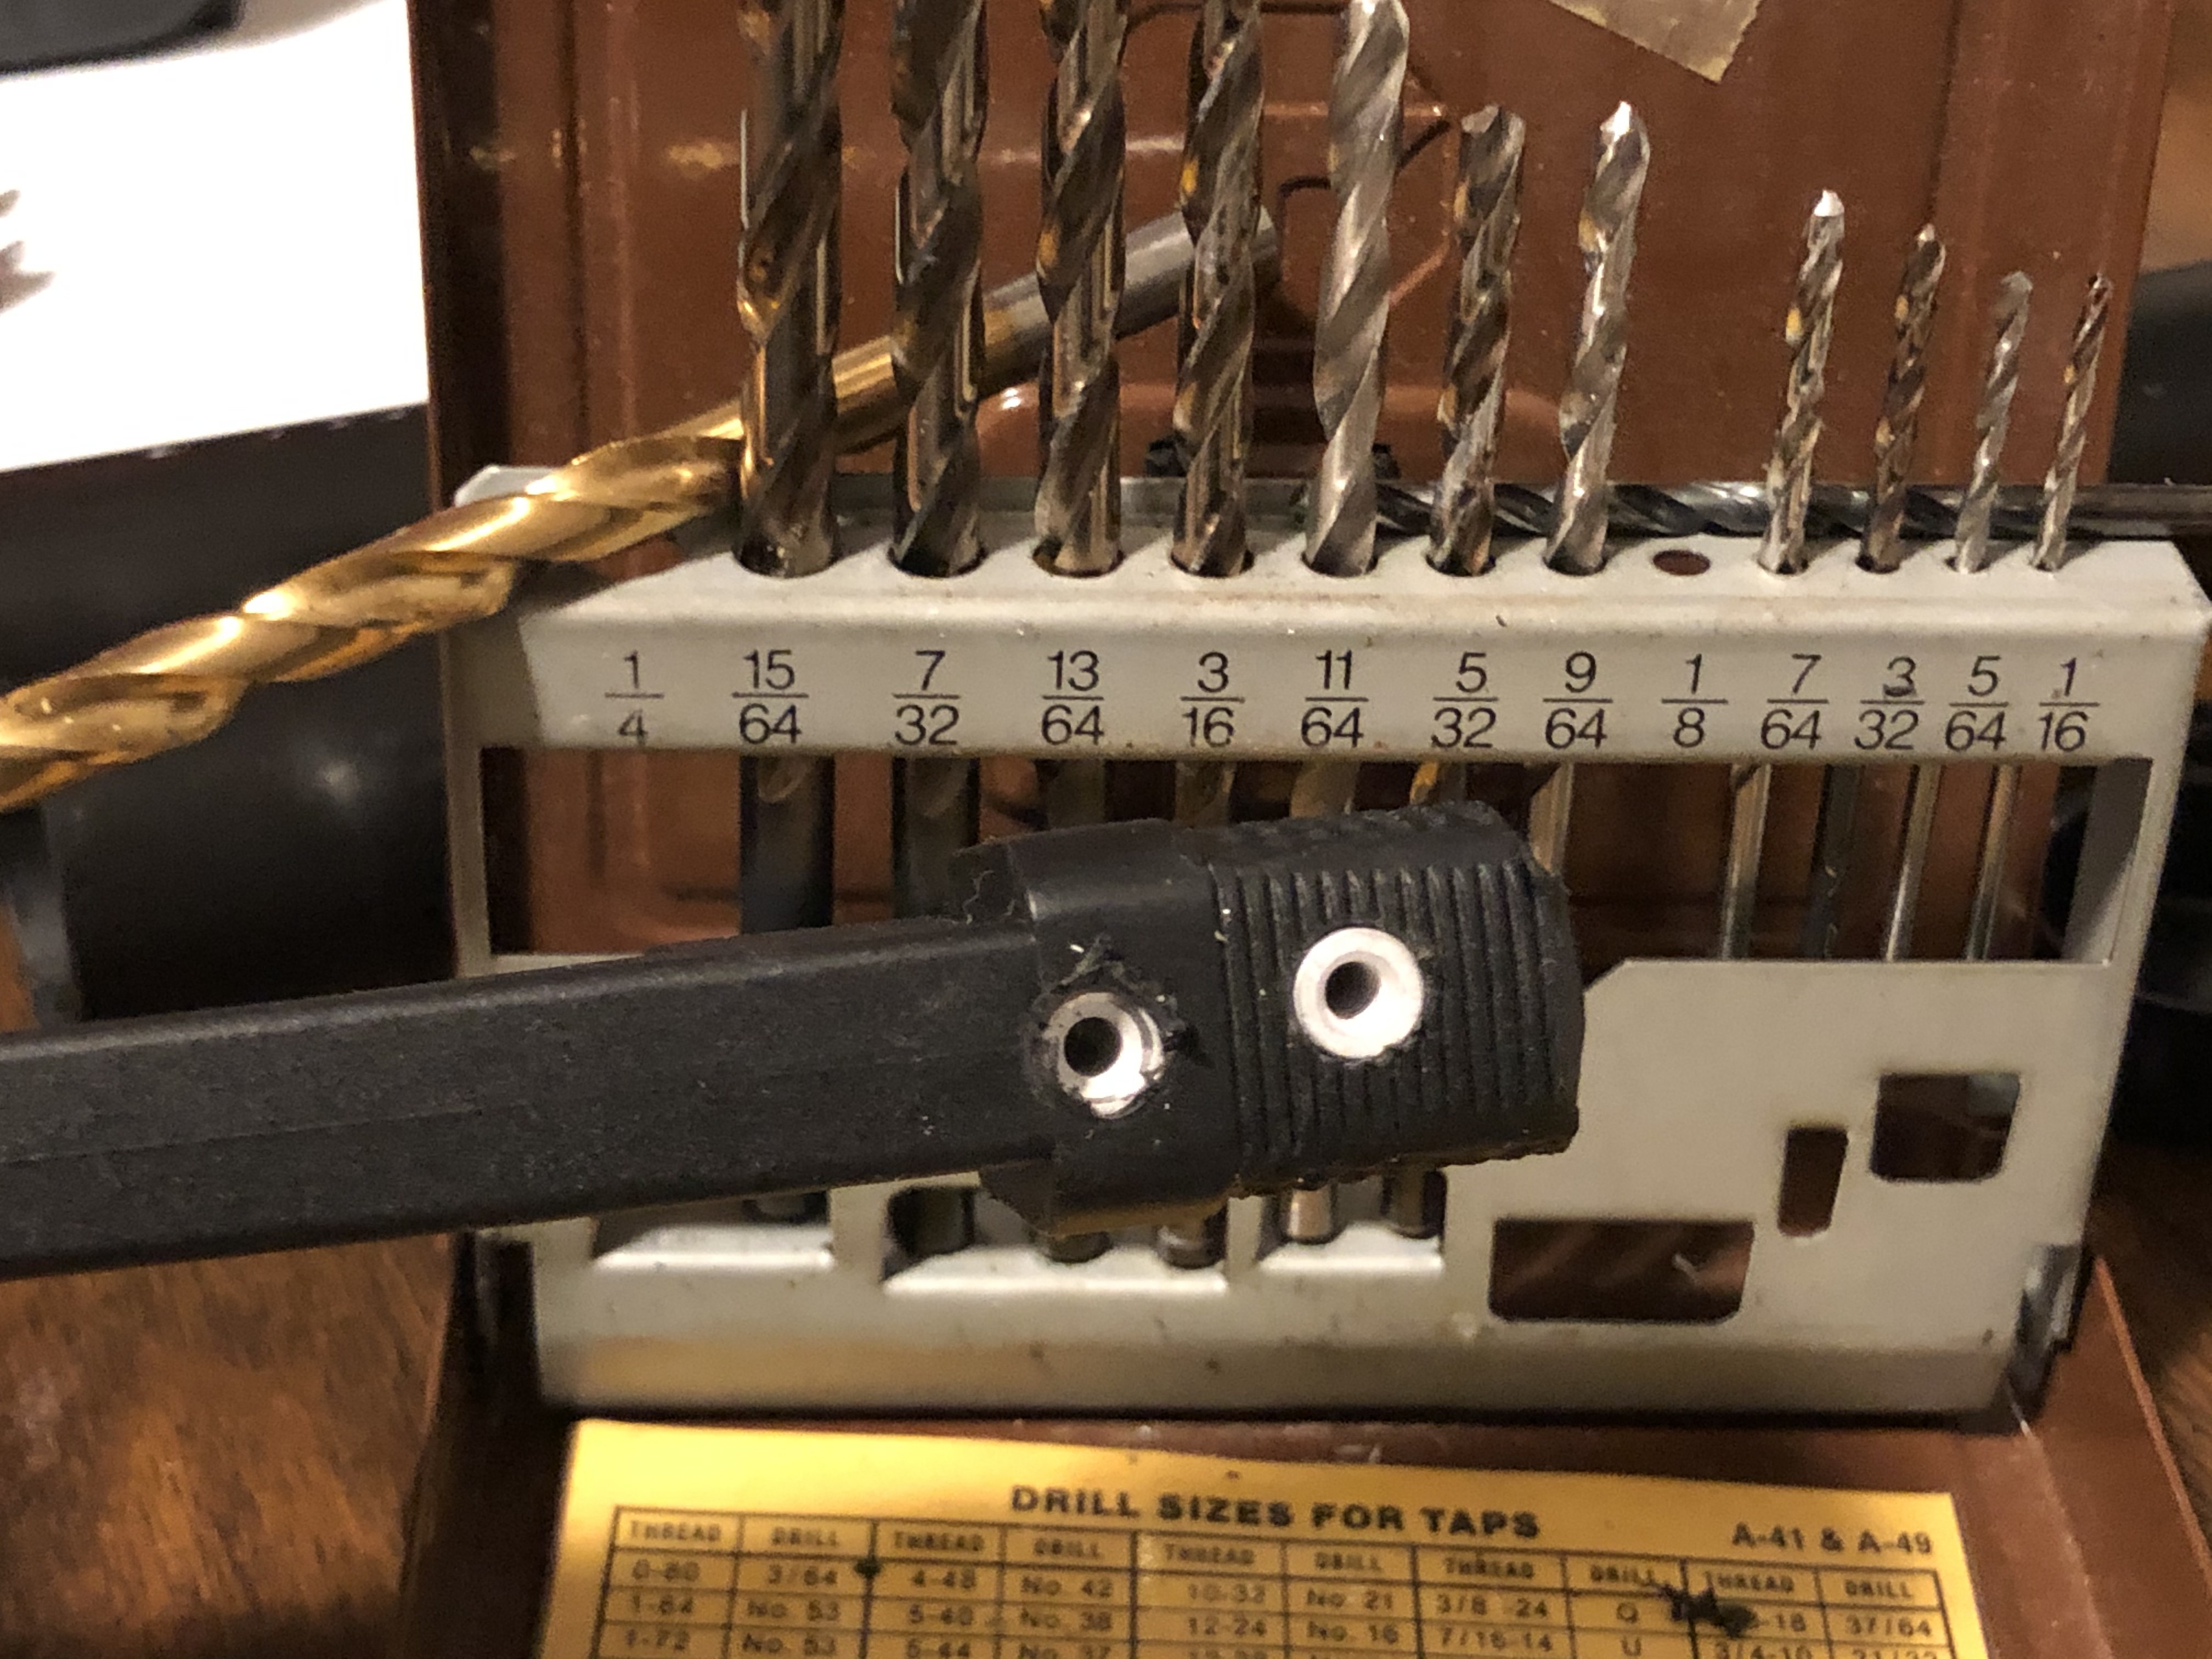
First, you will need to know a few dimensions from your parts. Starting with your switch, you will need the radius from the mounting threads, which is also the same as a hole you would drill to mount the switch. Be aware that this is a radius, not a diameter, so divide by two if necessary. With the example switch below, the switch has a thread diameter of 11.8mm, so the radius is 11.8/2 = 5.9mm.
The next dimension is the radius of the switch's hex nut. This measurement should come from opposite points. In the example switch, the hex nut is 17.5mm in diameter, so the radius is 17.5 / 2 = 8.75mm.
![]()
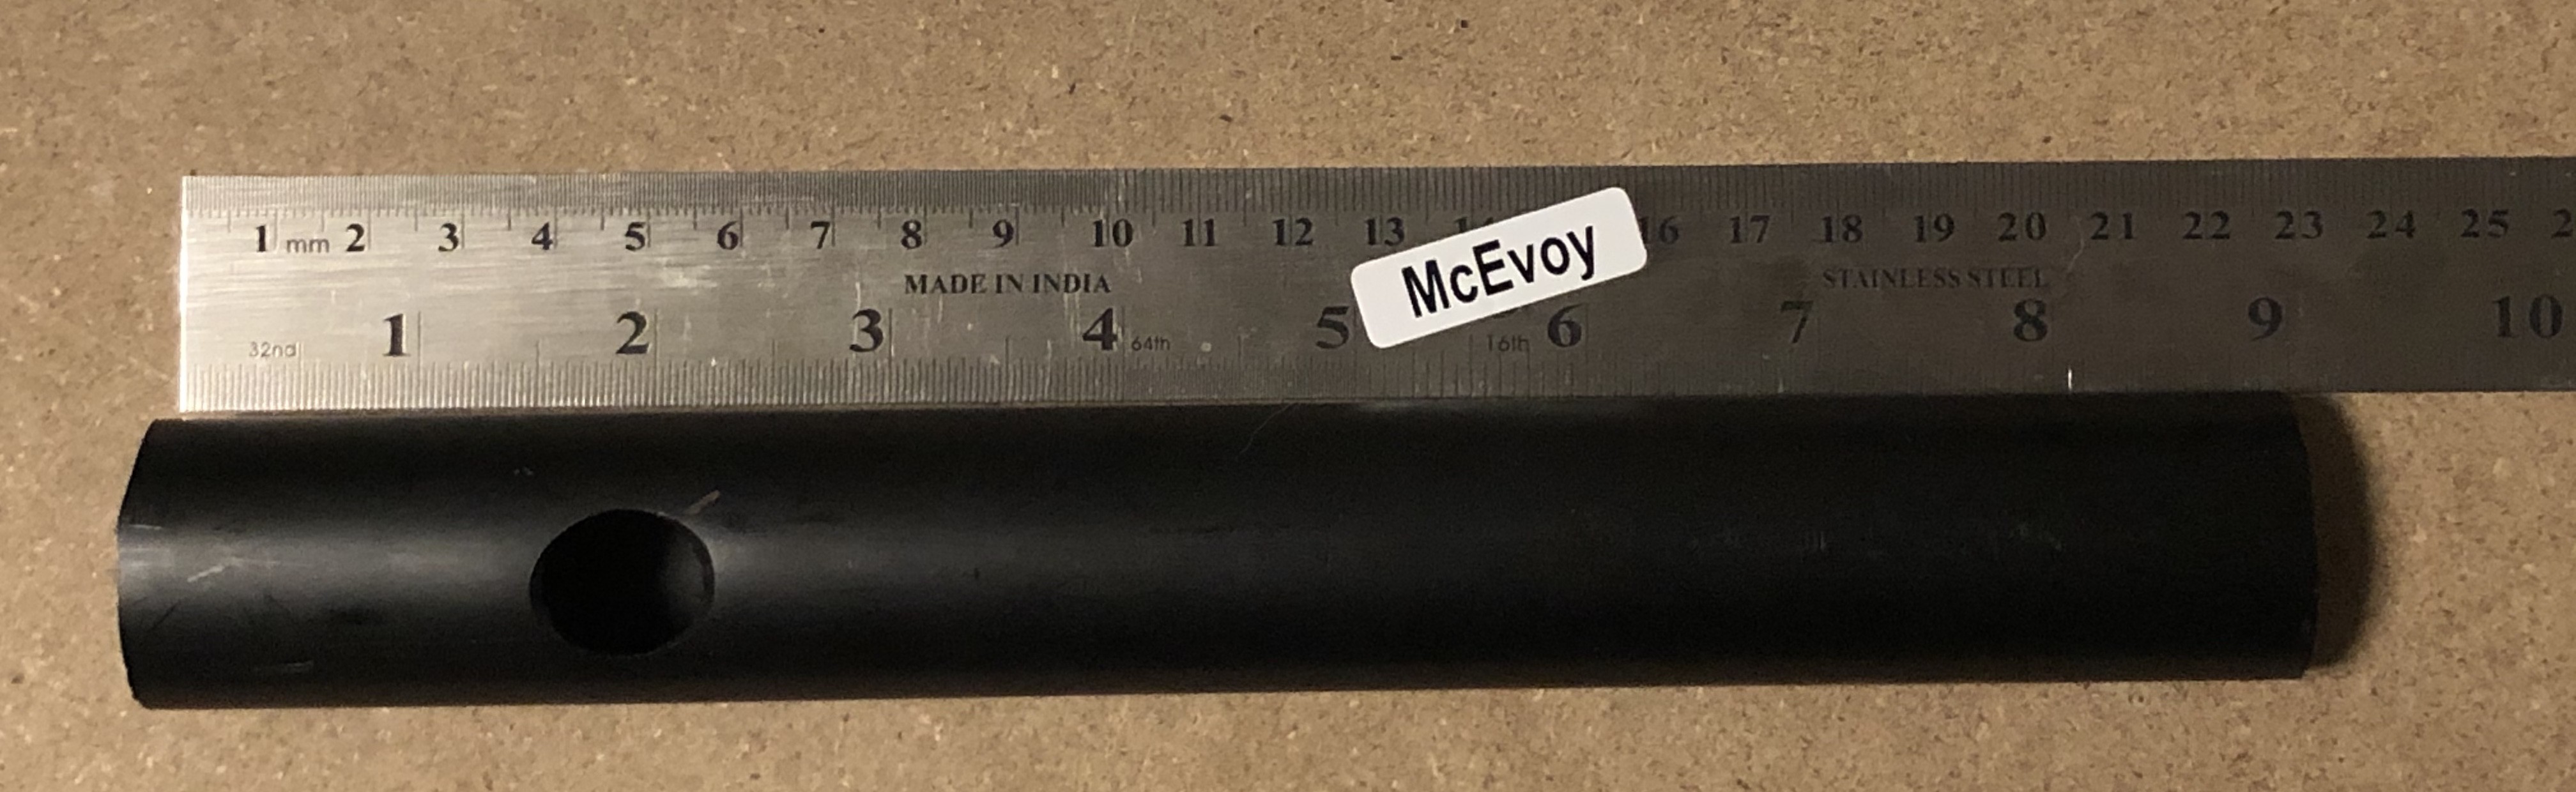
The next diameter we need is the outside radius of your pipe. The measurement must be in millimeters, so prepare your brain for a bit of unit conversion. I used 1" semi-flexible water pipe because it won't shatter like PVC. The spec sheet shows the outside diameter (OD), so remember to divide by two and convert to millimeters. The tubing has an OD of 1 5/16 inches, which is 33.3mm. 33.3mm divided by 2 is 16.6mm.
![]()
All my calculations are to the tenths place. You should be more precise if it helps you sleep better.
Take your measurements and head to my Round Pipe Switch Adapter Thingy. You will see a button labeled "Open in Customizer," which will show you eight editable fields. We only need to worry about three, namely, "Switch Thread Radius," "Switch Nut Radius," and "Pipe Outside Radius." Enter these values and click "Create Thing." Download this Thing, print it, and move on to the next step.
![]()
The rest of the steps are simple compared to this run-about. To be fair, I spent five days refining that model, so cut a guy a little slack.
-
4Handle
Get a grip.
I used a semi-flexible water pipe for my knife handles because it was in stock nearby and large enough to fit the electronics. Awhile back, I made a handle from polycarbonate, which was pretty BA. The only reason I didn't make ALL my handles clear was the cost. Functionally, you could make the handle from metal.
Once you have the pipe you like, cut a section 8 3/4" (225mm) long. Clean up the ends by removing any burrs or debris. I scratched off some white paint with a fingernail.
Pick one end to be the butt, and the other will hold your blade. At the blade end, measure back 2" (50mm) and drill a pilot hole in the side of the pipe, which is where your switch will go. Now, expand the hole big enough to fit your switch. I had great success with a step drill bit.
![]()
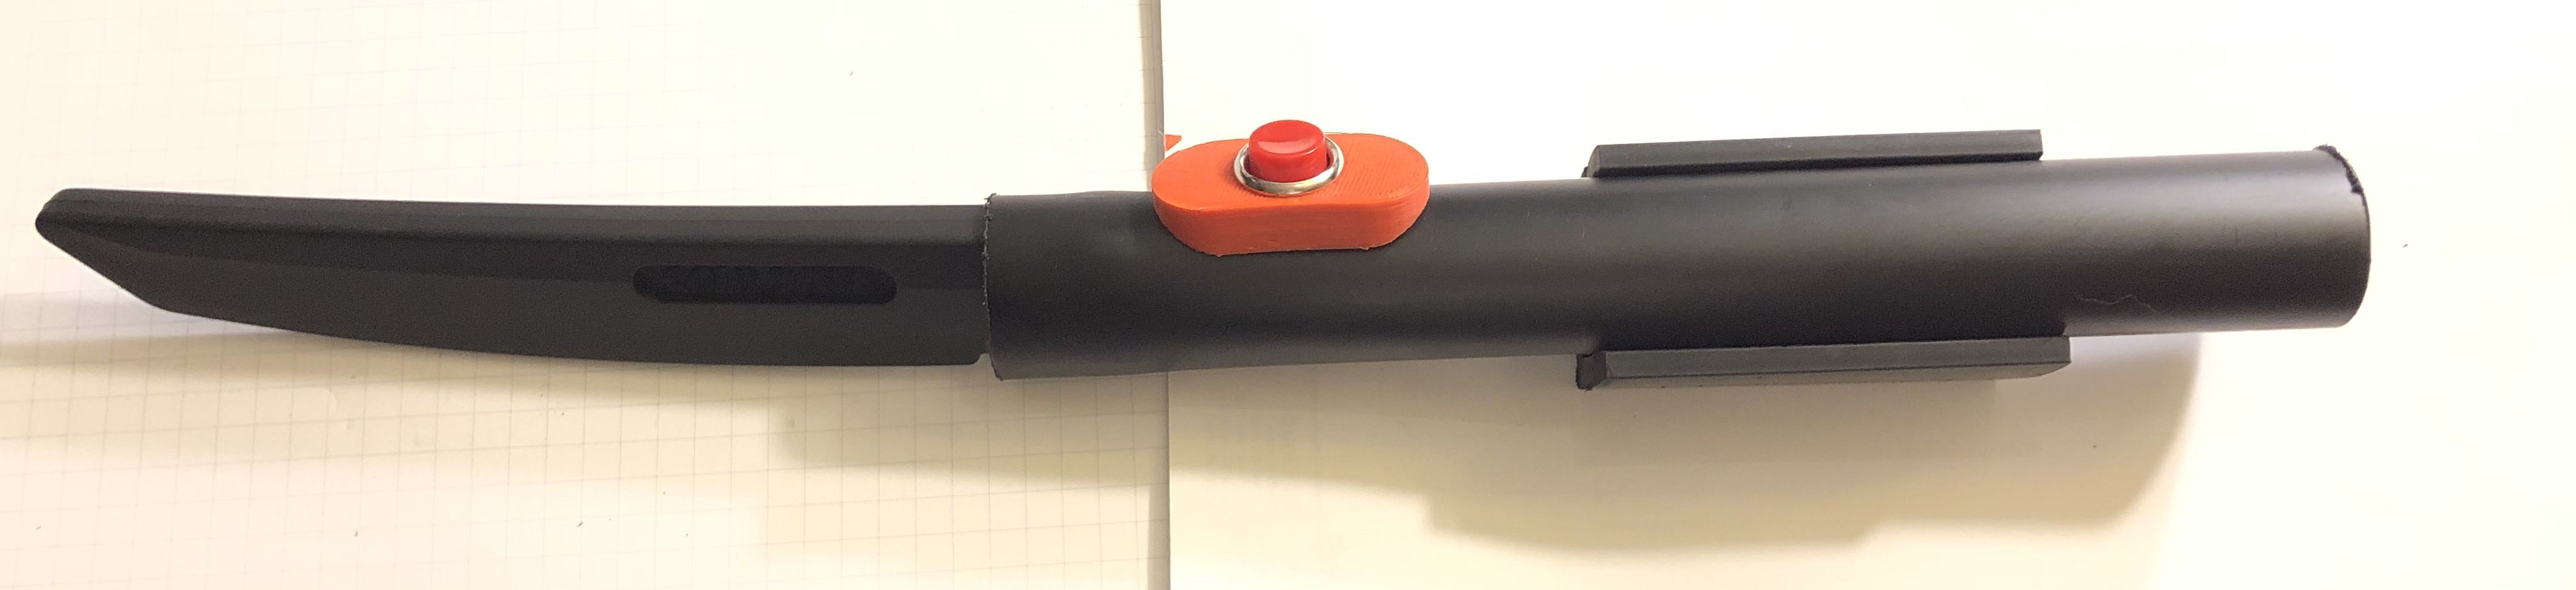
Now, hold the adapter you printed in the last step to the handle hole, and drill a couple of 1/8" (3mm) holes in the pipe below the adapter's mounting holes. Don't tighten the screws down yet, but it should look like this.
![]()
-
5Circuit
Before we assemble a circuit, we need to tear one apart. The heart of a cheap stun gun is the high-voltage converter, which is a tube with one flat side. You will have to rip up your VTS-T0* to get it, so bust out your little screwdrivers and a wire cutter. The converter looks like this. Make sure you switch everything off, lest you painfully remind yourself.
![]()
This circuit couldn't be simpler, but I will describe it in steps almost anyone can follow. If you're adept at this sort of thing, we want a switch to connect our battery holder to the high-voltage converter and interrupt the positive lead with a switch while we keep the wires long enough to pull the battery holder out the back end. Keep in mind that we have to interrupt the power on the low-voltage side because once it goes into the converter, it gets a mind of its own.
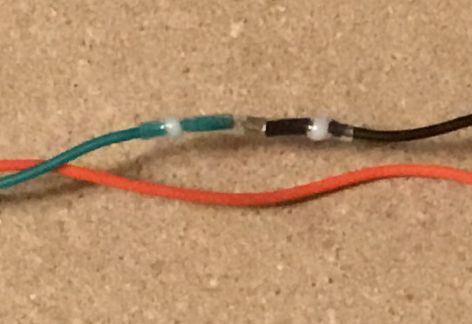
The first step is to join the black negative wire from the battery, and the negative on the high-voltage converter. On the converter, the negative wire was green. To join the conductors, I used solder sleeves because they are handy, insulated, and you don't need a soldering iron, although a hot-air reflow station will do the job cleanly. Solder sleeves work by putting your wires into either end, then heating it until the metal band in the center melts. Allow it to cool, then tug at them to make sure you bonded the wires. They should look like this.![]()
Always orient the converter so that the transparent red wires are far from the battery. These are the high voltage wires, and they will stick out the blade end of the handle.
Next, we need to lengthen the positive lead off the battery so it can reach the switch while hanging out the back of the handle. We need to make it extra long, so when the battery dies, we can slide the holder out and swap the battery.
The positive lead from the high-voltage converter must also reach the switch. If your switch uses plugs or a quick-disconnect, add those connectors. If you have to solder to the switch, wait on that step. Your circuit should look like this.
![]()
-
6Switch
Safety check: remove the battery.
Take all the electronics from the previous step and push them into the handle, but pull the two switch wires out the drilled hole. The high voltage wires need to stick out of the end of the pipe by the switch. If everything was correctly oriented, the high voltage wires should stick out an inch (25mm), and the switch wires should stick out half of that distance.
![]()
Connecting your switch may require a custom socket, soldering iron, screwdriver, or crimping tool. If you have the option to use a plug or quick-disconnect end, I recommend it.
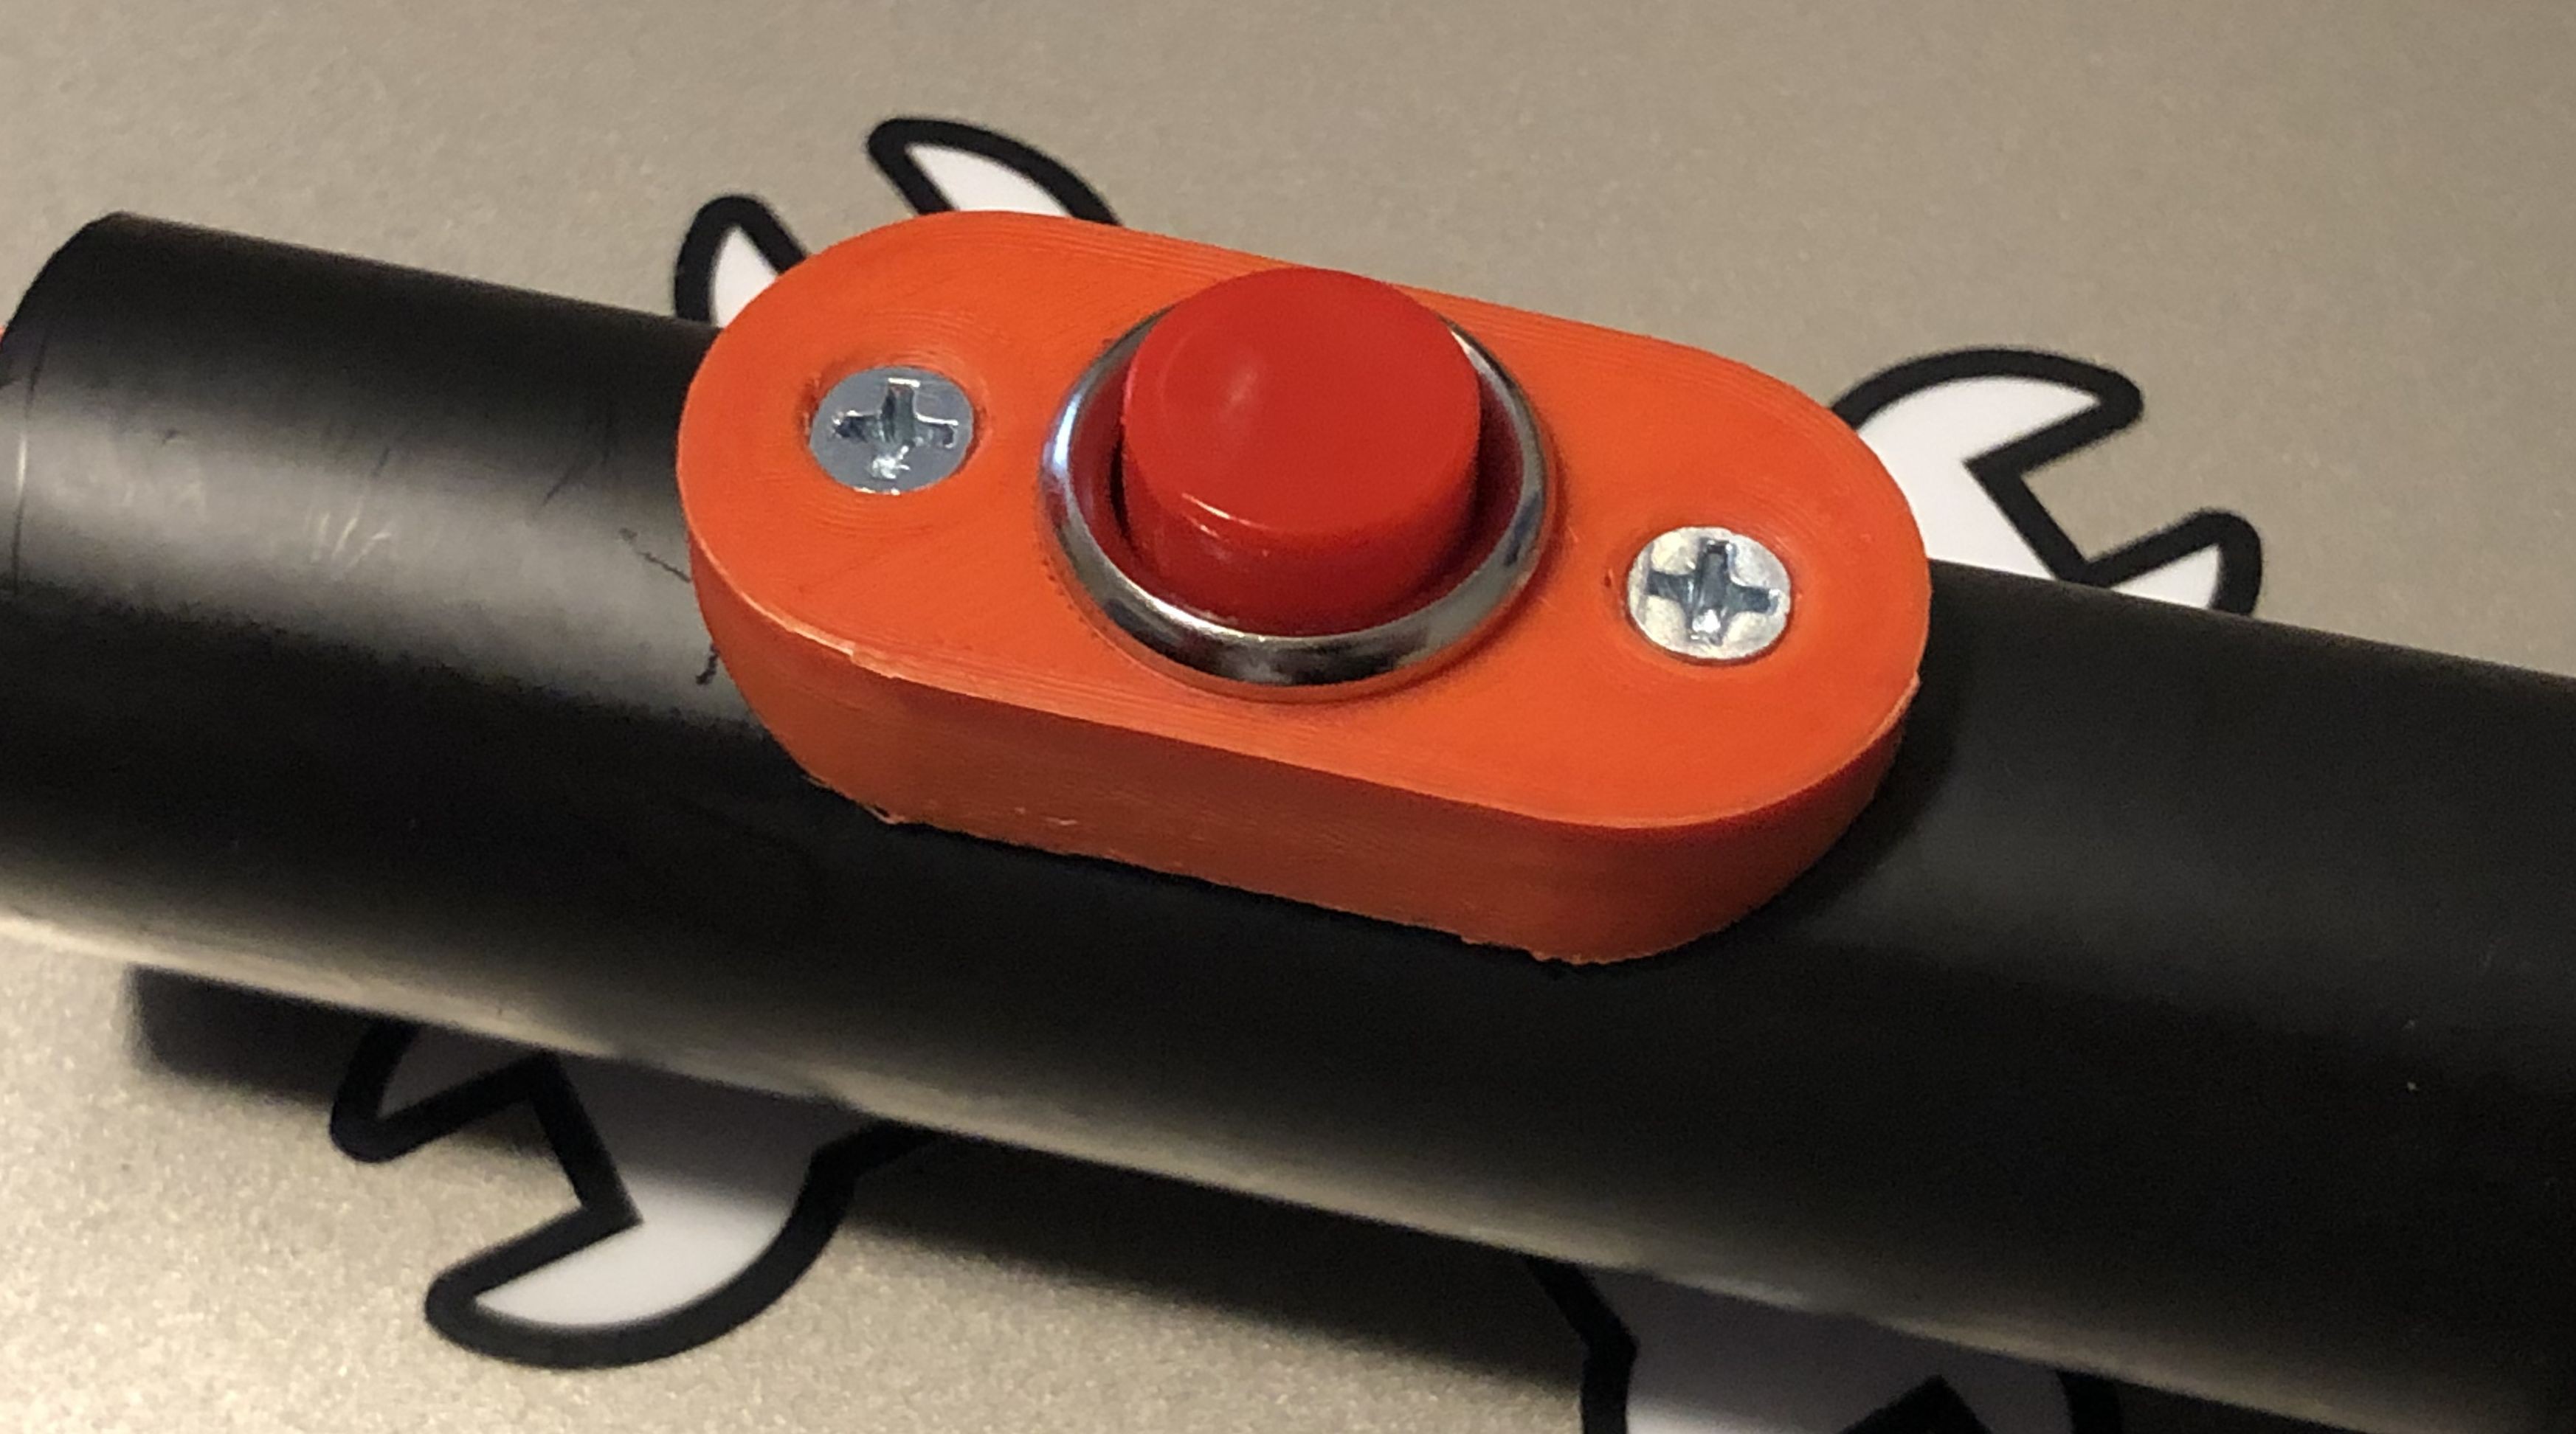
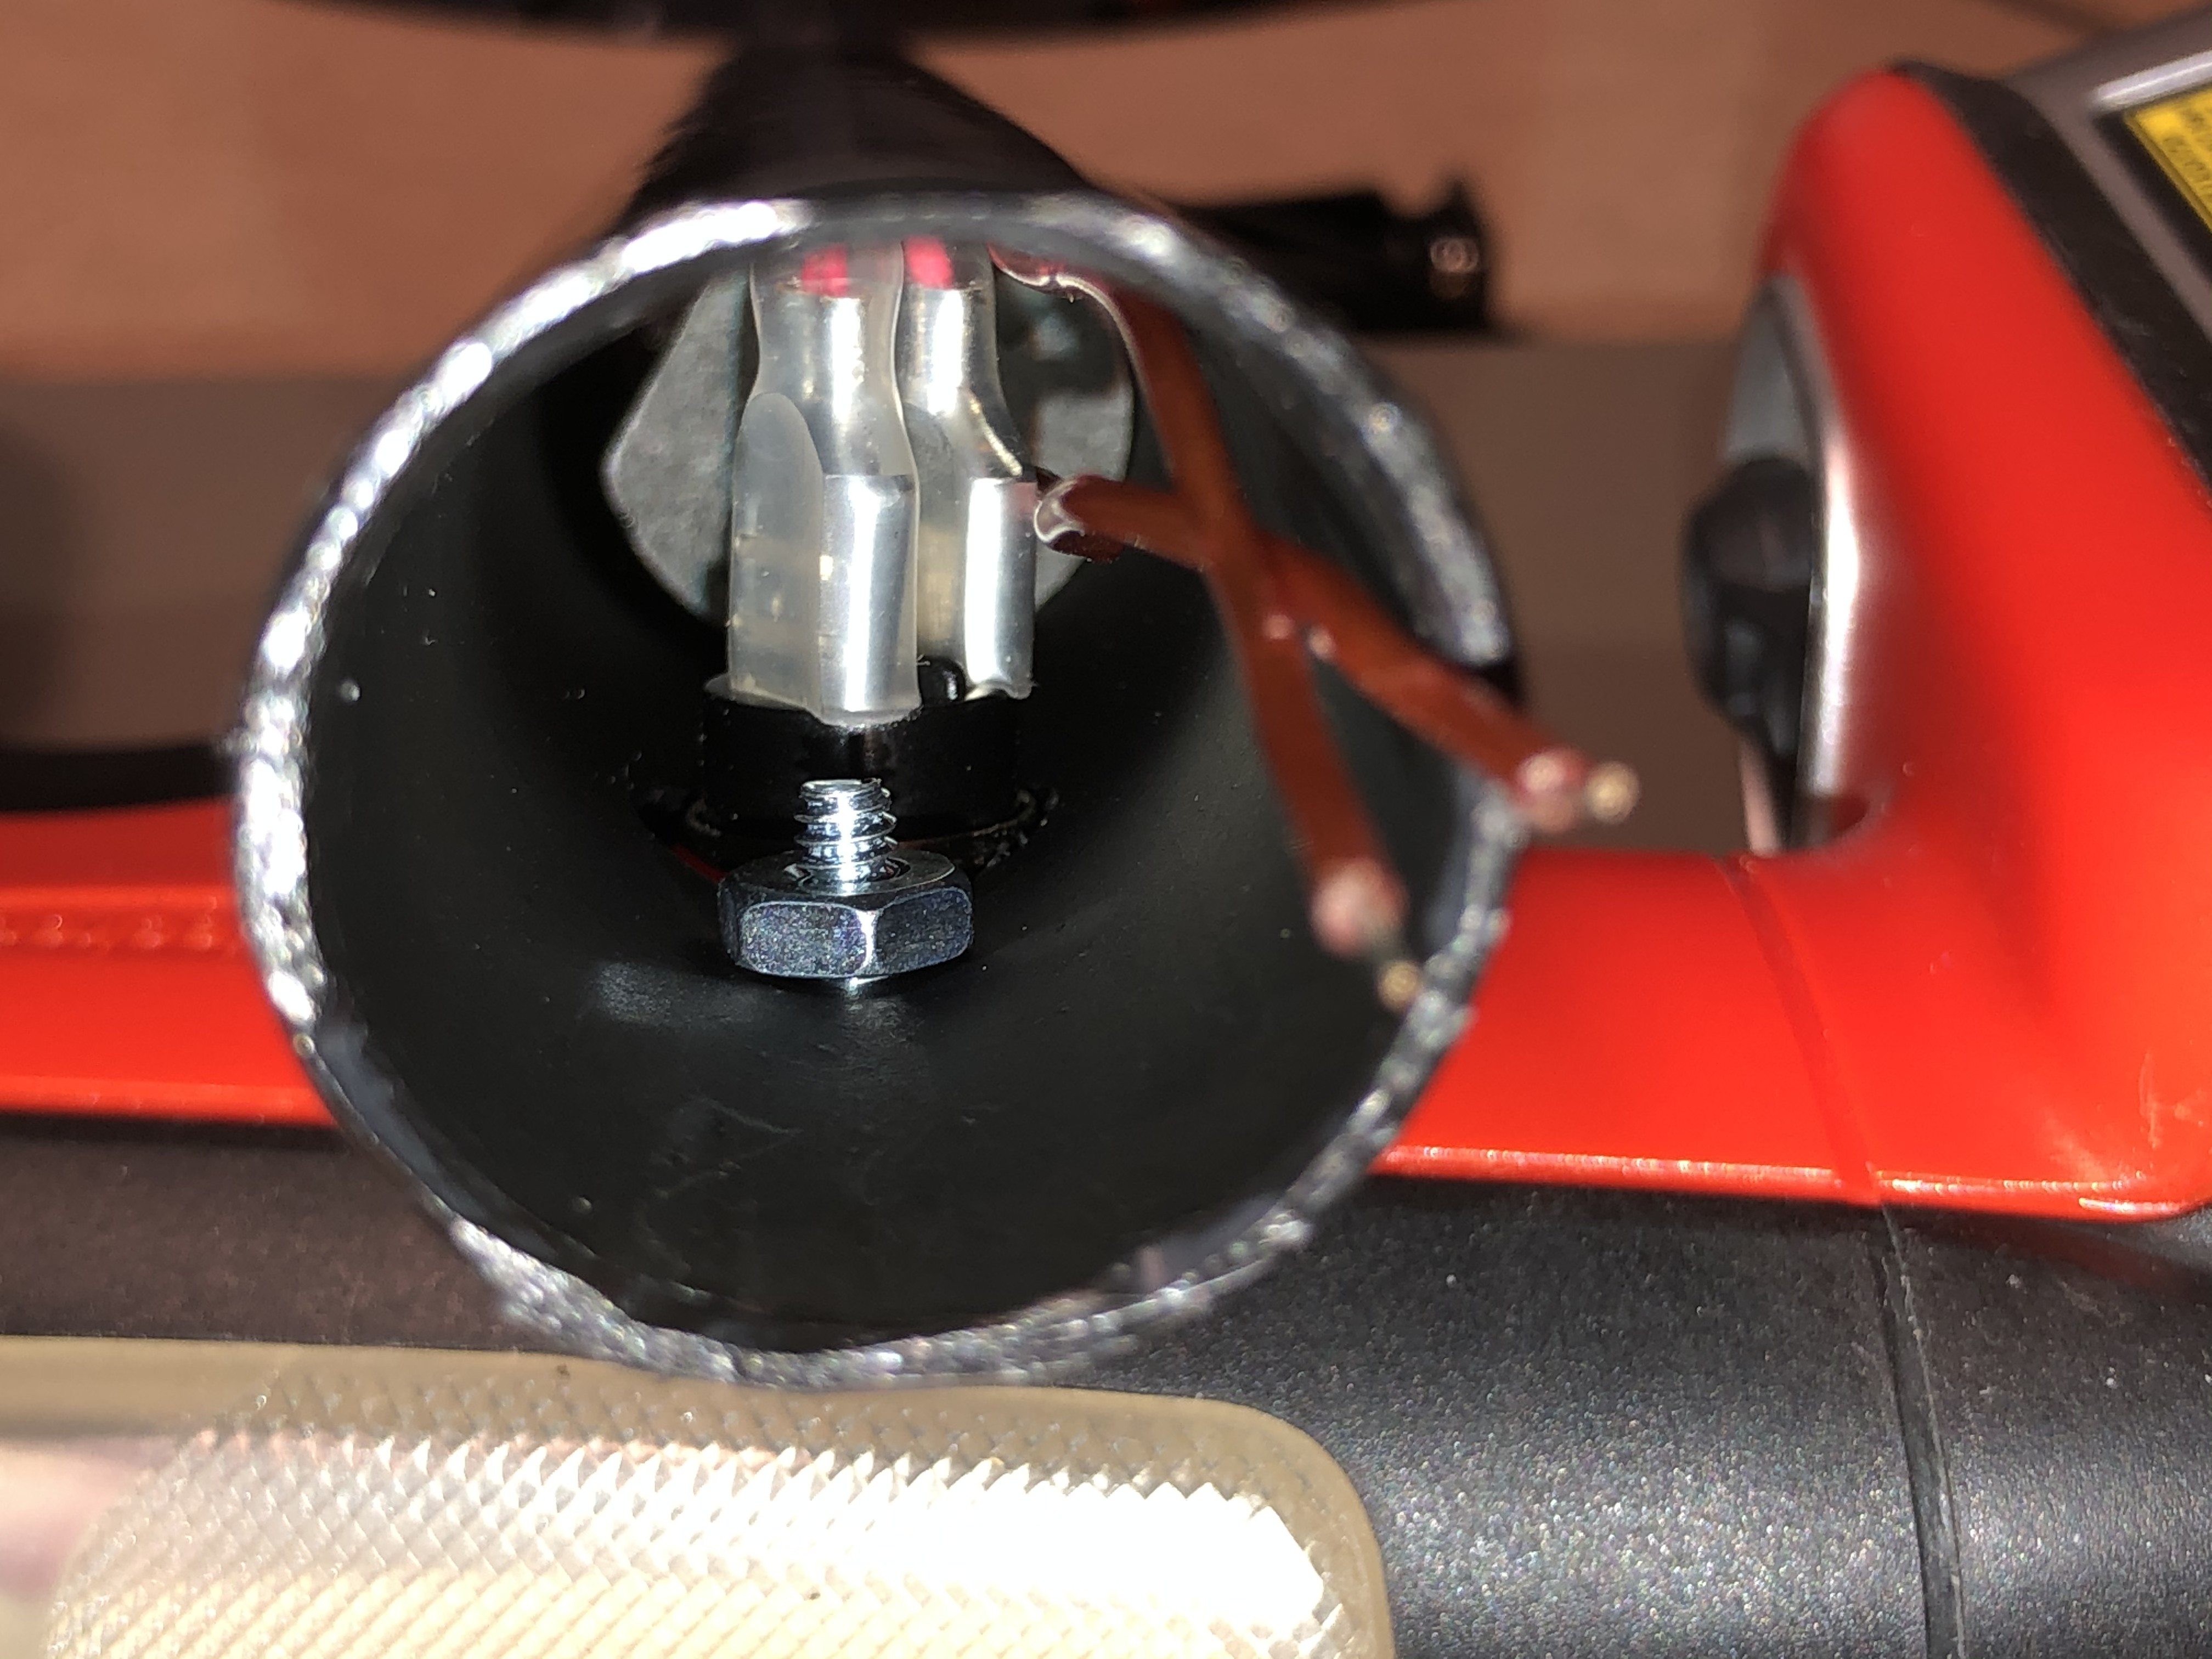
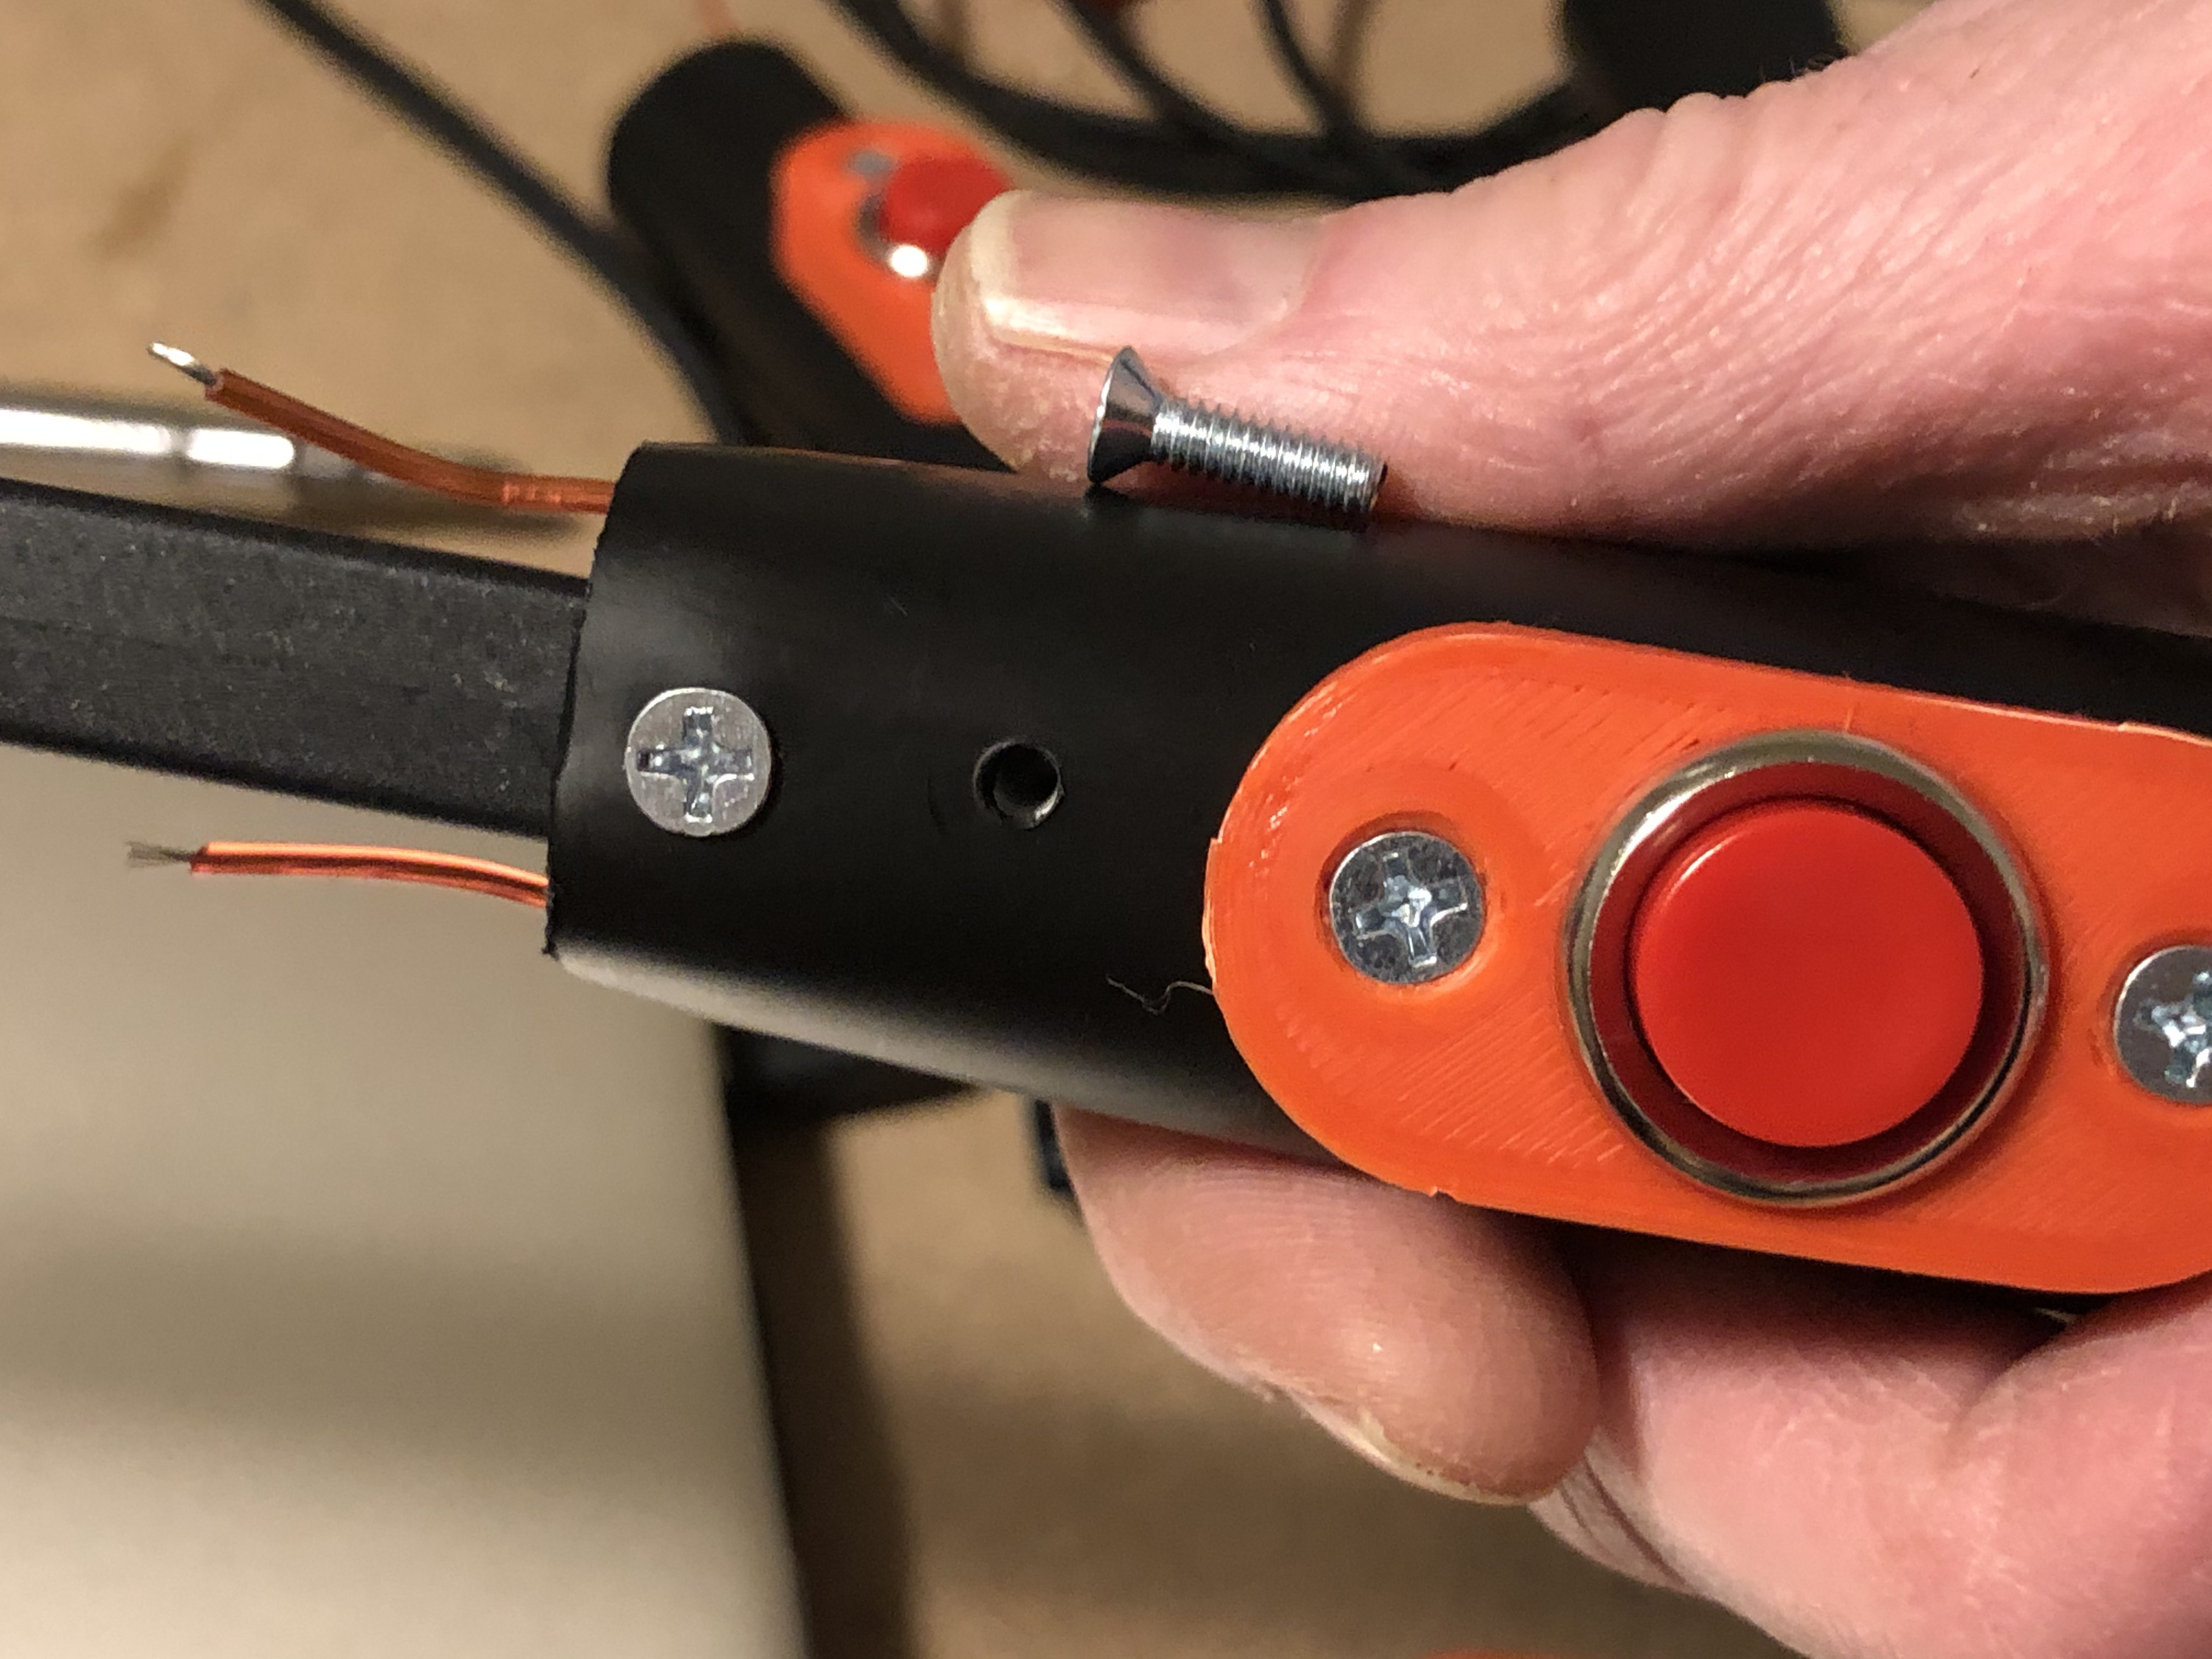
Now, we can finally tighten that precious switch adapter in place, and it is going to look sweet! Get your nuts ready, and by that, I mean the threaded metal things. I couldn't reach the rear bolt, so I twisted it into the plastic as best I could, and focused on the front nut and bolt.
![]()
Now we get to test. The first test is to make sure your battery holder can reach out the back of the handle. Make sure your high-voltage wires are not touching anything that they might harm, then install your battery. Push the battery holder into the handle, and give the switch a press. If you hear a high-pitched whine, but no sparking, release the switch and nudge the wires close to each other. Don't touch the conductors as the converter can hold a charge. When you have a short gap, maybe 1/4" (6mm), press the button again, and you should get an electrical discharge. It startled me the first time it worked, and I was prepared for it.
If everything is operational, remove the battery, and move to the next step.
-
7Blade
Welcome to the final steps. Make sure the battery is out of the knife.
We need to cut off part of the handle from each knife. Measure back from the finger-guard approximately 1 1/4" (30mm) and cut straight across with a saw. I used a hack saw with a 21tpi blade, but I had to clear the teeth often, so just about any other saw should work better.
Remove the finger guard with a sharp knife. I used a razor-knife and a rocking motion, and it had it off in a few seconds. Clean up the sawed edge with your sharp blade while you're at it.
![]()
Your knife blade should fit into the handle. It will be snug and require a little force to maneuver it into place. When I jammed it into the semi-flexible tubing, it distorted the plastic slightly, so if you have a rigid handle, you may need to trim away more plastic with a sharp knife.
![]()
Your blade should align with the switch in a line, so twist them if necessary because wherever you have it now, is where it will be forever.
Drill a couple of 1/8" (3mm) holes straight through the handle and knife blade. If you can use a drill press, I highly recommend it. I did not have one for the photo below.
![]()
Pull the blade out of the handle. The holes in your knife will ideally go right through the center, but it's all right if they are a little askew. The next step is to bore out the holes in your blade to 1/4" (6mm), so you can jam in your standoffs. Depending on the shape, you may need to widen the sockets a bit, but the standoffs should be as tight as possible.
![]()
Now you can put the blade back into the handle, but be careful that you don't pinch your high-voltage wires, and you should arrange them, so one comes out on either side of the blade. Your standoffs should align perfectly with the holes in the handle. Add your 1/2" (12mm) long machine screws from each side, and that blade shouldn't be going anywhere!
![]()
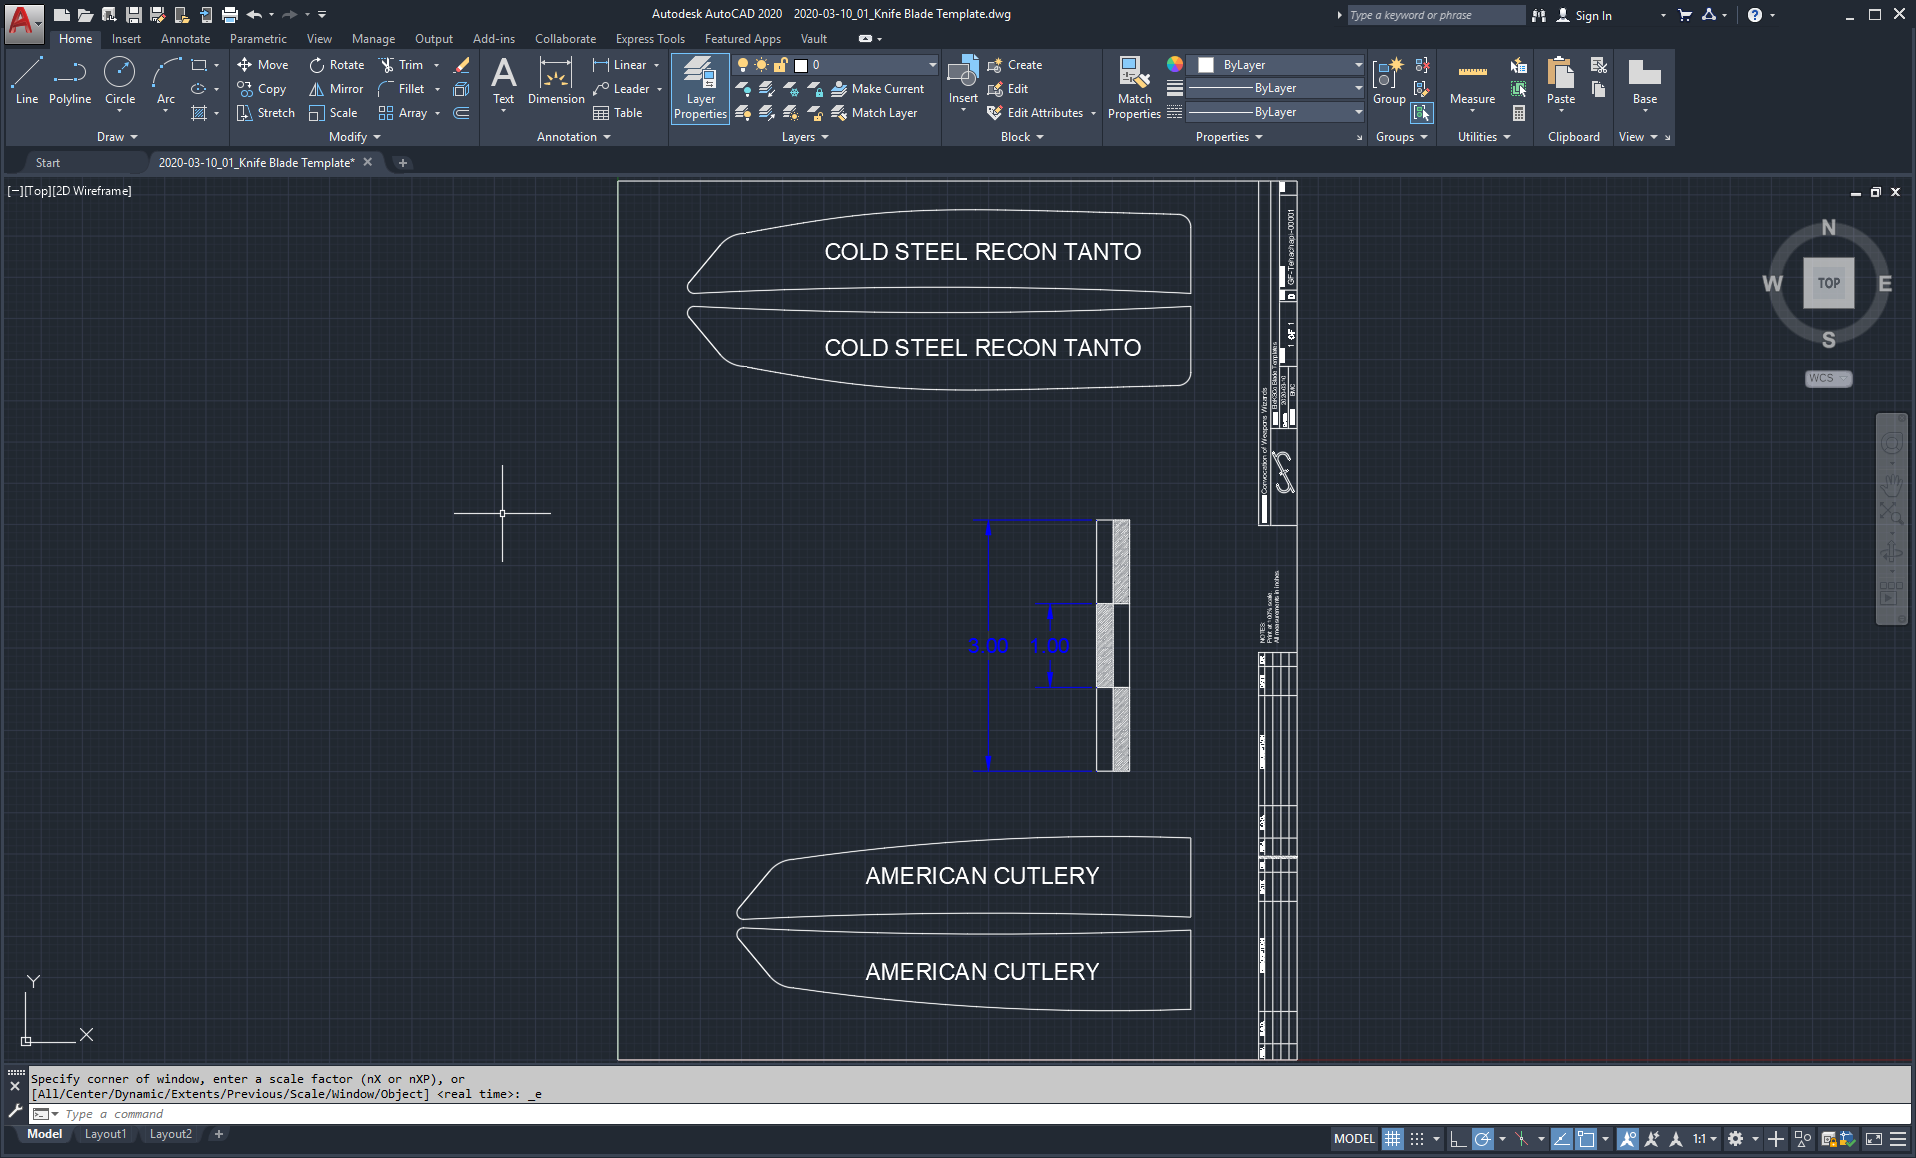
You can try your hand at cutting some aluminum tape into the shape of the blade, or you can print off my handy-dandy template and trace it out like a champ. Be sure to print at 100% and use the "COLD STEEL RECON TANTO" pieces. You can verify the scale by placing an SAE ruler next to the 3" black and white key.
![]()
Cut at least one of each of the sides for each knife. I recommend keeping spare on hand. Aluminum tape is cheap, and you won't want to be measuring and cutting when folks are anxious to zap one another.
![]()
Take your time and line up the aluminum tape on your knife blades nice and neat. Each time you peel back the tape, it will crease and wrinkle, which shouldn't hurt the performance, but it won't look as clean. I spent a chunk of time making sure these templates aligned with the knife blade, so you shouldn't have to fight with them. You are welcome to customize them with holes or markers, so let's see what you can do. They must not touch each other.
The high-voltage wires should reach your aluminum strips, and you can hold them in place with a scrap of tape. Add your battery and give it a test-zap! Mmm. That's some electric goodness.
![]()
The last necessary step is to add an end cap. I considered making a printable version, but you can buy some furniture floor protectors that do the job well. I bought the kind meant for 1" tube legs, but I had to remove some of the support material, or they would distort when I installed them. The picture above has the cap installed. Below, you can see what the protector looks like after trimming.
![]()
Optionally, you can add grip material, like hockey tape, bicycle handlebar wraps, tennis racket grip, or golf club grip. Just follow your heart. I used a couple of different colors of hockey tape on this model, and I like how it looks.
![]()
Electro Knife for Simulated Combat EleKSCo
Non-lethal electrified batons.


Discussions
Become a Hackaday.io Member
Create an account to leave a comment. Already have an account? Log In.